MtlBiker
-
Posts
850 -
Joined
-
Last visited
Content Type
Profiles
Forums
Events
Blogs
Gallery
Store
Everything posted by MtlBiker
-
Most often I guess I'd be using two layers of 6oz veg tan, but I made an axe sheath with 3 layers of 8oz (because of the gusset to protect the stitching from the axe blade). And even with only 2 layers of 6oz the Craftool chisels have a hard time and they make too big a hole. What I've been trying to do is to use my current chisels only to mark the holes on one side and then using my awl to push through all the way. That takes time and I'm not as consistent as I'd like to be. So I'm hoping that the new Sinabroks will help me improve overall. With the Craftools chisels, I have a 2-prong and 8-prong. With those I do use a chisel if I just need one hole, but I thought (maybe wrongly) that with the shape of the slit of the Sinabroks, my awl would make a diamond shaped hole instead of a slit. So I also ordered the 1-prong.
-
Replies came in here too late... I already ordered so as not to miss out the 10% sale that finished Friday. And I probably did order too much with 1, 2, 4, and 8 prong chisels. But that also got me free shipping (from Japan to Canada) which if I had to pay for it would have been almost half the cost of a chisel. Obviously I lack the experience of some of you guys but I would have thought the 1-prong would be useful in curves and unlike an awl (which is diamond shaped) this 1-prong would make an identical stitching hole to the others. Lonsdale still carries Sinabroks but they are out of stock of the ones I wanted, and they don't offer free shipping either. I haven't looked at Kevin Lee or KS Blade or the others you mentioned.
-
I saw them called European style on one of the sites, but Sinabrooks themselves call them "Pricking Irons (French Style)". I have to admit to quite a bit of confusion about these... and especially about the difference between what some people call "irons" and others call "chisels". My understanding is that these particular ones are not just for marking where you will stitch, but also for punching through the leather and that they could easily punch through 2-3 layers of 6oz veg tan. In any case, these are not hole punches but rather are slit chisels.
-

Skiving machine over skives the leather (HELP)
MtlBiker replied to ChelseaThom's topic in How Do I Do That?
Your photo doesn't seem to show a rubber roller, only the standard presser foot. And the problem you describe is similar to what I've got... but I think it can be solved by proper machine adjustment. At least I hope so. Where did you get a rubber roller? Oh, wait a minute... are you talking about changing the feed STONE to a rubber one? Or changing the presser foot to a roller foot made of rubber? What made you believe the feed stone/roller was the issue and not adjustment? And out of curiosity, what's the make of the skiver? -
That's looking really good, and noticeably better than the first batch. You've said that your French chisels are 3.85mm (I've ordered 4mm) but you never said what the regular chisel is (and size) for comparison. And if I'm not mistaken, the Vinymo thread isn't waxed... are you waxing it?
-
Interesting. I wonder if that's technique. I have yet to try such stitching chisels and I'm impatiently waiting for my order of Sinabroks 4mm European style chisels. I'm hoping they will help me elevate my stitching skills. When I get mine, I'm going to do stitching tests using Ritza Tiger .6, .8 and 1.0 threads. I suspect the 4mm chisels will be too closely spaced for the 1.0mm thread to look good. I like how you've done your comparison test.
-
In what way do those lines seem "off" to you? I think they look pretty darn good. (I've just ordered a set of 4mm French (Euripean) style stitching chisels.) Did you hammer down the stitch lines? The back stitching looks a little, uh, boring, to me and I agree with @battlemunky that maybe adding a cast to the stitch would make it look better.
-
Hi again (just commented on your other thread)... I've been having similar problems with my skiver, and it might be best for you to take a look at the thread I started and the replies in it. https://leatherworker.net/forum/topic/100836-bell-skiver-frustrations/ I think that both of us have related issues and the solutions would help us both. Good luck! (To both of us!)
-
Skiving machine over skives the leather (HELP)
MtlBiker replied to ChelseaThom's topic in How Do I Do That?
@ChelseaThom - Welcome to the forum! I guess you're new to using a bell skiver, as I am. And I've got plenty of problems figuring out proper adjustments on mine. But... I think in your case, it's a technique issue. The part that should be getting skived is directly under the presser foot and the part that extends past the foot (in the area of your red circle) should be held up by you. I would guess that your leather is fairly soft and that you're just letting it "hang" over the front. You should be holding it up. And guessing from your photo, it looks like you're set up to skive something like only 1/2" from the edge. That's the distance (guessing) from the adjustable (silver) guide and the front of the presser foot. Did you just get your skiver? Was it set up initially by your dealer? -
Sorry, but I just don't agree. MDF (we use a lot of it in our workshop) is really quite hard and I wouldn't risk using it as a base for my stitching chisel punching. I still think @Sheilajeanne had the best suggestion here... to use thick veg tan leather under the assembly I'm punching through. That way there's no risk to the (rather expensive) stitching chisels I plan to use. Where did you buy the poundo board? A search of Canadian sources didn't turn anything up other than the poly boards sold by Tandy etc. Would you use that under your belly leather when punching with your stitching chisels?
-
Well, you've certainly got more experience than I have, but my thoughts on that are that the $2 cutting board (I use those often to make templates) isn't going to absorb much if I use a stitching chisel on it. And I'm not sure what HDPE is, but it sounds expensive and hard. I wanted something that would not dull or harm the stitching chisels if I went through my assembly into whatever I have underneath. I just tried what @Sheilajeanne suggested above... I used a piece of 8+ oz veg tan on top of my poly board and it worked like a charm. Rigid enough to pound against but soft enough not to harm the chisel.
-
Thanks very much, Fred! Why do you turn each block so the grain is in different directions? I just tried using some 8+ oz veg tan on top of my poly board and that seemed to work. But I'll keep my eyes out for some suitable soft wood I could use to make something like yours. That really does look pretty darn effective. Cheers!
-
I just tried with a piece of veg tan that's 8+ oz thick. Put it on top of my poly board and it worked like a charm! Thanks again!
-
That's a great idea! Thanks for the suggestion. But as a newcomer to leather, I'm going to have to learn what belly hide is. I have veg tan leather in different thicknesses and of course chrome tan also. Is belly leather very soft? (Like a soft under belly?) Scratch that... I just found that it's just veg tan, probably a bit thicker (6oz+). I do have some veg tan that thick but I have no idea where it comes from (belly or what). I'll give that a try tonight when I get home.
-
This is a basic question which most of you probably have an answer for, but I am not sure what to do... What do you use under your leather assembly when using a stitching chisel? Obviously nothing hard. Or even a cutting mat. I have a couple of those poly cutting boards but I'm not sure that's the best to use with a stitching chisel. I use those with hole and corner punches. I think it was @fredk who at one time posted something he'd made... some kind of wood cut into pieces and then stacked together with the grain facing up. That might be good. But if I made something like that using 2x4's for example, there'd still be a small gap between the pieces. Maybe I could live with that. Is there a better solution or product? (I've ordered some expensive stitching chisels and want to make sure I treat them properly and don't ruin them.)
-
@ZacharyR - While you can use those universal needles on leather, they are not ideal. You should be using these: I still wonder if your thread tensions are correct. There's no doubt in my mind that when you change from 138 thread to #69, you must readjust the bobbin tension as well as the top thread tension. I also think what you're using is at the lowest end of what the machine is capable of using and that ideally that machine uses thicker thread and bigger needles.

-
I'm about to order some Sinabroks European style chisels from Korea and would love to hear the opinion of the members here about my choices. I have Ritza Tiger thread in .6, .8 and 1.0mm sizes but I generally prefer the look of the thicker thread. I'm hoping that the chisels I buy could be used with all those sizes. I'm thinking of the 4mm chisels, in 1-, 2-, 4- and 8-prong. Is that overkill? Do you think I could manage without one of those? But Sinabroks has a 10% sale on until tomorrow, and even with the discount, this order would still come to $315 US, qualifying for free shipping to Canada (orders over $300 get free shipping). So if I drop one of those chisels from the order I would have to pay shipping, which sort of balances it out, especially with the sale. It's only money, I guess. SIGH I'm hoping that such high quality stitching chisels will elevate my hand-stitching. And I think these would be easier to punch through thicker assemblies and also easier to pull out of the leather than my Craftools chisels which make a pretty darn big hole if I punch through many layers. Thanks for any help.
-
Round point needles are not leather needles. Okay, I suspect your stitches (with the needle and thread you're using) aren't correct. Can you post a photo of the forward stitches, both top side and under side? Since you say there is no problem when you're using #138 with a 23 needle, I suspect the tension adjustment is off and showing us the stitches would help us help you. (Do you know how to adjust the tension on the bobbin carrier? Certainly changing from 138 to 69 would require readjusting that.)
-
2-3 layers of 2 oz leather shouldn't be pushing that machine at all! Even my 2750 has no problem with that thickness of leather. Is your machine working the way it should with other materials? Is it only with the leather that you have a problem? Are you using leather needles?
-
Consew 206RB-5 Table Cut-Out Pattern
MtlBiker replied to DavidBraley's topic in Leather Sewing Machines
Hi David, Nice to see you here... I'm glad you found this site. It's one of the very best. And for leather working and machine specific help, it's way better than that other site where we've exchanged some messages. Since you're pretty convinced about making your own table, is it maybe possible for you to visit a dealer who has the correct table so that you can take some exact measurements and photos? As Wiz said, don't forget the cutout for the belt running the bobbin winder. And you really should be pretty accurate about the placement for the servo motor. A butcher block style table for this does seem to be a bit of overkill, imho. Best of luck! -
Consew 226rb-2 presser foot not lifting breaking thread
MtlBiker replied to Jholden0's topic in Leather Sewing Machines
Really not related to your problem, but for leather you should be using 135x16 needles. Is this a new problem? Have you been successfully sewing with that machine before? And with leather? Can you pull the bobbin thread out freely? I've had a couple of times that there was a thread jam in around the bobbin area which required partial disassembly to resolve. Usually was caused by my not inserting the bobbin case correctly to the snapped in position and then trying to sew. -
@karlova - Nice! But unfortunately many of us are not on Facebook (and never will be).
-
@RockyAussie - I'm making progress, but only a little bit. I was surprised that my presser foot was so tight that I had to use pliers to loosen the retaining knob. And it was so tight that it wasn't even touching the back stop (It wouldn't pivot at all) so the adjusting screw wasn't even reaching it. I've fixed that, and am trying to make the feed stone parallel with the bell knife and I think I've got that. I've also brought the feed stone up evenly to just shy of the bell knife. Still chewed up the leather. I guess I'll try backing off the presser foot pressure (but that'll reduce the skive amount, right?) and see what that does. I did change the angle of the presser foot to the bell knife (improved it I think). I'm not quite sure how to make the space between the feed stone and the bell knife the same all along... I put a piece of paper in and it seems to be the same. Should I maybe move the feed stone away from the bell knife and THEN insert the paper? And then try to feel how easy/hard it is to pull it out? And try that at the front and back of the stone? I'm going to have to sleep on it and try again tomorrow night after work.
-
How's this? Ok, seriously, I'd be surprised if there was a template for this. There are just too many variables. Are you looking for something that you will press into (deboss) your leather? Something that goes onto a sew in label or piece of leather (and is then in turn stitched onto your work)? Something to burn into the leather? My feeling is that you'll either need a proper graphics program (and some skill in using it) as well as first of all, a name you want to use. Then with a good eye for graphics, you (or a graphics designer) might play around with a bunch of different ideas and sizes. And depending on the physical type of mark you're talking about, the producer of it might have specific requirements as to the file type they can work with. Good luck!
-
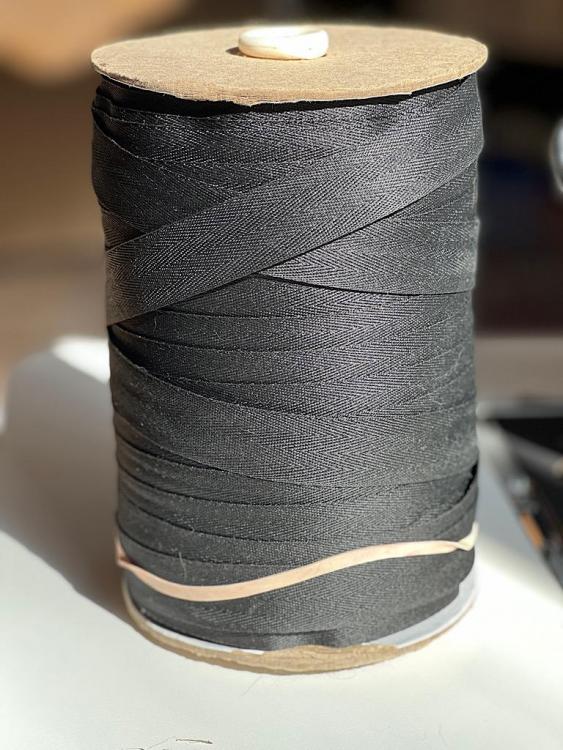
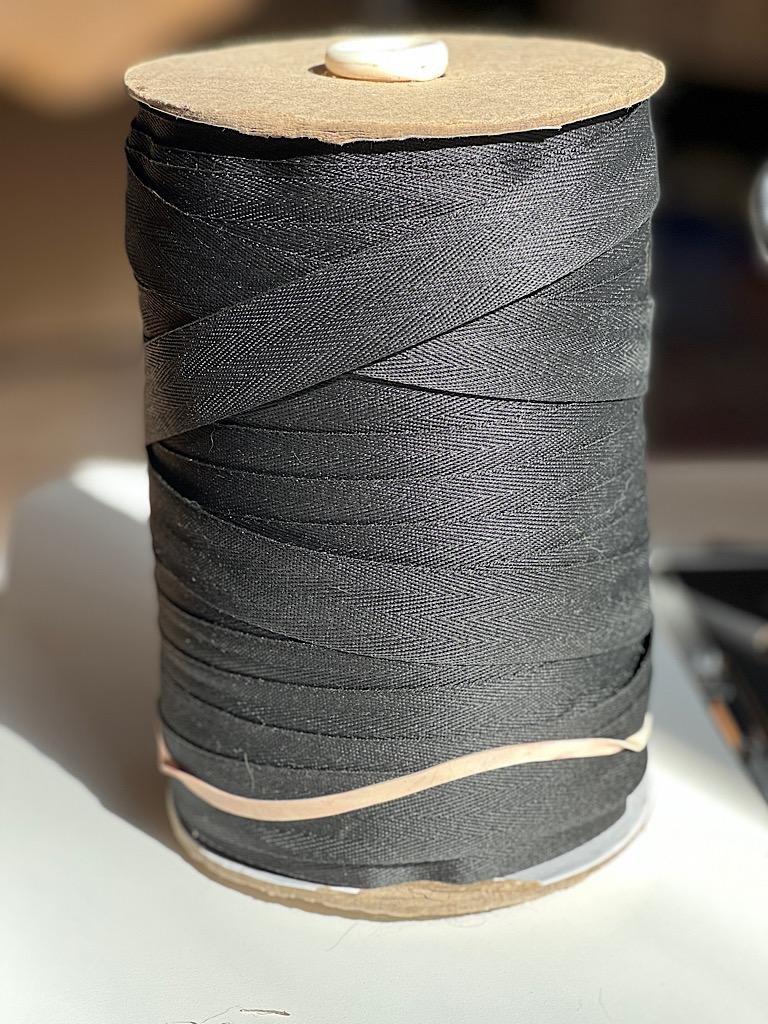
Thanks very much for explaining that. Much clearer now. The large spool of binding you show... is that the way you buy it? The ones I've bought (from A&E) are drum-shaped. I can't imagine unwinding those and trying to re-wind them flat like you show.