


MtlBiker
-
Posts
850 -
Joined
-
Last visited
Content Type
Profiles
Forums
Events
Blogs
Gallery
Store
Everything posted by MtlBiker
-
I'm new to using an awl and bought the "flatside awl haft", straight stabbing 2" and small diamond 1 5/8" awl blades from Tandy. Are these supposed to be quite sharp? Do they need sharpening, and if so, how? Using the small diamond needle I find it rather hard to punch through two layers of 6 oz veg tan... I'm guessing because it's not sharp enough?
-
Forgive me, but gee your post is hard to read. Breaking it down into shorter sentences would have been better. You've only got 3 sentences there, but golly your second one is LOOOOONNNG!
-
It looks like you're correct (that the same needles are called different sizes depending on the market) but that sure makes it difficult for us newbies. The John James proper website offers, 1, 2, 3, 4, 16 (3/0, 17 (2/0) and 18 (1/0) sizes. Rocky Mountain says to use a "0 (1/0)" needle for Ritza 1.0 thread. So I guess that means the size 18. I did receive a package of JJ needles today from a Canadian source which are marked "1/0" and they look awfully small and I'd be surprised if I could thread the Ritza 1.0 in them. My thread is at home and I'll try it tonight. My order directly from John James in the UK will hopefully arrive tomorrow, and I've ordered a package of each of the 7 sizes they offer. I guess the idea is to use the smallest needle that you can thread with any given thread... is that right? And I know you're supposed to flatten the end of the thread to make it easier to thread the needle. And then you get into Osborne harness needles, which seem to have size specified in a completely different way. SIGH And the only needle I've been able to try until now was a "000" (Large) size of unknown brand which was the only size in stock at Tandy when I ordered. It's way larger than the 1/0 needles I got today. No idea what thread that's designed for. Thank you for your help and your patience with us newbies.
-
Gosh this needle size thing is confusing! It seems that size 2 is not the same as 2/0. (And 1/0 is not the same as 1.) Why the heck do they make it so hard to figure out? Can you (or anyone here) tell me which JJ harness needle to use for Ritza Tiger 25 1.0 thread? Is it #1 or #1/0? And how does #000 harness needle (from Tandy) fit into the sizing scale? Those were the only ones they had in stock when I ordered and they're much larger than the 1/0 I just received today.
-
I think you'd use .8 thread. I'm taking that from Rocky Mountain Leather. I just got my 1/0 John James needles today, which are supposed to be the correct size for Ritza Tiger 1.0 thread. The eye looks awfully small though and I'll have to see if I can thread it when I get home tonight.
-
Thank you (again!) Chuck. I've just ordered that chisel in 3.5mm, both 8 and 2 prong. That size should fit right between what I have now, and would be much better (as you said) for the 1.0 Ritza thread.
-
Thank you! But just to confirm, even though it says "3mm" the point-to-point distance is 5mm. And that's good with 2 x 6oz and 1.0 Ritza thread? Or were you thinking it would be 3mm spacing? (Sorry, just want to be really clear on this.) And thanks also for the link to that topic. I will read through it all tonight when I get home. I had just assumed those items were the same... you say tomato I say tomato. Cheers!
-
This very likely is a dumb beginner question, but your comment makes it sound like there is a difference between a chisel and a pricking iron. Is that correct? And a more general question to anyone... With two layers of 6oz veg tan leather and Ritza Tiger 1.0 thread, what is an appropriate size for the chisel or stitching iron? I'm confused as heck about this. For example, I have a "3mm" Craftool chisel #88045-06 (or is that a stitching iron?) and it measures 5mm point to point. My "4mm" one measures 6mm point to point. And my Craftool Pro (#88056-09) 3mm measures as near as I can tell, 3mm point to point. That last one is the only one which seems to be the right spec. How does this make sense?
-
@Selvune - I'm in the same boat as you! I'm trying to learn hand-stitching and it's harder than I expected. So I'll be watching the answers you get about this and hoping to learn from them. Luckily YouTube has a ton of good videos about this, and also the Al Strohlman book about hand-stitching is excellent. (I'm still waiting for an order of harness needles and Ritza Tiger 1.0 thread to arrive, so for now I'm practicing with the largest harness needle Tandy had - all they had in stock - and their Tejas thread which doesn't have a spec for the thickness.) Out of curiosity, what did you use to make the holes for your stitches (size of chisel if you used one) and what size needle and thread are you using? Hard to tell from the photo but it looks like the spacing between stitches is quite long, which is why I ask about the stitching chisel. Let's hope there is good help coming.
-
@zuludog - I'm so sorry for your loss. I know how hard it is to lose a loved (and loving) pet. I feel for you Bud.
-

Whats a decent japanese edge beveler and french skiver?
MtlBiker replied to ToddW's topic in Leather Tools
On the recommendation of another member here, @Arturomex, I bought some Hidetsugu knives from Leather Craft Tools in Japan. They arrived in less than a week and I'm super happy with them. I bought them in 3 sizes and they were sharp enough to skive veg tan leather when I got them, but a bit more sharpening made them razor sharp. I wish I'd also bought a smaller one, like 24mm (1")... I got 36, 42 and 48mm and so far I'm finding the 36 tho be the most useful. -
Another problem I'm having... I did push the stitching awl through from the left to the right in order to pierce the leather. The problem now is that on almost every stitch when I push the needle in from the right in the same hole that the left needle just came through, I end up piercing the thread also, which makes it almost impossible to then finish pulling the left thread through to tighten it all up. I'm trying to pull the left thread from the left as I push the needle in from the right, but I guess the hole is just too tight to let the right needle pass along the side of the left thread through the same hole. (I hope I'm explaining this clearly.) I've just ordered some new stitching chisels as I suspect what I'm using is part of the problem. The ones I've got now are the Crafttool Pro from Tandy Leather, #'s 88056-09, -04 and -02. I just ordered their #88045-06, and -02, and also 88046-06 and -02. I haven't received my John James harness needle order yet (any day now) so I'm using a Tandy harness needle size 000-Large (only one they had in stock when I ordered) and an unknown weight Tejas waxed thread also from Tandy. (I've ordered some .08 Ritza Tiger thread.) I guess the first issue would be to start with the right tools... right stitching chisels and known thread weight with appropriate needles. But a beginner has got to start somewhere I guess.
-
I'm trying to learn how to hand stitch, with the help of Al Strohlman's hand stitching book and I've run into my first question... My leather is fairly thick, about 6oz and is two layers. When I use my stitching chisel to punch the holes, the chisel doesn't go all the way through. Strohlman says to punch from the front side and to have the front side to your left in the stitching pony. And then to use the stitching awl from the right side. Well, since my chisel didn't go all the way through, I can't see on the right (back) side where to use the awl. Does it make any difference if I use the awl from the left (front) side to first push the hole through? Dumb beginner question?
-
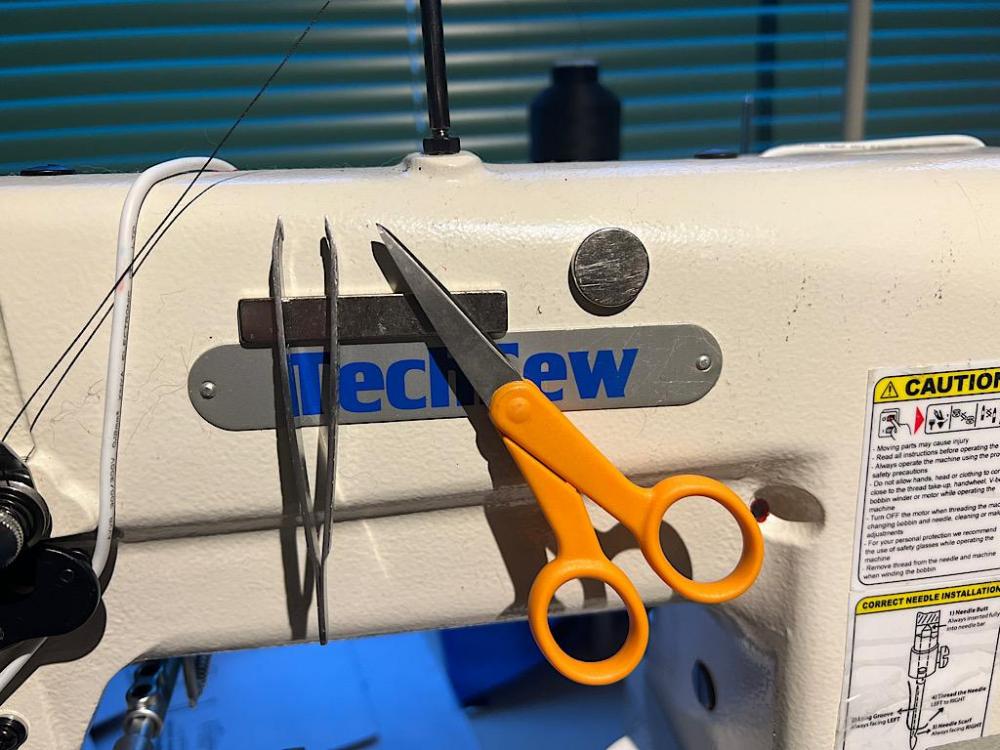
Believe it or not, I as a relative newbie, have been doing this with my Techsew 2750 since I got it. With a cylinder arm machine I too needed both hands to hold my fabric assembly in the proper position, especially when starting my stitch and that's harder to do than with a flatbed machine. I have a 3/4" diameter rare earth magnet that I just place on top of my two threads when starting. Works like a charm. I wasn't as ambitious as you however, as I just have the raw magnet without any wood "handle" on it. I will admit though that yours looks a lot easier to both place in position and to remove than my puny little smaller-than-a-dime magnet does. I also have a small 3/8" x 2 1/4 magnet on each of my machines to hold my tweezers and thread snips.
-
Are leather sewing machine makers lazy
MtlBiker replied to chrisash's topic in Leather Sewing Machines
That amazing customer support from Sailrite, both direct via email and phone, plus the incredible videos they post, is the main reason I bought my LSZ-1 Premium with WorkerB motor. The machine is really good, but what puts this head and shoulders above most others is that support. -
@RockyAussie - Thanks very much for your tips! I don't have a roller presser foot (yet) for my new skiver but I've ordered a really cheap set from, believe it or not, Walmart! Remember, I'm a beginner with this... are you talking about reducing the angle of the feed stone, or just loosening the pressure? And if you recommend rarely lifting the presser foot, how do you start the second skive past where the first skive was? Or does that not matter? I skived first the short edges. Then went back to the long edge... are you saying that by holding the leather a certain way you can prevent the first already skived edge from being ripped up when it goes through the skiver again? I was trying to start the long edge skive just after where the short edge skive was, which is why I tried lifting the presser foot and placing the leather at that point. Without a roller presser foot what should I do? And how do you skive a rounded piece of leather? I found it almost impossible, when I tried, to turn the leather through the skiver to follow the curve. Is there another trick? I'm all for practicing, but want to be sure I'm practicing the correct techniques.
-
I just found a nice YouTube video by Myth Leather Co. that (among other things) shows how he does all four sides of a piece of leather. Leather Bell Skiver | The Basics Exactly what @chrisash suggested above... start skiving on the short ends first, then raise the presser foot and place the long side of the leather onto the skiver just at the point where the first short side skive has finished. Then skive that side. It doesn't seem to matter that the end of the skive hits the short end that's already been skived. Nor does it seem to matter if he starts that long edge skive even a little bit on the first skive. I'm going to experiment with this tonight and see how it works out for me. Thanks guys!
-
I'm not quite sure I understand your suggestion. Sorry. Let's see... if my skive width is 1", I should start (it cuts right to left as the leather is fed in from the left) skiving 1" in from the right edge? And then do that all around, rotating my leather clockwise to get each edge. Maybe that's the right way, but I found in my trials that it's next to impossible to start the skive at exactly the right place, and if you start it too soon, when you get around to that side again you end up skiving on already skived leather and it tears apart. And if you start further over, there is unskived leather left when you finish. And I haven't had any luck at all hand skiving chrome tan leather. I hope to hear advice from members who are experienced with bell skivers. Once I learn what is the right approach, I guess it'll take practice practice practice to master.
-
I tried that on two of the pieces and still had a problem because the thin edge that I'd already skived seemed to get caught up in the feed wheel. I'd have to go past the first skive by enough (and stop also before the end) and when I did that, it left a strip of unskived leather that I really do need to skive also. Also at the end of the skive, because I didn't go all the way to the end/edge of the leather, it left some debris still attached and it was hard to pull the leather out. I'm hoping that if this is the way to do it, I wouldn't have to try skiving that part by hand (I'm not yet at all good at doing that, especially with chrome tan).
-
Yes, that's exactly what I did, and I agree that's the problem. But how to skive all the edges? I need to learn how to do this.
-
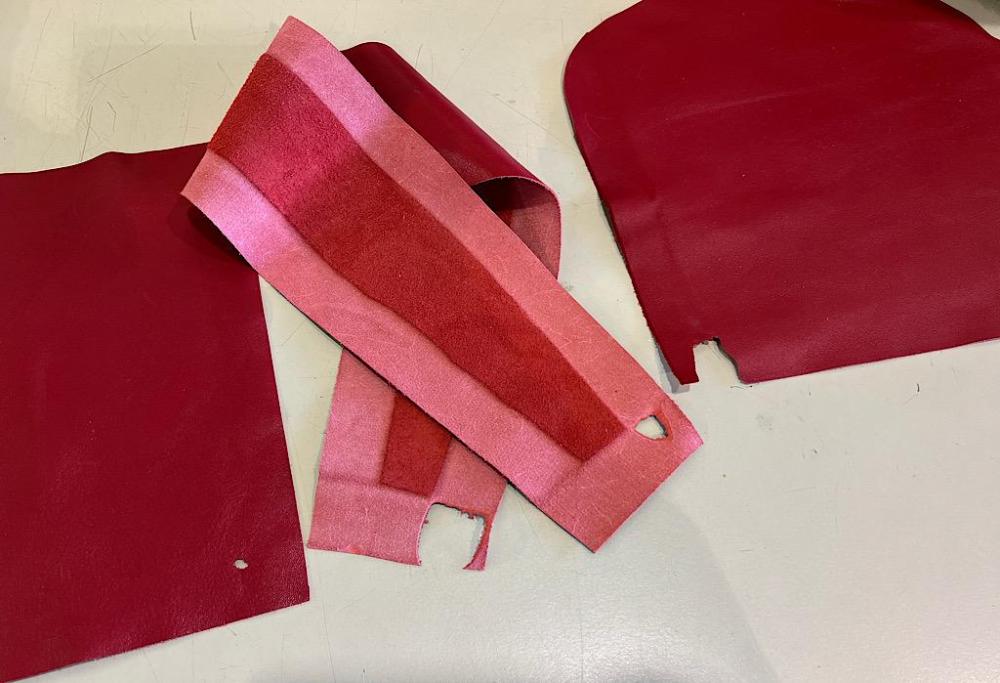
As some of you know, I just got a new bell skiver (my first) and after using it to skive a few test pieces I was really stoked. Worked like a charm. So I cut out some nice leather (the same leather I'd been practicing on) pieces for a purse I wanted to make. But I destroyed every piece! I don't know if there's a special technique I need to learn or what. If I skive just one edge, say of a rectangle, it works perfectly. Same for the opposite side. But if I try to skive the perpendicular sides (to my first skive edge) the skiver chews up the leather and makes holes. Now I've got some leather scraps I can't use. Can anyone tell me what I was doing wrong or explain how I should be skiving these pieces? The long folded piece in the middle is the gusset and all edges should be skived. The other pieces are the front and back of the bag and again all edges should be skived. This is 4-5 oz chrome tan leather. Thanks very much.
-
@Suncrest - I just bought a skiver yesterday... a Consew DCS-S4. Brand new, with servo motor, table, light, a bunch of accessories, I paid $1600 Cdn... which is about US$1250. For a known and popular brand, with warranty. A quick search turned up a Nippy skiver https://www.alibaba.com/product-detail/Leather-Cutting-and-Nippy-Skiving-Machine_1600094299793.html?spm=a2700.7724857.normal_offer.d_title.2cb8151dwCwHnG for US$599 but shipping is most probably extra. This isn't new but reconditioned, but it does come with table and motor. So my gut says that paying $500 for the head only, without table or servo motor is way too much. You could probably get a complete skiver used, with table and motor for not much more than that in a much more known and popular brand. Good luck!
-
Thanks for the link. Too bad they don't show photos of the actual presser feet in the video, other than already installed on the machine and running. It looks like a roller foot would be the most useful for me.
-
Sorry, I don't have any photos, but this skiver (and the others I have seen on websites) came with two sizes of curved presser feet. If I understand correctly, they give a skive of the same amount from edge for the extent of the skive. Websites, including Consew, say: With my inexperience I'm not really sure what that means, or if it would even be useful to me. And the dealer said that in 20 years of selling these machines nobody has ever asked for that special presser foot. I'm guessing that I don't need it.
-
I don't think the truckers protest is the issue with Techsew... First of all, they're in Quebec (Montreal) and the protest is in Ottawa, plus it just started a week ago. I placed an order with Techsew for a new skiver which they said was in stock. For pickup right here in Montreal, so no shipping involved. I was told it would take 10 days to two weeks for them to get the order ready, because they were, uh, "busy". Then just over a week later they said it would be another week at least before the order would be ready for pickup. Again because they are "busy". I wanted to deal with them because they support this forum, and also because I had bought a new 2750 Pro from them a year ago and I've been happy. But they were making me feel that they were doing me a favor by taking my order. Meanwhile, two weeks ago I talked to the local Consew dealer who had a brand new skiver in stock. He offered to deliver it to me that same day. He made me feel his company valued my business and that they wanted to be helpful. But I still placed my order with Techsew. On Friday I cancelled my Techsew order and today I have my new Consew DSC-S4 skiver. Plus they refused to let me just pick it up... they insisted they would do a run-through of the machine with me first, showing me exactly how it worked and how to adjust it. They obviously value their customers. The machines might actually be the same, only with different branding and maybe a different table. The Consew also included a "chute" attached to the table for collecting debris that I'm pretty sure the Techsew doesn't have. And it came with (I believe) more accessories than the Techsew does. At least according to the Techsew site. Anyway, I don't believe the trucker's protest has anything to do with this. (Also a few weeks ago, way before the trucker's protest, I needed a small sewing machine motor for a project I was building. Again a stock item at Techsew. I had an errand to run that day which would bring me literally within one block of their offices. I called them, confirmed it was stock, but was told it would be about 10 days before the order would be ready for me to pick up. Simply not acceptable in this day and age. So I called in a favor by calling one of their guys, and he came through and had the order ready for pick up the same day. All I'm saying is that for a simple stock item, there is really no excuse for it taking longer than a few hours to be made ready for pickup. No testing or adjusting required, just let me pick it up. And it shouldn't require a special favor.)

