-
Posts
43 -
Joined
-
Last visited
Contact Methods
-
Website URL
http://raydepew.com
Profile Information
-
Location
Colorado
-
Interests
Hiking, climbing, backpacking, skiing, camping, running, biking, reading, Raspberry Pi, Arduino, home automation
LW Info
-
Leatherwork Specialty
No specialty, I want to try it all
-
Interested in learning about
preserving the Western floral tradition; figure carving; stitching techniques
-
How did you find leatherworker.net?
Internet search for something else
Recent Profile Visitors
1,790 profile views
OldCanuck's Achievements

Member (2/4)
-
Thanks to all of you for your comments and your advice! @PastorBob, my wife is happy that I'm returning her Tupperware container to the kitchen.
- 10 replies
-
- coloring
- floral carving
- (and 4 more)
-
The twins
OldCanuck replied to chuck123wapati's topic in Gun Holsters, Rifle Slings and Knife Sheathes
... and that's one reason (one of many) why I love Wyoming. The rattlesnake inserts are really sweet. And the knives look fantastic. -
That's a good idea. I'll put some more thought into that one.
- 10 replies
-
- coloring
- floral carving
- (and 4 more)
-
:-D That was a lot of lace. It took me the entire Star Wars trilogy (4, 5, and 6) to get it done. Thanks for the closure idea.
- 10 replies
-
- coloring
- floral carving
- (and 4 more)
-

My Second 22 Pouch
OldCanuck replied to Brokenolmarine's topic in Gun Holsters, Rifle Slings and Knife Sheathes
I learn so much by reading what everybody posts on this site. For example, turn that 22 case on its side, and it has a lot on common with a camera case. I'm taking careful notes. Thanks for the pictures and the verbiage. -

Pistol Grip Wraps
OldCanuck replied to hashtagartz's topic in Gun Holsters, Rifle Slings and Knife Sheathes
Sweet. Fascinating. Beautiful work. -
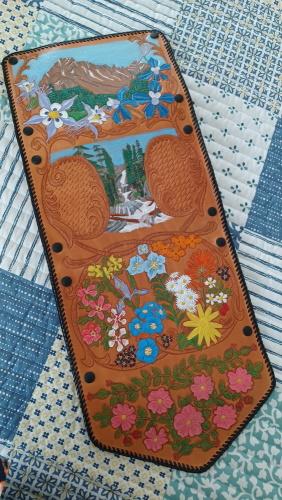
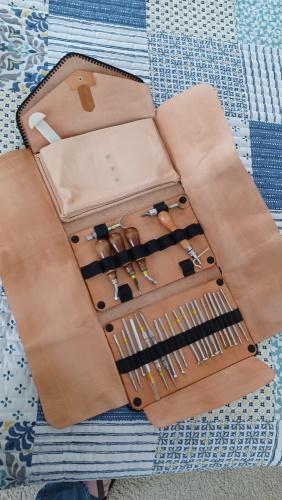
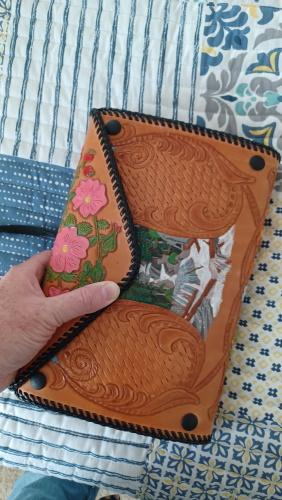
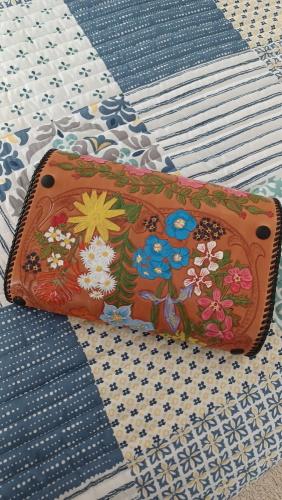
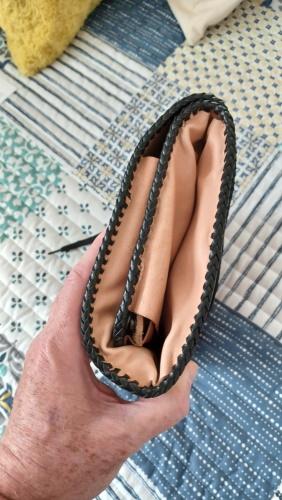
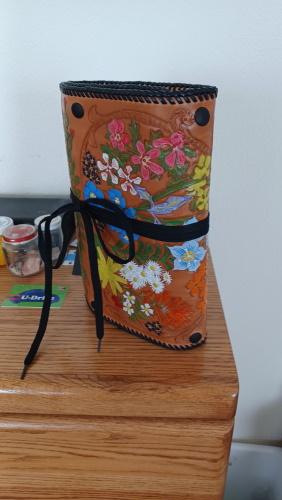
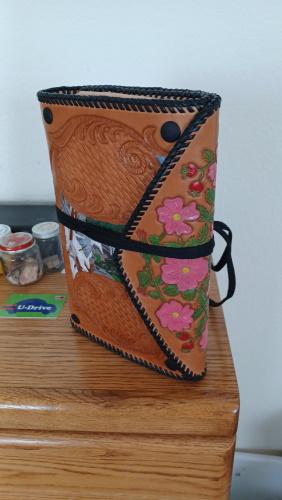
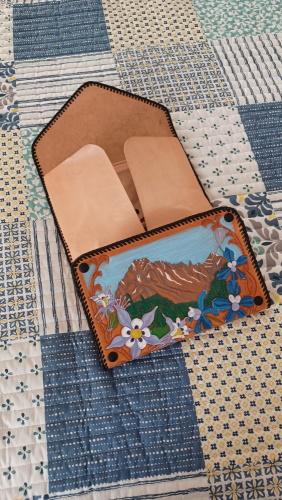
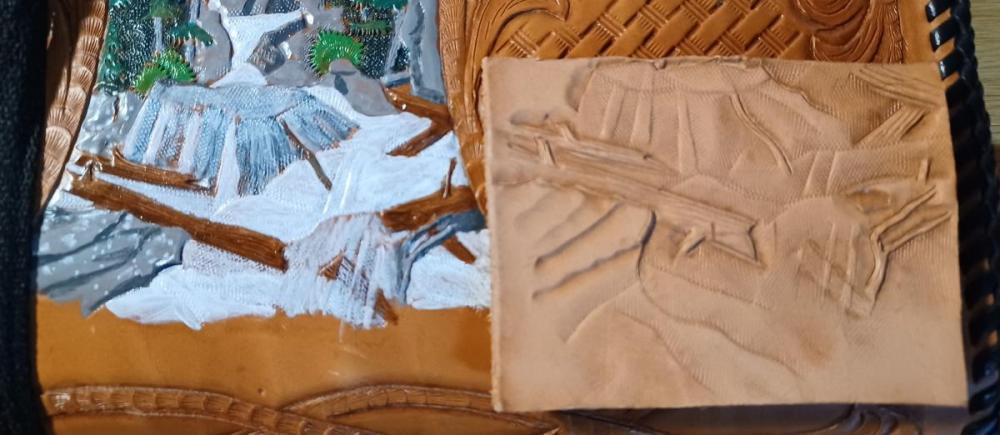
It's done! Next on the list: a set of coasters for my sweet wife, and a replacement camera case for my son's antique Minolta SRT201. This was a fun project. It took so long because it's a hobby, not a job. I envy those of you who can turn around projects faster than this. I did find two serious design flaws. The three folds? gussets? (the places where it bends) are all the same 2-inch width. I should have made the inner one 1.5, the middle one 2.5, and the outer one 3.5 inches. I thought the 2 inches would be more than adequate for the tools inside. Related to that, I need to rethink the closure. I had been planning on using a simple Prusik knot to attach a 12-inch thong to the flap, and then wrapping the thong around a concho in the foreground of the waterfall. Now I don't know if I really want to do that. So for now, I've tied it shut with a bootlace. Got any advice for me? Some things I like about the design: The inner panels are removable and interchangeable. I'm going to make a second panel for stamping tools, to replace either the handled tools panel or the inner pouch. And if I decide to trade leatherwork for another hobby, I can design brand-new panels. The lacing looks so retro! I love it! My next project will be sewn, but I love the old-style look of this double-loop lacing. The carving and coloring is *chef's kiss*. After a hiatus of more than 30 years, I've still got it. But now I need to get serious about brushing up on Western Floral. Outside and inside One-third closed. This panel is hidden when it's fully closed. Front, back, and side when closed Tied shut with a bootlace I carved this little piece to match the base of the waterfall. I was going to color it to match, and cut out a circle in the right place, so I could use it as a concho . . .
- 10 replies
-
- coloring
- floral carving
- (and 4 more)
-
Luvvit. The rare-earth magnets are a sweet touch. I'm going to blatantly copy your idea and add those to mine.
-

22 Plinking Pouch
OldCanuck replied to Brokenolmarine's topic in Gun Holsters, Rifle Slings and Knife Sheathes
Ahhhh, that's beautiful! It turned out great. I appreciate the detailed walkthrough as well, especially all the tips. What a clever technique for marking the location of the snap! Gotta remember that one. Thanks also to @dikman for the PDFs of the other design. -

That little shield you use when removing your stitching chisel ...
OldCanuck replied to OldCanuck's topic in Leather Tools
You all are fantastic. Thanks for the replies. I'm heading down to the workshop to make a whatchamacallit right now. -
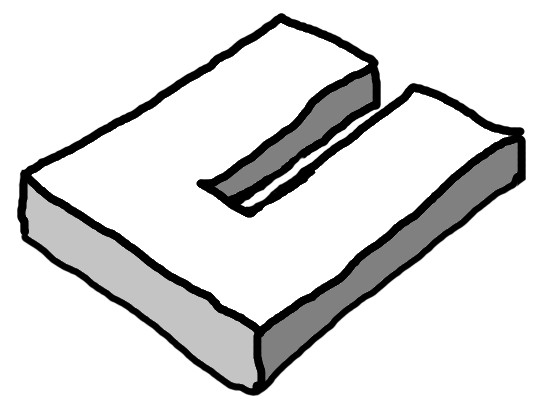
I've been following with interest the discussions about removing stitching/lacing chisels from leather. I've totally absorbed the "polish 'em real good" and "dip 'em in beeswax" advice. I never did that as a kid, but back then I only had chisels with 3 or 4 prongs, and the leather stack was pretty thin, so it didn't really matter. However, most of the discussions have revolved around thicker leather and more prongs, where the chisel would get stuck in spite of polishing and waxing, and removal would be problematic. Some of the discussions talked about a piece of wood or acrylic that one can use to protect or support the leather while removing the chisel, so the leather doesn't stretch or tear, and so the user doesn't bonk their knuckles or stab themselves -- over and over again. Does anybody know what I'm talking about? What is this shield called -- that is, if I were to look for one in an online shop, what terms would I search for? (I'm asking, because so far I haven't had any luck.) If I were to make one from scratch, what material would I use? Wood is plentiful and easy to work with, but I worry that the shield would eventually split along the grain and all would be in vain. I don't even know what the thing looks like. Here's what my imagination came up with:
-
Love it! That's pretty!
-
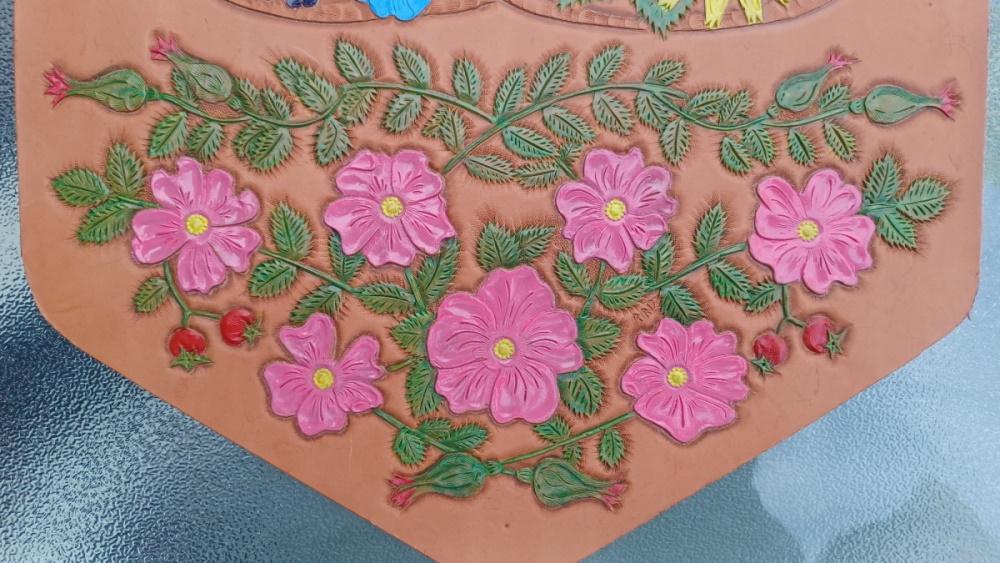
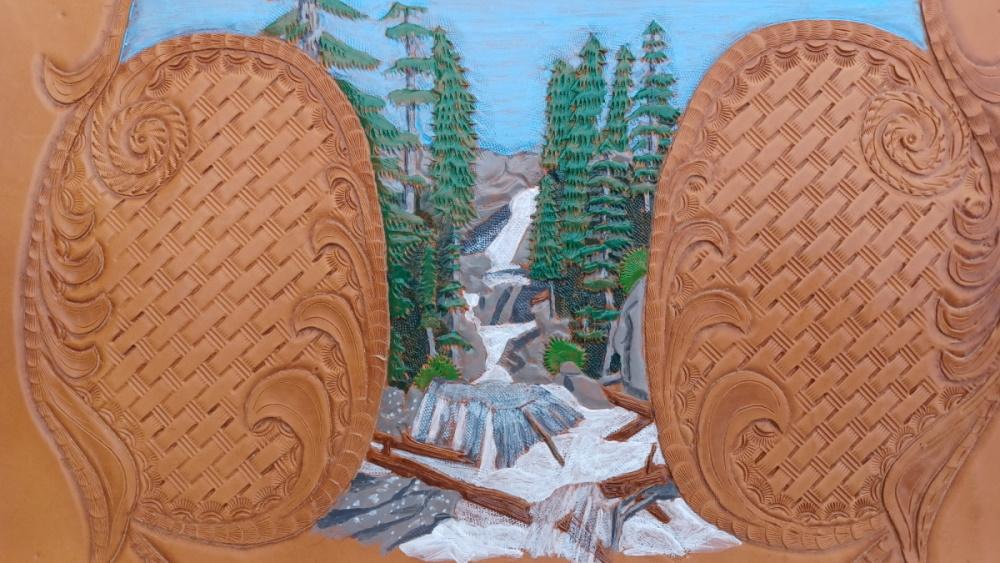
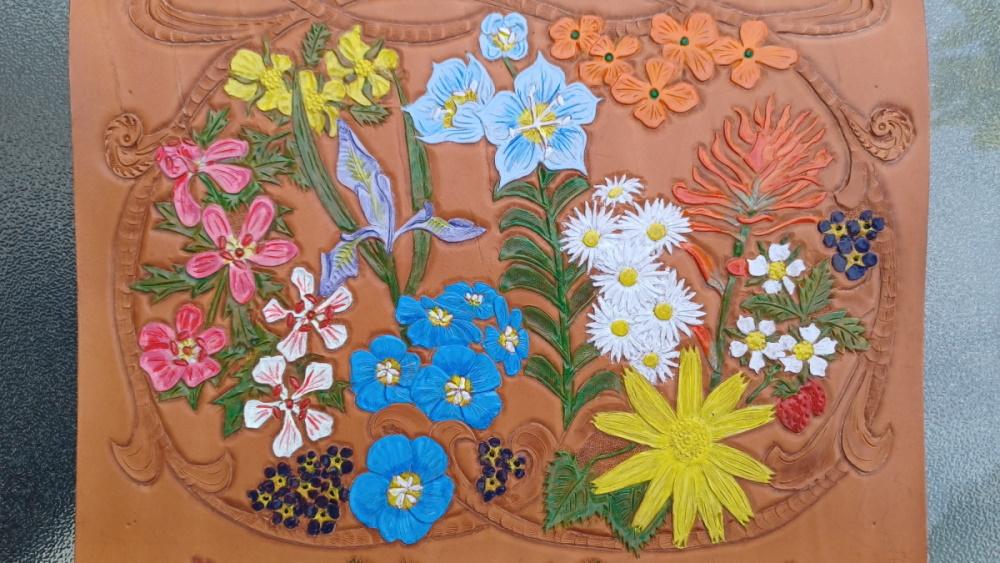
It's been a while. I didn't quit; I just went really slow. Here are the four completed panels. The mountain is Longs Peak, the Keyboard of the Winds, and Pyramid Peak, in Rocky Mountain National Park. Columbines on the left, larkspur on the right. The waterfall is Ouzel Falls, in Rocky Mountain National Park. I'm stunned at how close to the photos this one came out. The spray of Rocky Mountain wildflowers, starting with the orange ones at 1 o'clock and going clockwise: common western wallflower forget-me-not wild strawberry heartleaf arnica forget-me-not again blue flax forget-me-not again white geranium and wild geranium potentilla or cinquefoil ... and across the middle, left to right: wild iris Jacob's ladder aspen daisies Indian paintbrush Each of the seven wild rose blossoms on the flap is based on a photo I took somewhere in the Rockies. Next steps are: Some kind of clear finish. Punch holes, mount hardware. Punch & lace the edges. Call me old-fashioned, I guess. Final assembly.
-
My son-in-law designed mine using Inkscape, a free vector graphics package. You have to be somewhat of a computer jockey to use it; I'm not. My kids sent it to a guy they found on Etsy, who turned it into a brass stamp. It works as a branding iron on the end of a heater, or as a stamp on wet veg tanned leather. To stamp it, I use a vise and a couple blocks of wood. One of these days when the budget allows, I'll buy a press.
-

Tool pouch: progress so far
OldCanuck replied to OldCanuck's topic in Purses, Wallets, Belts and Miscellaneous Pocket Items
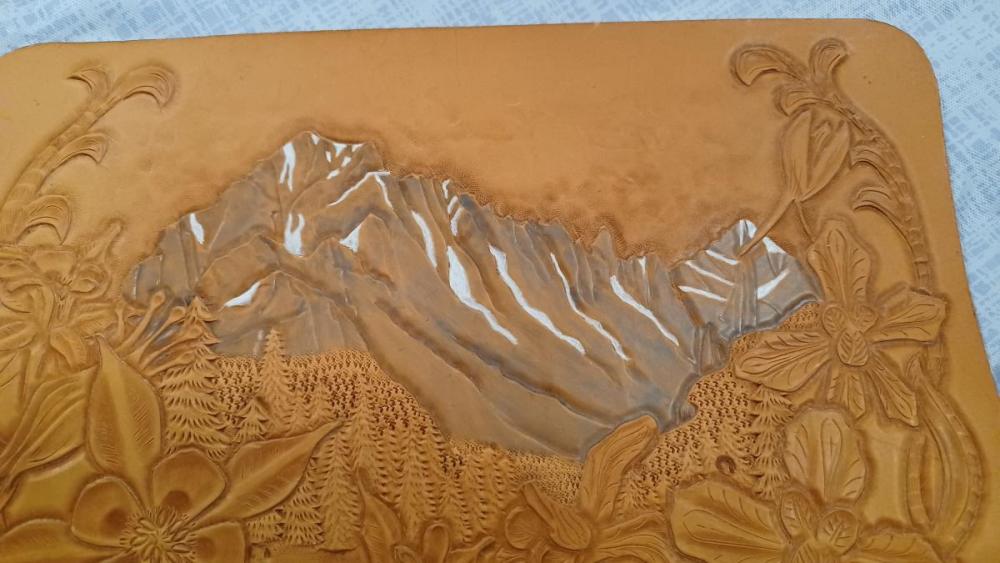
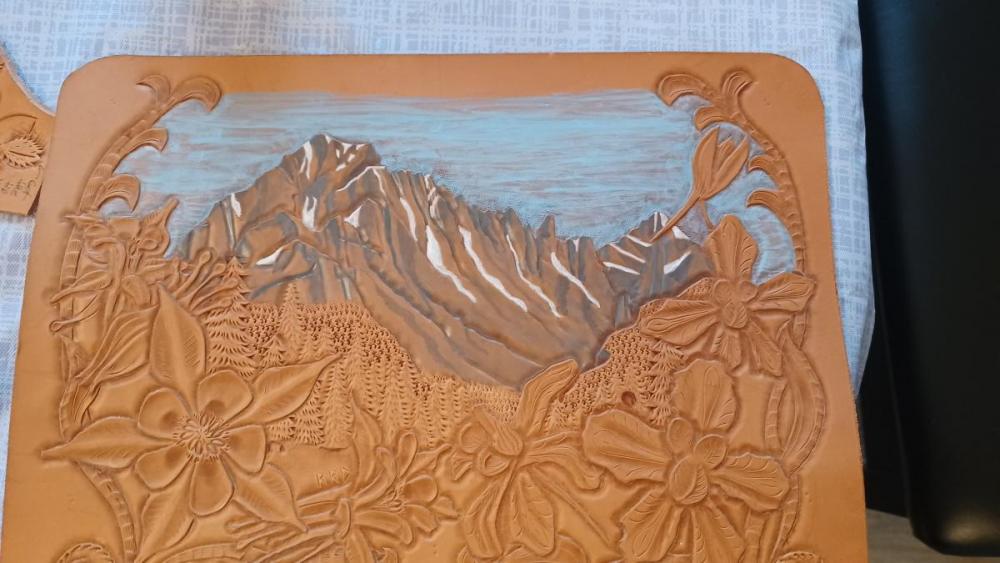
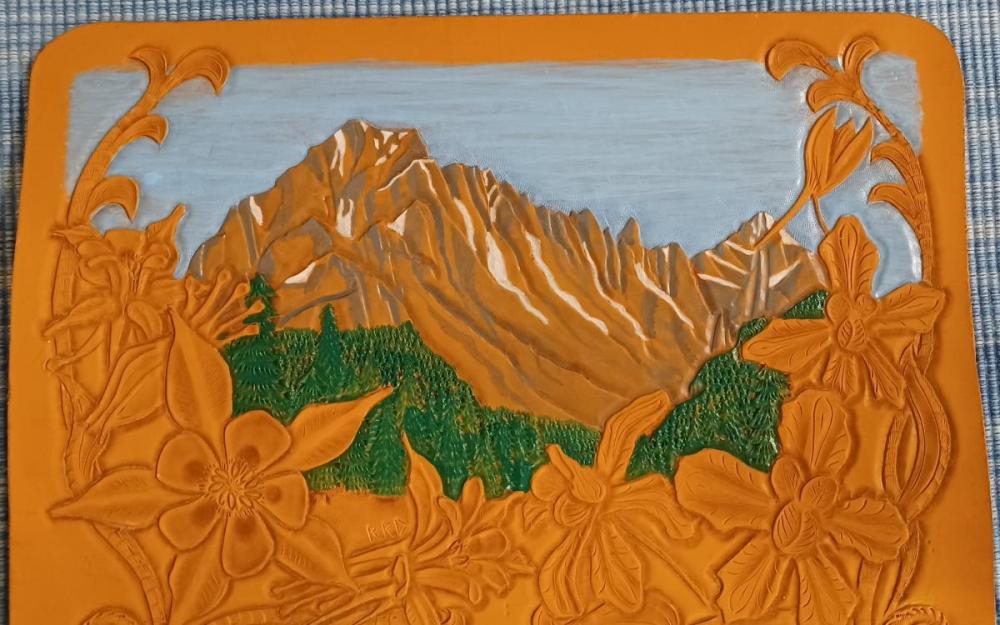
One coat of the lightest grey: Mountains are finished, first coat of sky: All done! I used one shade of forest green on the trees. I'm not happy with it; it makes them look flat, compared ot the mountain. I'm going to go back and highlight the trees in the foreground with a different shade of green, maybe lightened with a little bit of yellow, to give them some depth.- 22 replies
-
- western floral
- basketweave
-
(and 2 more)
Tagged with:



.thumb.jpg.6e903dd66163ad5672f00f144058c571.jpg)
.thumb.jpg.be873fe3cafed424774b187cfb1a470f.jpg)
