


Tastech
-
Posts
148 -
Joined
-
Last visited
Content Type
Profiles
Forums
Events
Blogs
Gallery
Store
Everything posted by Tastech
-
Claes bootpatcher user manual and needles
Tastech replied to susanjeanscott's topic in Leather Sewing Machines
@susanjeanscott did you by any chance buy this machine in Canberra a couple of years ago ? -
Development of best servo motor for leather sewing machine
Tastech replied to CowBoyOUTLAW's topic in Leather Sewing Machines
Perhaps 2 versions of motor 120 volts for north America and 220-240 volts for the rest of the world . -
Screws ripped out of saddle tree
Tastech replied to Mendosa's topic in Saddle Identification, Restoration & Repair
I would use a wooden dowel to repair the hole and then fix the screws into the same position. Select a dowel size .eg 1/4 " dowel . Drill out the existing hole with a 1/4' drill bit . Apply a high strength wood glue and knock in the dowels . When dry after 24 hours screw into original position . It's pretty much the same method a carpenter would use when replacing screws on the hinges to re-hang a loose door . The method seems to work well . -
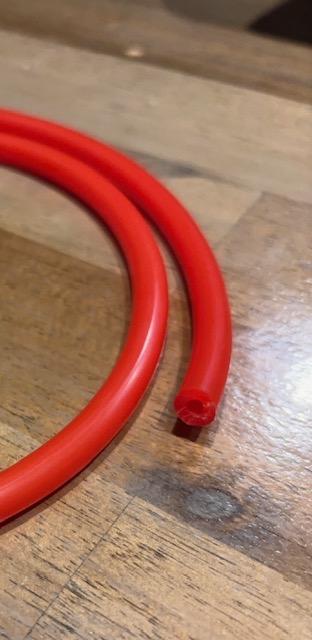
@Gerald Whitehurst With T90 i use a size 20 minimum needle . A size 22 is ideal
-
@hugh123 Just found this while searching ebay . It looks like it has potential but i don't know how compatible it is with a standard feed dog . I ordered one to experiment with. https://www.ebay.com.au/itm/167507136396?_skw=roller+foot+for+singer+31K-20&itmmeta=01JWXCQJ4AGJVPYNWVW18KNB7V&hash=item2700340f8c:g:ldQAAOSwP9ZideG~&itmprp=enc%3AAQAKAAABAFkggFvd1GGDu0w3yXCmi1cEIlHfb8sInkPmjL0p%2FgNQ4XNRdPNI1GJi9YJ2%2BiJnSpLXr%2FfmfFisNgsVgZbN367LwL9iJlX8j1qKvTZIwws4AnXkZGVjE3gKiNW5kOmW5Sp5RkXNueimLJ6w1KjggajzRI%2ByQEp4iZyzl%2BY3BR1Cd4levH6VmZJ5b6K34i2YchyzuzaUHze%2Bgfm2vSgZbisY6vDaEcLUibwhGn7VklrOP5rskMWcyUHIr9PUnAErYBrrnOrKNdP401UXFtwlFKEhj3%2FlVcJZKwX87HxSA67keTr2nzQ0g5aIFTbS10%2B9%2BijHvU6vG4hvSxLlV7f5CzA%3D|tkp%3ABFBMrKLerOdl
-
@hugh123 You are correct . there is no way to convert to a walking foot . However converting to a roller foot is easy . I have a roller foot on one of my machines that is not a conventional roller wheel but a flat foot with needle bearings built in . I got it on ebay a couple of years ago as an experiment and it works fine but its a bit hard to see whats going on underneath so i use it for a specific purpose which is doing french seams . From memory it bolted straight on with no foot height adjustments . below is the link . Feet are generally universal and will fit most generic machines https://www.ebay.com.au/itm/365600908899?_skw=roller+foot+for+singer+31K-20&itmmeta=01JWXCQJ49B77637G3JE4XYEEN&hash=item551f832663:g:7IYAAOSwhx5oI~hn&itmprp=enc%3AAQAKAAABAFkggFvd1GGDu0w3yXCmi1fCN2aP9mPAusXtjaGkljFugJUoWrdFrw4oueyVnNjUGkLMsqw2A6ARqmDzLoQ65%2B6VKZ5BpJTIWHqUr1gsAOKSLFs8TQ7CYKhMETxipEaei3vvBp2b%2F91N8AvpaCQMLo4Vt%2FACuoad%2B1uTF%2FZhtZZe4nyAKUA%2BakPAP8b4jzIepqj%2FPyMITWByc4pS5%2B7vzVZkJLYamjy3tohmqev4LqOx4N3YrFdOSZLuyKw7jk9yoBvIxS%2F6rUjcjTQfAKRfpHL7MYjwrt9WDEaUN7Bgm7pWJqhF0m4BK0OBfFbvFjZpDAE2byPoGcXJAFcLL9q2Opk%3D|tkp%3ABk9SR6yi3qznZQ I also have converted another machine with a conventional roller foot. You will have to replace the feed dog as well as the roller and make a height adjustment to the foot bar . This foot however will not fit on the 31K-48 because it has a different needle clamp and the thread hook touches the roller when fully down . https://www.ebay.com.au/itm/354875933078?_skw=roller+foot+for+singer+31K-20&itmmeta=01JWXCQJ49JEFKG7SBTM0GYEDA&hash=item52a0410196:g:qDAAAOSwvsBkmk8w&itmprp=enc%3AAQAKAAABAFkggFvd1GGDu0w3yXCmi1e%2F5qCmG6xFw0AmKOEDIWLEe0meYXmfQ2BKpJtZ1P%2Bh48FCaYQZxULdwlEtyKbEMBeLpidUIA45OPgpgjVKM7yJB2L4LXfRmBZyQDRrRs5L67GNxP206vL3mdP1QxDH994bxrJCjnO%2FS1Jl%2BA2SE%2FAYNaXNlXFo1vdRbo%2BgC6k3D%2Fh79FmOJRI7H8SiRghTvt98TlD4e62mktu678ExQ%2Bbj%2F27xXANP%2B6RmhCZ4GgUeP3EeIlhQy0YPye%2BwjIuW7R7lER0emGv9yKVHvmY1ejsdzEz3LiHr4EZfaEYdfrV2SVnFAddYtRhsNJ26bgZMiEQ%3D|tkp%3ABFBMqqLerOdl Its up to you which one you think will suit your need better. If you do get the 31K-15 ,compare the bobbins and case with the 48 and you will see what i mean about difference .Its only a couple of millimeters but they are not interchangeable .
-
It could be 2 things . I don't have one of these machines so i am making some assumptions based on a Singer 29K. First the timing could be out . This is where the hook on the bobbin case is not picking up the top tread . It's hard to explain but easy to fix . I would check that first then proceed to the second likely cause which is the needle adjustment (left to right ) is not in the ideal position . Again an easy fix which is easier to explain . It could be a combination of both . I will leave it to someone who has one and knows more about the machine to either correct me or agree with me . I would expect @Wizcrafts to chime in and give you the lowdown on the method of adjustments . I have a question of my own .Why is it that only Americans have the hand wheel attached to the side of the machine and not the front ? from my experience this is most unpractical.
-
@CoupdeTete Try a shoe repair supply wholesaler , they are a standard type of eyelet for boots . As for high quality ,they don't make them like they used to . I just recently bought 2 boxes of 3000 black ones that were made in the 1950's for the military. They are so good .
-
@hugh123 this is the one i got https://www.ebay.com.au/itm/203842070658 If you search sewing machine servo motor on ebay you will see this type come up everywhere . There is a difference between them such as watts and top end speed . I looked for the lowest speed and highest wattage . Note that the speed range i chose is 500-4500 rpm and wattage is 600W . Some state that their range is 0- 4500 rpm but i think they don't quite understand what they are talking about . I am happy with both the power and speed . I hardly ever run it above minimum speed which is fine for me . To run it even slower i just pulse the foot pedal and it gives me a stitch at a time .One thing to note with it is that you can bolt it straight on where the existing one was but the pulley did not line up so i moved it about 20 mm left or right . To get the right position i put the motor upside down on top of the table bed and inline with the slot and marked and drilled the holes from the top and then bolted the motor underneath . I didn't use a set length fan belt but this silicone rubber stuff that you cut to length and insert an aluminium joiner to connect the 2 ends . I have no idea what the product is actually called but my local industrial supplier has it in stock . Which reminds me i need to get a few meters for some machines i have restored . The diameter is about 7 mm but comes in 3 sizes . In case you were wondering i have fitted an after market roller on the foot but had to lift the foot up so it would fit . Pretty easy to do but if your original roller is fine then just leave it .Because it would be of much higher quality than a new one . From memory i got some spare bobbins and bobbin case on ebay and they were listed as a singer 31K20 . The 31K15 looks the same but the bobbins are not as deep .Both machines are built on the same basic body but have a few differences the bobbins and bobbin case being one of them . If you have any problems sourcing them let me know and i will go through my purchase history and take some measurements and see what i can find for you Regards Tas
-
@hugh123 My machine uses a 16-257 needle . I dont remember if this is standard or if i tweeked the needle bar to line up so i can use the same needle on all my machines .I use the 16 for tkt 70 thread . For tkt 90 an 18 might do it but a 20 would be ideal a 22 might leave too big a hole . You may have to adjust the bobbin tension to suit . I use a 750 watt servo motor i got from ebay . I got the slowest one i could find . I believe there are 2 versions with different speeds . I also have one on a treadle which is a modified 29K patcher treadle . As i mentioned earlier the bobbins and bobbin case is different to the 31k-15 so get the right one . I got some spares on Ebay from china ( after making a mistake and getting the wrong size) .When i set one of the machines up with the new servo i also bought some bearings and pulleys to make a speed reducer but i don't need it so i have not installed it . I forgot to mention in an earlier post the the difference between the 31k-15 and the 31k-48 . The 48 has a roller feed dog not the standard up , back and down feed dog. look after the machine because parts are very hard to find and you will have to resort to buying a spare so you can rob bits off it .
-
Renia Colle de Cologne vs Syntic Total a Superfix
Tastech replied to Yukonrookie's topic in How Do I Do That?
@Yukonrookie "The notion that the glue you use is just supposed to bond until it’s sewed, is something I have to get used to. I think that if you’re using glue for something why not use the best you can find." I think when it comes to the type of leather work you do you are correct . The glue will still hold up for many years maybe even for a lifetime. The stitching is where its at . Always use the best quality thread you can get your hands on .I always use a nylon thread for both uppers and soles . I think a braided nylon would be perfect for your sheaths . I use it for stitching soles to the welts . I have not known of it breaking down over time like cotton and flax does . Last week i repaired an old 1950's leather jacket which is of the field style jacket . The stitching had deteriorated along the back panel and shoulders The thread was a cotton . After checking the rest of the jacket i realized everything else was going to fall apart . From what would have been a simple repair i had to remove the lining and re stitch everything . While at it i used a padded flannel shirt to make a new lining . I spent the better part of a day on it , but the customer was over the moon and happy to pay I used to see thread deterioration quite a lot 30-40 years ago. Mind you the jackets and shoes were already 20 - 30 years old back already . I was told by my master tradesman at the time that this was because of the acidity of the water proofing product namely dubbin and neatsfoot oil which would dissolve the stitching over time . I believe that lanolin based products does this as well . Because of the almost universal use of nylon threads this is no longer a problem . When it comes to preserving and waterproofing leather in cold harsh environments I think mink oil is probably the best to use . Bees wax just seals the leather but doesn't nourish it much . Think of it this way . Mink oil is a leather conditioner as moisturizer is for skin . Beeswax and polish are like make up for leather . The 2 serve different purposes but are compatible with each other . As i do with my shoes i first condition and then polish . The leather stays soft and flexible with the conditioner and the polish shines and protects the leather from dirt and water . Due to your location and lifestyle you will need a good pair of boots. from the videos i have watched nothing compares to Nick's hand made boots . The construction and materials of those boots are next level. They are like T90 tanks for your feet. Too hard core for Australia but for Pacific North West USA and Canada they are perfect and you know they won't fail you . -
Renia Colle de Cologne vs Syntic Total a Superfix
Tastech replied to Yukonrookie's topic in How Do I Do That?
While on the subject of glues i thought i should mention an observation i have made that would be totally irrelevant to almost the entire population of the world except a for a few cobblers .It concerns water based contact glue . I dread when Italian made shoes come in for repair . There is a common denominator . The leather sole comes unstuck from the upper . The shoes are usually about 5 years old or more . Most women will buy a pair of Italian shoes while visiting and think they have something special . Well they don't . Italian shoes are like their cars , They can be well designed but poorly engineered . In other words they look good but consistently fail because of poor construction . Italians are just as capable of making a crap shoe as the Chinese . In fact i would go further and say that a Chinese shoe is usually better constructed than your average Italian factory shoe . Why you ask ? The reason is the glue used to attach the soles . It's a low VOC ( volatile organic compound) glue usually water based . Some time in the early 2000's the EU in their infinite wisdom decided that thinner based glues are a bad idea so they put in place regulations for occupational health and safety reasons banning thinner based glues .In factories at least . The banned ingredient is toluene which can cause health issues in some people .I believe that the state of California also has restrictions of toluene . What happens with water based contacts is that after a period of time the glue breaks down and loses its performance , in other words it comes unstuck .In Australia we have no restrictions so we can still use the good stuff . Another factor affecting the performance of water based contact is heat . Australian pavements in summer get really hot and walking on them with thin soles glued with water based contact loosens the sole . To fix the problem i have to sand the original glue off both sole and upper and use a proper contact . The are a few brands which have consistent failure in hot weather , one of them is Birkenstock and Hugo boss and quite a few others but Italian women's shoes consistently fail . To give an analogy . 20 years ago car brake pads lasted about 3 times as long as they do now . Why ? Asbestos . Longer lasting and very little black brake dust over the rims .I make no judgments on what is good or bad for the environment but i have noticed a steep decline in performance and longevity of many products in many fields . As many will be familiar with there is a certain noticeable difference between the steel of an old knife to a new one . Most of my shoe making tools are very old and still perform better that anything new especially blades that can maintain an edge 3 times longer than a modern blade does . Having said that ,a shout out to Victor from Starko tools in Ukraine who still makes some impressive shoe tools and blades . Sorry for the rant but if its worth saying its worth saying good . -
Renia Colle de Cologne vs Syntic Total a Superfix
Tastech replied to Yukonrookie's topic in How Do I Do That?
From my experience as a shoe maker the Renia is over kill for what you are doing . Colle de colone is good for shoe repairs because it dries quick and can be used for many incompatible materials such as rubber to leather and rubber to PVC and rubber to polyurethane. It can get a bit stringy out of the pot and usually needs a bit of thinning using xylene . Not to mention the price . I generally use run of the mill contact cement for most jobs and renia when PVC or polyurethane are involved . Gluing leather to leather is easier and much cheaper using a regular contact . The shoe repair glue is the same formula only a thicker consistency than barge for example . Renia is not any stronger than the basic shoe contact i use but is 3 times the price . Its only advantage as i stated above is that it works on incompatible materials but even then when the correct primer is used. -
With industrial machines its a horses for courses sort of deal . The machines are very specific when it comes to intended use . Walking foot versus roller foot is all about intended use . I mainly used a post bed machine for sewing shoe uppers because i can do the concave / convex parts with easy access . I prefer a roller foot because i can do tight curves and see what going on when i am making brogues. I also use a cylinder arm walking foot for other bits but mainly making bags. I use a flat bed roller foot for stitching the padding to shoe tongues and attaching that to the vamp. I even hand sew some features like apron and spit toes because i don't know of a machine that can do it You can cross over with machines but generally i use a specific machine for a specific task and even leather thicknesses . Ask yourself what specific task do you want the machine to do ? there will be a good machine out there that is perfect for the job . Even consider a new Chinese machine. they are generally clones of existing tried and true machines and to my surprise are really good and relatively cheap . I love the old legacy machine but most are obsolete and very hard if not impossible to get parts for .My preference is a treadle powered machine but after half an hour i get cramps and my hips hurt so i use a servo motor on all my main machines.However I just love the precision of a treadle when doing a wingtip brogue 2 mm off the edge around a tight curve . One really good advantage of a new machine with a servo motor is the reverse feature . No more turning the job around and having the roller where you don't want it and missing the same stitch hole. No one will ever notice it but i know its there and a little piece of me dies each time it happens .
-
@hugh123 I think 5mm would be about the limit using chrome tan. with the right needle and tension . The only thing i can see going wrong is if the needle cant punch through it may allow the needle shaft to slip from its timing setting . Open the side cover and make sure the needle shaft screw is tight before you start . Do a practice run using 3mm then 4 mm then 5mm which will give you a good indication of what to expect and to just get the feel of things . If you motor doesn't have enough torque to get through at a slower speed then a reduction wheel might be necessary. not for a lower speed but for higher torque. What sort of motor are you running ? Old school induction clutch motor or the new DC variable speed ?
-
@hugh123 I have both machines you mention .The 48 has a roller foot while the 15 has a flat foot . The roller/foot shaft is also different in both machines as in the needle clamps . The fundamental difference is that the bobbins and bobbin carriage are different . I use my machines for stitching shoe uppers up to 3.5mm overall thickness . Not sure what that is in ounces
-
Working boots last making
Tastech replied to Larryvaan's topic in Shoes, Boots, Sandals and Moccassins
@Larryvaan You have done a good job on the last and it looks quite usable however there are a few things to consider before commencing . Heel height for one . Its probably a good idea to have some sort of replaceable heel material . this can be as little as 6 mm or a few stacked leather thicknesses up to 20mm. If this is the case then the last needs to incorporate the heel height . I would allow and extra overall width of 6mm and some toe room of about 12mm in length and also toe box height .You dont feel it right away but after a couple of hours a big toe touching the top of the toe box can give you grief therefore at least 3mm clearance there as well. This can easily be done with gluing some sole leather to the sides and front and then skiving them into shape. But the best method to get an actual feel for the last is to make a sacrificial pair of shoes specifically to test the fit , you can then make the modifications to the last for the real pair . The test pair can be rough as hell , it doesn't matter . All you have to do is sew the upper but only glue down the sole . Wear them for a day in the way or environment you will use them and take a note of where if any changes need to be made . You may nail it first go but probably not . In the bespoke shoe trade it is standard to make up a mock sacrificial pair of shoes to test fitting before the real pair is made . with the customer present we get feed back and then to their horror we cut sections out to confirm toe room and width . A mock pair of shoes takes a couple of hours where the real ones can take between 20 to 40 hours so you want to get it right. Worse cones to worse you can always stretch out the width but length can be difficult. If you realise you have got it all wrong and making a new pair of last is to much trouble there is always the option of buying commercial lasts and going from there . On Etsy i have seen lasts from Ukraine that are what i call anatomically correct . some call them barefoot lasts . They are similar in shape to brikenstocks and crocs where the have a rounder toe area . The seller is called goodhusak. here is a link to show you. https://www.etsy.com/au/listing/1089736001/shoe-lasts-for-cowboy-40-47-sizes?ls=s&ga_order=most_relevant&ga_search_type=all&ga_view_type=gallery&ga_search_query=mens+shoe+lasts&ref=sr_gallery-1-13&bes=1&content_source=b01e6a2a4020411eadd45b61df19f14b1b9553e2%3A1089736001&search_preloaded_img=1&organic_search_click=1&logging_key=b01e6a2a4020411eadd45b61df19f14b1b9553e2%3A1089736001. Below is another link to show you the fitting of the sacrificial pair and what gets done to them during the fitting Bespoke Shoe Fitting With Legendary Lastmaker Tony Gaziano | Gaziano & Girling - YouTube I would like to see a drawing or photo of what style you had in mind and perhaps i can offer some advice . Regards Tas -
The skiving blade is easy . I do it this way . Using double sided tape on one side of the blade , Stick it to a bench with the sharp side over hanging the bench by about 1/4" . Your can use various grades of diamond sharpening plates or stones . when one side is done flip the blade and repeat . Surprisingly , the blade stays sharp for a very long time . As a shoemaker and cobbler i use mine about 20 to 50 times a day . Its been over a year since i last sharpened. Interesting fun fact . The skiving blade is the same width as a Stanley NO 4 hand plane blade . You can still get a new blade for the cutter from landis . Over time they lose their diameter and wont cut all the way through . The round blade on my machine is about 30 years old and is due for replacement soon.
-
Cutting soft or chrome tan leathers will always be troublesome . The tool was specifically designed to cut veg tanned kangaroo leather of a thickness of .8 mm to 1.2 mm. It is the relative stiffness of veg tan that makes cutting lace easy with the tool and the added fiber structure of kangaroo leather make cutting a breeze. Perhaps with a little practice and finesse you might be able to get good results with soft leather but i would not be hopeful.
-
@FDC Its been almost a year since your last post and i was wondering how the machine is getting along . Are you seeking therapy yet ?
-
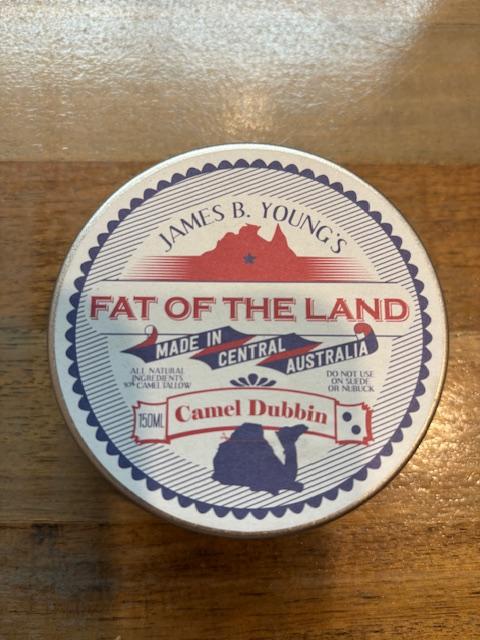
I'm not really a fan of camels , spitty , ugly and temperamental animals that they are ( reminds me of some humans ) .However i am predisposed to a well presented foot . lol. I recently made the acquaintance of a fellow shoe maker and leather worker from Alice springs in central Australia . He gifted me a tin of his own brand of camel dubbin leather dressing made from the fat of the hump . I didn't think to ask about the source of this hump fat and how it was obtained let alone ask about the qualities of its leather . I do know that wild camels are rounded up and exported to the middle east for their meat but i am not sure if they are shipped live or as frozen meat . If they are shipped frozen then the skins are disposed of because i don't think there are any viable tanneries in or close to camel country . They may on the other hand be salted and exported green along with cowhides to tanneries around the world for processing into leather.To be honest i have never really given it much thought before. It could in theory be financially viable under some circumstances . You would need to round them up , pen them and transport then to an slaughter house . The skins would go to a tannery and the meat to be butchered . Camel hair is world renowned for its fineness and thermal properties but i think the wool is shorn at a certain time of year and you need i live tame live camel to do that . Is the meat tasty and marketable ? who knows . If i ever come across some i would be happy to give it a try. I am sure NSW lwaether could source you some if you wanted it .After all they sell veg tanned Kangaroo scrotum's , so why not camel leather About 40 years ago i met a bloke who lived out in the desert who was once a cameleer . He told me he made the saddle bags for his camels out of camel leather as well as old carpet. Again i didn't inquire further as he sort scared me and was as we say in Australia a bit on the nose . Below is a link to the website of James B young , the bloke from Alice .If you contact him he might be able to enlighten you and us all https://www.jamesbyoung.com.au/
-
@Andy132, A couple of things . With the photo resizing i use this method . Take a phone photo and send it to my email . before it send it asks me what size . small ,medium , large ,actual. I choose medium or small for this forum . I then open the email on my desktop and save . then post from there . Its a bit of a chore but it works . With the stripping down of the machine i follow a standard process . WD 40 to loosen all parts Remove everything ,taking photos as you go . Degrease everything with an alkaline degreaser . Its a pink liquid i get from repco . With a wire wheel on a bench grinder to remove as much rust and crap as possible . for all the bits For the main body and painted parts i use a paint stripper . available at bunnings . Wash down the body with soap and water and a wire brush after paint stripper With a wire wheel on an angle grinder clean up the main body and lager parts . i use 2 types of wire wheel , a cup type and one with the bristles on the out side of the disc . Wear eye protection , gloves and an apron because wire bristles fly off and and can fk you up big time . and hold on tight . I then acid bath everything for a couple of hours . The acid i use is phosphoric acid . I get it in 1 or 4 litres from a cleaners wholesaler around the corner from my shop . for the main body u use a big tub that will submerge the whole machine body including the hand wheel top rocker and housing . you may need about 1 litre of acid just for this and the rest is water. for the nuts , bolts and gears i put them in a smaller container and do them separately. it take about 2-4 hours to strip the rust . remove parts and wash with water and scrub the black residue with a scotchbrite scourer . allow to dry and wire wheel everything again . I go the extra mile and linnish and polish most of the parts so they look sexy . After the acid bath you will notice instant oxidization but the wire wheel treatment stops it . Its best to paint the same day or the next . Work on the main body parts first and get them undercoated and painted . while the paint cures for a week or so work on the other bits . everything comes off pretty standard but you do need the right size pin punch to remove the ends of the shafts and a gear puller. don't use a hammer to bash things off . with the treadle frame it's just so much easier to pay $100 and get it sand blasted . Apart form the disproportionate amount fairies, Canberra is a nice place to live Tas
-
@Andy132, I too have a thing for singer 29k"s .I have 5 but not a 29k58. I have a couple of 29k53"s . One was a paddock find that i was going to use for parts for a machine i have had for 40 years . It was seized and rusted solid but everything was there so i worked on it and got it moving . I then fully stripped it down to bare metal , painted the body and Mirror polished all the working bits and now it works perfectly and surprisingly tight for a 100 year old machine . The original intention was to use the gear box in original machine that has been waiting 10 years for a pinion gear . After about 2 weeks of getting the old girl going i found the parts i needed for my original machine in England so i got them , 2 weeks later i sourced another set of gears and pinions from a member of this site from Canada ( thanks Joe ). So after 10 years of searching the world for pinions for a 51 they all appeared within 6 weeks of each other . Gears for a 53 are different to a 58 to 71 .Old sewing machines can be a test of your patience at the best of times so hang in There . I have a 29k13 that needs a rack . I know one will turn up so i am not concerned . I also have a pfaff post bed with a problem in the bobbin shuttle but i am doubtful of ever find one , but you never know .
-
Depending on the style you can sew some uppers on a flatbed industrial machine . As for soles to welt i would say definitely no. Some machines may have the technical punch but not the access to do a welt to a sole . The machine you need to stitch soles on is either a blake type stitcher or a curved needle out sole stitcher . Both require some experience and skill not only of operation but of repair and adjustment , They are old machines and very temperamental . If you don't need to stitch soles to make a living then just do it by hand .
-
I use various types of gloves for shoe making and repairs . My standard are a rubber coated lycra material with a rough texture . I mainly use these for their grip when grinding down soles and heels . They also offer some protection to my hands when i am on the sanding machine where i inevitably touch the sanding belts with my hands which takes a bit of bark off . Black nitrile gloves offer surprisingly good protection when handling sharp stuff but my go too is Kevlar (maybe ) finger protectors . They are like little condoms for your fingers . I generally only wear one on my thumb when i am trimming soles and heels with a knife . Having said that cuts are inevitable and just part of the job so i always keep band aids and disinfectant with in reach Here is the link to the finger condoms https://www.aliexpress.com/item/1005006856555250.html?spm=a2g0o.productlist.main.23.178eHytrHytrEc&algo_pvid=78e31e9a-babb-4d76-b964-a0cd081f29f6&aem_p4p_detail=202409020109327904732602416650008110524&algo_exp_id=78e31e9a-babb-4d76-b964-a0cd081f29f6-11&pdp_npi=4%40dis!AUD!3.38!2.50!!!16.00!11.84!%402103010c17252645725072209e0e9b!12000038528356314!sea!AU!3945930413!X&curPageLogUid=aWsrsU2QSqjM&utparam-url=scene%3Asearch|query_from%3A&search_p4p_id=202409020109327904732602416650008110524_3 the rubber coated gloves https://www.aliexpress.com/item/1005001530548182.html?spm=a2g0o.productlist.main.27.26f65ea0ra2ZW5&algo_pvid=50c25f5e-c506-478b-812a-9557bcea60a0&algo_exp_id=50c25f5e-c506-478b-812a-9557bcea60a0-13&pdp_npi=4%40dis!AUD!38.58!27.39!!!25.74!18.28!%402101effb17252655745574262e0449!12000016487902917!sea!AU!3945930413!X&curPageLogUid=Gby5jnVPQPL4&utparam-url=scene%3Asearch|query_from%3A