-
Posts
75 -
Joined
-
Last visited
Content Type
Profiles
Forums
Events
Blogs
Gallery
Store
Everything posted by Heartless
-
agreed, road rash is a very nasty thing. personally, i would not go any less than 2mm, and even heavier, or doubled up in key areas, like back, shoulders, elbows, etc.
-

How much to charge for your leather goods?
Heartless replied to GrampaJoel's topic in Leatherwork Conversation
i am definitely not impressed, at all.. and I already know I am old... and old school. If you are going to do something, do it right, or dont bother. Hate to say it, but far too many have no clue what real quality is anymore. They are so used to cheap, Chinese made goods that even half a$$ed stuff can impress if it carries the "Made in *your location here*" label I live in the USA, and to a lot of folks here, "Made in the USA" is supposed to mean high quality... sorry, but what I saw on that website is not what I would call high quality. I think Sup hit the nail on the head.. blinded by the slick website. -
honestly, i like the Pinocchio one better, lol
-
i wish you the best of luck with your project. Please do keep us posted on it =) (i dont mean to be the grammar police, but correct spelling does make a difference when you are trying to find information)
-
yeah, i suppose it would, if one had the correct type of awl.. I dont, so... all i have at the moment is just a scratch awl.. still building my tool set a little at a time
-
actually, there are times when a single point chisel is useful say you are going around a zipper cut out - you get close to finishing and realize that the spacing is slightly off to use the 2 point for that last hole... use the single point to center the last hole and minimize the visual impact of that one being slightly different than the rest. If i were going to skip one when buying individually, it would be the 4 point... 6 point for long straight runs, 2 point for working around curves, and the single point for times like described above. I have a full set as shown above and rarely use the 4 point
-
i kinda thought the same thing... but then i thought, the artifact is pretty clean also, so maybe they were working in the cleaning area? LOL
-
@kgg thanks for the name.. I grew up sewing with my grandmother who did custom clothing for others, but names of the different types of seams were never really a thing, LOL
-
most likely not finding anything because you are using the wrong spelling.. the word is seam. spelling does matter. the biggest "safety" thing you need to consider is making the seams strong enough to withstand sliding on pavement without falling apart the type of thread you use, and way the jacket is constructed will have a lot of bearing on that. i dont know the proper name for the type of seam i am thinking of, but it is very strong, and would serve you well in this project.. it is actually easier to draw it out than try to explain it, so I will post a drawing shortly.. ~~~~~~~~~ Ok, I am going to call this a rolled seam. you are looking at this from the end of the seam.. the blue & red are your leather pieces/panels... black is stitch line 1. lay one piece over the other and stitch together - the way I have drawn this, left is on top.. 2. after stitching the two pieces together, "roll" the seam over so the initial stitch line is hidden and do two more stitch lines - kind of top stitching, but making sure you get both panels in each line of stitching - in essence, you will be going through 4 layers of leather for both of these seams this kind of seam is very common on blue jeans where two panels are joined together... except they dont usually do that first line of stitching, they just roll and do the double top stitching.
-
make it a 3 piece gusset.. with the bottom piece being slightly larger than the sides.. stitch the bottom in first to both front and back panels, then attach the side gussets make the side gussets with a rounded bottom edge to match the bottom gusset shape that allows the tablet to slide down further.. see drawing below I would stitch up both edges of the side gussets at the same time to make it easier to get at all the stitch holes (2 sets of needles & thread - one for front edge, one for back edge - if that makes sense?) do 2 or 3 stitches on the front, then 2-3 stitches on the back, alternating back and forth until you get to the top I grew up sewing and making alterations, so this sort of thing is kind of second nature to me, just a different "fabric"
-
have to agree with Chuck.. cut the stitching and add in a new strip/gusset to give the needed extra space - and I would stitch it to the inside of the main panels, using the existing stitch holes.
-
@LOM- sewing through the cardboard is not really a good idea - it would weaken the board edges and would also allow moisture to get to the board.. not a good thing.. sewing around it as fredk suggests is a better idea if you really want to sew it, and i would have to agree with the leather weight suggested, no more than about 4-5 oz not sure why you would be so concerned about glue not holding, book binders do it that way all the time - holds fine as long as the leather used is thin (think goat/kid skin).. thick leather would be more problematic there are a multitude of ways to approach this, with a spine cover, without a spine cover, hidden screws, visible screws... kind of depends on the look you are going for. if you want something like the image you shared, that is simply heavy weight leather (think saddle skirting) with the chicago screws thru it.. no stiffeners, no fancy stuff - about as simple as it gets. start adding stiffeners, you start complicating things, and the weight of the leather used makes a big difference in the final outcome.
-
yup, Sam Brown button.. the hole in the leather is actually a hole and a slot combined - the hole portion should be about as large as the shaft of the button, with the slot making it easier to fit over the head..
-
that particular example is just a single layer of heavy weight leather - just guessing, but i would say 10-12 oz, possibly thicker, possibly with a groove cut to make opening easier, there is nothing "inside" the cover. the hardware is just Chicago screws.... for the pages, you can find photo album refills at most craft stores. If you did want to use thinner leather and a stiffener, you could use something like mat board or similar, but I would not sew it - i would do more like a book cover - glued down.. and that means skiving edges, and such. would need a total of 4 pieces of the stiffener... 2 large for the main covers and 2 thin strips for the binding edge.. with a small gap between them (1/4 in or so) to make opening the album easier. there are plenty of videos on book binding that could help you with that kind of cover, if you wanted to go that route
-
somebody must have asked the right people... check this out https://www.springfieldleather.com/Craftmaster-Push-Beveller
-
thanks @PastorBob - and I do try to learn something new everyday, regardless of what it is... the day we stop learning is the day they put us 6ft under. =P
-
thank you, very much.. i spent many hours watching videos - lots and lots of videos! before i ever picked up a tool sewing comes naturally to me, I learned that from my Grandmother when I was very young.. learned on the very machine i now own. the artistic side, well, i have always had, or so I am told... leather is just a new medium for me.
-
Thanks! =)
-
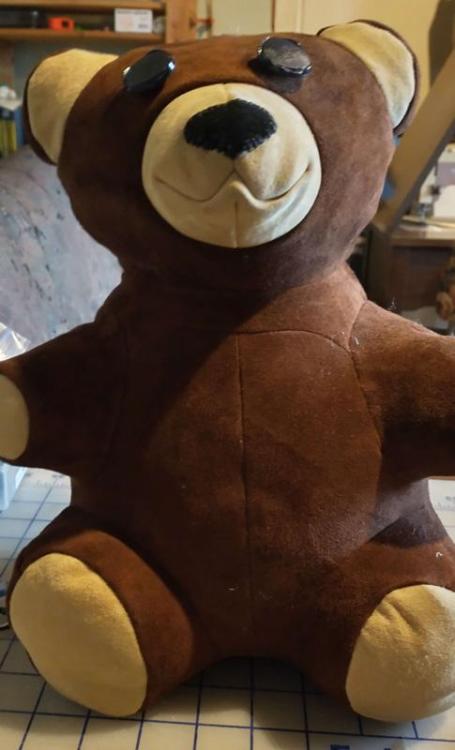
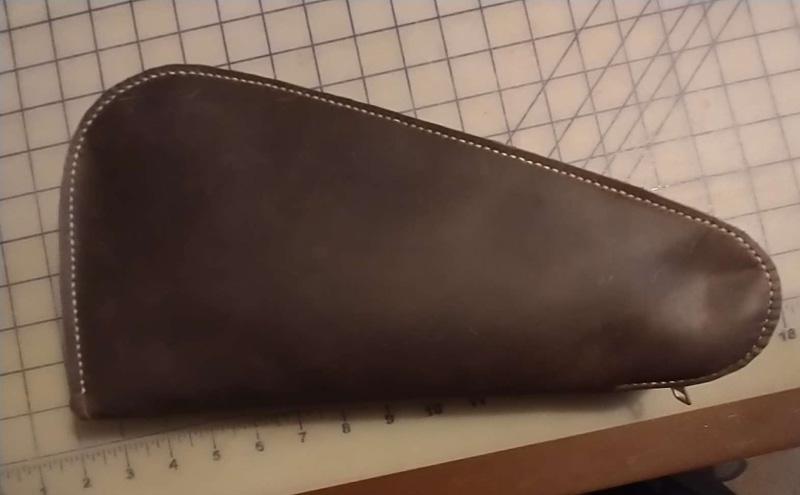
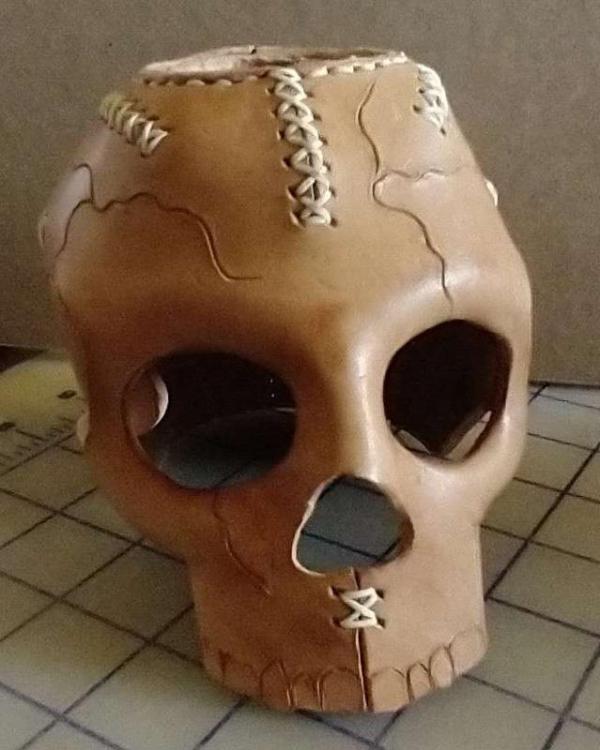
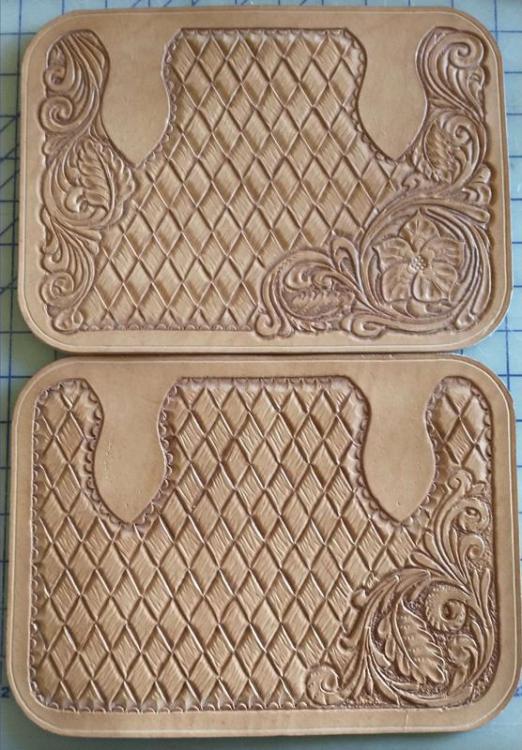
New here and new to leather crafting. Have always admired well crafted leather goods and tooling? oh yeah! so i have finally decided to try my hand at this craft, and so far I am enjoying it very much. still trying to decide which way I really want to go, thus the different pieces.. 1. suede teddy bear, 2. pistol case made of Cowboy pull-up, lined with natural shearling, 3. veg tan skull votive and 4. the front & back panels for what will be another pistol case the teddy bear is all suede, body seams stitched on my grandmother's old Necchi Lelia 513 that I inherited, the other stuff is (or will be) all hand stitched. I also have a small-ish satchel bag I made using a dieselpunk-ro pattern (love his stuff!) - need to take some pics of that yet. the tooled panels are my first "real" attempt at tooling.. I did a bit of fooling around on some scrap pieces to get a feel for the tools, and to see how well my hands could handle doing it (arthritis issues). I know it is not perfect, not by any stretch, but feel i did ok for a beginner. the basket weave is all hand cut and beveled.. couple of goofs in there, but these are for myself at this point, so I am ok with it.
-
imho, it is "genuine" leather, but it is not "top grain" leather.. it is a lower grade split that has been treated to look like top grain, as most commercial grade upholstery leather is actually recently read something about the subject, just wish i could remember where I read it...


