
Goldshot Ron
-
Content Count
356 -
Joined
-
Last visited


-

Leather beveling tool: how to make this tool?
Goldshot Ron replied to Dannyman's topic in Leather Tools
I made a beveler like the one that you showed with the vise. I held the blade in with a woodscrew and small washer. Then, I had a second piece of wood to form a channel the width of the string. To hold the string in place while beveling, I used a piece of plexy glass on top with a pivot screw and a locking screw. It looked cool, but sucked at the task of beveling. It didn't cost me any money, just time and frustration. Let us know what you come up with. -
Leather beveling tool: how to make this tool?
Goldshot Ron replied to Dannyman's topic in Leather Tools
Danny, This is how I see the tool: the center block has a slot in it that holes the blade. (I think a craft blade would work.) The rods or bolts go through all three pieces of wood to hold the blade in position and the left hand block is the piece that the string rides along the top and is beveled by the blade. The top piece of metal is a hold-down piece that keeps the string is position to bevel. As TomE mentioned, it may be just as easy to buy a tool. I have tried to make my own, and I have never been satisfied with the results for the amount of time I spent making the tool. Ron -
Thanks Ron, The last Wade I made was only a 1/2 inch rise, and I am never sure how it will feel until I cover the darn thing. I believe the set of rear d's that I have are JW. I am always on the look out for new hardware, and nice conchos that will not set me back a fortune.
-
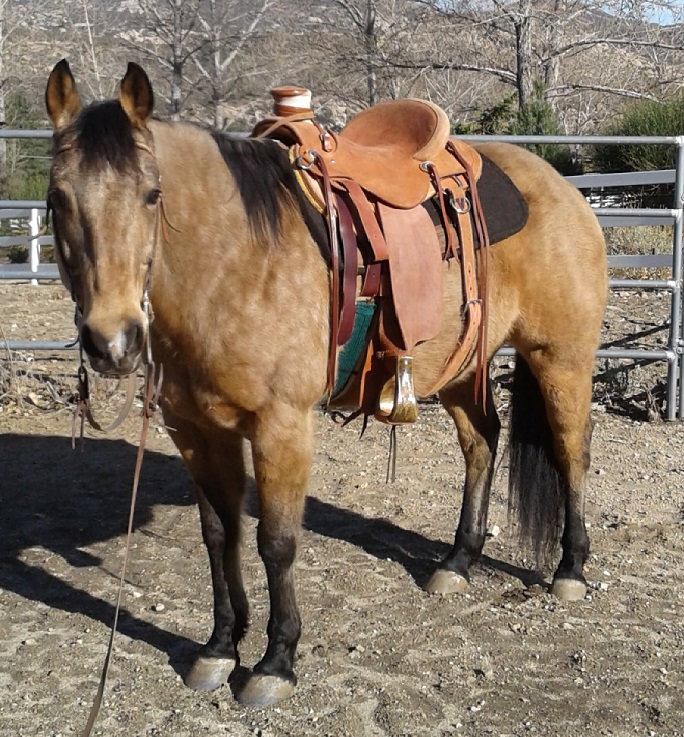
I think your saddle looks good. It appears that you worked on the rough out to get it smooth, and I find that hard to do correctly. What is the slope on the horn? I am trying to figure out what to order on my next tree. I don't want a charro looking horn, but, I don't want a flat woodpost either. Also, where did you pick up the rear flank cinch dee? Ron
-
Fudging stitch length @ a border/corner: Cobra class 4
Goldshot Ron replied to DieselTech's topic in Leather Sewing Machines
To fudge this, you move you stitch length handle up a little to adjust the stitch. There is a good tutorial on Youtube using a 205 clone. I am sorry that I cannot remember the name of the video, but it is very helpful. -
Cobra class 4 foot pedal: Thread Release
Goldshot Ron replied to DieselTech's topic in Leather Sewing Machines
Call Cobra on Monday. -
Thanks for the info. Randy.
-
Hey Randy, Your new saddle looks really good. I never heard of your tree maker, where are they out of? Aren't taps fun? How did you attach the lower string on the taps? My suggestion after making a new saddle is to use it, then sell it as used. You can feel what you did right or wrong, and use it as a learning tool. Also, I have found people will give you almost as much for a used saddle as a new one. Take care, Ron
-
Picking up bottom thread Adler 167 GK373
Goldshot Ron replied to Tinytim's topic in Leather Sewing Machines
Check out Uwe Grosse video on Youtube. It sounds like your timing is off. -
I have a Toro 3000 that I purchased in 2007. I have always used Weaver's bonded nylon thread without any problems. If the grease bothers you, cleaning it off will not hurt anything. I have always used sewing machine oil, so I have no experience with any other lubrication. The company was in Vernon, CA when I purchased the machine, and since then they have moved up to the Bay Area, and they have changed ownership. But, be advised, if you need parts they change a minimum fee for the parts. So, a $3 bobbin spring may be $30; or, in my case, a spring plus 6 bobbin spools for the same price. This machine takes many of the same parts as other 205 style machines. Happy sewing.
-
I do not say this to be a "smart arse", but is the condition of the saddle worth your time and effort? It is easy to fall into the trap of the challenge. Not with the saddle here for me to look at, but from your photos, I would consider recovering the knee pads and tucking the new leather under the existing leather of the seat and front jockey. To repair the cantle: you either replace the whole seat cover or scab in leather to go over the cantle. Either way will require a lot of stitching. If the cantle is wood, you might be able to replace the triangular part of the seat and pull the edge over the back side of the cantle. Scallop the back edge of this new piece of leatheer, and tack it to the back of the cantle. This technique is used on western saddles and creates a vintage appearance. Good luck
-
Adler 205 top thread getting stuck
Goldshot Ron replied to Goldshot Ron's topic in Leather Sewing Machines
4 of us loaded the machine into the trailer, but I unloaded it alone. First, lower the table to it's lowest position and tighten the two knobs on the stand. There is a pistol within the stand that allows for machine height adjustment. If not secured, the table may spring upward when the head is removed. I cannot tell you the exact weight of the head, but it feels like about 175 pounds or more. I moved the head on a hand cart into my shop, and was able to lift it onto my work table. The stand is not light either, but manageable. Once inside the shop, I positioned the stand equal to my work bench, and slide the machine onto the stand. This all sounds simple, but I questioned my logic more than a couple of times during this operation. Good luck, and happy sewing. -
Adler 205 top thread getting stuck
Goldshot Ron replied to Goldshot Ron's topic in Leather Sewing Machines
@Uwe...yes, the problem that I was having with my 205 was exactly as shown in your video (nice camera also). To time it, I took off the presser foot cover and the feed dog. It sure made it easier to time, and see what was going on. I had to use 6 spacer rings to adjust for the 346 thread. I am still having some problems sewing in reverse, but that will have to wait for another day. -
Amazing the work you do. Zippers scare me, but I have sewn them into cantle bags. Easy stuff compared to your boots. I use rubber cement when sewing them, and the clips like you used. The cement is just to hold the zipper in place while sewing.
-
Adler 205 top thread getting stuck
Goldshot Ron replied to Goldshot Ron's topic in Leather Sewing Machines
Solution found. As Wiz mentioned, there are spacers that go in front of the bobbin. I installed extra spacers for a total of 6 spacers to accommodate the heavier thread and retimed the machine to make sure all was correct. It appears to have solved my problem.