All Activity
- Past hour
-
There is a shop in Kansas City MO - Fitzwater Leather. He is an active duty firefighter and does leatherwork. He focuses on shields and has made tons of them around the country. Reach out to him. He would be happy to help, if he has what you need.
- Today
-

Work belt with a story
PastorBob replied to KillDevilBill's topic in Purses, Wallets, Belts and Miscellaneous Pocket Items
Nicely done. I had the same phenomenon occur when I made a belt for my dad. He only wears it for special occasions. That is sharp. Hope he wears it more than just on Sundays. -
Hey, Ten kalkulator frekwencji jest naprawdę przydatny dla uczniów, nauczycieli, rodziców i działów HR. Ułatwia szybkie i dokładne sprawdzanie obecności w szkole, pracy czy przed egzaminami. Łatwy w użyciu i dostępny online za darmo świetne narzędzie do planowania i kontrolowania frekwencji. https://kalkulatorsfrekwencji.pl/
-
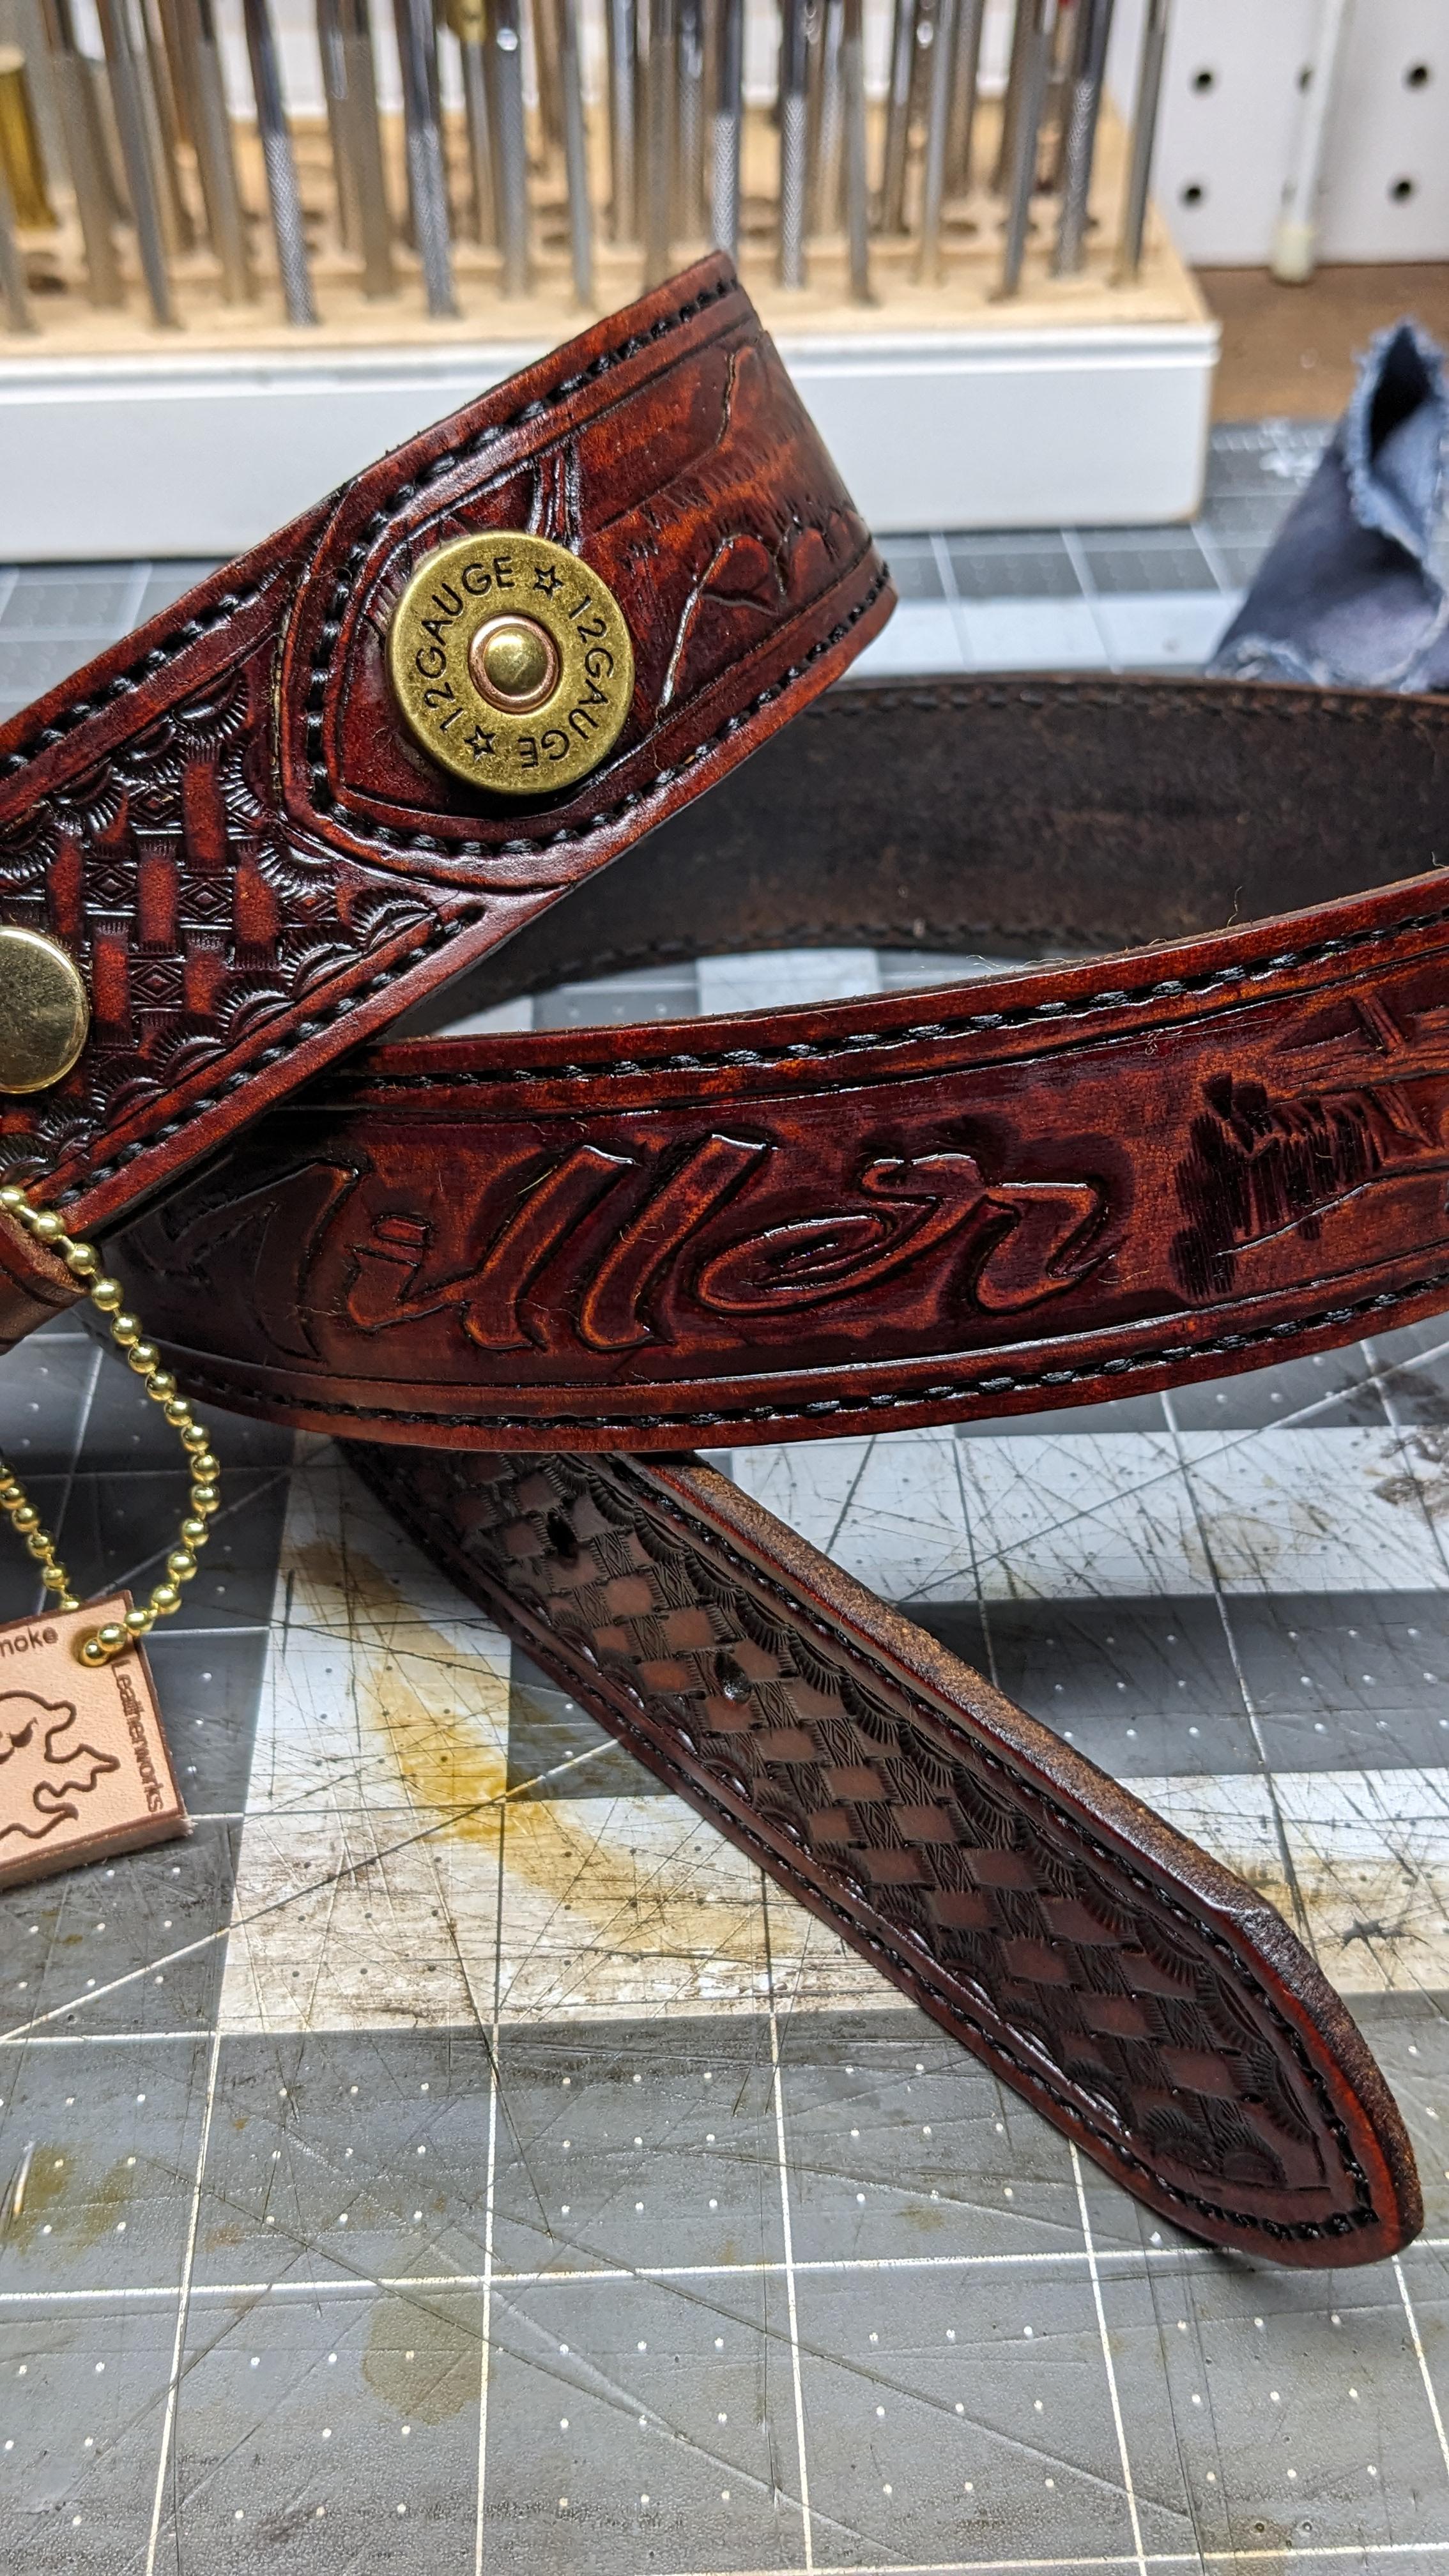
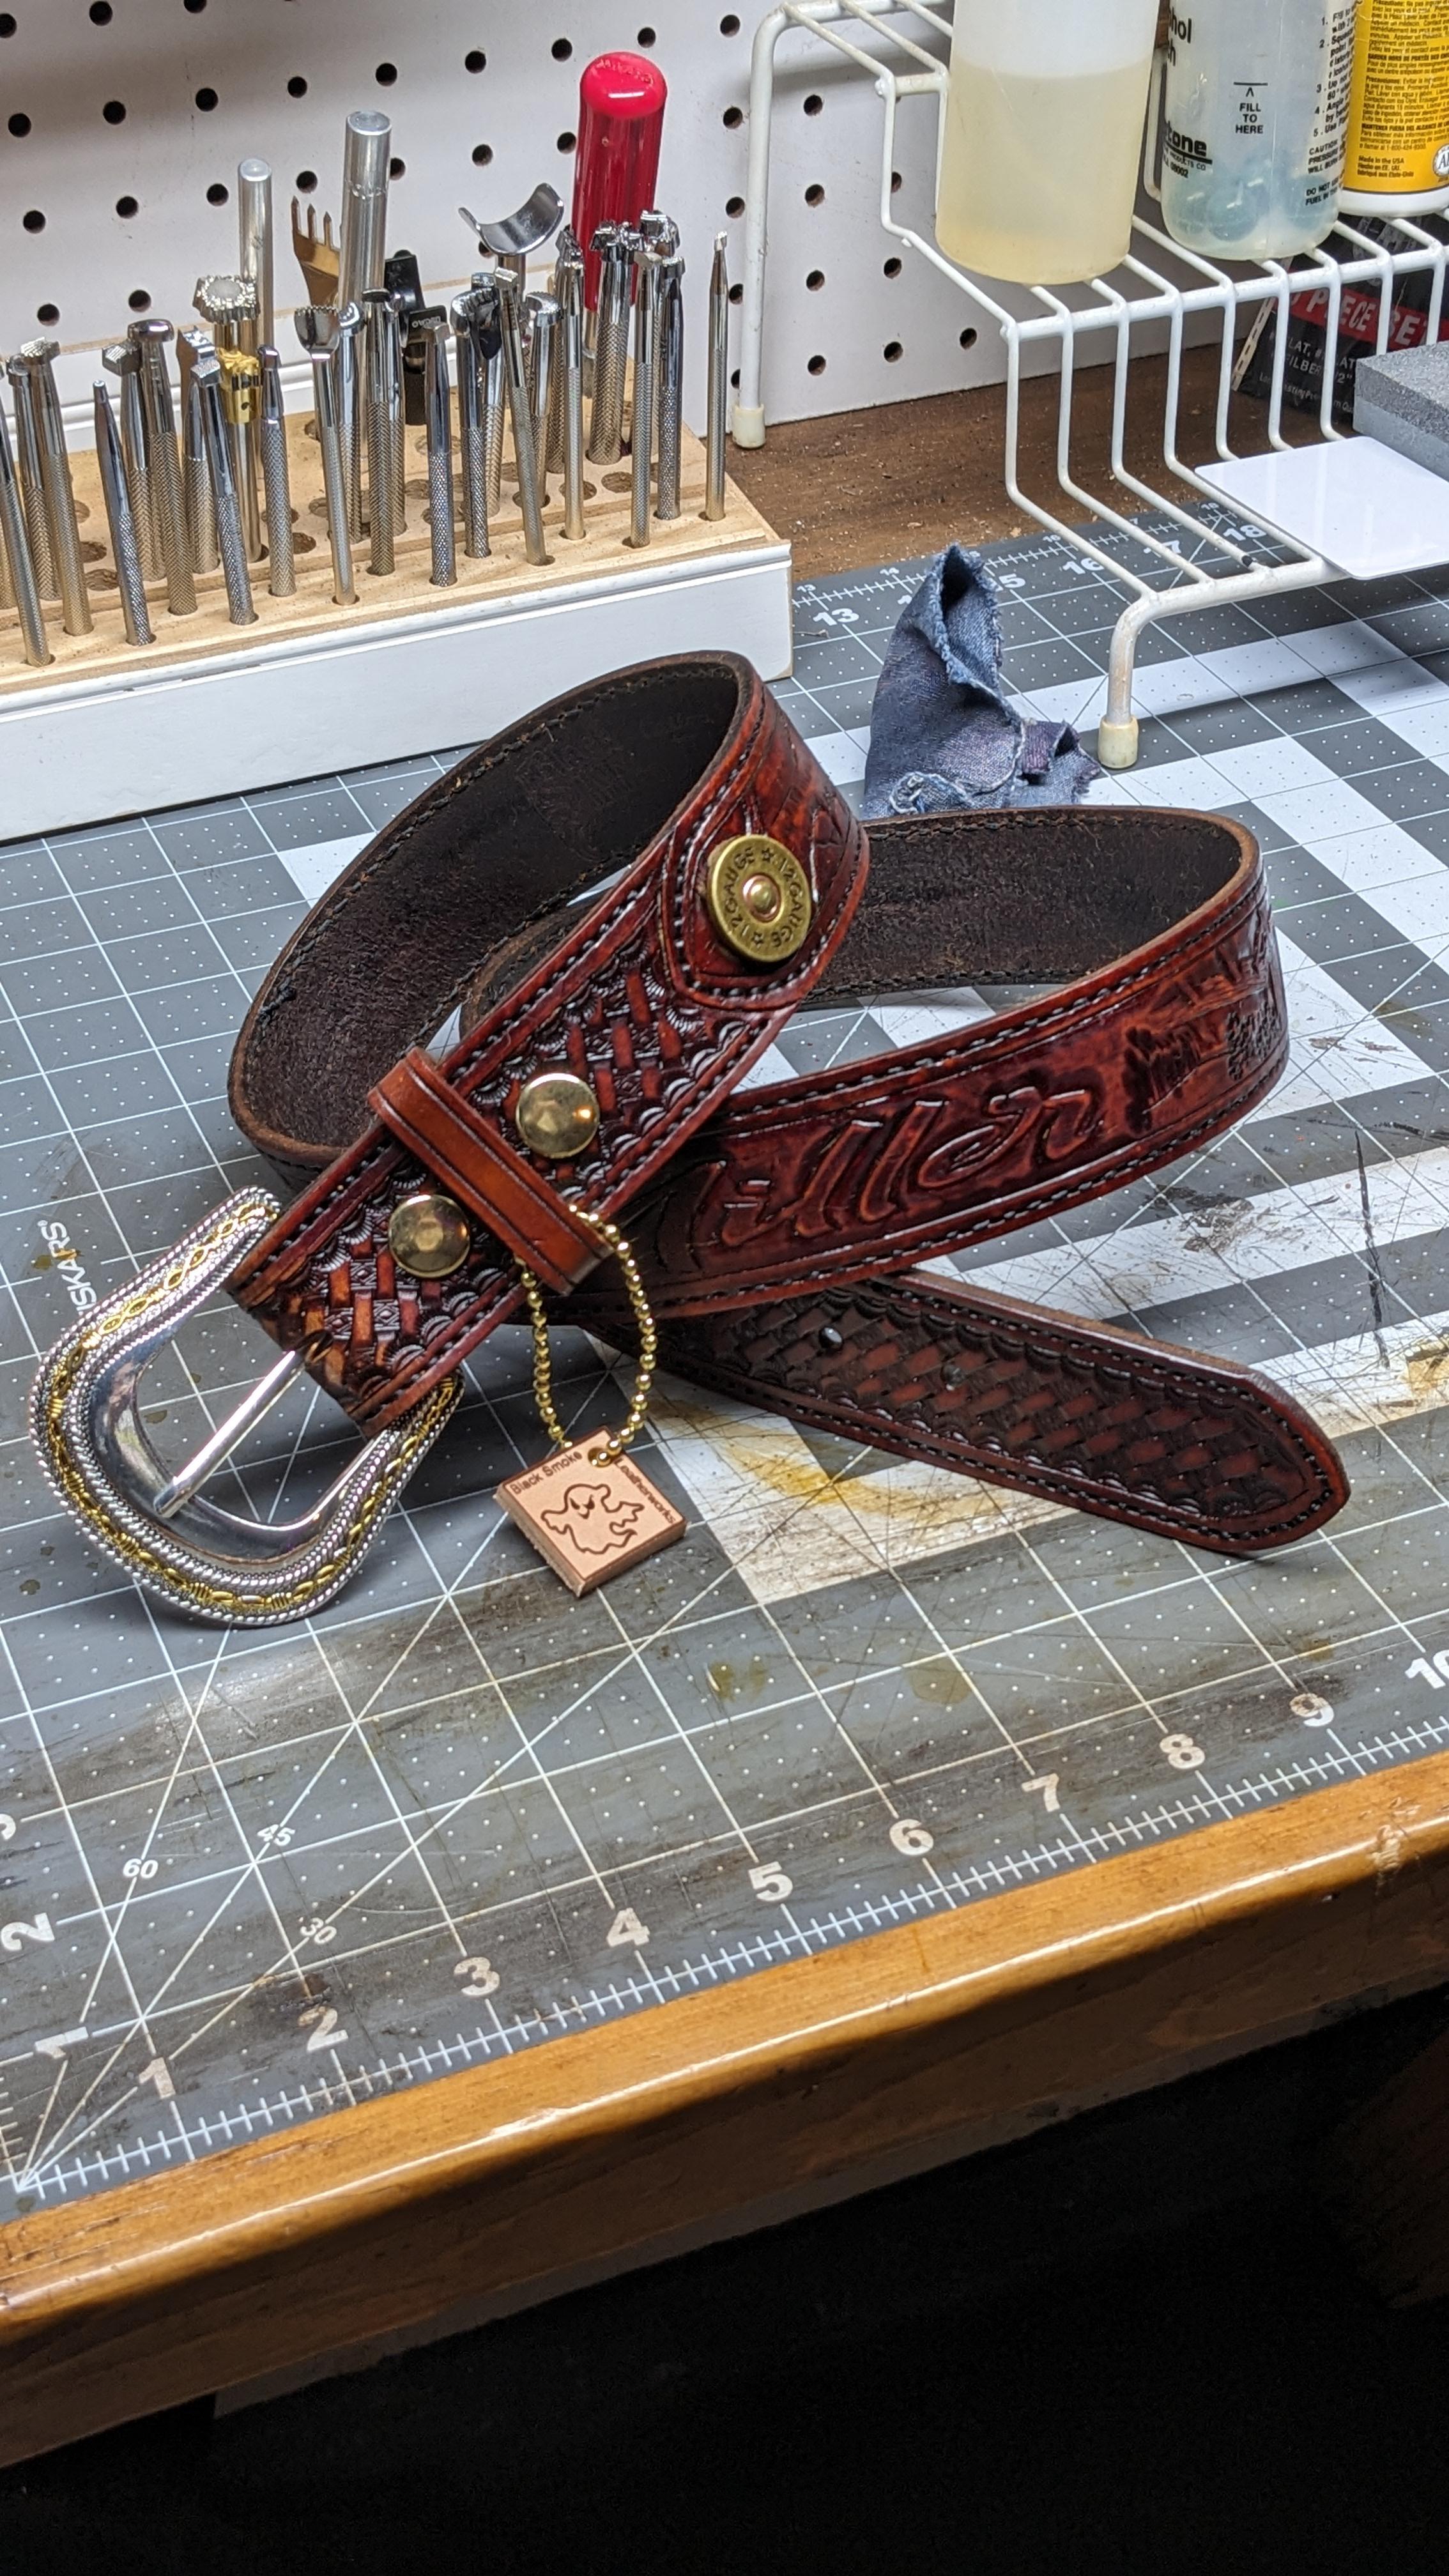
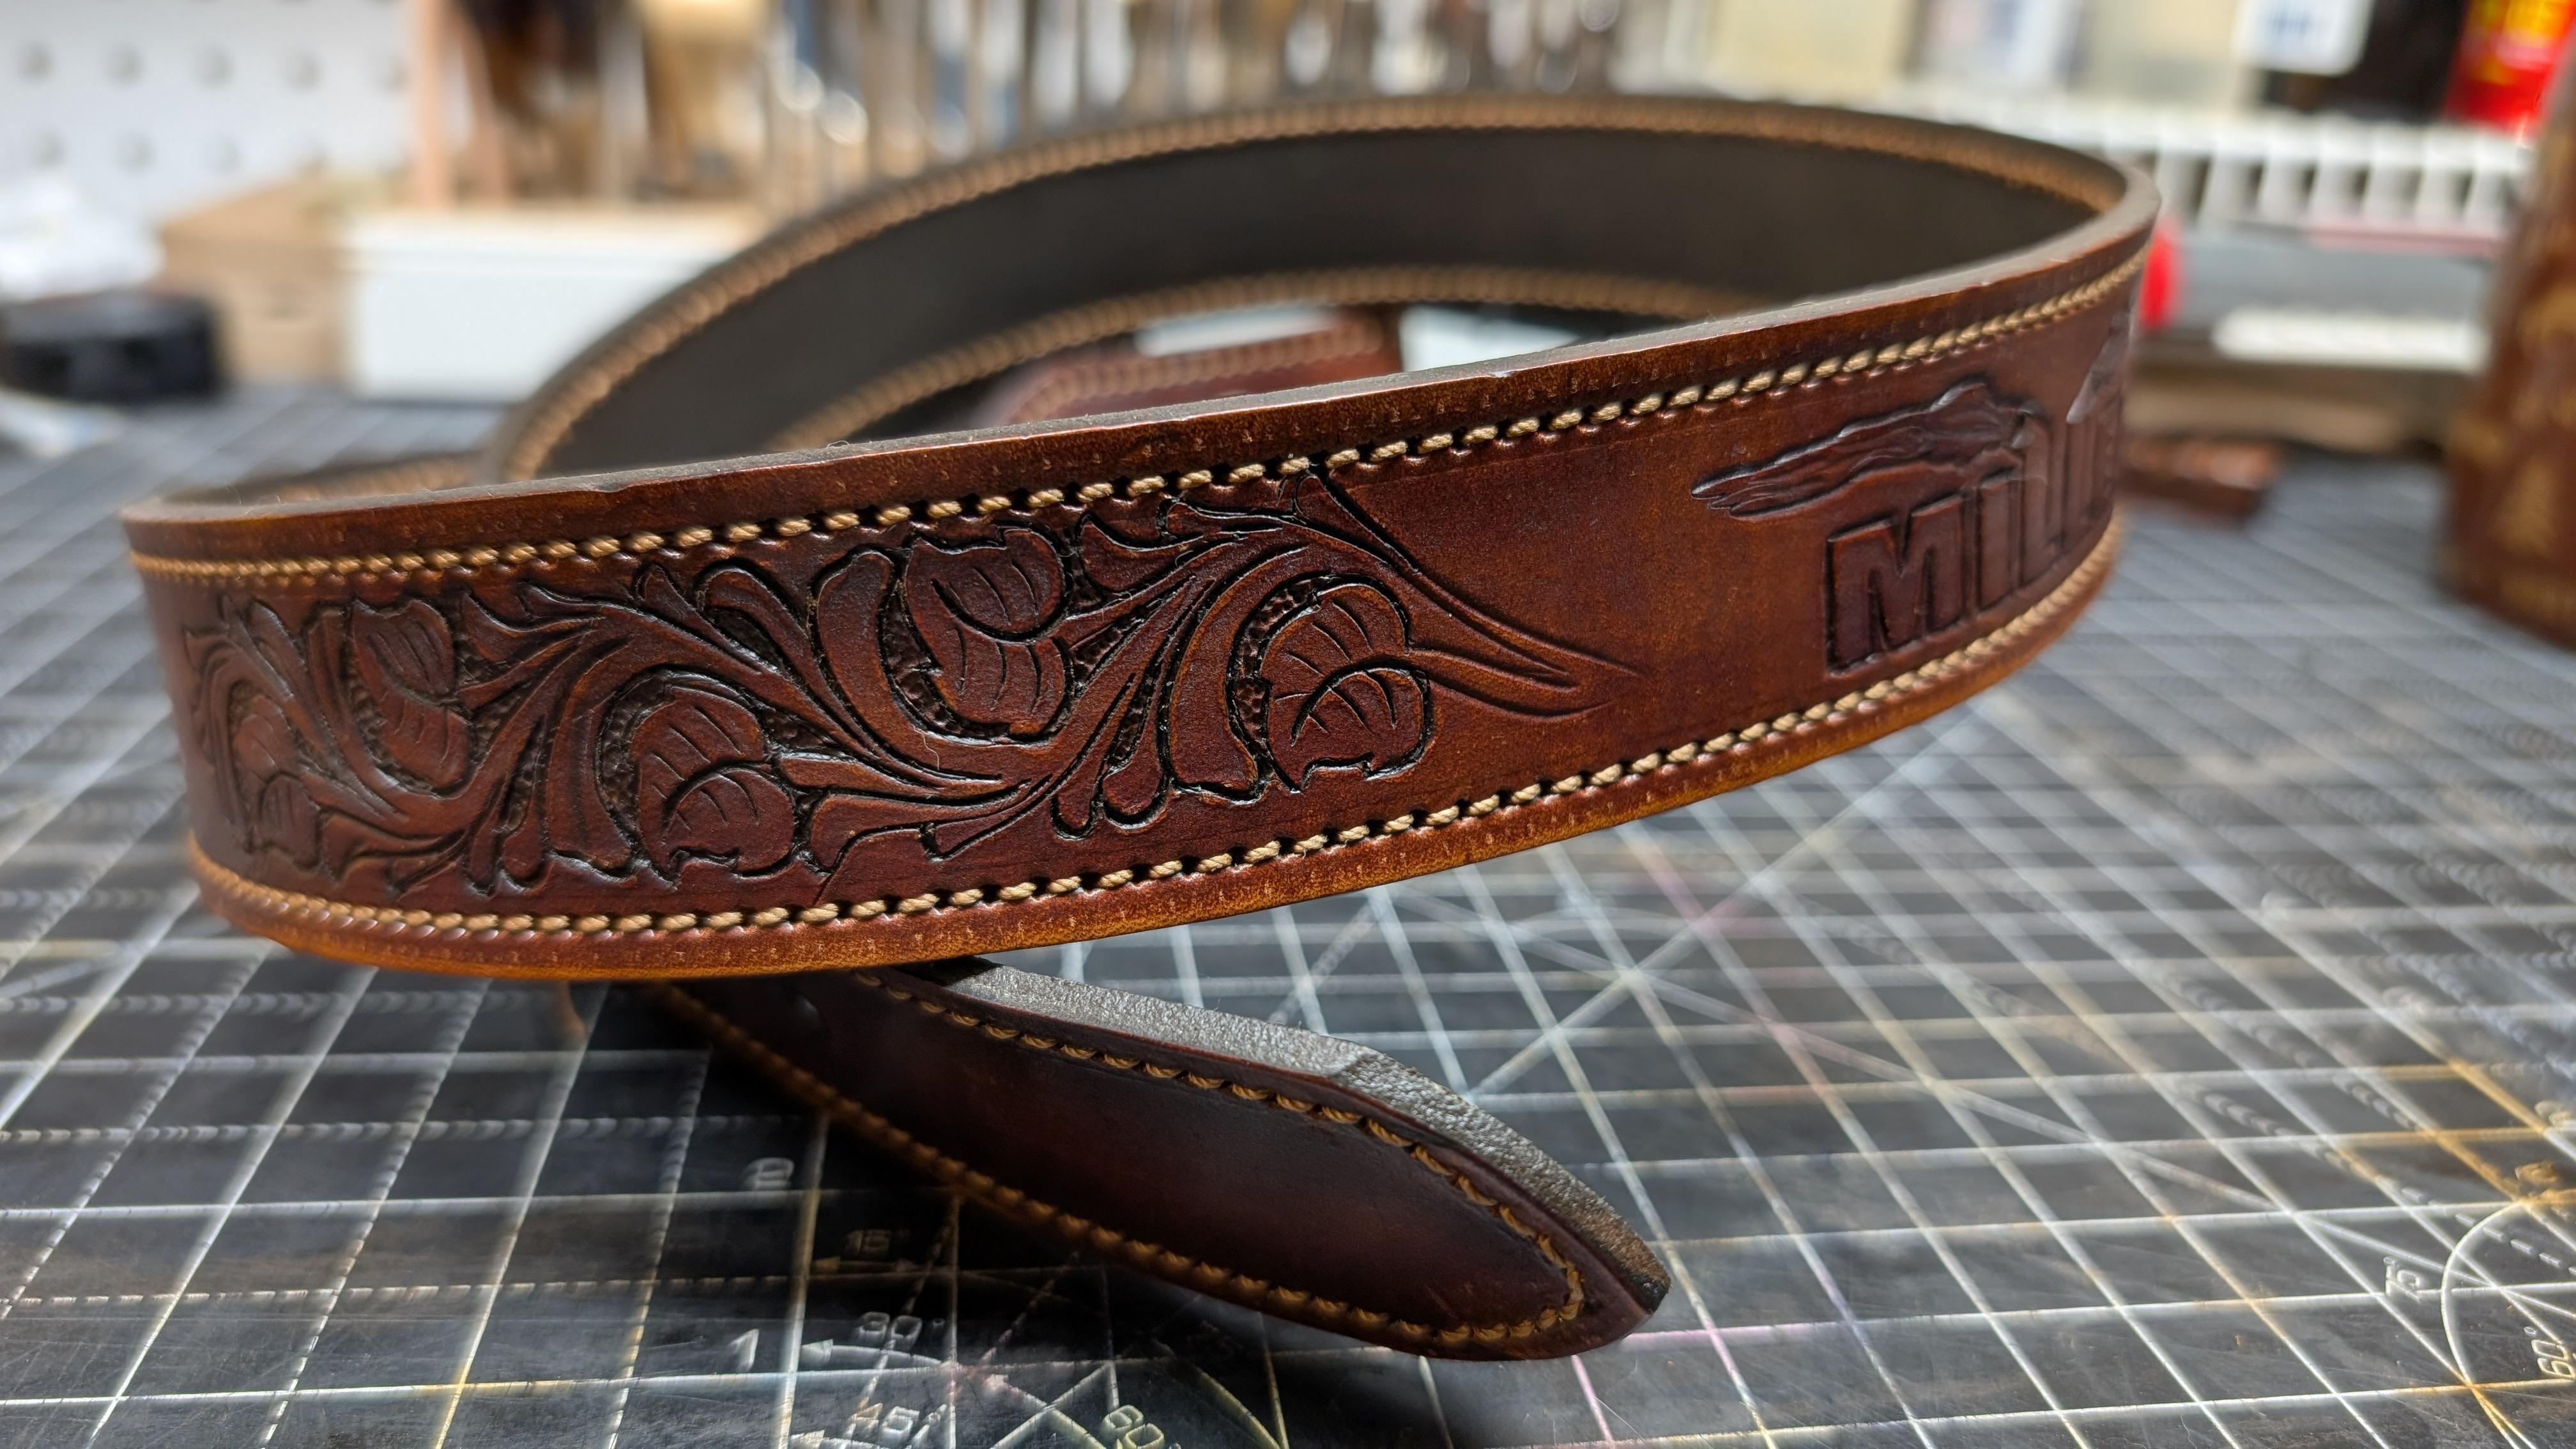
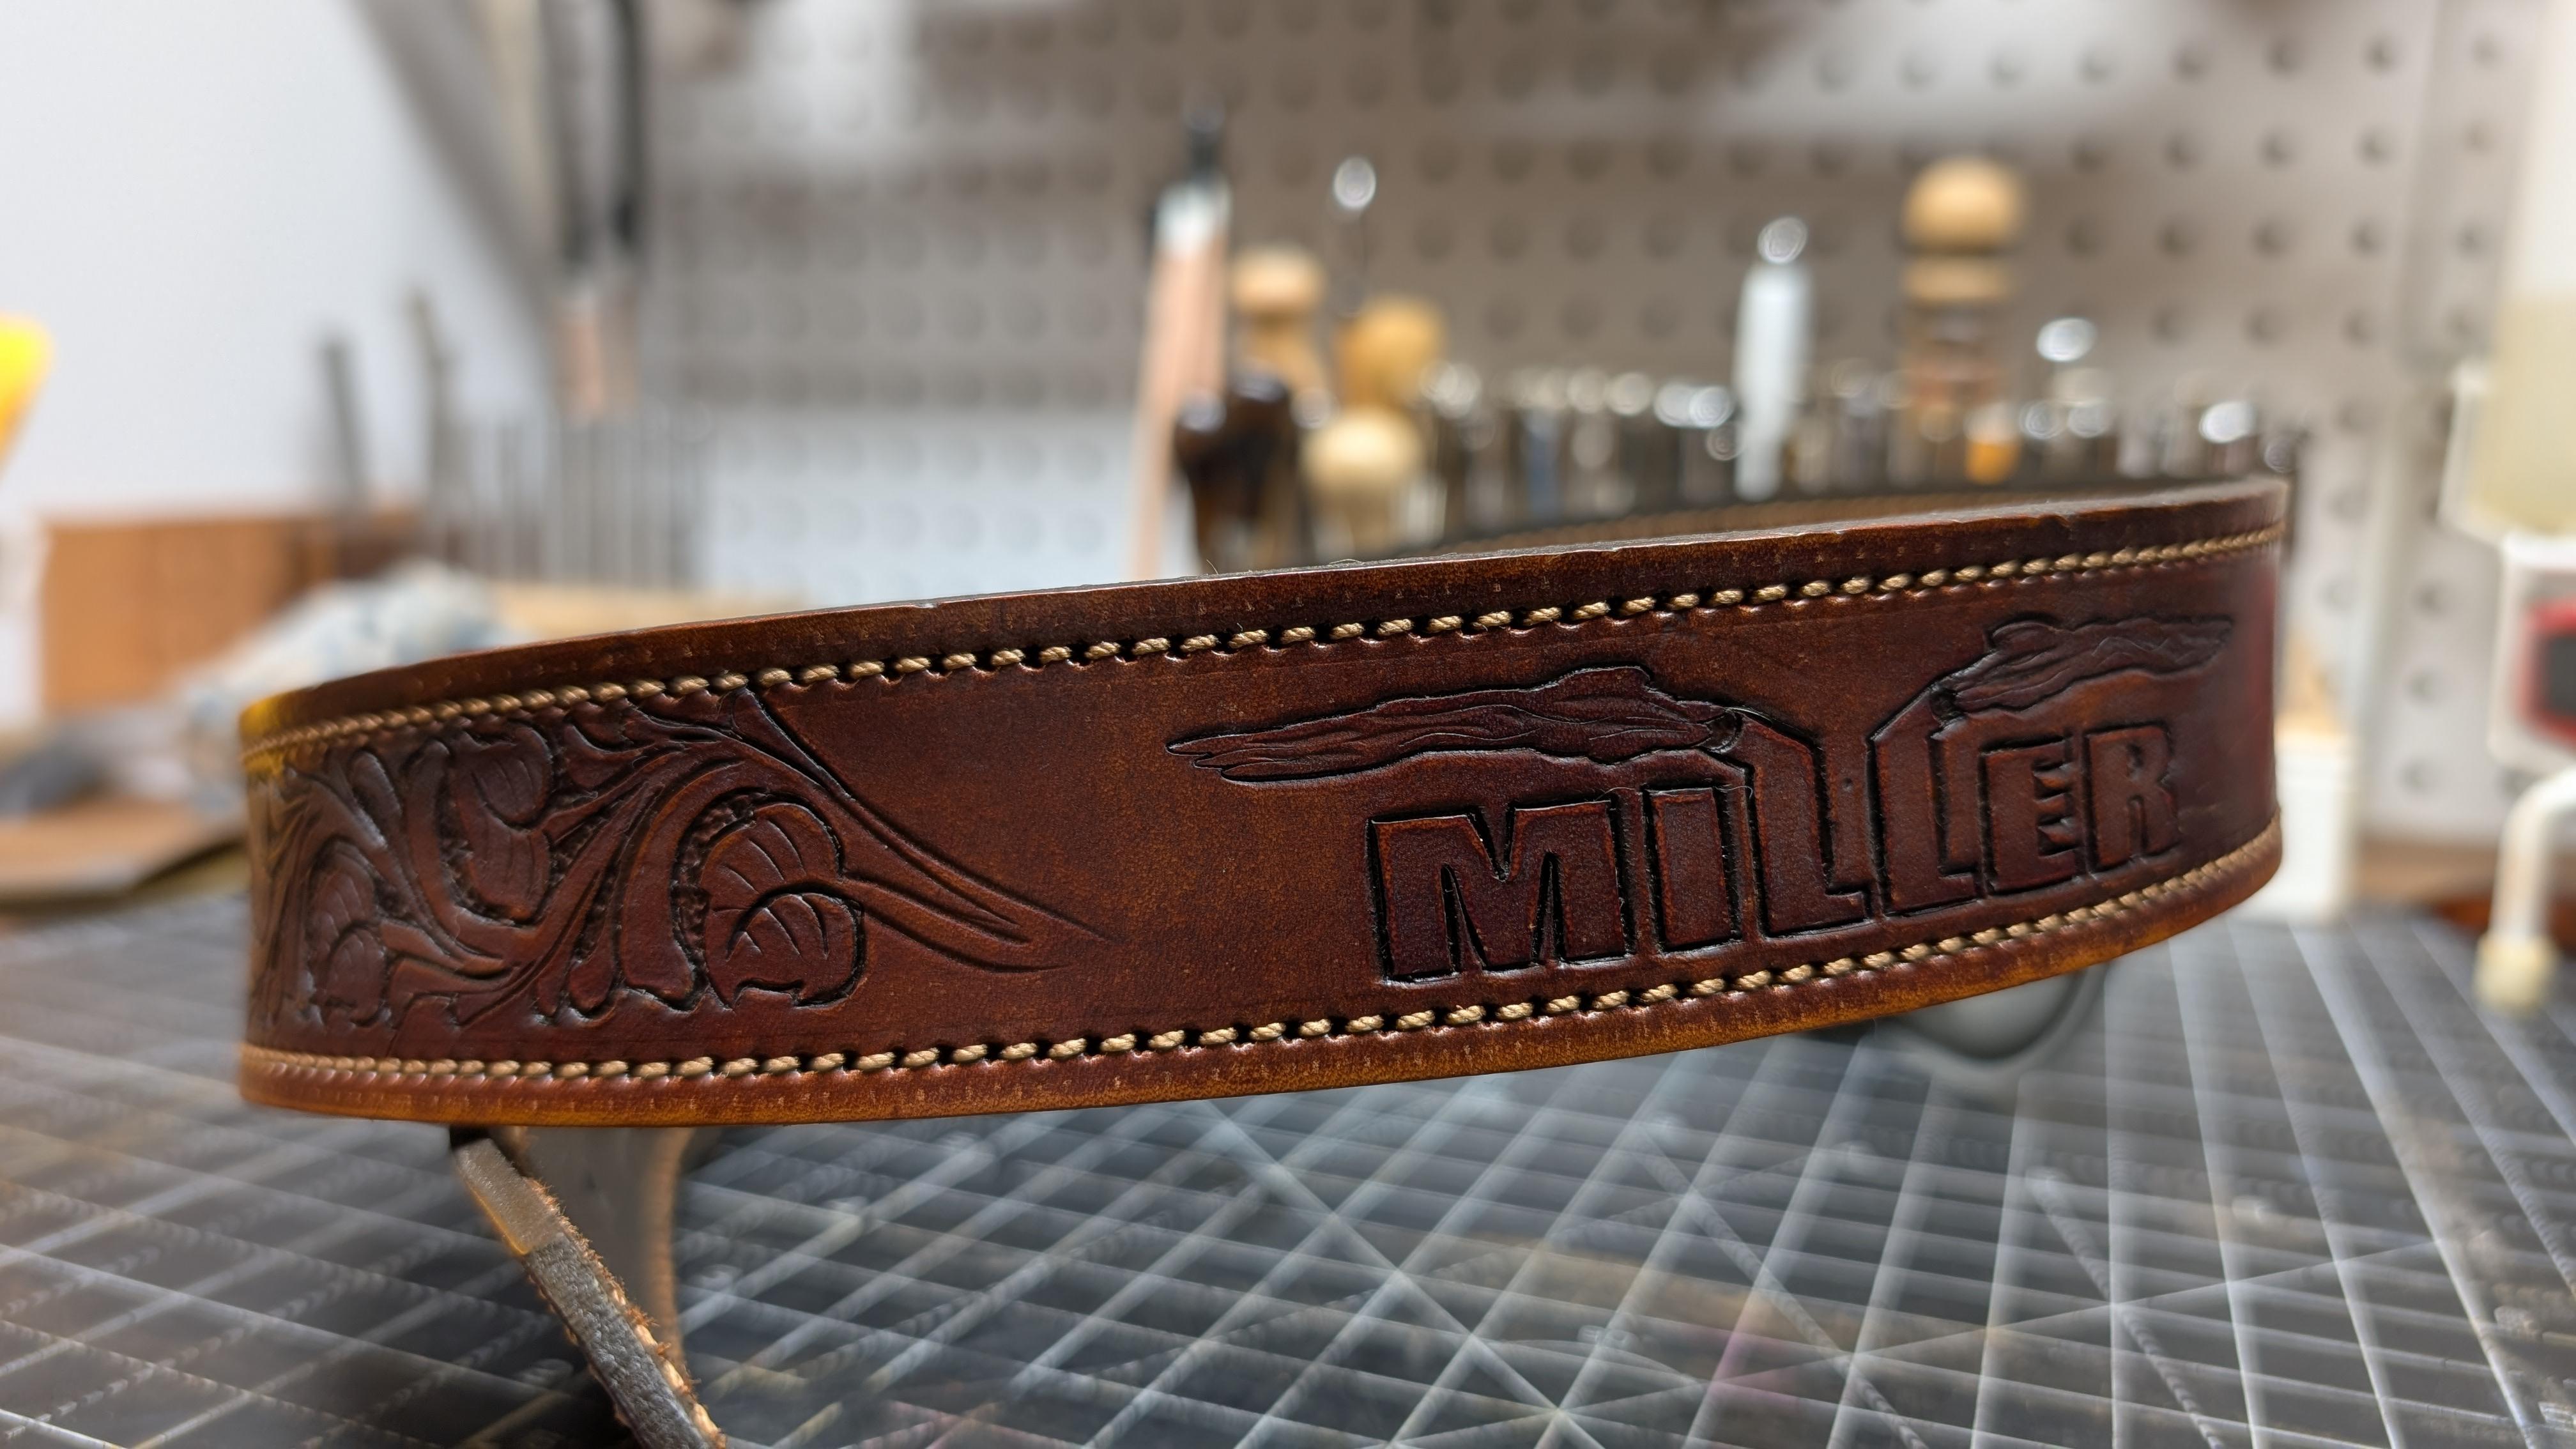
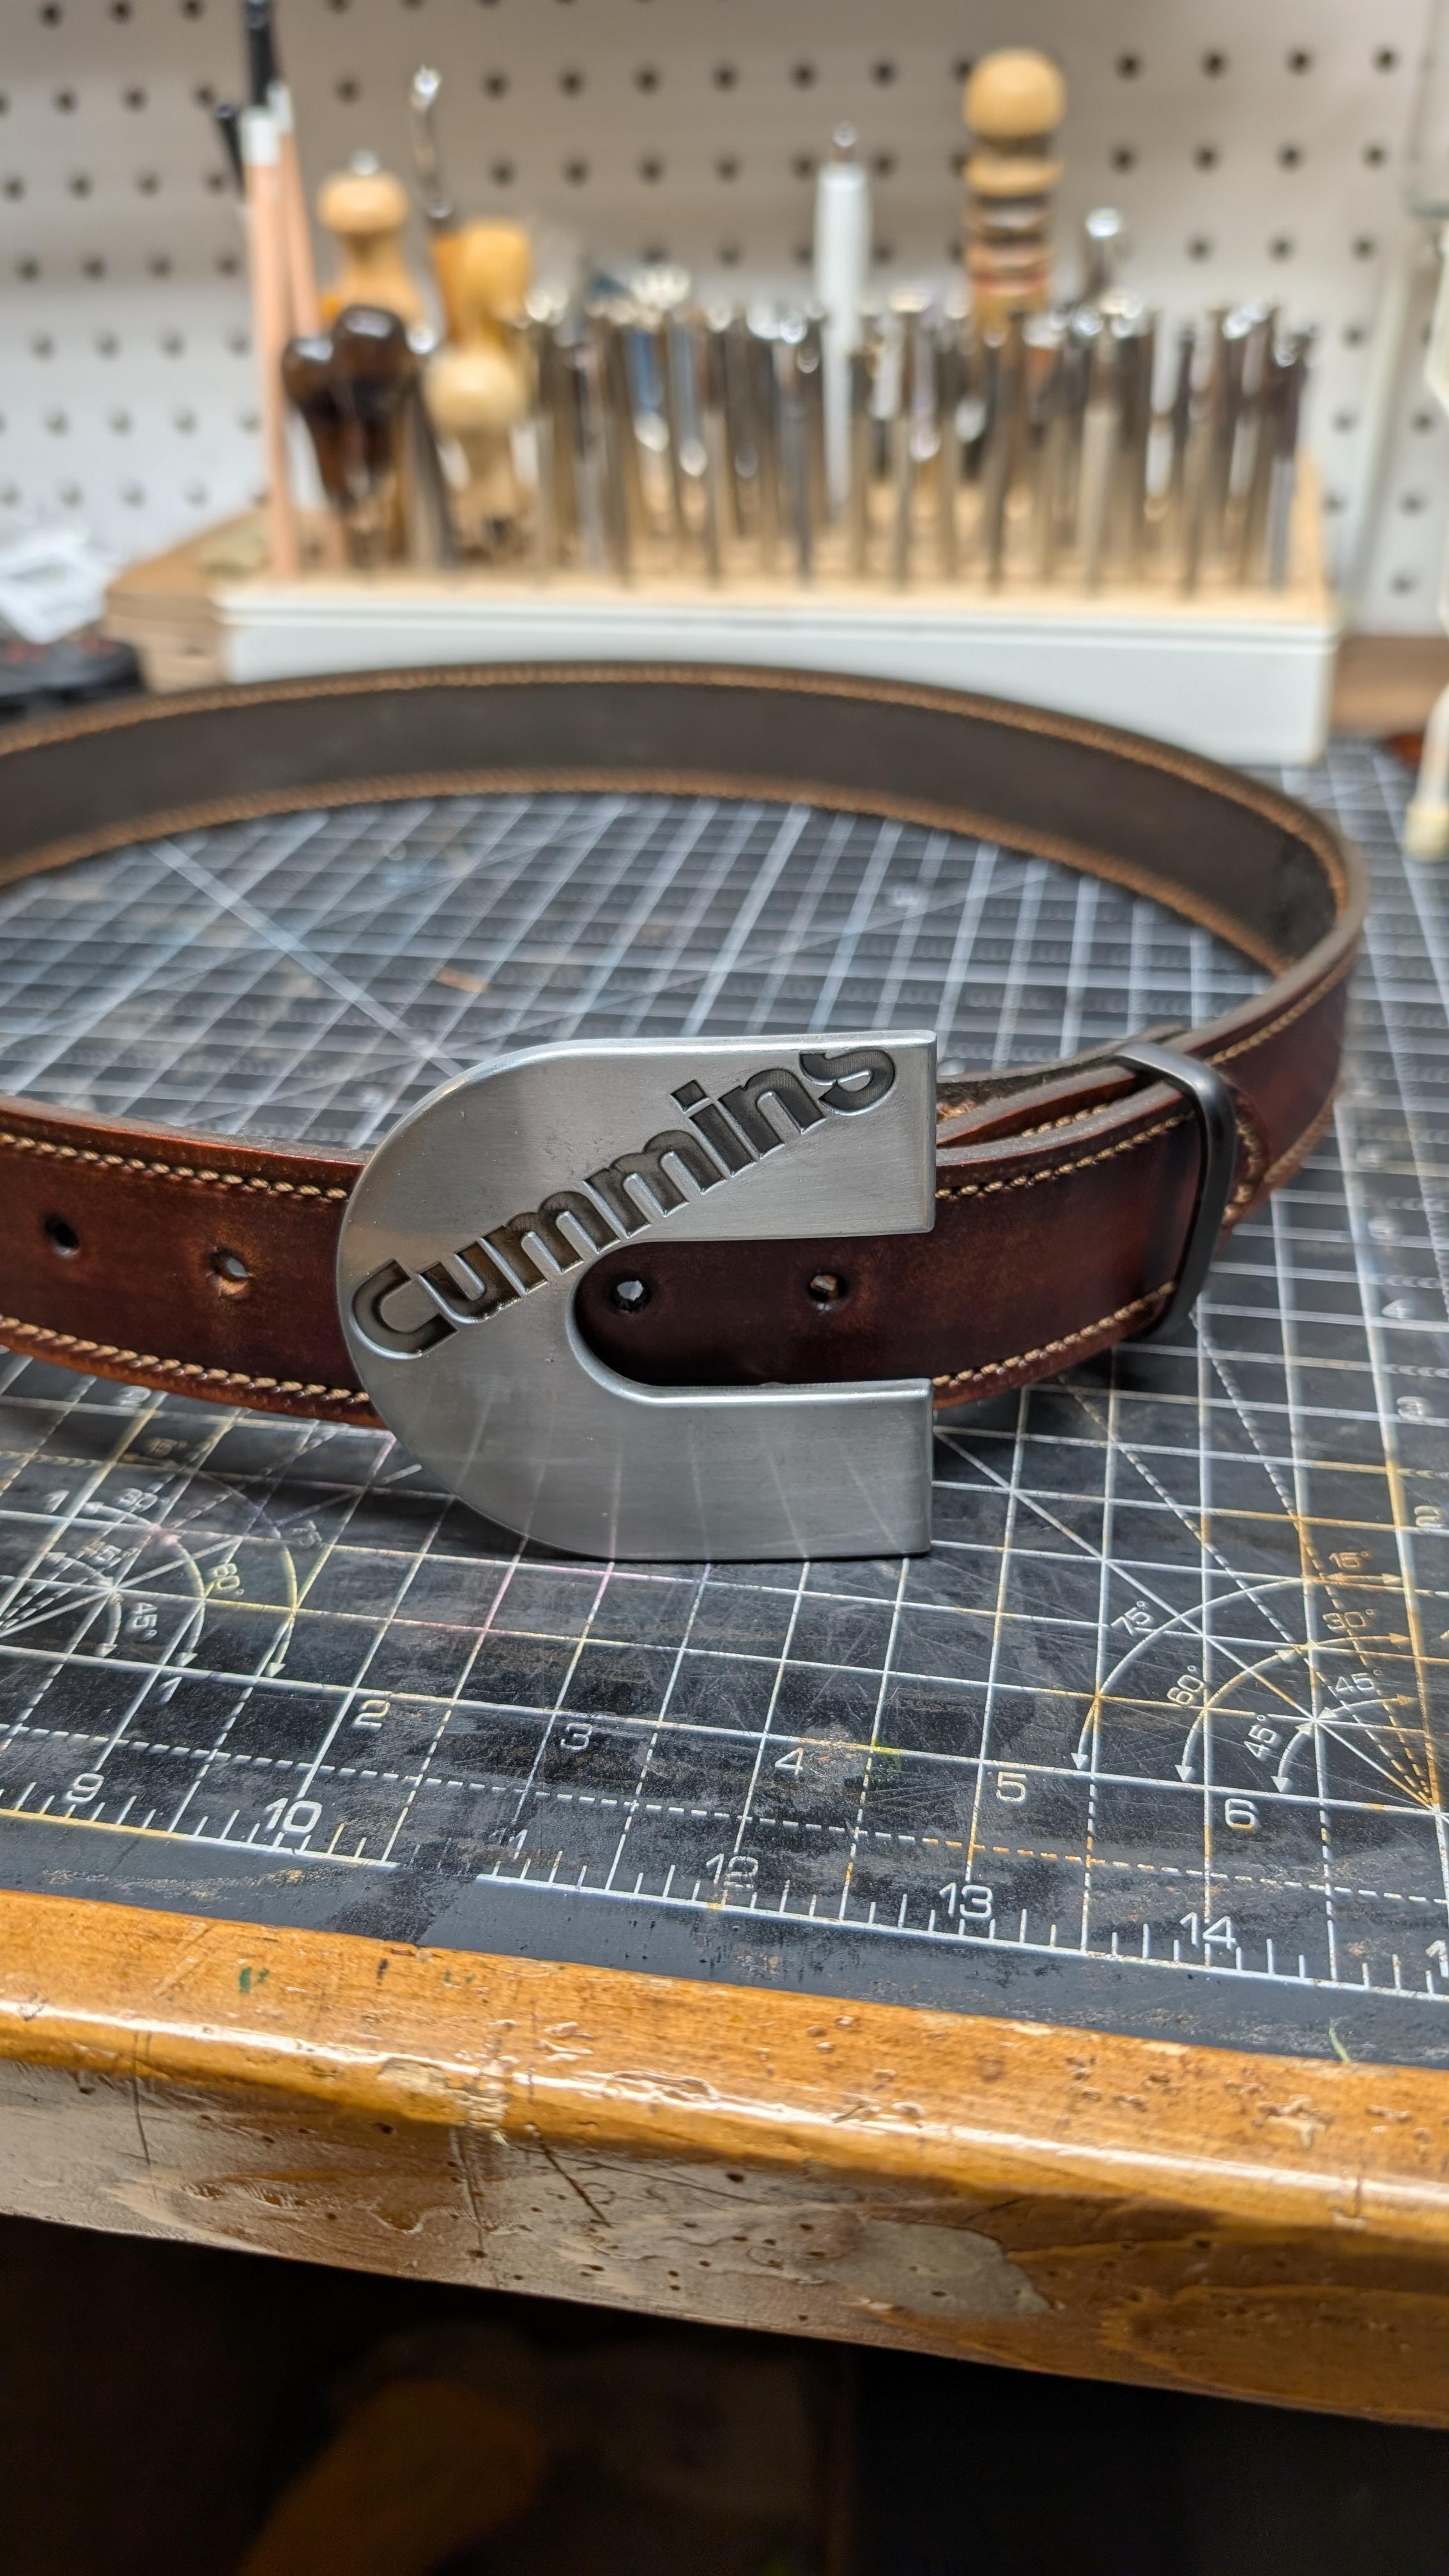
One of my first projects was a new belt for our mechanic at work. He asked me to make him a new work belt when I first got into this hobby. He's also an avid hunter, so I came up with this. He absolutely loved it but the "problem" is he won't wear it to work because he claims it's too fancy. It became his hunting/Sunday dress belt. Fast forward over a year, Miller still needs a new work belt, and we both forgot all about it. I guess that old worn out one wasn't so worn out! As a surprise, I just finished up a "less fancy" belt for him to wear to work. I tried a new dye technique I read about, make a new belt look old.
-
Dummy gun
KillDevilBill replied to KillDevilBill's topic in Gun Holsters, Rifle Slings and Knife Sheathes
Thanks Dwight! I've become pay-a-zon dependant and forgot about eBay. I just ordered one. 👍🏿 -

Hand-cast solid Brass Buckles from a small foundry
Origibelts replied to Origibelts's topic in Suppliers
@Dwight Hi Dwight, Yes sir, I could definitely work from a pattern like that. If you sent me a plastic cutout of the buckle you had in mind, I could use it to build the mold and cast it in brass. Western-style buckles are a bit bigger and often carry more detail, but that’s all part of the fun. I’d just want to know how heavy-duty you’d like it, and whether you prefer a polished finish or to let the brass age naturally. Sending over a physical template should be simple — a flat plastic piece in a padded envelope can usually be mailed to Kenya for around $20 or so. Once I see the pattern or a picture of the buckle you have in mind, I’ll be able to give you a clear idea of cost and the best way to approach it. If you’d prefer to share details more directly, feel free to message me here or reach me through my site at origibelts.com Thanks for the idea — projects like this are what keep the foundry interesting. May God bless, John G. Origibelts – near Nairobi, Kenya -
My way would be: i) Oil ii) Dye iii) Oil What I would do is: i) oil the leather as evenly as possible and let it rest for 24 hrs or so to get absorbed evenly. ii) Mix the dye with 50 % thinner and 50 % dye as a good starting point. I use 99% Rubbing Alcohol with Fiebing's Dye iii) Airbrush the dye on in thin coats to get an even coating and let sit for 24 hrs. iv) Oil again Note: i) I am not sure how mink oil will work as I don't use it so you should experiment on some scrape first. ii) If you have some black dye and want to darken the Angelus Ox Blood up a shape or two try adding about 2 to 5 % Black to the dye mix before adding thinner. Once again experiment on some scrape first. kgg
-
The picture is actually a test piece. I started by trying to get the color right and I realised I was skipping a step. I do have an airbrush that I can use for dying the main bag. I'll dig it out and test settings to get decent coverage. So, if I'm understanding correctly, after the cleaning steps: Dye, Mink Oil, Wax? Or Mink Oil, Dye, Wax? Letting the whole thing rest in between thin coats for at least a day each. I know that my combo of stuff may/may not be the perfect recipe but it's what I'm most familiar with and what I have on hand.
-
Noseband With a Bad Reputation?
Goldshot Ron replied to TomE's topic in Saddle and Tack Accessory Items
I had to look twice to see if you actually installed a crank or pulley on the nose band. Like usual Tom, your work is flawless. Keep posting for us "want to be's". Thumbs up. Ron -
Same here lol. But my original question was about making the, as it was described to me as a "boston style" shield not necessarily a shield from Boston. Personally I didn't know there were different styles
-
I did not know about starting with "image". I always just go to https://images.google.com/ Learned a new trick. Easier to just start with "image".
-
I agree the only thing I do different is I use 100 % pure organic JOJOBA oil first then dye then re-oil. I have gotten away from using a dabber, sponge, brush and dipping for the dying process and have converted to airbrushing when dying. I am also experimenting with airbrushing the JOJOBA oil. You may have some success with heating the Red shoe polish with a hair dryer to get it to suck into the leather and then apply the mink oil. I haven't tried this myself so I don't know if it will work. kgg
-
Consew 227 parts are copies of Singer 153 parts. Should be interchangeable. glenn
-
Patent Elastic was the early name for the Claes I believe. They started in 1869. There have been about 15 plus manufactured of the shoepatcher with the early design like you see in front of you. Singer came out with a shoepatcher in 1877 and their design was new and unique. Adler came out with the 30 class in 1900 which was a copy of the UFA/ 29 class. Adler had an earlier design like the old shoepatchers which was a 29 class. I have one. Bradbury had a few shoepatcher designs starting in 1872. glenn
-

Singer 211 U166A walking foot problem
friquant replied to NowhereMan01's topic in Leather Sewing Machines
Whoo whoo!! 🎈Congratulations! 🔔 Those safety clutches need to tell us when they trip 📯 I decided to back mine off today because it never trips. But as I started stitching thicker and thicker material, the safety clutch needed a higher and higher setting in order to stitch it without tripping. So I'm almost back to the setting I started with 😂 - Yesterday
-
Never knew that about starting with image, even after what 20 years of googling lol. Thank you
-
I'd suggest a Tippmann Boss . . . used you should be able to get one for that price. They are 1000 or so brand new. You can sew down on them to two layers of canvas (I've done it) . . . or you can to up to almost 3/4 inch of veg tanned leather. I've made leather dog collars on my old Boss . . . and it worked fine. It is a non motorized . . . hand operated machine . . . and they are hard to screw up. The company used to have a full lifetime warranty on the machine . . . no matter who owned it. You'ld have to check if they still do . . . and my guess is yes. You can also go into a Tandy Leather store . . . they sell a similar machine . . . take your sample in there . . . let the manager show you how their machines do . . . then go home and look on Marketplace for a used one. May God bless, Dwight
-
Well . . . if you google . . . "image: boston mass firefighter helmet shield" . . . you should get something near 20 pages of information. Google is your friend when wanting to see something . . . just start with the word "image" May God bless, Dwight
-
You should never put shoe polish on before any kind of oil. It can block the oil from penetrating. But since you have already done it . . . go for it. I ALWAYS . . . oil before I even think of dyeing or stamping . . . and I use just a light coat of neatsfoot oil. For me it has been THE thing that makes my dye jobs much more even. May God bless, Dwight
-
Singer 211 U166A walking foot problem
NowhereMan01 replied to NowhereMan01's topic in Leather Sewing Machines
I got it working! It seems that the safety clutch got kicked out again, and when I finally snapped it back in place, the hook timing was way off (not sure how I missed any of that). Anyways, I adjusted the hook timing as discussed in the video below (which, btw, is a very similar machine to mine). It now sews. I probably still need to fiddle around with the safety clutch, as it seems to kick out before I get to the maximum stitch length, but otherwise, it appears to be working as well as it ever has in the (relatively short) time that I've owned it. Thanks again for all of the suggestions and help. This was a fantastic learning experience for me, as I now have an infinitely better understanding of how the machine works, and I believe that I should be able to keep it going for the foreseeable future... -
I'm starting a resto-mod on a vintage leather bag. I've got a test piece to the color and finish I'm looking for. At least until I remembered that I wanted to add Mink Oil to keep the wet out as much as possible. I know it will likely turn the end result darker, and I'm fine with that. At what stage do I add a couple thin layers of mink oil? To get to where I am now, I've deglazed, foam scrubbed, 3-4 light coats of Angelus Ox Blood, a couple light coats of Red shoe polish. The leather is fairly solid veg-tan.
-
Does anyone have any leads they could point me towards on making a Boston style firefighter helmet shield? I was contacted on Facebook about making one. Not going to lie, I have a list longer than my leg of things I want to make and shields are on there but haven't as yet had a chance to do so. Any help to figure out if it's something I can manage would be greatly appreciated! Thank you!!
-

Singer 211 U166A walking foot problem
friquant replied to NowhereMan01's topic in Leather Sewing Machines
I've been meaning to ask you, when you tightened the position screw (rounded tip that goes in the groove) and the set screw (flat tip that goes against the wall of the shaft) on that feed eccentric...By any chance did the screws end up in different holes than originally? If they did, the feed mechanisms that run on that eccentric would be out of time. (Hook timing would be unaffected.) The feed mechanisms could be made to run either way, but may be quicker to get it all straightened out if it's the same way as original. -
Be wary of people advertising machines as "semi-industrial" or "heavy duty", in most cases they will simply be older domestic machines.
-

Singer 211 U166A walking foot problem
friquant replied to NowhereMan01's topic in Leather Sewing Machines
Let's get it to where the hook reliably picks up the needle thread. If the thread breaks when it gets picked up, we'll solve that when we get to it. How to stuff a hook Meaning how to use the needle guard to ensure that the hook point is always stuffed into the scarf regardless of material thickness, forward/reverse, stitch length, slightly bent needles, machine speed, etc. Correct needle system Brand new needle, of the size that you use most often Make a black mark on the inside of the scarf of the needle indicating where the point of the hook should cross. (Usually about 3mm above the top of the needle eye, the manual will say for sure) Needle fully inserted. (Look in the window to verify) Needle orientation: Scarf facing hook Sharp hook with clean angles Bend the needle guard slightly out of the way, or remove it temporarily Set the stitch length to whatever you use most often Loosen the hook saddle Move the hook closer to the needle, until the interference with the needle is approx 0.5mm - 1mm Tighten the hook saddle into position Adjust the needle bar height such that the hook point attempts to bisect the needle at the black mark you made on the needle scarf. (This height is important because it affects how much of the needle rubs on the needle guard) Bend the needle guard so that the needle guard deflects the needle such that the hook point just kisses the needle, or is VERY CLOSE to kissing. (0mm - 0.05mm away) Set hook to needle timing (also known as "needle bar rise"). You'll probably have to reset the needle bar height in the process Reference: https://leatherworker.net/forum/topic/47477-211g155-do-i-have-the-wrong-machine/page/6/#findComment-304044


