All Activity
- Past hour
-
This item has been sold.
- Today
-
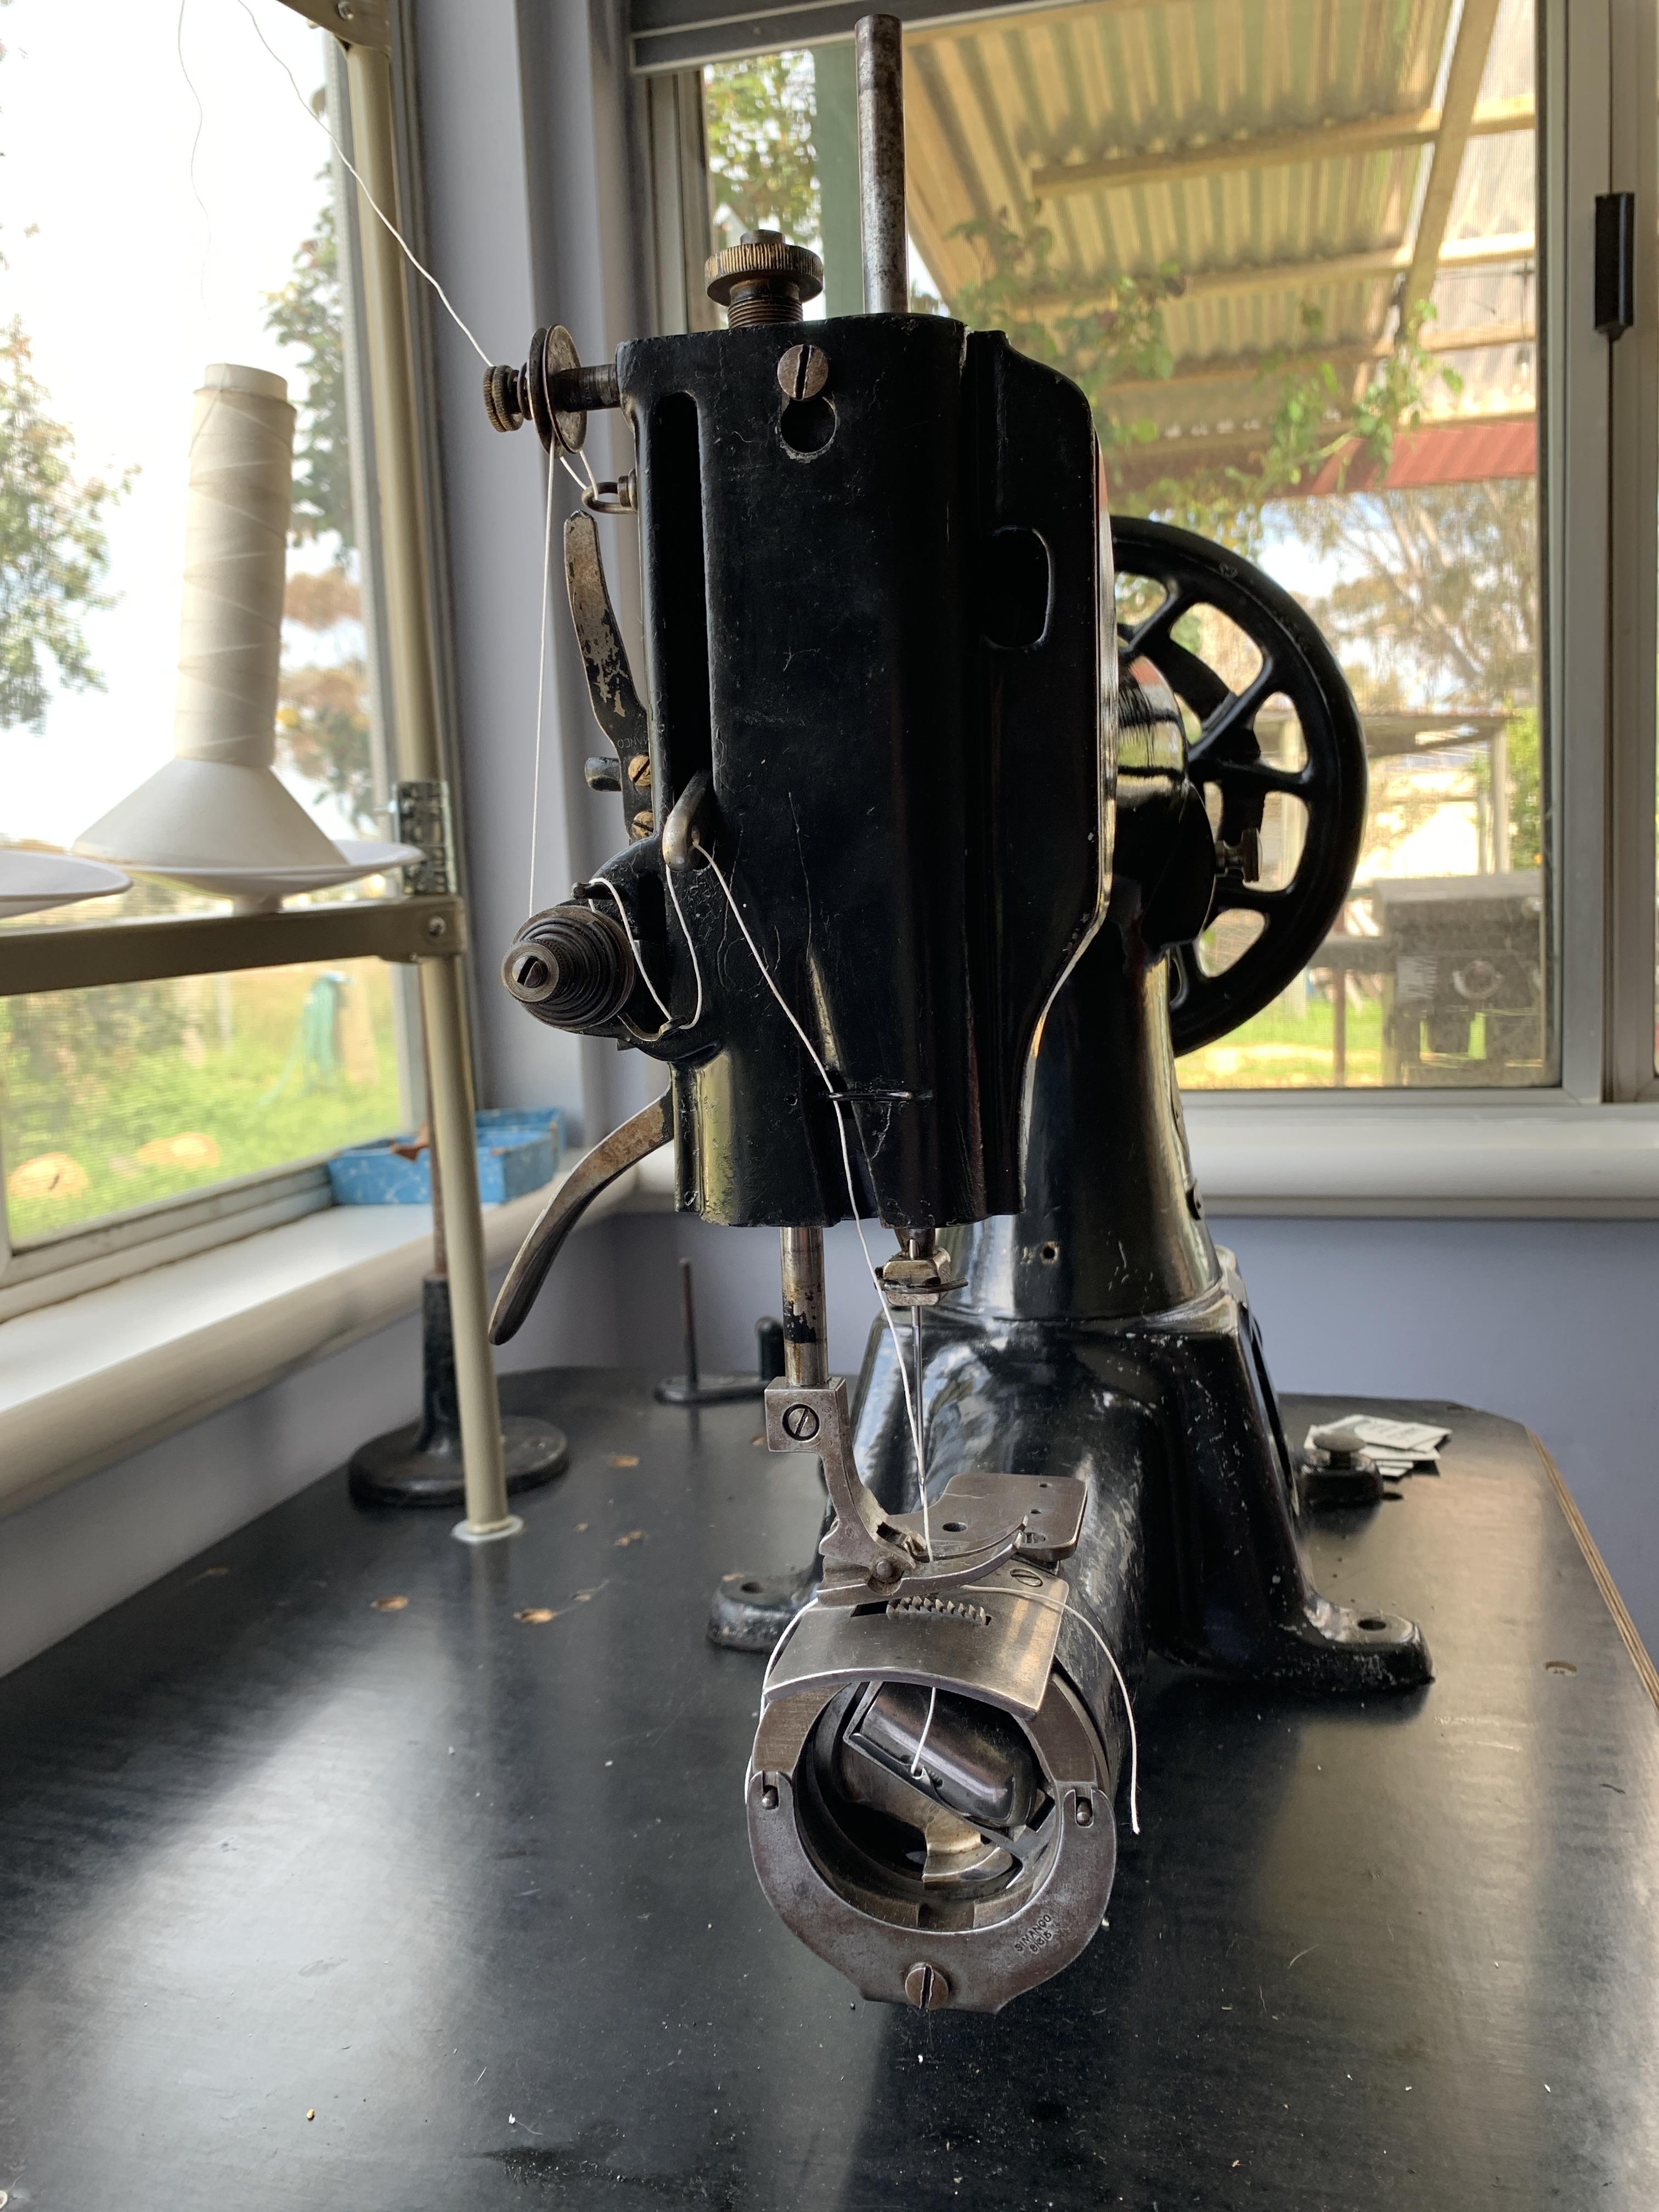
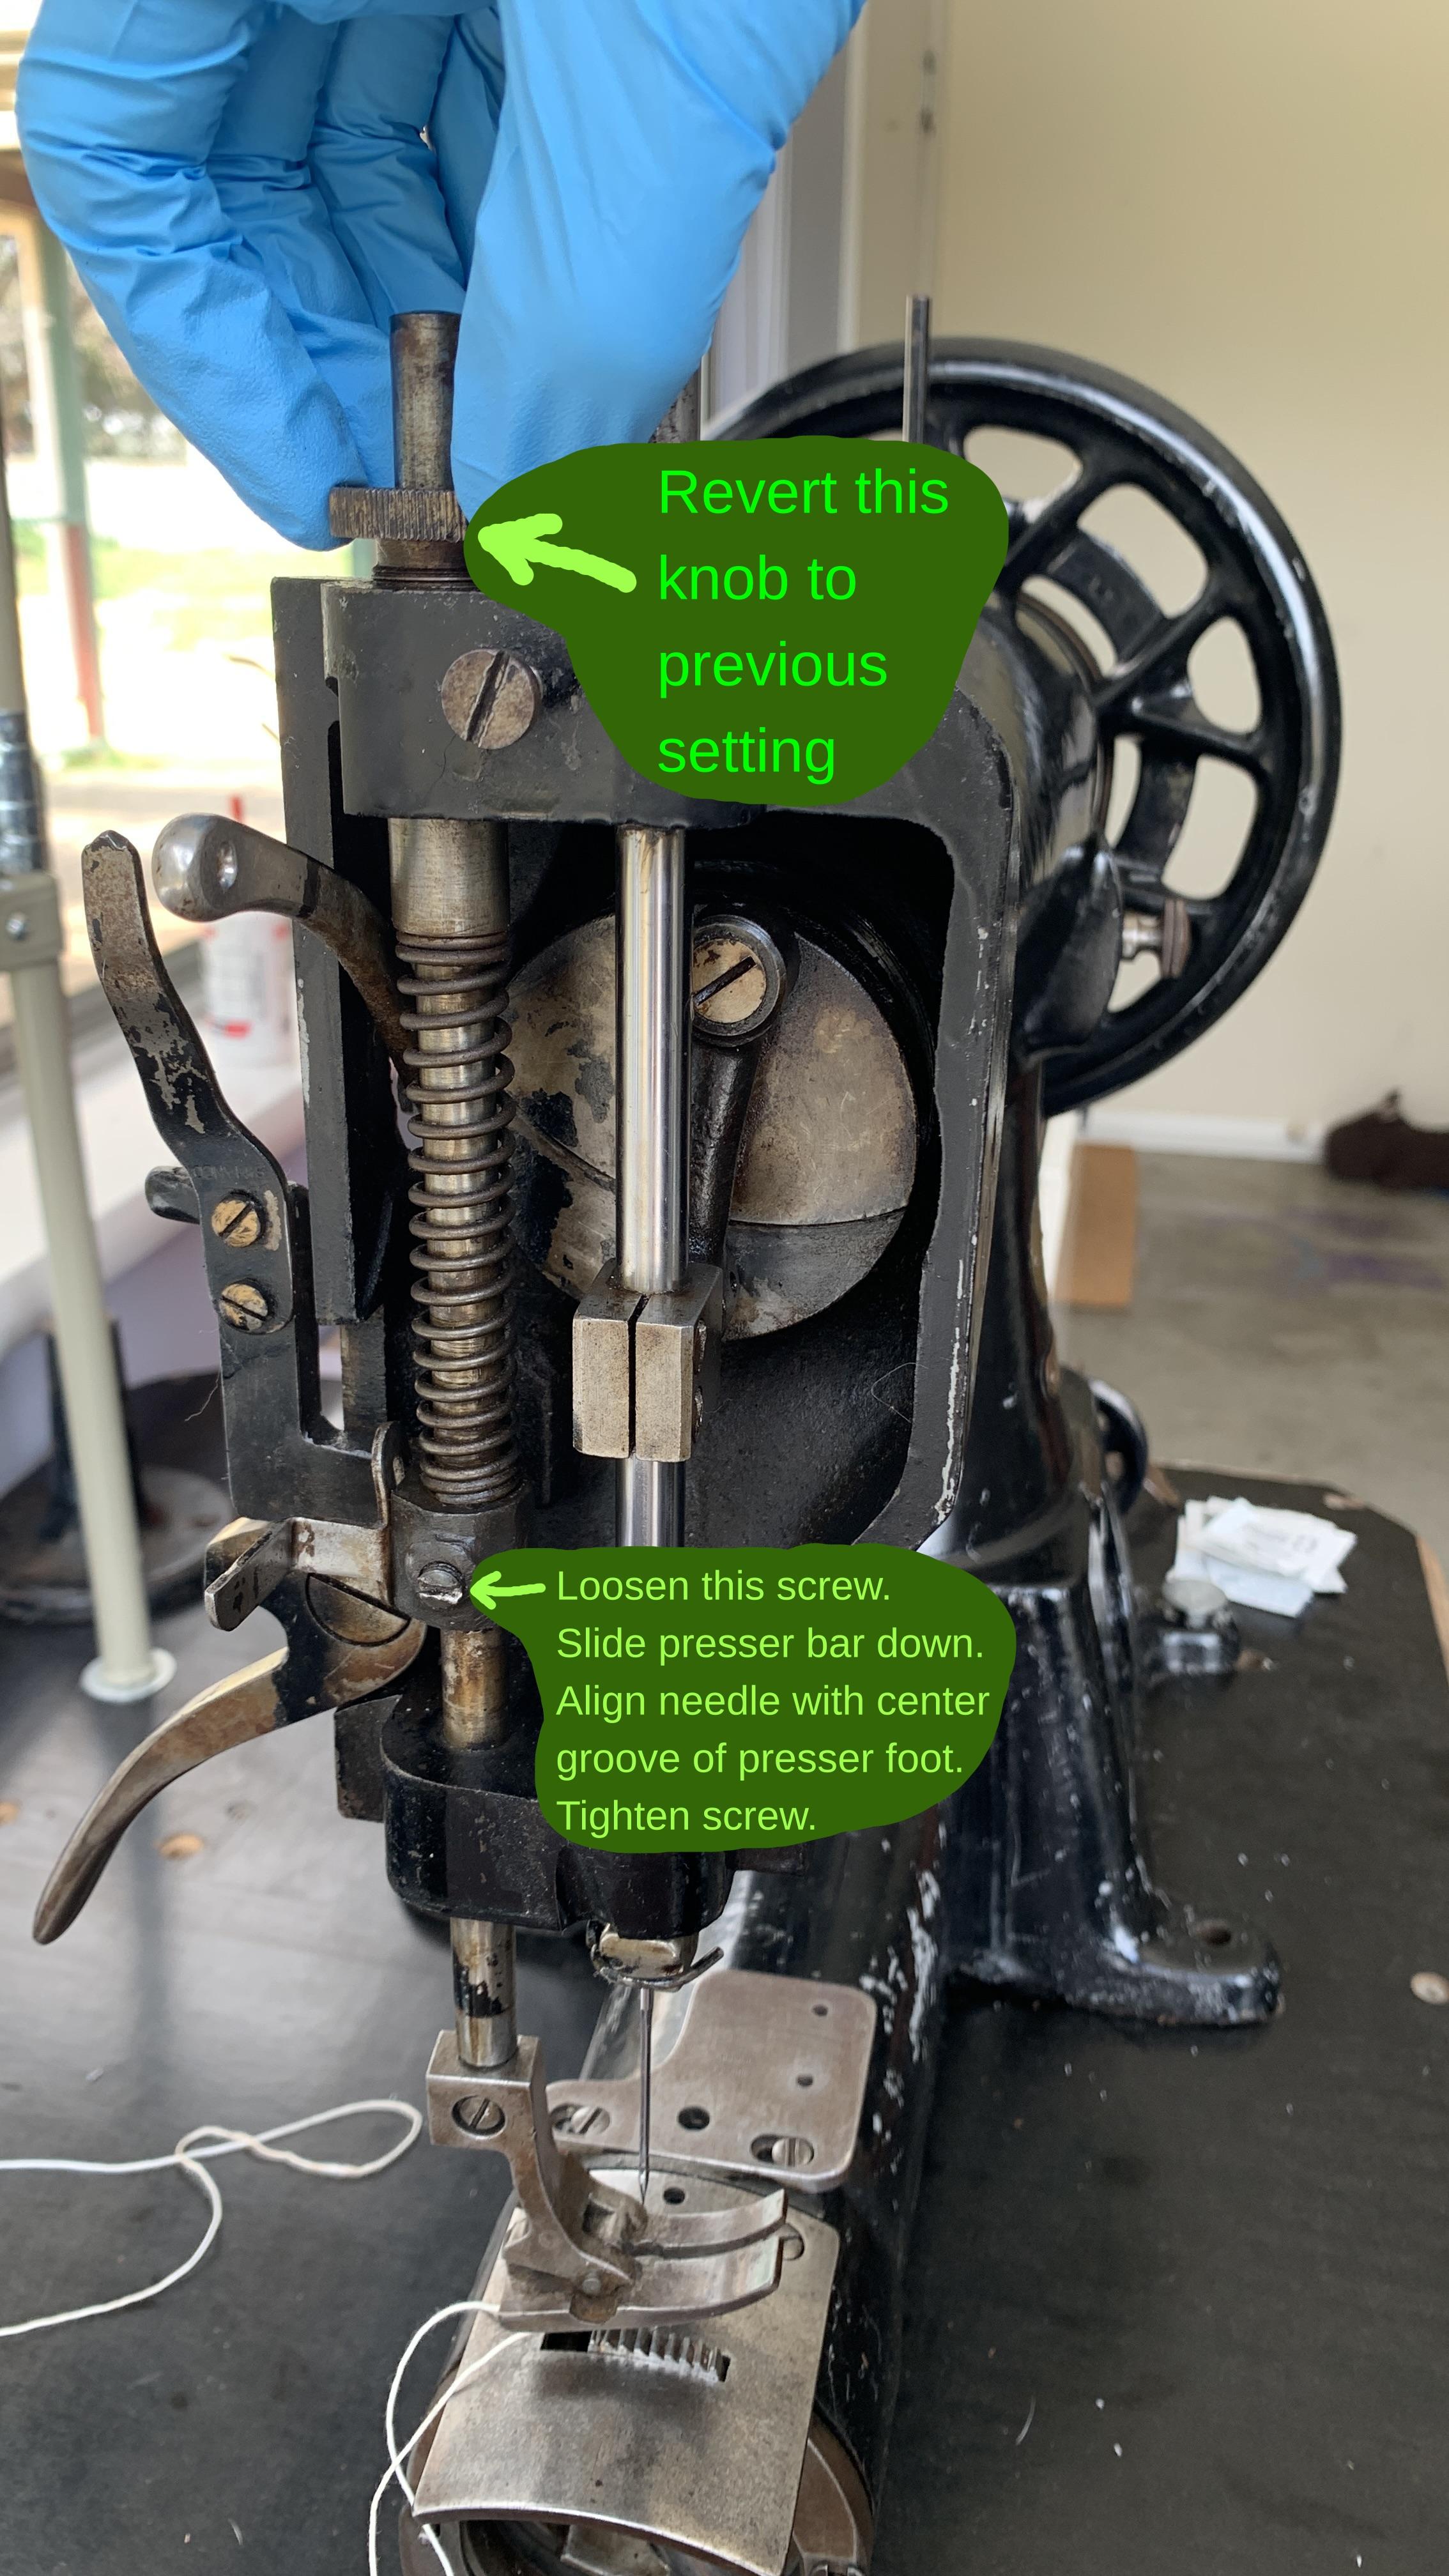
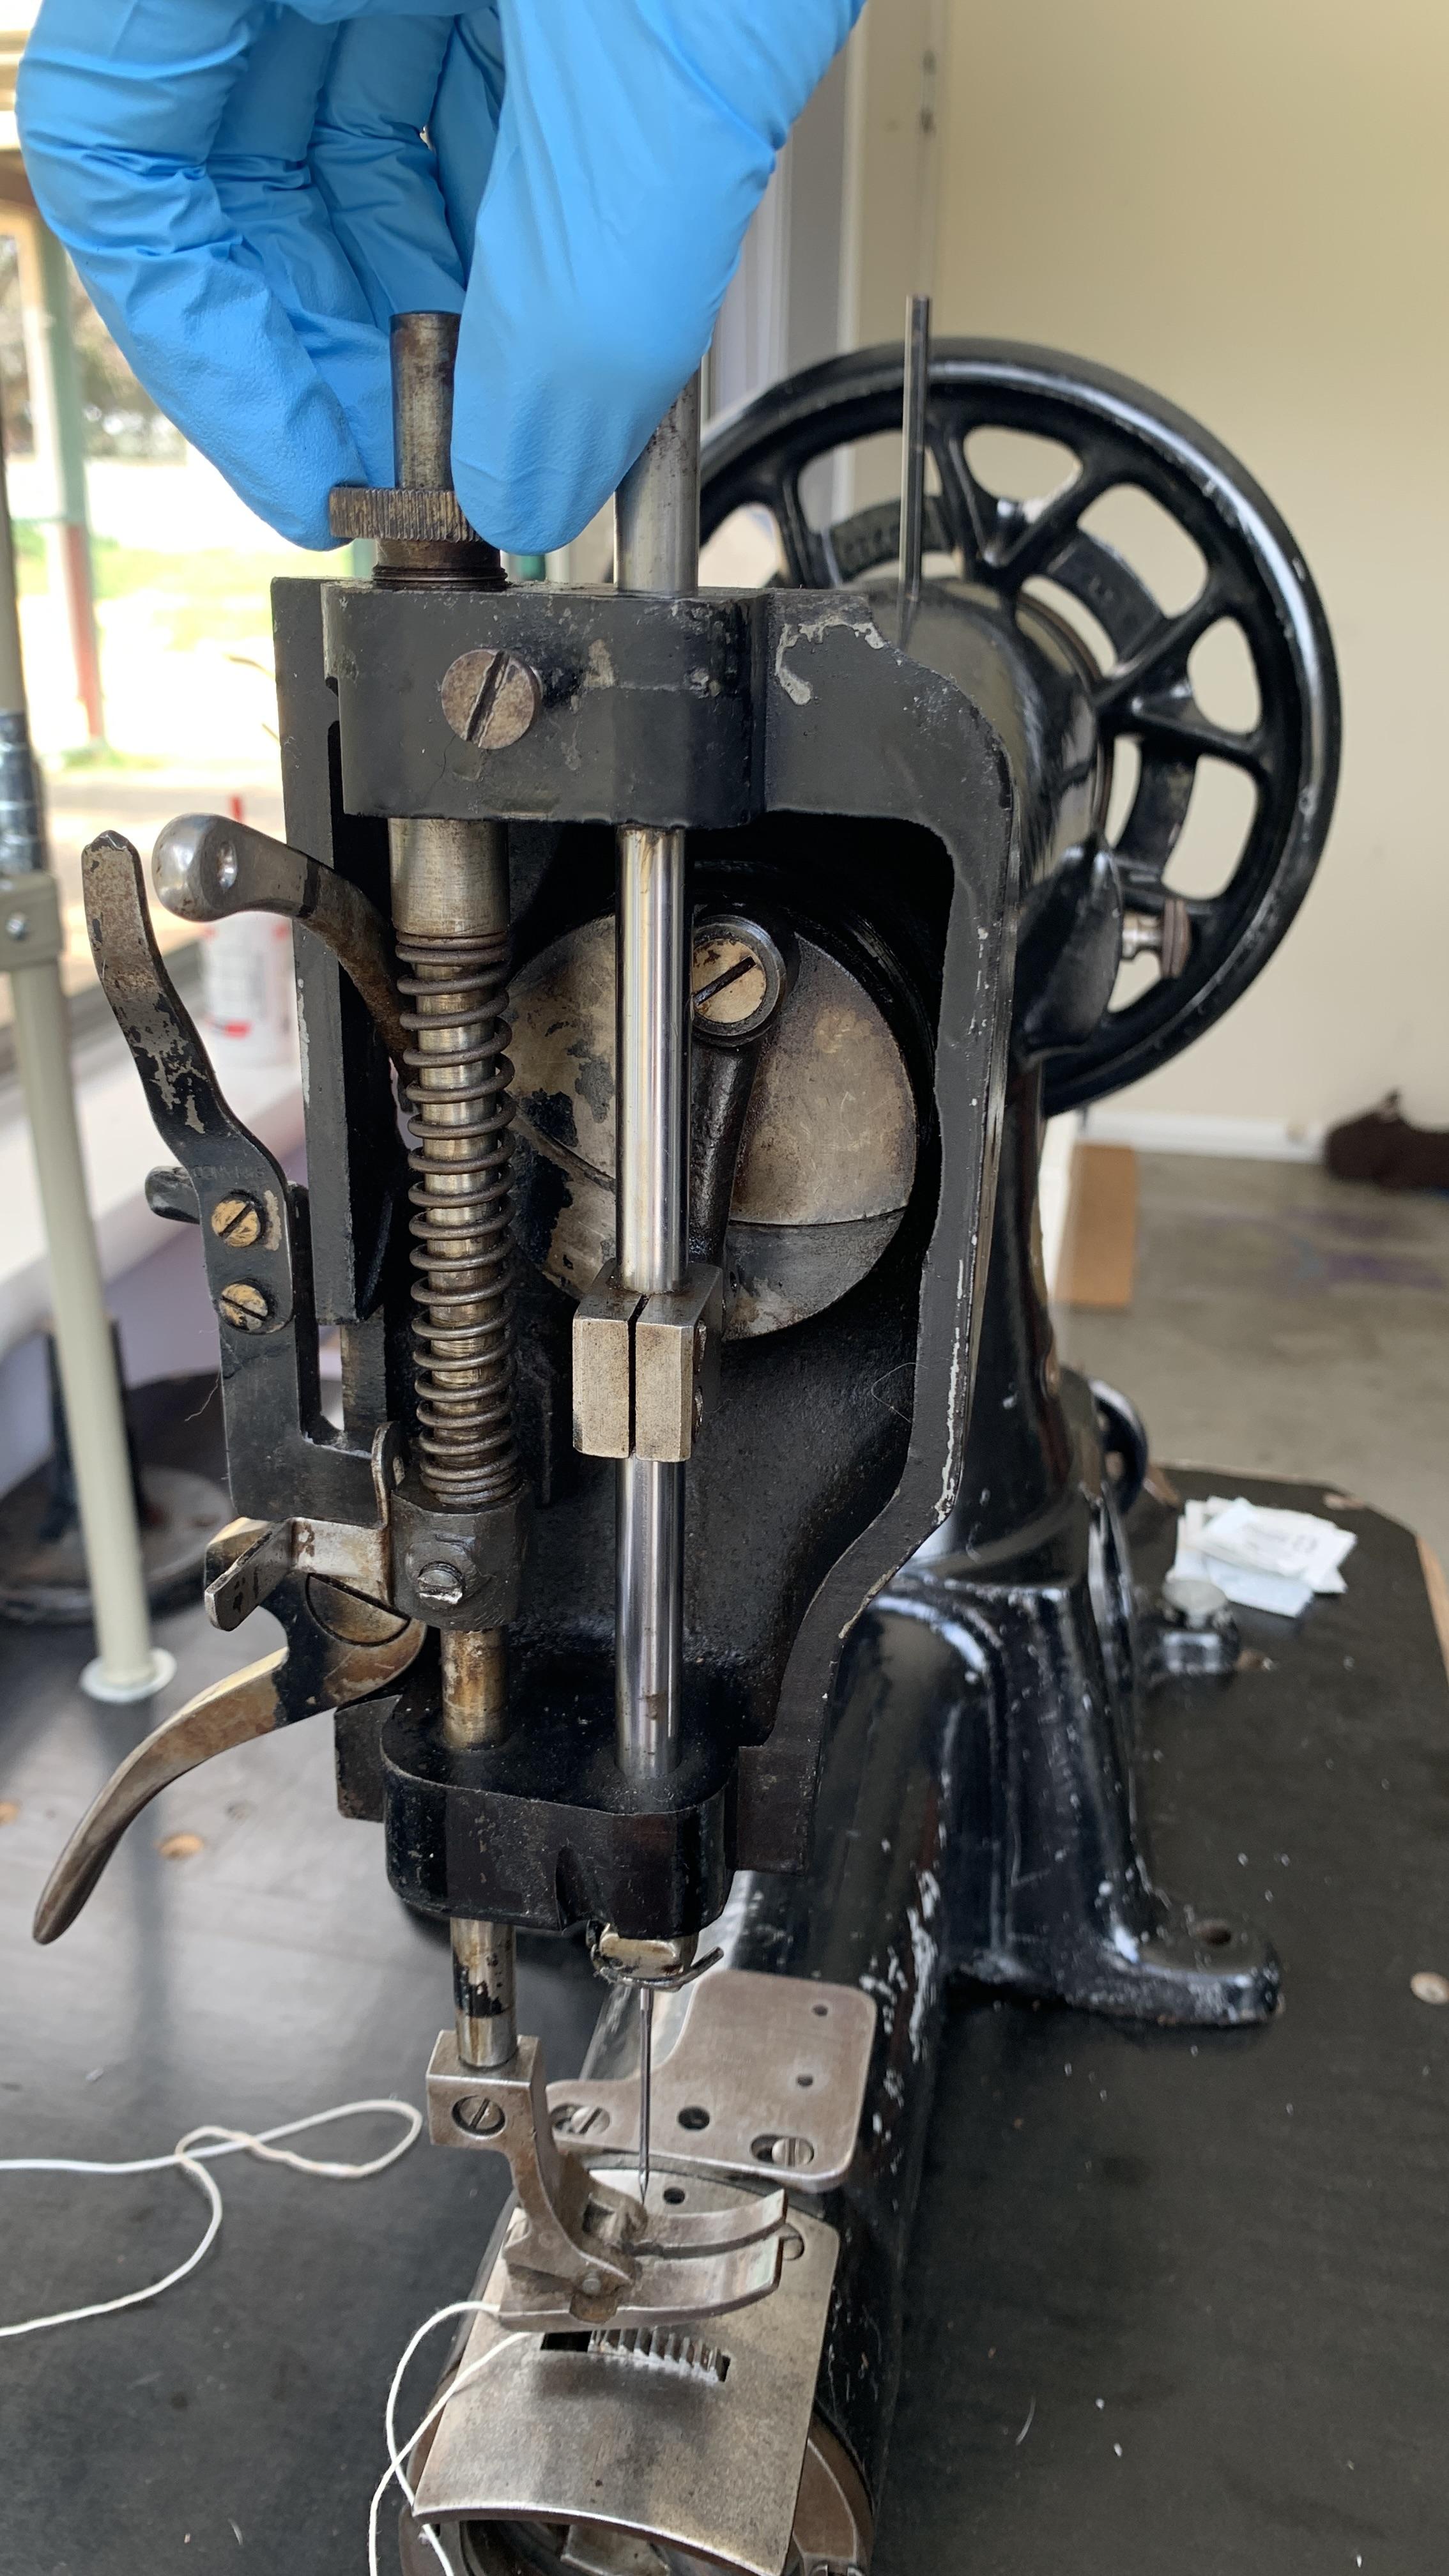
I wound this down as far as it can go (where my hand is). I took the plat off and included the entire mechanism in case there is another trick you can show me. You led me to the light, thank you so much! Everything is working perfectly now woohoo!
-
Very nice!
-
I have in the past made several different size punches like this myself. I do find a bolt slightly smaller than the hole and wrap some tape around it to keep it firmly held in place for being hit with a mallet or hammer but loose enough to remove and get out the waste occasionally. I generally make up a mild metal shape about the same as the inside hole of the punch I am making and after a bit of shaping use it to refine the end shape of the punch. I make quite a few from stainless tube which works pretty well.
-
The knob that you turned increases the spring pressure. You can loosen that back up. To bring the presser foot down to a usable position, loosen the screw near the bottom of the spring.
-
I wound this down as far as it can go (where my hand is). I took the plat off and included the entire mechanism in case there is another trick you can show me.
-
Can you show a picture of what you adjusted to put the presser foot bar at its lowest setting?
-
Великолепная работа с кожей!
-
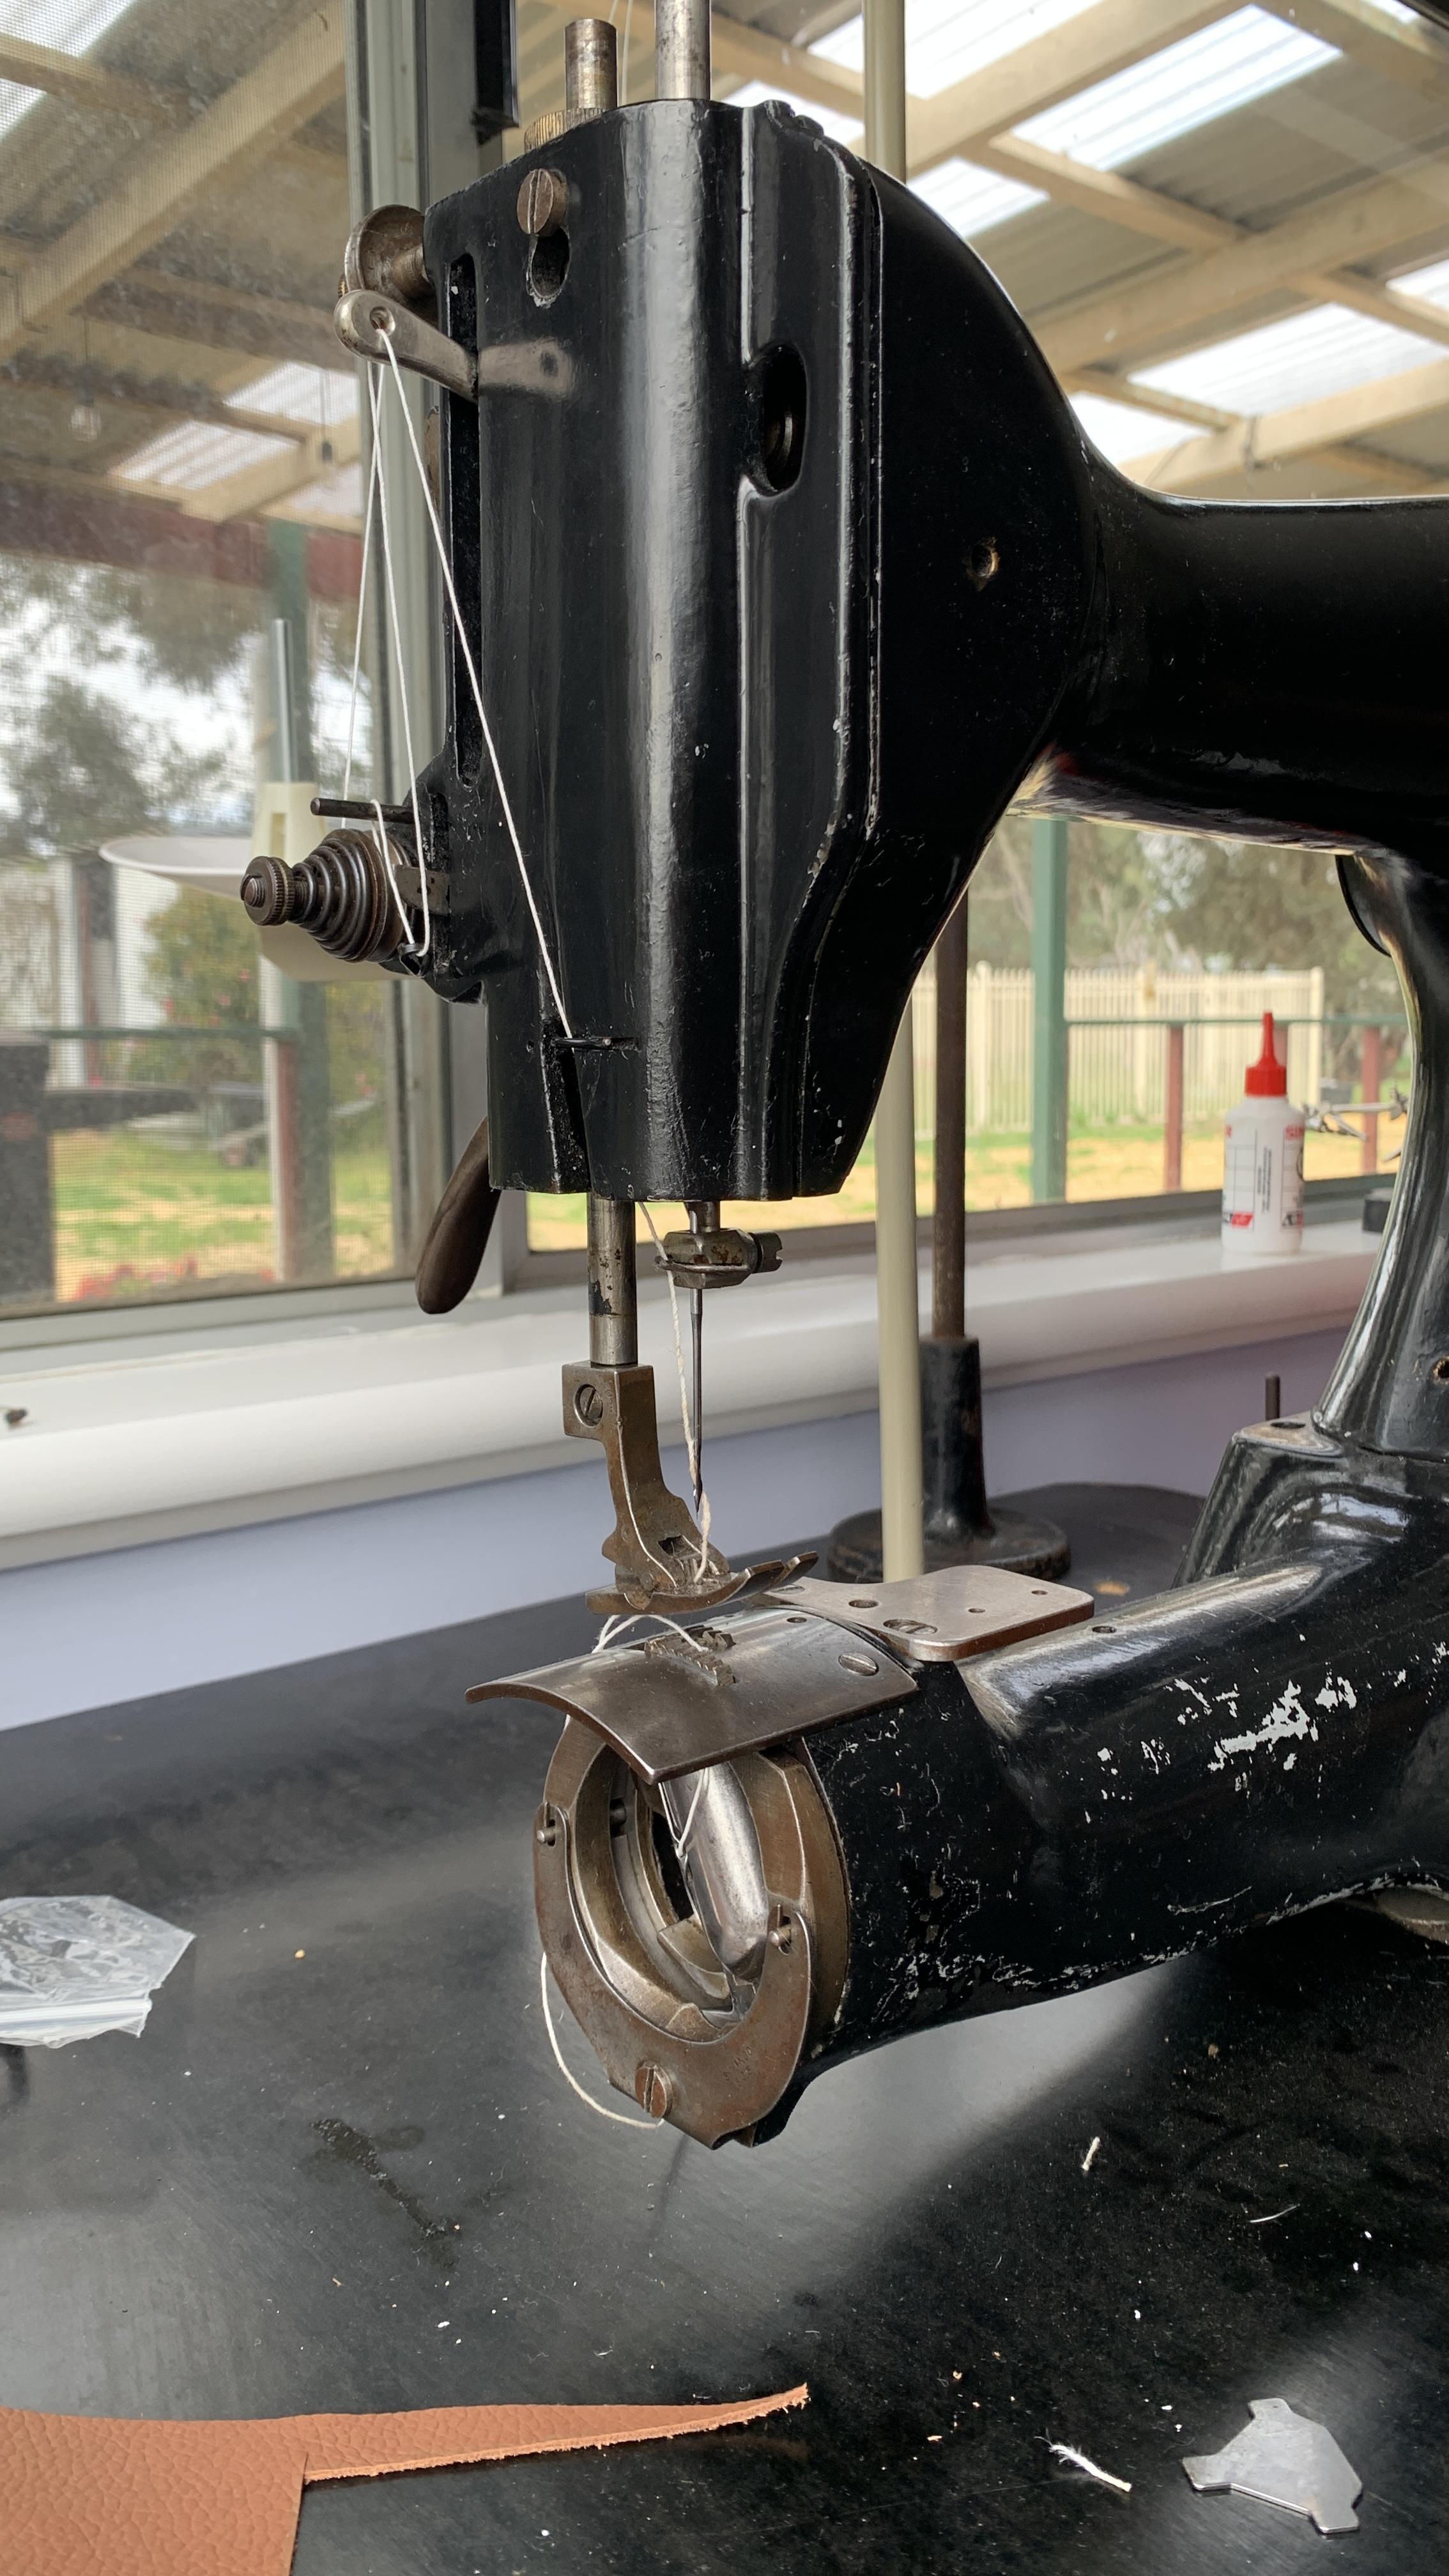
Hello everyone I have recently purchased a Singer 45K25 as I wanted to complete a leather upholstery project for my car. The machine came with a wheel instead of a foot and the alignment of the wheel was weird where it came down onto the leather. I couldn't sew the upholstery as the wheel grips further away from where I need the pressure to be. I am topstitching if that helps to clarify? So I purchased a foot for the machine and it arrived and I installed it, but now my issue is that even with the presser foot bar wound down to its lowest setting, I still have close to 1cm gap between the foot. and the feed dogs. I sat in the slough of despond for a while thinking I had bought a machine too fierce and uncouth for what I wanted to sew, when I thought perhaps I can have a foot made with a longer shank? My thinking is that it would not just be a matter of having a longer shank, but the needle hole opening would need to be calculated correctly as the foot angles out from the bar it is attached to. So if I commissioned a foot it might need a little engineering knowhow to ensure the needle hole aligned correctly. Does anyone here understand what I am talking about? better still, does anyone know someone who knows how to fabricate what I am talking about? I think a shank approximately 10mm longer would allow me to unwind some of the presser bar and give a bit of allowance back for adjusting the pressure and would allow me to sew materials thinner than 1cm thick. Attached is a photo of the machine with the foot all the way down. Am I under thinking this? Am I nuts? I really like my beastie machine a lot and am reluctant to rid myself of it.
-
 Hjay joined the community
 - Yesterday
-
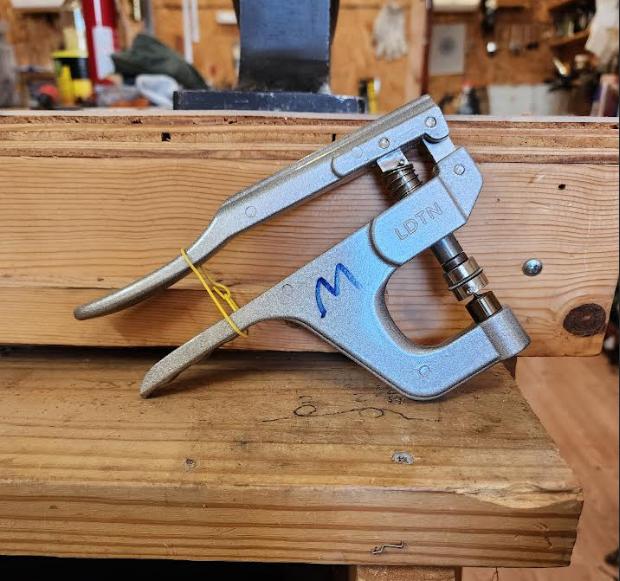
I recently bought one of those off Temu for £12, for tool, 2 sets of dies and some snaps. Not used it yet. I have one for use with KAM snaps and it works fine so I reckon the new one will as well
-
 Smiche joined the community
 -
Great job beautiful work.
-
A couple of years ago . . . I was in an Amish store that sells material for sewing . . . kinda like an Amish Joann Fabric shop. They had this tool in there . . . and I knew exactly what it was as soon as I saw it . . . the tool itself was 35 bucks . . . and the set of dies was 18. Both sets fo male and female came in that kit. I went back later and bought another one just like it . . . so I didn't have to swap dies every time I wanted to do a snap. I have been just plain pleased with this tool . . . it is great . . . you have to be careful and follow directions . . . and if you do . . . great snaps every time. I believe I also saw them in Hobby Lobby . . . not certain. There is a cheaper version like this . . . sells for about 18 bucks . . . comes in a kit . . . Amish buy them for the snaps for the women's clothing . . . it is a smaller tool . . . and I don't know if it will do line 24 snaps . . . mine does every time. Nothing against Dot . . . but that's a bunch of money for a snap setter. May God bless, Dwight
-

Help! Singer 111w155 stripped / stuck screw
friquant replied to matthew123's topic in Leather Sewing Machines
It looks like you are missing a screw here.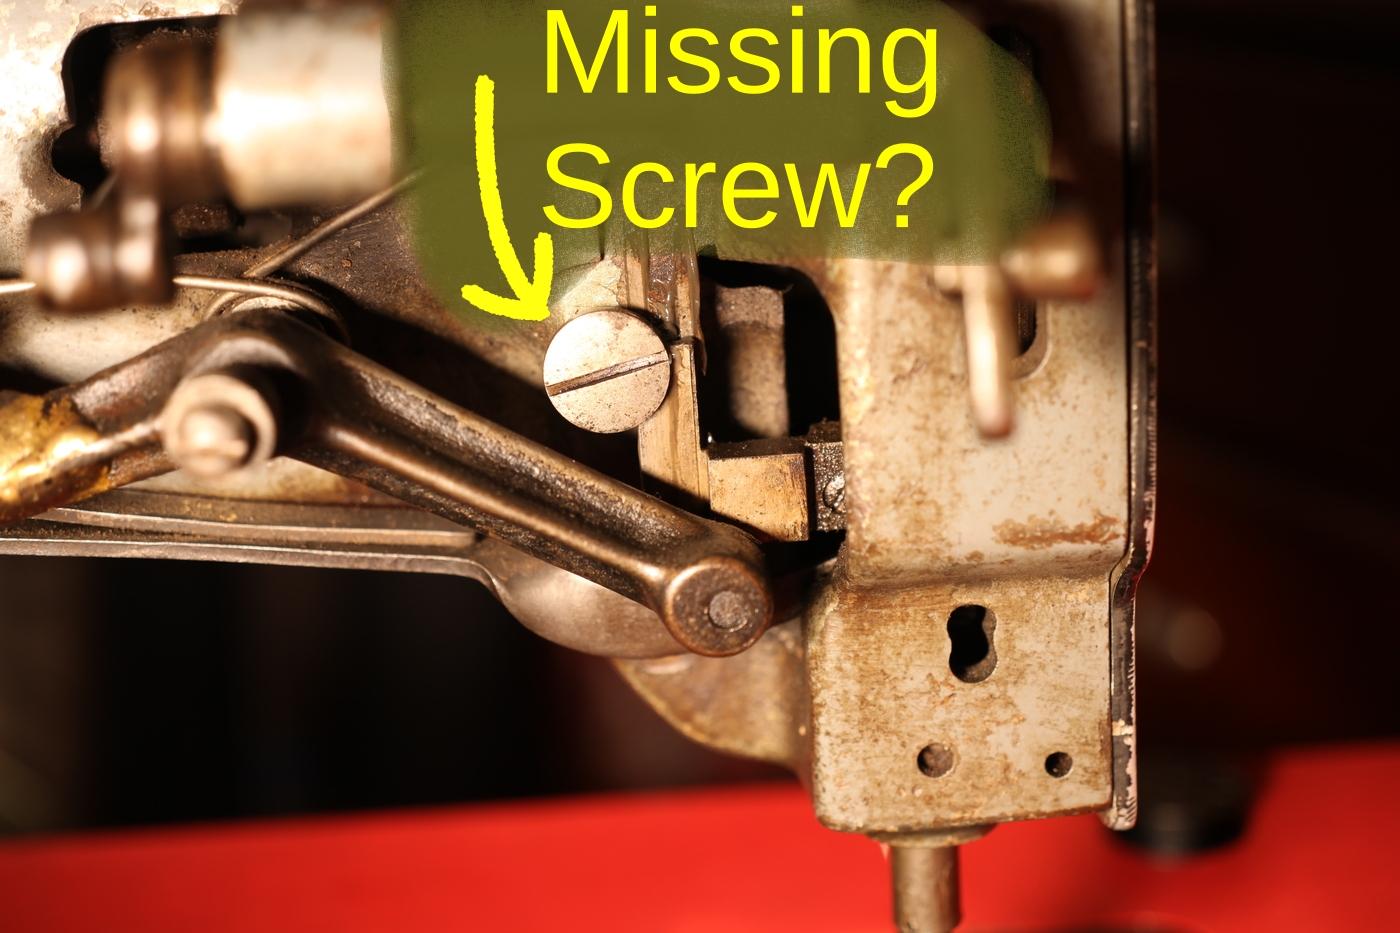
-
Help! Singer 111w155 stripped / stuck screw
friquant replied to matthew123's topic in Leather Sewing Machines
This is normal. The extra work is going into compressing the presser foot spring. The effect goes away if you lift the presser feet. Mine does not lift as far when the inner toe is down. Maybe you aren't getting enough lift. Try pressing down with your hand on the far end of the foot lift bar and see if the feet will come up.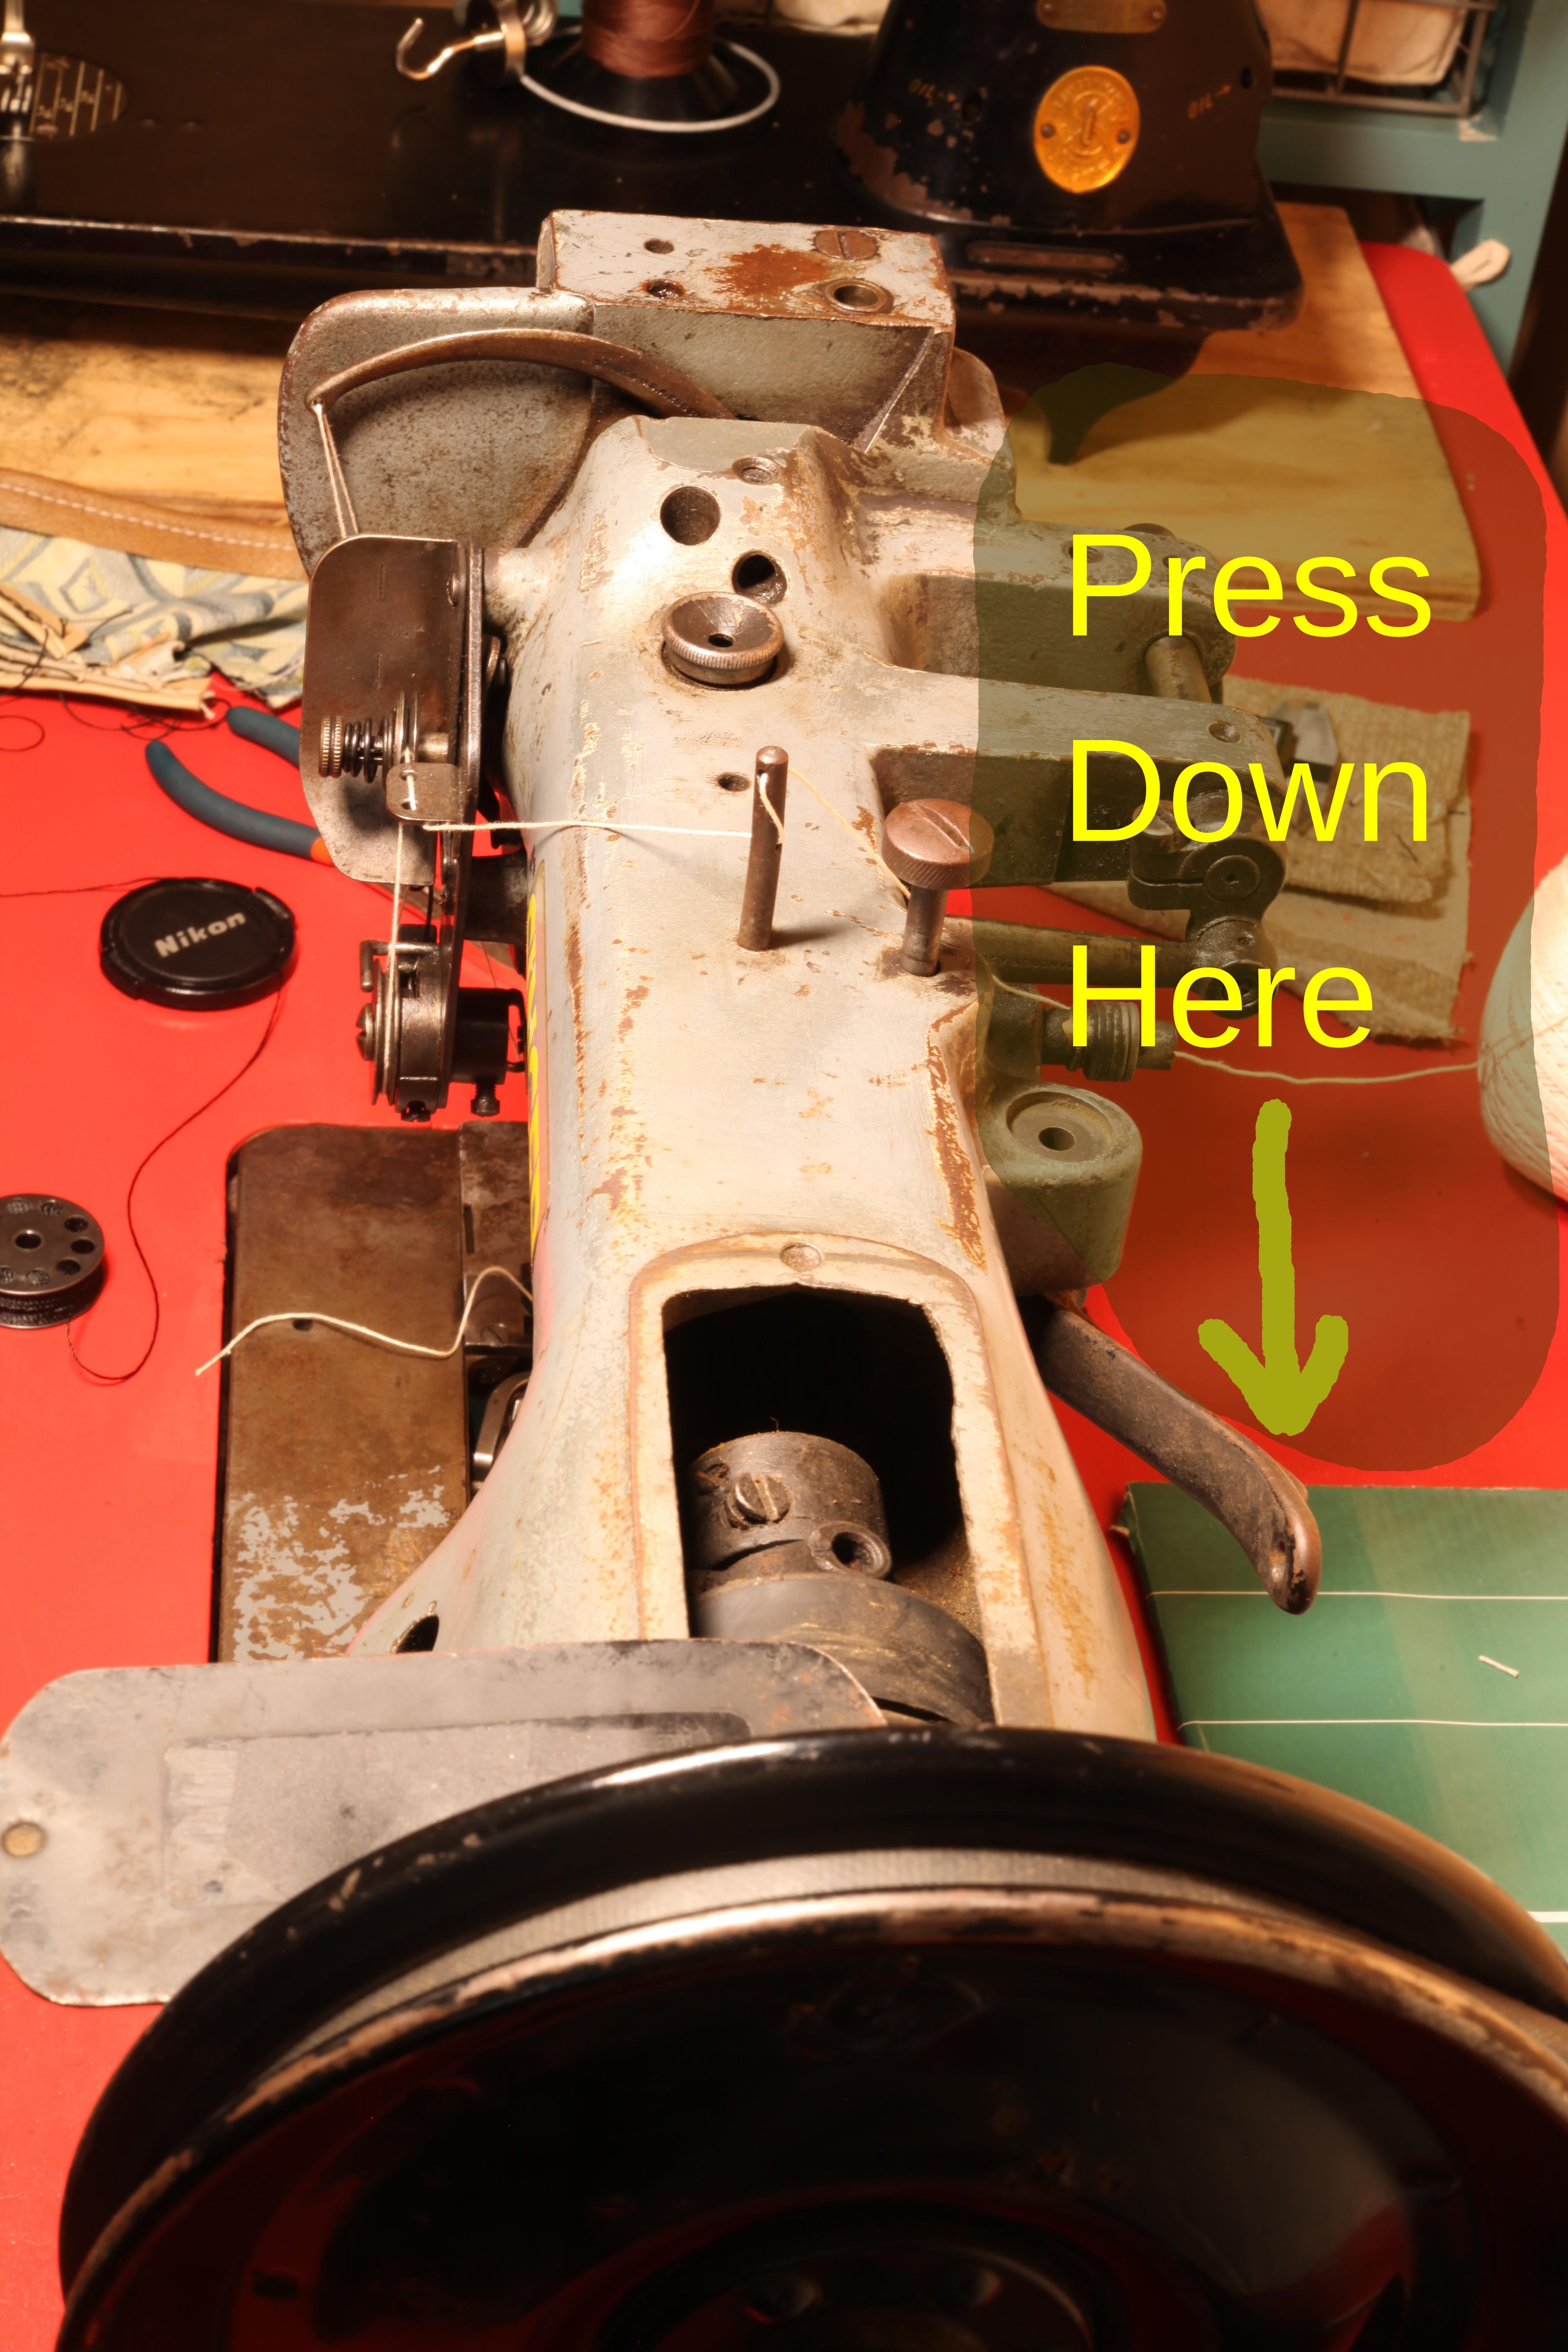
-
Help! Singer 111w155 stripped / stuck screw
friquant replied to matthew123's topic in Leather Sewing Machines
Missing lock nut? My singer 144 has a lock nut on that stud.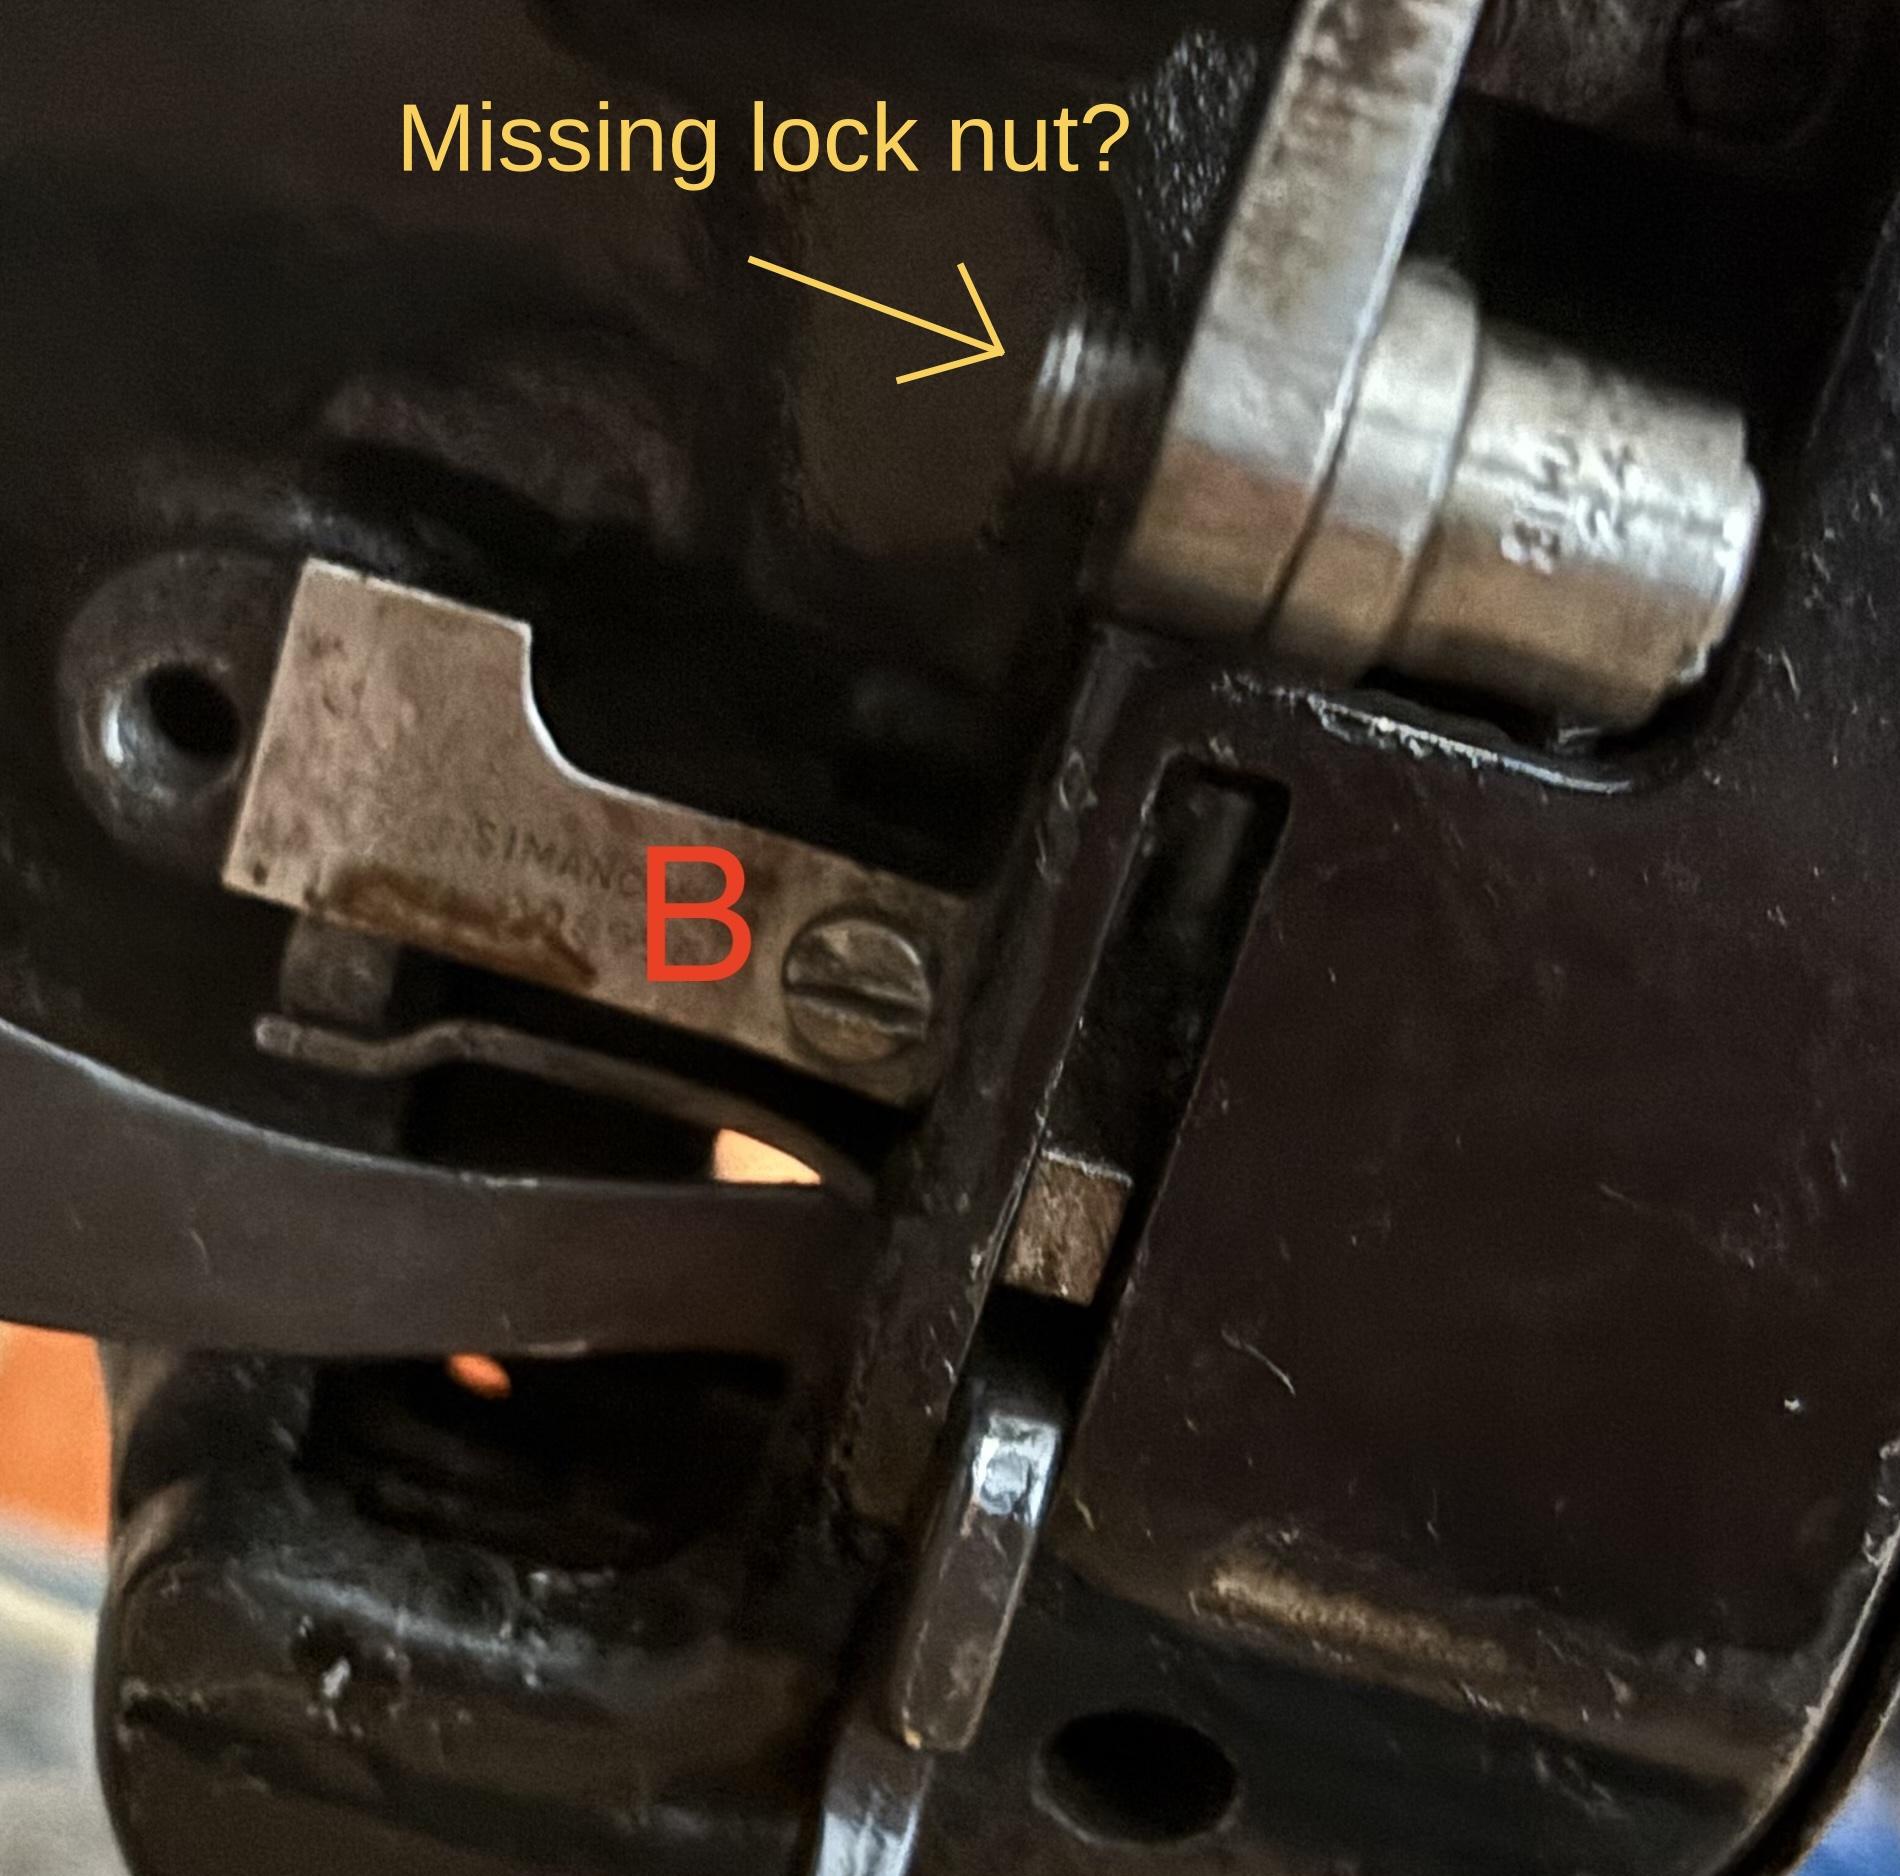
-
Help! Singer 111w155 stripped / stuck screw
friquant replied to matthew123's topic in Leather Sewing Machines
Genius! -
That was good help, thanks! Found the online manuals - parts, owners, and adjusters. All I needed!
-
Beautiful work
-
 Beautiful!
 -
It that's not THE excuse to make a new collar, then I don't know XD Have a lot of fun with your new family member! My little setter-cross, who is a rescue from Italy, also taught my mums puppy all the nasty things and now he is teaching her how to behave like a little retard again. And I thought that phase was behind us. Thank you for your feedback and for sharing your experience! I know what you mean, I’ve also seen some cheaper leads fail at that point. That’s exactly why I used Italian dorsal leather, not skived at any point, cut from the best end, and sew everything with strong polyester thread in saddle stitch. The rope itself is made for dog leashes, so I feel good about the stability. But it’s always interesting to hear how others approach it — your rivet and shrink tube method definitely sounds very sturdy! Best, Tove
-
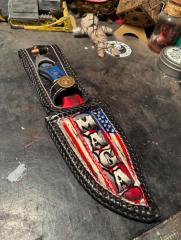
 It's machine stitched with a singer 3150. Thank you for the compliment.
 -

Help! Singer 111w155 stripped / stuck screw
matthew123 replied to matthew123's topic in Leather Sewing Machines
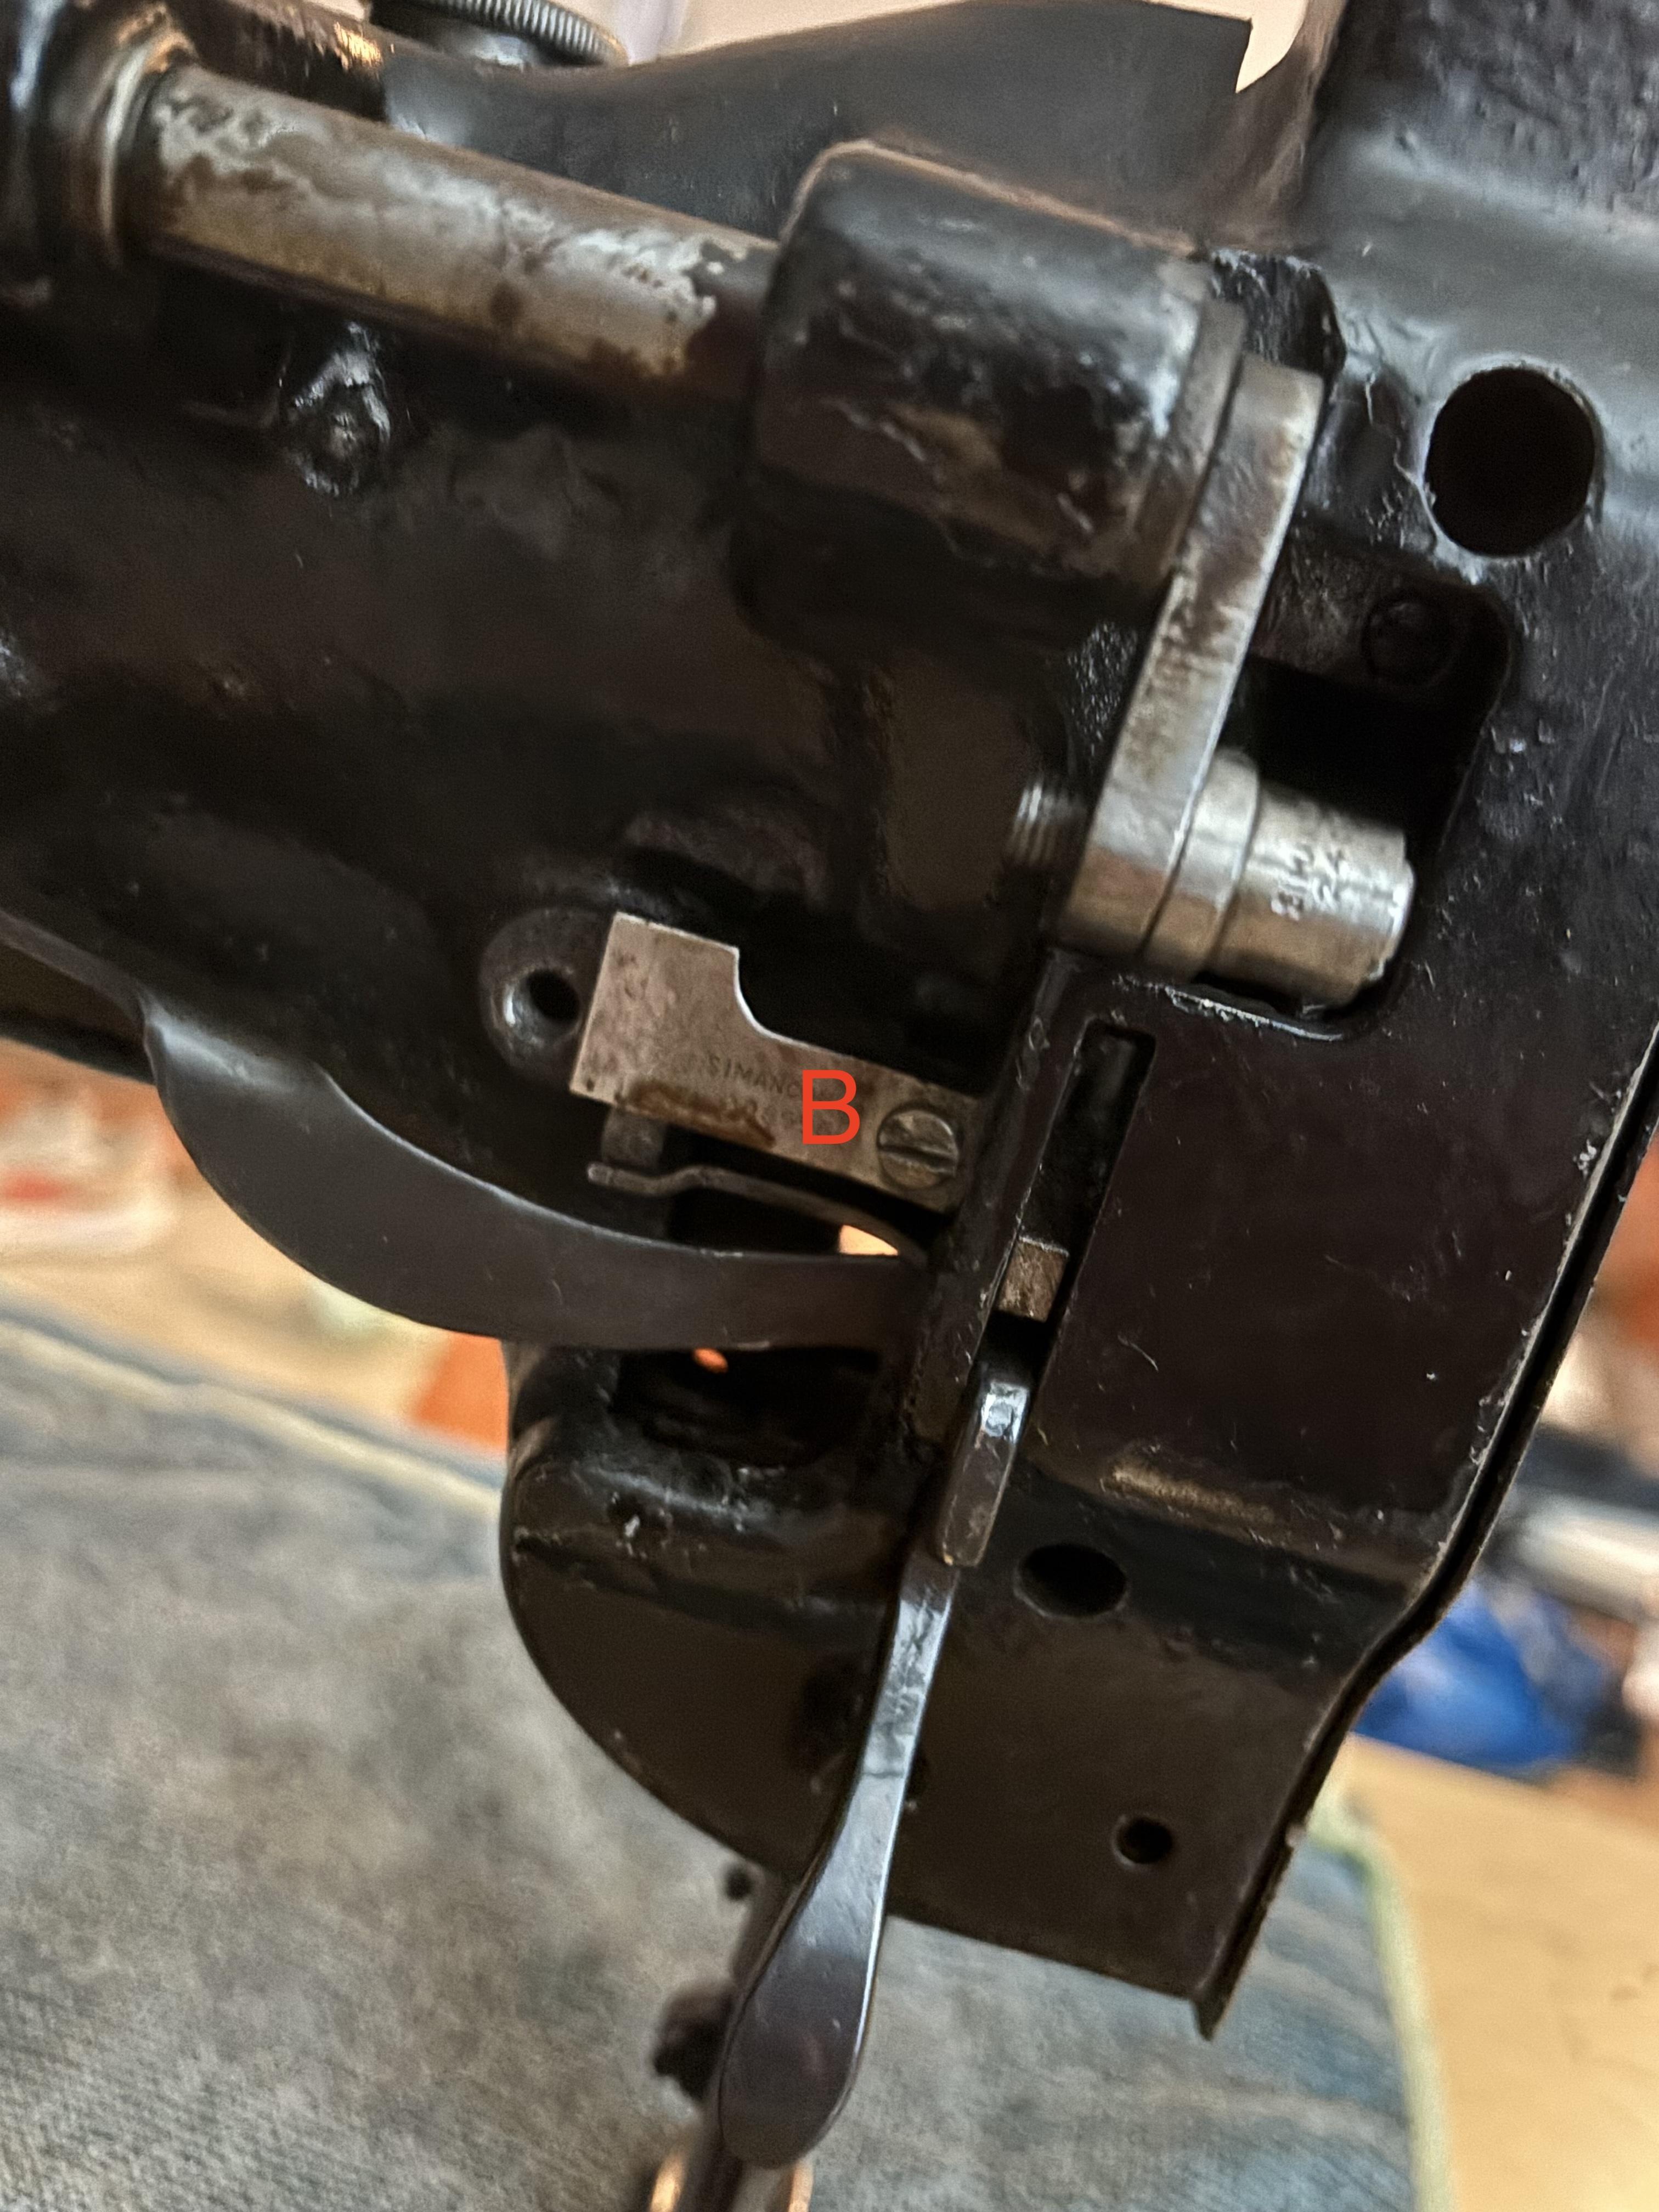
Thank you all for your help! I ended up cheating a little bit and took the machine to a machine shop. The machinist got the screw out in minutes and didn't charge me. I asked him how he did it, and he said I had already done all the work for him 😆 I think it was likely a case of having the right selection of screwdrivers to fit the deformed slot, just like you all advised me. He also is 94 years old and probably has about 85 years of experience. What a legend! Since he didn't need to drill the screw, I still have it. I cut a new slot in the head perpendicular to the old one, cleaned the threads on the screw and on the machine side, and so far I'm reusing the screw and it seems to be fine. I got the feet lifting equally now, too. The only things that seem wrong still are: 1. Cranking the machine takes a bit more effort during the part of the cycle when the inner foot is making contact with the work and the needle is down. I don't see anything binding, it just doesn't feel as loose and smooth as the part of the cycle when the needle is up. Is that normal? 2. The pressure foot lift releasing lever (the lever you'd use to raise the feet when beginning and ending your stitch) will lift the feet when the needle is up (and the outside feet are down) but won't lift the feet when the needle is in the work and the inner foot is down. Any ideas? I think it's something with either screw A or screw B in the pics I've attached. The lifting lever isn't contacting the whole assembly it needs to lift when the needle is in the down position. THANK YOU all again for your advice and guidance. You guys rock!!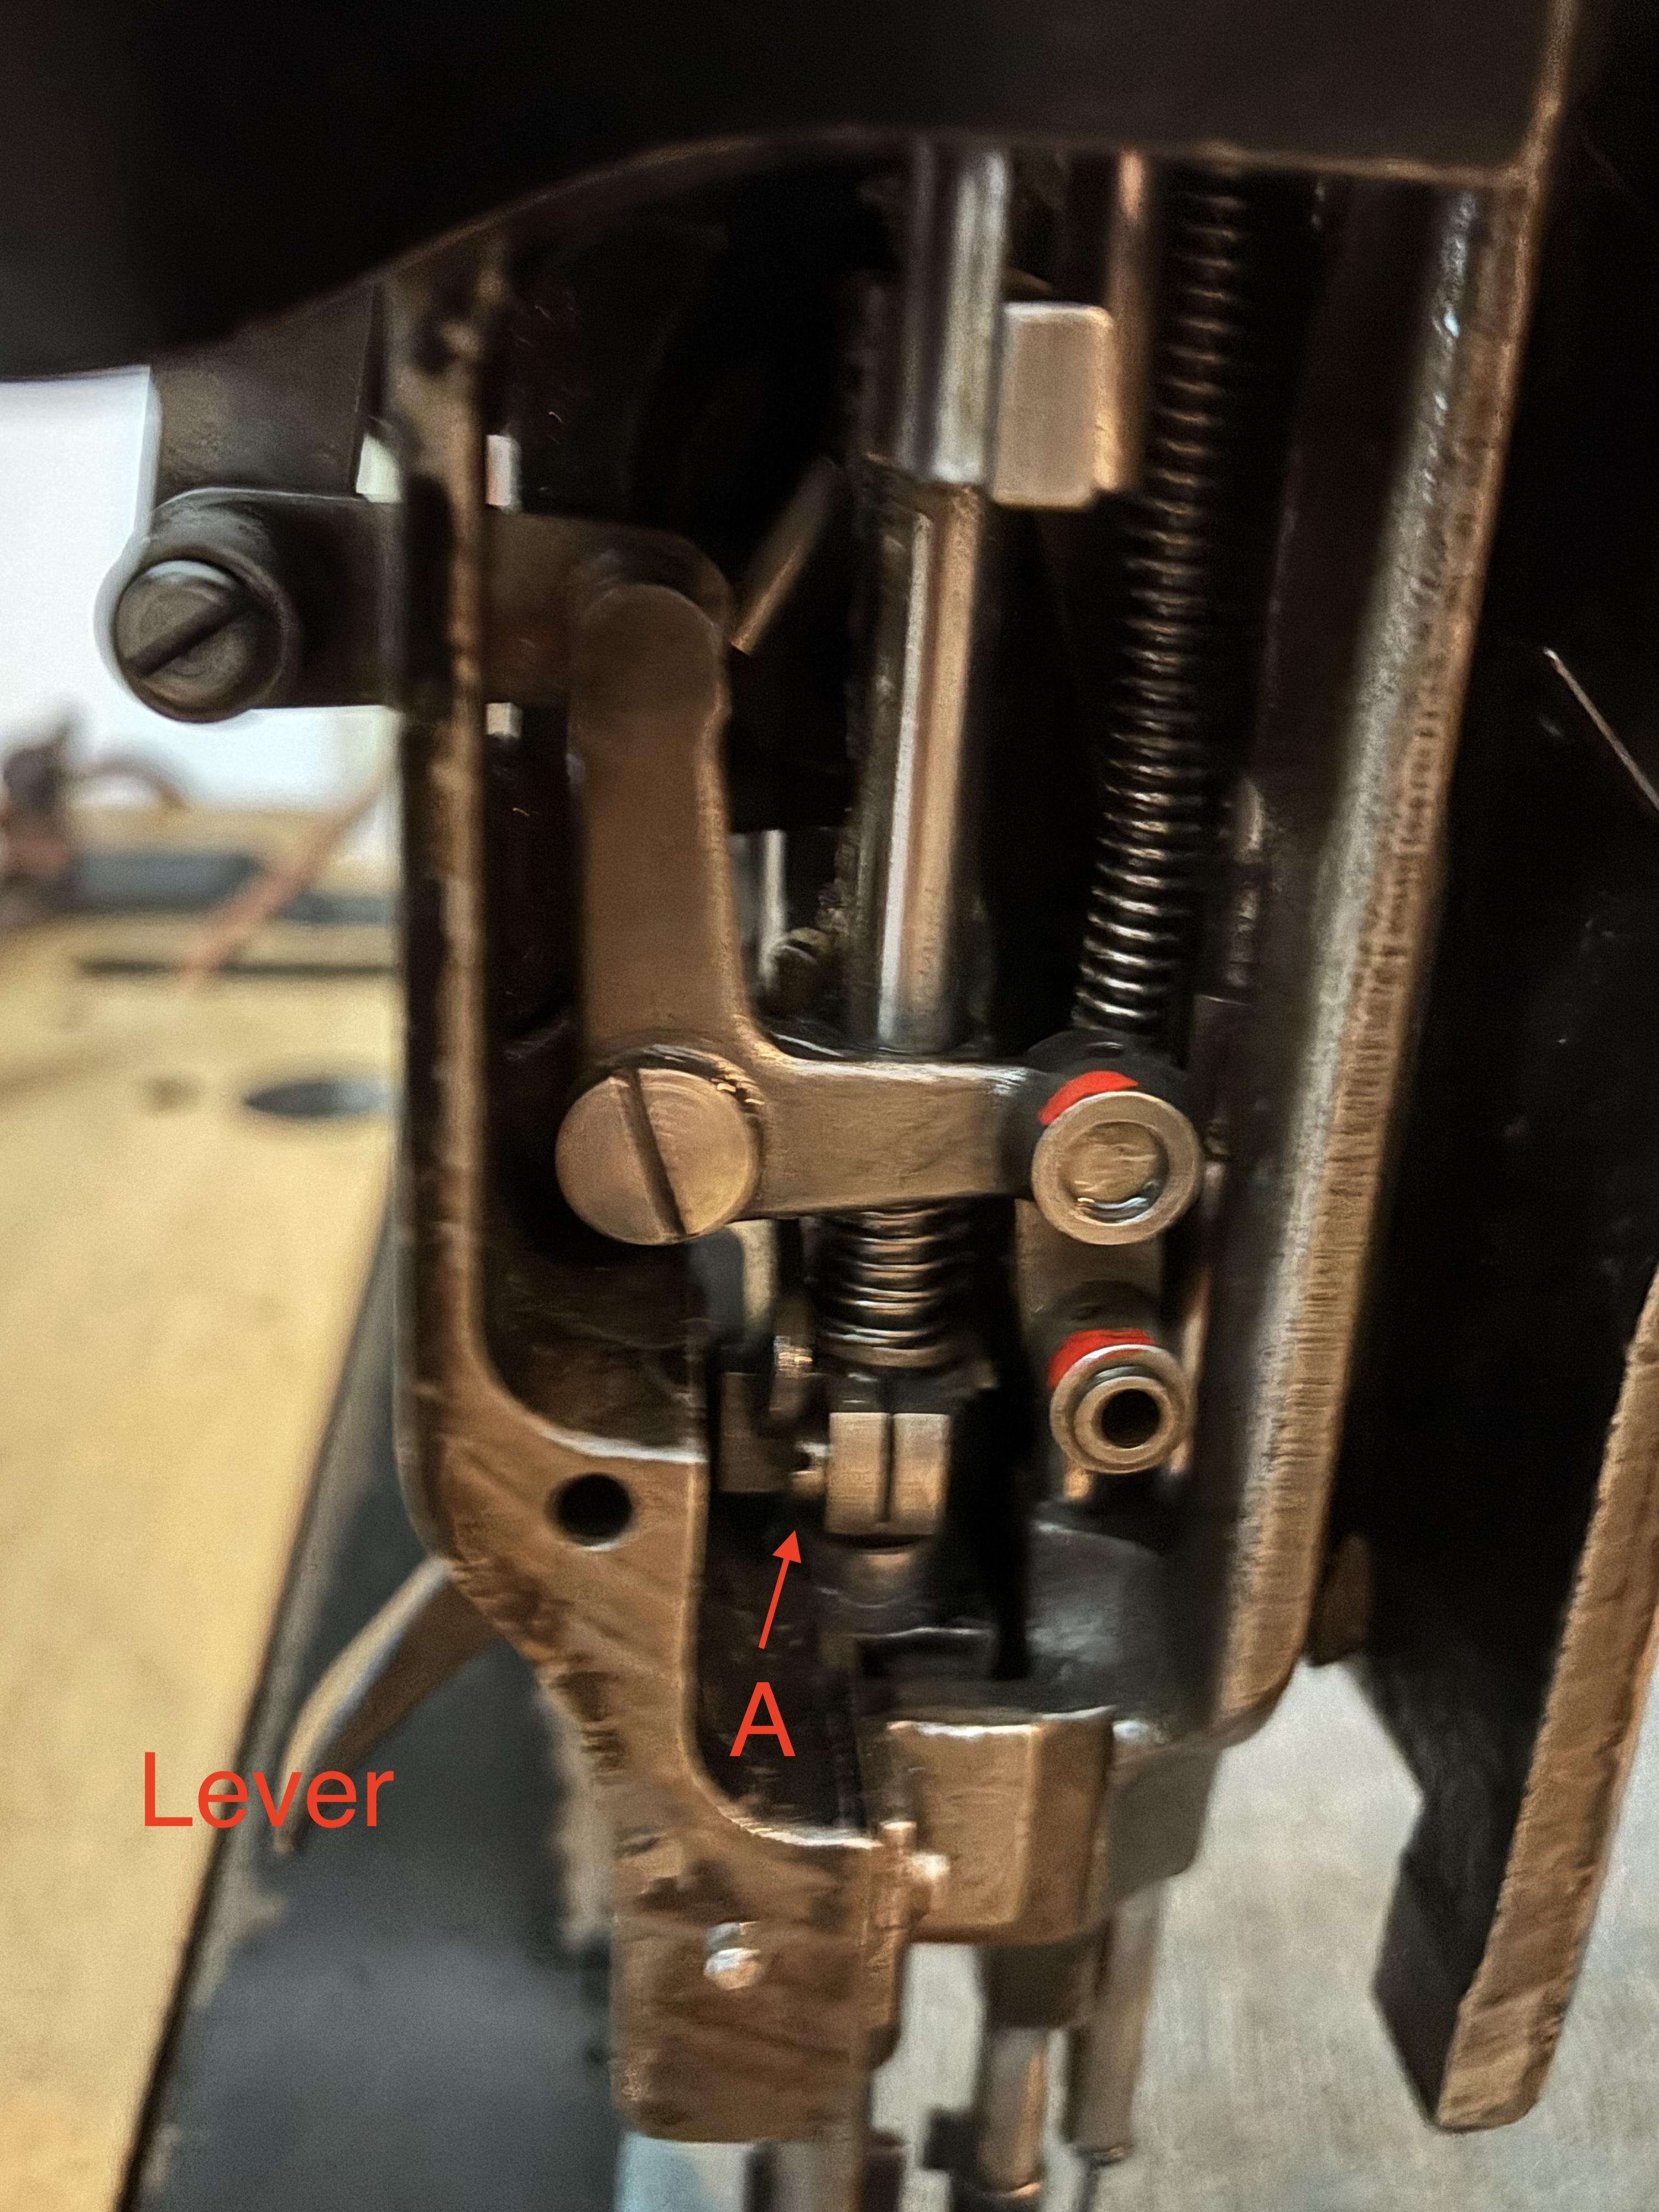
-

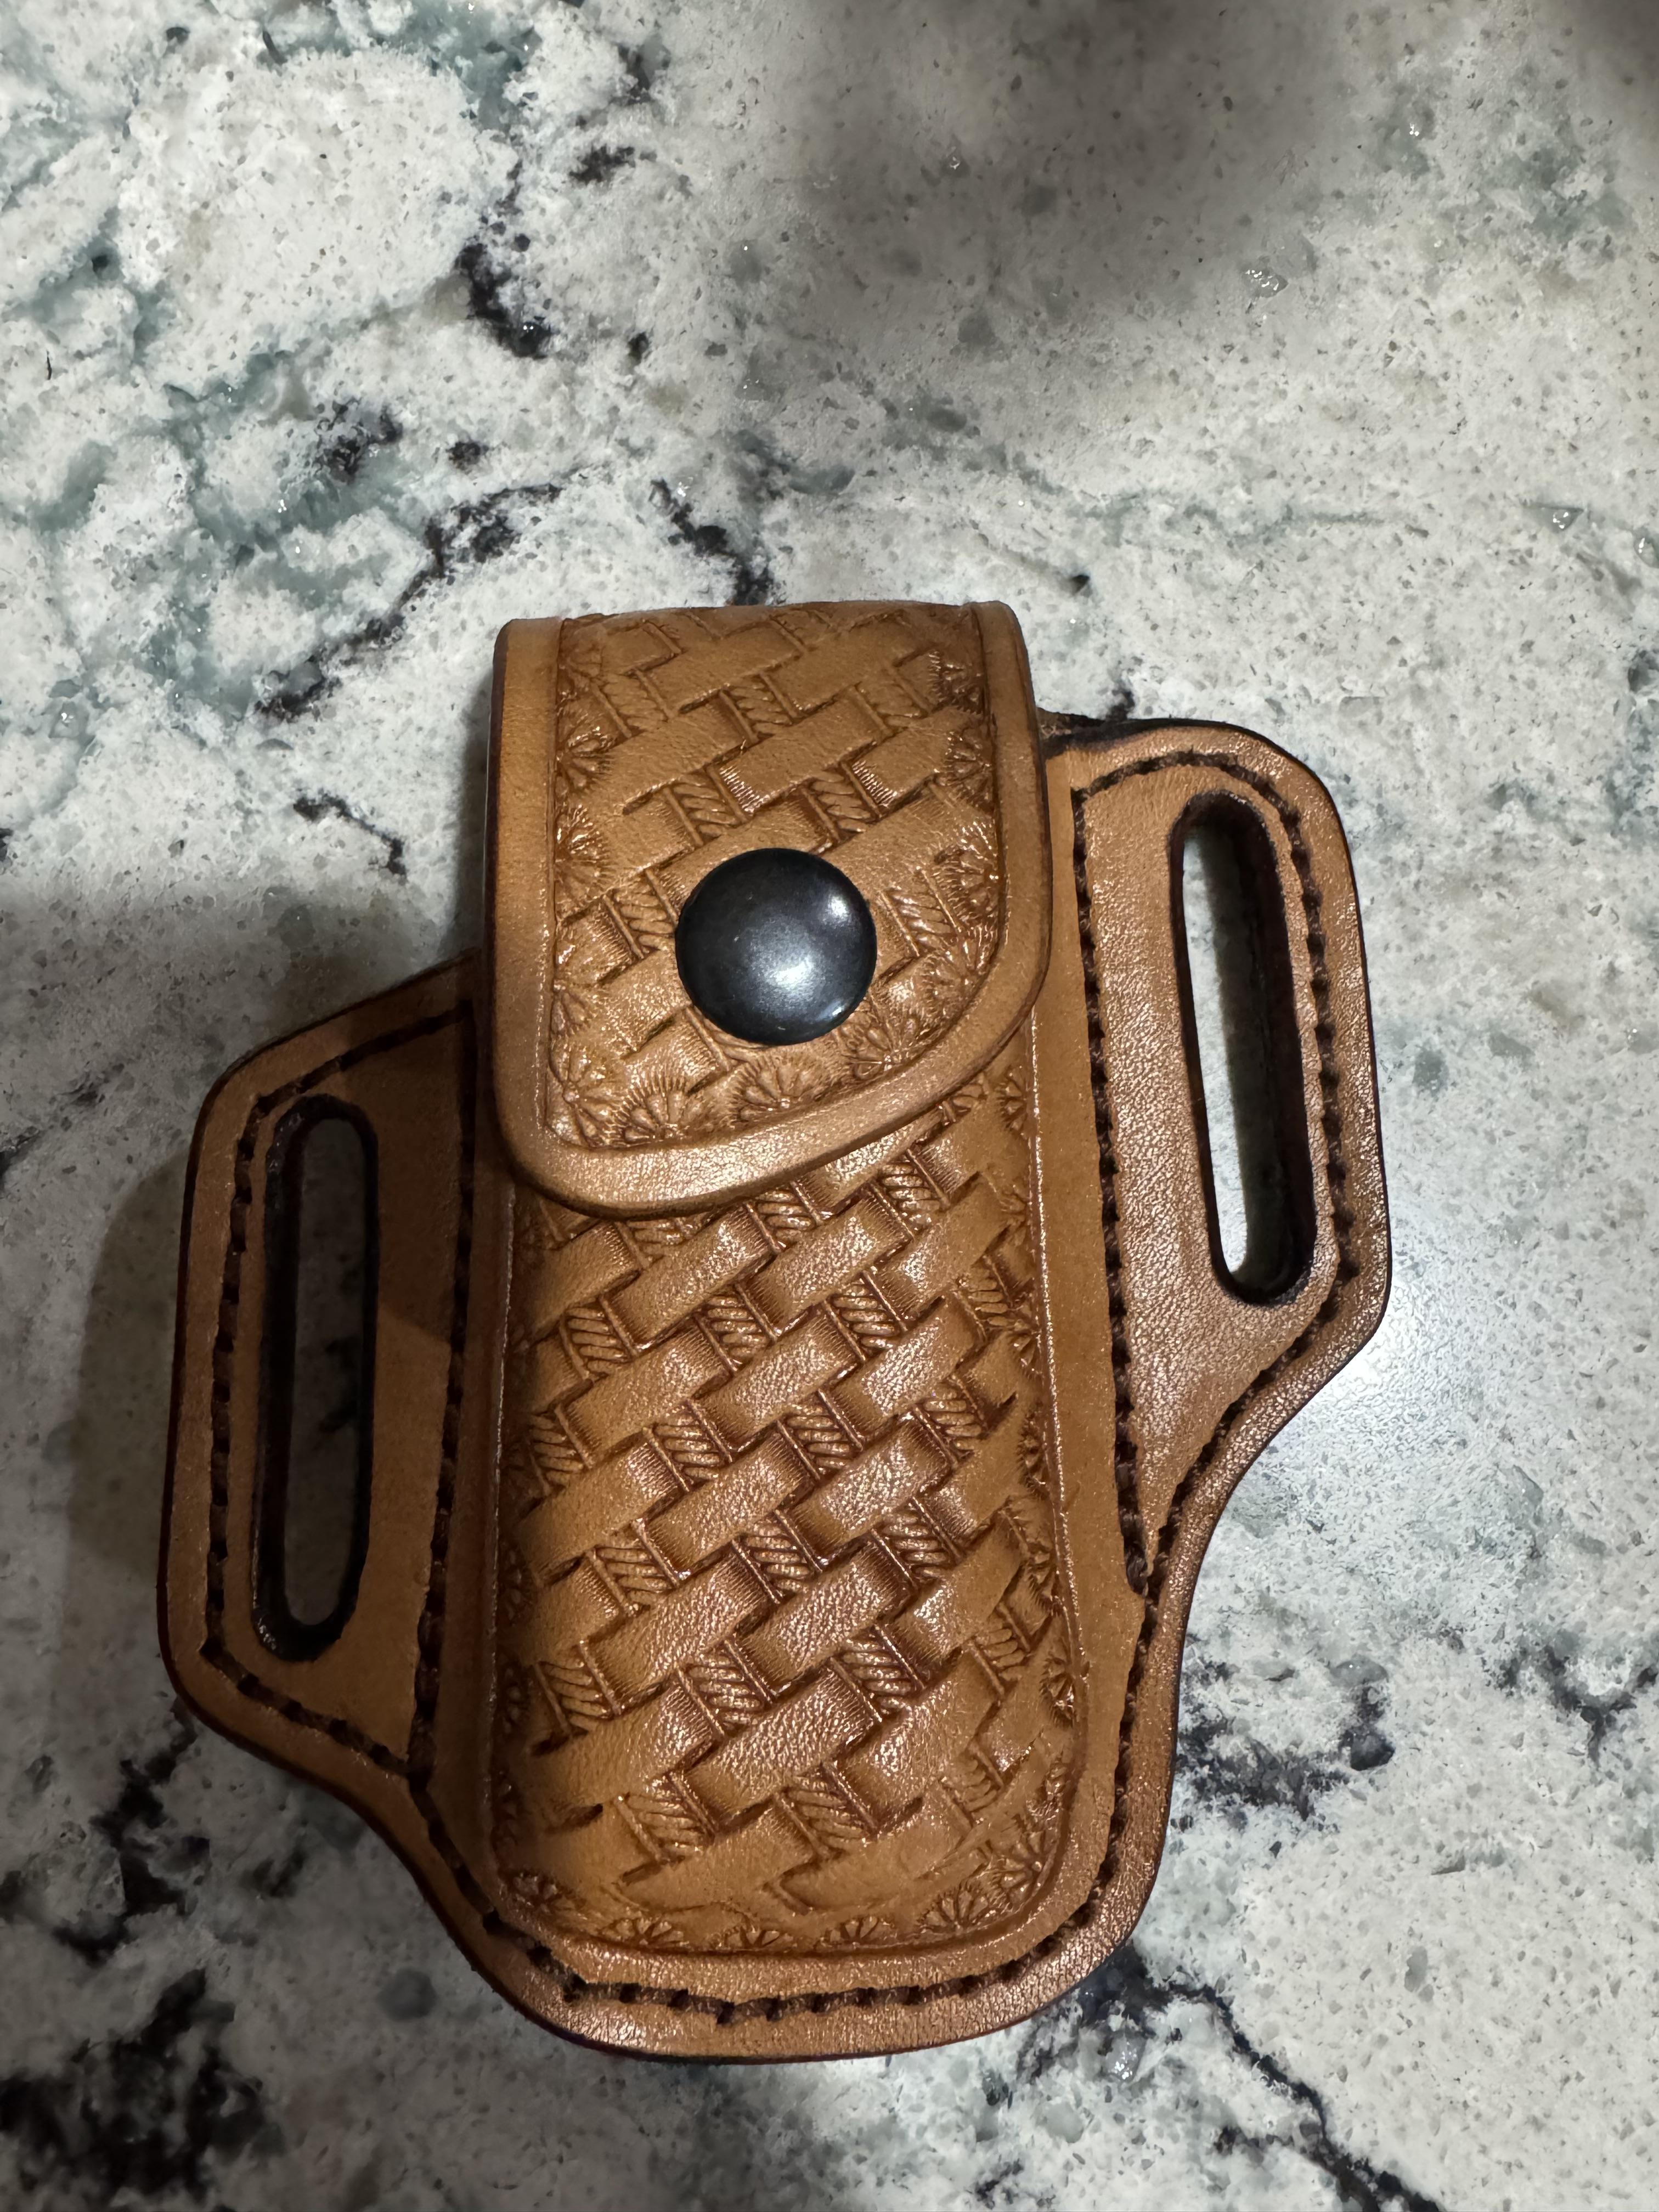
Leatherman sheath
Stetson912 replied to Stetson912's topic in Gun Holsters, Rifle Slings and Knife Sheathes
@Hildebrand looks good to me man. I like basketweave. Looks like it'll work great! I use mine every day -

Leatherman sheath
Hildebrand replied to Stetson912's topic in Gun Holsters, Rifle Slings and Knife Sheathes
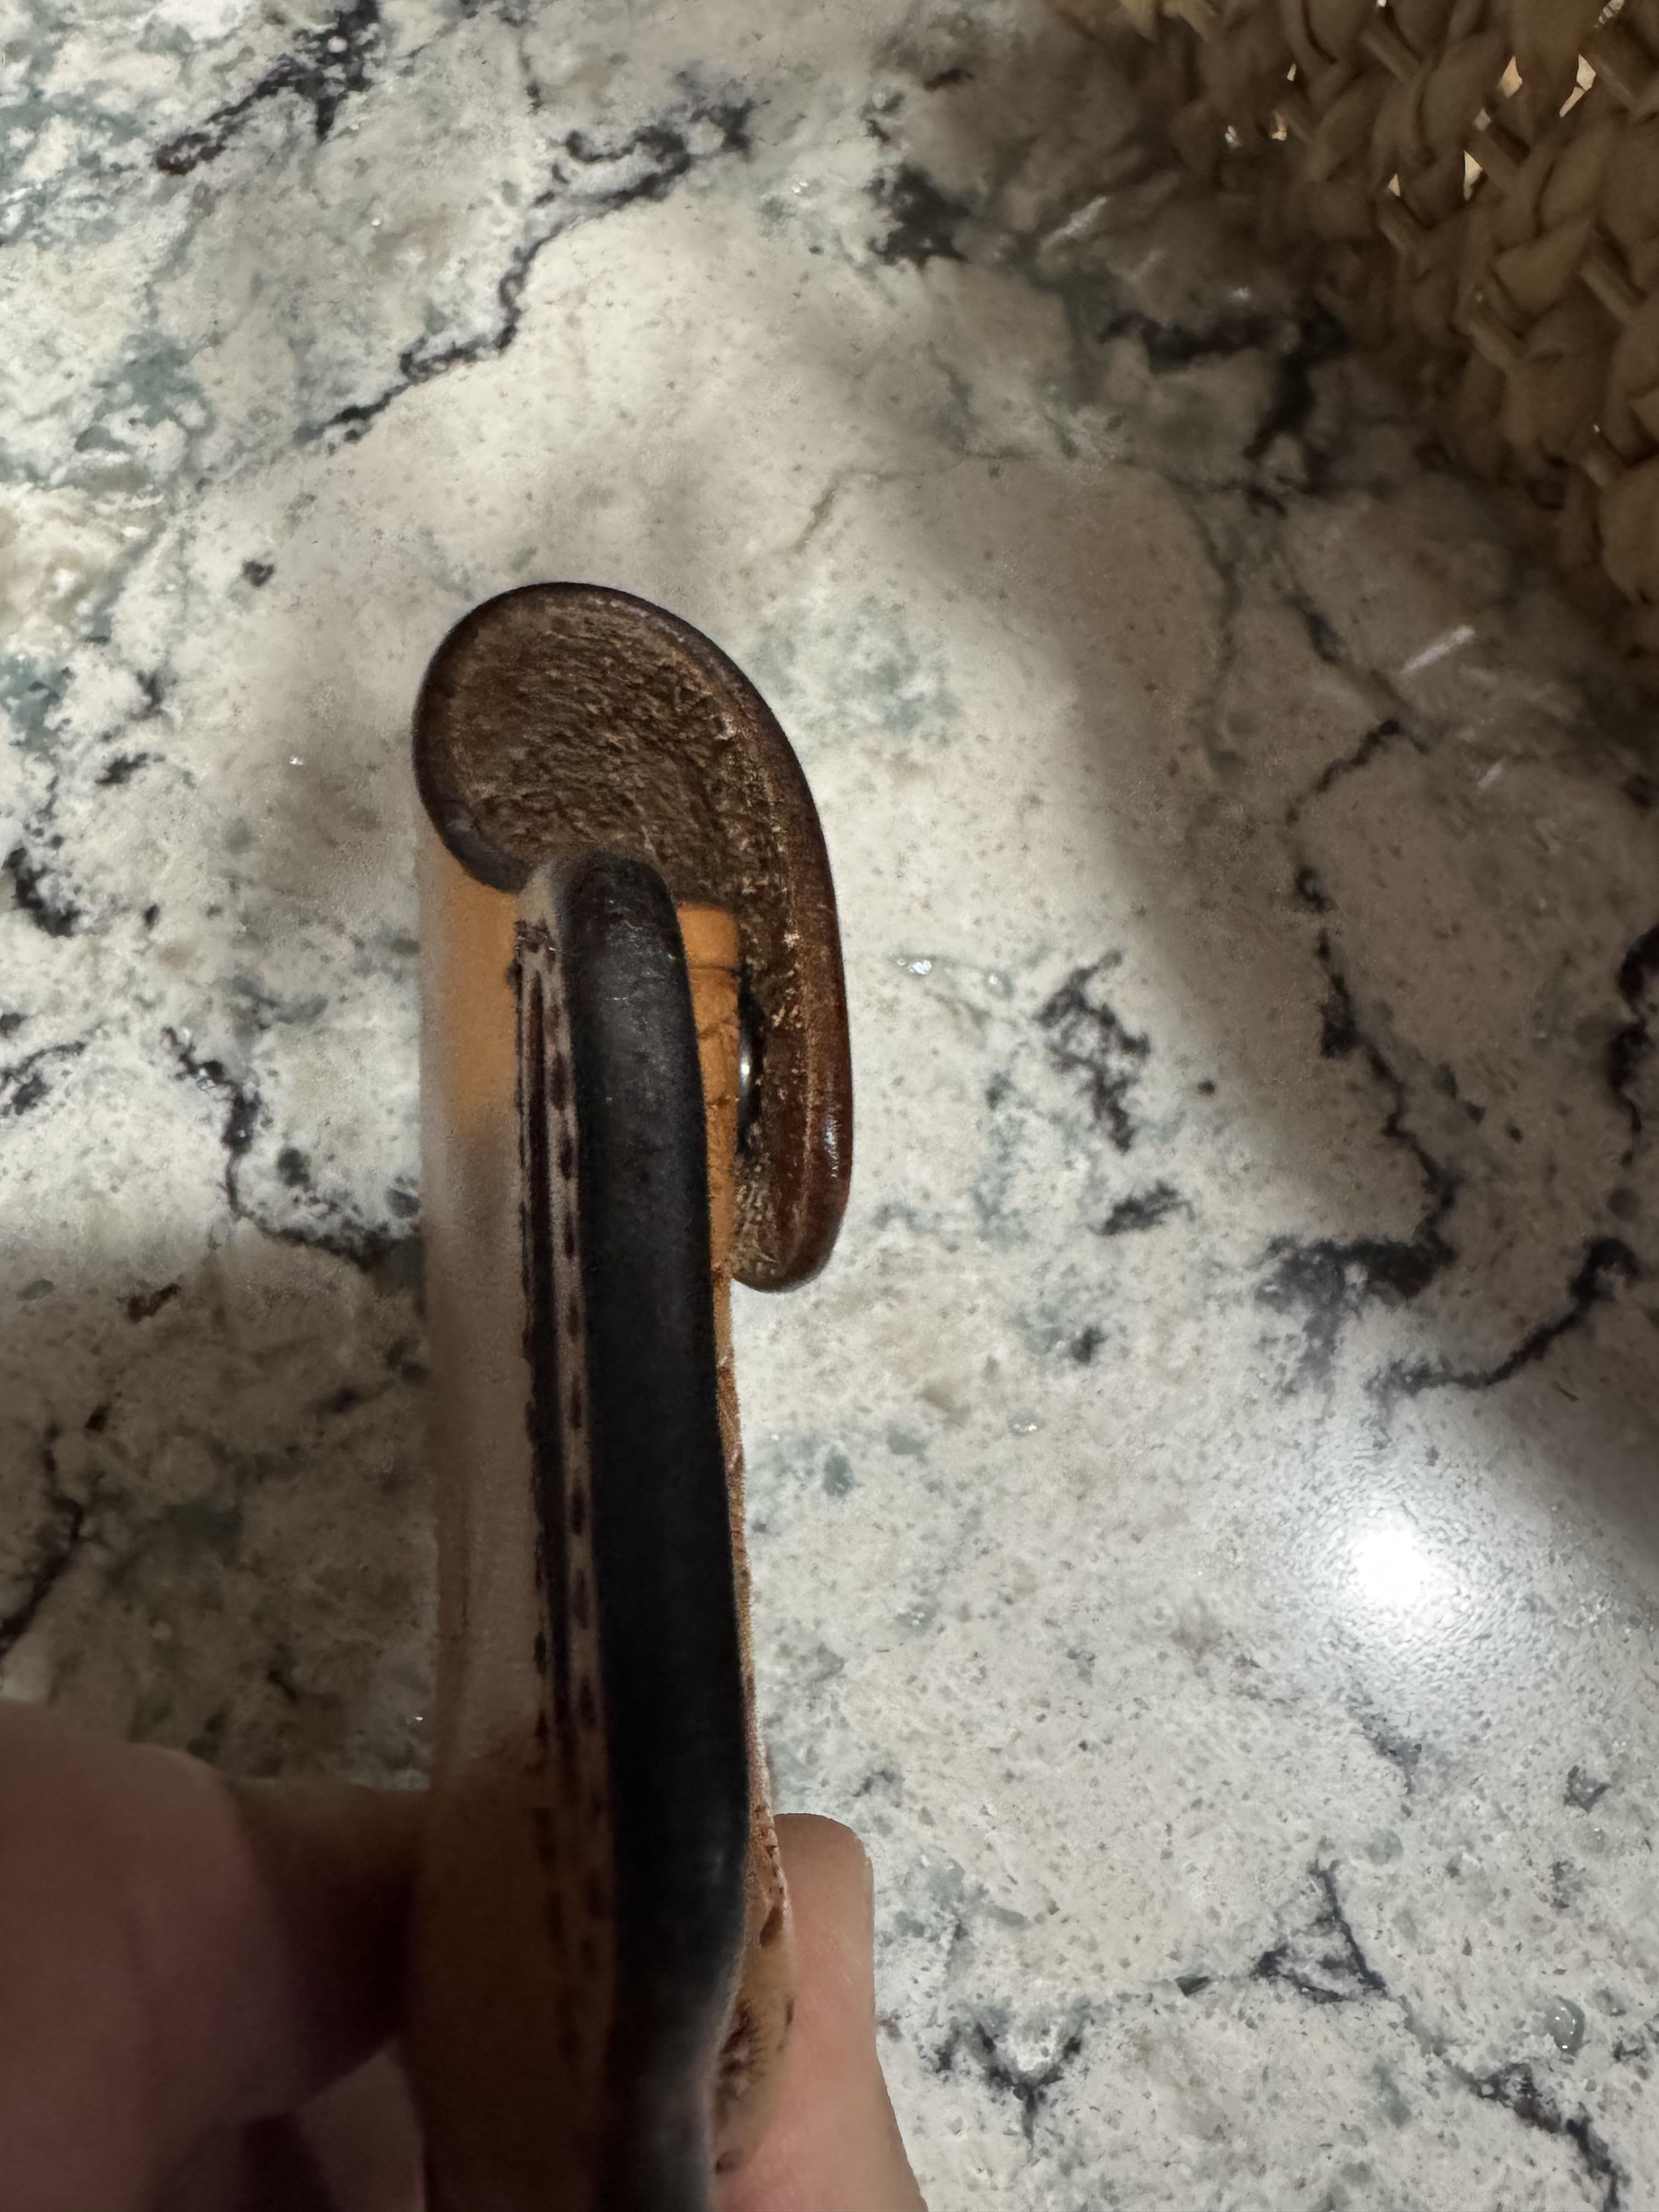
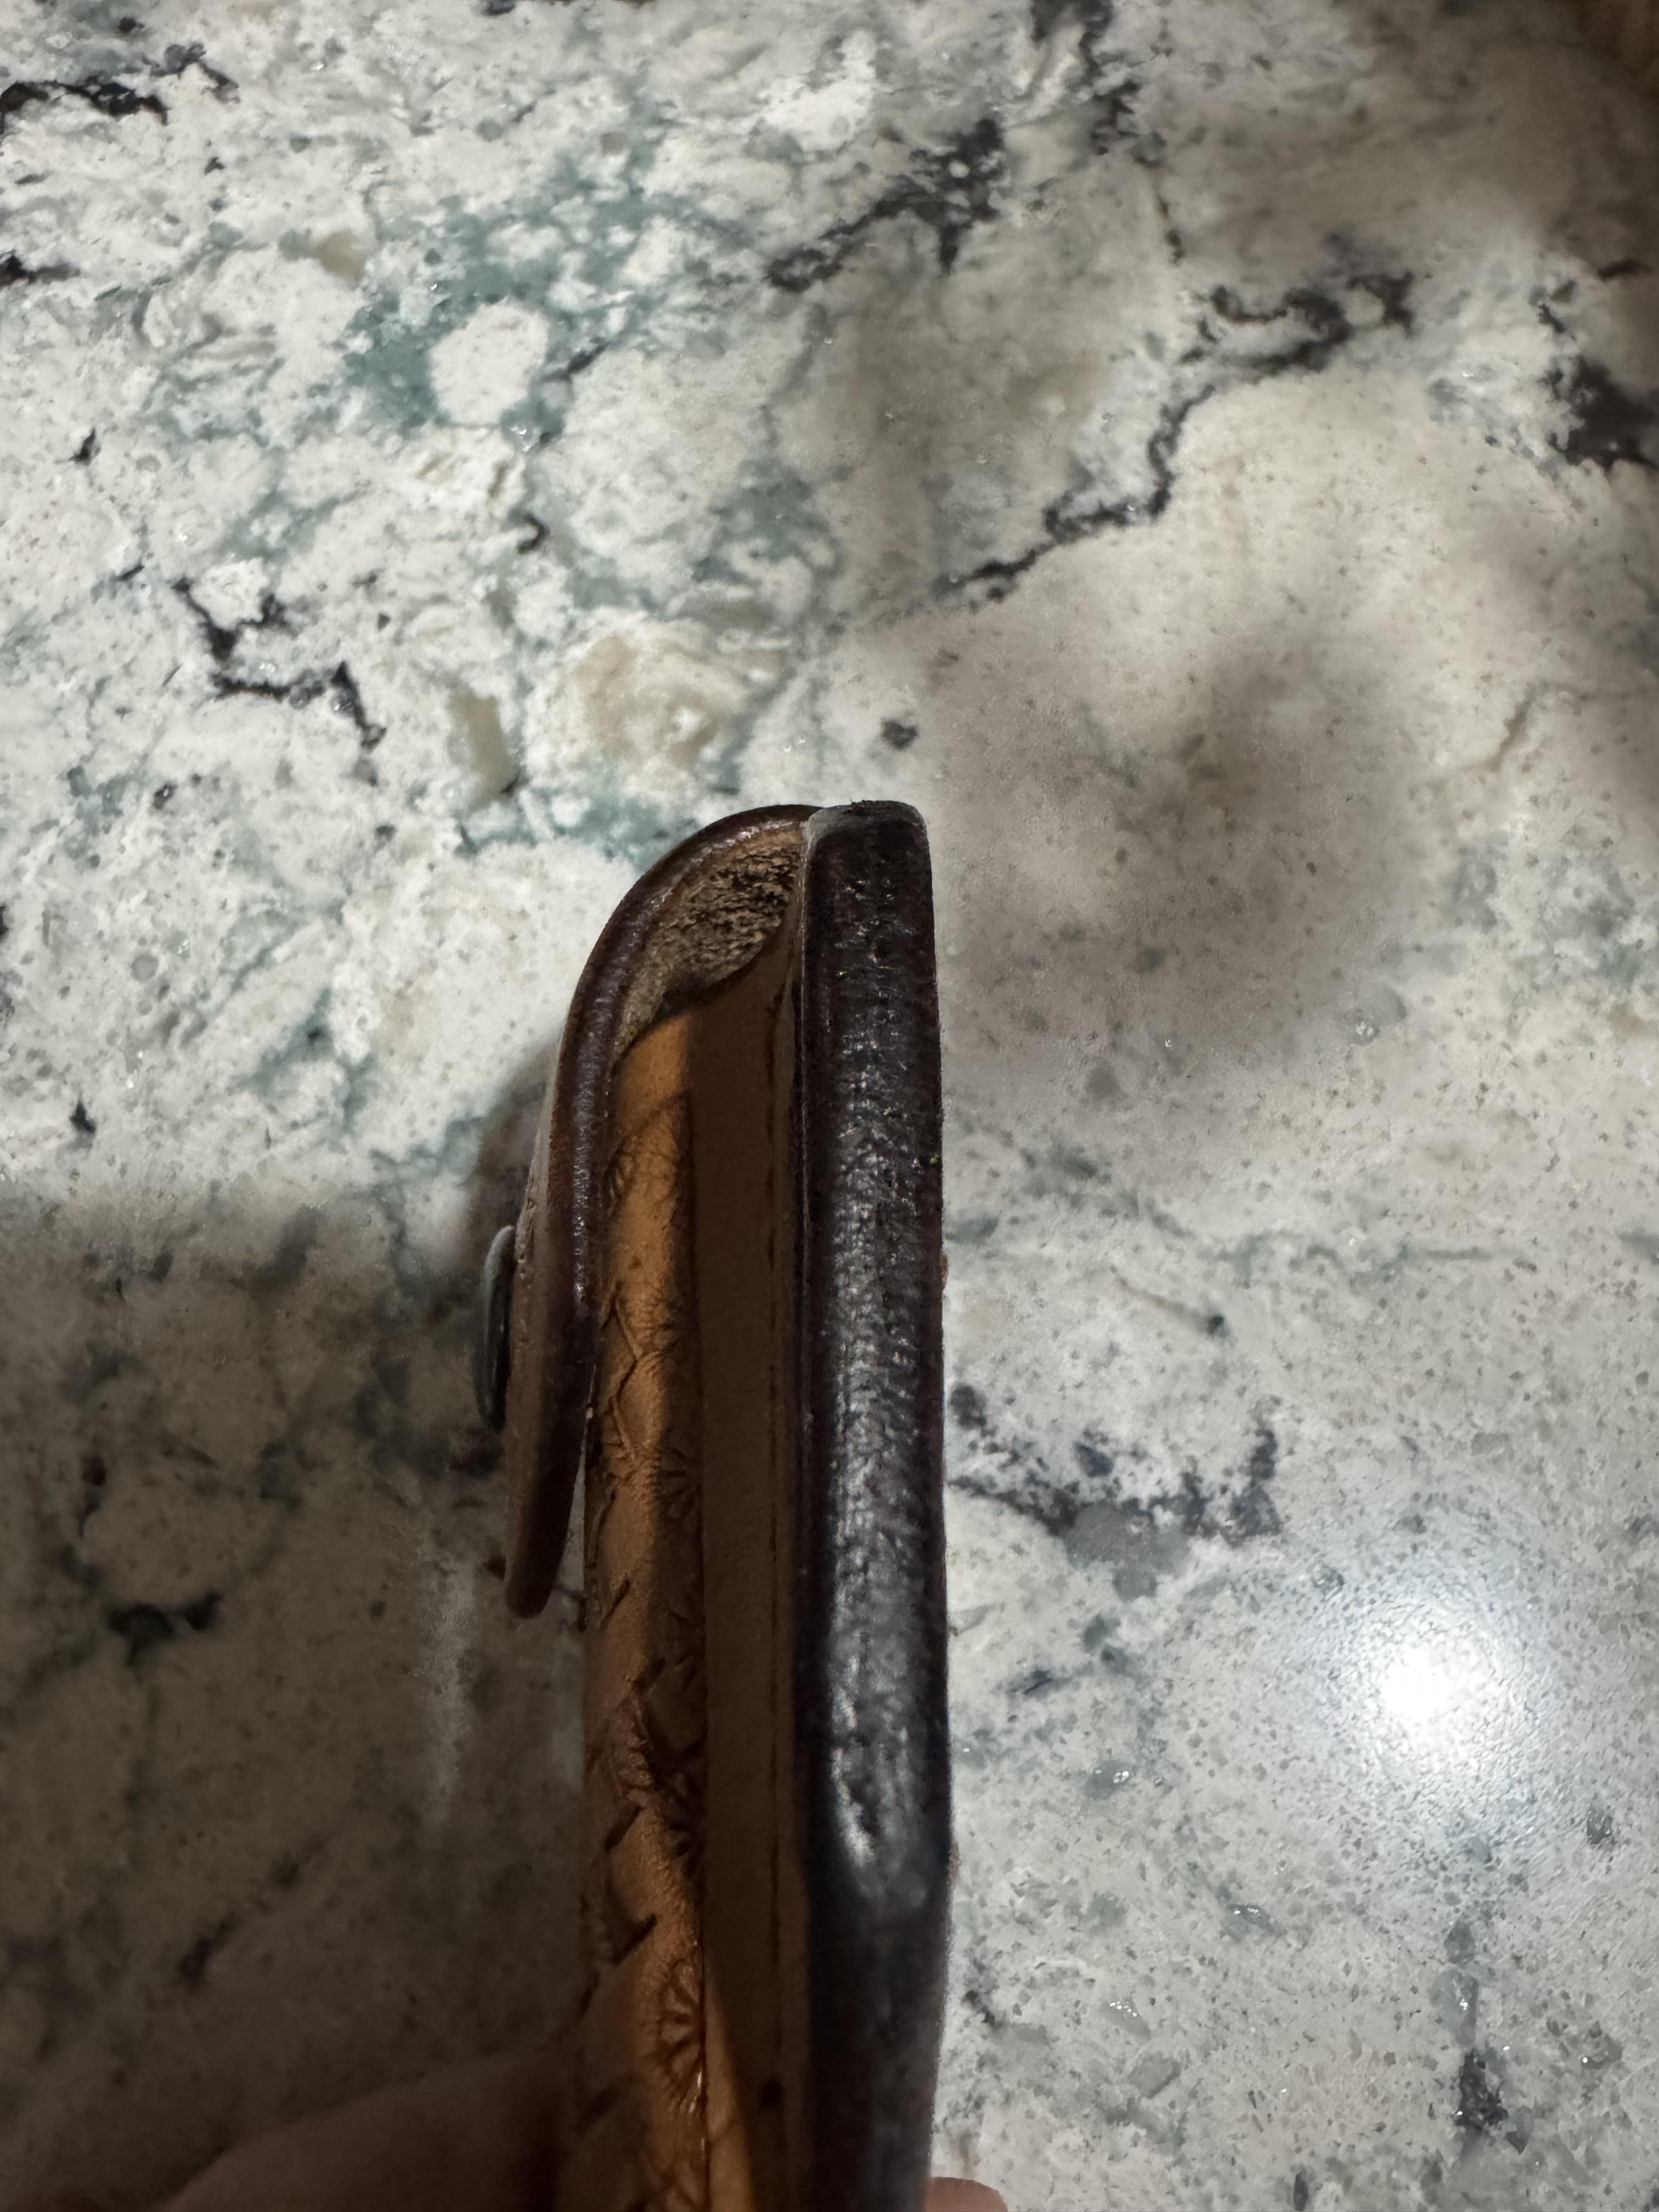
Saw the beautiful work by @Stetson912and decided to give the pattern a try, I am not a floral carver so I went with a basket stamp. I really like the pattern it is a great fit for the weatherman tools. Todd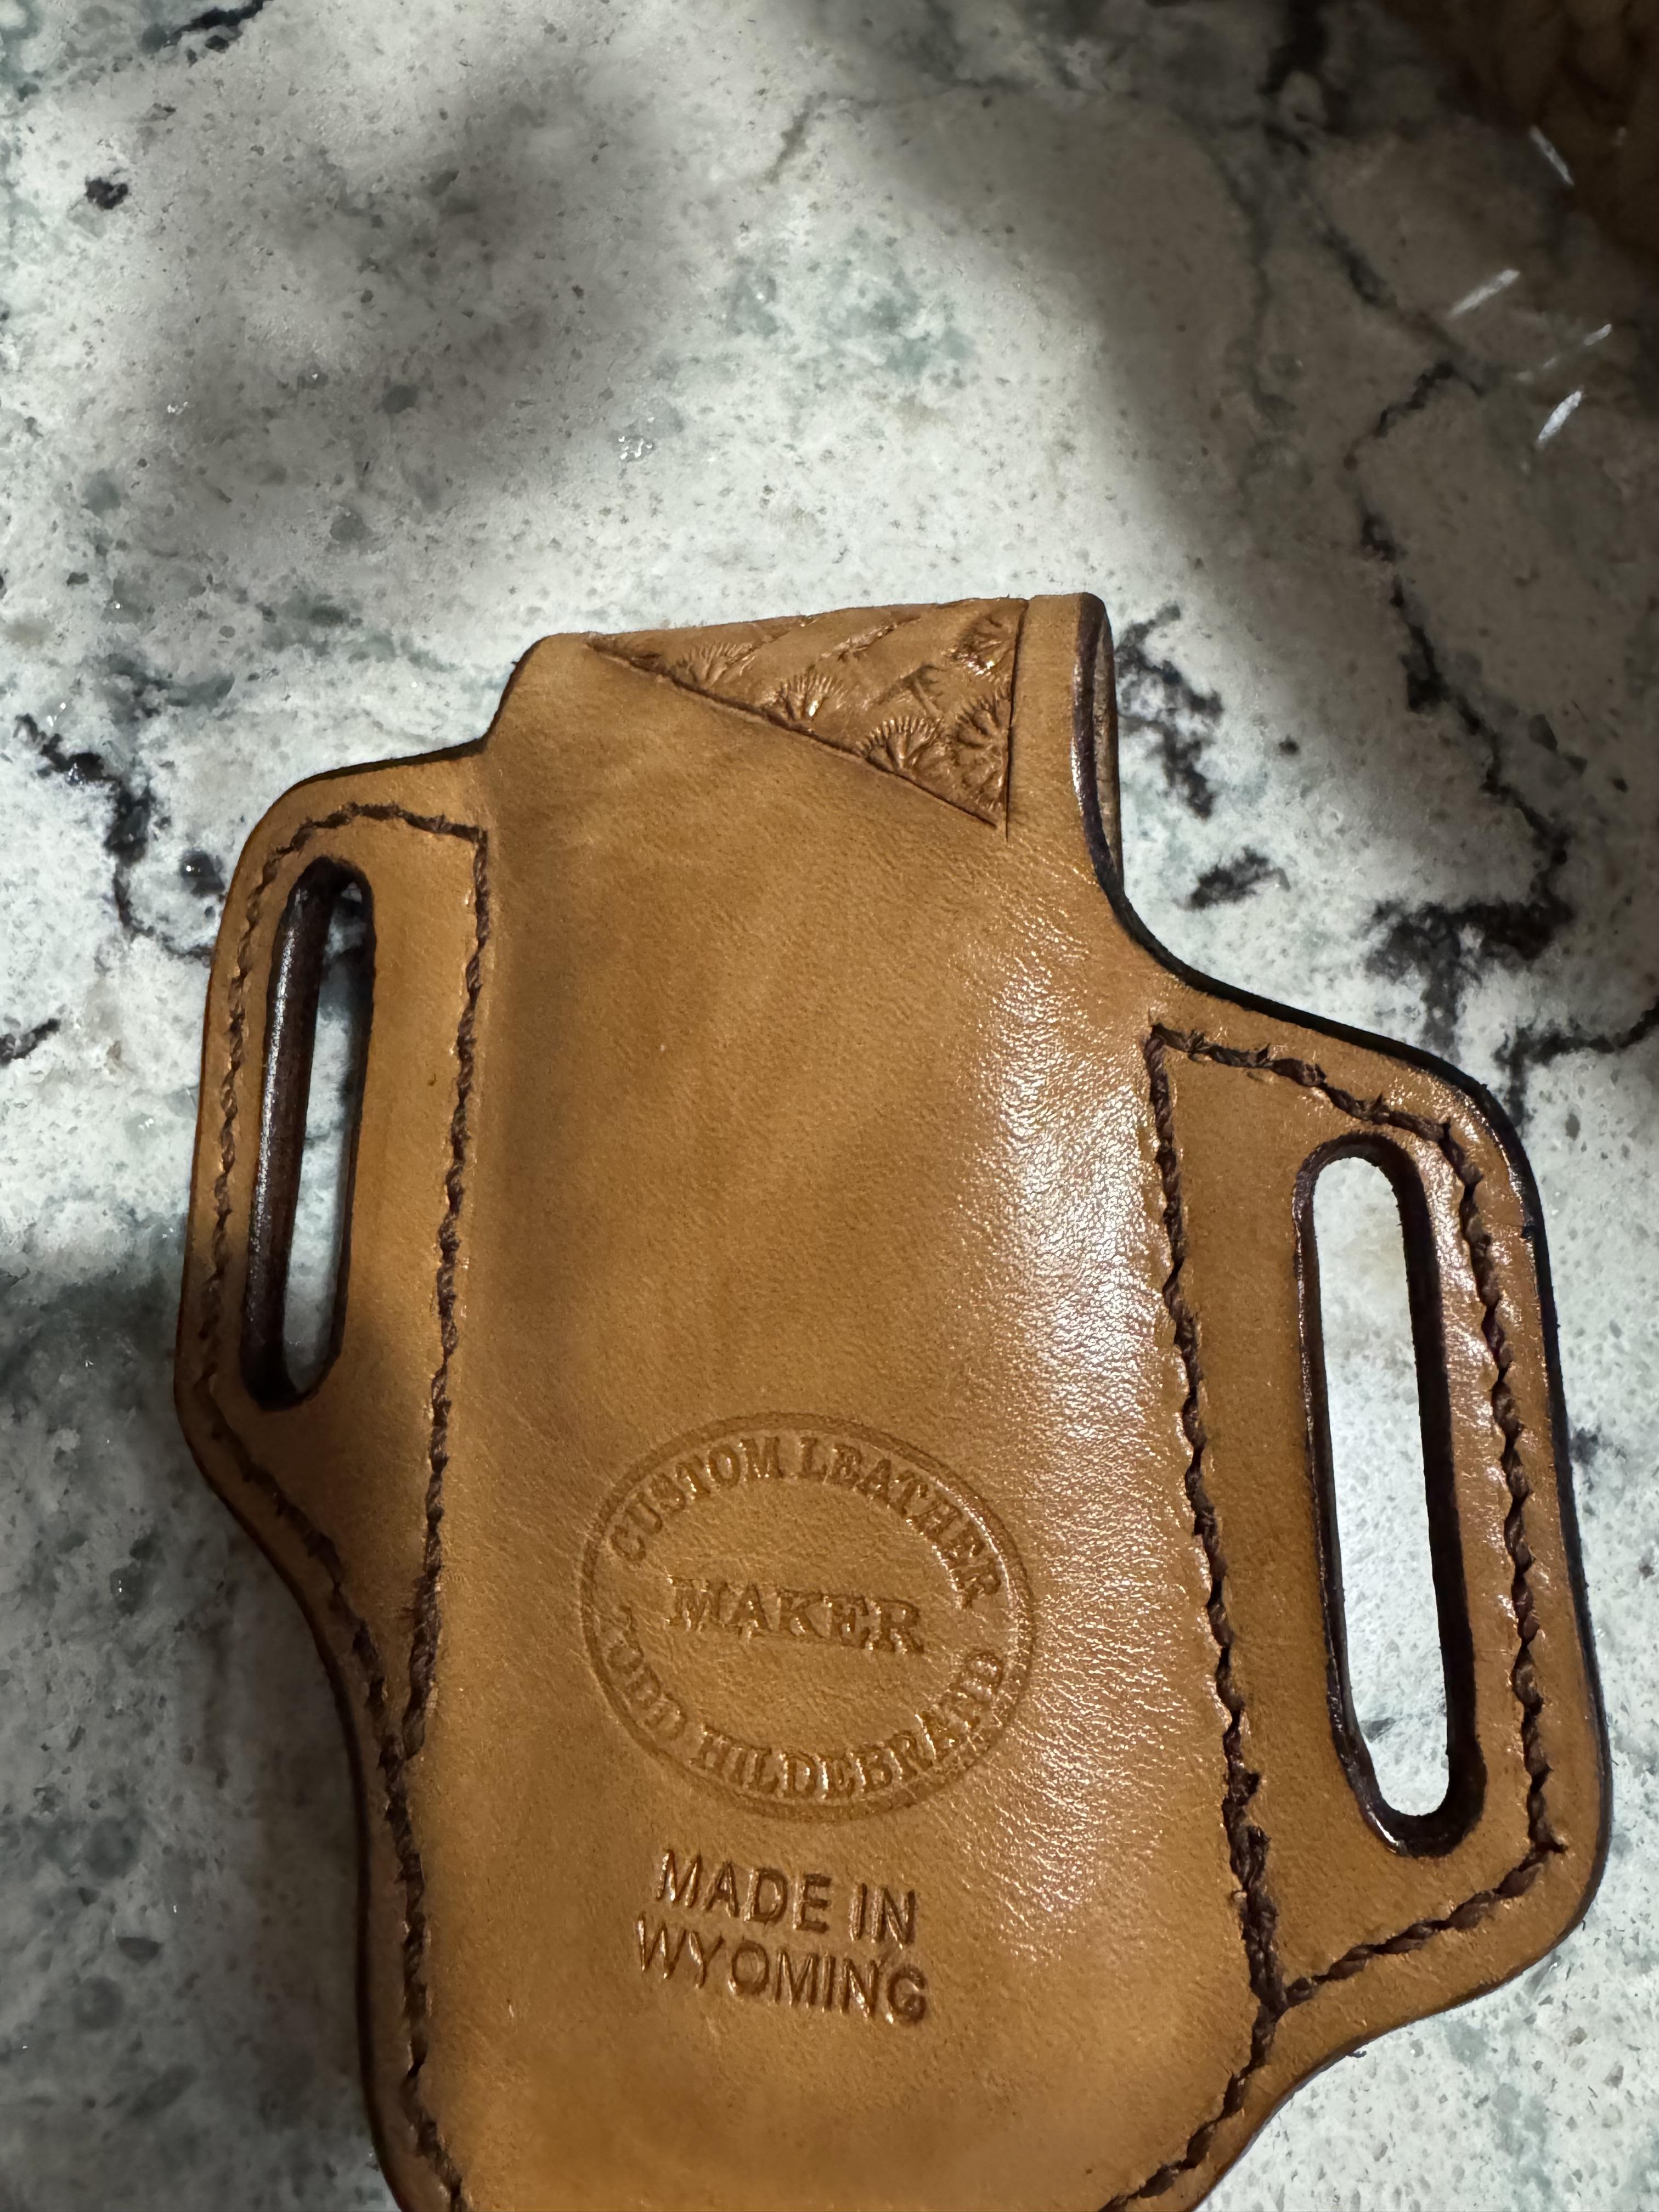
-
Thought so, I have seen them made full leather backs in one piece also from two pieces spliced together just make the join is not in the part that will be sliding through the bit ring as is will wear on the stitching. Also seen them made with webbing and leather. The ones I do not like are the ones made from Biothane because they become very tatty very quickly with wear and the other thing with certain pieces of tack made from Biothane if the gets loose the reins can some times can get wrapped around the horses legs resulting with a badly injured horse at times as the Biothane will not break first the horse will, that's why I like leather for tack over anything else, having said that Biothane can be useful for areas of safety in tack. Once it was held up as a cheap alternative to leather tack but I have noticed how the prices have crept up and are a par price wise to leather tack and for certain pieces of tack or in some cases more expensive, how did that happen especially as with all plastic it will not break down once thrown away like leather tack stitched with linen thread.Sorry not wishing to sound like some hippie eco warrior or something, good leather tack looked after well will last a very long time I have seen this, Biothane will crack and look very untidy eventually and then just gets thrown in the bin not worth repairing. Regards JCUK