All Activity
- Past hour
-
Those look great. The last one, what's the lettering? How is that done
-

Noseband With a Bad Reputation?
BlackDragon replied to TomE's topic in Saddle and Tack Accessory Items
So is this nose band essentially like what a curb strap does, adding extra pressure around the muzzle instead of chin for better control? -
 Thank you kgg for your response. I want to sew through ballistic nylon and harness leather and it appears that this model will do the job. Because it was used by the grandfather of a 30 something year old I think it’s pretty old. I had not thought about replacement parts, so thanks for pointing that out. Again, I really appreciate your thoughts on this.
 -
Noseband With a Bad Reputation?
Tove09Tilda replied to TomE's topic in Saddle and Tack Accessory Items
You're welcome. Have you checked HS Sprenger? I don't know where you can get them in the US, but here in Germany they are amongst THE suppliers for hardware for saddlers. You can only get it with a registered business as far as I know - maybe that's different in the US. I think they might have what you are searching for as they are more specialised in english tack. - Today
-
 Interesting use of your laser.
 -

Singer 29k60 front hand wheel installation
friquant replied to Dlane's topic in Leather Sewing Machines
Hi Diane, Sounds like a complex operation. How about posting several pictures of the parts you bought and the machine it's going into? -
Very nice!
-
Use a dime or coin as a guide and take small straight cuts.
-
So I am very new to leather crafting u have a set of basic tools from Amazon I am cutting out leather neckercheif slides for scouts tonight i made one for myself here it is having s hard time cutting the round coners using an exacto knife.
-
Coincidentally, I had a customer come to my shop yesterday with a dozen webbing straps that I had to sew together in pairs, at the loose ends, with a 3" overlap. I chose #138 yellow bonded polyester thread and used a #23 round point needle. I had to retime/advance the hook to avoid skipped stitches in reverse, and adjust the check spring throw, in addition to increasing the bobbin and decreasing the top tension. All of the tension changes will have to be undone when I have to sew a holster or sheath.
-
Thank you, @Tove09Tilda for your kind words. Welcome to the forum. Hope to see your work here. For the dee rings, these are a bit heavier than needed and I welcome ideas about different designs to pad them. I have seen a crank using a small ring with a tab that was buried between the end of the strap and the padding. It appeared that the tab had a slot and the stitching was placed into the slot to secure the ring. The underlying padding extended past the ring, similar to what you described, but it was a short overhang that looked tidy. I haven't found this type of ring/tab/slot at my usual hardware suppliers.
-
I'll definitely get some pictures. I'm not relying on memory to reassemble, although I've grouped related parts together in containers as I go. I've got a copy of a US Army technical manual with some nice exploded diagrams of all the parts, plus a US Navy guide with pretty detailed disassembly/reassembly instructions.
-
Hi all it’s been a while, I bought a front hub ,shaft , gear from a place in England . The gear hole is .003 smaller than shaft , is it a shrink fit ?, there is no set screw on gear . Any advice on installing this and the front balance wheel would be appreciated thanks
-
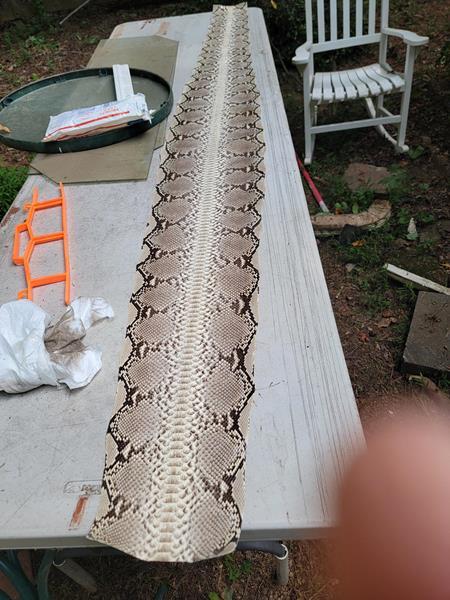
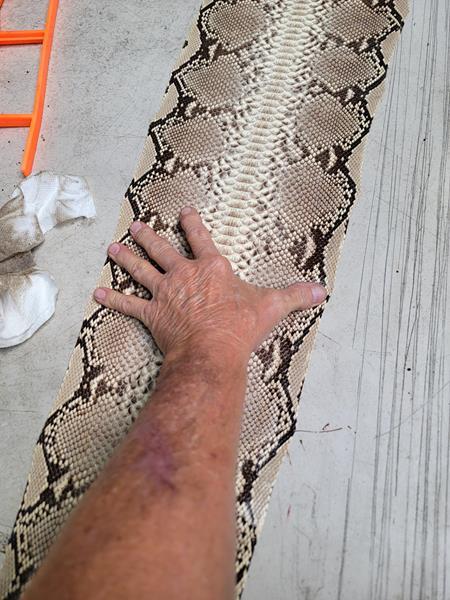
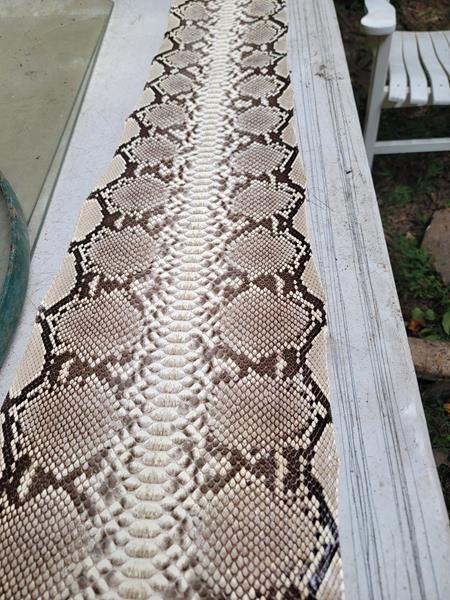
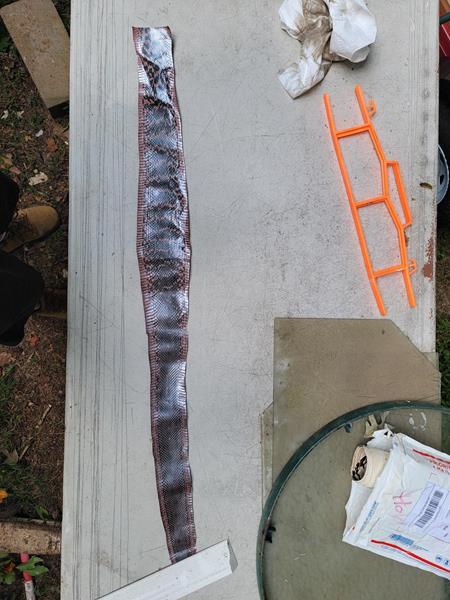
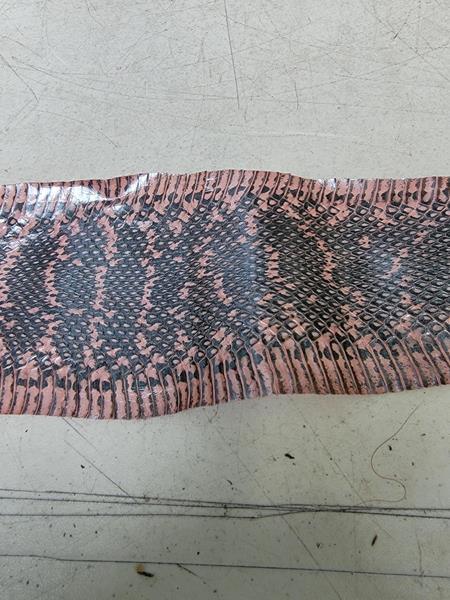
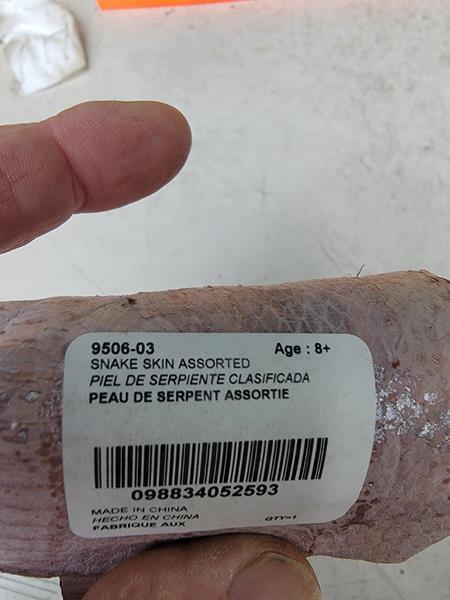
I bought these many years ago and never got around to using them. The large one is Back Cut Python and is 8 feet long and approximately 9.5 inches wide at my hand span. The smaller Tandy skin is probably 2 feet or so. The product number is no longer listed in Tandy's ever-changing catalog. But a fellow user ID'd it as probably Whip Snake, or similar. $180 for both, (+shipping) Shipping will be at my actual cost.
-
These look nice! And welcome from SE Wyoming!
-

Hello from Germany - New Member Introduction
FrankHester replied to Tove09Tilda's topic in Member Gallery
And welcome from SE Wyoming, USA! -
Would enjoy seeing pictures of the machine in its disassembled state, as well as how you've got the parts laid out for remembering how they go back together. The most I've removed on the singer 144 is removing the needle bar rock frame so I could grind a passage into it for a screwdriver to access the needle bar pinch screws. Everything else I fixed in-place.
-
Nice work! Inspiring me to start my tooled belt project! Beautiful work!
-
Nobody is sitting waiting for you to post a question and able to immediately answer you. You need to be patient. I have merged your 2 posts into one to reduce clutter.
-
.thumb.jpg.6e903dd66163ad5672f00f144058c571.jpg) I moved your post to Dyes, Antiques, Stains, Glues, Waxes, Finishes and Conditioners.
I moved your post to Dyes, Antiques, Stains, Glues, Waxes, Finishes and Conditioners. -
 Less is more and reapply as needed. Think of leather like that dry stiff kitchen sponge. Like a sponge, there are little gaps between the fibers. A dry sponge is stiff. Add a little moisture and it absorbs - some swelling of fibers and some remaining in those gaps. The sponge is now soft and flexible. This is the place with oiling leather to usually stop. Yes you can add more and it will take it - just like the sponge. And just like the sponge - add too much and it drips back out. The sponge actually loses a little "body" and gets floppy - just like over-oiled leather. Oil is not a waterproofer. If you are worried about weather effects then you need something else. One brand is SnowSeal. My granddad and uncle fought over grandma's goose grease, Mink Oil paste, there's a bunch.
 -
Moved your post to Leather Sewing Machines
-
I moved your post to Leather Sewing Machines
-
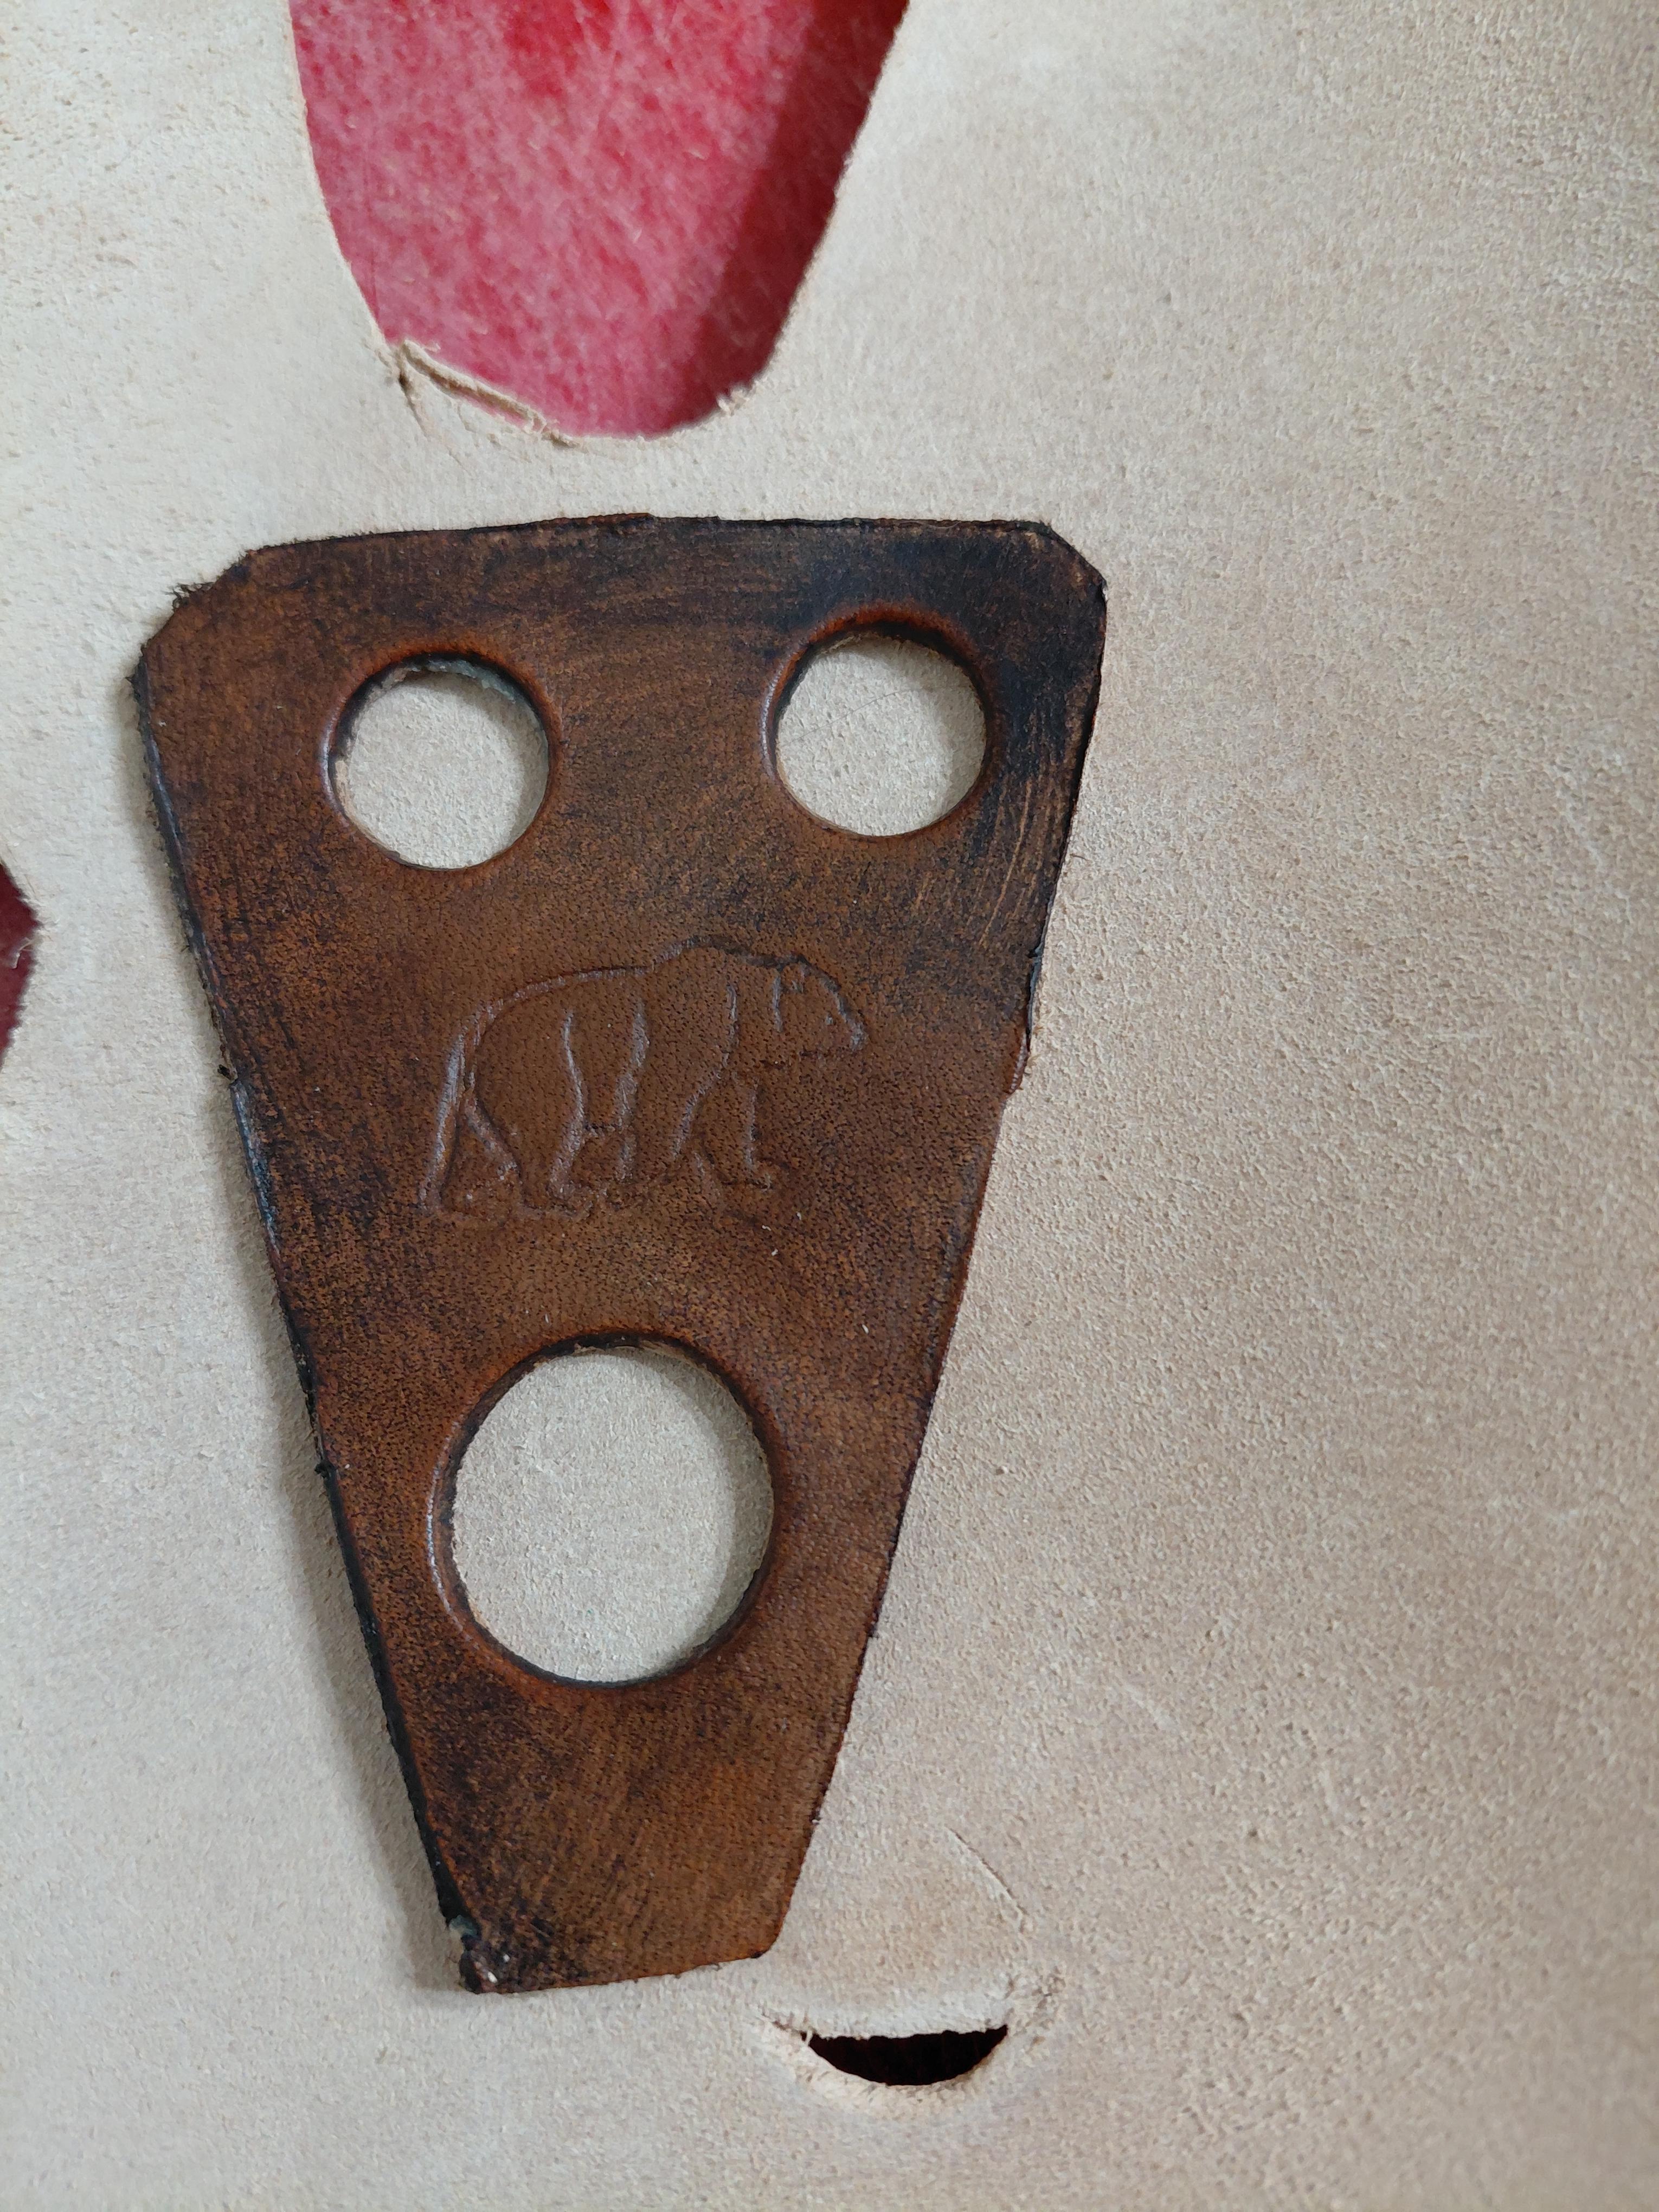
It looks to me like the two circles the leather goes through are grommets that were painted. If you look at the edge of the patch there is a spot where the leather is thicker. I believe that's where the loop leather is anchored, much like you make a purse handle. it's tubular in the center and flat on the ends. It just passes through two grommets. It's a neat concept but I would worry if it can take the weight of the jacket for long. I guess if it's large enough it can be ok.
-
Very nice!