

All Activity
- Today
-
-
Not exactly the same but kinda the same idea. I have a couple other projects going on and then Ill see if I can figure out something like this for my 7 SAUM.
-
there either is a big thumb screw OR a slotted screw (flush with the lid or a bit deeper) in about the same spot for adjusting the foot pressure. But if you dial in a too low foot pressure the friction between needle and leather may lift your sewing material when the needle bar is rising.
-
 Some AI notes on Jojoba oil and Neatsfoot oil. Jojoba oil is chemically nearly identical to the sperm whale. Jojoba oil is a liquid wax ester that closely resembles human sebum. It penetrates leather fibers well, moisturizes deeply, and is less likely to darken leather or cause discoloration. It is also stable, won't go rancid, and is hypoallergenic. It is often recommended for delicate leather items and is favored for leaving a natural feel without heavy saturation. However, it is more expensive and can be harder to apply evenly without over-saturating the leather. Neatsfoot oil is derived from cattle bones and is a traditional, widely used conditioner for rugged and outdoor leather items like boots and saddles. It penetrates deeply and restores suppleness and flexibility to leather. However, it can darken leather significantly and may turn rancid if over-applied, which can negatively affect the leather and its stitching over time. It is suitable for thicker, durable leathers but needs cautious use. Neatsfoot oil is still commonly used for leather boots, saddles, and outdoor gear. It deeply conditions but may soften or darken lighter leathers over time and must be used in moderation to prevent damage to stitching. kgg
 -
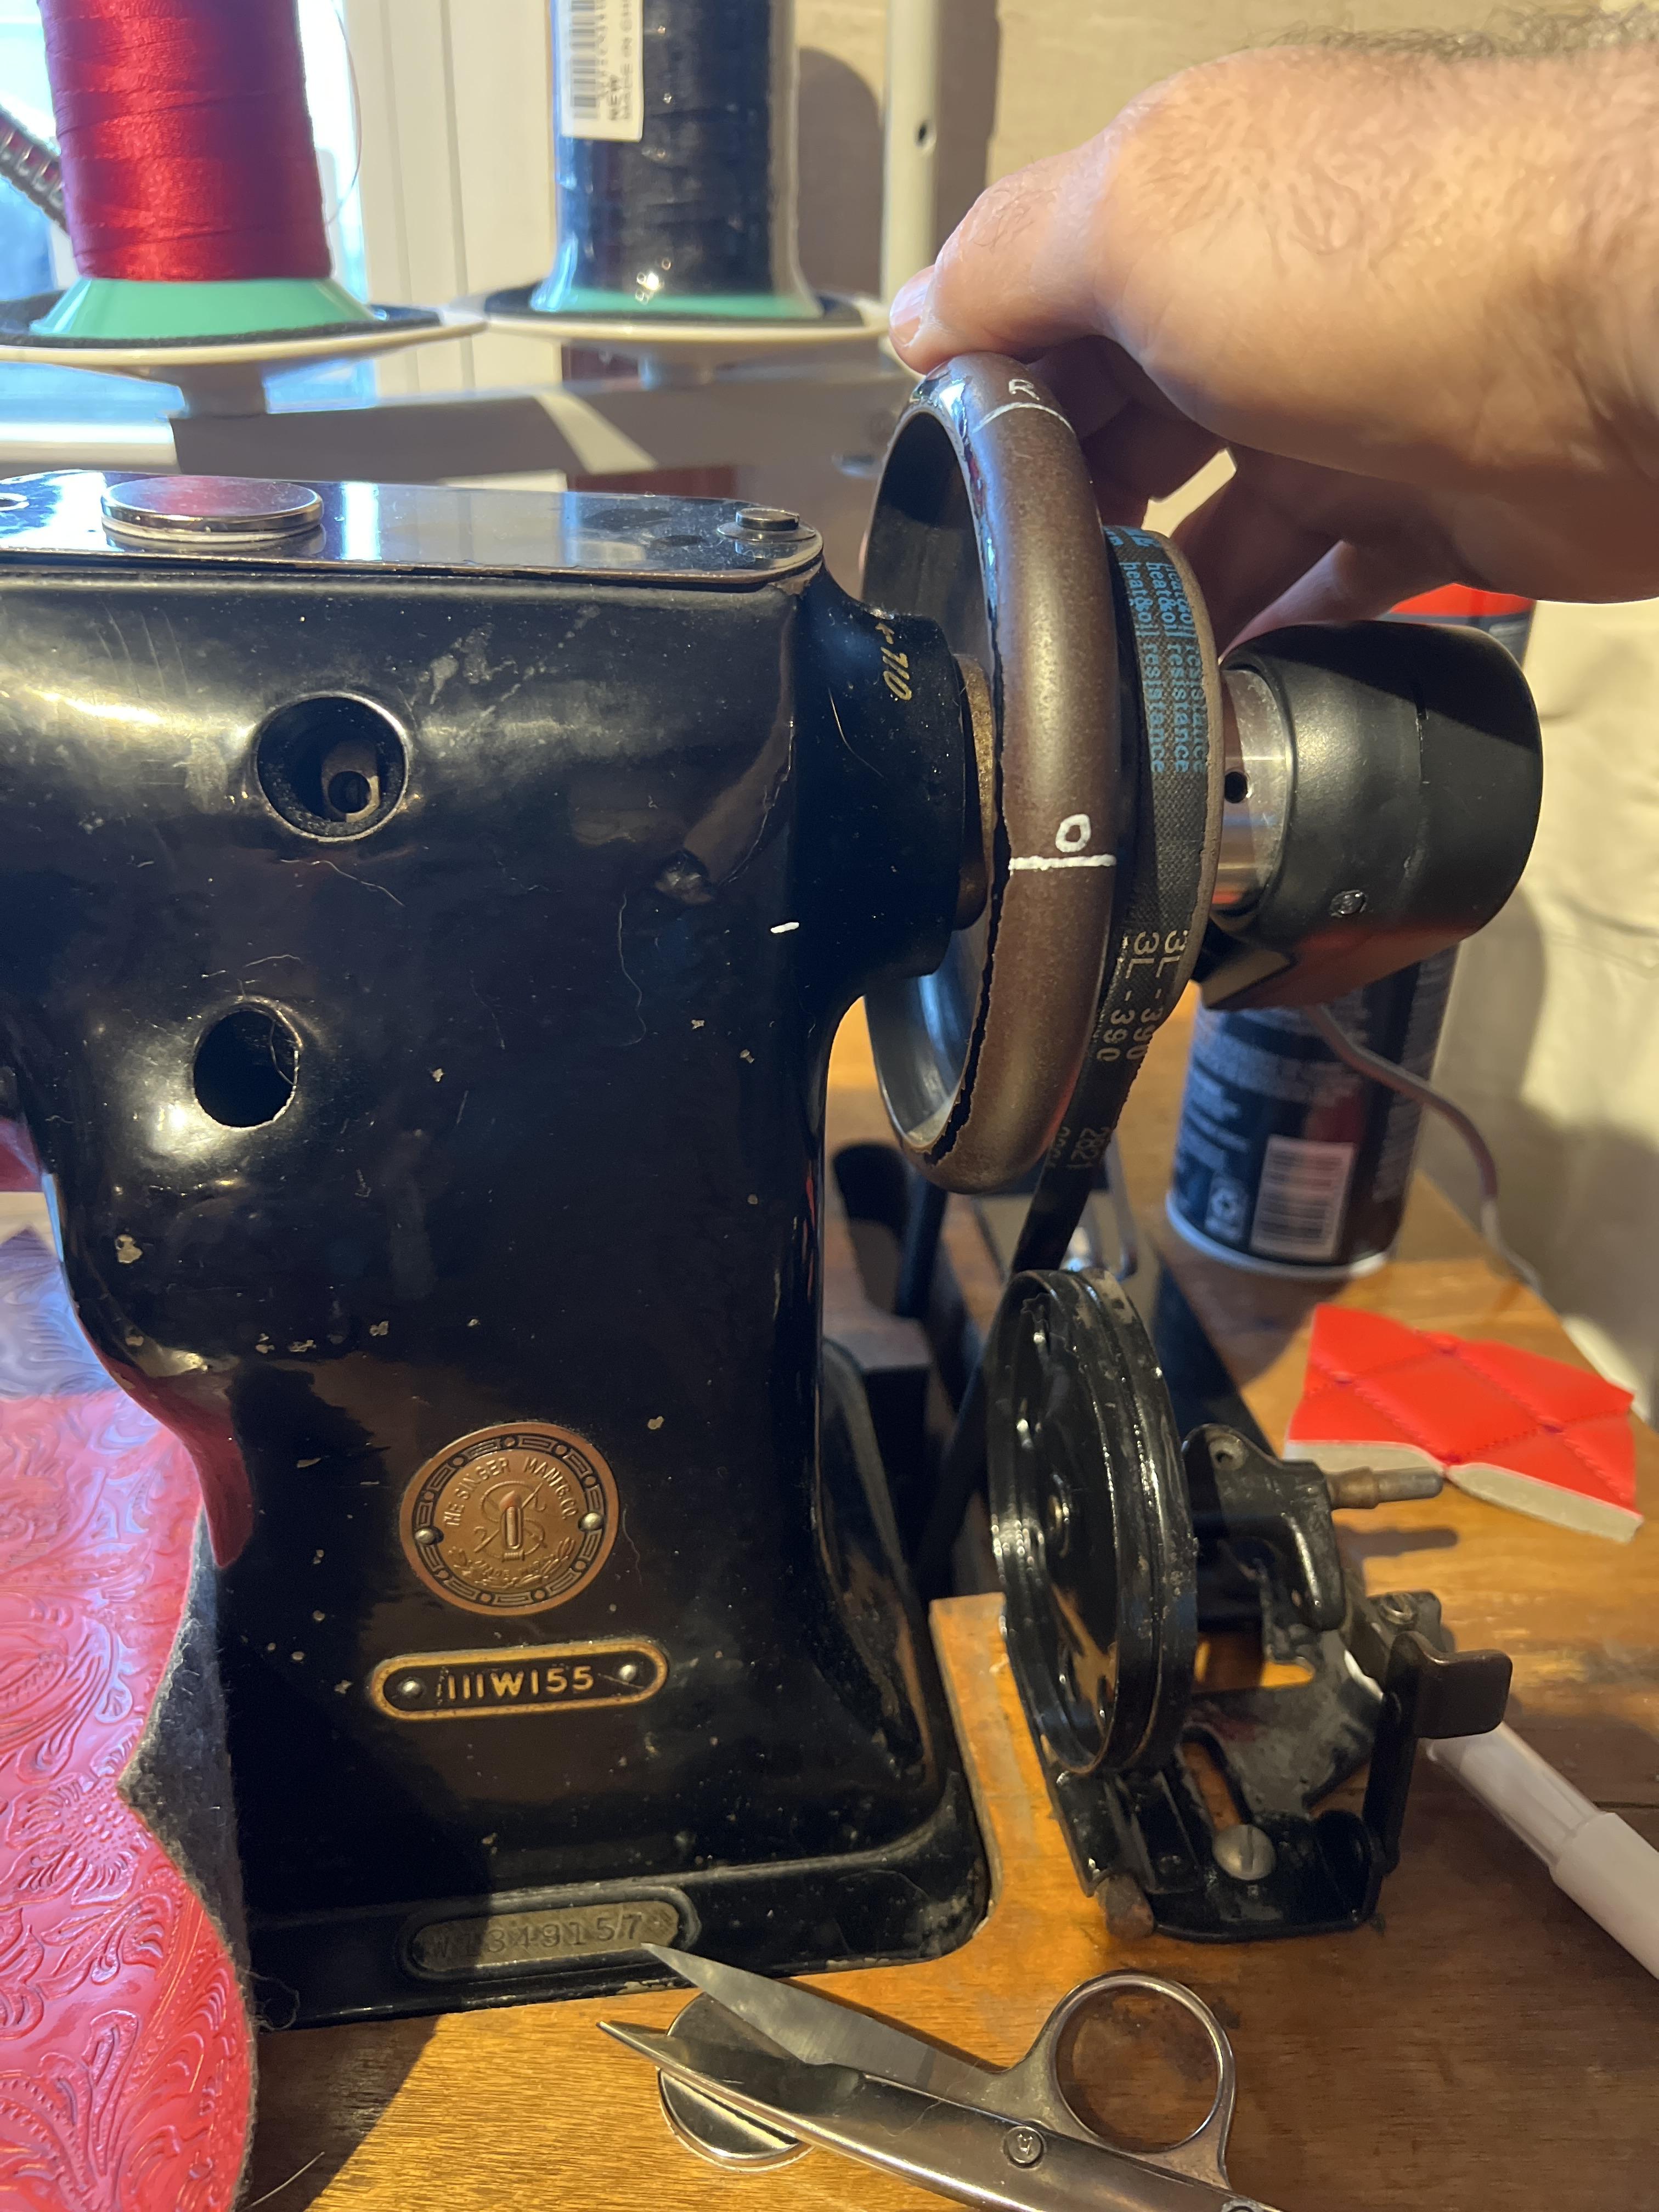
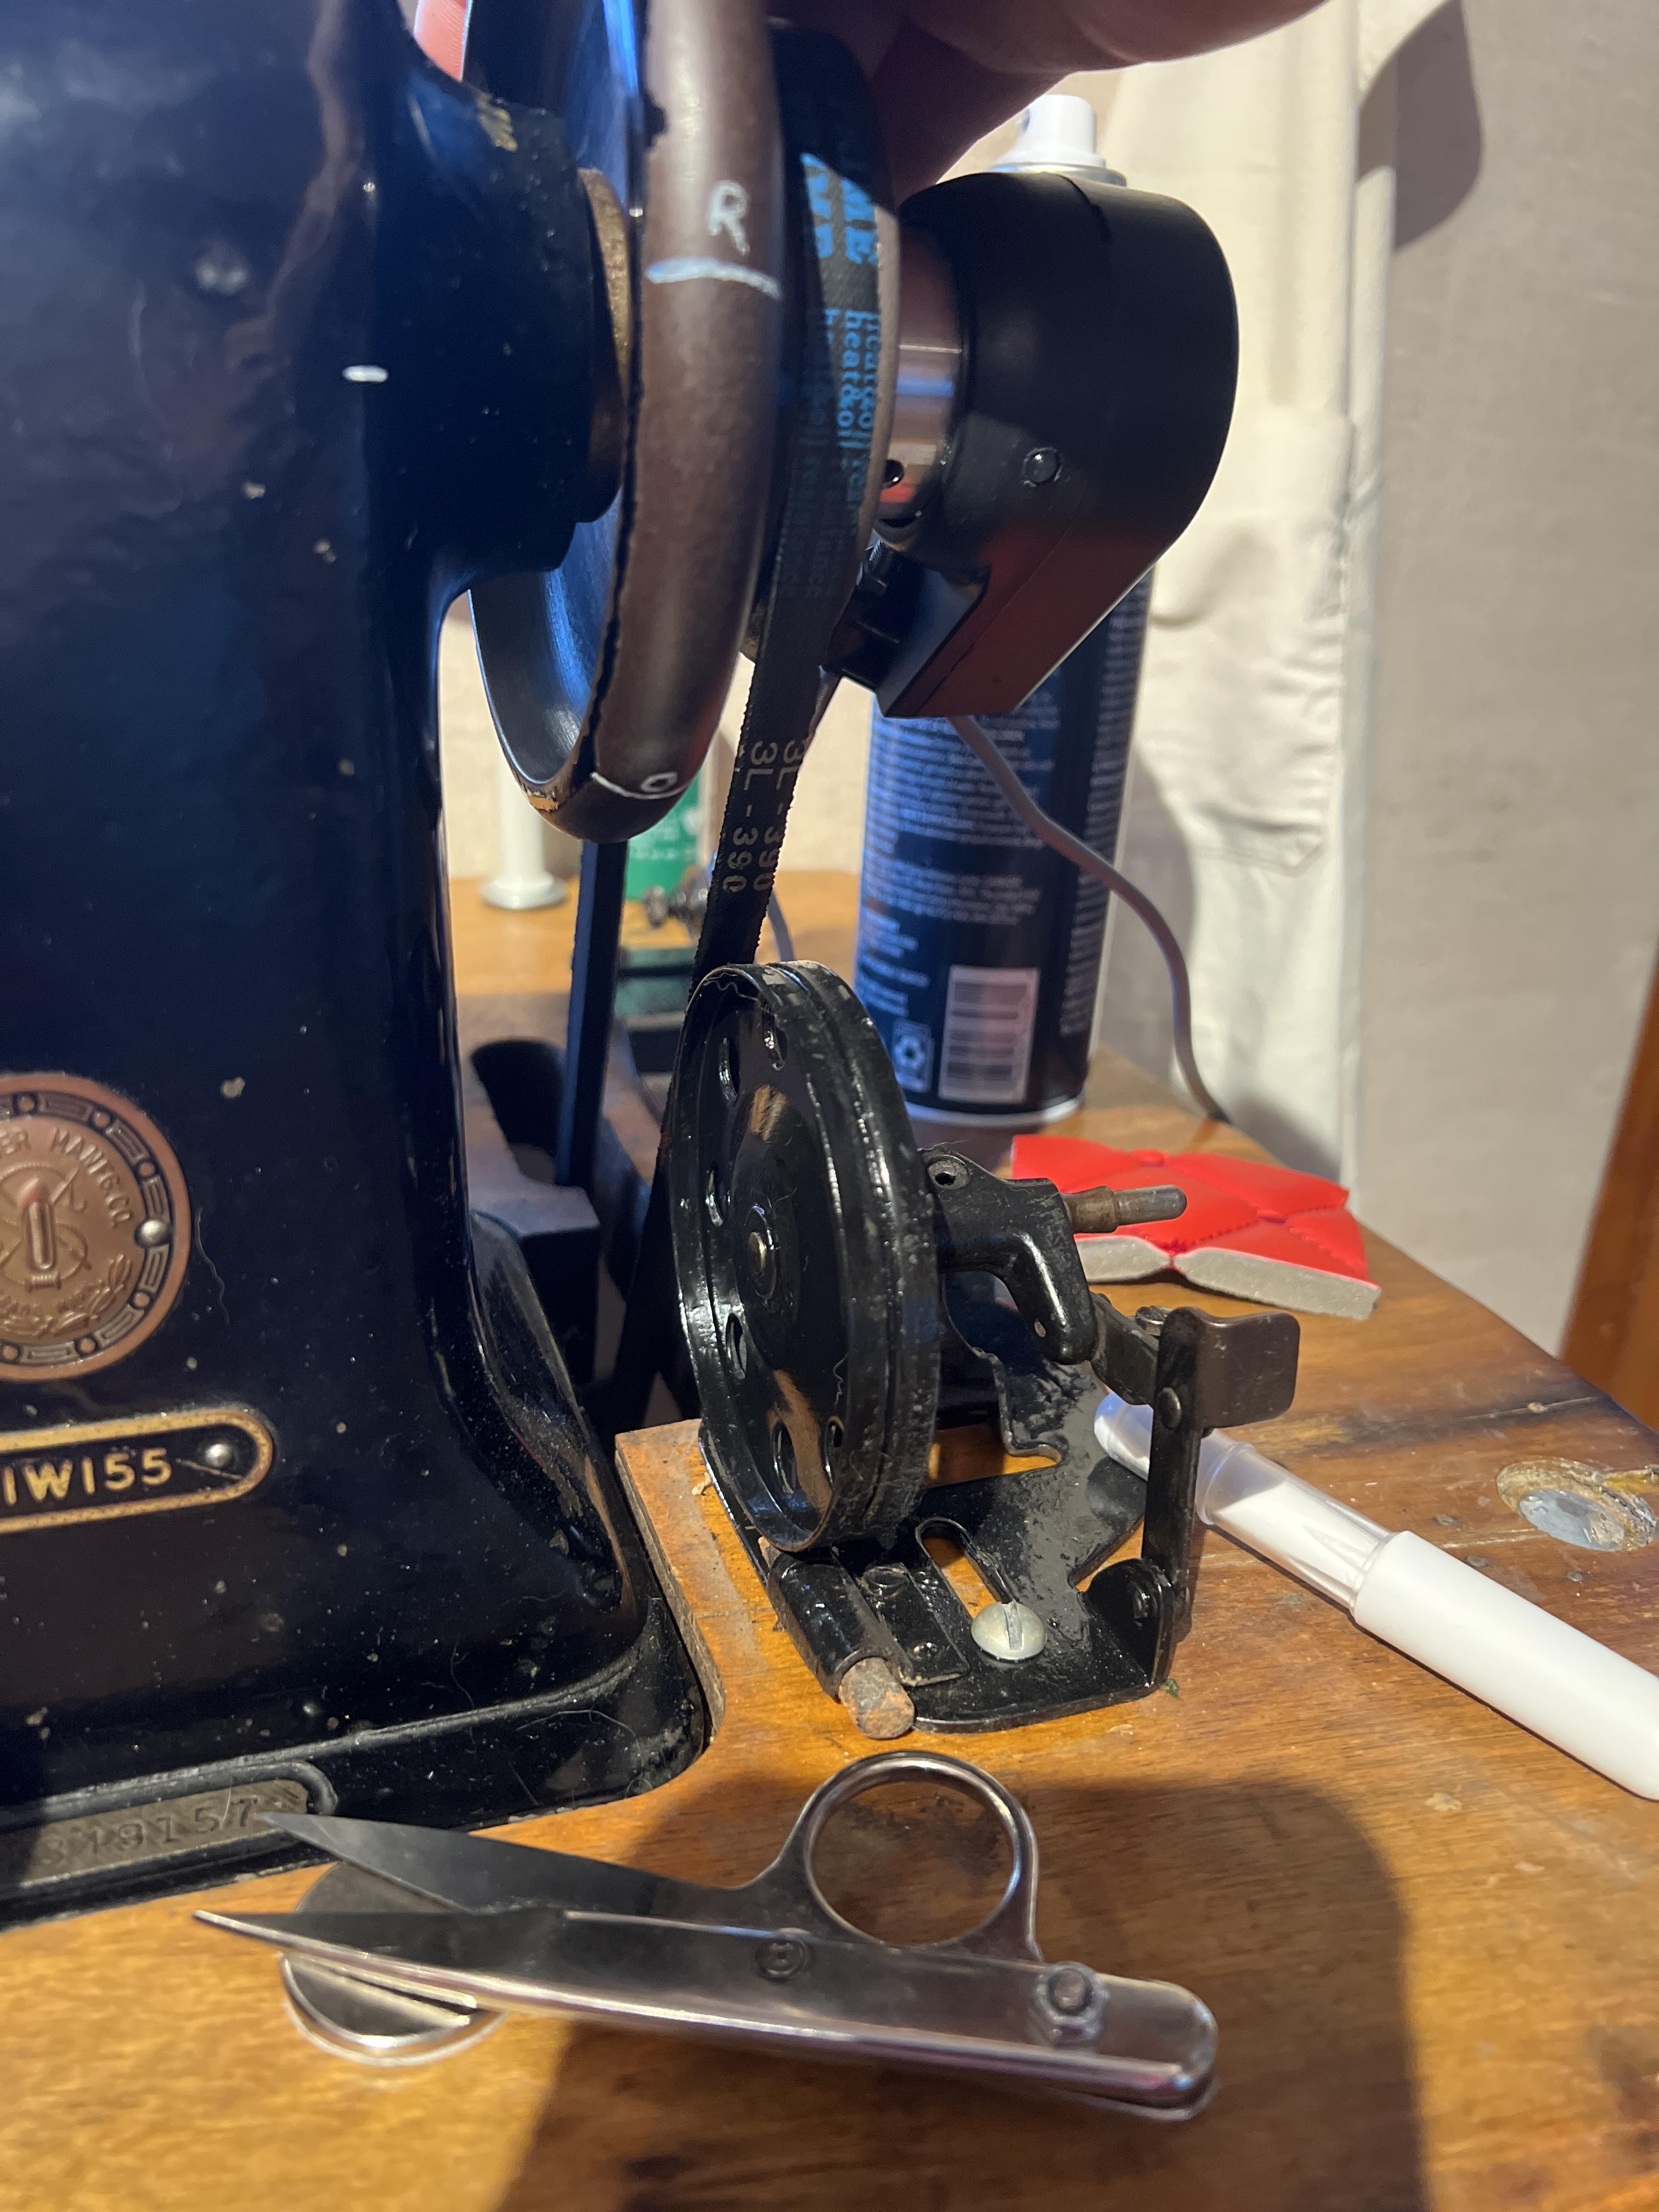
Do you mind posting a photo of the top of your machine?
-
 Hello, Tove! Thanks for your advie! Yes, I didn’t apply any sealer to the shoes, since many YouTubers in their videos just use conditioners after re-dyeing their shoes. They then create a gloss or mirror shine, which looks like a coating or sealing effect. So I did the same, but I didn’t realize it would turn into a disaster. I've just looked up that Fiebing's Caranauba Creme which you've mentioned but fortunately it's not sold in Korea. I think I might put Fiebing's Leather Sheen or Resolene on my shoes after I re-dye them again Also I've seen many people talking about using neatsfoot oil, let me look into whether this is also suitable for sealing my leather shoes, or if it will play more of a conditioner role for them.
 -
Thank you kgg! These are fantastic works
-
Below is the photo which is mistakenlly pulled down. It was after I deglaze the shoes thorugh acetone.
-
 Skylerlubert joined the community
 -

Shoe Repair Machinery for Sale in Covina, CA.
AlZilla replied to Shoe repair daughter's topic in Used
Hi @Shoe repair daughter To do this right, we really need a listing of what you have, pictures, condition, pricing and whether you'll ship or if it will require pick up. Thanks for offering it here. The Marketplace Rules are linked here for your review: https://leatherworker.net/forum/forum/71-items-for-sale/ -
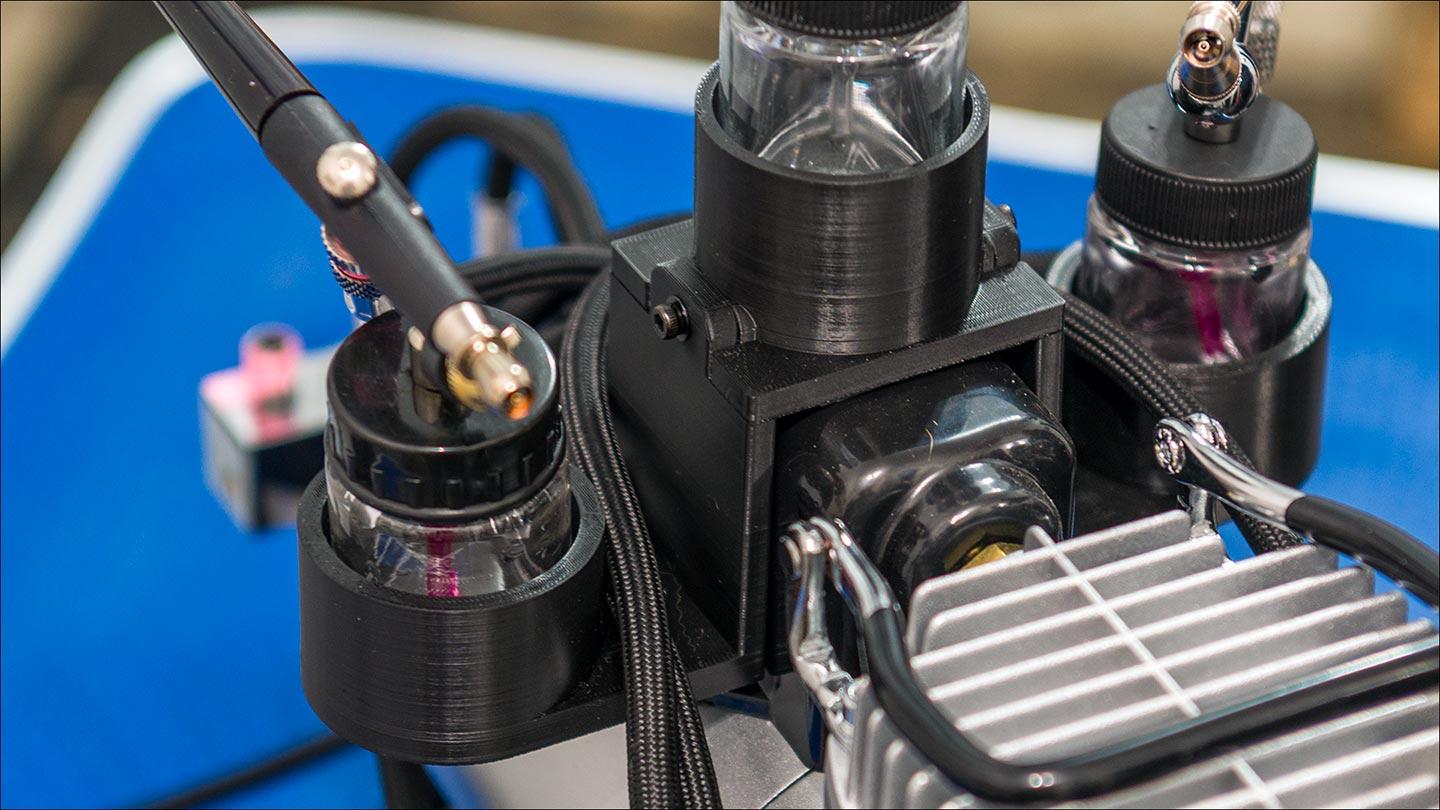
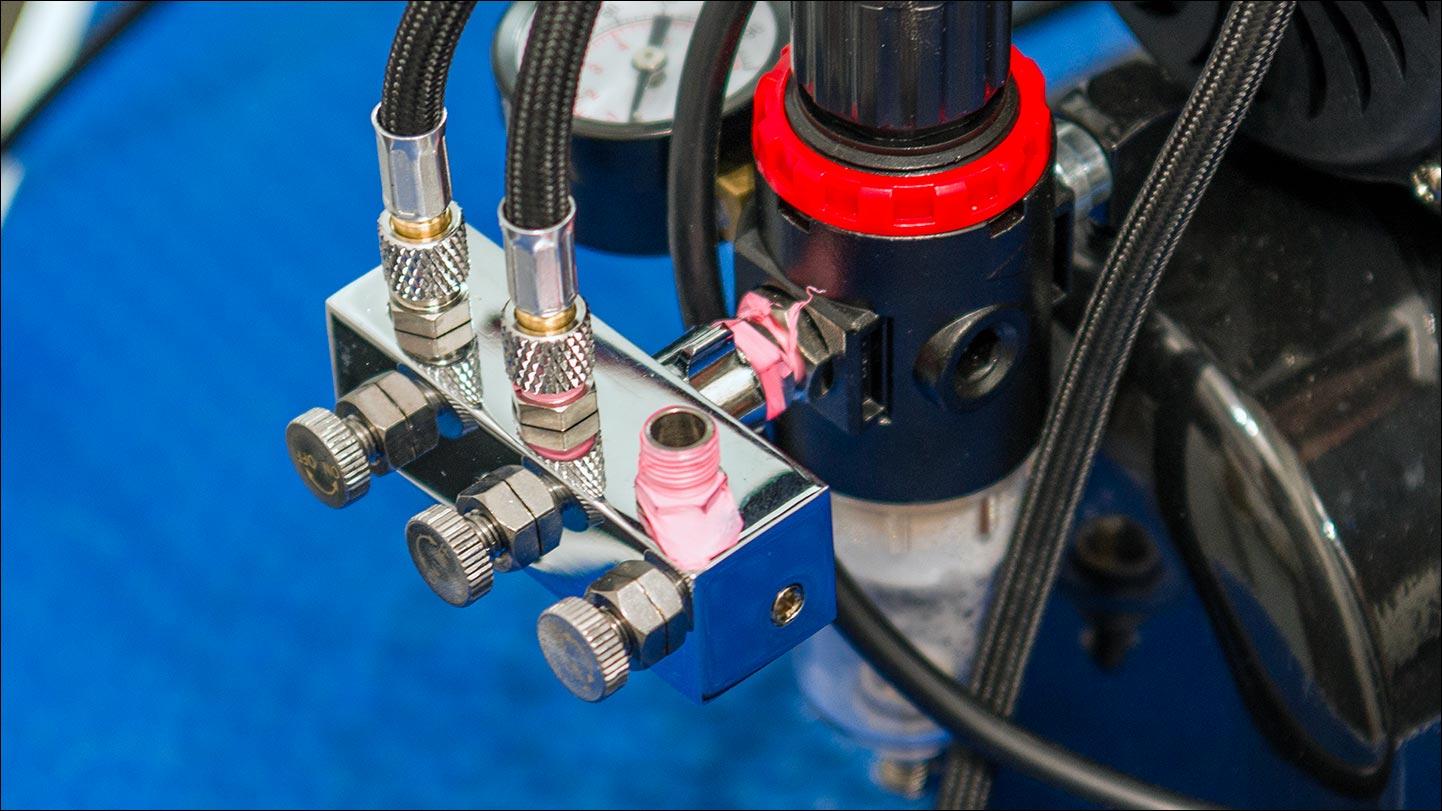
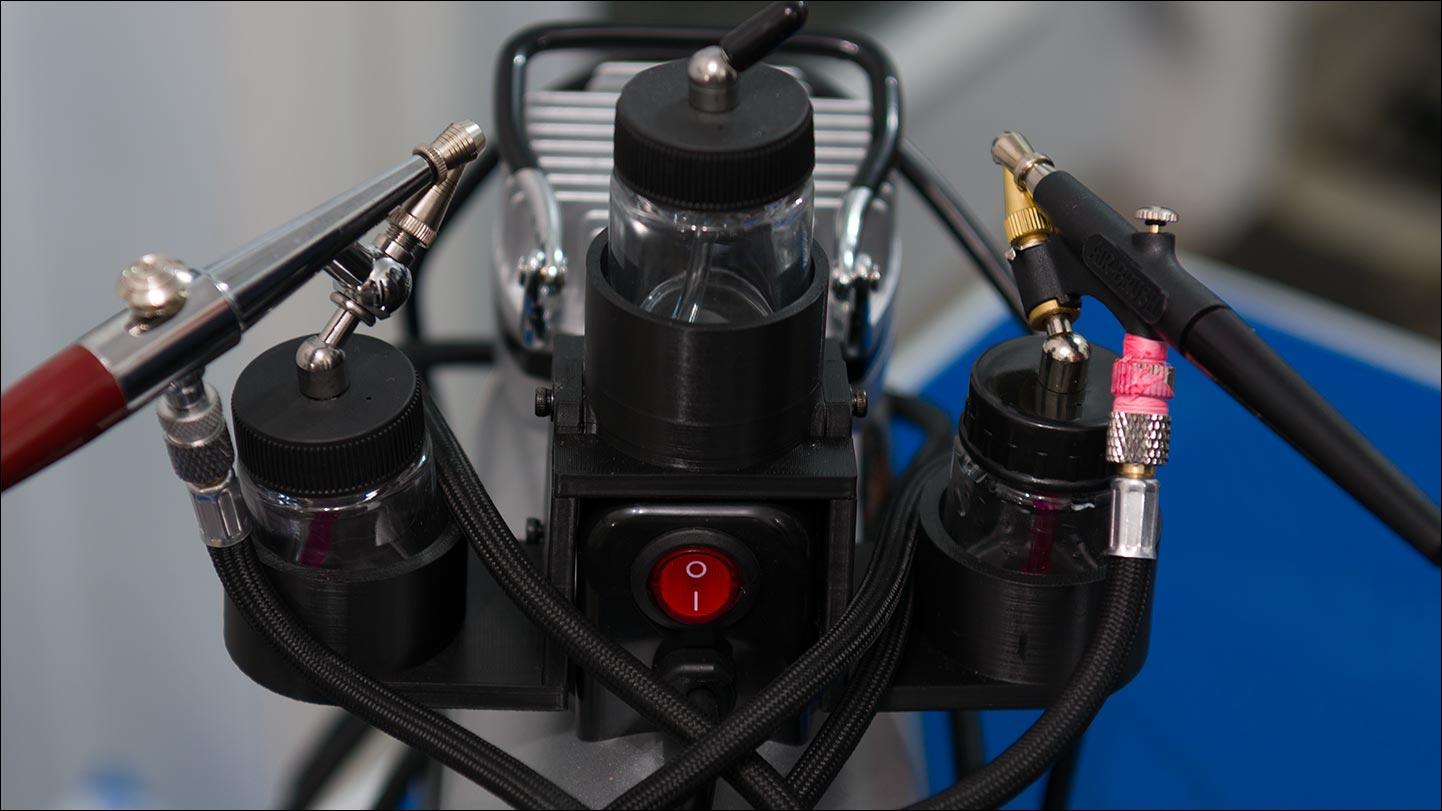
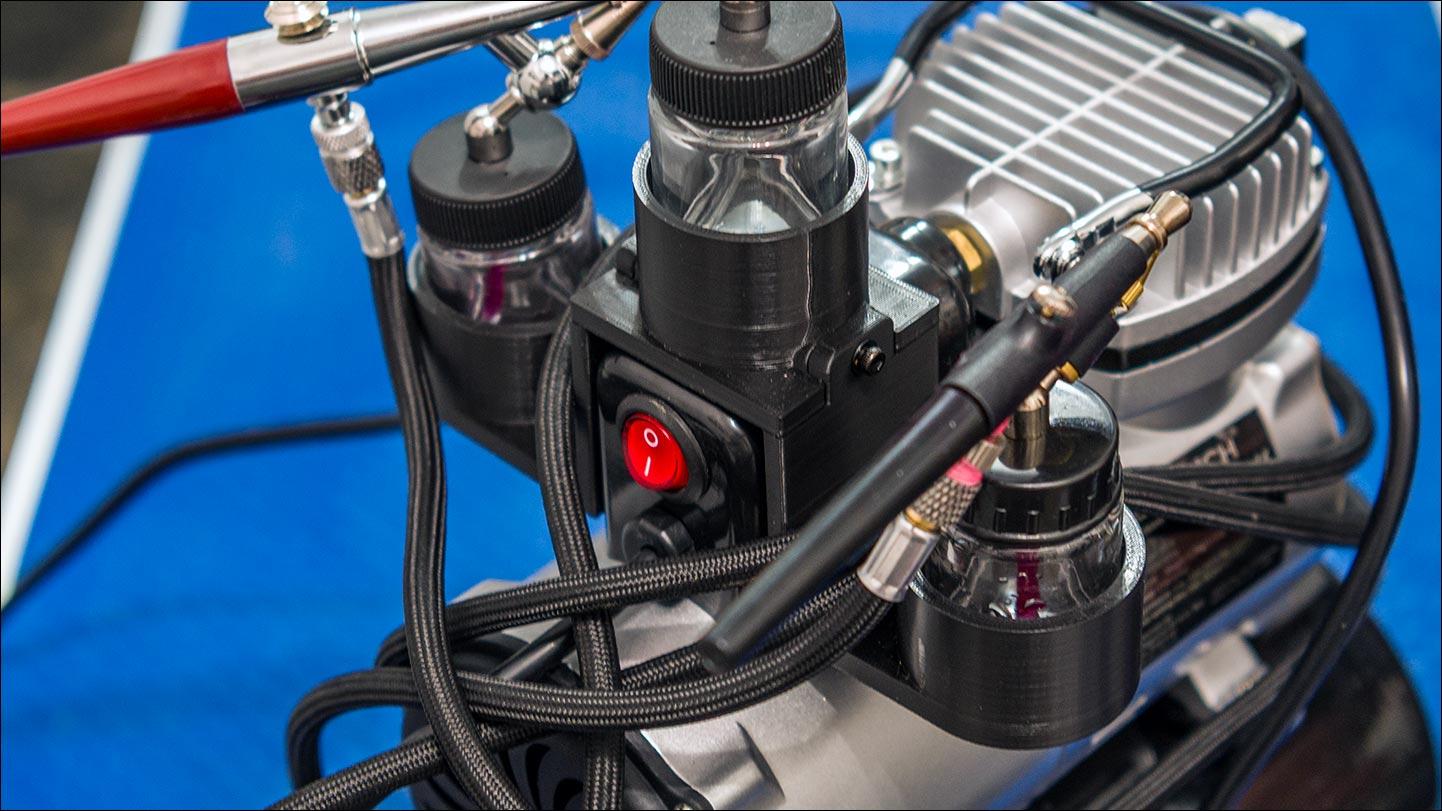
The following is long and my experience for dying, oiling leather. My journey to airbrushing and the cost of a small setup not including a spray booth. How I got here: i) Tried the dabber method I could not get consistent results from one piece to another and used to much dye. ii) Tried the dipping method got consistent results just never liked what it done to veg tan leather or the end result. iii) Tried the brushing method getting consistent results were difficult. iv) Tried the continuous spray bottle that women use for misting hair but typically gave a spotty coverage. The spray bottle was large, clumsy and awkward to use. v) Tried the small cordless airbrush which was a dual action airbrush. It did work but was under powered pressure wise, clumsy and awkward to use due to it's battery pack size. I have used a single action Pasache airbrush in the past with a real compressor and it worked perfectly. The pro to a real air compressor is all the reserve air capacity while the drawback particularly indoors is the noise of the compressor motor. To that end I purchased off Amazon.ca two cheap single action airbrushes ($40 CAD), nylon braided 6' hose ($28 CAD), 10 pack of 60 degree down angle glass bottles ($30 CAD), three way outlet splitter ($10 CAD) and a small airbrush compressor with a 3 litre reserve air tank ($106 CAD ) for a total of $214 CAD. The reason for: i) Airbrushes: The simplicity of the single action airbrush vs the dual action airbrush. Insert the bottle of mixed dye and thinner (50/50) to the airbrush, push the down on the "go" button, set the nozzle spray and you are good to go. As a note I use 100% pure organic JOJOBA oil and the airbrushes will apply it without dilution. I like JOJOBA oil as it is almost identical to sperm whale oil. ii) Hose: The air hoses that came with the Amazon airbrushes, to be kind, were absolutely terrible. They are made of plastic tubing with poor end fittings that leaked. iii) Compressor: The airbrush compressor is almost silent, had a cooling fan, water separator and a 3 litre air reserve tank. iv) Bottles: Pro's: Glass bottles are easier to clean, don't stain like the plastic ones and you can see at a glance how much dye / oil you have left. Also I can mix different dyes, oil and thinner without the worry of any cross contamination. Con's: Getting 60° angle down angle adaptor lids with rubber seals, spout covers and 22 cc (3/4 oz) glass bottles for single action airbrushes can be either difficult or expensive ($6 - $10 CAD each). v) Outlet Splitter: Simply convenience. The three way splitter with three separate shutoff valves makes it so easy to change between airbrushes. Personalization: The setup was still lacking for my needs. It needed: i) an airbrush storage holder and I'm to cheap to buy one that fitted over the Pressure Regulator at $30 CAD ii) a dye shaker to prevent any die/thinner separation. So me being me I designed a very simple one and 3D printed it. The holder mounts on top of the ON/OFF electrical box, install 3mm high density rubber in the bottom of the holders and was dirt cheap to make. When the compressor motor kicks in the airbrushes and or bottles vibrate slightly. Conclusion: What I have found is that airbrushing for dying and oiling uses considerably less fluid then any of the other methods that I have tried and gives more consistent, repeatable results. As a note I use JOJOBA All comments are appreciated. What are your thoughts??? kgg

- Yesterday
-
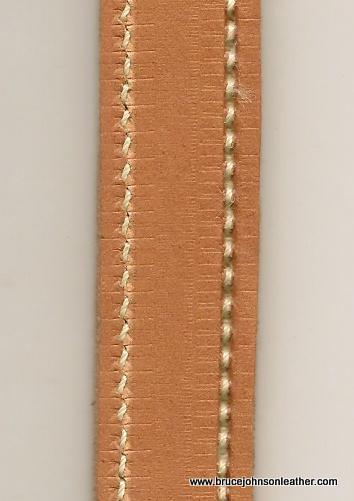
Yes needle type makes a huge difference in the appearance and uniformity of stitches. The only times I used round needles was for nylon. I preferred LR needles for my leather, and then rolled the backside stitches with an appropriate sized overstitcher when appearance mattered like it does here. I have attached a picture of some backside stitching as it came out of the machine with one side left as-is and one side overstitched.
-
Perfect, I assumed it was right but with the positioner working it just looked funny. thanks. btw, that video is great explanation.
-
I just went upstairs and looked to be sure. My 111w153 acts like yours. I never paid much attention but the other 3 machines up there all do the same thing. I don't even think it's possible to adjust the timing of one to the other. Just tweak where your "needle up" position stops.
-
On my singer 144, the needle top of stroke happens 55 degrees before the takeup lever reaches its highest point. This video by @Gymnast is also informative:
-
So that is kind of what my question is. On this machine, the needle top of stoke happens 20-25 degrees before the take up arm reaches its top of stroke and that is when the bobbin thread releases. top photo marked 0 is needle top of stroke, bottom marked R is take up top of stroke.
-
 HH Supply joined the community
 -
Hey Everyone! I tried searching but was unable to find what I was looking for. I’m hoping someone can help me understand some adjustments on a Singer 211W155 machine. I picked up this machine with a table and an already installed Sailrite Workhorse for $300. It was a deal I couldn’t pass up as my first machine to help me learn and speed up production over hand stitching. It runs great! The only problem I’m having is that it’s marring up the leather pretty bad. I’m going to apologize in advance for using descriptions of parts as I’m still learning the correct terminology as well. The part leaving a mark is the foot that the needle actually passes through. It’s a smooth bottom foot but when slowly moving the hand wheel, I can see this foot is pushing up tight against the feed dog with no space. If I run it with no material, I can even hear the feed dog click against it metal to metal. The pressure of this foot to feed dog is causing my marking. how can I relieve this pressure and raise this foot or allow for the spring pressure on this to be less intense so that it still feeds correctly, but it doesn’t smash my leather into oblivion and mar it to hades?
-
I wonder if that slit Bruce mentions is actually the result of a narrow sliver of leather being removed? If that was done top and bottom it would allow the leather to be pushed together to bulge up a bit, then stitched and finally wet formed.
-
Most of my patterns I design today are done using Lightburn. I will also many times use my laser to directly mark the leather on the flesh side for cut lines etc. Reference patterns and layup jigs are cut from card stock by laser. I use Fusion a lot for my CNC mills & 3D printers but I found that Lightburn was quicker and more efficient for my leather work flow. Adobe software I will no longer use or recommend.
-
 ventinots joined the community
 -
 I might have 2 of the missing parts that you need. I'm not sure if I have a spare tension piece. I'll have to check and get back to you. I'm in Toronto. Canada.
 -
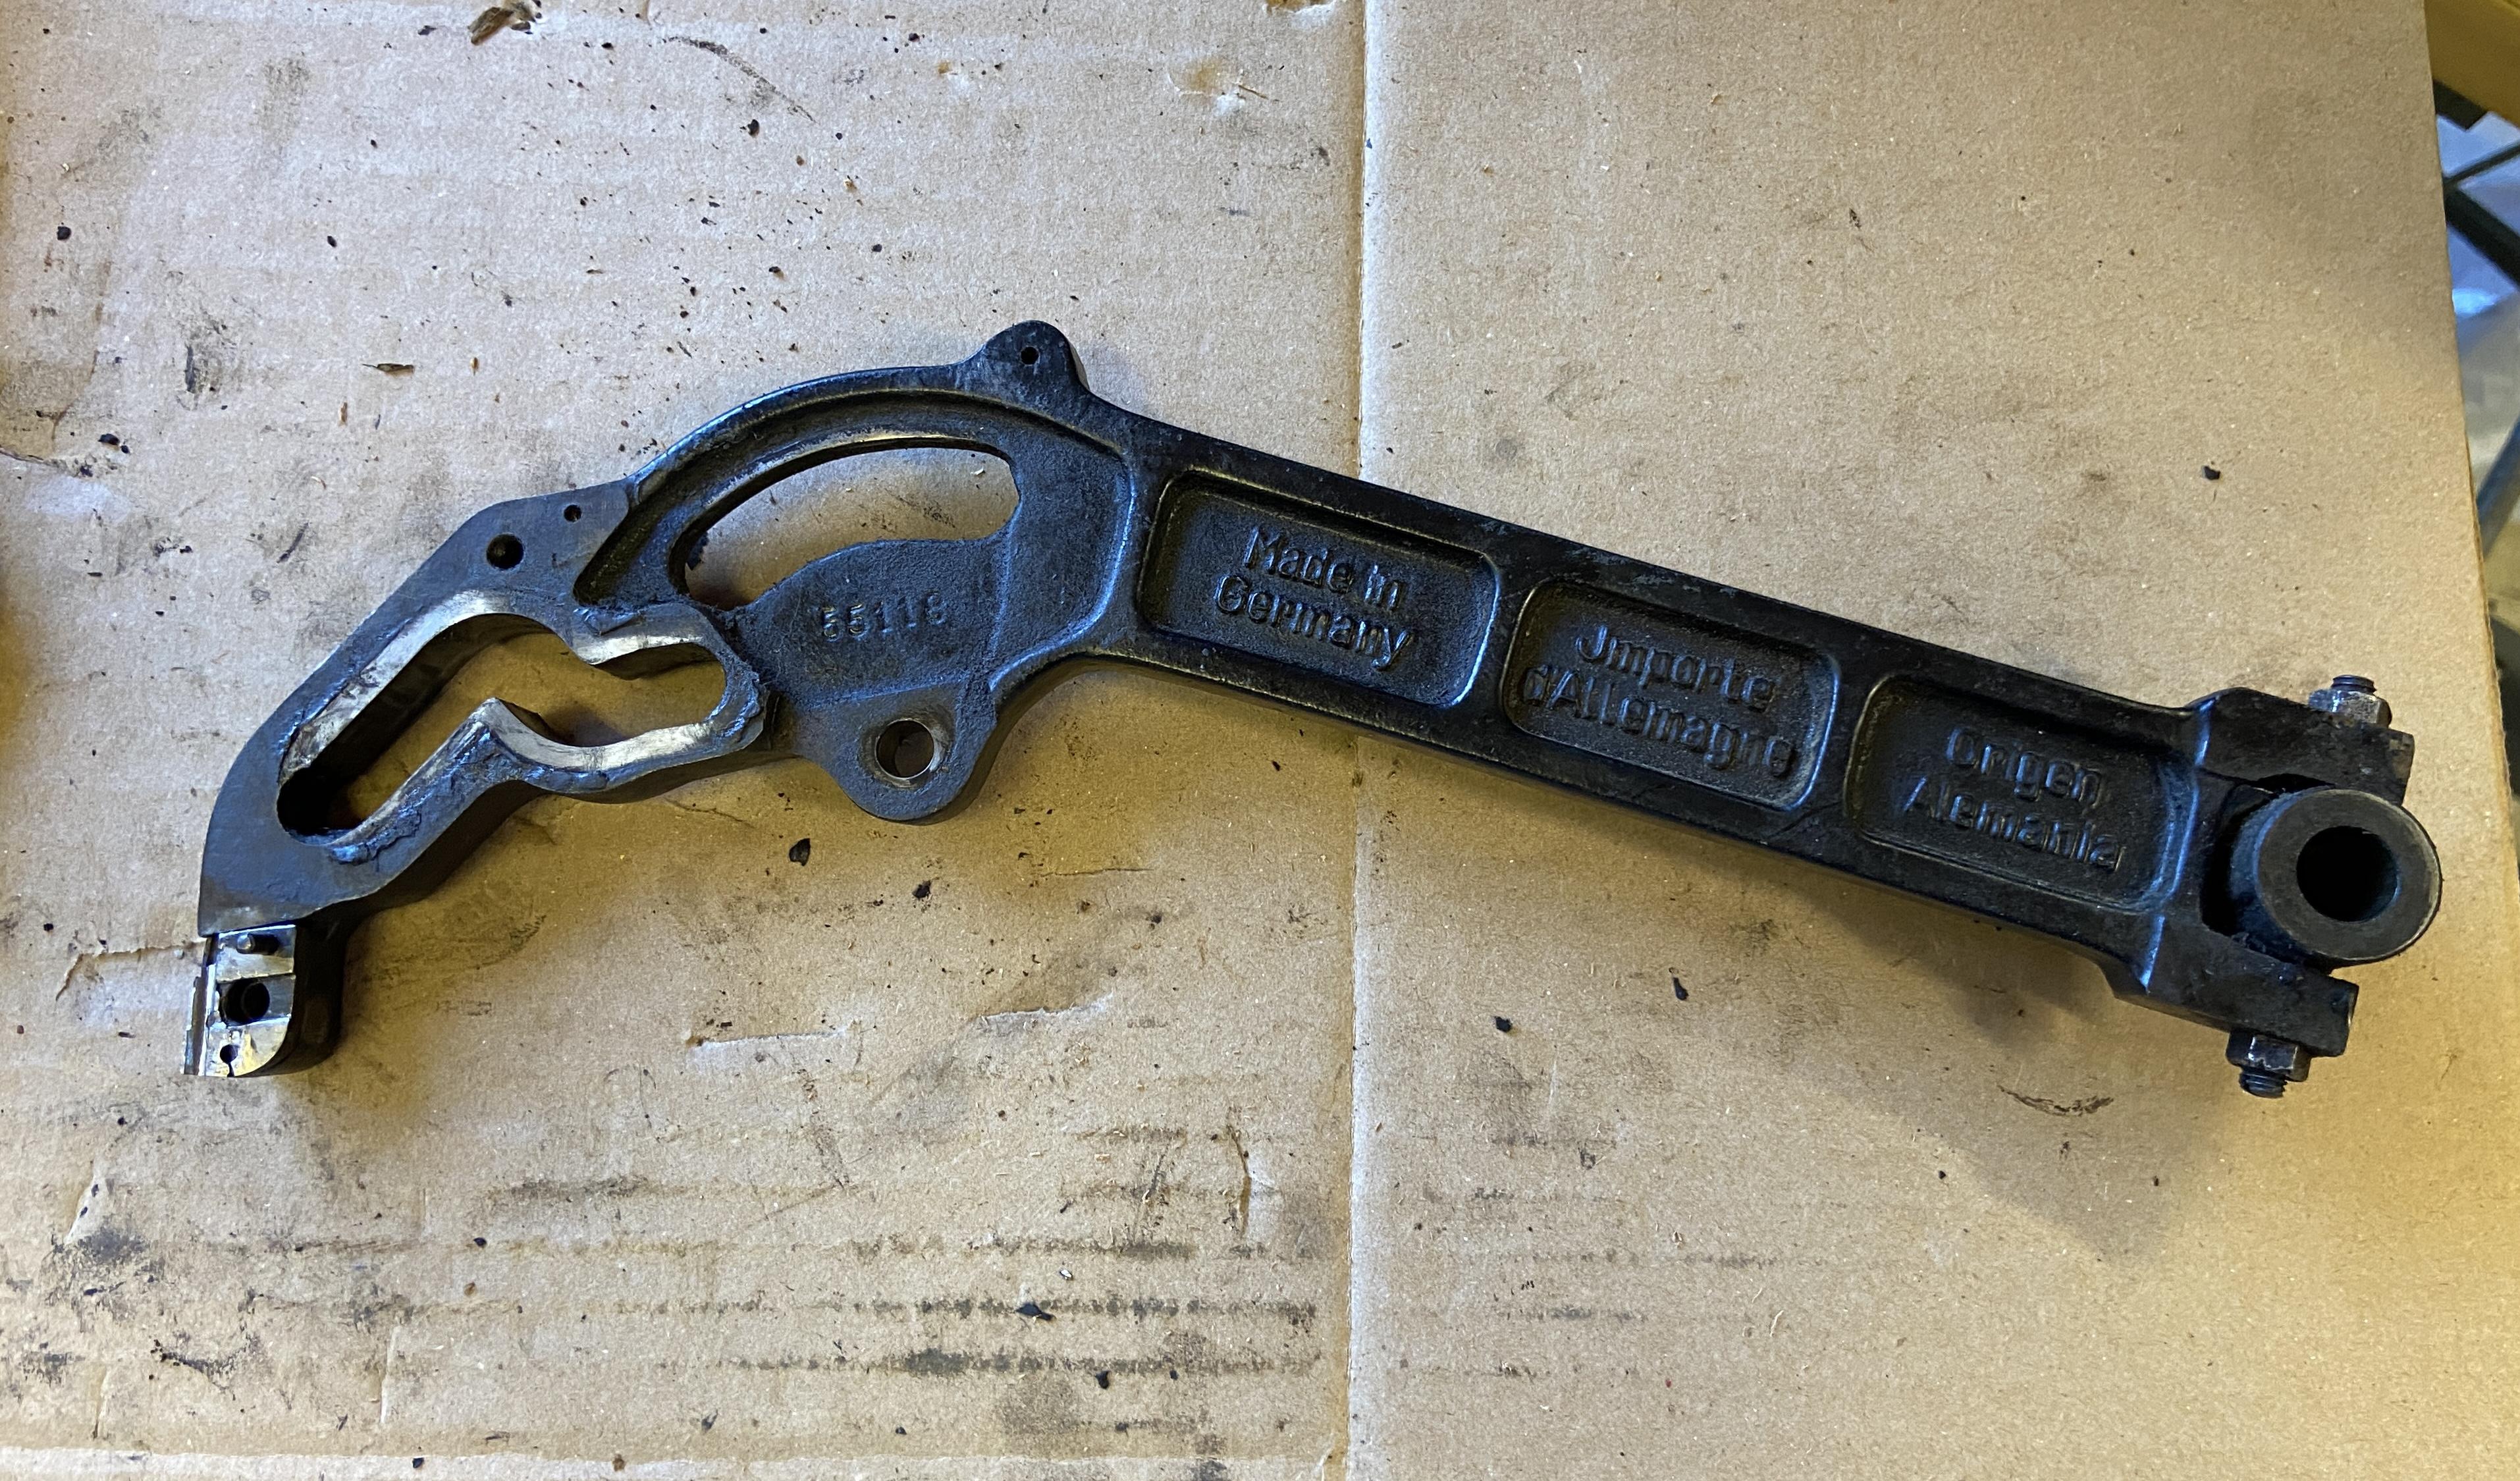
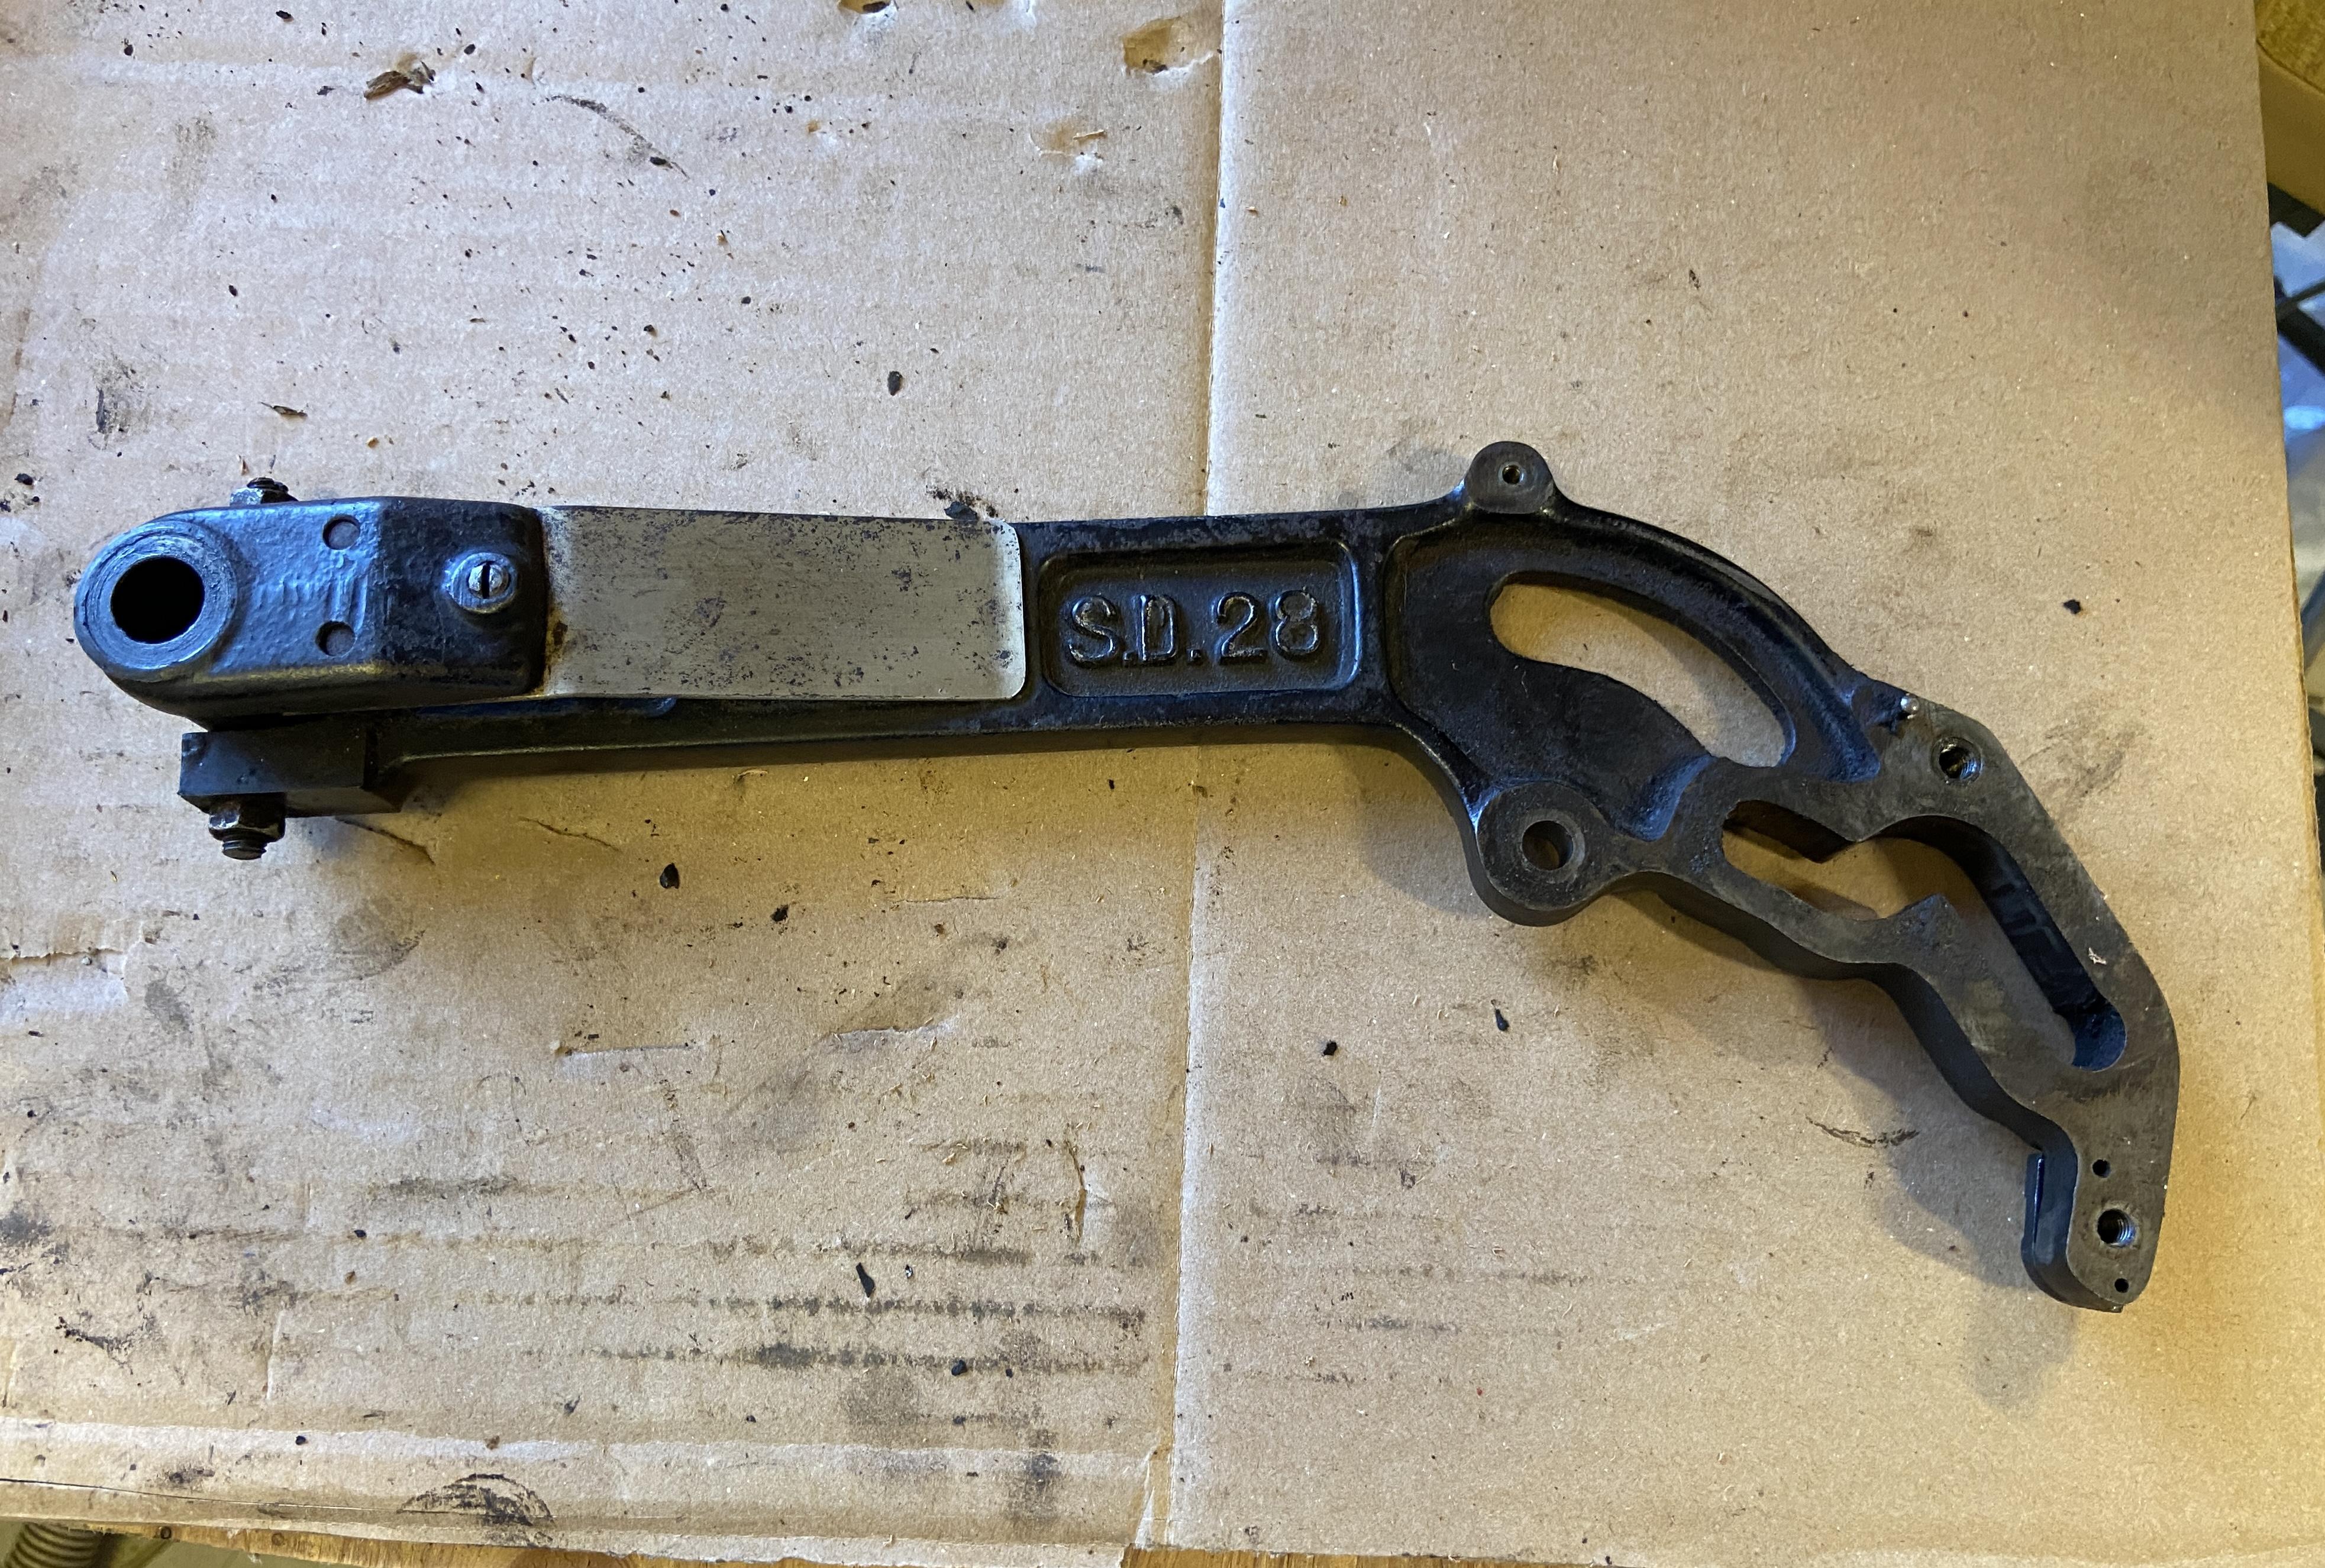
Greetings People, I am looking for a part for a Junker & Ruh Sd 28 to complete a machine I'm restoring. Please refer to the pictures. Mine is damaged where it holds the needle so it can no longer hold a needle properly at the correct angle. If anyone is looking for other Junker Parts I may have them. I also carry new shuttles and bobbins if interested.
-
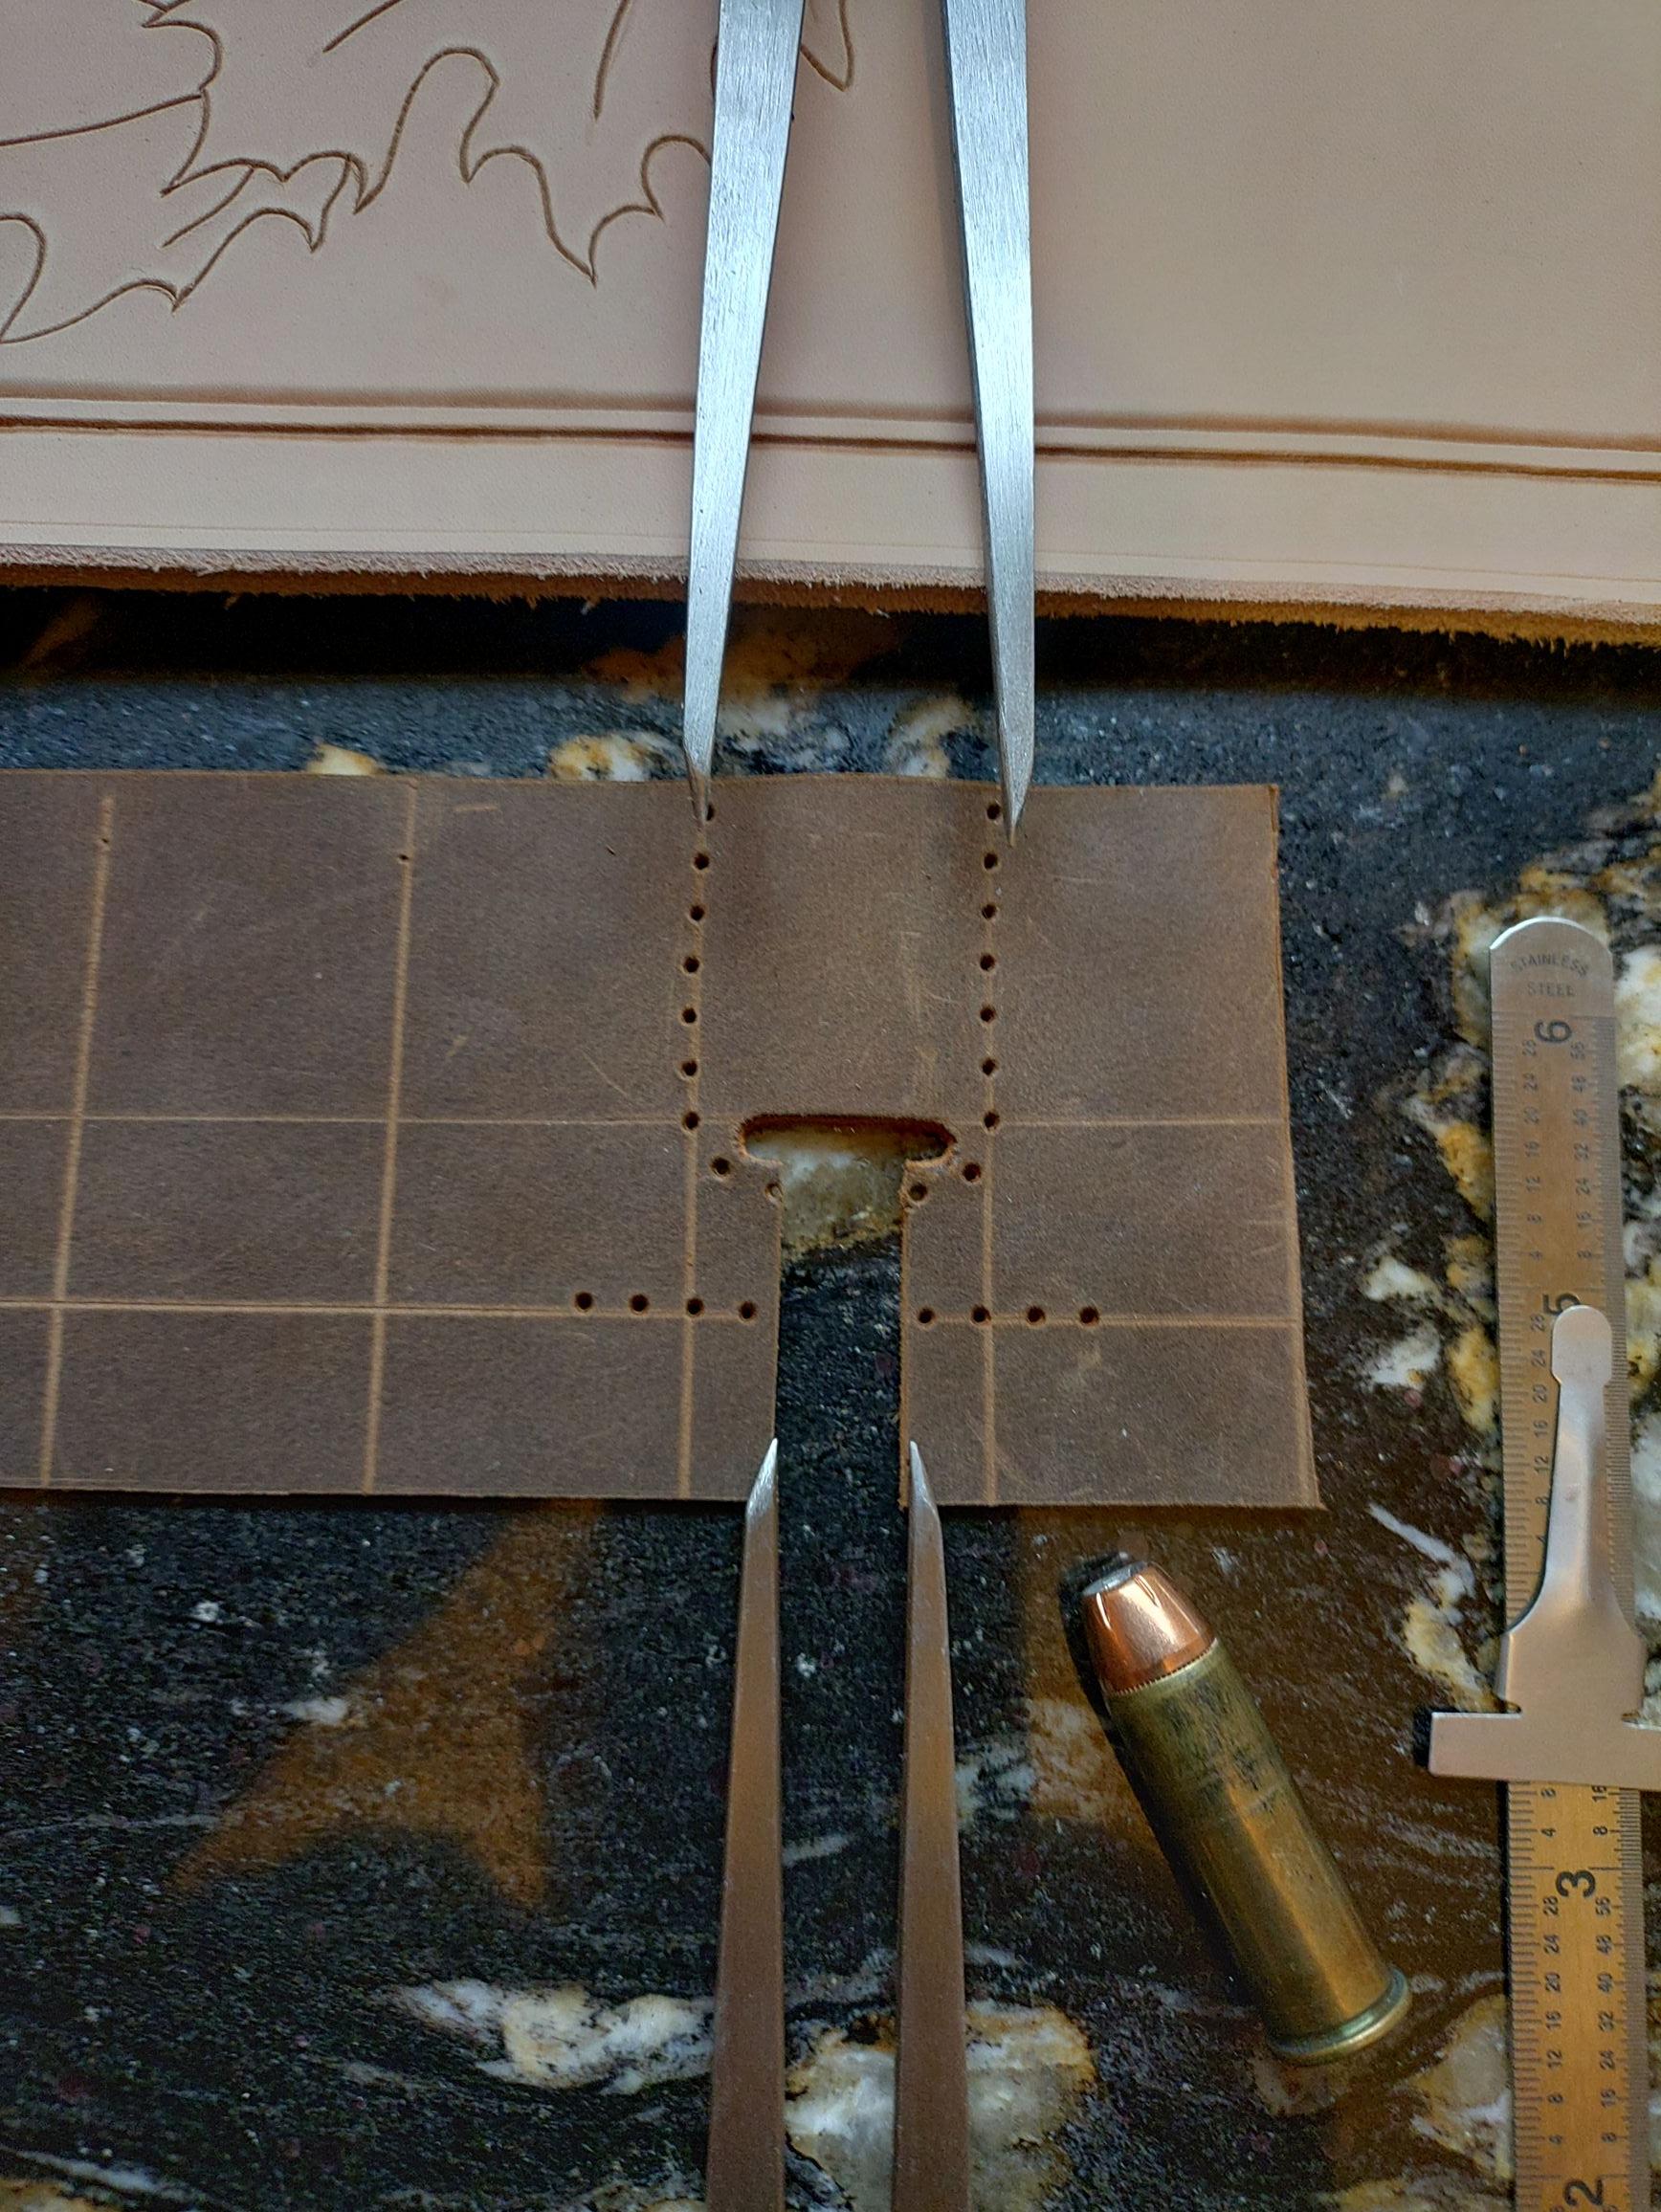
So I was waiting for leather to dry a little and thought I would fiddle with this. The removed material at the bottom needs to be the diameter of the cartridge (in this case .429" -44 mag) The oval punch should be close to that plus the thickness of the leather doubled (.429 + leather doubled) The stitching down the case wall needs to be measured with a couple strait edges holding the leather and bullet down to a flat surface. In my attempt, my punched hole is a little too long. The stitching holes I just eyeballed the radious going under the bullet. Knowing these measurements I think I could build a pattern. Then the stitching on the back piece I think would be like a normal piece except the radioused part under the bullet might need to be punched during assembly? On a bottle neck case, Ill probably have to work that out but I think the oval hole might need to be higher?
-
 truffledog joined the community
 -
You might look at Adler 669 Adler 105-25 Cowboy cb246 Jianglong 246 Jianglong 341 Jianglong 1341 Cowboy cb227r cowboy cb341 cowboy cb1341 Techsew 4800 Cobra class 26 Pfaff 335 Typical TW3-P335 Necchi 840-100
-
Edges are my Achilles heel. Yours ain't perfect but not bad at all. Some folks spend an inordinate amount of time on edges to get them glassy smooth... only to have them fray with a little bit of use. Don't be too hard on yourself because it proclaims the handmade source of the gift. I love the design and the execution is worthy of pride. Lucky son! I grew up playing Scrabble across the table from my mother. It's how she taught us how to improve our vocabulary.
-
Maybe, also maybe files were too large, but somehow missed telling you that. There was a major upgrade here a month or so ago and some things are still cropping up to be changed or clarified. Keeps us all on our toes!
-
By the way, I love that picture of the dog lol, he looks like he's thinking about something, what a beautiful dog.


.thumb.jpg.6e903dd66163ad5672f00f144058c571.jpg)
