

All Activity
- Past hour
-
Older post but damn. That’s nice. Did you wing it or did you try out a pattern?
-
Really great work so far mate and I know this was a request but I ain't having it until I see a handbag. If anyone knows where I can get tiny hollow tube that I can incorporate into my dies to punch rivet/snap type holes at the same time please let us all know cos it won't be long before dikman wants em too.
-
I need to store the deerskins that I have, as I try to determine how exactly to choose the additional deerskins I need for my next project, as no one here seems to know the exact answer to my question, asked in another thread. As I wait, I found a way to store the deerskins, that has not damaged the deerskins as yet. So I thought I would share it here for newbies in the field like me. Others might be using the same method as well, of course.. I need this way because I do not have space to hang them all up. I store my deerskins in large zip-lock bags, the ones I received clothes in, actually. I leave sufficient air inside to provide a buffer against the weight of leather placed on top and then zip it tight. The air inside prevents damage and give it air, as it were. Of course, I have not kept them in this way for long periods as of yet, but for short periods, it works. Deerskin is notorious for getting wrinkled, so this is an easy way to prevent that. You get similar large zip lock bags online as well. Come to think of it, other leathers that might crease could be stored in a similar way as well. Hope that information helps somebody.
- Today
-
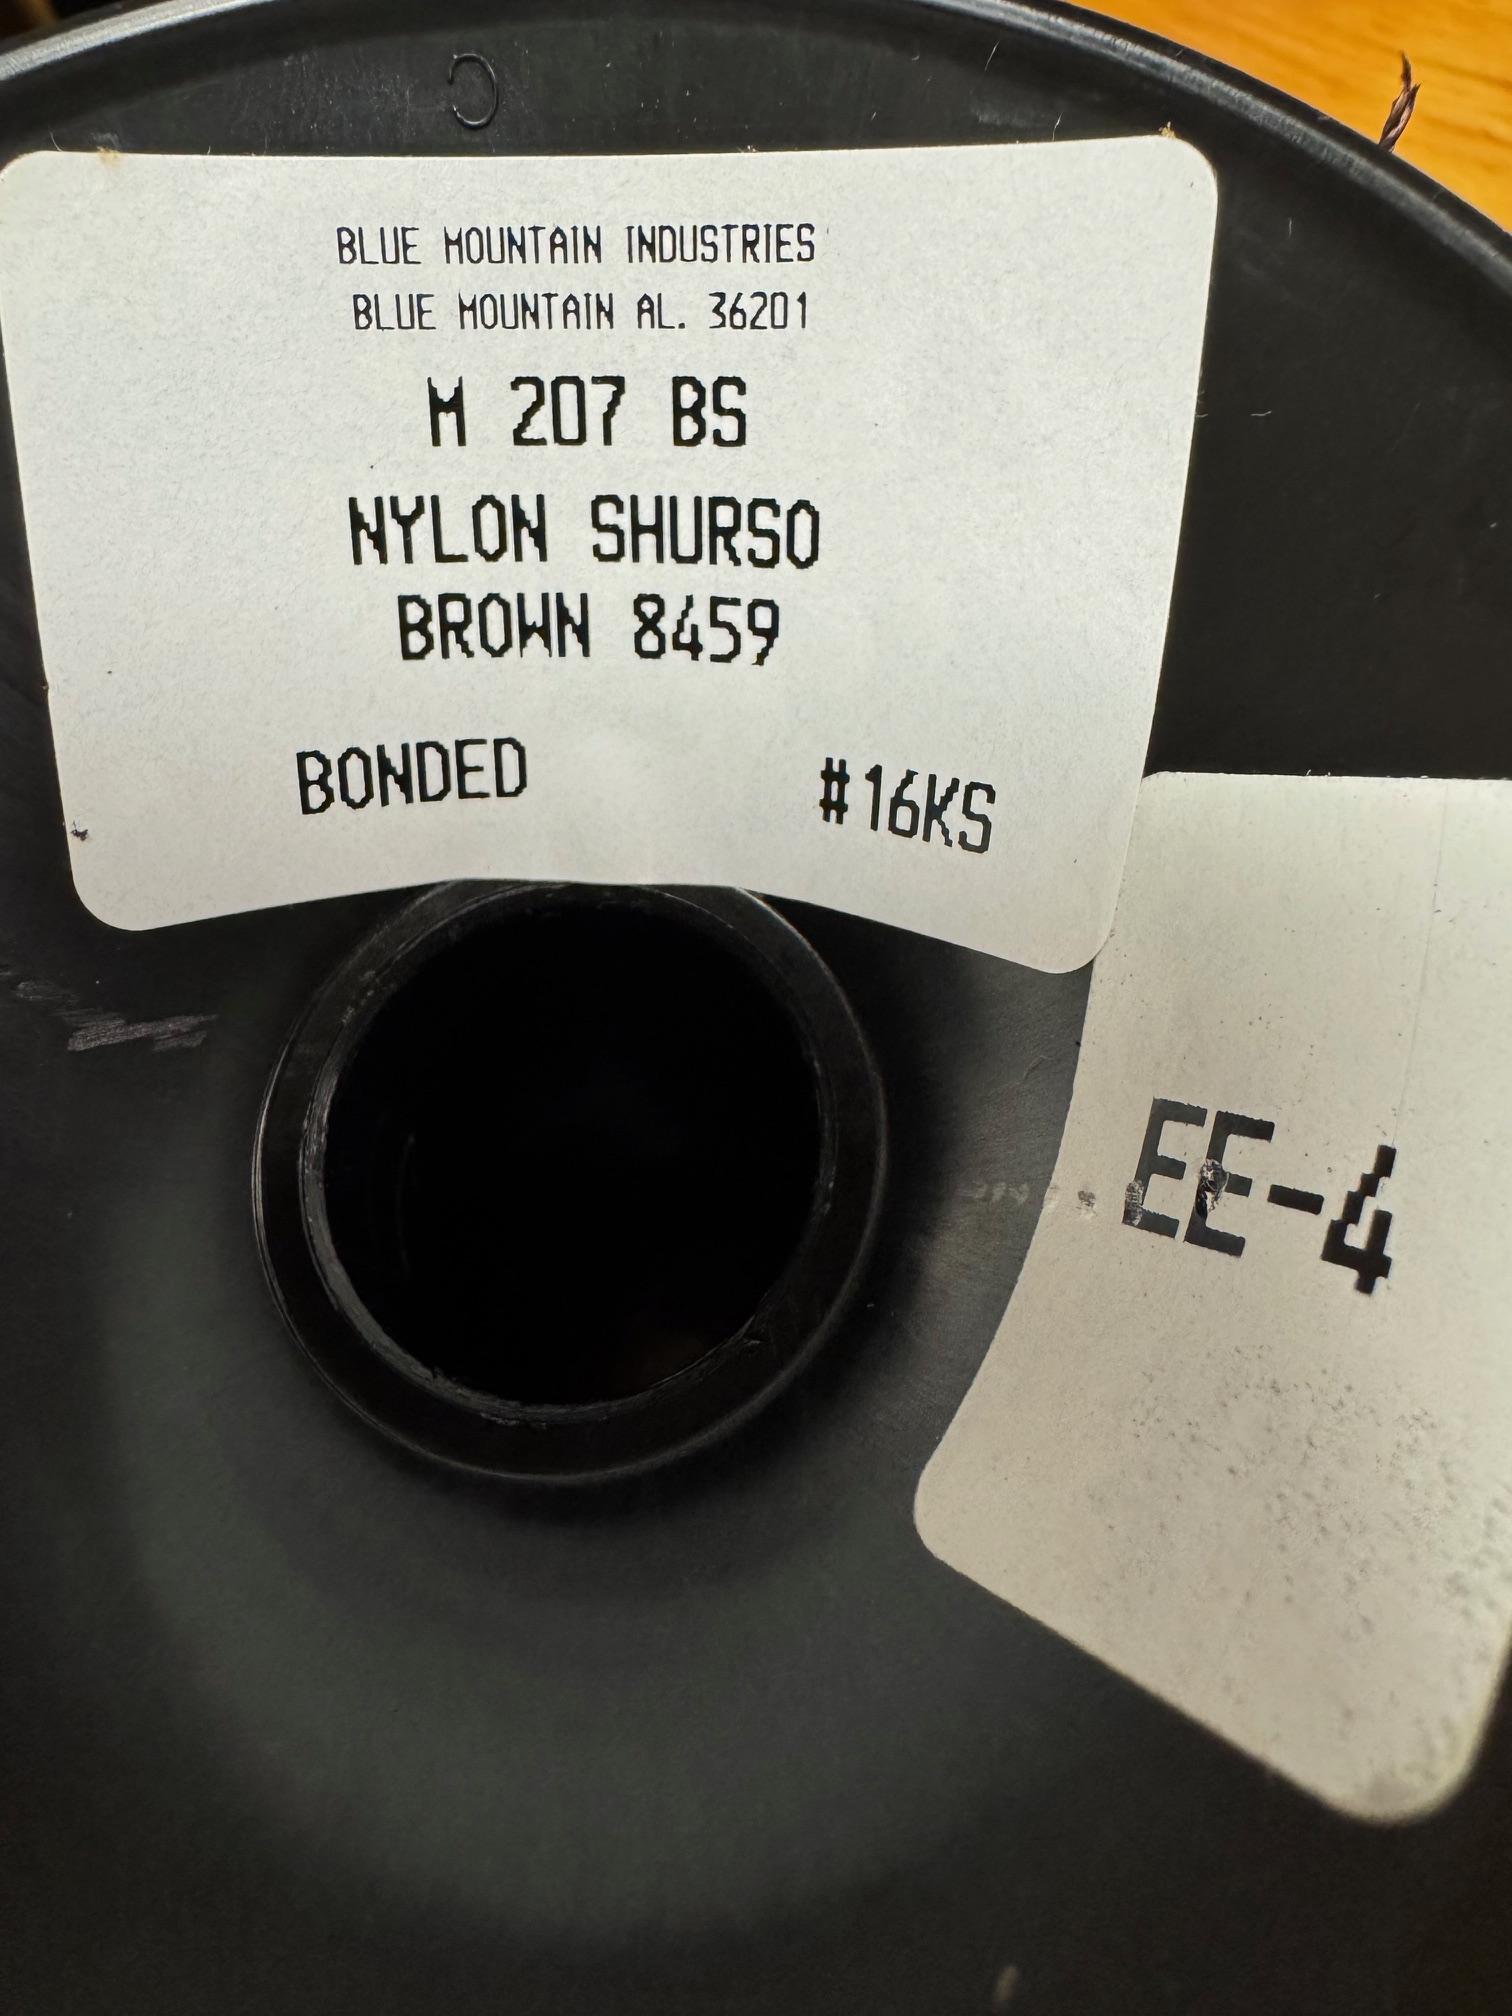
Well, further time on the internet indicates that Blue Mountain Industries thread was a product of Barbour threads (the US company) that apparently went out of business 20+ years ago. Would still like to know if this thread is any good. Any insight appreciated.
-
Are those things hardened? If not once the the rust is gone heat it to blue-gray and drop in oil, that gives a nice finish and some rust protection.
-
@bruce johnson That's a pretty impressive collection you have there Bruce . Excellent job on their restoration . I have about 30 lasting pliers in my collection but have no cast bell type . To be honest i didn't even know they existed till a couple of days ago . I will now be looking out for a decent one to add to my collection .
-
This looks good to me! I absolutely love the little square in the stitching. I'd never get it that symmetrical.
-

Belt extension, tooled English bridle
KillDevilBill replied to DoubleKCustomLeathercraft's topic in Show Off!!
LMAO Don Gonzalez' method has never failed me, IF a big IF I'm given the correct information. Nice save! I think this looks great. Almost intentional. Gonna try and remember this when it happens to me. -
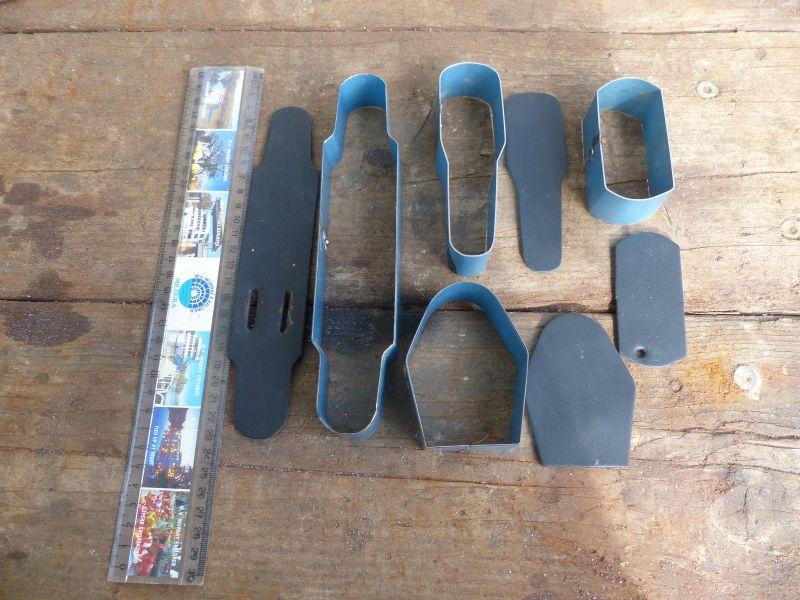
Finished off the last of the dies for the four pieces that my mate is cutting out (he has been getting orders from a Single Action shooting club for suspenders that he makes and cutting them by hand is getting tedious). The dies aren't perfectly uniform but a little bit of sanding/trimming of the leather pieces should fix that. I used some "pretend" leather that I salvaged from my old Triumph saddlebags, not something I would want to use on anything. The Vevor press punched three without any trouble, the larger one took a bit of fiddling as I think I have a pronounced burr on the cutting edge. The press also punched the die fairly deep into the plastic cutting board!!
-
Thank you, AlZilla
-

Singer 111w155 stitch length issues
friquant replied to Glaciersew's topic in Leather Sewing Machines
Looks like the belt is one tooth off. -

Singer 111w155 stitch length issues
cadet4x4 replied to Glaciersew's topic in Leather Sewing Machines
My arrows don't line up, the collar could be locked into any position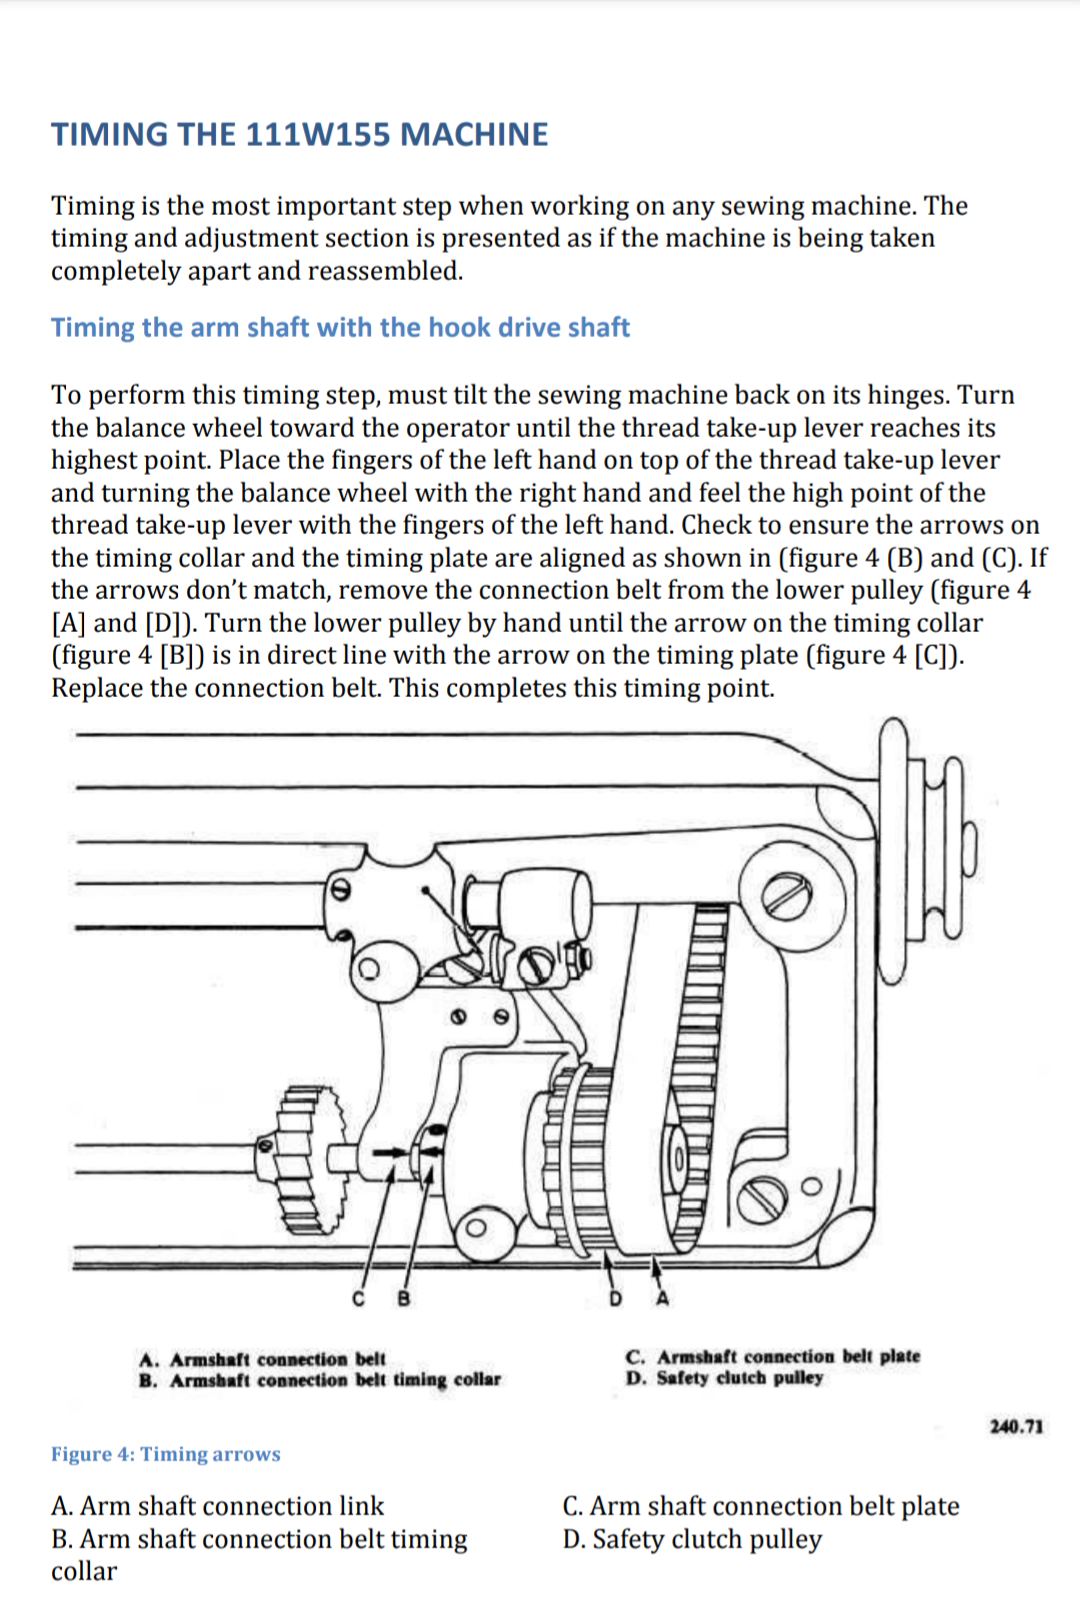
-

Old, Faded Saddle
Majolica15 replied to Majolica15's topic in Saddle Identification, Restoration & Repair
Thanks. -
Singer 111w155 stitch length issues
cadet4x4 replied to Glaciersew's topic in Leather Sewing Machines
Here is left of the drive belt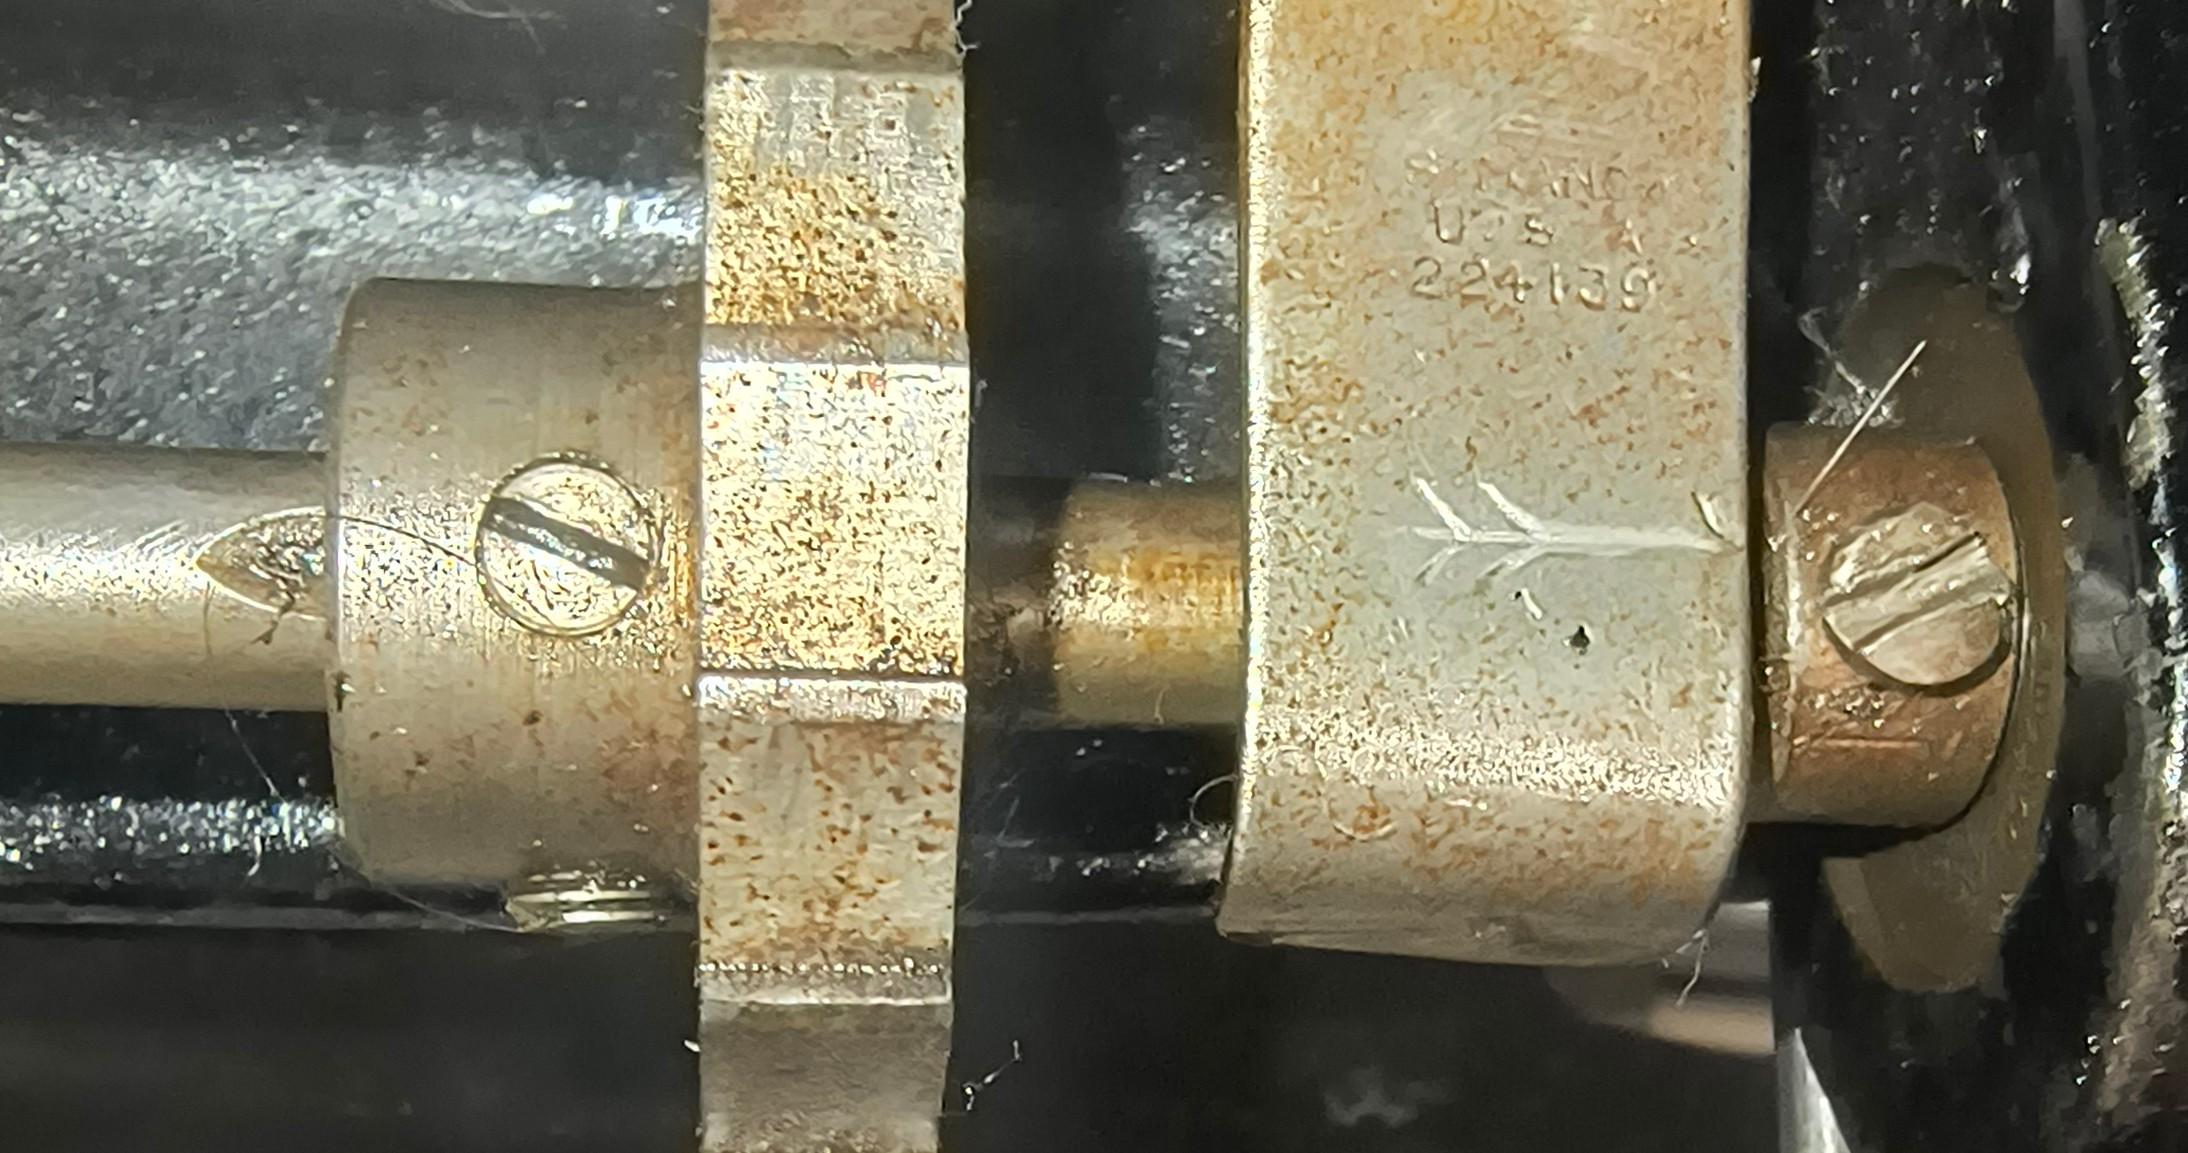
-
Singer 111w155 stitch length issues
cadet4x4 replied to Glaciersew's topic in Leather Sewing Machines
I realize my lower plate is loose. Here is the underside pic of the adjustment made. I'd like to verify this entire shaft is timed correctly. Anyone know at a procedure?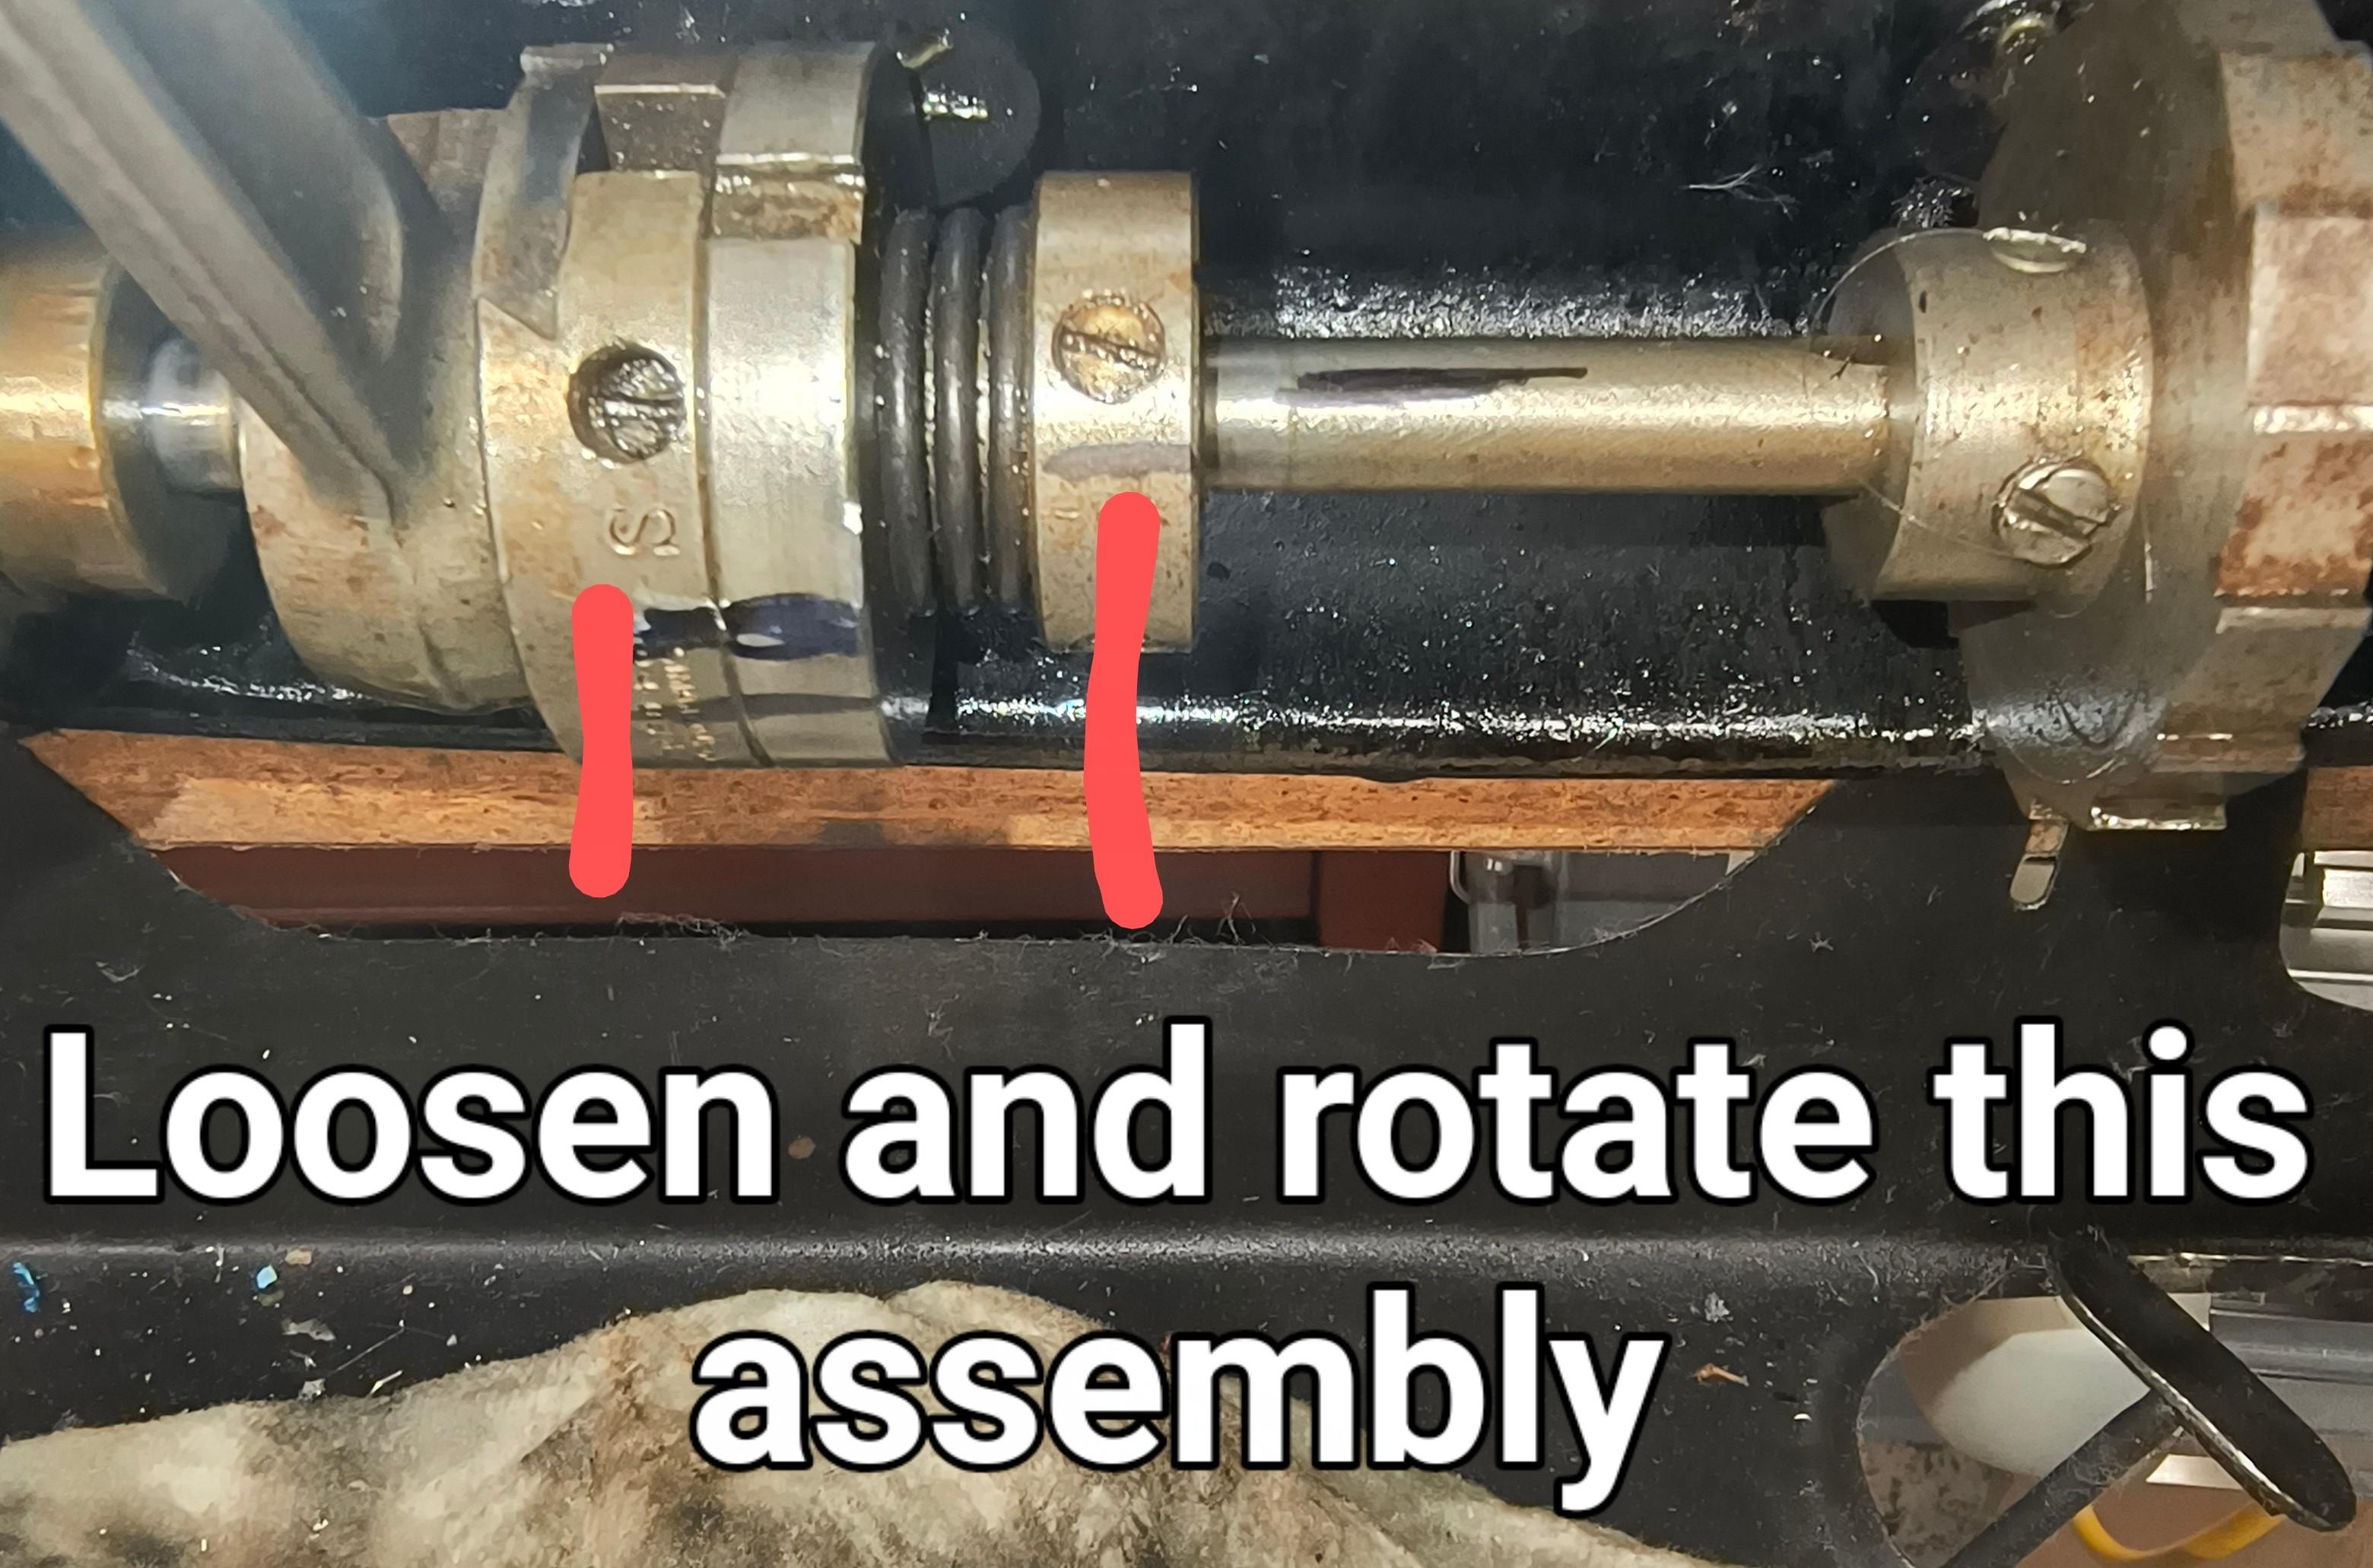

-
Moved your post to Saddle and Tack Accessory Items
-
Singer 111w155 stitch length issues
friquant replied to Glaciersew's topic in Leather Sewing Machines
Feed timing looks good. The needle plate is loose, but I assume you knew that, and I don't think it will change the stitch length. -
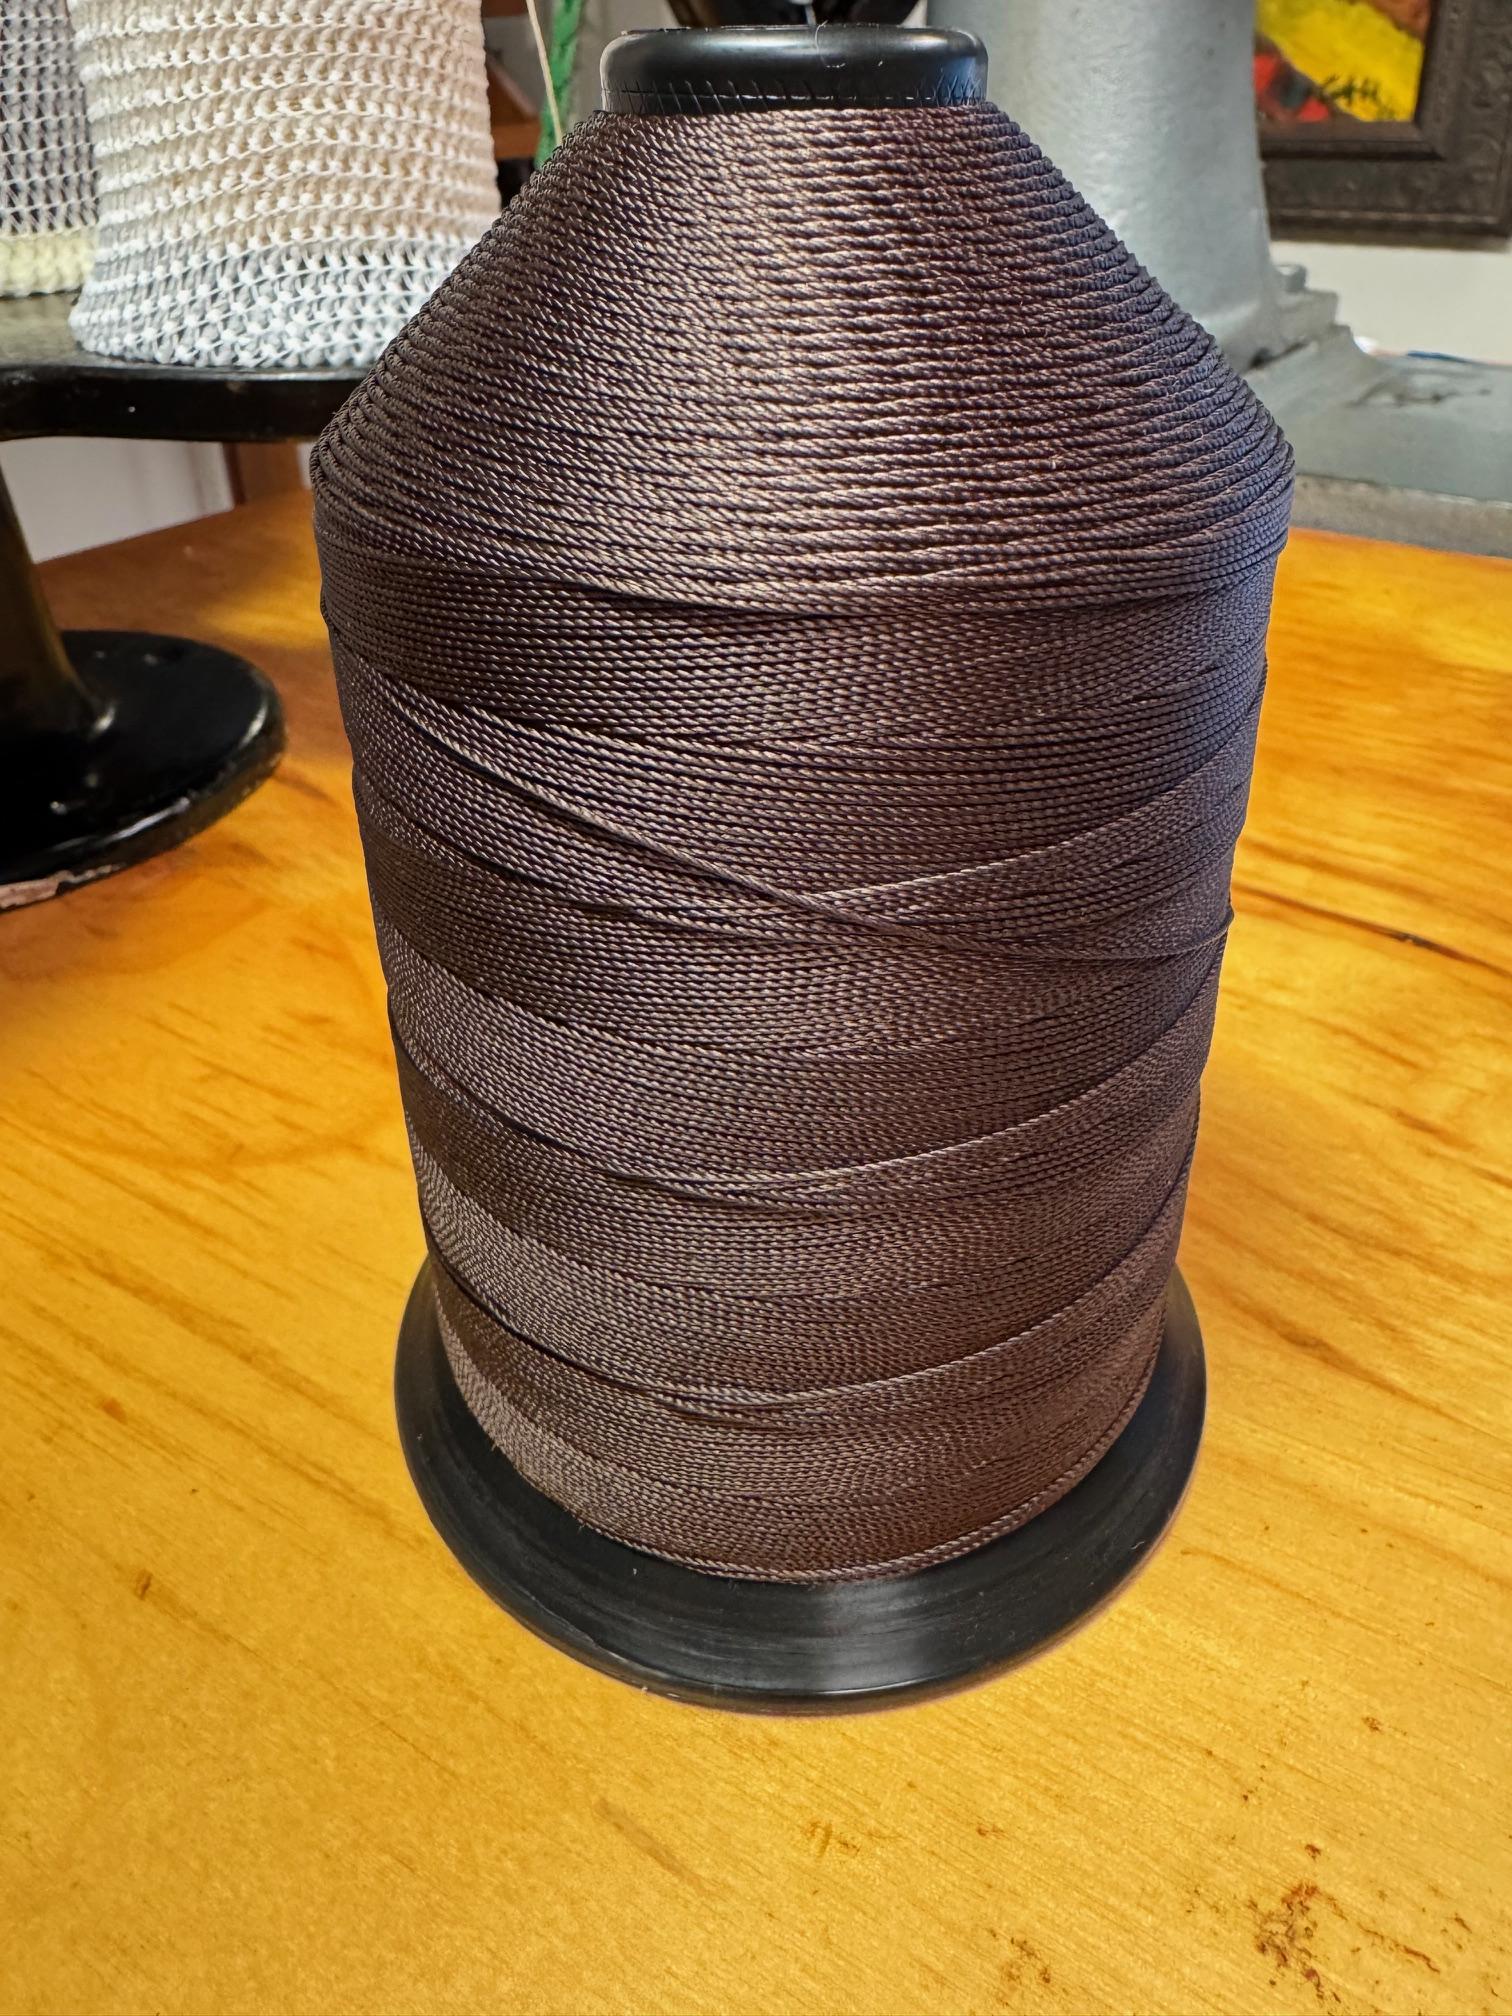
Does anyone know anything about Blue Mountain Industries threads? I was given 6 one pound spools of 207 "Nylon Shurso" bonded thread I cannot find any information about the manufacturer... thanks...
-
.thumb.jpg.6e903dd66163ad5672f00f144058c571.jpg)
TechSew 2750 Pro Cylinder Arm Sewing Machine - $2000 Lots of Extras
Northmount replied to RecentRelics's topic in Used
You need to quote part of the OP's post or tag him/her to help ensure they get a notification. Notice I quoted your post. To tag a member, type the @ symbol followed by the username and pick the name from the popup box. Like this @RecentRelics -
Singer 111w155 stitch length issues
cadet4x4 replied to Glaciersew's topic in Leather Sewing Machines
https://youtu.be/OezNzJN9LFk?si=lt7xv1-eMcQC6RzR Fingers crossed -
Old, Faded Saddle
Northmount replied to Majolica15's topic in Saddle Identification, Restoration & Repair
Moved your post to Saddle Identification, Restoration & Repair -
Singer 211 U166A walking foot problem
friquant replied to NowhereMan01's topic in Leather Sewing Machines
Oh I see.. The feed eccentric slid about 1.25 inches to the right, exposing the actual cam lobe. Based on the manual page 24, "Feed Eccentric Adjustment", I think you are to slide the feed eccentric to the left so the cam lobe goes inside the pushrod, then apply your chosen amount of pressure to the left to compress the "feed driving eccentric adjusting disc spring" to achieve your chosen amount of spring pressure. Then tighten what appears to be set screws in the collar that holds the spring. -
Singer 111w155 stitch length issues
friquant replied to Glaciersew's topic in Leather Sewing Machines
I'm not able to view the videos. What format are they? Some people upload to youtube, the embed here. I find that too much work, so I shrink mine using ffmpeg (and convert to .mp4 along the way), then upload directly. -

Singer 211 U166A walking foot problem
NowhereMan01 replied to NowhereMan01's topic in Leather Sewing Machines
It looks like I spoke too soon. It did seem to "walk", so I tried adjusting the stitch length (still without thread, just trying to get a bigger "step"), and when turning the wheel with the button pressed, it seemed to have no resistance, and the results were very flaky. Sometimes it would walk more-or-less as expected, sometimes almost not at all, and sometimes it would even go in reverse (without the reverse lever pressed). So I started looking at the "Feed eccentric adjustment" on p. 24 of the manual, and that thing in the 2nd picture slid out of place, and doesn't seem to be attached to anything. Is it supposed to be like that?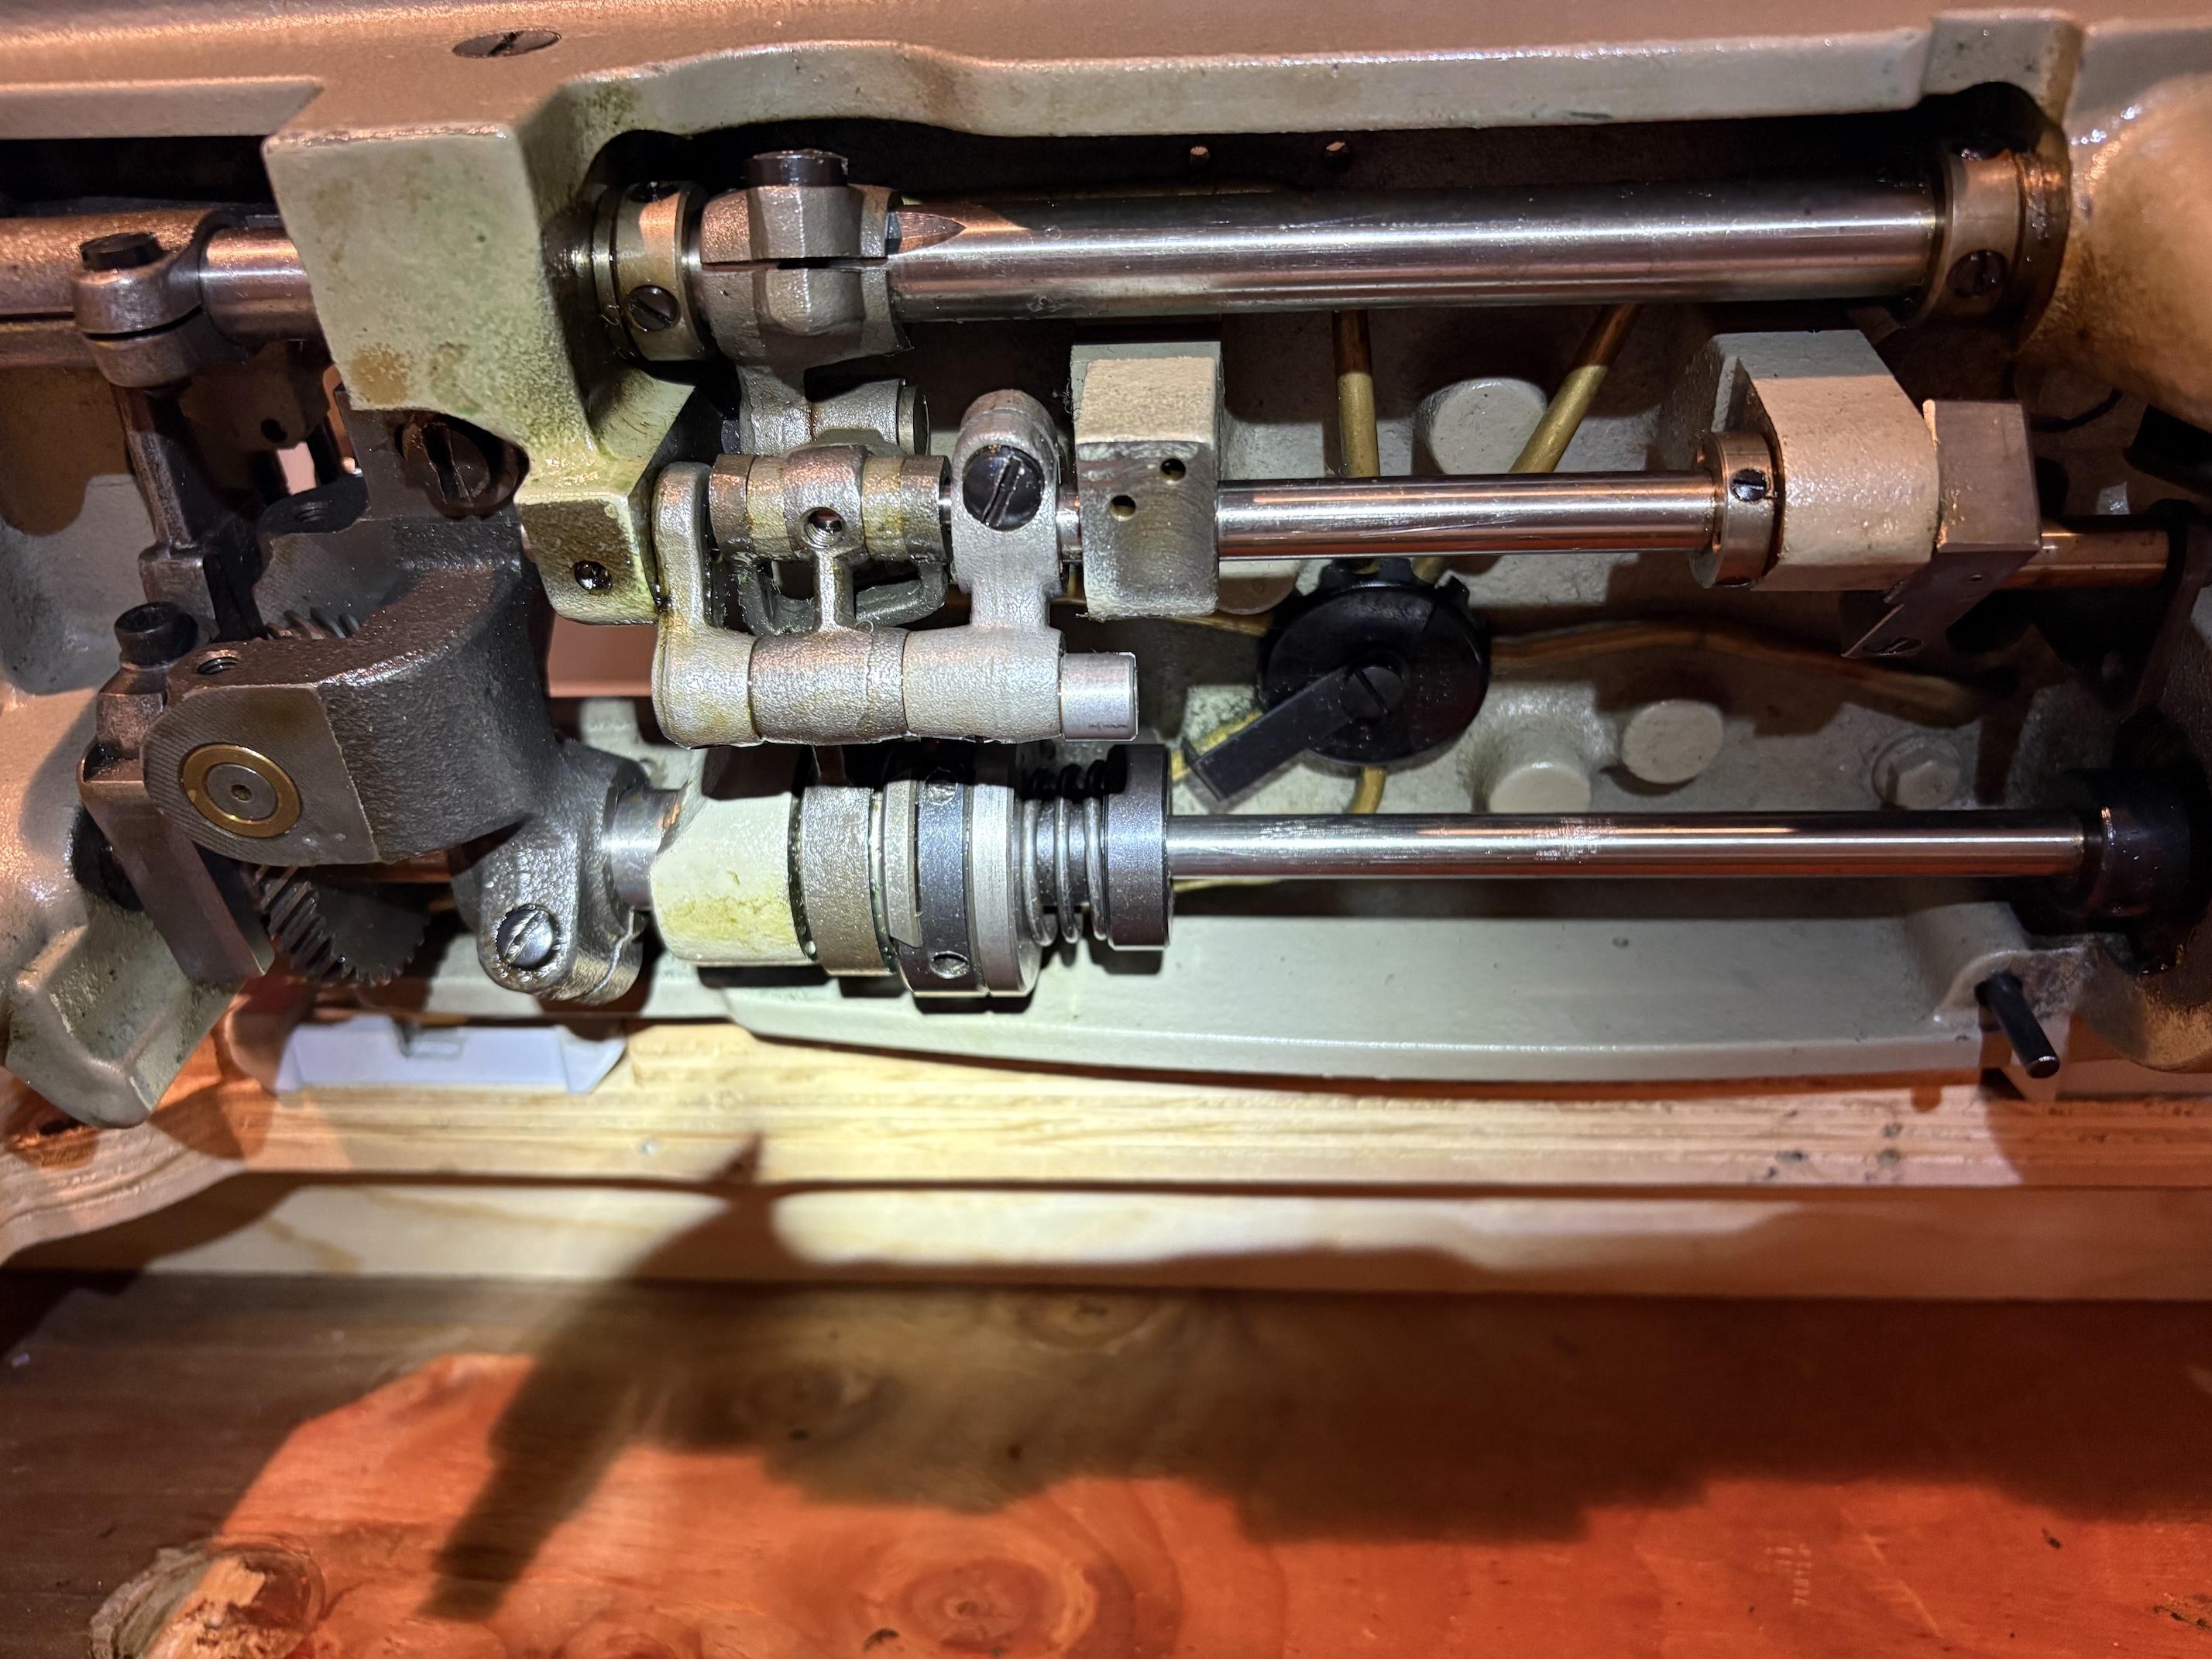

-
 kelmzx joined the community
 -
Singer 111w155 stitch length issues
cadet4x4 replied to Glaciersew's topic in Leather Sewing Machines
friquant, Yes I can adjust the stitch length, from the longest stitch all the way back to zero. Yes it hits a positive stop rotating either direction. Reading a naval manual it mentioned to set the take up at the highest point. Loosen the dovetail cam assembly and rotate forward. The pics and video I'll be attaching soon are after this adjustment, it's yield is about 5.5/in. VID_20250902_165612895~2.mp4 VID_20250902_165612895~2.mp4 VID_20250902_165612895~2.mp4


