All Activity
- Past hour
-
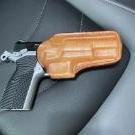
Thanks for the kind words-means a lot! After wet-forming, I used Weaver's 'leather firmer', since I want my holsters to be as stiff and sturdy as possible. After that, there's a dip in Resolene, and that's the entirety of the finish. The clip is mounted to slotted posts mounted under the reinforcement piece wrapped around the mouth of the holster. Larry
- Today
-

Problem using a TandyPro Deluxe Leather Splitter
DieselTech replied to Coloradoguy's topic in How Do I Do That?
I think your blade is not quite sharp enough. Plus if the blade is dull & you are taking a big bite/cut you are actually stretching the belt some & resulting thinner/thicker cuts on the sides of the belt. -

Problem using a TandyPro Deluxe Leather Splitter
TomE replied to Coloradoguy's topic in How Do I Do That?
My older Tandy Pro splitter doesn't have the additional depth locking screws on both ends of the roller. It seems that the strap is getting pinched on either edge and drawn up towards the blade in the middle. I don't have an idea why that would happen. Does this occur when using different parts of the blade? Have you tested different leathers of varying thickness/temper? Is the roller centered on the edge of the blade? Also, I don't understand the need for the 2x4 clamping the strap. When I split straps I don't have any pressure on the strap entering the splitter. I am careful to pull the strap through at a consistent angle, slightly lower than horizontal. -
Here's a manual: https://www.manualslib.com/manual/505004/Pfaff-145.html#manual Here's a guide to the numbers and letters: https://leatherworker.net/forum/topic/89283-an-introduction-to-the-pfaff-numbering-system/ Here is a good video by Uwe on timing in general: https://leatherworker.net/forum/topic/36127-pfaff-545-safety-clutch-and-timing/page/2/#findComment-442262
-

Problem using a TandyPro Deluxe Leather Splitter
fredk replied to Coloradoguy's topic in How Do I Do That?
I think your 2 x 4 is giving too much localised pressure. Giving it more pressure to cut deeper in the centre than the edges Can you try a wider lever bar? -

Tall Post Sewing Machines?
RockyAussie replied to Cumberland Highpower's topic in Leather Sewing Machines
Mine is not great compared to most of my other machines for sitting at but I use an adjustable high stool which is close to standing height. That means the knees are not a problem as they barely go in under. I have an adler post as well that is set on an angle like the picture posted by @nylonRigging but that is how I bought it set up. I would be somewhat concerned about how the oil falls down and through on the tall post to do that without checking every oil hole for proper lubrication. -
 The visual of the dual belts running up the right side is picturesque! Congrats on getting it up and running 🌻
 -
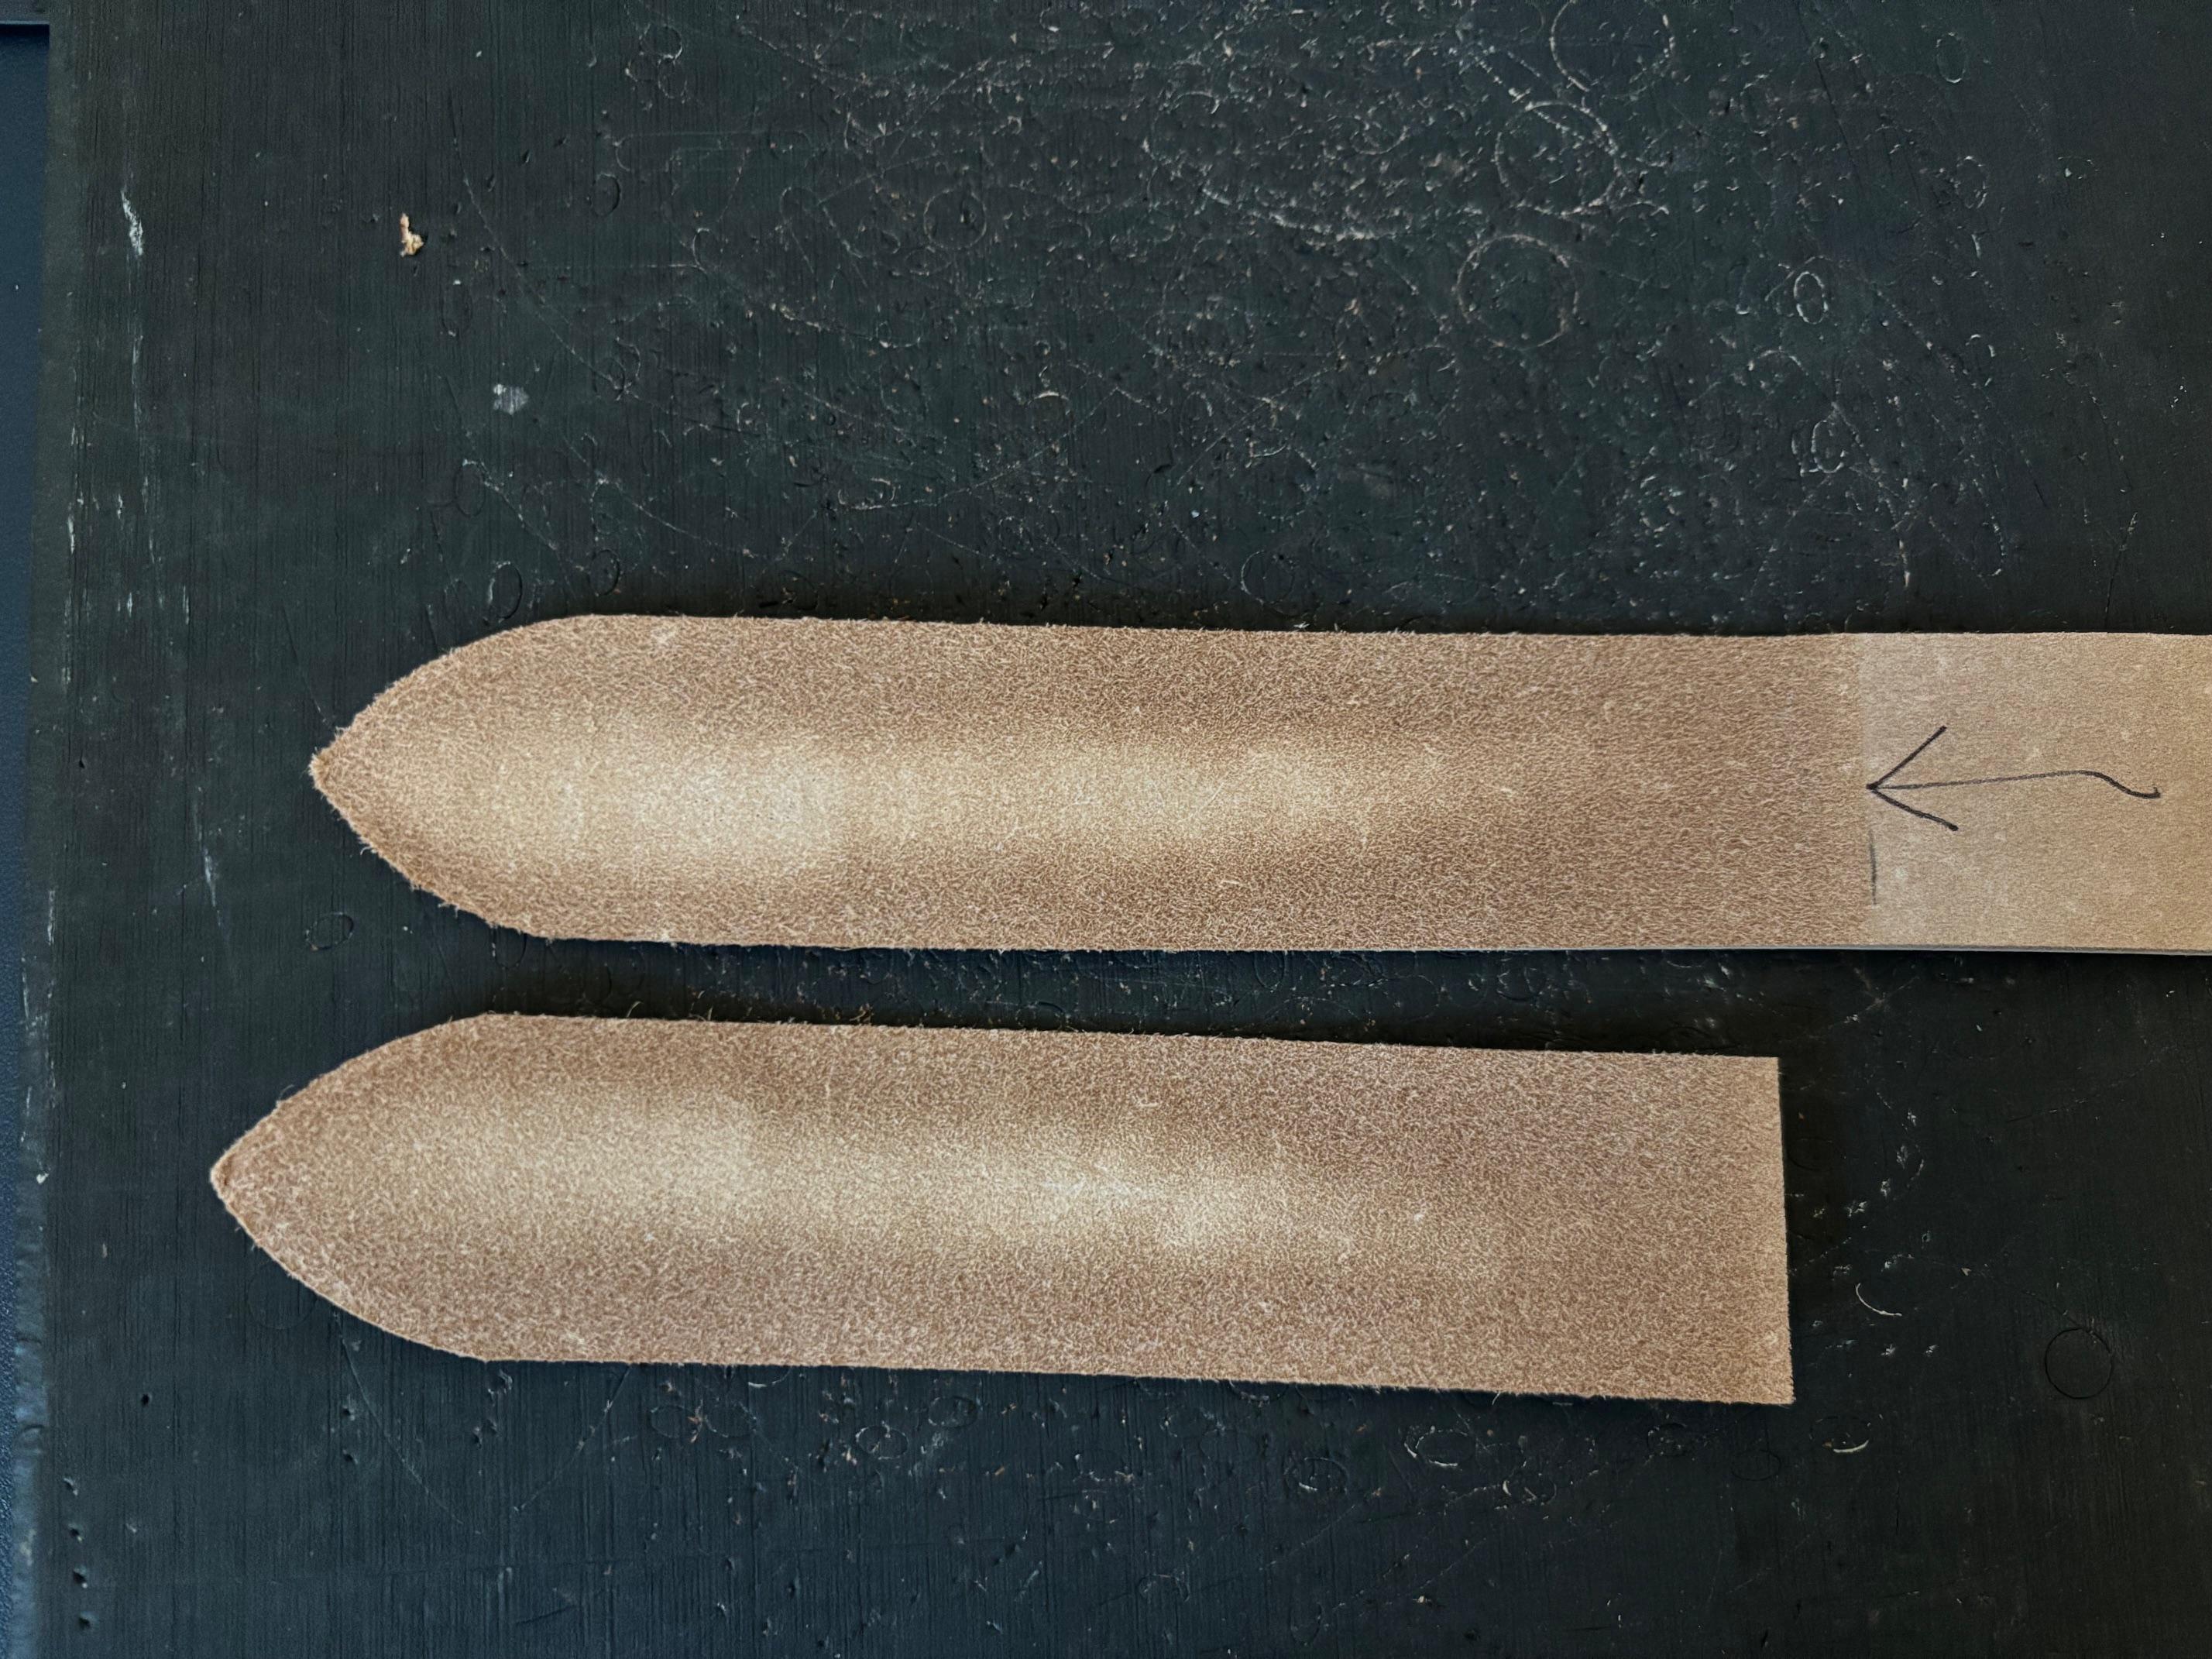
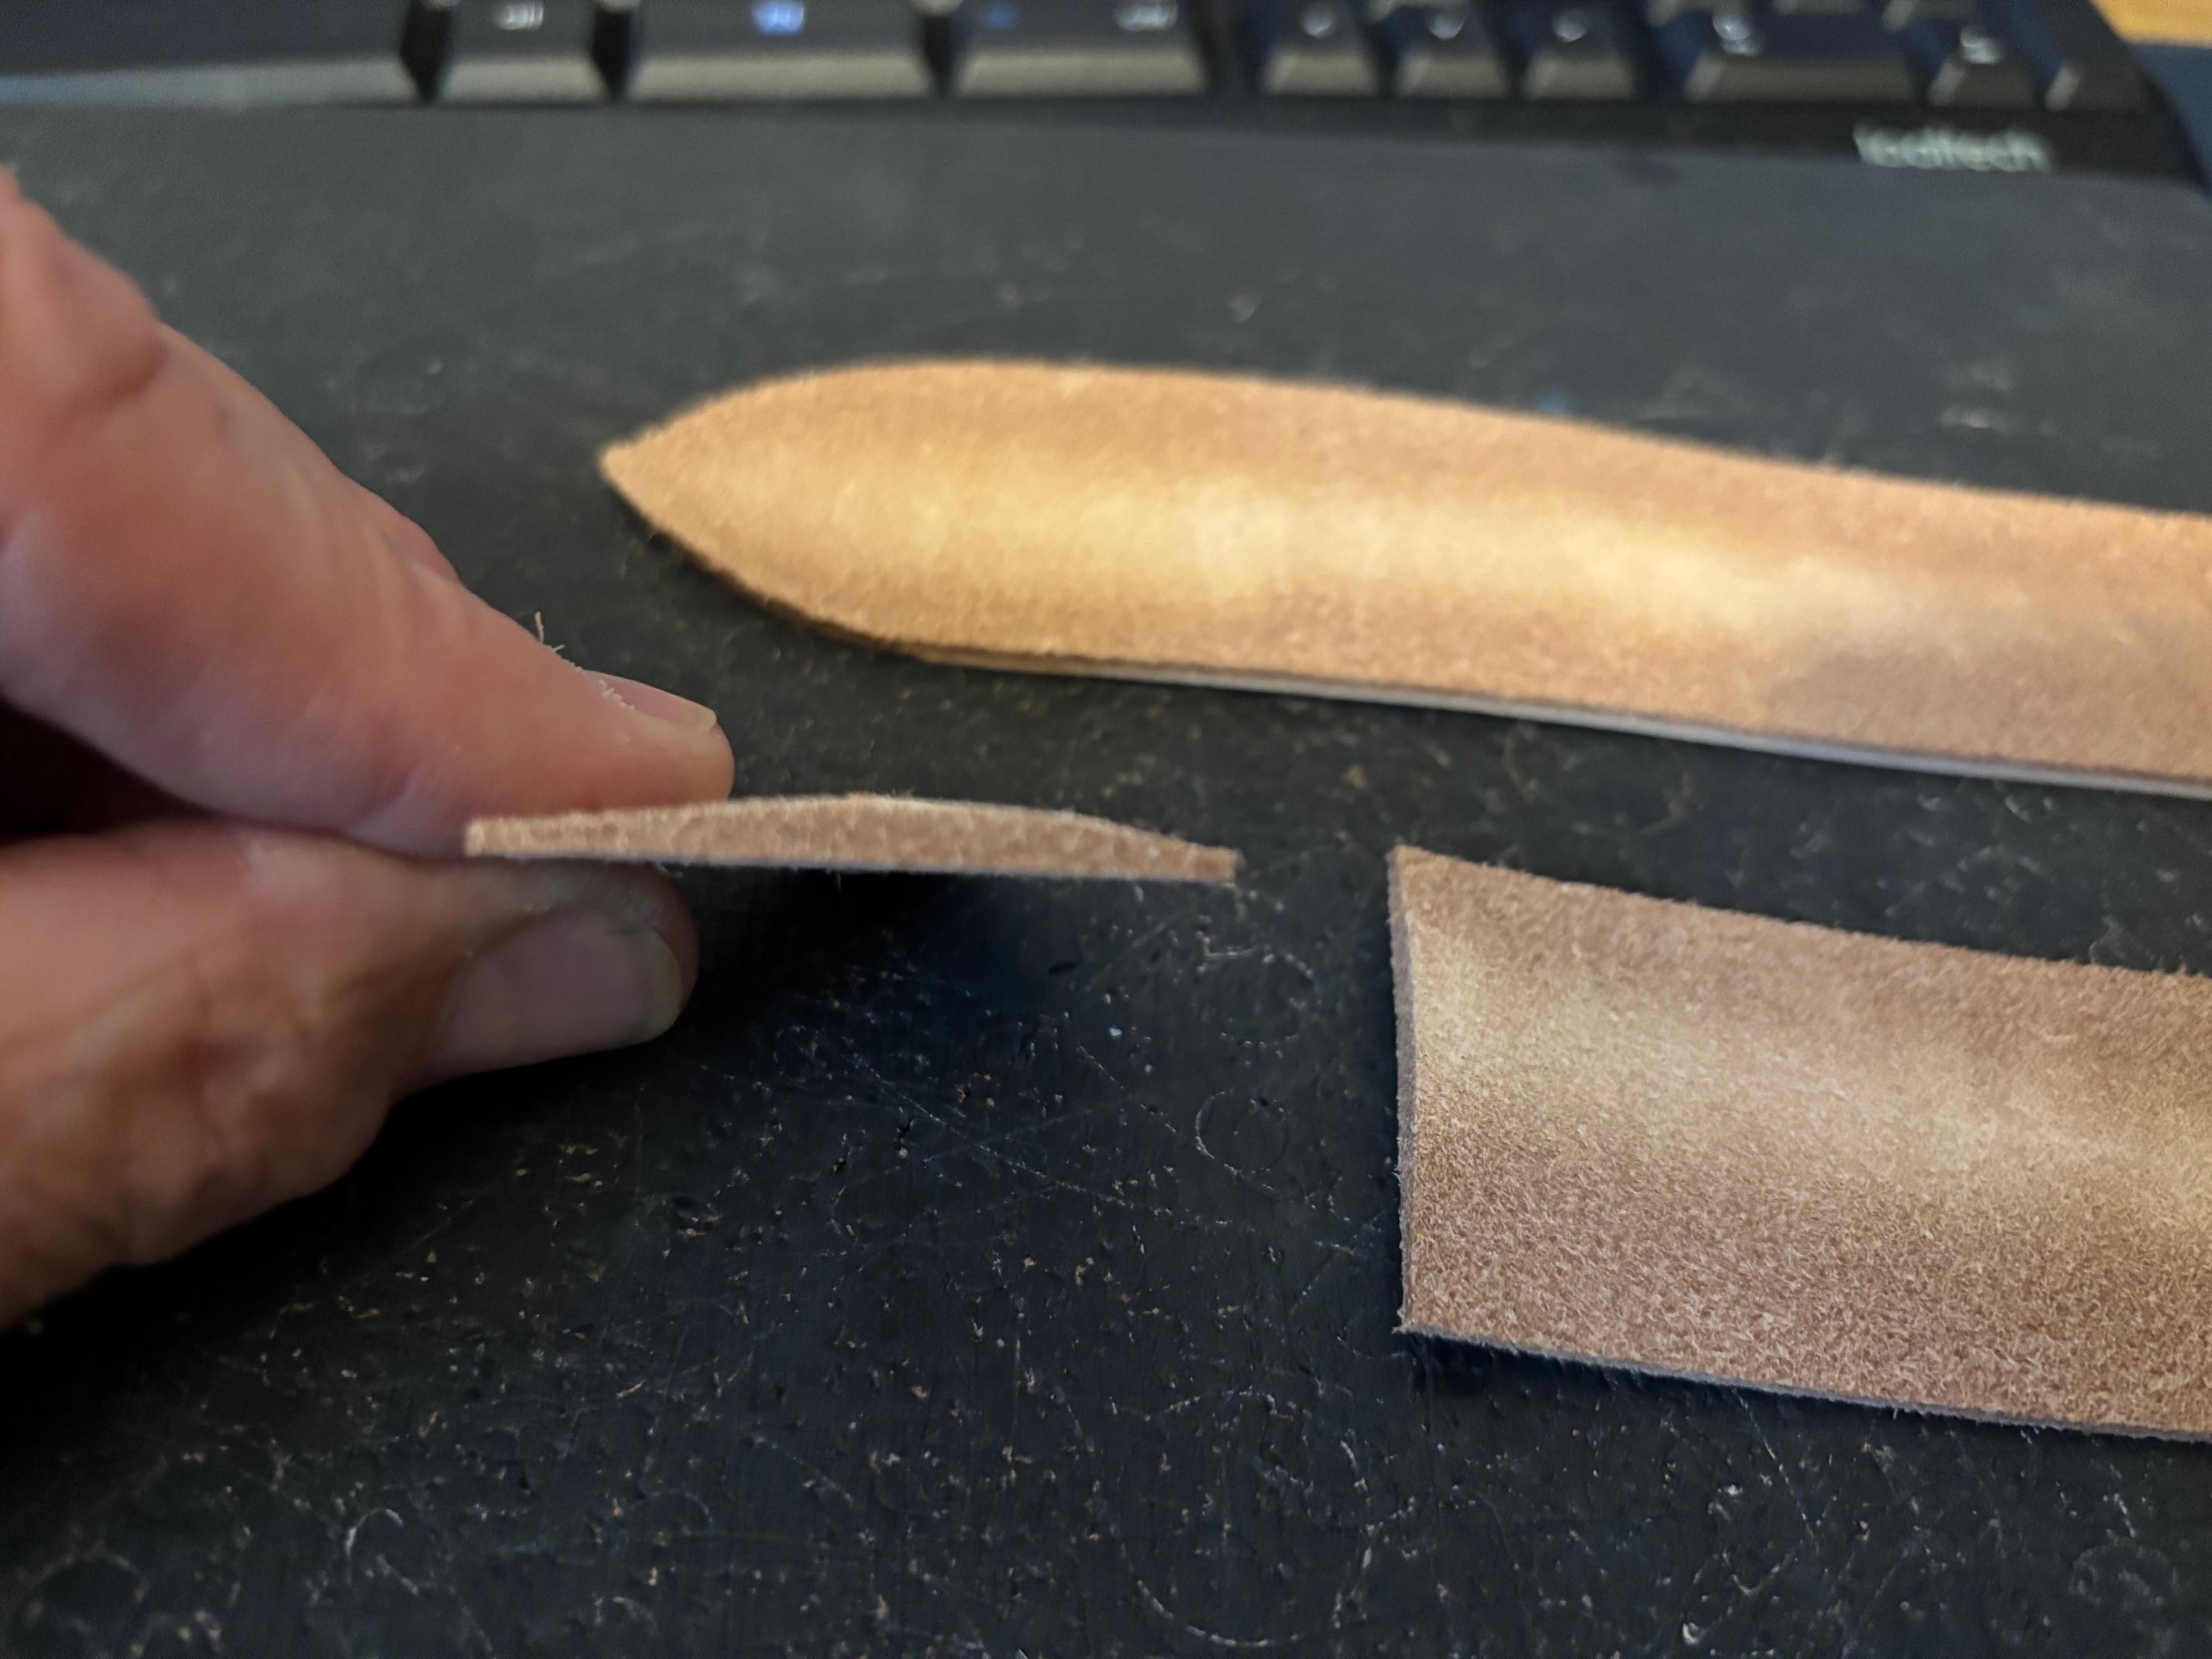
I posted a similar question back on May 18 in this forum and got some good tips, but I'm still having trouble. I purchased the TandyPro Deluxe Leather Splitter a few months ago. My problem is, when I pull belt straps through to skive 7" at the buckle end, I am not getting a flat cut. It is cutting too deep in the middle of the blank, see photos. The light area on the end of my blank in the photo is cut too deep, I cut a cross section of the waste piece and am holding it in my hand in the photo, you can see how bad it is cutting. These are the steps I am taking to do my split/skive: First, I sharpened the blade a LOT from how it came in the box, and kept the edge very flat. I set the roller at the depth I want at both ends and tighten the two lock nuts I start my cut while pressing back on the lever, cutting slowly for about 1/4" to 1/2" until the blade gets to depth I stop and tighten down the roller with the large nob Then I use a short piece of 2x4 to hold down the bar and the blank behind the roller, so the blank follows the curve of the roller from behind and slightly below Then I pull the blank through slowly. And it screws up the cut. What am I doing wrong? Previously, and before I started holding down the bar and belt with a piece of 2x4, I'd split through the blank entirely and ruin belts. I'd appreciate any tips or comments to correct this problem, thx!
-
 A couple weeks later and she's pretty much squared away. A thin plastic washer in between the motor side pulley and the casing got rid of the clunk I was complaining about earlier. There's still a lot of play in the hand crank but I'm not going to worry about it. I still need to finish up the bobbin winder and tall spool placement. The O-ring for the bobbin winder didn't come with the machine and I can't justify paying $25 for the "bobbin winder rubber" from Landis. BTW, a new shuttle costs $400!?!?! I have two, fingers crossed I never have to pay for a new one! I ordered a new servo motor with needle positioning sensor for my Consew and moved its servo motor over to this machine along with a 3:1 speed reducer. I had to make a couple custom mounts and platforms but enjoyed working through the process. While doing some testing, the machine was running about 32 SPM which is exactly what I was hoping for. I did get some belt slippage when not giving it a running start on some thick leather. I'm wondering if a rubber v-belt would do better than this adjustable fiber chain belt that came with the machine. It was very convenient for setting everything up but it seems to be more "slippery" than what a v-belt would be. Eventually I may get some low profile wheels but for now I think it'll just live on the floor. Thanks for the advice and feedback!
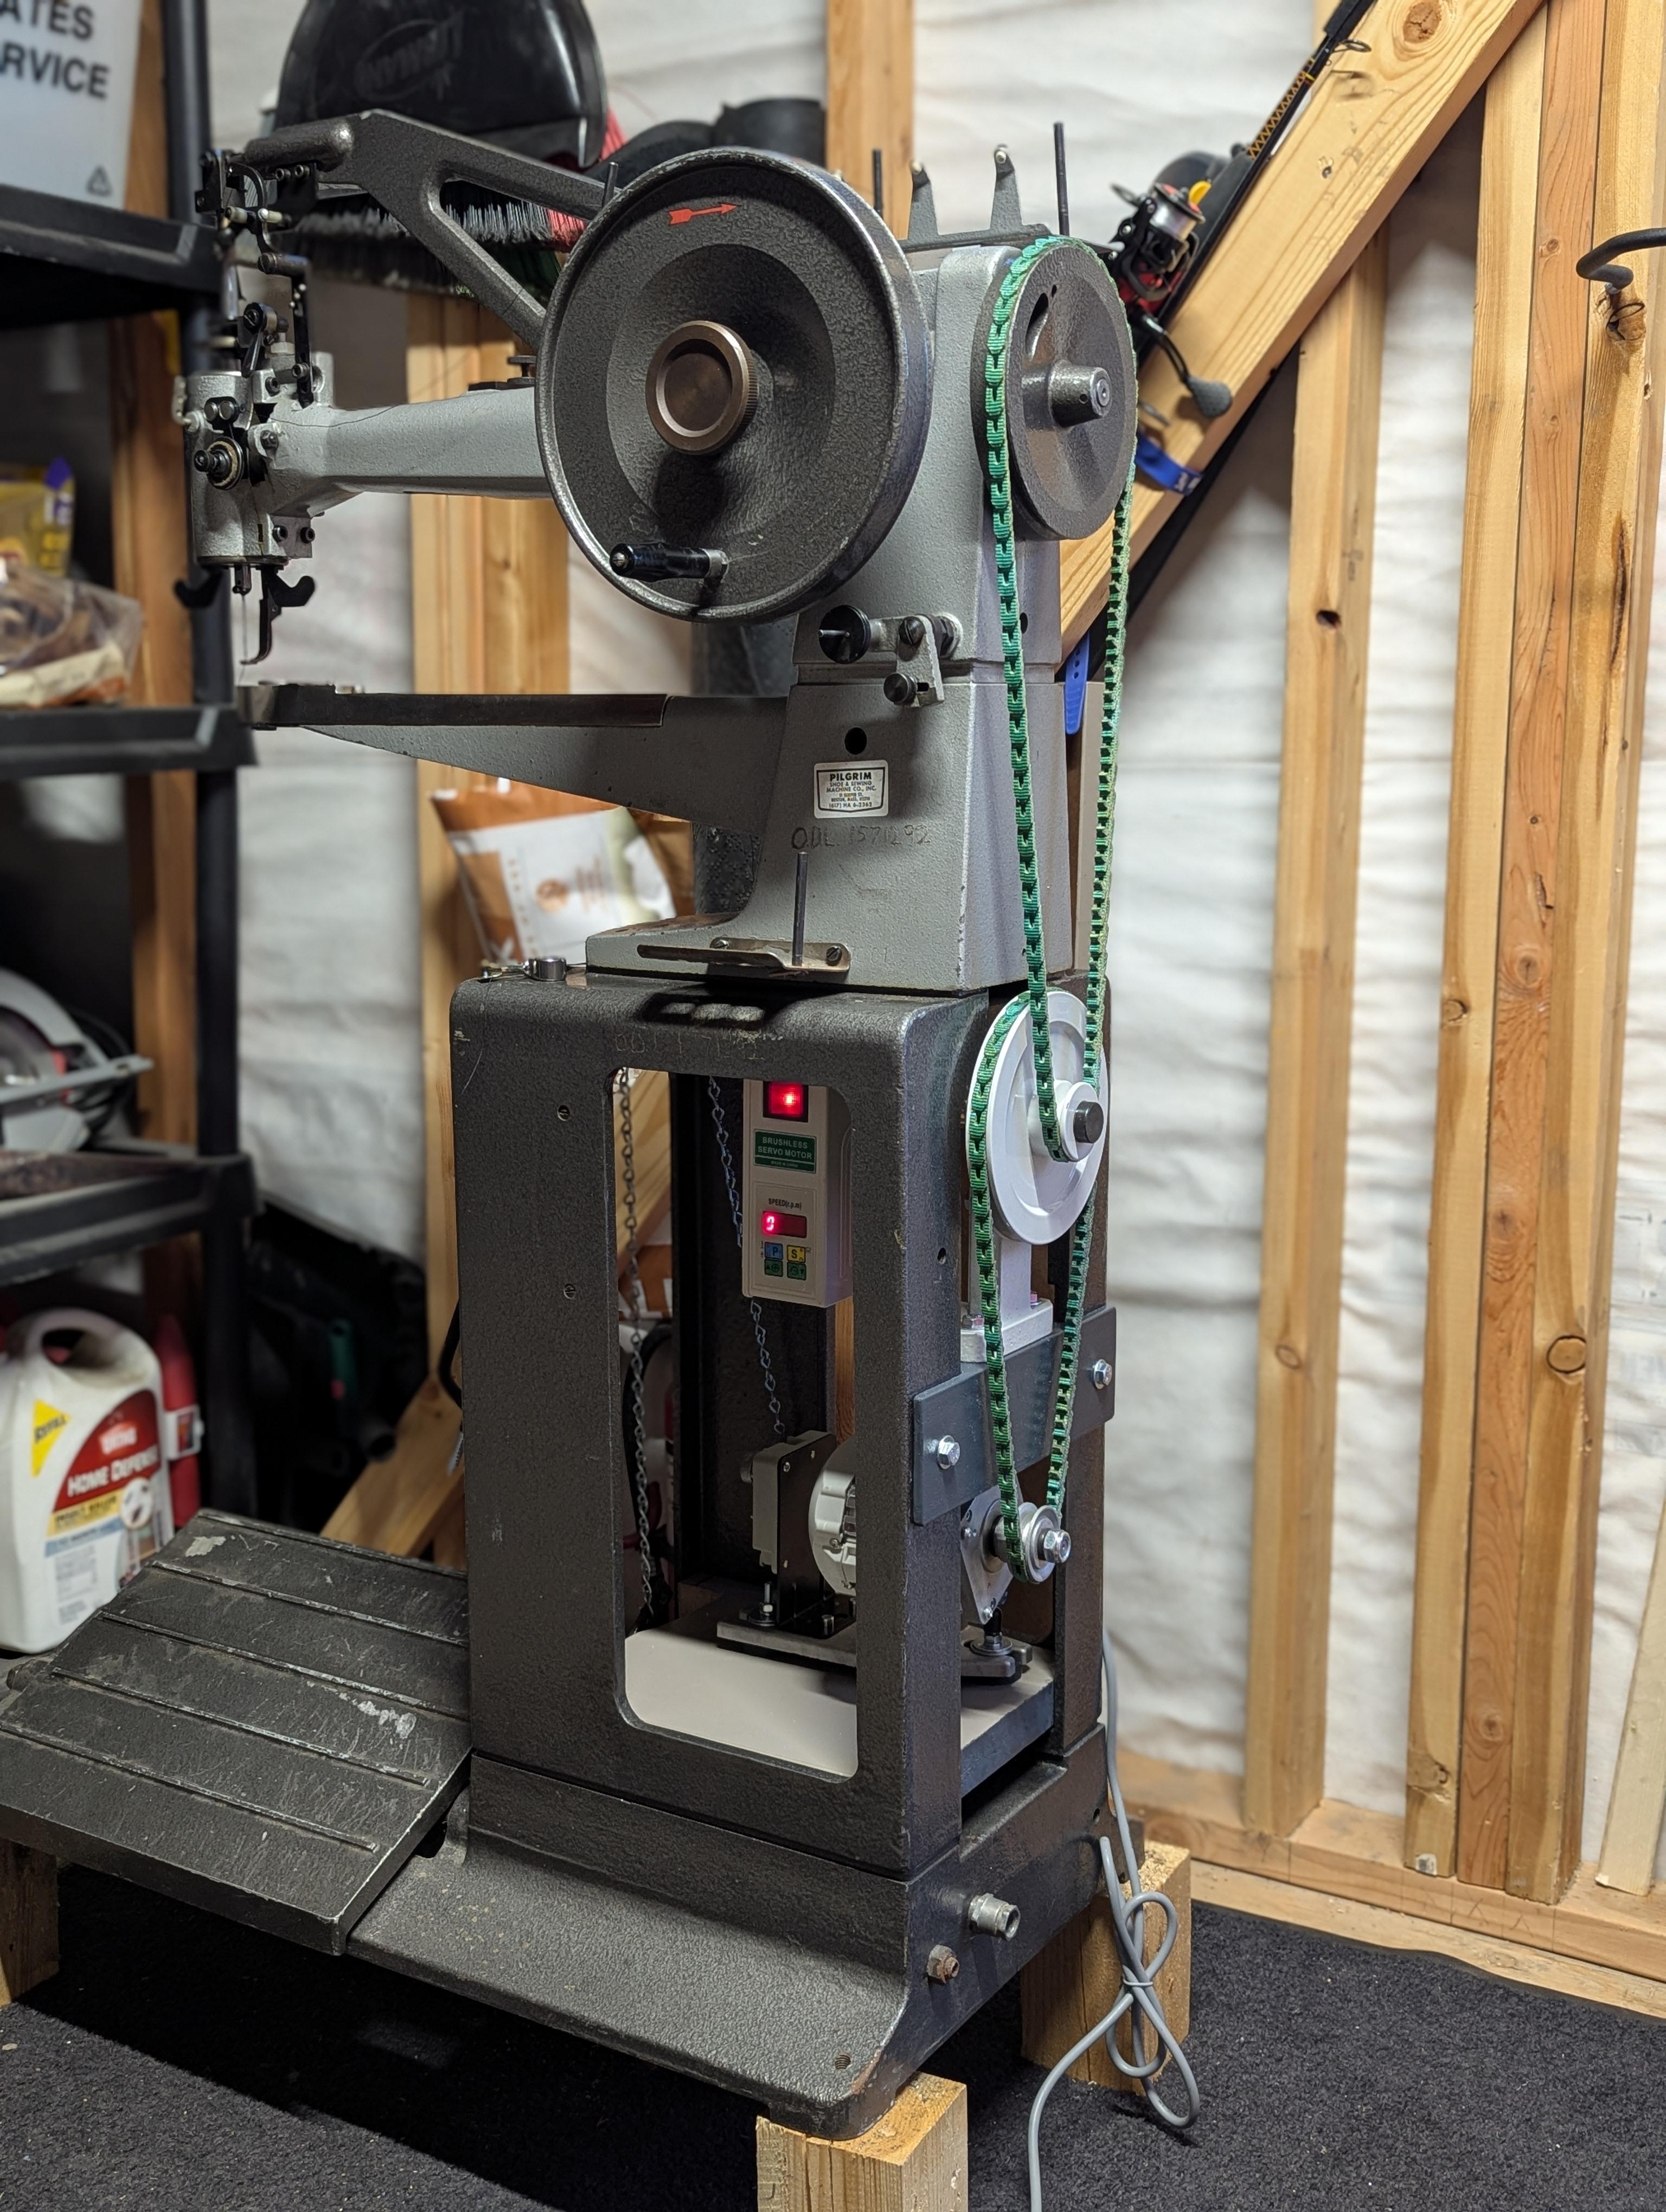
-
Not really a fan of rough out, but man you really made it look great!
- Yesterday
-

Adventures in watch strap making
dikman replied to dirk87's topic in Purses, Wallets, Belts and Miscellaneous Pocket Items
Well, my efforts were not exactly a success. First leather I tried cracked at the fold for the pin. I then tried kangaroo leather as it is thin and tough, unfortunately it is still too thick, next I tried some chrome-tan as it's thinner but two different types proved to be too soft at the fold. I finally got a piece to stay in place around the pin but it has too much stretch to use as a watchband, I don't think buckle holes will last long. The problem, I finally realised, is the watch, it has recessed parts in the body where the pin/strap fits which severely limits the thickness of the band material. Probably why they use synthetics for all the bands for these I guess. Ah well, it was an interesting experiment. As I have a strap hanging off one side of the watch I'll use it as a fob/pocket watch instead. Me hats off to you, Jim of Calgary. -
 Bnorton49 joined the community
 -
Anyone taken a cheap servo motor apart?
friquant replied to AlZilla's topic in Leather Sewing Machines
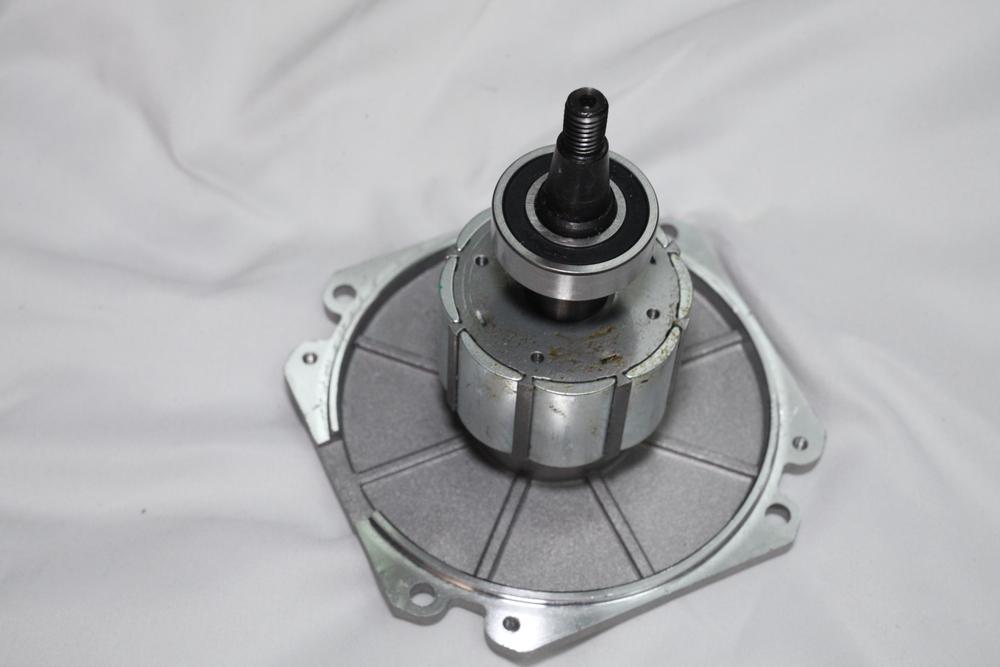
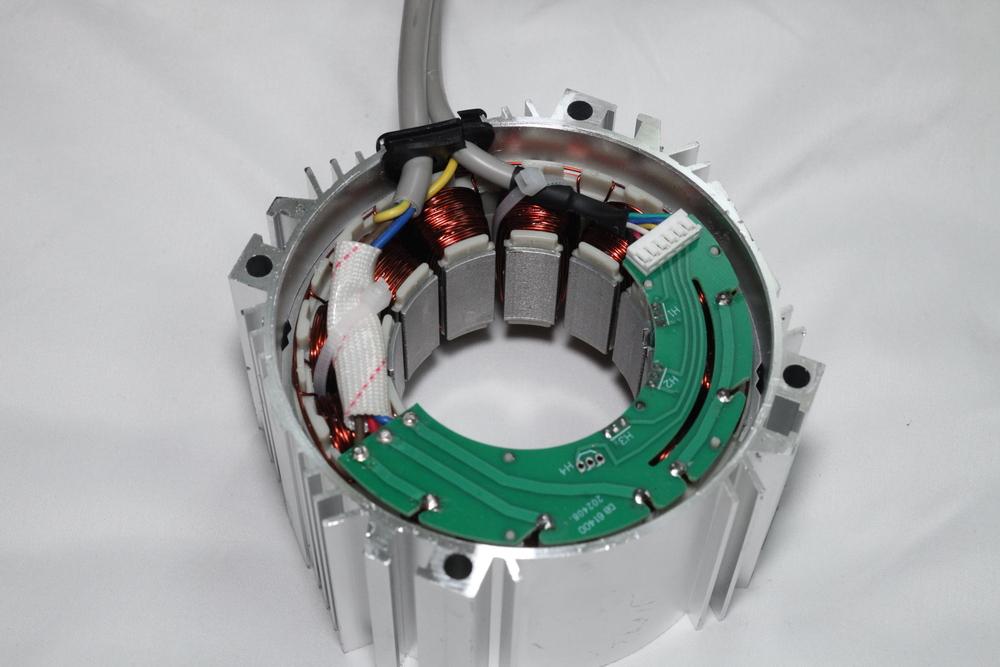
This is the stator and rotor from my "stitchman" digital servo. Only took about fifteen minutes to get it apart with a #2 philips on the screw gun, then a screwdriver and wrench to pry the plates off. Those permanent magnets are no joke!
-
Universal motors are all brushed. My universal motor came with extra brushes even. About half the digital servo motors I see advertise as being brushless---the others don't say. I took the motor apart today on my "stitchman" digital servo and verified that it has no brushes. If anybody has a digital servo with actual brushes inside, I'd be interested to hear.

-
https://dn790008.ca.archive.org/0/items/TheAshleyBookOfKnots/the ashley book of knots.pdf Over 600 pages! That's a lot of knots.
-
 Aleathermaker joined the community
 -
Ditto!
-

Stitch strength heresy - Lock vs Saddle
Cumberland Highpower replied to AlZilla's topic in Sewing Leather
Ok. -
Tall Post Sewing Machines?
Cumberland Highpower replied to Cumberland Highpower's topic in Leather Sewing Machines
Hey I like that. I guess that's the "Slant 6" of the sewing world? -
I'm wondering if the minimum speed issue is to decrease heat. I've read that 300 is where heat dissipation is adequate (maybe for sustained operation?). Possibly 200 is banking on the user not staying at 200 for longer periods? I've also noticed that some of these cheaper motors have actual cooling fins on the outside of the body, where others just have undulations cast into them. My current motor with a 100 rpm minimum start speed has the cooling fins on the case. I'll have to start noticing if there's any correlation. Also, based on my recent disassembly of a cheap servo, the fan built into the end is just flat paddles running next to the closed end of the motor. No circulation at all. I think a small computer type fan blowing on the motor housing would really up the cooling game. It's on my to do list, even though with my low volume of sewing, I don't think heat is going to be an issue.
-
And maybe there's a distinction between brushed and brushless.
-
The top thread on a machine stitch saws back and forth something like 50 times. Remember that the tension arm way up at the top of the machine is letting it get pulled around the bobbin each rotation and then yanked back up. I was surprised when I first heard it. You are correct about the bobbin thread having an easy time of it. I'm glad this post finally got some traction.
-
Well said Fred.
-
I would dispute that simplistic statement 1. I like to saddlle-stitch. It is NOT for novelty value. Knowing how to saddle-stitch is good for any sort of leather work. I can s/s some items up faster than it takes me to set up any sewing machine 2. Poverty - NOT, I have numerous usable sewing machines and a few speedy-stitchers. The right tool for the right job. All in the leatherworkers armoury. I am neither poor nor rich
-
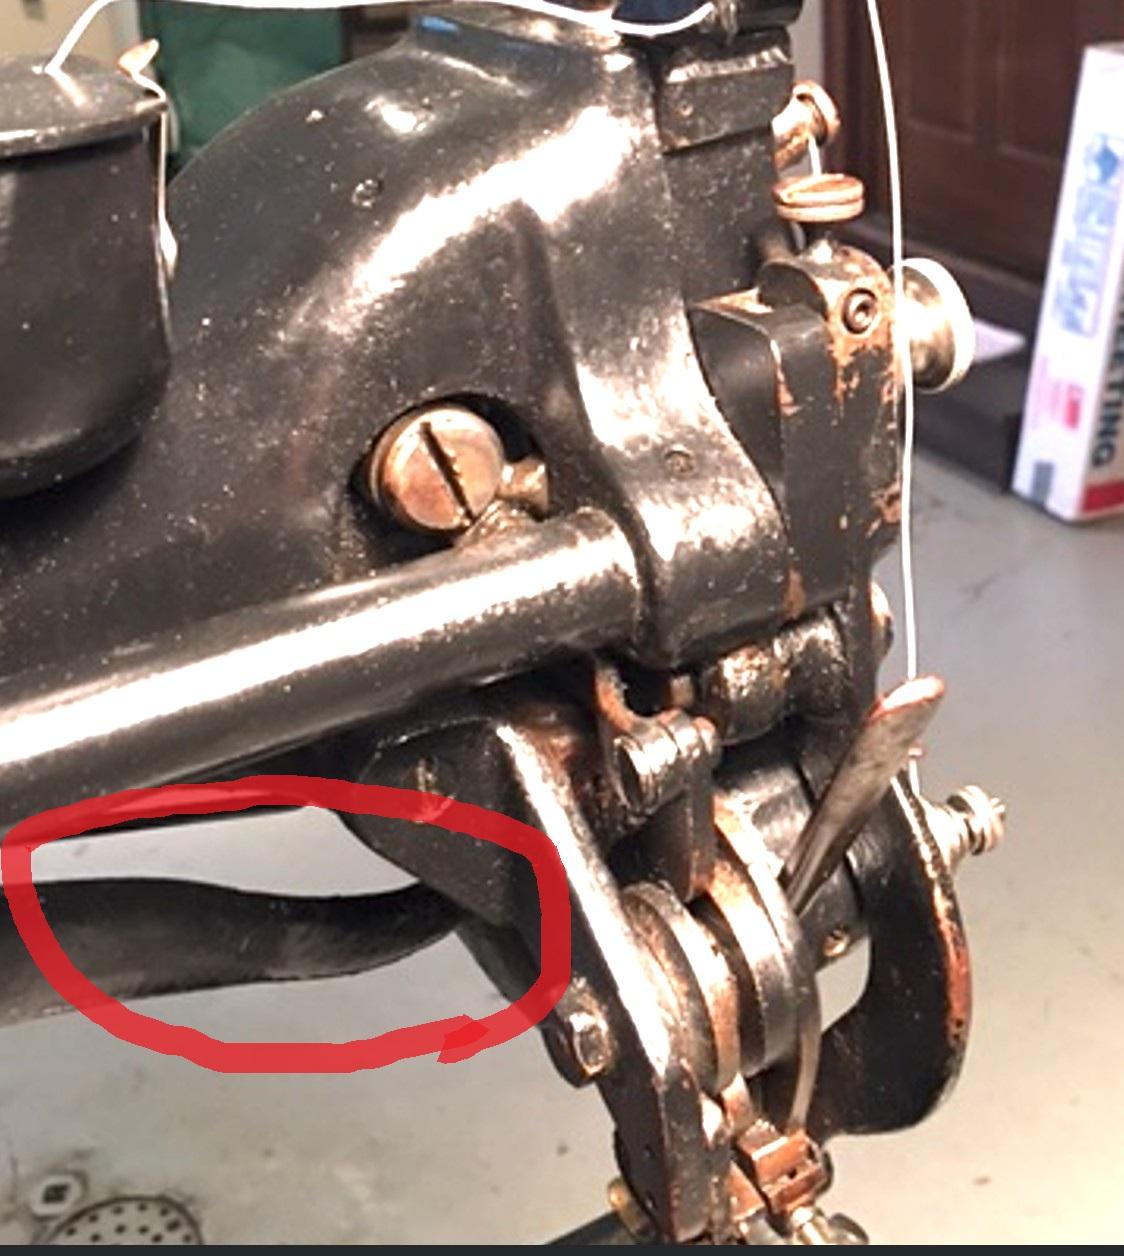
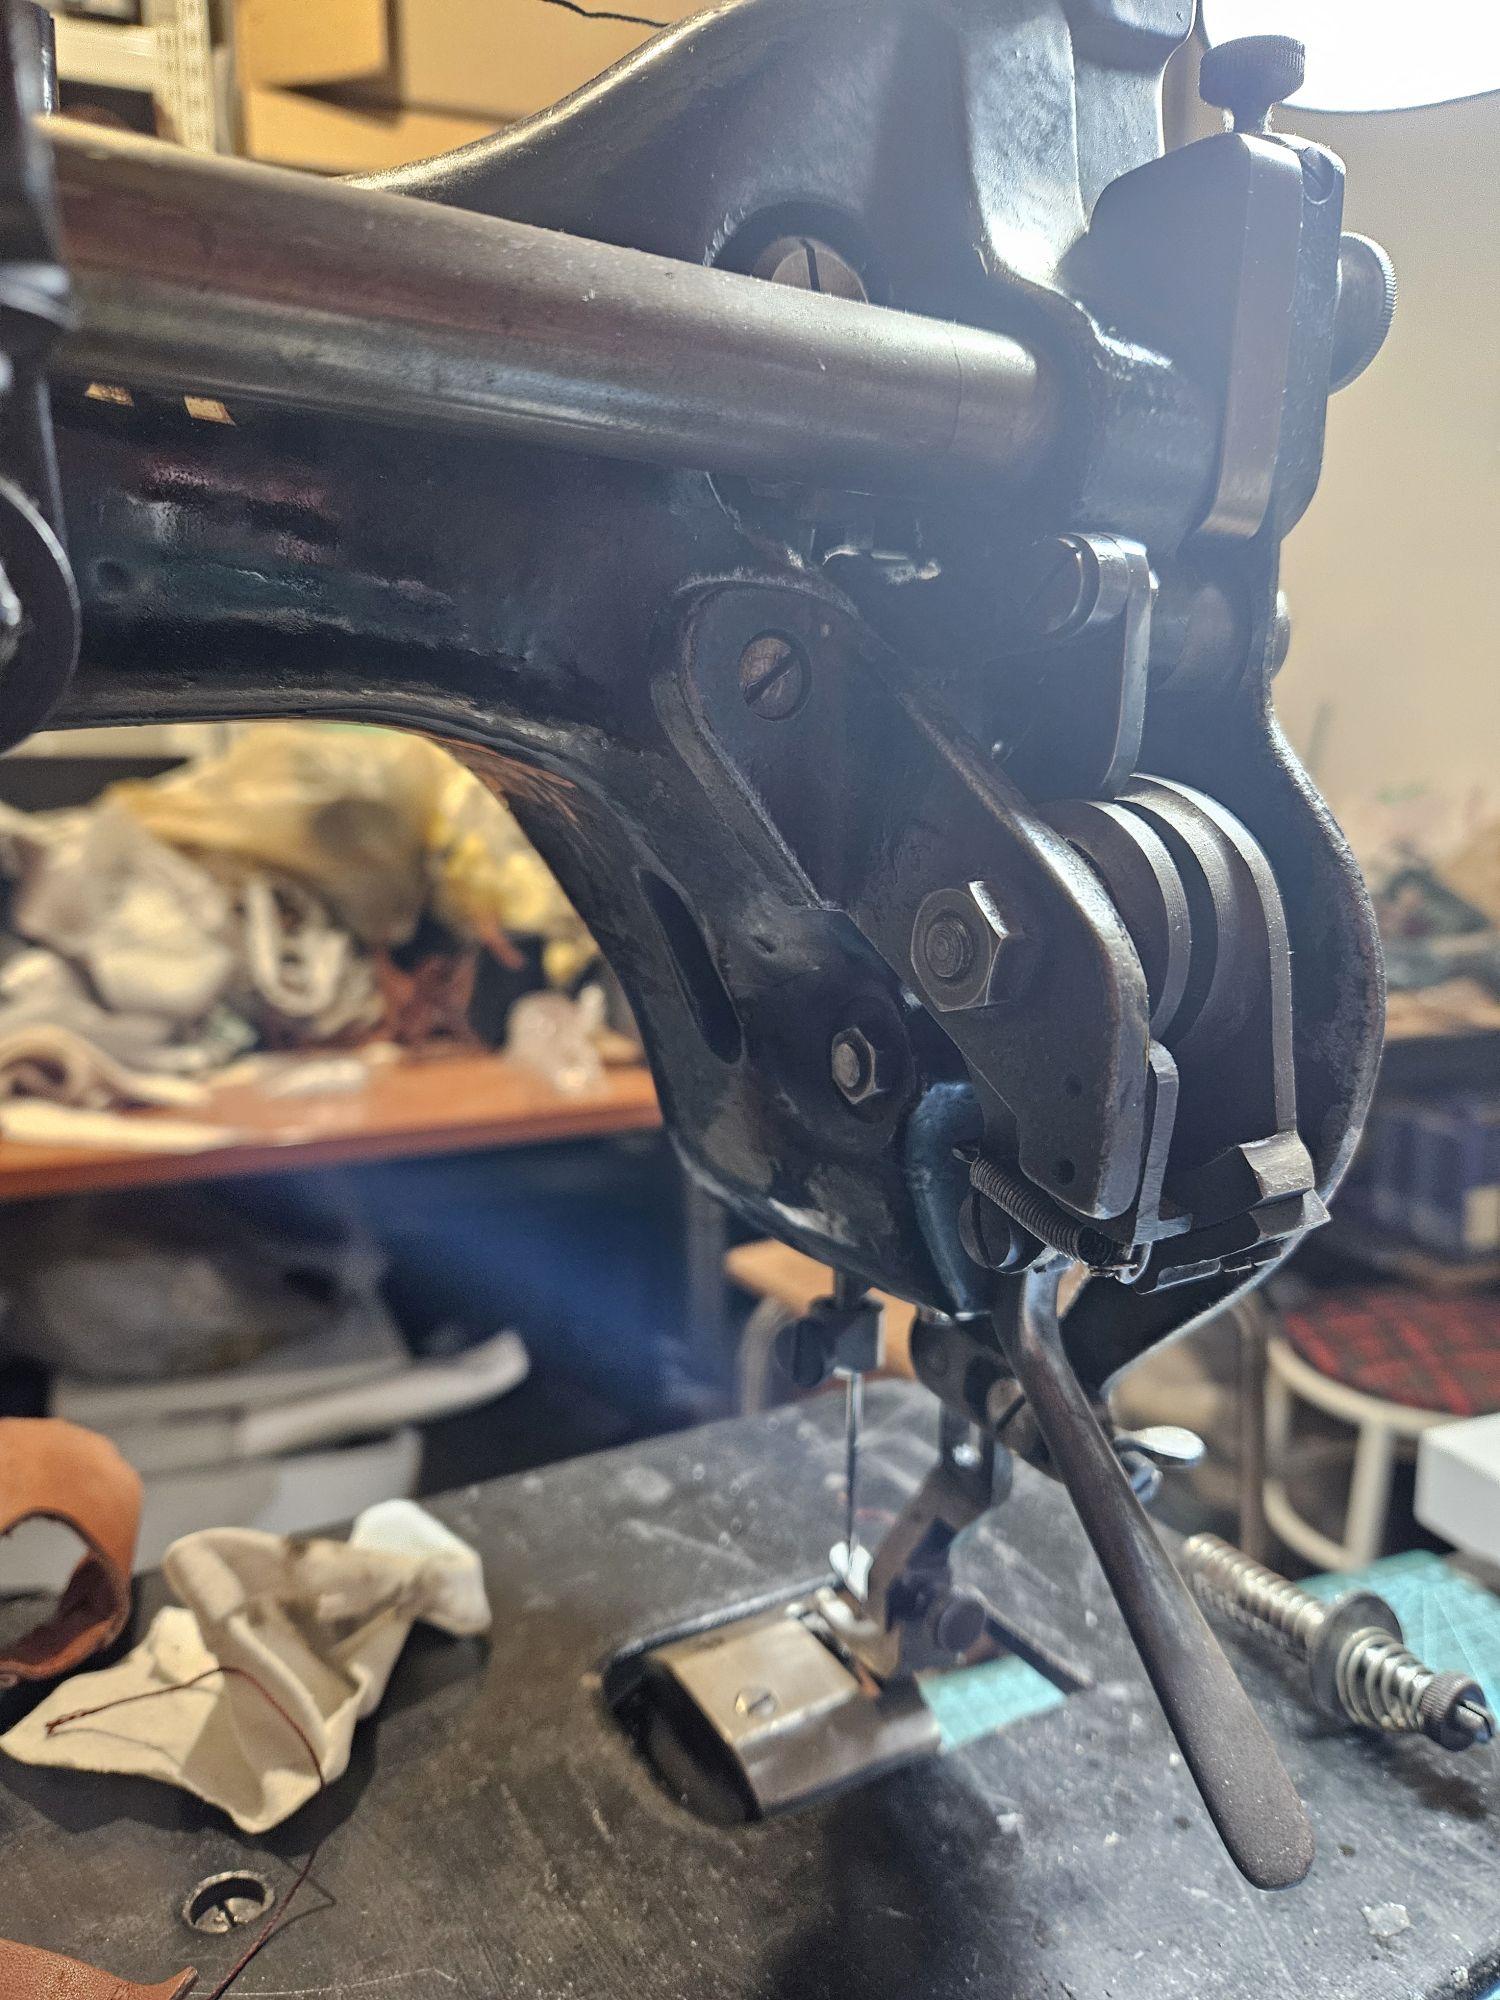
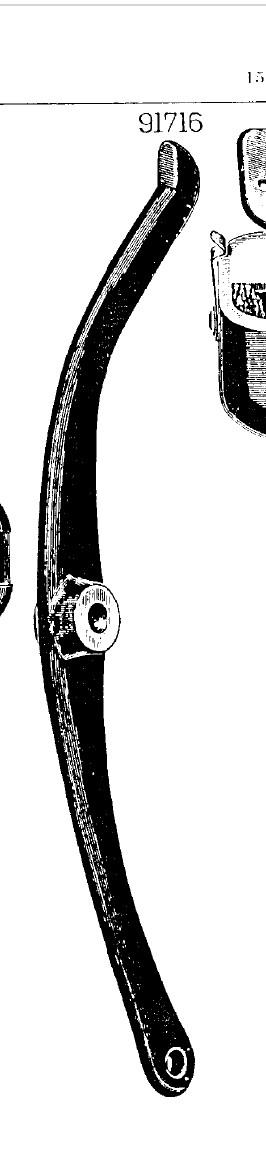
Hello, I have a question about my 45k53 machine, Since I couldnt find parts list for 45k53, I dont know how it would be but, I want to rebuilt foot lifter lever . I have also one 45k25 and I have completed rebuilding for 45k25 . From this topic , I have seen this photo with lever system And also I want to share my machine photos, I just want to learn the shape of part,in order to produce a utilizable replica of it. I think it should be a bit diffrent from the one 45k25.(part code 91716) If possible, Could you please share the photo of foot lifter lever for 45k53 (or part code of it) Thanks

-

Tall Post Sewing Machines?
nylonRigging replied to Cumberland Highpower's topic in Leather Sewing Machines
Not a Tall extra high post, but the slight shim tilt forward modification to the sew head is more comfortable on sitting behind with eye-hand, and you dont find yourself leaning forward as much . - -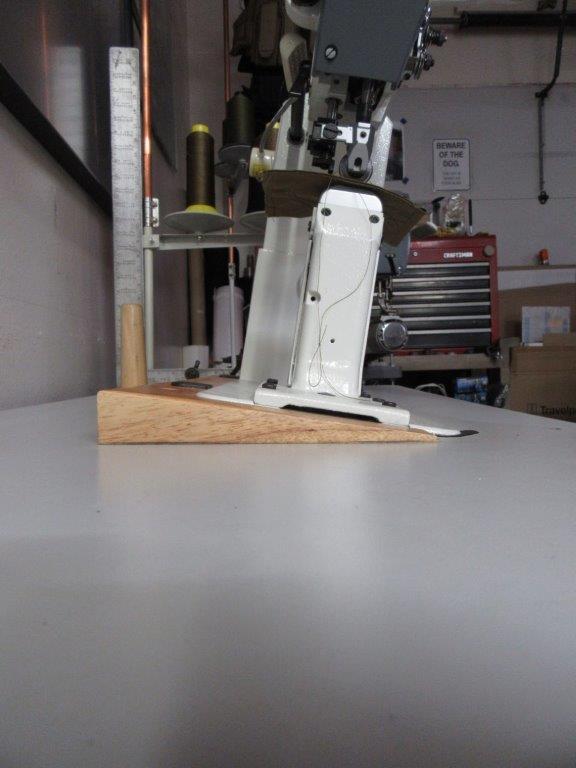
-
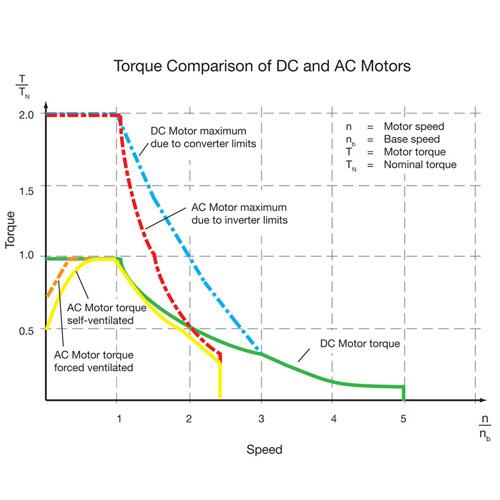
I guess the problem is with the minimum speed to start. Which is I guess an engineering characteristic of the motor, but this is beyond my limited knowledge of electric motors Regarding torque of different types of motor I found this: