Spinner
-
Posts
1,373 -
Joined
-
Last visited
Content Type
Profiles
Forums
Events
Blogs
Gallery
Everything posted by Spinner
-
Modified Slim Jim Holster in process
Spinner commented on Spinner's gallery image in Our Leatherwork Galleries
 Thanks Natalie. Unfortunately the client asked for it to be solid black so it blends in with the almost all black bike but the overall piece should still be pretty cool when done.
 -
From the album: Three Mutts Customs pics
Modified Slim Jim Holster for a folding cane with a carved silver dragon handle. Will also be making custom brackets to mount this to the side of a Harley Trike.© © leatherworker.net
-
From the album: Three Mutts Customs pics
© © leatherworker.net
-
You have been busy Joker, those look great. The skull in the harley emblem is a cool idea, hadn't seen that before.
-
Springfield Leather has a whiskey colored roo lace: http://springfieldleather.com/store/product/16322/Lace%2CKang%2CClass%2C1-8%2225y%2CWhsky/
-
Trying Out Airbrush And New Pattern
Spinner replied to cjcinin317's topic in Gun Holsters, Rifle Slings and Knife Sheathes
Something that will help the HF airbrush 'feel' more expensive and give you a tad more control is to sand & polish the trigger stem. On the cheaper are brushes, they simply cast them & kind of clean them up so there is a rough, 'sticky' feel to them. Next time you clean it, take the trigger out, sand it to 600 grit or so and then hit it with a buffing wheel and polishing rouge. That way when the needle draw rubs against it the action will feel smoother. If there are good sized casting pits, run some epoxy over the trigger the same way you would auto body filler and then resand/buff. -
I'm not a holster maker but it looks to me like what's been said above. The wrinkle looks like it's due to pressing in that area, the leather looks a bit thin (I'm guessing it's single 6-7oz or so?) and I don't know about the rest of you, but if I were holstering a gun and felt it hang up I wouldn't keep trying to force it into the holster. I may be wrong, but wouldn't you feel some resistance before that weak wrinkle was able to push the trigger all the way back to fire? I also find it interesting that he conveniently had a camera and a trajectory prop (chopstick?) handy enough to take CSI style photos moments after this happened. I'm guessing moments due to the fact that the wound is still fresh & oozy.
-
Last night life taught me to always be humble, have patience and to put the tools down when it's getting late...time to break out a new piece of leather & start over.
-
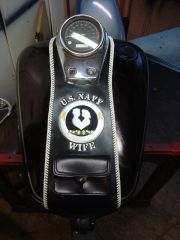
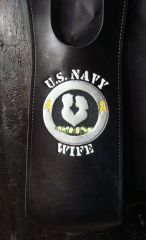
US Navy Wife bib for 2006 Shadow Aero 750 Trike
Spinner posted a gallery image in Our Leatherwork Galleries
From the album: Three Mutts Customs pics
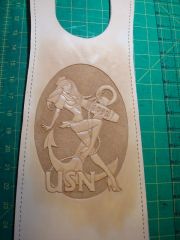
Latest bib off the bench. Client requested the US Navy Wife's - Toughest Job in the Military medallion be the tooling but the text was too small to make it look good so we went with the Stencil font lettering that you see here. The medallion is painted with Golden Fluid Acrylics "Iridescent Silver", when brushed on, it has the same properties as aluminum or silver foil but with better adhesion. W&C 6oz leather, white kangaroo lacing with a felt liner. The pocket detaches and has a black pigskin wrist strap that clips onto it to make it a cell phone/wallet bag.© © leatherworker.net
-
Ballcap with Leather Patch
Spinner commented on JustKate's gallery image in Our Leatherwork Galleries
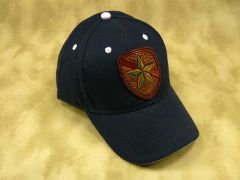 great idea!
 -
Thanks Bob. I've always believed that sharing what little knowledge I have knocking around in my head is me paying my dues to the folks that helped answer my questions when I started out. Pay it Forward and all that.
-
Thanks Roo. I do line the bibs with a high quality quilters felt that is nice & soft. To get it cut right, I cut it to the pattern shape , glue it to the bib back using 3m 90 hi-strength spray adhesive and then sew it in spots that won't show like around the dash opening. Once attached, I trim the excess along the lacing at an angle so the felt doesn't show when installed but it protects the paint from the studs and the edge of the lacing (lacing can leave an abrasion line if left to rest on the tank over time). Thanks Joel. The color is Fiebing Spirit based dye. I do it in 3 steps to ensure I get an even color and fairly good depth. First to rub the bib down with alcohol to clean and open the pores. Just before it is completely dry, I hit it with 1-2 coats of Fiebing Royal Blue using a Preval sprayer to get a base color down. Let dry for about an hour; then 1-2 coats of Fiebing Black, again with a Preval. Let dry overnight. Next day, a good coat of neatsfoots hand rubbed in followed by a hand rubbed coat of Fiebing Black. I use diaper cloth for the hand dye applications as it seems to put more dye on the piece than I get with lambswool. I like the Preval sprayer over a airbrush or tough-up spray gun as it atomizes the dye less...harder to control overspray but it penetrates better than the other two.
-
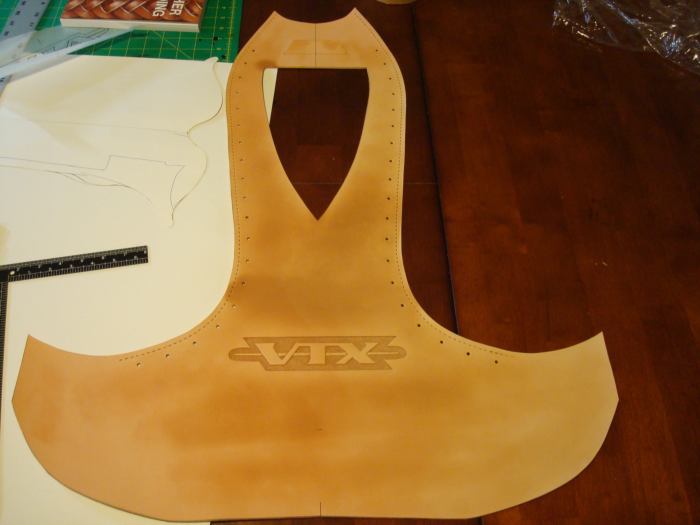
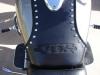
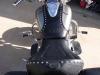
This was a new learning experience for me...the tank was longer than any I've worked with so far and the client wanted full length versus the normal ones I make that come up about 1/2 way under the dash. The effect was great and allowed me to run the studs all the way over the tank creating a nice horizon effect. After the wet-forming, the bib dimensions are: 27" long, 12" wide and 6" deep (there is another 1-3" of leather wrapped under the tank). Studs are rivet-on 12mm chrome domed spots set 1 1/4" apart on center to match the aftermarket seat the client has. W&C 6oz. with 1/8" kangaroo lace - triple loop lacing with extended tooth for the herringbone effect.

-
Waste Paper Basket
Spinner replied to leathercrafter's topic in Purses, Wallets, Belts and Miscellaneous Pocket Items
Ah, ok...makes perfect sense. Like the plastic inserts they put in chrome trash cans. -
I agree, the SK-3 is my best knife . I really like my Barry King knives but after getting the SK-3 a month ago, I have a hard time going back to them.
-
Waste Paper Basket
Spinner replied to leathercrafter's topic in Purses, Wallets, Belts and Miscellaneous Pocket Items
Never would have thought of making a trash can but that's pretty cool! I'll have to make one of those for the new work area once I get in there in August. Did you use a existing can for the form/lining it? -
From the album: Three Mutts Customs pics
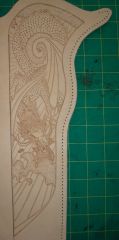
tooled & painted artwork for a Shadow Aero 750 tank bib. Still need to de-sheen the topcoat, apply the weatherproof dressing and add white triple loop lacing. The metallic color is Golden Fluid Acrylics "Iridescent Silver"...my new favorite color...looks and acts similar to brushed aluminum in the light.© © leatherworker.net
-
Hey Jimbob, one solution would be to use an acrylic medium with your acrylic paint to make it a bit more workable and to take the gloss out of it that acrylics naturally produce. Golden makes a nice matte medium that I have used in the past, might be something to look into: http://www.dickblick.com/products/golden-polymer-and-matte-mediums/
-
Airbrushing Dye, Etc.
Spinner replied to Sixer's topic in Gun Holsters, Rifle Slings and Knife Sheathes
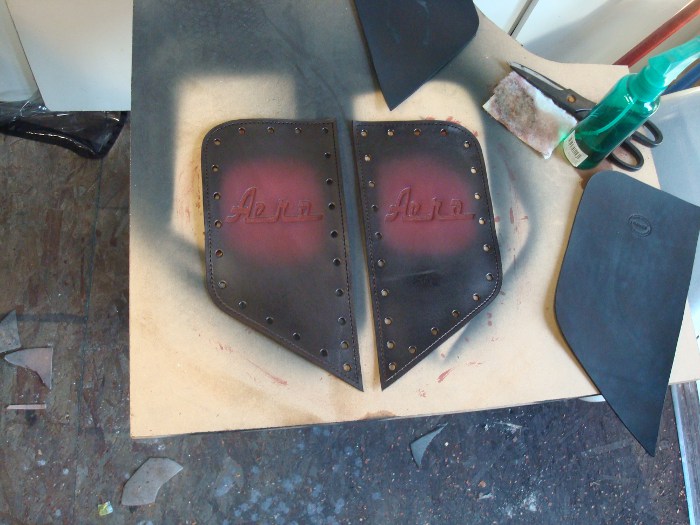
Here's a quick tip on airbrush penetration and concentration... First 1-2 coats use the thinned to 50%, this will help the first coat penetrate better (more water or alcohol) and open up the pores. Next couple of coats use full strength. On the full concentration coat following the thinned coat, don't wait for the thinned coat to dry completely before the next coat. Airbrush tip: lowering the air pressure below 'normal' recommended values (30psi for bottom feed, 15-18 psi for gravity feed) to about 1/2 and then using the brush at 3/4 open will create a similar effect as a HVLP gun...more dye, less air so it atomizes less & penetrates more. For a stipple type fade, lower the air pressure to 1/3 of normal and hold it back a bit farther, you'll get a stipple or granular pattern like the black spots in granite. Here's an example of a quickie two-tone fade I did last night using the techniques above with Fiebing Black over a custom mixed Cranberry/Burgundy with Eco-Flow. (Yes, that is spirit based over water based). The lighting contrast is a bit off (they are actually much darker) but it illustrates the idea well enough. ~Chris
-
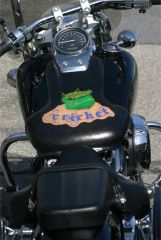 "Cricket" (client's nickname) whaletail tank bib for 2007 Honda Shadow Spirit 750
 -
Tank whaletail bib 003.jpg
Spinner commented on Spinner's gallery image in Our Leatherwork Galleries
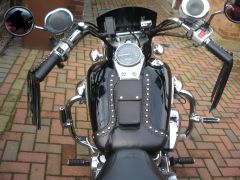 Whaletail bib for 2006 Honda Shadow Aero 750 (UK version) with double buckstitching, 12mm spots, triple loop edge lacing (kangaroo)
 -
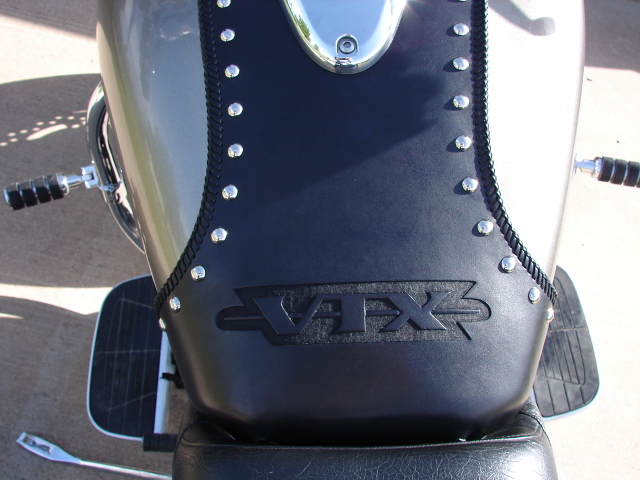
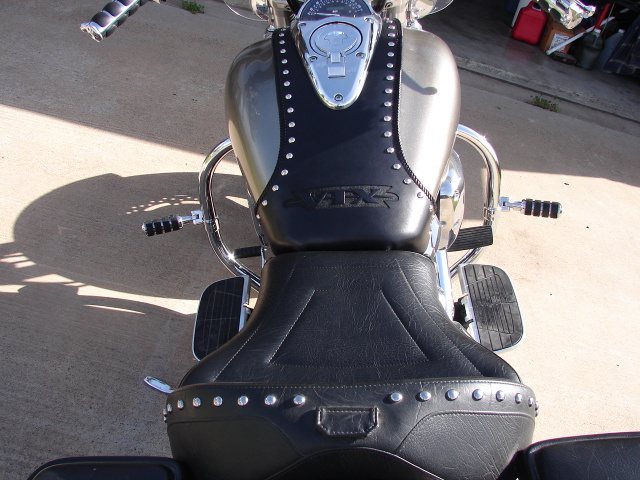
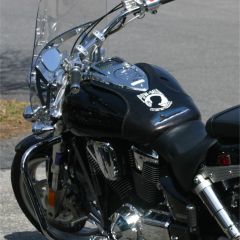 POW-MIA logo & submarine tooled whaletail bib for Honda VTX1800F1
 -
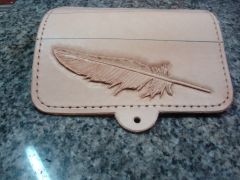 tooled feather on what will be the flap for a tank bib pocket
 -
From the album: Three Mutts Customs pics
-
From the album: Three Mutts Customs pics