Spinner
-
Posts
1,373 -
Joined
-
Last visited
Content Type
Profiles
Forums
Events
Blogs
Gallery
Store
Everything posted by Spinner
-
Folding Cane Slim Jim Style Holster
Spinner replied to Spinner's topic in Gun Holsters, Rifle Slings and Knife Sheathes
Thanks Chris! And you're right, it is. The smile on his face when it was all installed was priceless. -
Folding Cane Slim Jim Style Holster
Spinner replied to Spinner's topic in Gun Holsters, Rifle Slings and Knife Sheathes
Thanks folks, it was pretty challenging to figure some parts of it out (it was only my second holster and first with my own pattern). Yep, actually I laid the holes out on the welt and then used my drill press and a long 1/16" drill bit to open them up. that plus a 2" long needle and a pair of needle nose pliers to pull it through... -
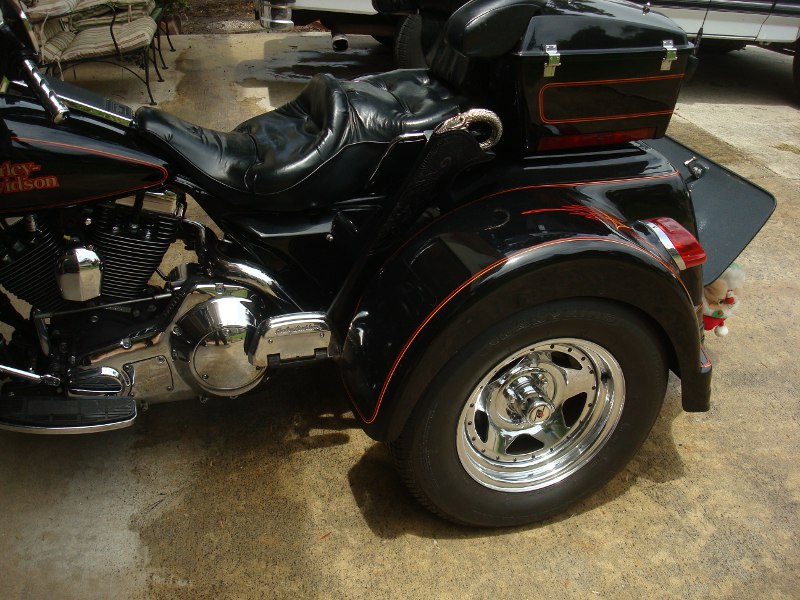
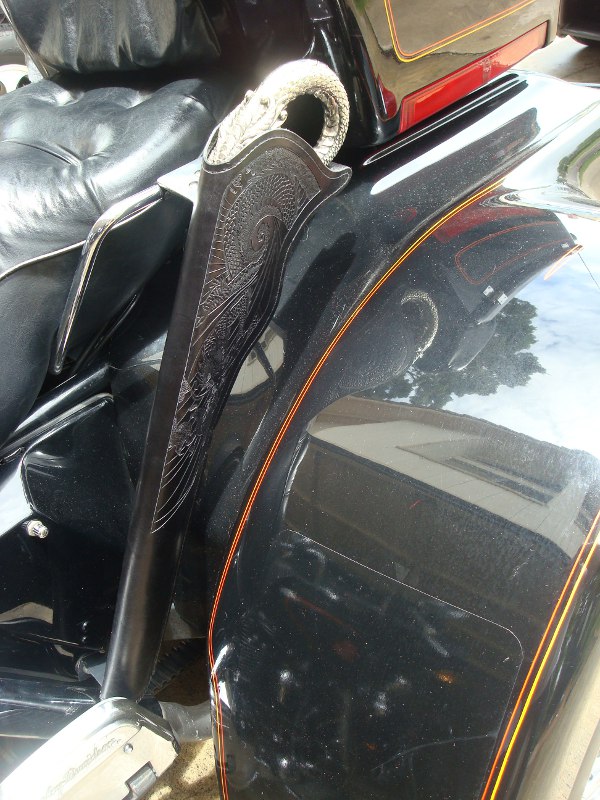
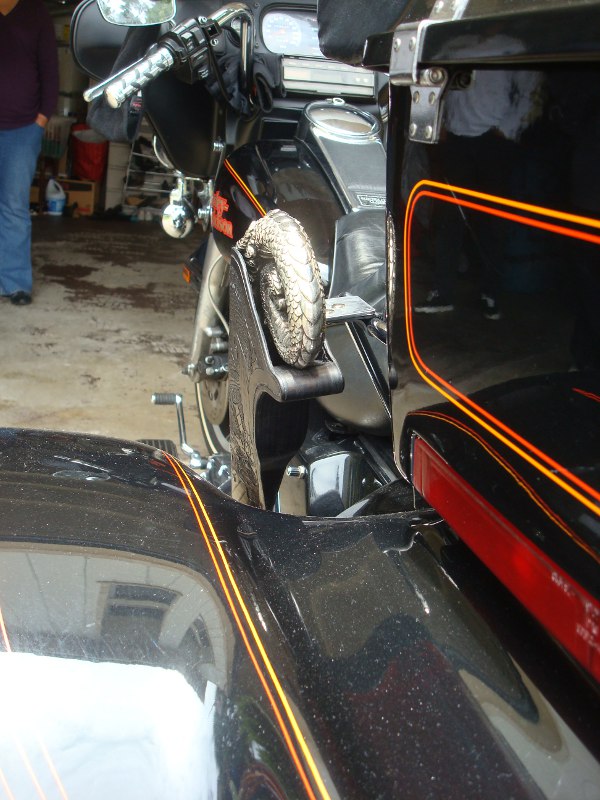
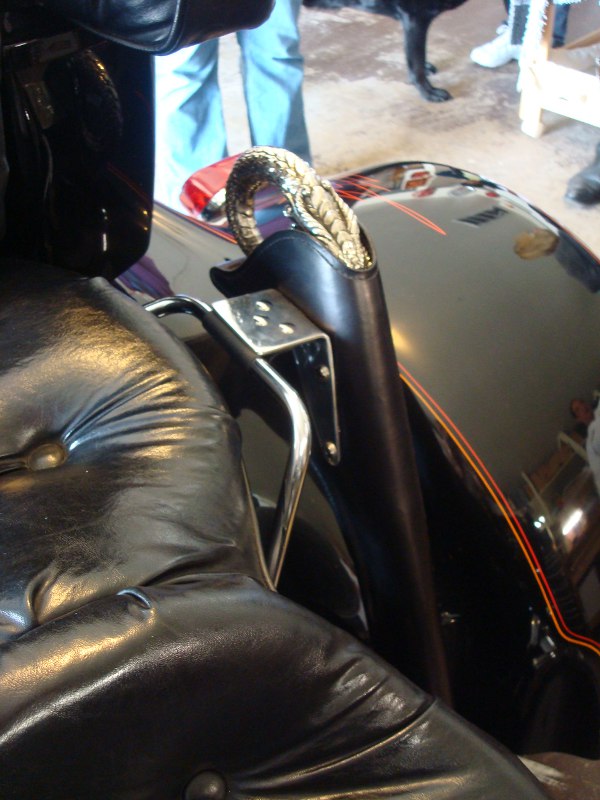
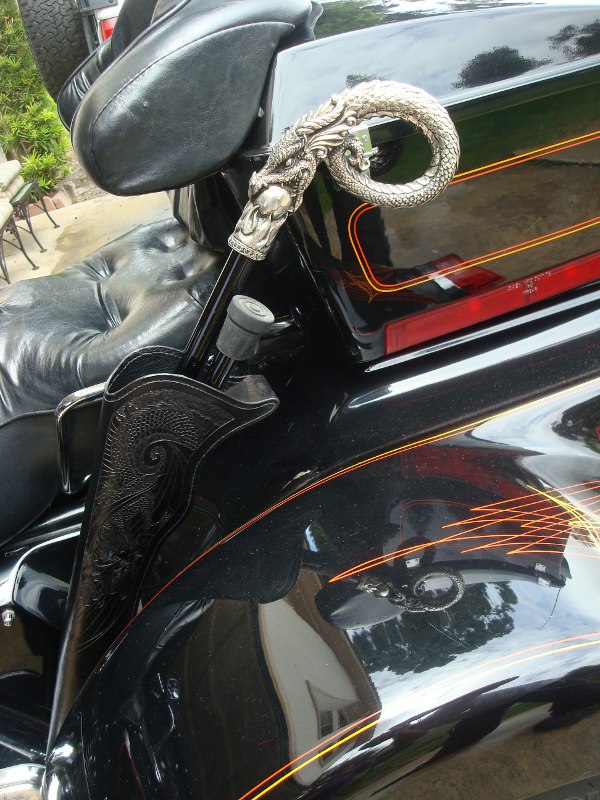
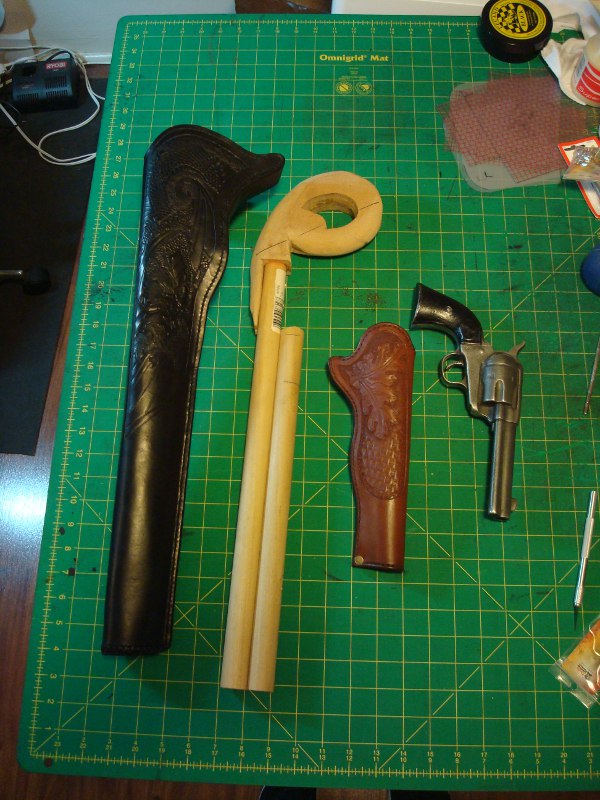
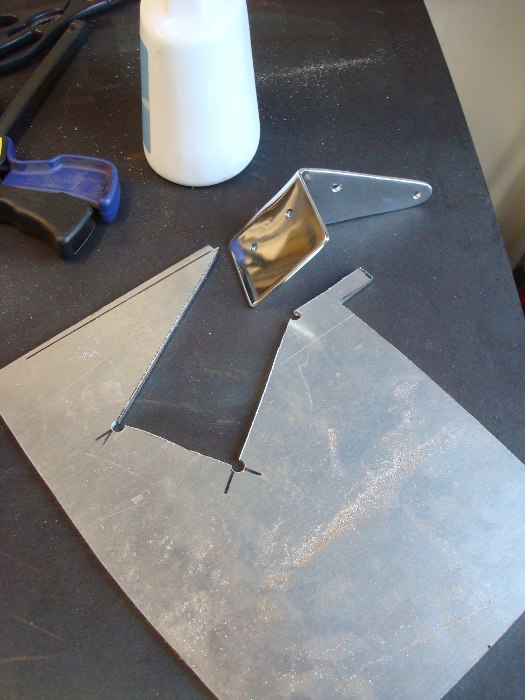
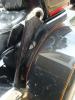
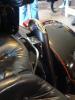
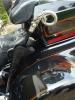
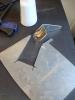
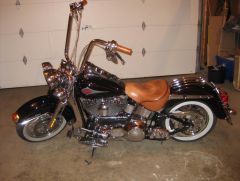
Here is a holster I have been working on for my mother-in-law's cousin to mount on the side of his Harley ElectraGlide trike to keep his folding walking cane close by. Previously, he had to store it in the trunk which meant walking from the back of the bike to mount it while trying to balance using various points on the bike. This allows him to walk right up and holster the cane next to where he gets on & off making life much easier and safer. It's made from 6oz. W&C veg-tan with 1.5 oz. pig black skin lining. The welt is 1.5" wide at the top and tapers to 0 about 1/2 way down the holster. As you can see in one of the pics, the cane has a carved silver dragon handle so I tooled a tattoo style Japanese Wind dragon motif on the side. I also custom made & polished the mounting brackets from 1/8" thick aluminum plate and kydex to enable it to mount high enough by using the factory grab rails on the passenger seat and an existing bolt location for the left fender at the bottom. The upper bracket is 2 pieces, the kydex clips onto the chrome grab rail similar to a belt clip and then bolts to the aluminum bracket via three 1/4" screw posts. Here are some pics of the piece installed one of the undyed tooling to show the detail better and one showing the comparison of it next to a normal sized holster...enjoy! Chris


-
Looks nice N. I'm guessing one of the ends comes off to slip the wood on? If you haven't found it yet, there is a great group over at WoodturnersResource that is similar to the leather group we have here but for turning. I founded that forum about 10 years ago and have since passed it on to another turner to manage.
-
Looks great, the stitching is top notch.
-
Good Idea BGD, I was thinking chainmail at first but anyone who has worn it in even a play fight knows that sharp object still hurt, they just don't penetrate as deep. Scale plate armor might do the trick.
-
jayjay - ok, that makes sense. As for the form, it's the typical government oversight stuff that Dupont has to provide reports on for statistics. Basically your info, what the intended use is, etc. I'm sure there is some govy pencil pusher who looks at them from time to time but 1-2 yards won't even put you on the radar. As for the wax question, there is the cuirbolli process of wax hardened leather for medieval armor but I don't know much more than pulling up articles on it. Some of the folks in the reenactment section may have more info. Here's one article: http://www.swordbrother.com/sca/hardleather/ Dirtclod does bring up a good point too. Most manufacturers won't say proof simply because there is always going to be that one thing that gets through. While a combination of treatments might stop a full bladed knife, they might not stop the slim point of an icepick (or shiv) from penetrating and therefore wouldn't be stab-proof in 100% of instances. Kevlar 29 isn't rated for stabbing due to the dispersion reasons dirtclod mentioned but is rated for ballistics. Kevlar 779 is the better 'personal use' fabric as it is made for correctional officer use (stab and low velocity projectiles) but available to the public. If you can find it, Kevlar 159 is actually rated as stab-resistant fabric, designed specifically for that purpose but harder to come by (the forms may get longer...LOL)
-
Hmmm...good question. First off, being in Hemet and likely near some of the bigger biker clubs, the first question I would ask (unless you already know) is if they want it to wear over or under their 'cut'. If they answer either way, then start asking about club affiliations. If they don't know what you're talking about then I'd start wondering what the heck they need it for. If they are affliated with an MC, then think about whether or not to put your mark on it...doing work for members of one club and not another can brand you as a supporter. Just some things to think about with weird requests like this. Past that, I don't know that plain leather unless stacked pretty thick would completely suffice against stabs (versus slashing). I think i would personally add another layer of protection to the garment using something like Kevlar ballistic fabric. Here's one source for it: http://www.armorco.com/shop/item.aspx?itemid=212 the stuff is not cheap and requires a special set of shears to cut it (very difficult to cut otherwise) but if the client is willing to pay for the protection, it would do nicely as a liner.
-
Leather Paint
Spinner replied to RunningRoan's topic in Dyes, Antiques, Stains, Glues, Waxes, Finishes and Conditioners.
I use Golden Liquid Acrylics thinned with Golden Airbrush Medium 50/50 on the motorcycle tanks bibs I do. Much larger selection of colors and hues than Eco-Flow and they have great lightfast & adhesion properties. Can be brushed or airbrushed on and sealed with an aerosol acrylic sealer as a top coat. -
Quick Question
Spinner replied to manji's topic in Dyes, Antiques, Stains, Glues, Waxes, Finishes and Conditioners.
Same here...24 hours to dry after the final coat of dye is applied. when applying one color over another I allow for 24 hours in between as well. Color and finishes come out truer and deeper in my opinion. -
I cut mine back with water 50/50. Takes an extra coat or two to get a full application but it applies SOOOO much smoother and more evenly with no streaking.
-
to the biker leather folks out there...side cover tutorial is underway, should have it done next week sometime.
-
 Nice job Randy, looks good!
 -
How-To...introduction To Making A Whaletail Motorcycle Bib
Spinner replied to Spinner's topic in How Do I Do That?
Hey Bob, I have tried both methods with these, soaking and spraying and found a few things in regards to bibs specifically. Number one is when I soak and re-wet the leather tends to take 2-3 times longer to dry on the tank. Normally most of leatherworking wet forming is done on wood blocks and such so the wood and indoor temps help the leather dry fairly fast. On a tank, being metal, the moisture has to dissipate through the flesh side as it just sits on the underside. A sprayed piece has more top than bottom moisture and tends to dry faster. The other thing is that I may not necessarily want the top soaking wet due to stretch & shrink. If the top was fully cased, it can pull away from the dash cutout area more than planned for when drying and thus end up being outside of the dash panel (i.e. gaps between the leather and dash. By only wetting the area to be formed and simply spritzing the area on top, I eliminate any unwanted shrinkage but the spritz gives it just enough water so they leather doesn't get uneven color due (water spots). Spraying also helps you control where the water goes so you can wet right up to but not including the tooling and thus don't have to worry about the tooled area raising. Hope that answers the question, Chris -
That's awesome Roo! I like the hammered texture you did for the empty areas and as outcast said, the knife work & Victorian curls look great. Chris
-
How-To...introduction To Making A Whaletail Motorcycle Bib
Spinner replied to Spinner's topic in How Do I Do That?
Thanks Joel & Kevin -
How-To...introduction To Making A Whaletail Motorcycle Bib
Spinner replied to Spinner's topic in How Do I Do That?
Thanks for the kudos Joel. I figure it this way...On just one forum that only covers 2 models of motorcycles I do leather for there are 38,000 members. I can only make 40-50 of these things a year while working my day job and there are countless other forums not to mention tens of thousands of riders who don't use forums...that's just in the US. Even if I did overlap with someone, the odds of it happening more than once are staggering. If it happens more often then it means either my marketing or work quality aren't as good and I need to step something up! I also realize the value of information as I have seen a number of woodturners and leatherworkers over the years take their secrets to the Great Beyond with them...that doesn't do those who would pick up the torches for future generations any good. -
How-To...introduction To Making A Whaletail Motorcycle Bib
Spinner replied to Spinner's topic in How Do I Do That?
No problem Roo, hopefully it provides some useful info. Also, the web version is online already for those that don't want to download it: http://tech.bareasschoppers.com/resources/leatherworking-101/ The idea is I'll eventually add to it with various articles on making bike related gear and parts out of leather. I'll be doing a Honda Rune seat next and a set of leather wrapped side covers for a Shadow Aero. 99% of the folks that read them won't attempt the projects but should come away with an appreciation of the time and effort leatherworkers put into custom gear. The other 1% will likely be asking me questions soon on that forum...LOL -
 Looks sweet Banjoman, nice job on the lacing and I like the text on the backend. I'm getting ready to do a Rune seat with a similar feature, nice to see how it works before I start.
 -
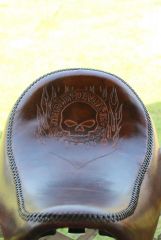
I was asked to do a write up of a haphazard article/thread I posted on one of the motorcycle website I frequent on how a whaletail bib is made. Done in DIY format, part of it is to show folks what goes into making decent leather gear and to give the adventurous ones just enough tools to have fun. Enjoy! Chris Introduction-to-making-a-whaletail-motorcycle-tank-bib.pdf
-
Ah, gotcha...doesn't mean she wouldn't appreciate a good looking rope can though!
-
Looks very nice Rookie, your mom is sure to love it. Reminds me, I need to finish my mom's belt...hehe
-
Thanks folks. @Ben - I was actually thinking that the other day...now just to figure out what to do, LOL
-
Thanks groovy and dirtclod!