ClayB
-
Posts
2,063 -
Joined
-
Last visited
Content Type
Profiles
Forums
Events
Blogs
Gallery
Store
Everything posted by ClayB
-
Last I heard, Bob is NOT going to be at Wichita Falls or Fort Worth.
-

Paul Burnett's free online lessons
ClayB replied to ClayB's topic in Special Events, Contests and Classes
The second lesson in Paul's FREE online carving course is now available. It's a month late due to an illness, but I think it was worth the wait. And the good news is Paul is doing better and WILL be teaching in Fort Worth!! This second lessons talks about beveling and goes into things like which sides of a line to bevel, how deep to bevel, and best of all, WHY. The next lesson is going to go into moisture for carving and tooling. You can get his free lessons by going here http://paintingcow.com/free_lessons.html -
Thank you all for the nice comments. You really are all way to kind, but I appreciate it. It's fun to finally work on some original designs and see them come together. Clay
-
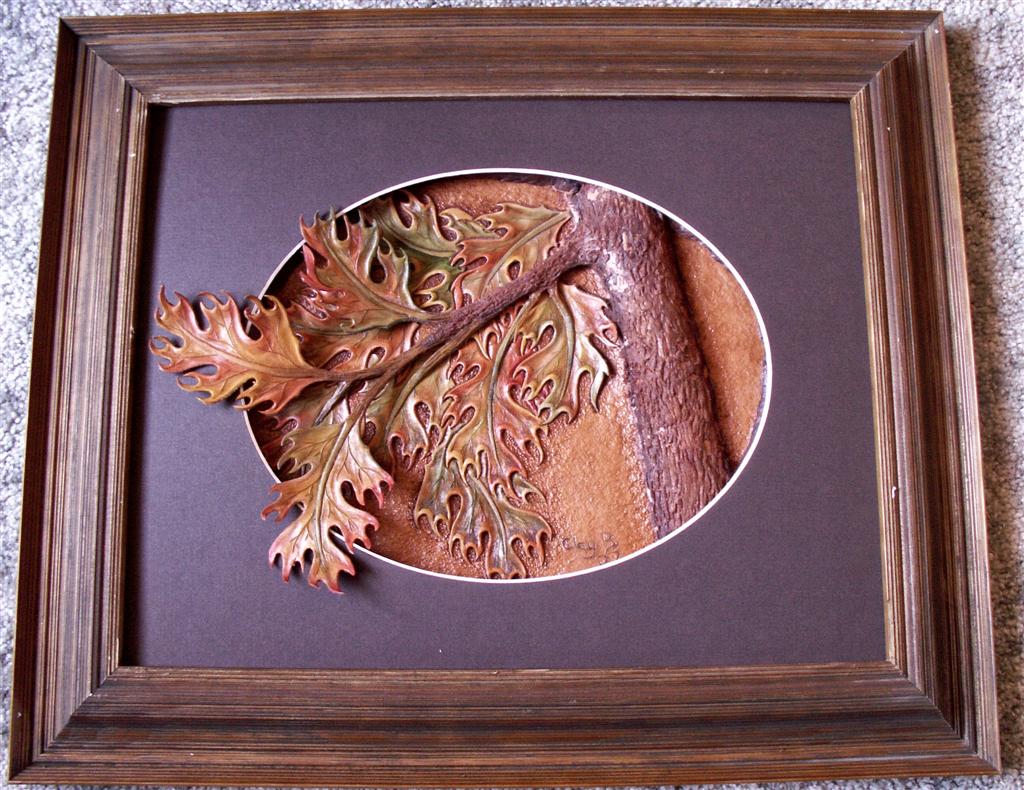
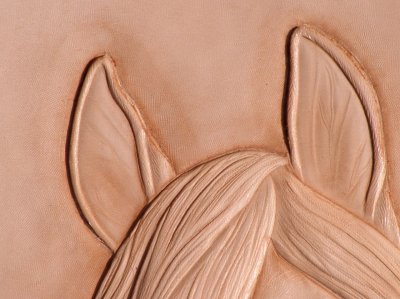
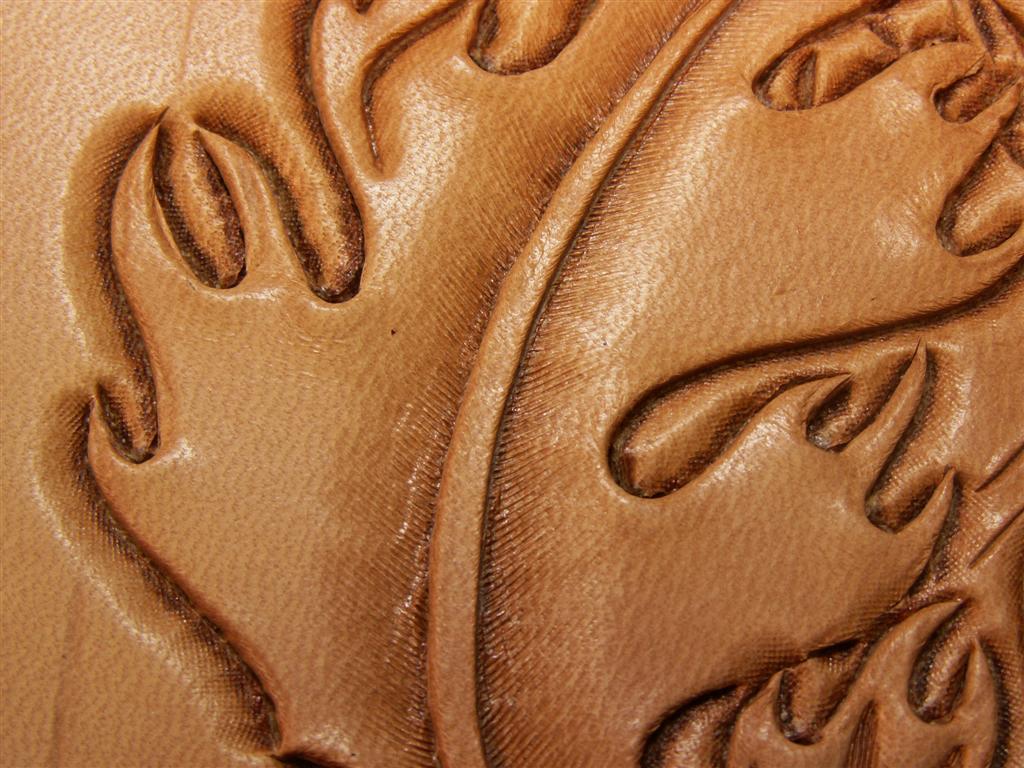
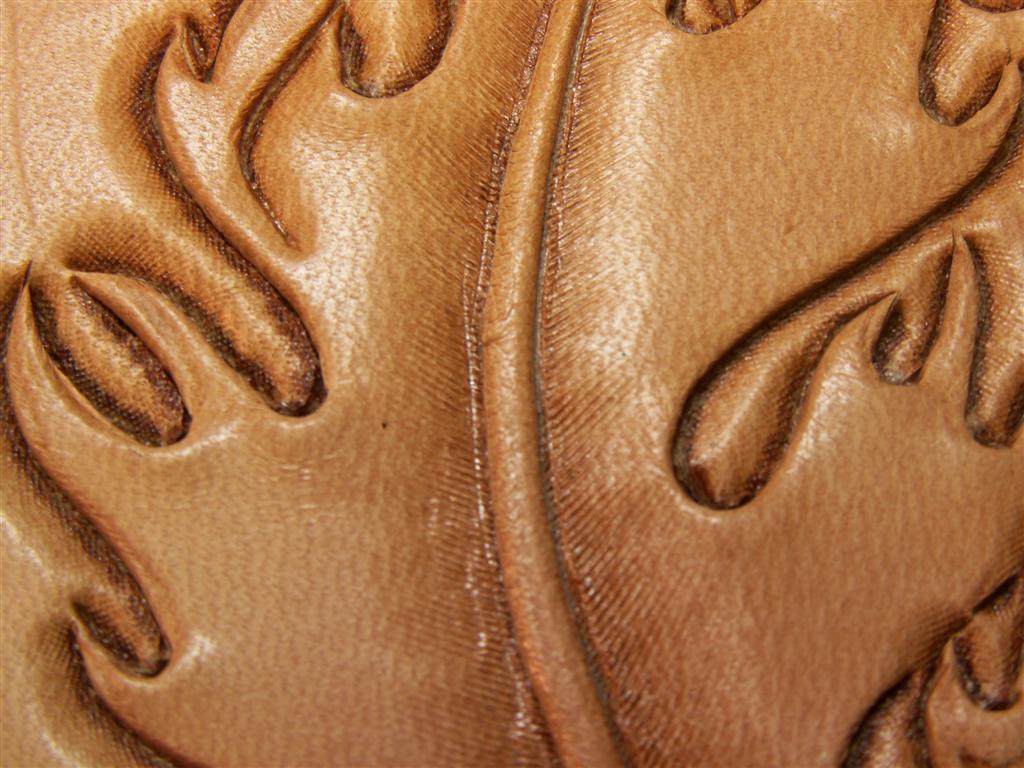
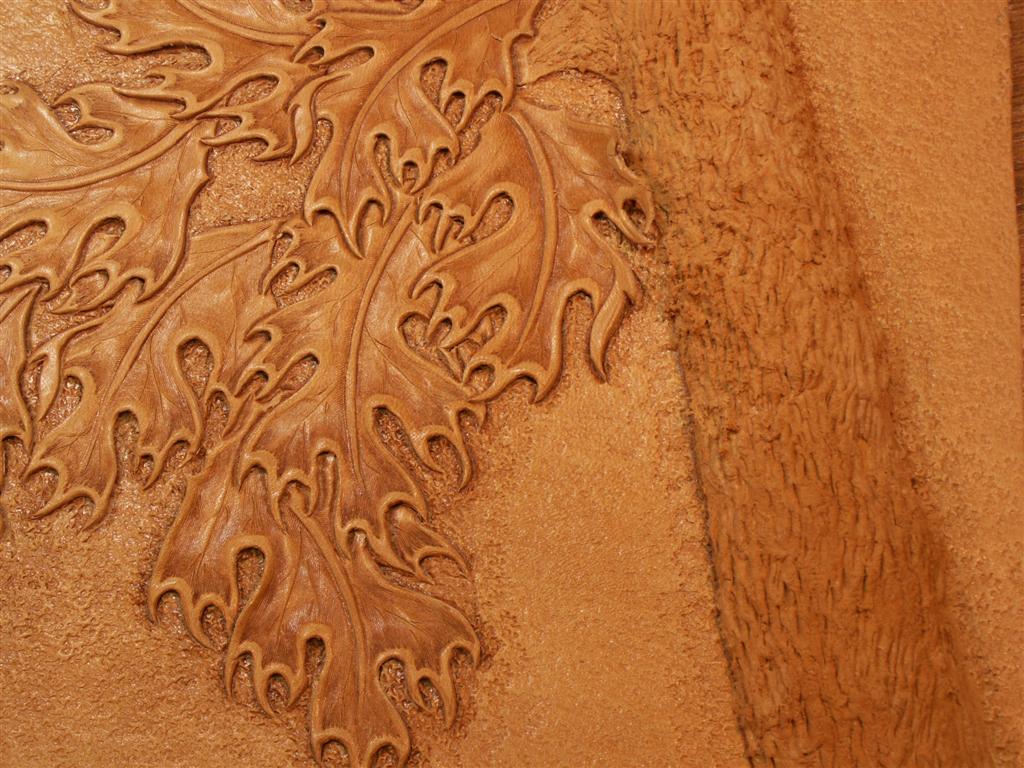
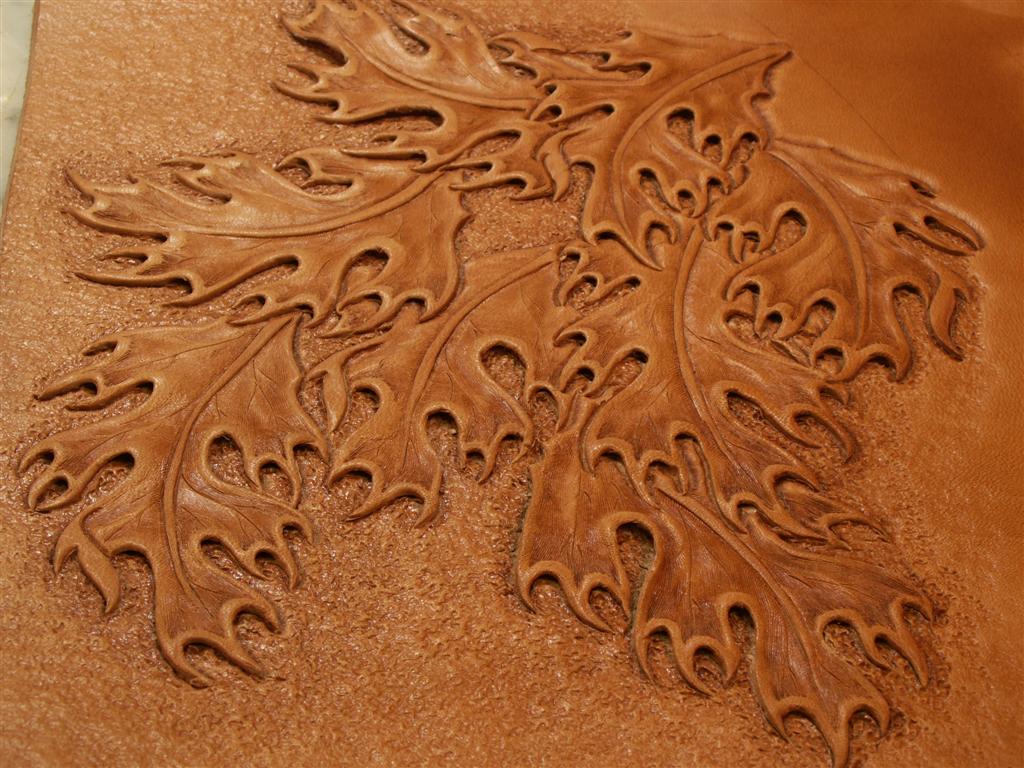
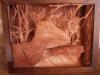
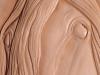
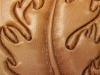
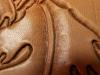
Here are a couple projects I have been working on the last couple months. Both of these projects ended up being way different than what I had in my mind when I started. The elk picture was supposed to be a 3-D version of a flat picture I carved last spring. Since I really didn't have it all planned out in advance, I just made it up as I went along. I did get some advice from some of my friends that helped make the finished project end up like it did. The second project was supposed to be just some oak leaves attached to a branch, but I just cant seem to keep anything simple these days. After carving the oak leaves and embossing the tree branch, I felt like it needed more. So I added the additional branch with the cut out leaves and blended it into the original carving.
-
Steve, Yours is a really different style and I really like it! There is a lot of interesting things going on in your leaf. Any possibility of getting you to do a step by step????? Thanks for sharing your picture. Clay
-
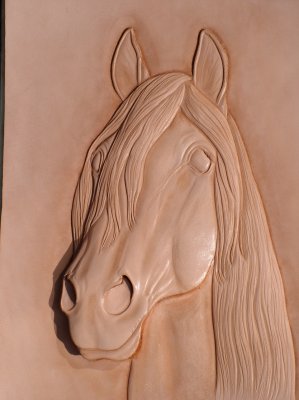
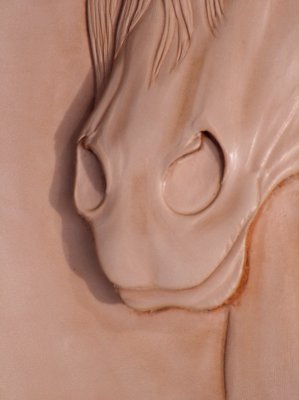
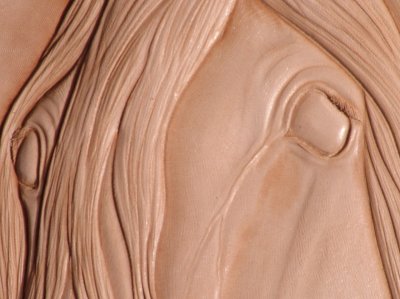
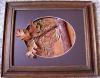
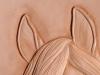
Kathy recently taught a carving class in a Tandy store in Denver. I am really sorry for not posting it to the calendar, I have no excuse for missing it : She sent me a few pictures of the class project and I really like it. So much that I have begged her to let me hang it on my wall. Here are a few pictures that show the detail she gets into her carvings. There might be a tutorial coming later this year on this project. How cool would that be???
-
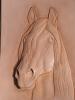
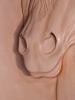
Kathy Flanagan will be doing a demo titled Face Lift at the IFoLG show in Fort Worth. It will be from 9 until noon on Friday the 19th of October. She will be showing how to do facial features on leather, using Davy Jones as the subject. Here is a picture of the project.
-
I am not going to be at the show, but I should have some things entered if Kathy doesn't forget and leave them at her house. I probably deserve that because I completly spaced out posting the recent class she taught in a Tandy store in Denver to the calendar. : She taught how to carve horse head and from the pictures, she did a GREAT job of it. I'll post the pictures elsewhere. The good news (for those of you going to the show) is, Kathy is doing a demonstration at the show in Fort Worth, as she mentioned. Here is the subject for her demo. He demo will be from 9 till noon on Friday. I also heard from Dave Peterson that he and his wife Cheryl are going to the show. Cheryl is Robb Barr's sister. Her and Dave are really nice people. They are going to have a booth at the show displaying a bunch of Robb's work and it sounds like some of it may even be for sale. If you have never seen any of Robb's work in person, you need to check it out. So there are a couple more things for you to do while at the show. And dont forget to take LOTS of pictures! Clay

-
Someone asked me if there was a way to invite a friend to the forum. Would it be possible to have way to do that? You could fill in an email address and it would send a person a message with an invitation to check out the forum and link to get there. Maybe a brief message about what they will find there.
-
Could somebody distract Freak for a few minutes? It wont take me long to dump this can of Barge on his keyboard Dang it Freak, nobody would have ever noticed that if you would have just kept quiet!! Actually I did take pictures when I was coloring my leaves but they didn't turn out that well. The dyes go on pretty dull looking and get brighter as they dry, at least the way I used them. I mixed them about 3 parts water to one part dye because I had no idea how they would work. I figured I would go to one part water to one part dye on the next coat, but I liked how the diluted dyes looked, letting the leather show through. I thought the dyes dry brushed really well for shading. Maybe one of these days I can try and see if I can make a video with my digital camera while painting a leaf. Not sure how that will work. I think I'll go and eat all of tomorrow's doughnuts now :dribble: One thing I agree with Freak on. Kate does rock!
-
Don, There is absolutly nothing wrong with that oak leaf!! It's really nice. My wife does not believe you colored it with Sharpie's. If you did that a long time ago with little experience, I can't wait to see how they will look now. Thanks for sharing the picture. Clay
-
until41st Annual IFoLG Show Legends of Leather Craft October 18th - 21st, 2007 Green Oaks Hotel and Conference Center Fort Worth, TX for more information contact: Lone Star Leathercrafters Guild 817-878-5797 For show registration forms and more details: http://www.leatherworker.net/forum/index.php?showtopic=956
-
beginner/intermediate filigree pattern for a billfold
ClayB replied to Dragons Pearl's topic in Patterns and Templates
A lot of patterns could work to filagree instead of background, but not all. You have to be careful that you dont cut out parts that hold the pattern together, or leave pieces just hanging. Take a close look at the pattern and you should be able to get a pretty good idea if it will work or not. -
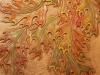
I am always really reluctant to color my projects, but it doesn't stop me from trying. Sometimes they end up in the scrap pile, but more of them these days turn out ok. I tried to put some fall colors on some oak leaves yesterday. The first attempt with oil dyes turned out terrible. Then I decided to try the Eco Flow dyes I had picked up a month or so ago. I was really surprised at them. I guess I was expecting water based dyes to be just like acrylic paint. It sure isn't. These dyes are really nice! They are easy to apply, they mix and shade really well on the leather. I had a lot of fun playing with these and am actually looking forward to doing more with them. Maybe some of my elk pictures will get colored this winter after all. (Kate, get out the brushes, you will have fun with these!) Clay
-
Hey Kate, That is really nice. I am glad you took the time to do that for us. There really are a bunch of different kinds of oak leaves and different ways to carve them. None right or wrong, just different. I think it would be great if a few more people would take the time to carve thier favorite oak leaf and take a few pictures of the process. You are just going to antique it????? I was so hoping for a coloring lesson to follow. I tried coloring some of my leaves today with fall colors and really messed them up. My bottles of oil dye were getting about 2/3's empty and it almost seems like the pigment is seperating in them. They didn't work nearly as well as they used too. Guess I am going to have to try the new Eco dyes I got awhile back and see if I can mess up some more leather. Thanks again Kate for the lesson!! Clay
-
Hi Regis, It took me awhile to figure out how to do the leaves. Here is what I finally came up with. I copied several leaves off a pattern sheet that came with George Hurst's oak leaf book, The Mighty Oak. Then I cut each leaf out and arranged them on piece of paper. Taped them down and took them to the copy machine and printed them on to velum. Could have just traced them onto tracing paper but the copy machine is pretty handy. I think you could do the same thing with real leaves, but we dont have oak trees up here. If you did it that way, it might be easier to figure out how they attach to a branch too. Hopefully my idea for that will work too. Clay
-
Hey Freak, You did a great job on your oak leaf!! If you really want to get a lot of practice on them, try a couple of fully carved oak leaf saddles. After that, you wont want to do them again for a LONG time. I get a little more agressive with the pro petal than you did, but that's personal thing. I did a bunch more leaves last week and realized there were a couple things I could add to the tutorial that I tried on the center vein. I used the angle lined beveler around the vein, then I tried to matt away from the vein with the same beveler. I think it made it look less like it was standing out on it's own so much. Then I took a modeler and rounded of the edges of the vein. Then for the final touch, I drag a lined tool down the center of the vein to give it some texture. You can use a lined beveler, pear shader or anything to do this. Here is a picture of something I started on last weekend. This started out to be something fairly simple, but I keep having ideas that I want to try on it. Maybe I can finish it this weekend. I am thinking of coloring the leaves with fall colors, and will add a few more leaves that will be completly cut out and attached to another branch. The branches are made with leather putty. This will give the picture a 3-D look.


-
Hi Kate, You confessed to me that you use ink on your leather awhile ago and I let it slide. Now you have admitted it to the WHOLE WORLD! The leather police will be showing up at your door today and taking away your license to carve leather. Really though, I agree with you. If it works, go ahead and do it. And anyone that sees your work will have to admit the ink isn't hurting anything. The only thing that I know you are doing wrong is not posting enough pictures of your work!
-
Hi Tim, I am also a big fan of your airbrush work. All your stuff looks really great. I am going to join in on the begging for some airbrush tips or a tutorial. Thanks for sharing all the pictures of your work. Clay
-
Thank you Skip, I am using a Konica Minolta Dimage Z6. I got it for the 12X zoom for taking pictures of wildlife, but it also has 2 really good macro settings for taking close ups of my leather stuff. Clay
-
A couple more things on getting your background to fade. Some of the background tools like the pebble backgrounders come in different sizes. I use the smallest tool closest to the object that is carved. Then when you start to get farther away from the object, go to a larger backgrounder. As was mentioned in the posts on beveling, to get the same depth with a bigger stamp, you have to hit harder. Works in reverse here. The larger tool hit with the same pressure makes a lighter impression, so will help to fade out. An even bigger tool will then fade out more. Do your background when your leather is getting prttey dry will make it easier to fade out also.
-
I just posted this link in the question about beveling but I will add it here too. It's a tutorial on matting and backgrounding by Bob Beard. http://robertbeardtools.com/educational.html
-
There is a lot of great advice here. Another place to look is on Bob Beard's website. He did a tutorial on bevelers, and another on matters and backgrounders. Lots of good info in these. http://robertbeardtools.com/bevelertutorial.html http://robertbeardtools.com/educational.html
-
Thank you Pip, If you go to this topic, there are several pictures of a pro petal tool. http://www.leatherworker.net/forum/index.p...entry7225 I hope you will share pictures of your leaf when you get it done.
-
I think that you have figured out your own answer. Most of the teachers will tell you to use the tool like a jack hammer. If you hold the tool slightly above the leather, when you hit it, it will pop back up slightly. You are supposed to continue hitting it quickly while moving the tool a little at a time. I find it kind of difficult to do. Usually I will hit the tool, move it a little, hit it again. Then when I finish the line of beveling I will go back and do it the other way, rapidly hitting and moving the tool to smooth it out. It takes more time than just doing it once, but it gives me the results I want. Proper moisture while beveling is also important. Checkered bevelers usually leave less tracks than smooth bevelers. It's probably going to just take practice to see what works best for you.