ClayB
-
Posts
2,063 -
Joined
-
Last visited
Content Type
Profiles
Forums
Events
Blogs
Gallery
Store
Everything posted by ClayB
-
Darc, That really is one nice looking saddle. I like the old style too, and the color is just perfect. The time you spend drawing your patterns really pays off. The tooling really fits. Any tips or hints in pattern drawing for something like this that you would like to share? Great job, thanks for sharing this with us. Clay
-
The pictures and explanation on making rawhide are interesting. I have a couple more questions. It doesn't rot? Does the temperature or weather or anything matter when you are letting the raw hide dry and cure? You don't have to put anything on it? The other question is about the thickness of the hide. When you are done stretching it, is it fairly even? Is that something you take care of when preparing the strings for braiding? You guys that braid rawhide must have an endless amount of patience but you sure turn out some awesome work. Clay
-
 Since nobody has responded to this question, I will take a shot at it. I dont think painting or dying leather is harmful to the leather. You can color leather with spirit dye or acrylic paint or a combination. You can also use antiques or highlighters. These can be purchased from any leather store such as Tandy or Hidecrafter etc. You can also get acrylic from most hobby or craft stores. It can be put on with a brush or an airbrush. You might want to go and read some of the posts in the "dyes and finishes" section of the forum to get some ideas. Your questions have been discussed in that section and maybe you can get some answers there. Clay
 -
Thanks Dale and Johanna for doing this! Dale, it was really fun seeing how you do this. I like the way you use the pear shader so much. I have started doing more and more beveling with the pear shader, but not nearly as much as you do. Now maybe I will do even more that way. Are you just using the needles to draw in the hair? And if you are, did you do the entire body that way too???? Seems like that would take forever! I think I read somewhere that Bill Gomer does his hairing like that. I haven't tried that. The whole thing looks great. Thanks for taking the time to do the pictures and text. I know it takes a lot of time, but lots of us will appreciate that you did. Thanks to you Johanna for putting this up on the forum. I know (on the ones I did at least) that it probably takes you as much time to get them up on the forum as it does to carve them. We appreciate all the time you put into this too! Keep twisting those arms! It's neat to see some of the tricks that Dale has come up with and it's always a good day when I learn something new. Clay
-
I mentioned in a previous post that Paul Burnett was working on a newsletter and some free online lessons. The first one is out, and I think it is something anyone interested in improving thier leather carving check out. The first lesson discusses using your swivel knife to create depth in your carvings. Paul gives examples of different things to practice on to improve your swivel knife work and explains why you need to vary the depth of cuts to create depth. The newsletter also includes information on where Paul will be giving lessons and some advertisements on where to get his other lessons etc. I am really impressed that Paul is sharing his knowledge and expertise in these free lessons and I hope a lot of people take advantage of his generosity. To sign up for the free newsletter and online lessons, go to his website paintingcow.com and click on the "free online lessons" bar. It's really simple. Clay
-
Hi Gesa, I really like how you got so much detail in those, the contours and shapes, and the tiny spokes in the wheels. Hope we get to see the guitar when it is done too. Clay
-
untilThe New Mexico Roadrunner Leather Artisans Guild is sponsoring a three day class with Jim Linnell August 31, Sept. 1st, and Sept 2nd. We will be doing the embossed White Buffalo flask. This is in conjuction with the New Mexico State Fair where Jim will be judging the leather craft entries. If you are going to be in the Albuquerque area, please join us at the Tandy store in the Hoffmantown Shopping Center, 8252 Candelaria Rd, NE. The cost for the class is $45.00 plus the cost of the flask kit. Bring your embossing tools and standard carving and stamping tools for the floral portion. For more info, contact the Tandy store at 505 296 3255. I have been told there are already about 25 people signed up for this class so it should be a full house.
-
ALSO; I am a photographer as well as a writer. I would like to know some of the tricks of taking my photos and putting them onto the leather canvas. Hi Julie and welcome to this forum. I think you have come to the right place to find help getting started. The best place to get videos on different leatherwork techniques is Hidecrafter. They have videos covering lots of different subjects. As for putting your photos on leather, are you thinking like t-shirt transfer or actually carving the photo into the leather? Both can be done, but the techniques would be very different. Clay
-
Hey, don't give up! You are going to lose some of the detail when you emboss from the back. For embossed projects, I would suggest using leather around 4-6 oz, but you can use heavier leather. You will just have to work a lot harder to stretch the heavy stuff. Usually I carve and tool the project like a flat project. Then wet just the part you want to stretch, not the back ground. If you plan to cut the figure away (no background) it is easier to emboss it before you cut it loose. To emboss, you can set a marble under the leather and push down from the front, you can use a ball modeler (or the end of a tool) and push from the back or anything else that you can think of to stretch. Then I fill the cavity created by stretching with putty made from leather dust and rubber cement. Let the putty dry which can take several hours to a day. Then you can go back and re tool the front to get your detail back. With the putty backing your work, you can really get a lot of detail into the carving. I hope this helps. Clay
-
This was inspired by something I did????? Well, what you are doing is really neat and it's fun to see the progression. The pattern is great too. Wish I could draw. Thanks for sharing the pictures and I look forward to seeing a lot more. Clay
-
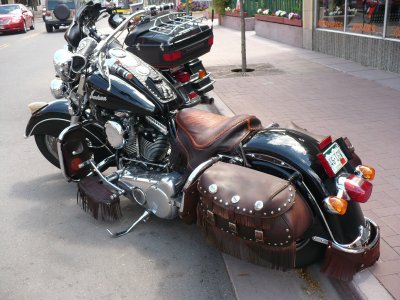
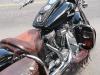
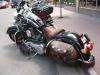
Here are a couple pictures of the bike that Kathy had sent to me. Clay
-
I dont think you will have a problem with tooling or dying after wetting and shaping. I would be concerned with the heat though. Heat wont be good for the leather. Depending on how you do it, it could be painful to you too. I used to do quite a bit of welding and leather gloves will insulate you from the heat, for a whiile. Once the heat transfers all the way through the leather though, you cant get them off fast enough. I am not sure what temperatures your heat gun puts out, or if the leather will be attached to your body in some way when you are shaping it, but just be careful. Clay
-
Celebrate the Grand Opening of the newest Tandy Leather Factory location in Rapid City, SD. The store specials are good from now until August 18. There are going to be 4 drawings for shopping sprees of up to $250, the first on Wednesday the 15 and the last on Saturday the 18th!! The manager of this store is Clay Miller. If anyone is in that area, be sure to stop in and see him at 514 Seventh St. Rapid City, SD. You can also call him at 605 342 2221 or toll free at 877 800 1853.
-
untilChan Geer, leather artist and Al Stohlman award winner from Sheridan, WY, is going to be doing a class on drawing Sherdian style patterns in Billings, MT. The class is scheduled for October 5-6, 2007. For more info on this class, contact Chan at 307-674-9226.
-
I have been trying to figure out the right words to use to comment on your works and keep coming up short, so I think I'll just agree with what Kate said. Clay
-
That's your first completed carving project? WOW! I dont get into the celtic designs much myself but that is really, really nice. The coloring really sets it off. Thanks for sharing the pictures and I hope we get to see more of your work in the future. Clay
-
There are several books on figure carving by Al Stohlman. The earlier ones were earlier ones were Figure Carving by Al Stohlman, Pictoral Carving by Al Stohlman, and How to Carve Leather by Al Stohlman. That one showed both floral carving, and some basic figure carving. Then later on he came out with the Pictorial Carving Finesse and Figure Carving Finesse books. Those are really what I would recommend for anyone really interested in doing figure carving. He goes into a lot of detail on dozens of different animals and other things in Figure Carving Finesse. It covers different textures for hair, how to carve people, and lots more. In Pictorial carving Finesse he shows how to carve scenery, trees, sky, rocks, water etc. He also shows how to get effects like rain, wind and fire. These really are good books. You should be able to get any of Al's books from any Tandy store. Give Clay Miller a shout and I bet he can set you up with whatever you need from his new store. Paul Burnett did a figure carving book too and it was called Pictorial Definition, The Fine Art of Leather Carving. I think Paul's teaching material is more like a college course in leather carving. He goes more into detail about why you use your tools the way you do. He started a home study course on leather carving back in the 80's that was really good called Realistic Leather Carving that went into real detail on using tools for both floral and figure carving. There were only 4-5 lessons put out, but it sounds like he will soon be releasing some new lessons that take off where the first ones left off. You can get Paul's books from his website http://www.paintingcow.com/ Hope that helps. Clay
-
Ok, I have questions about kangaroo hide. I bought the one I have from Jim Downey in Arizona. I have had it a couple years and never did anything with it. I have seen some of the amazing things Peter Main does with kangaroo so I wanted to try carving on it. The hide I have didn't take water well, it felt greasy. I could carve on it, but it didn't take tool impressions very good. So, is there a difference between the greased stuff, and regular veg tanned? Why is it greased? Clay
-
There was a thread about shops quite awhile ago here in leahter conversation too with a few of us showing pictures of our shops. I'd like to see more pictures of others shops too. http://www.leatherworker.net/forum/index.p...125&hl=workshop
-
Happy Birthday Regis. Hope you have a great day! Clay
-
ebay auction on a Stohlman piece
ClayB replied to Billsotx's topic in Special Events, Contests and Classes
http://cgi.ebay.com/ws/eBayISAPI.dll?ViewI...y0%3D%26fvi%3D1 -
You might want to check out Barry King's swivel knives. I have one of his small ones and it is at least a half inch smaller than the adjustable Craftool ones at their shortest adjustment. Barry's measures about 2 3/4 inches from the base of the cradle to the tip of the blade at it's shortest adustment. Clay
-
Thank you all for the kind words, they are much appreciated. Both of the carvings were done on 4-5 oz American Value brand lether from Hidecrafter. They say it is tanned for them by Herman Oak. I got a couple sides of this stuff and have been really happy with the way it carves, the depth and color I have been getting are really nice. The leather you use can make a BIG difference in how you need to case it, how it cuts, takes tooling, oiling etc. Clay
-
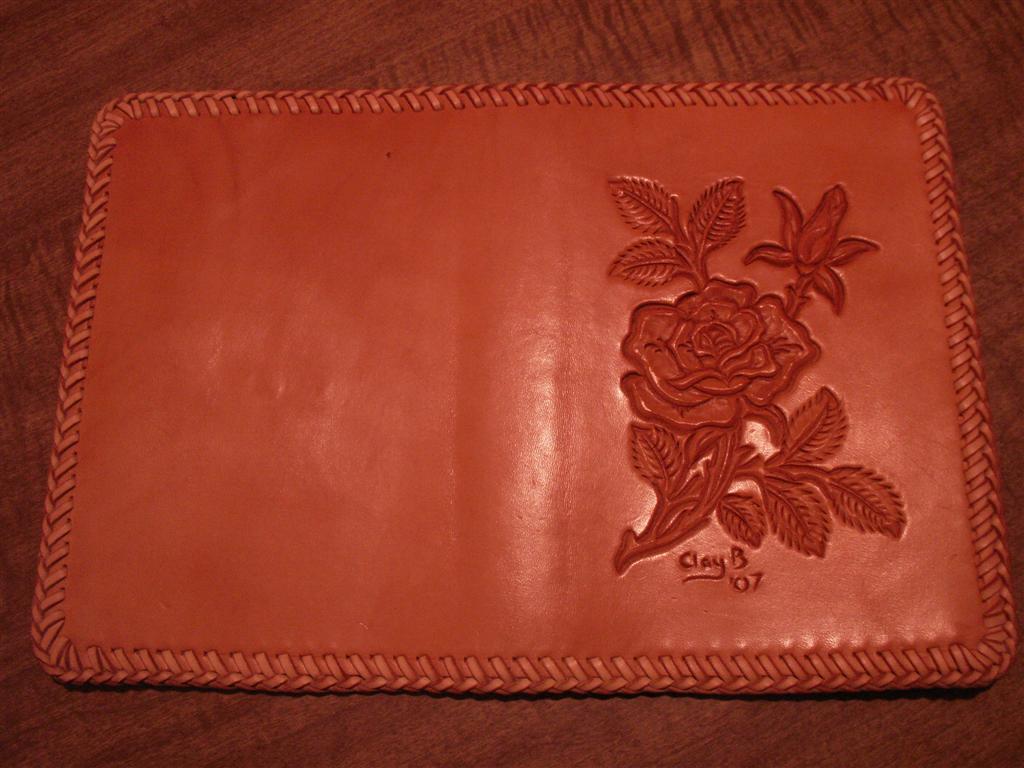
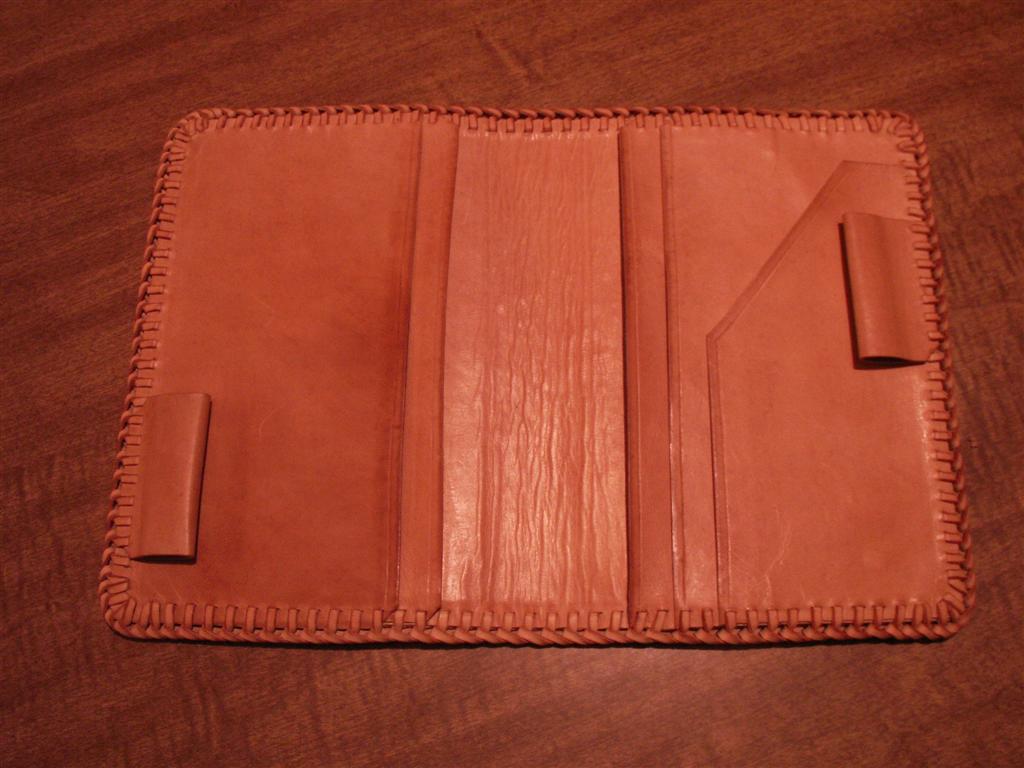
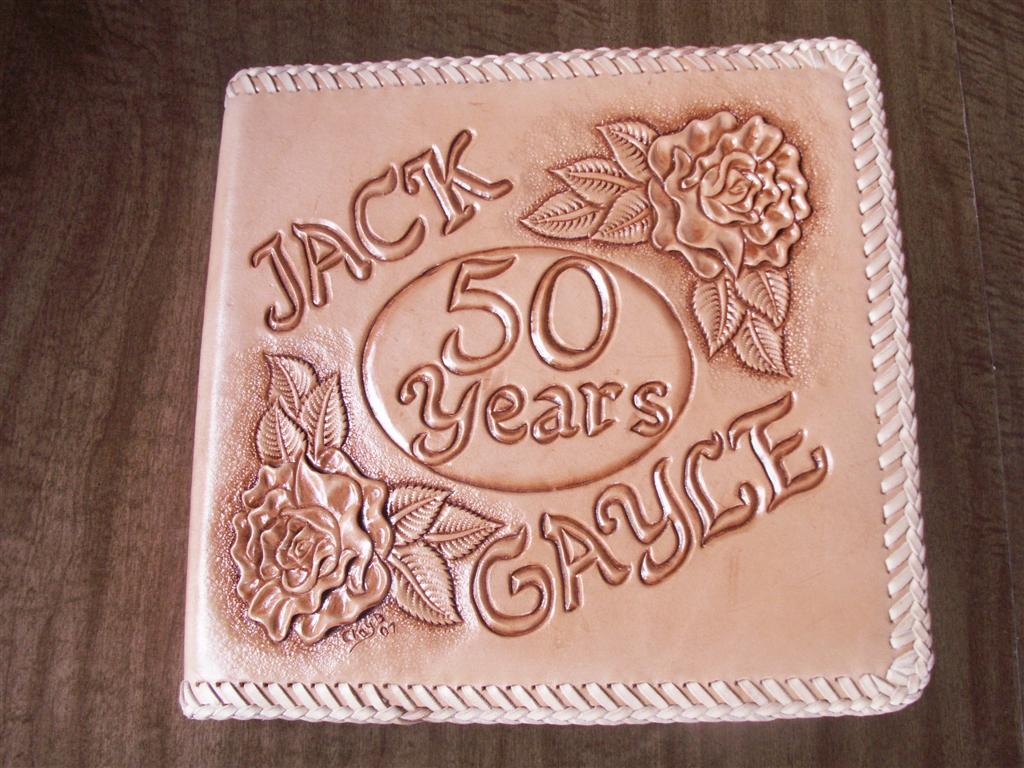
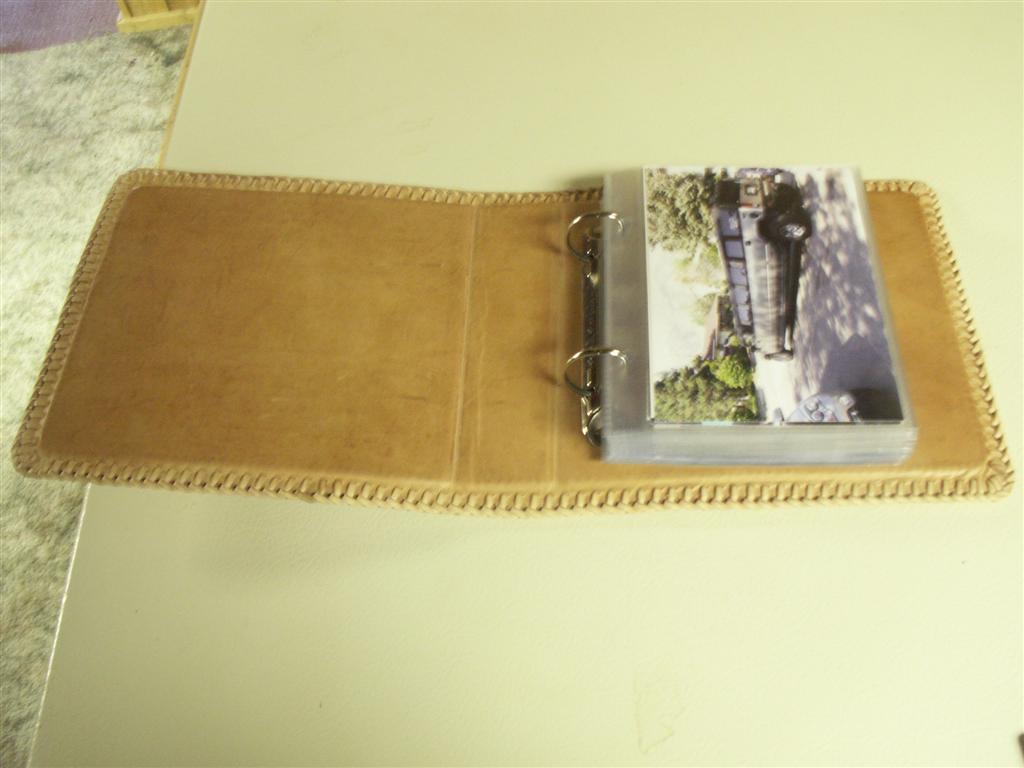
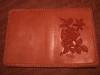
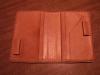
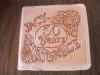
Thought I would share pictures of my latest projects. The first is a cover for a small notebook. It has pockets inside that the notebook slides into and a couple extra pockets for whatever. The pen holder also serves to hole the notebook shut when the pen is slid into both slots. I dont remember who I stole that idea from, but it seems to work well. The second in a photo album for my parents 50th anniversary. They held the party last weekend and I took a bunch of pictures (big surprise, huh?) I thought a leather album might make a nice present. I had a cheap album from Wal Mart and I took the binder and cardboard stiffeners out of it. The liner and lacing for both of these is kangaroo. I tried to carve the front of the first one from roo too, but it was too thin to get any depth. Clay

-
Back in the 80's, Paul Burnett introduced his first home study course for leather called "Realistic Leather Carving". That course had some of the most in depth, detailed instructions I have seen anywhere for learning to use tools correctly. Recently Paul introduced a new cours called "Designing With Stamping Tools". I think that one is more geared towards the stamping techniques he used in his series of books on creative belt stamping. Now in the latest LCSJ, he introduced his latest, "Victorian Style". In the announcement, it says " All modern styles of western floral have roots in the Victorian Era and the floral patterns of the Victorian Style. The Victorian Style encompasses all types of leather carving: floral, human figure and wildlife". I am excited to see what Paul does in the series of lesson that he says are a continuation of his Realistc Leather Carving series. Paul also is introducing a newsletter and free online leather lessons to be coming soon. Here is what Paul sent me when I asked him more about these things. "Clay... The on line lessons will be expounding on some particular aspect of something covered within the one of my Home study Courses. The newsletter will keep you aware of what is in the works as regards to new lessons, pattern packs etc. It will keep you apprised of any work shops give by me. Good to hear from you and thank you for you comments about my course. I think you will find the Vicotrian Style Course a fitting continuation of Realistic Leather Carving. Thanks you for signing up for the Painting Cow Newsletter and Free On Line Lessons. The lessons have not started yet. I hope to have the first lesson available for download in August. You will receive a notification and link to download the lesson once it is available. My plan is to have at least one lesson per month (perhaps more...as my courses deal with three areas of leather decoration....carving, stamping and coloring). I am looking forward to serving you in your endeavor as you strive to increase you knowledge and skill in the art of leather decoration. Paul Burnett" If you are interested in any of these new things from Paul, check out his website, www.paintingcow.com Paul is a master at carving and coloring leather and is a great teacher. I encourage anyone interested in taking their carving to the next level to check into his lessons. I hope lots of people will sign up for the newsletter and free lessons to let him know that there is enough interest to encurage him to keep providing them. Clay