ClayB
-
Posts
2,063 -
Joined
-
Last visited
Content Type
Profiles
Forums
Events
Blogs
Gallery
Store
Everything posted by ClayB
-
Hi Don, I am definately not offended. I appreciate any input I get on this. I am just playing around with the pattern and hoping to learn something while I am doing it. This piece is intended to be the padded part of a shoulder strap and if the intitials were in the center, they would probably end up being on the top of the shoulder and nobody could see them unless they were about 8 feet tall looking down I agree that this pattern looks kind of busy. I think that with the right coloring, the intitials could still stand out fairly well, but the person this is for prefers natural colors, so not sure if I will color it or not. I do have at least one more idea to try so I will probably carve another one. Can I ask how you changed the picture on the computer? What program did you use? Thank you for taking the time to do that, and for your comments. Clay
-
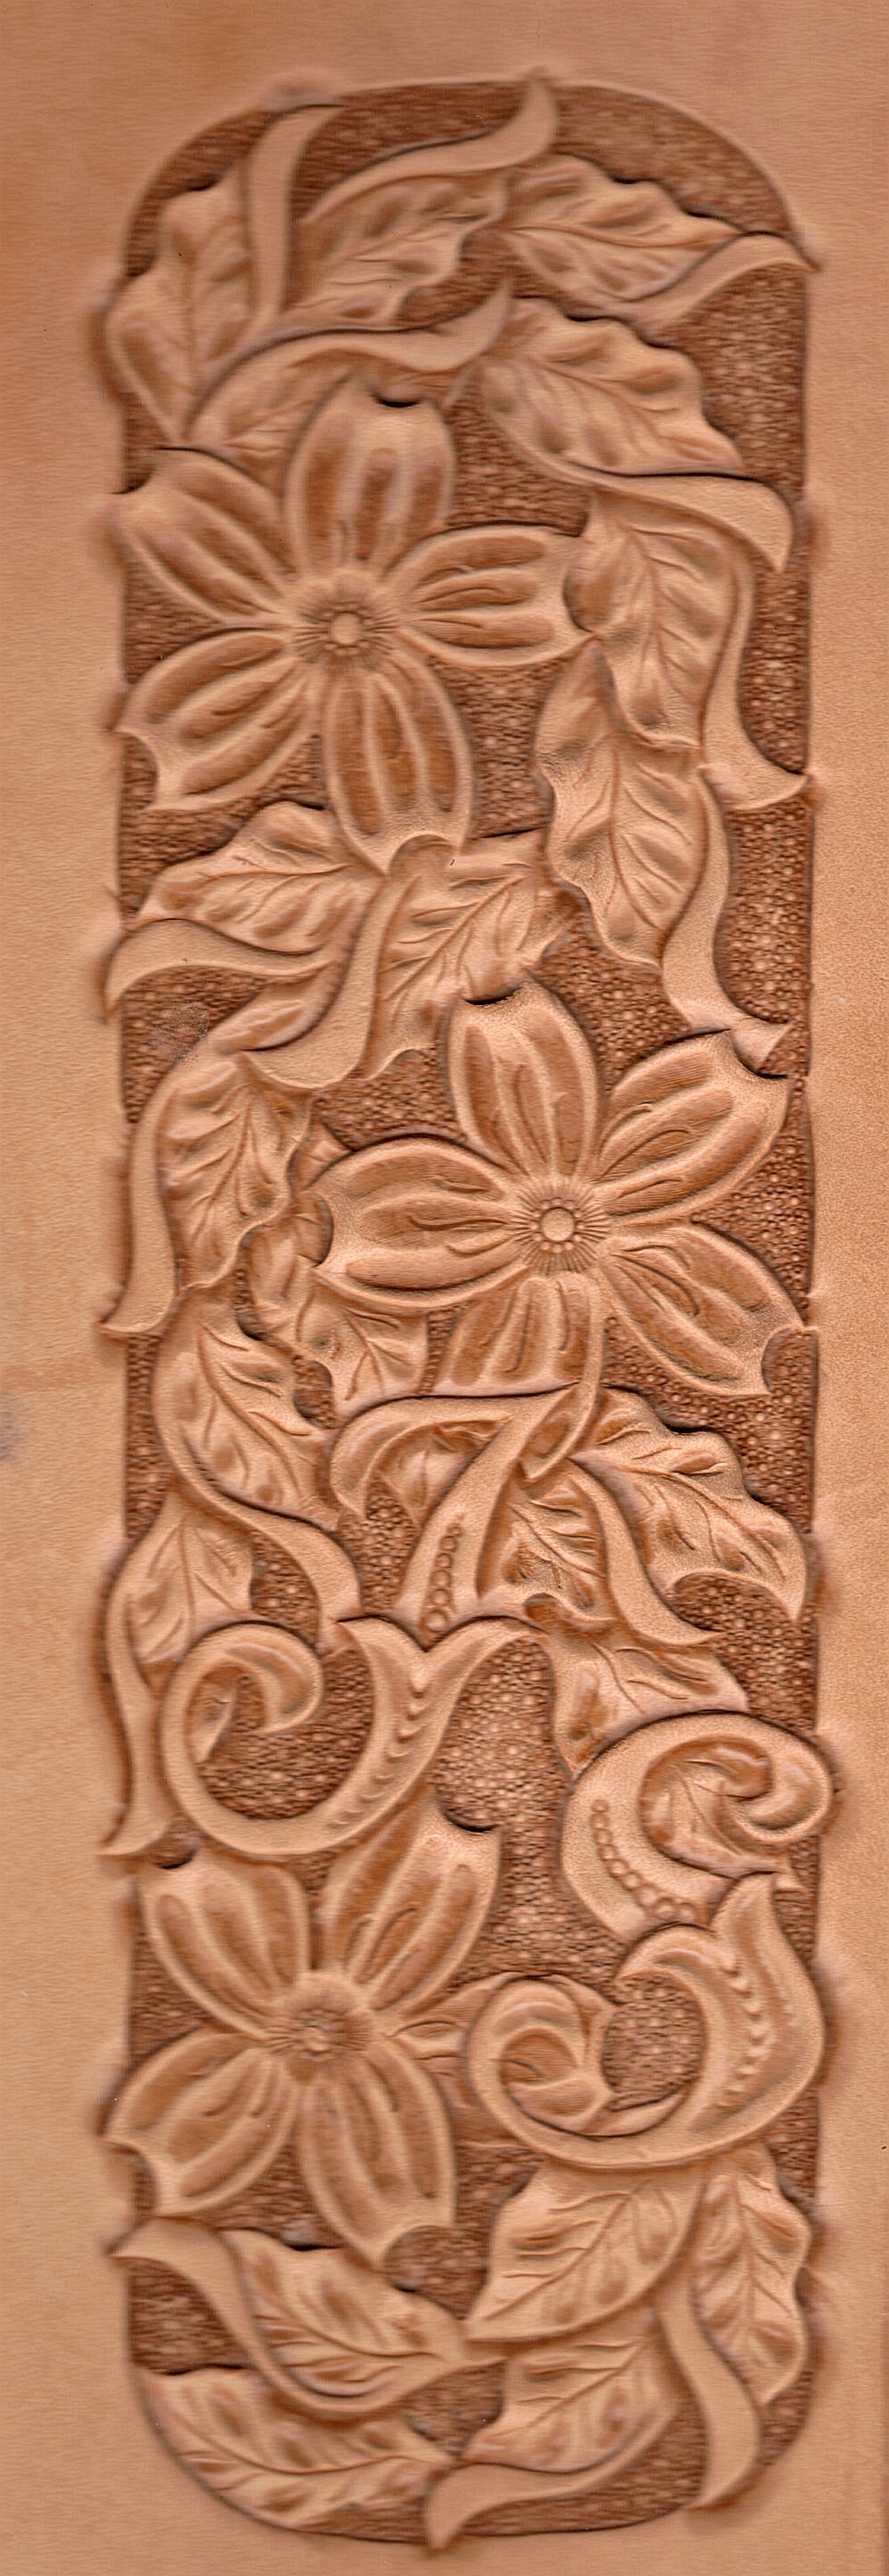
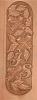
Well, I carved this again trying to incorporate several of the suggestions that were made on the pattern. I am not sure what I think of it. I think the new pattern fixed some of the things I thought were wrong with the first pattern, but I am not sure it is what I was looking for. So I guess it's back to the drawing board once again. I have a couple ideas for doing something different that I would like to try. If anyone has any comments on this attempt, I'd like to hear them. Clay
-

My work got wet!
ClayB replied to Steel Dragon's topic in Dyes, Antiques, Stains, Glues, Waxes, Finishes and Conditioners.
I hope it didn't sound like I was endorsing the use of deglazer. My point was to try other solutions first and use deglazer only as a last resort. When I bought the deglazer I was told that it could turn leather to "mush". When I did try it, I was fully aware that it could ruin my project beyond repair. That said, I did use it on one of the projects I entered in the CIL show last week and it removed all the acrylic paint that I had put on it, and I then repainted the project. It didn't ruin the leather. So like so many here have said, try it on scraps first to see what it is going to do. Be prepared for unexpected results and the possibility of turning your project into scrap. I hope you find something that will save your project. Clay -
My work got wet!
ClayB replied to Steel Dragon's topic in Dyes, Antiques, Stains, Glues, Waxes, Finishes and Conditioners.
I think the first thing I would try is just re antiquing it with the original color and see what that does. If that doesn't work, then you might want to consider the de-glazer. I had a bottle of that stuff for years and never used it until recently. It does take off anything acrylic on the leather, paint, antique, etc and lets you start over but it is pretty nasty smelling stuff so I would guess it's not very good for you. Clay -
Clay, That really looks good. I am surprised that you could stretch it that far and still have so much detail showing. Usually when I do embossed pictures, you lose a lot of the detail in the stretching, and then after filling with the dust mixture, you re-bevel to get the detail back. If you re-bevel, you can usually get even more depth. I can't wait to see how they all turn out once they are colored. ClayB
-
wanting to carve an oakleaf pattern
ClayB replied to twostepct's topic in Floral and Sheridan Carving
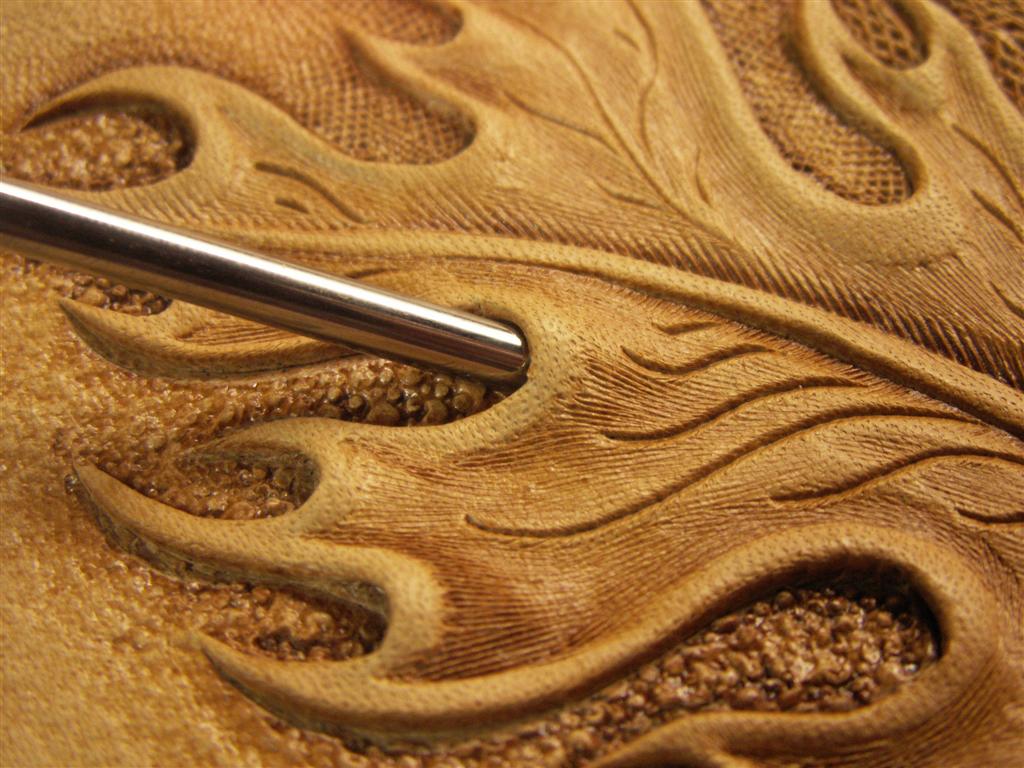
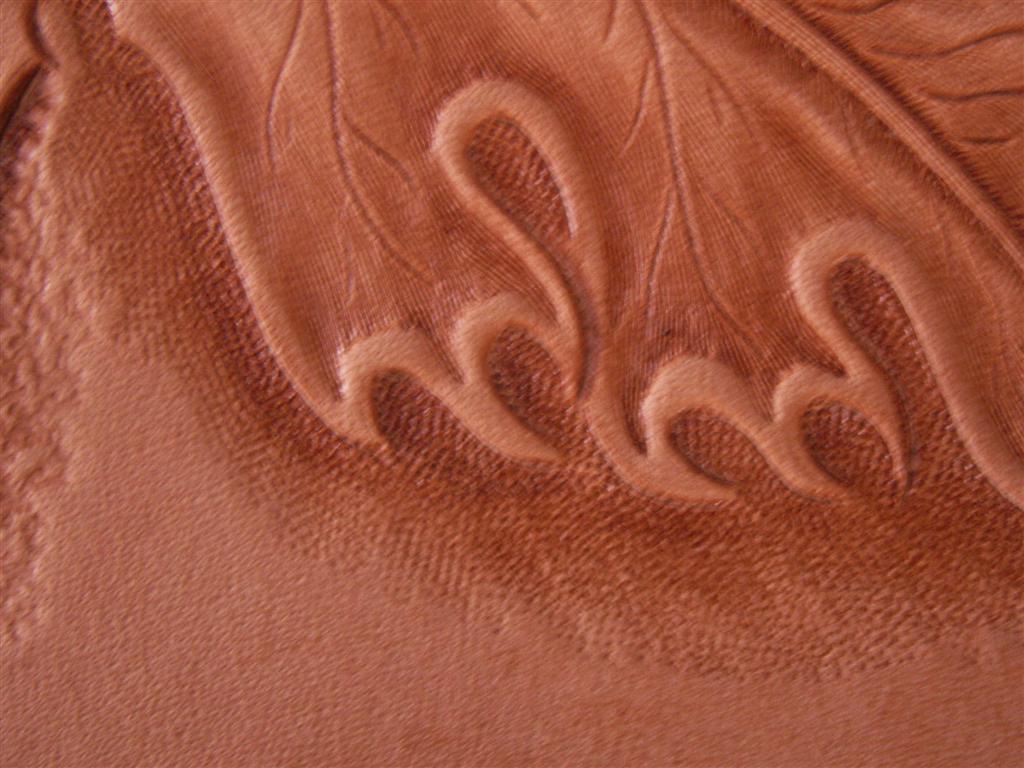
Lifting is kind of like a special effect to add depth your carivng when used in certain areas like flower petels and the inside curves on leaves. There are several tools you can use to achieve the effect, from Craftool undercut bevelers to Pro Petal tools. What you are doing with the tool is cutting under the leather and lifting a small area to give a 3-D effect. Here are a couple pictures that show the Pro Petal tool being used and the effect of added depth it gives to the leaf. Clay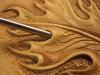
-
Once again I want to thank you all for your replies. Johanna, maybe the initials KD would show up better? Clay, I really appreciate your help with this. Pattern drawing is something that I just don't spend enough time with so it hasn't become any easier to do. I'll try your suggestion about adding a petal to the flower to see what effect it has, but it's supposed to be a dogwood flower, and almost all the pictures I found of them show only four petals. In a conversation with Verlane once before, she told me that there is a difference between reality and art, and that art doesn't necessarily have to be exactly like reality. I do a lot of figure carving and strive for realism, and I guess that is following over into my floral carving now. Trying to add a petal will go against what I think is right, but I'll try it anyway. David, I appreciate your comments too. I am having a little trouble grasping what you say sometime, but I would like to persue your suggestions too. Quite often when I carve oak leaves, I intentionally make them go over the edges of the border and I have had a lot of people comment that they like the look. I do too. So that might also be something to try here. I also don't have a problem with going against all the rules and doing something different. So I might just try a couple variations on this pattern just to see what I can come up with. Then I'll decide what I want to carve. Clay
-
I sure wish Verlane could get onto this forum as she has so much knowledge that she could share with us all. I know I have that evaluation form printed out somewhere, and I must have memorized quite a bit of it becuase what I posted looks like it came right off her form. I agree with David, Verlane put a lot of effort into this as she does with everything she works on. Clay
-
Happy Birthday Jim! Hope you have lots to smile about today.
-
Thanks to all of you for your responses. I did some work on the pattern this afternoon (before I read the reply from David) and tried to get some flow into the design. Here is what I came up with. I'll wait to carve it this time to see if there are any more suggestions for changes. Clay
-
I voted "other" on the poll because I think that Dan's picture can look good with any of those options. It looks really nice as natural leather. If you go to his website, he has a picture of a couple elk in some aspen/birch trees, where the color is really nice. So he has the ability to make it look great in color too. Spirit dye or acrylic or a combination would be a personal choice. Whenever I do a carving that I am happy with, as Dan should be with this one, the decision to color it is difficult because there is always the chance of messing it up. I think that adding color to a pictorial carving can really add to it if it is done well. If it was me, I'd take the chance and try to color it. I'd use acrylic because that's what I have more experience.Then when I messed up, I'd carve another one and leave it natural
-
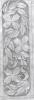
Earlier this week I tried to do a quick carving project. I have never been very good at drawing patterns, so what I usually do it try and find parts of other patterns that fit in the space I need to fill. When I finished carving this, I was fairly happy with how it looked. But, the more I looked at it, the more it looks like I just tried to fill in space (which is what I did) So I am wondering if any of you out there that actually CAN draw patterns could give me some pointers. What I see here is 3 seperate elements and a set of intitials. I would like it to be one continous pattern without breaks in between. My first idea to try and fix this pattern was to try and join the 3 seperate pieces with a vine in sort of an "S" shape to connect the pieces which I think will help, but not sure if it is the real solution. I would appreciate any ideas. Clay
-
Charley, Guess since I encouraged you to start this conversation, I should participate. There are a lot of things to look at when you judge/critique a piece of leatherwork. Johanna hit on some of them. I enjoy carving more than construction, so that is what I will start with. I came up with a list of some of the things that I look at when I look at floral carving. For figure carving, some of the things apply but I would look at it differently. I'll try and put together a list of those too. If anyone wants to add to the list or discuss anything that maybe needs clarification, I think that would be great. Floral carving The pattern Is the pattern pleasing to the eye? Is it symetrical? (if it is supposed to be) Does it have "flow"? Tracing Was the pattern traced correctly? Swivel knife cuts. Are they smooth? Do they follow the flow of the pattern? Do they follow the pattern lines? Are there any flat spots where they should be curved? Do the curves have proper flow? Are the cuts proper depth? Do they fade out where they need to? Do they start and stop where they are supposed too (do they cross other lines that they shouldn't?) Beveling Does it follow the cut lines? Does it fade out where the lines fade out? Is it smooth? Does it flatten out areas that it shouldn't? (other stems etc.) Does it go past the cut line? Cross lines? Is the beveling done on the proper side of the cut line? Proper direction changes? Cams, Veiners, Mulefoot Do impressions face right direction? Are they evenly spaced? Was the tool tilted the right direction when appropriate? Do the impressings follow the flow of the pattern? Do the impressions stay in areas they should be in? Fade out if appropriate? Seeders Spaced evenly? Cover the area properly? Even depth? (it's easy to hit a seeder to hard and make a really deep impression) Stops Used in proper area? Follow flow of pattern? Proper depth? Backgrounders Even depth? Stays within borders? Fills in entire area? Fades out if appropriate? (Areas with no borders) Decorative cuts Enhace pattern flow? Proper depth (start deep, fading out at end) When multiple radiating lines, do they head towards a common end point? Proper spacing?
-
wanting to carve an oakleaf pattern
ClayB replied to twostepct's topic in Floral and Sheridan Carving
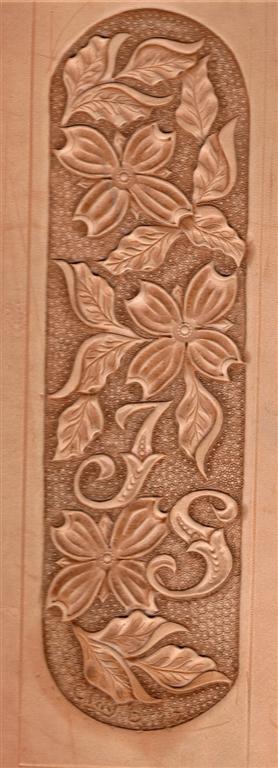
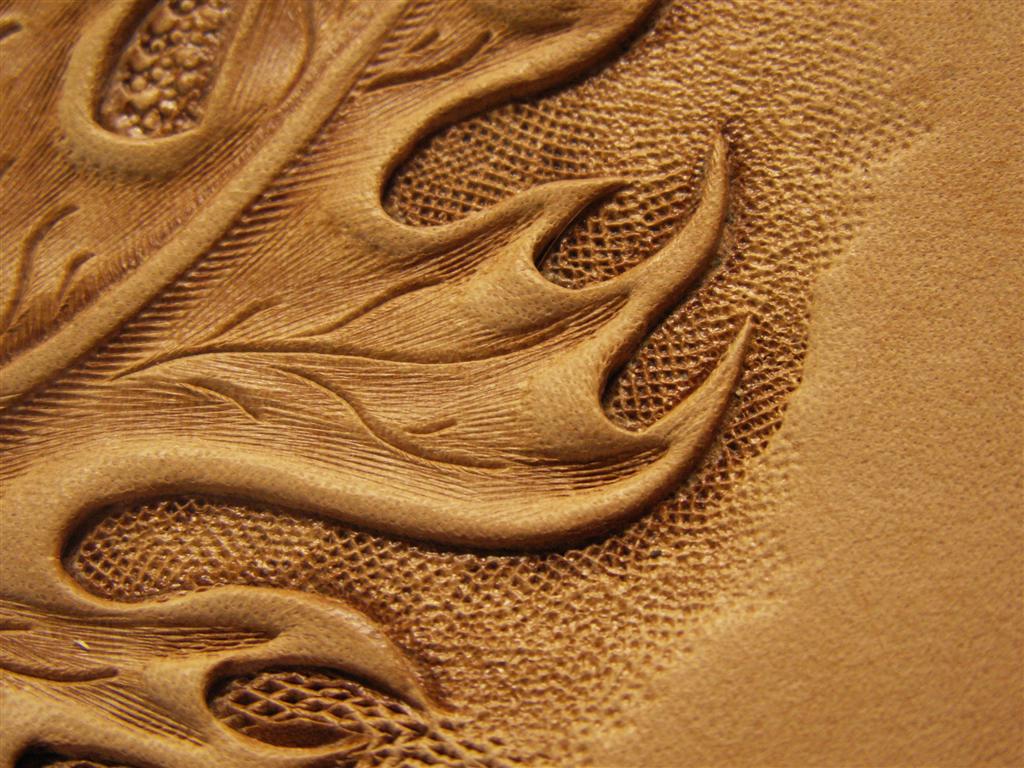
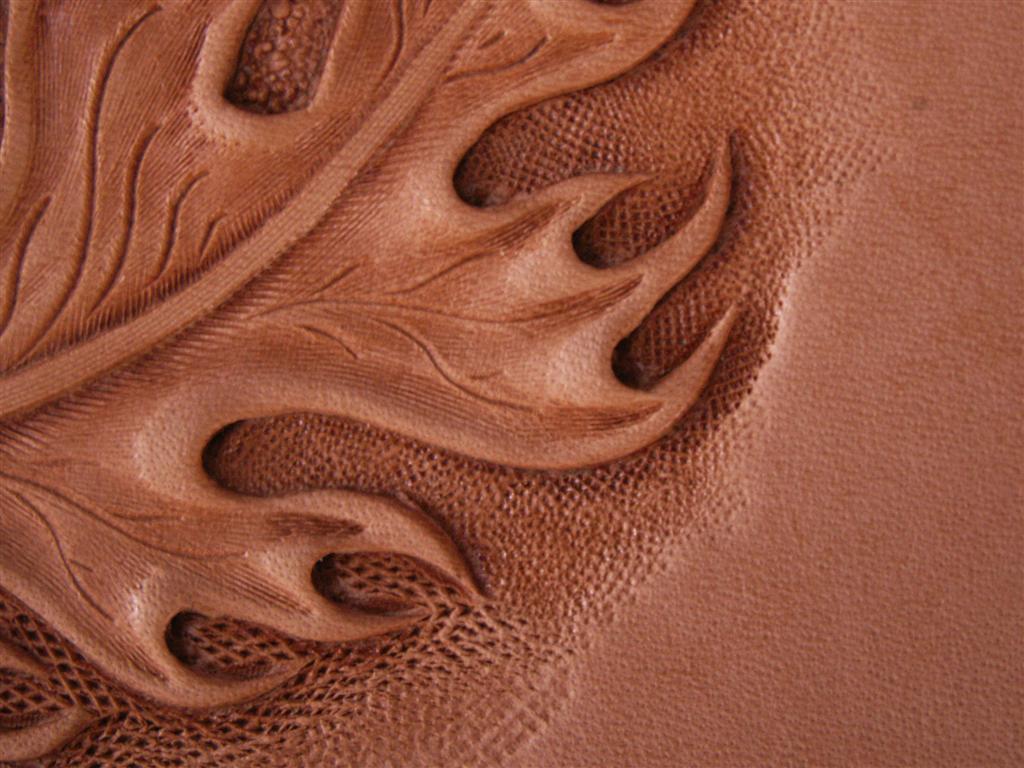
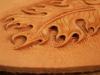
Good point Charley. I did happen to take a picture before lifting. I should have posted that picture instead so here it is. Lifting does make a lot of difference in the apperance of depth. I tried to background just as deeply in both examples, in fact I tried to go over the un-beveled one to see if I could get more depth. It just didn't work for me. Maybe it has something to do with the fact that I think I bevel deeper than I cut?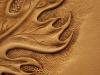
-
wanting to carve an oakleaf pattern
ClayB replied to twostepct's topic in Floral and Sheridan Carving
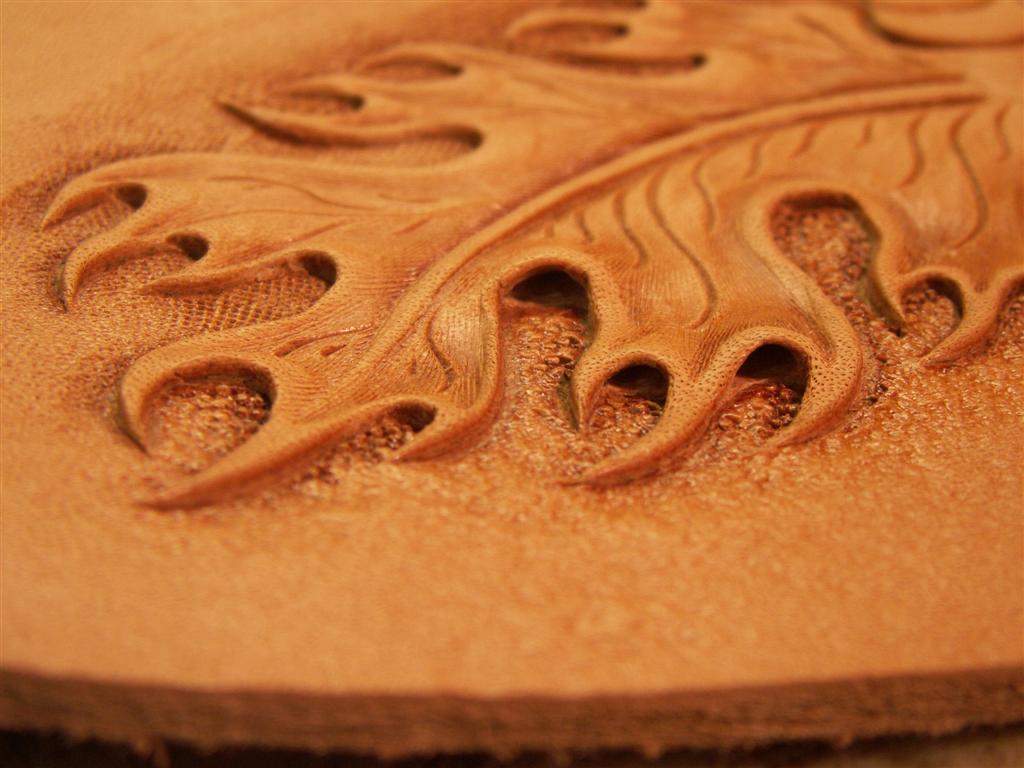
quote name='David Genadek' date='Apr 9 2007, 09:54 PM' post='3749'] Usually the question is if you should bevel the areas where you back ground. Often you just use the background tool as a beveler to speed things up. I had heard of people not beveling the background areas before, just using the backgrounder. I had never tried it but since it's acting a lot like January outside today with all the snow coming down, I decided to give it a try. I carved a couple oak leaves, one my normal way and one without beveling the background area. To me, the one without beveling looks really flat, almost like the stuff done with some sort of pressed in or rolled on design. It also seemed like backgrounding took more time to do trying to keep the tool up next to the cut, but not beveled line. Maybe there's some tricks to that technique? I could see a combo tool (beveler with background texture) working well if you were trying for more speed in your carving. without beveling with beveling (and lifting)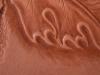

-
untilSeminars, Workshops, Demos and Competition Clarion Hotel and Conference Center 2930 Waterfront Parkway W. Drive Indianapolis, IN 46214 For more information Central Indiana Leathercrafters Guild Workshops and seminars by Ava Gannon, Chan Geer, Bob Beard, Jeff Mosby, Paul Burnett, Charles Crenshaw contact Edd Lucas at 317 849 8847 (Thanks, ClayB for adding this one- I heard you have entries there? I will be going, and I hope you don't mind that I added some more info to this post! Johanna)
-
I finally got my pamplet for the upcoming Sheridan leather show today. It lists all the classes and other info for anyone that is interested in attending the show. You can request your own copy of the digest on the Leathercrafters and Saddlers Journal website at http://www.leathercraftersjournal.com/tradeshows.html Looks like there are a few new classes being offered this years, as well as some of the regular ones. Should be something for just about everyone. I hope that some of you get the chance to make it to the show. Clay
-
$25 for a 3 day class with Jim Linnell?????? What a deal!!!!!!!!! Sure wish I lived a little closer. That's a deal that would be really hard to pass up. If the store isn't full to the max, then there a lot of people missing the boat. The other Clay
-
I heard from Verlane that they didn't get enough interest in this workshop to go through with it. It's really too bad. Verlane has so much knowledge and experience and is willing to pass it on to others. I hope she doesn't give up trying to get this started as I know there are people that could benifit from it. Clay
-
how many in the group are saddle makers?
ClayB replied to Blake's topic in Saddle & Tack Maker Gallery
Hi Blake, I have made a few saddles with the help of a local saddle maker, and a couple more on my own. I took some classes in Sheridan a few years ago too. But I don't really consider myself a saddle maker. I enjoyed making the ones I did, but most of the guys around here that make saddles say most of the money is in fixing them and that is something I don't want to do. And then today a guy stopped where I was working and said " I had a wreck with my horse and tore the rear rigging off my saddle, can you fix it?" and the saddle is now in my basement. I am in North Dakota. I know there are several real saddle makers on this forum. Clay -
I really like the way that seat turned out. I like the pattern, how the leather looks ripped open with the carving inside. I also like how you colored it, leaving the more natural colored leather showing. I think the contrast with the black really makes it stand out. All you seat makers continue to impress me each time you share pictures. Clay
-
I am passing on a message from Silva Fox concerning her Dazzling Color DVD. This video teaches a unique way to use acrylic paints on leather. I really learned a lot from it and recommend it to anyone that wants to improve their use of color on leather. Silva told me the new DVD will be basicly the same program as the old one, only it will have with an interactive menu so you can select where you want to start in the program. Here is a messge from her: I currently have 10 copies of the Dazzling Color Volume 1 DVD available at a clearance price of $23.00 INCLUDING SHIPPING! These were produced and sold by Hide Crafter and are no longer available. The best way to purchase is through PayPal to insure you get one because once they're gone, they're gone! Go to: http://www.wdstudio.net/foxart/edu.htm A new version of the program with interactive menus, the bonus pattern and a whole new look will be available at the end of April through the Silva Fox Artistry website http://wdstudio.net/foxart for $29.95 plus $5.00 shipping. Reserve your copy now. Thank you. Silva Fox visit: http://wdstudio.net/foxart
-
Hi Gary, I like your wolf puppy a lot better than the one I did. Maybe it was the lighter color you made yours. Mine ended up pretty dark and looked a lot like a bear cub. Have you done any other of Robb's patterns? I am glad that we finally got to see the pictures. You did a really good job! Clay
-
Hey Wolvenstien, you been talking to my wife? She is always telling me that I am too picky! I usually try to be pretty careful about what I actually say about someone else's work. Sometimes it's hard to tell some things from a picture. In this case, I remember doing the same thing David was doing when I learned how to lace, and how much better it looked when I finally figured out what I didn't get. As for picking nits, that sounds a little bit........um.... Gross! But it kinda reminds me of that new song by Brad Paisley, called "I'd like to check you for ticks". Now that could be interesting, depending on...........Ok, back to leatherwork )
-
Hi Carl, I am usually in the chat room on Saturday evenings around 7PM mountian time and will stick around as long as anyone is there. There are usually a few people there around that time, Johanna, Dale and Kate have been the regulars, but lately quite a few more are dropping in. If there is a better time for you, let me know and I will try and catch up with you. Clay