ClayB
-
Posts
2,063 -
Joined
-
Last visited
Content Type
Profiles
Forums
Events
Blogs
Gallery
Store
Everything posted by ClayB
-
Regis, You can carve on 2-3 oz leather but you have to be careful, especially when using the swivel knife so you don't cut through the leather. You might not get as deep of stamp impressions as you would on thicker leather. If you glue the leather to a piece of cardboard ( I use the stuff off of empty cereal boxes) it will allow you to get deeper impressions and also keep the leather from stretching out of shape. Using rubber cement will allow you to remove the cardboard when you are done carving. Clay
-
 I got a pamphlet in the mail today for a new event to be held in conjunction with the trade show in Sheridan. The American Saddle Makers Association is sponsoring a workshop that will cover cutting, stitching, edging, skiving, loop making. Teachers for the workshop will be Verlane Desgrange and Bob Brenner. This workshop will be held Wednesday and Thursday May 16-17 from 8:30 AM to 4:00 PM and there will practice sessions on Wednesday, Friday and Saturday evenings from 7-9. The event will be held at the Wagon Box in Story, Wy which is a 20 minute drive from Sheridan. The workshop will cost $500 for ASMA members and $550 for non members. A deposit of half the tuition must be postmarked my April 1, 2007 with remainder due by May 1st. Cost includes tuition, 5 nights of dorm style accommodations, Tuesday- Saturday, plus continental breakfast and lunch on Wednesday and Thursday. Class will be limited to 20 students with a minimum of 13 needed. This will be a great chance to really develope your leatherworking skills from one of the best, 2006 Stohlman award winner and former saddle making instructor at Spokane Falls Community College, Verlane Desgrange! I didn't see any info about this workshop at the ASMA website yet but you can get an email address from the site and maybe get more info that way. http://saddlemakers.org I am sure Verlane would be happy to answer any questions anyone has on this. Clay
 -
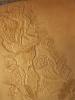
--> QUOTE(Oscar B @ Feb 25 2007, 06:10 PM) I can't put my finger on what is wrong. Help! [attachment=842:attachment The other guys mention deeper beveling. I think the same goes for pear shading. On the triangular shaped leaves, you really got some depth and it gives a lot of shape to the leaves. You can see the wavy shape of the leaves and they almost pop off the leather. I think that if you get the same depth into the other leaves and the flower petals, it will help to bring out their shape more. The way Jim drew that pattern, the leaves are fairly straight, but with the right shading at the tips, you might be able to give them the appearance of a little curve. To my eye, that would help the looks of the pattern. Clay
-
Hi Stephanie, Sometimes it seems to be easier to try and show the process than trying to explain it. I hope seeing the pictures helps people see how I do it, not necessarily the right way or the only way to do it. I used 5-6 oz leather but you can what ever weight leather fits the project. On thinner leather, you have to be careful not to cut through it with your knife, or stamp through it with your tools. On really thin leather, 3 oz or less, instead of using a beveler and a mallet, you can do most of the beveling with a modeling too. Attaching the leather to a piece of cardboard with rubber cement will help when carving thin leather. It seems to give the leather some cusion allows for deeper stamping without going through. It also keeps the leather from stretching out of shape. Casing depends a lot on the leather you are using. I have been using Herman Oak lately for tooling on and it seems to be pretty easy to case. I can just wet it down with a sponge, let it start to come back to color and start carving in a matter of minutes. That works on small things like the cougar. If I am going to be working on a larger picture that is going to take several hours or more, I will usually soak the leather front and back, let it start to come back to color, and then place it in a plastic bag in the refrigerator overnight. I think that allows the moisture to get more even, and it seems to stay at the right moisture longer. As I carve and the leather starts to dry out, I will wipe the leather down with a damp sponge. Moisture content will make a big difference in you carving, but unfortunatly, it's something that you pretty much have to learn through experience, and it can be different with each piece of leather. The pointed beveler I used is a craftool F902. It's made to do the hair like I showed, but usually they are pretty thick at the pointed end. They just work a lot better if you file them down to a sharp point. You could do the same thing with any smooth beveler, it would just take more work to shape it. Craftool also has a F902-2 which is the same shape but has lines on it. That would work just as well, maybe better. I have a tool similar to that one made by Bob Beard that I really like, but for the demo I tried to use the tools that most people have, or can get easily. The hair blade I used is available through Tandy or Hidecrafter. It is a special blade with several lines on it that you put in a swivel knife. They come in a fine and a coarse. I think the one I use is fine. Tandy carries another version that is held like a pencil with a fine blade on one end and a coarse blade on the other. If you don't have either of these, you can get a similar effect by using a lined beveler or other lined tool and dragging it across your work to give the hair effect. When doing hair, pay attention to length. Don't make hair go all the way across the body, but do it in short strokes paying attention to direction changes. Hope that helps some. Clay
-
For patterns like that where they overlap each other, or I just dont want to cut up the original, I got some large sheets of graphite transfer paper, 18x36 inches. I trace the original onto cardboard, brown paper, etc. Some of my patterns for different parts of saddles I cut out of leather splits. That way they are durable and flexable and I can fit somewhat fit them to the tree and see where adjustments will need to be made. Clay
-
You might try reducing the dye about 50 % with dye reducer or isopropyl (rubbing) alcohol before you apply it. That should give you a lighter color. If it is too light, you can apply another (or several) coats. You can always make it darker, but not lighter. I came across an article in an old magazine awhile back that I found interesting on spirit dyes. It said that they saturate the liquid with pigment and whatever can't be absorbed, settles to the bottom of the bottle. If some of the liquid evaporates, more pigment will settle to the bottom, keeping the color the same. It said that if you shake a bottle you will suspend more pigment into the liquid and make the color darker until the extra pigment settles back out. The article said to never shake your dyes before using them. It's been said here before already, but always try your finishes on scraps before applying it to your finished projects. It's usually not fun to get surprises at that point.
-
Regis, It kind of looks like that area is the neck on the side of leather. If that is the case, there are going to be wrinkles in that area. On the live animal, the neck is always moving, up, down, side to side, so it has to be flexible. The neck and the belly areas of the hide are the least usable areas of the hide because they are stretchy. Sometimes stretchy leather can be useful. On the embossed pictures that I have been doing, leather closer to the belly that is stretchy works really well, because of the stretch. But you don't want to use it on anything that needs strength, like a strap. If you try to carve leather from the neck or the belly areas, it is going to stretch out of shape unless you attach it to cardboard, plastic or some other stiff backing material before you carve on it. I usually glue it to a piece of cardboard from an empty cereal box with rubber cement. Carving can cover up blemishes in leather, but make sure that the leather is suitable for your intended use first. Hope this helps a little. Clay
-
Thank you all for the birthday wishes! I didn't get the day off. I spent this morning on a cold windy roof and most of the afternoon climbing up and down a scaffold, but after reading about Johanna's day, I felt pretty good about mine. It was great coming home and reading all the nice messages from my new friends on this forum (and some old ones too!) Clay
-
I have to agree with the statements that the videos are instructional and not much on entertainment value. But don't get the idea that the guys doing them are boring in real life. George can be quite entertaining in person. I even heard that once in Japan he did a little karoke after consuming a little saki. Now that I think might have made an entertaining video.
-
Hi Dale, Your notebook turned out really nice! The different antique colors you used, were they the antique stains? The only antique I have ever used was the paste and I can't imagine you doing this with those. I like the color and would like to know how you did it. Waiting to see how the other project looks when it is finished. Clay
-
Dave, You might want to try some kangaroo lace. I have been getting it from Jim Downey and the quality is good and so is the consistancy. It comes in dozens of colors. Jim Downey Box 30 Skull Valley, AZ 86338 928 442 3638 928 925 3365 cell j.c.downey@worldnet.att.net
-
One of the best sources for learning to use your swivel knife that I have seen is Paul Burnett's Realistic Leather Carving home study course. Paul started this back in the 80's I think and only got to lesson 3 before he quit, but the 3 lessons he did were like a college course in leather carving. The first 15 page lesson was on how to use a swivel knife, varying depths of your cuts, doing curves, cutting parallel lines, etc. After the basics, he goes into cutting floral and figures in depth. You can still get these lessons from Paul's ebay store at http://stores.ebay.com/Painting-Cow The set of lessons cost $30 but I think it is money well spent. If you ever get to a show where Al Gould is giving his swivel knife class, take it. You will be amazed! Al teaches not to turn your work, but to learn to cut in both directions, either pulling your swivel knife like most of us have been taught, but also pushing the knife away from you instead of continually turning your work. It is really difficult at first, but it is something you might try to learn once you get comfortable with your knife. The man that taught me to build saddles always pushes his swivel knife. It's just the way he learned to do it because there wasn't anyone around to tell him what he was doing was "wrong". He carves really well pushing the knife, and to top it off, he is missing his thumb on the hard he carves with too. Just one more of those cases where there really is no right or wrong, just what works for you. There are several things I pratice cutting with my swivel knife. You can start just cutting straight lines, side by side and vary the depth from deep to light. Cut curves in both directions. Circles, start with a large one and keep making smaller ones inside them until you cant get any smaller. Letters and numbers are really good practice to make both straight and curved lines. Cut the alphabet on scrap leather and see how small you can get as your skills improve.
-
Thank you all for the comments. Regis, the eye is about 1/4 inch wide and 1/8 high. I really like doing larger figure carvings because it's a lot easier to do the details on them. I watched Bob Beard do some eyes last summer and he could do them about 1/16 of an inch and get all the details in. You just need a really good modeling tool and a lot of practice. Jim, tell me what you want in the way of a tutorial and I'll see what I can do. Clay
-
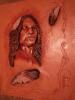
Last spring, one of the leather artist's who's work I really admire challenged me to try and do an original carving using one of the photos I had taken as subject matter. When I couldn't decide what to try, she suggested this buffalo skull sticking out of a dirt bank. I tried this once before and it was a disaster. Pieces of it are buried in the scrap pile and I put off trying it again until last week. This time it went much better. The second part of the challenge was to write an article for the LCSJ on how the project went. Well I didn't take any photos while I was doing the last two projects because I really had no plans as to what I was going to do. They just evolved as I went along. I am planning to try each of them again because there are always some things that I want to try differently. Started the second skull picture today and am taking pictures as I go this time. So I should have something to show in the way of an article or tutorial in the future.
-
Next time you go, take 2 carved pieces with you. Give her one and keep one for yourself. Then try and get her to go slowy, step by step showing you what to do on the one she has while you practice on the other yourself. If you have a camera, take pictures of each step so that you can refer back to them when you are at home. Painting has been one of the hardest things for me to learn, but I trying and it is getting easier. It will for you too. Clay
-
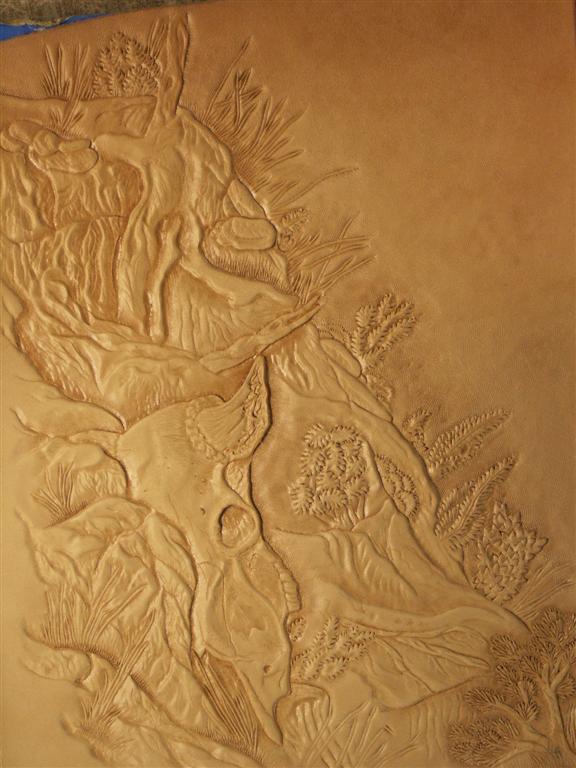
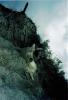
Here is something that I tried last week since it was too cold outside to work. I took the picture in Rocky Mountain National Park in CO last summer. I blew the picture up to 8 X 10, printed it out black and white and then drew a pattern from that. Not too many tools needed to do this one. Mainly just a small figure carving beveler and a background tool. I did get to know both of them quite well before I was finished. I have a bunch more pictures from that park and I think I will be trying a few more of them like this. Probably wont be this week though, it was 52 degrees here in ND today so vacation is probably over. Clay
-
I gotta start getting up earlier. I always miss out on the doughnuts!!!!
-
I decided that the best way to find out exactly what Tandy's position on the free patterns is was to ask. Here is the response from Jim Linnell. Clay, Your read on the disclamer is correct. The patterns are for the personal use of any who wish to use them. If they want to sell their items made with those pattens, that's fine. Don't sell patterns, but make and sell as much leatherwork as you want. Jim L.
-
I got the same thing out of the statement that Dan did. The pattern itself is copyrighted and you can't sell the pattern. If you are really worried about it, the address for them is right there and you could ask them. That way you would know for sure.
-
The Seventh Australian Leather Conference, From the 1st to 7th of July 2007 Every couple years they have a week long leather conference in Australia. This year it will be held from the 1st to 7th of July. There will be workshops, evening demonstrations, display/exhibition, and a market evening To find out all about the 28 workshops being taught, and all the details, check out the website at www.dimensionsinleather.com
-
Here is the last of the Robb Barr video projects that I was working on.
-
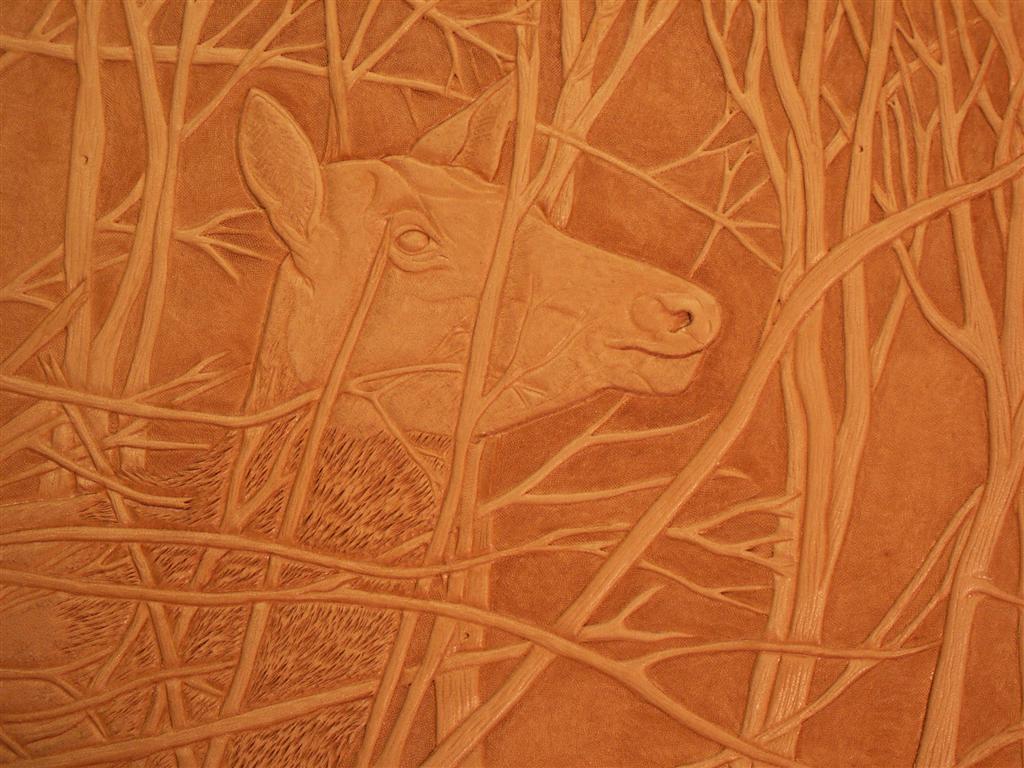
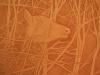
Last spring in a class with Jan Schoonover in Sheridan we were working on a project when a lady with her young daughter came into the class. The lady was talking to Jan while the little girl walked around the tables looking at what we were doing. She would point to each picture and say "horse". Jan thought it was pretty funny and said "well, it looks like you all pass". I have had a couple people look at the wolf puppy project after I got it painted and call it a bear cub. Guess I failed on this one. There were several things I didn't like about this. One that I could change was the eyes. Those blue eyes just didn't work for me so I redid them several times. Tried different shades of blue, yellow and finally settled on brown.

-
Central Indiana Leathercrafters are putting on a show in Indianapolis Indiana April 18-22. For complete details on this show go to thier website at http://www.centralindianaleathercrafters.org/ They will have 1 1/2 to 3 day seminars by Ava (Ostrander) Gannon, Chan Geer and Bob Beard. Then there are workshops by Jeff Mosby, Charles Crenshaw, Paul Burnett, Lisa Galvin, George Hurst, Edd Lucas, Cody Young and more. They are also having a competion similar to the IFOLG show but you need not be a member of any guild to enter. Sounds like they are going to have a good time. Hope some of you get a chance to attend. Clay
-
Ok Bruce, that is some REALLY neat stuff!!!!! I haven't been able to get into some sites lately but I am sure glad I got into that one. His styly is definately Sheridan done right but with it's own flair. It's clean and neat and I like it. Wish I could go to that class with you. Thanks for passing that along. Clay
-
I just recieved a flier from Siegel of CA. It says in the flier that thier new catalog is available on CD. You can get a copy of it by calling Siegel at 1 800 862 8956 or 805 686 2700. Siegel carries a wide variety of leather, tools, and supplies. They also offer free shipping on most orders over $75. Check them out at siegalofca.com