ClayB
-
Posts
2,063 -
Joined
-
Last visited
Content Type
Profiles
Forums
Events
Blogs
Gallery
Store
Everything posted by ClayB
-
 One suggestion from another site is to place your rusty tools in an aluminum pan filled with water and one tablespoon of Cream of Tartar. Let the tools cook on low heat. When the water starts to turn colors, it is the rust letting loose. You should then be able to brush the tools clean with a scrub brush. Other suggestions would be to use a steel brush on a bench grinder or dremel tool. I soaked some I had in vinegar once and it worked, but was told afterwards that this isn't the best idea. They said that if you leave it in the vinegar too long it will start to eat the tools. Hope this will give you some options to try. Clay
 -
I think Bruce is right about what could be causing the spots, and what to try to get rid of them. I use lemon juice right out of the bottle on a damp sponge. The spots wont dissappear right away, but should go away as the juice evaporates. You can also wipe down parts of your work area if you suspect they might be contaminated and causing the spots. If you are handling something iron like Bruce said, maybe an anvil, or filings from a drill press etc. you might try washing your hands with lemon juice also before you go back to working on leather. I hope your spots come out. It can be really frustrating when things like that happen. Clay
-
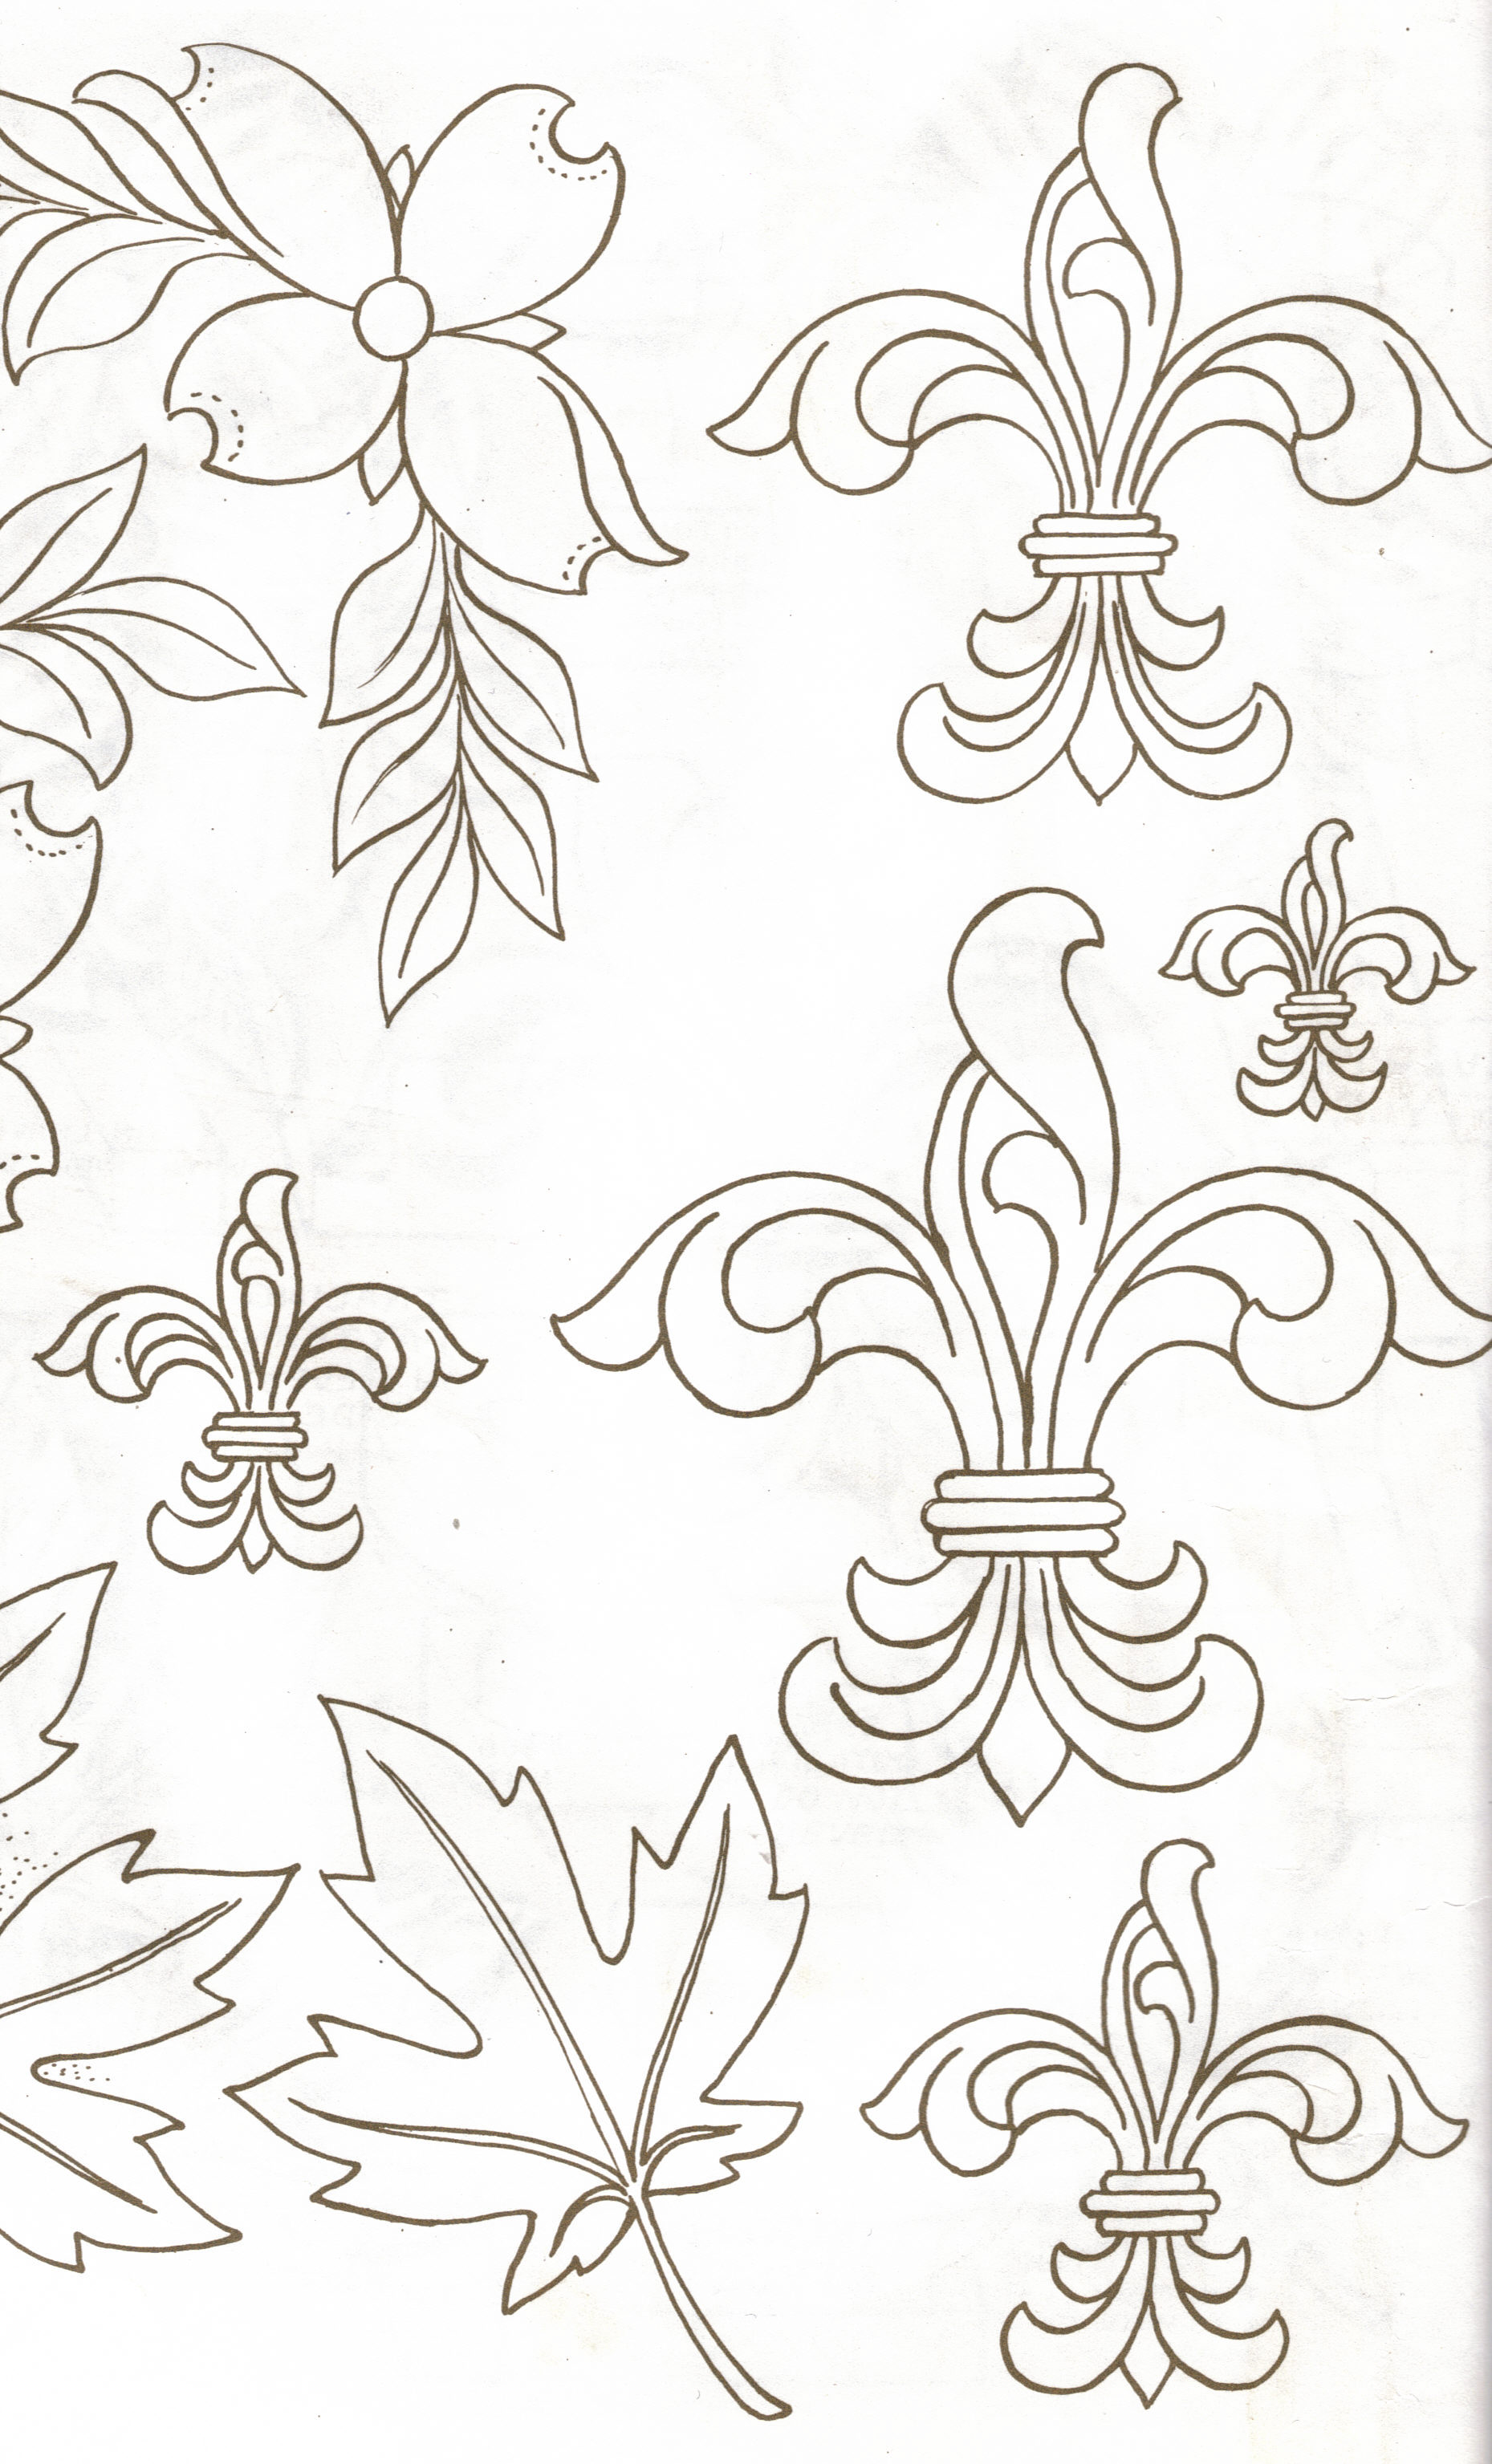
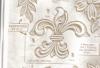
Took me awhile to remember where this pattern was. It is from an old Al Stohlman doodle page. It had several patterns and shows how to carve them the traditional way and also inverted. Hope this helps you. Clay


-
Making and coloring an eagle feather was the first video in Robb Barr's series. Hidecrafter is the place to get any of Robb's videos (ask for Anne if you call) . You will need to either buy or make yourself a "multi-blade" knife. It is the knife that puts lines in the feathers. Basically it is a bunch of X-acto knife blades side by side. Robb made these by cutting a hole in a 3/8ths in wooden dowel and then epoxy-ing the x-acto blades into the hole. The other tool you will need is a surgeons scalpel. You should be able to get both of these from Hidecrafter also. The feathers are fun and fairly easy to make. Clay
-
On the rifle slings I just made, I used a felt like material in between the carved leather and the lining. I used chap leather with the rough side out for the lining to give it some grip. I think cotton batting might work too. Not sure if it would just flatten out due to the weight of the guitar hanging on it after awhile. I'll be interested to see what others recommend. Clay
-
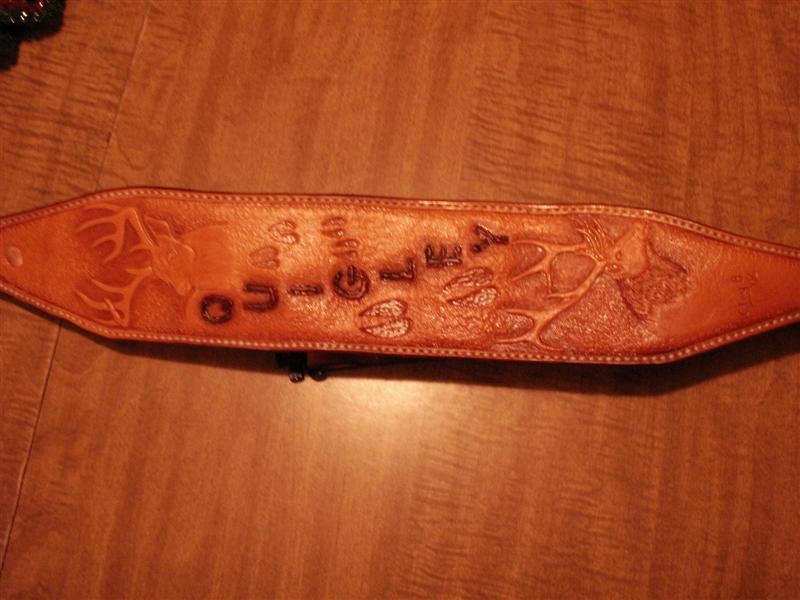
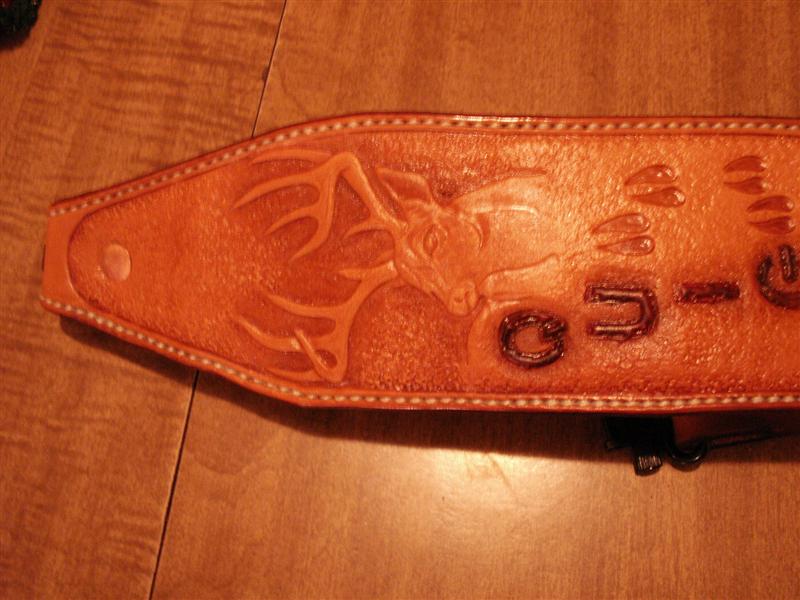
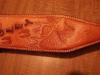
Was pretty ugly outside yesterday so I got the day off. I spent the day making another rifle sling. I wasn't completly happy with the elk on the first one, so I came up with a different pattern. I found a picture in a wildlife book I had and started by tracing the head of the elk. Even after shrinking it on my copy machine, I couldn't make it fit the small space I had to carve in. So I started modifying it, curving the antlers down, pointing the nose up a bit. Then I had to change some of the lines on the neck to make it look more natural. I have never had a lot of luck doing patterns from pictures before, so I was really happy when this started turning out like I wanted it too. I was really pleased when I carved it and it looked just like I wanted it too. I got a little surprise when I oiled the leather. There must have been a small scar on the leather right across the elk's nose. It's noticable, but there isn't anything I can do about it. I did pull all the stitching because I still don't have my Boss adjusted quite right, but I am getting it to work better and with some more adjusting, maybe it will work. Clay

-
Hi Claudia, Your first attempt at embossing turned out a lot better than mine! My first try was a horse head on a belt buckle and I hated it. I still have it on a shelf and see it every once in awhile. I did it like Stohlman did it with leather plugs, and if that was the only way to emboss, I would not emboss anything. Your horse looks pretty good but the white is pretty strong. I have learned that when I use acrylic paints, I thin them down a lot with water. Somebody on another list mentioned some kind of acrylic "medium" that might work better. I would like to try that sometime, but water works ok so far. I thin it down so that sometimes you can barely tell that you have painted an area. You can just keep going over it until you get enough color. It is easy to add more and more coats of light color. If you use it straight out of the bottle and it is too dark, you are usually stuck with it that way. I know you learn a lot from videos. One you might like on color is Silva Fox's Dazzling Color video. I did the picture from her video and was really surprised how well it turned out. You can get her video from her website http://wdstudio.net/foxart/main.htm or from Hidecrafter. She also has a few lessons on her website that you might find helpful. She does amazing things with acrylics on leather and she has helped me a LOT! Keep up the good work Claudia, and keep sharing your pictures. Clay
-
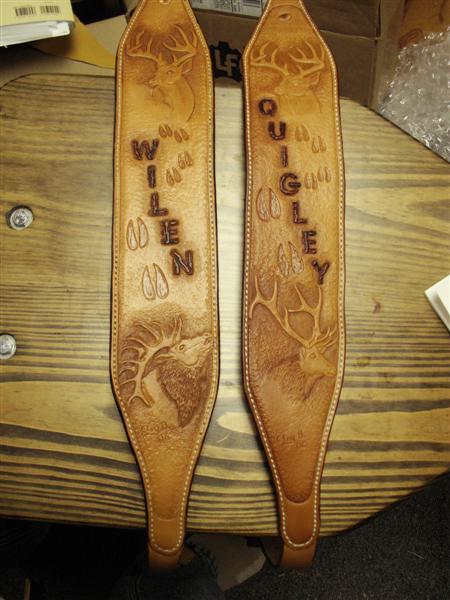
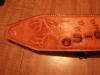
A good friend of mine called a couple weeks ago and said his daughter was looking for someone to make a hand carved leather rifle sling for her boyfriend. She wanted a whitetail deer on top, an elk on the bottom and his name in the middle. This is what I came up with. Clay

-
I usually go into the chat room on Saturday evenings around 9pm central time. The last couple weeks nobody has showed up, but I will keep trying. I have met quite a few of you in there and we always have good conversations. Talk doesn't necessarily have to be about leather. Even if it doesn't say anyone is there, check the room out. As for tutorials, I am still willing to work on something. We tried to get something like Doodle pages going on another site and it seemed to fizzle out. I know there were people willing to contribute. I am not sure that I can do anything with a webcam. My internet service is through a satalite dish and we have limited bandwidth. They told us using a webcam uses a lot of it. I can (and do) take a lot of pictures when I am working sometimes so doing a tutorial that way shouldn't be a big problem. Couple questions for the tech people. If you were going to do a video, what would be the best way to do it? Webcam? Digital video camera? I dont have either. If you used the old style video camera like I have and copy it to DVD, could that be run on a computer? As for the day job Johanna. If I didn't have a day job, what excuse would I have to climb around on a scaffold on a late November day in ND when it is 10 degress outside with a 30 MPH wind (-10 windchill), with sleet and snow making everything slick to walk on???? Clay
-
I would tend to agree with those that say "don't try it". One thing that I would like to add is that at one time, Tandy offered the Stohlman doodle pages in book form. There were three books, each one covering several years worth of the doodle pages the Stohlman's wrote. Since they were sold in book form I am sure that Tandy owns the copyright to those ones. Clay
-
They are available in DVD but my guess is that the sale is on the VHS format. Anne is really nice lady (and a good friend) and she can answer any of your questions. I have most of the Robb Barr video series and I can tell you that they are worth getting if you are interested in learning his style of carving. Clay
-
untilLearn to make a roper style wallet with Al Stohlman award winner Chan Geer. The 2-day workshop will be at the Las Vegas Tandy Leather store located at 5785 West Tropicana Ave. Saturday, Dec. 2 and Sunday Dec. 3, 2006. Class fee is $150 and will include the leather needed to complete the project. Call to reserve your seat 800-395-2690 or 702-221-4172. Email lasvegas@tandyleather.com
-
untilSOUTHWEST LEATHER WORKERS TRADE SHOW March 8 - 10, 2007 (Workshops March 4 - 10) Wickenburg Community Center Wickenburg, Arizona "Out Wickenburg Way" FOR SHOW INFORMATION, CALL / WRITE: The Leather Crafters & Saddlers Journal 331 Annette Ct. Rhinelander, WI 54501-2902 Toll Free 1-888-289-6409 (local / international: 1-715-362-5393 To sign up for your free trade show guide, go to http://www.leathercraftersjournal.com/tradeshows.html
-
untilColoring leather class taught by George Hurst, December 2-3, 2006 at Hidecrafter, Fort Worth, Texas. Cost of the class is $50. For more info call Hidecrafter at 817-878-5797
-
untilPanhandle Leather show, Amarillo TX November 10-11, 2006. For more info, contact Hidecrafter 817-878-5797
-
You've gotten good advice here already. There are two sides to this topic. First off, you need to practice and learn to use whatever tools you have, or are planning on getting. A high dollar tool doesn't instantly make you a great carver. It takes lots of practice to learn to do smooth beveling or pear shading. It takes practice to learn proper placement of veiners and cams. But on the other hand there are some tools out there that make it difficult to do a decent job of carving no matter how much practice you do. Several years ago when Tandy was closing all it's stores, I added quite a few Craftools to my collection at really cheap prices. Some of these tools were terrible quality. The checkering was almost filled completely in with the chrome plating. The shape of some of the tools also made them almost impossible to use correctly. I have bought some of the newer tools that Tandy offered in the last couple years and the quality was a little better. I do think that the tools from Hidecrafter are better. And I really like the Hidecrafter Pro Series tools. I have a set of their steep bevelers that I use a lot. When you get to the point that you are sure that you want to continue with leather carving, then you MIGHT want to go to the custom tool makers. I have tools from Barry King, Hackbarth, and Bob Beard. I usually only buy tools that I know I will be using a LOT or ones you can't get anywhere else from these guys. When I decided to try Sheridan style, I got some tools from Barry King. I get my specialized figure carving tools from Bob Beard. I feel that the guys that do that style of carving probably know best how to make the tools to do the job. If you are going to do basket stamping or geometrics, check out Barry's, Wayne's, or Jeremiah's. They have some neat designs. These tools are going to cost some serious money, but they are definately made to do the job right. One other option you have is to modify Craftools to do what you want them to do. Peter Main said all he uses are Craftools, but he has altered some of them to do what he wants them to do. I don't think anyone will argue that it works for him! Sometimes you can get good deals on Craftools on Ebay. The better ones are the ones that don't have a letter prefix before the number. Don't know if this helps, but at least it should give you some options. Clay
-
untilJan Schoonover will be teaching a leather embossing to the extreme class on Dec. 1 and Dec. 2, 2006. The class will run Friday and Saturday from 8:30 to 5 PM with an hour for lunch. The class will be held at Montana Leather Co at 2015 First Ave North, Billings MT. The phone number is 406-245-1660. He will be doing an 11X14 picture of a Paint Horse from start to finish. You will need a 12X15 piece of 6 oz leather, which you can purchase from Montana Leather. Jan will supply the acrylic paints, and also the hairing knives which you can purchase if you want. He will also have disposable scalpels for sale at $1.50 and will be furnishing the leather dust and rubber cement. The class will run $150 and will require a $50 deposit mailed to Jan F Schoonover, 511 S 33rd street, Billings MT 59101 by November 20th in order to know how many will be attending. Tool List (additional supplies can be purchased at Montana Leather Co.) swivel knife with 1/4" angle blade B701 beveler B203 beveler F910 lined figure pointed beveler F976 checkered pointed beveler F902 small pointed beveler B60 or B935 undercut beveler 8033 modeling tool 8036 modeling tool F890 small figure beveler F891 small figure beveler F897 large figure beveler Background tool of your choice Scalpelwith #11 blade P206 pear shader F895 figure beveler Pro Petal tool A number 4-6 round brush and a number 0 round brush. A good quality brush is what you will need. Recomendations: The brushes Jan uses are #4 loew-cornell 797-r round stain #00 Loew-Cornell 801 white nylon #5 Leow-Cornell 795 white nylon avoid soft brushes, especially camel hair and squirrel hair You can see Jan's work at http://www.sculpturedleather.com
-
Hey I know that one! I won't post the answer for those that want to figure it out.
-
What a neat idea, Jim. I like it. It's always fun to see the new stuff people think up. Clay
-
On that website, you can get an idea of some of the tools that Bob makes, but it is pretty outdated as to what he makes, and especially as to prices. The latest printed catalog is also out of date, and Bob has a freind that is in the process of adding around 100 more tools to it. When that is done, he has another friend that will try and get the updated catalog on a new website http://www.robertbeardtools.com/ You can look at the site, but there isn't much there yet as it is early stages of construction. Photos will have to be taken of a lot of tool impressions before they can be put in the catalog, or on the website.
-
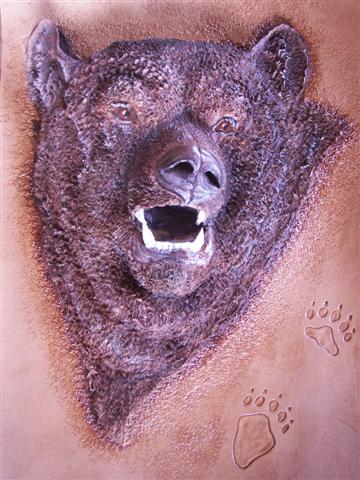
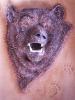
Hi Carl, Thanks for your comments on "ol growley". Maybe it takes a "technical" eye to catch some mistakes. It sure does look like you are right in your comments. The highlights are suppposed to be on HIS right side, like on the ears, and neck. Not sure why I put them on the wrong side of his nose. I did think that the overall paint job made the crooked nose less noticeable. Tom and several other people pointed out that the crooked nose CAN occur in nature, either because all bears will have different facial features, or maybe just the face he was making at the time. I hope to do another one of these in the near future, and I will have to decide it I want to alter the pattern before I start. If I get to Bismarck before I do another one, I will have to study the ones Robb did to see what he did. I appreciate the comments from everyone. I still have lots to learn and it helps to have other points of view. Clay
-
Thanks Shirley, One of the nice things about leather is that there are so many different things that you can do with it. If you don't like one style, there are so many others to try. My problem is that I feel like I have to try them ALL!! At least I never get bored that way.
-
Figured I would add the picture of the bear after I colored him. I was really happy with how he turned out, and that doesn't happen very often! I sent the bear to Butler Pennsylvania where he was part of the IILG display table. He somehow got lost over there and missed his trip home on the UPS truck. So now he is residing in Mississippi with a good friend of mine. Last bear that got lost up here in ND got run over by a semi on the interstate

-
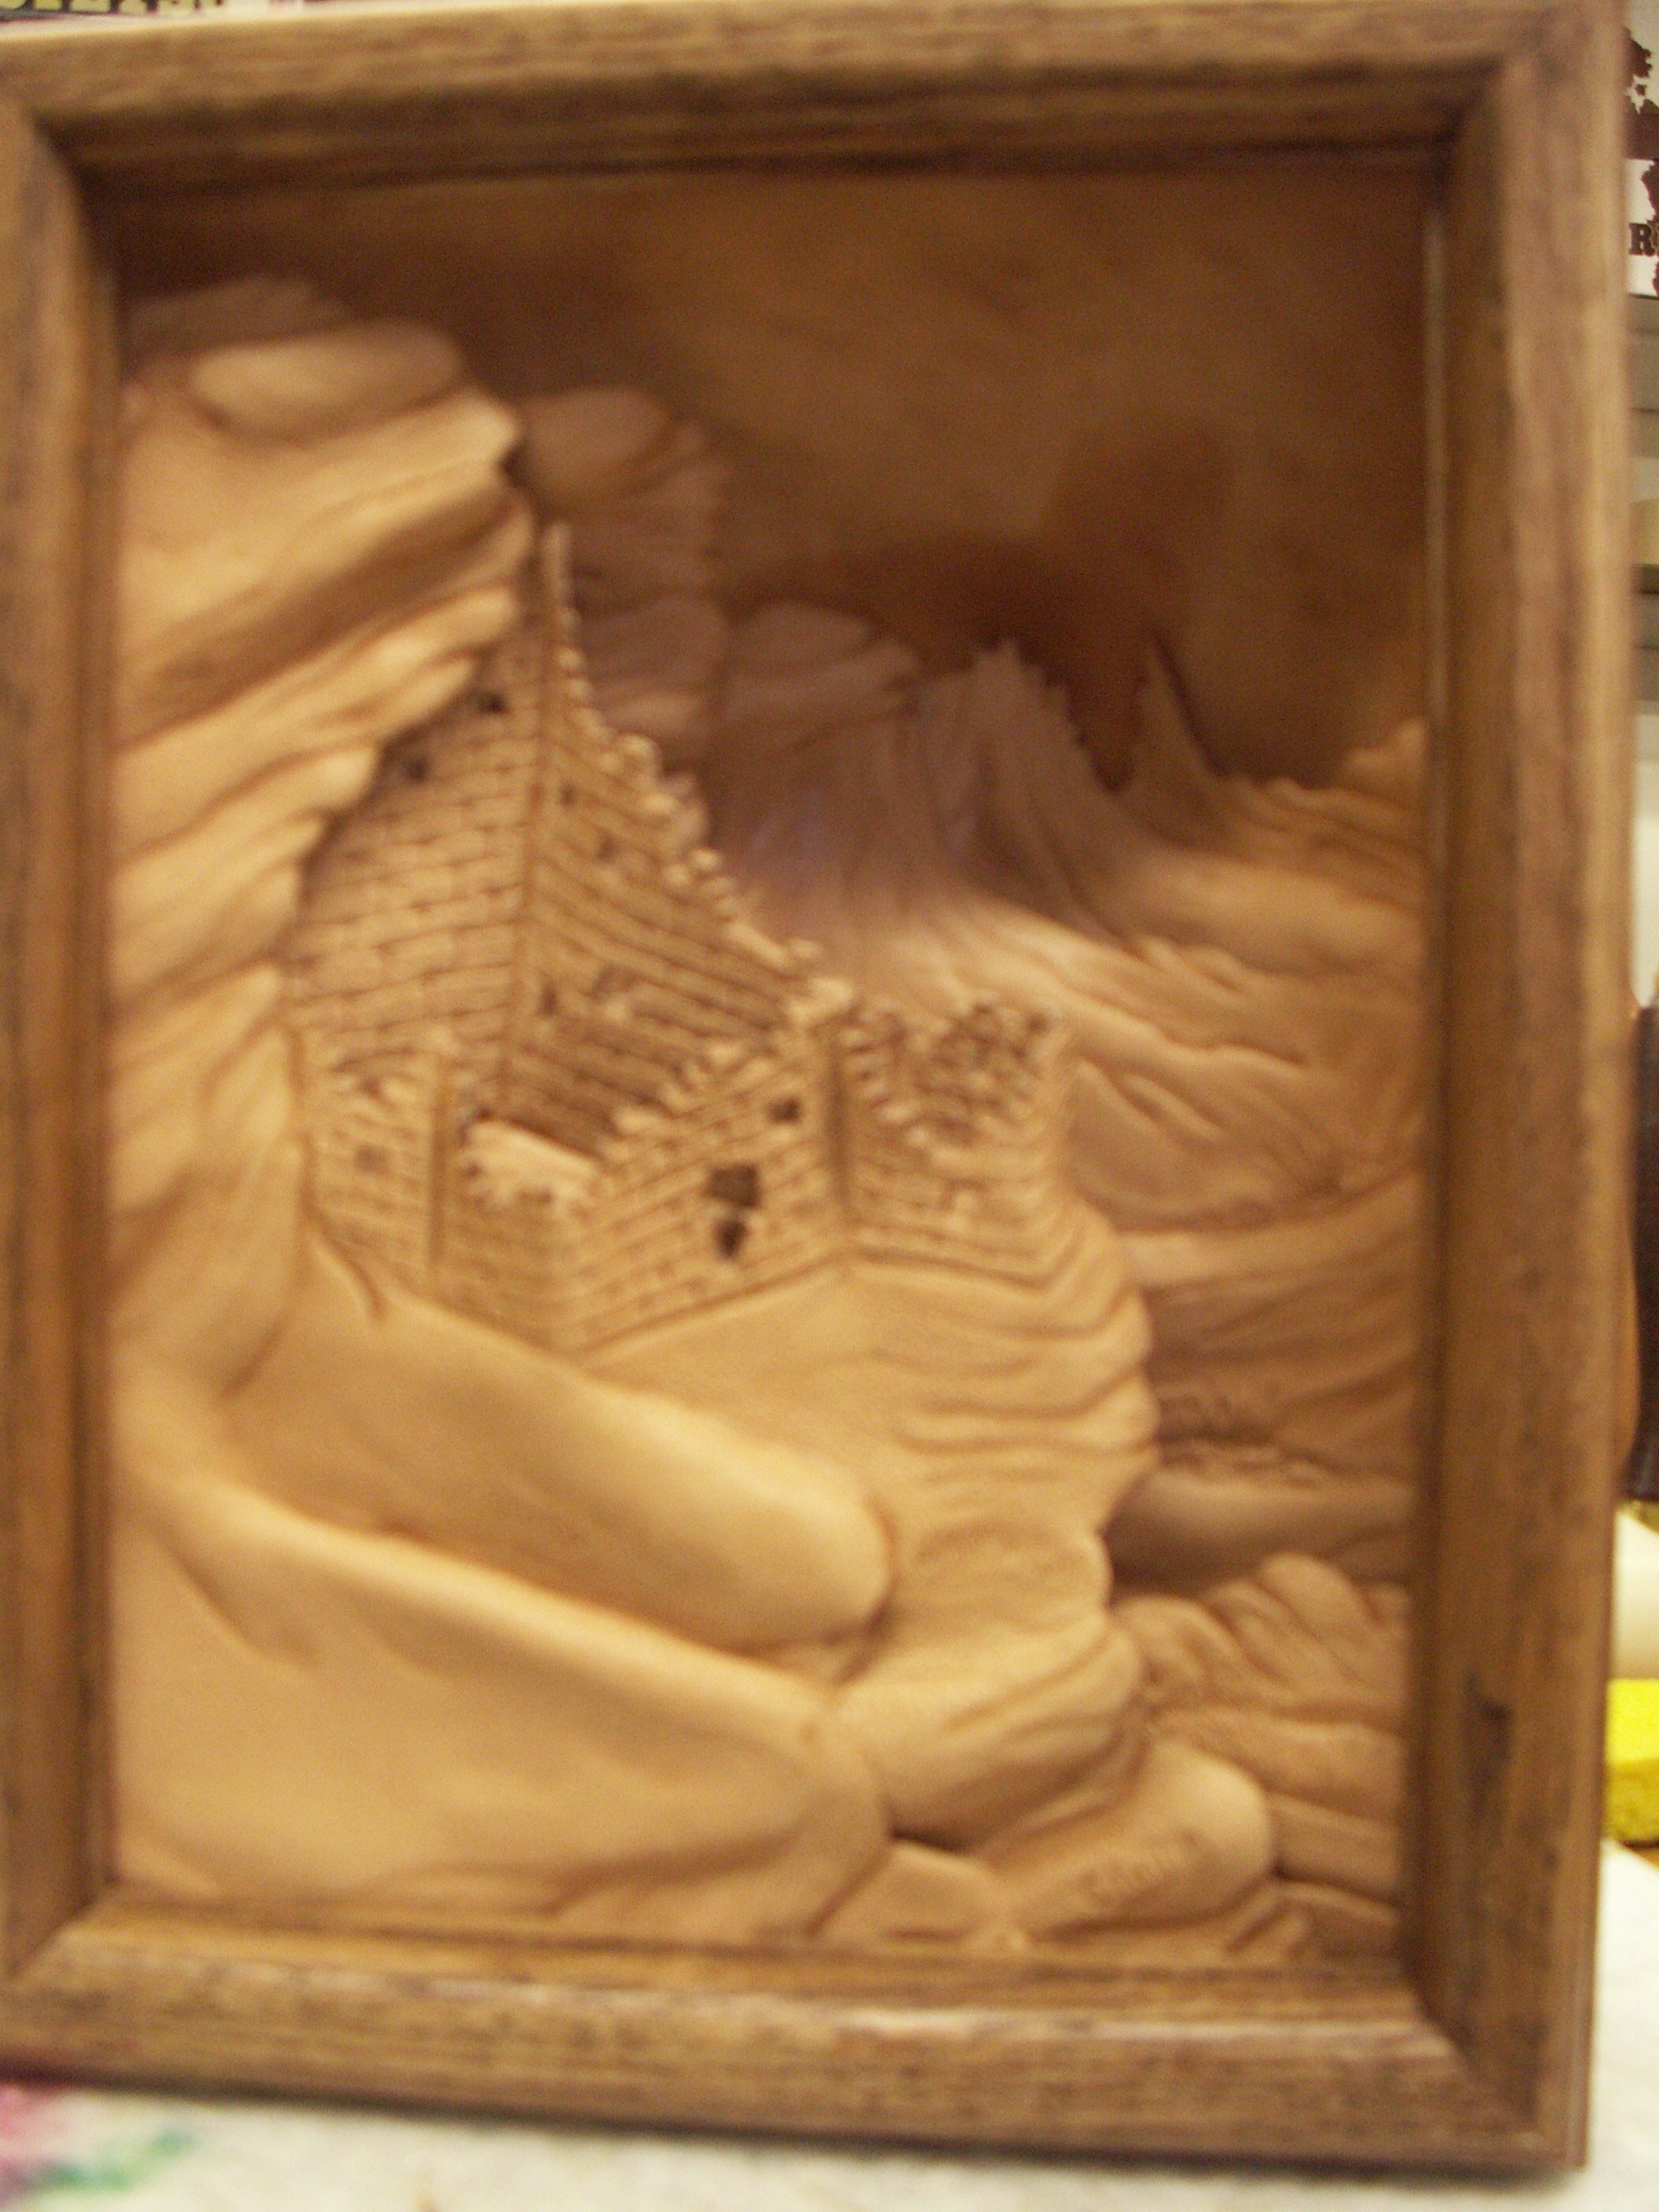
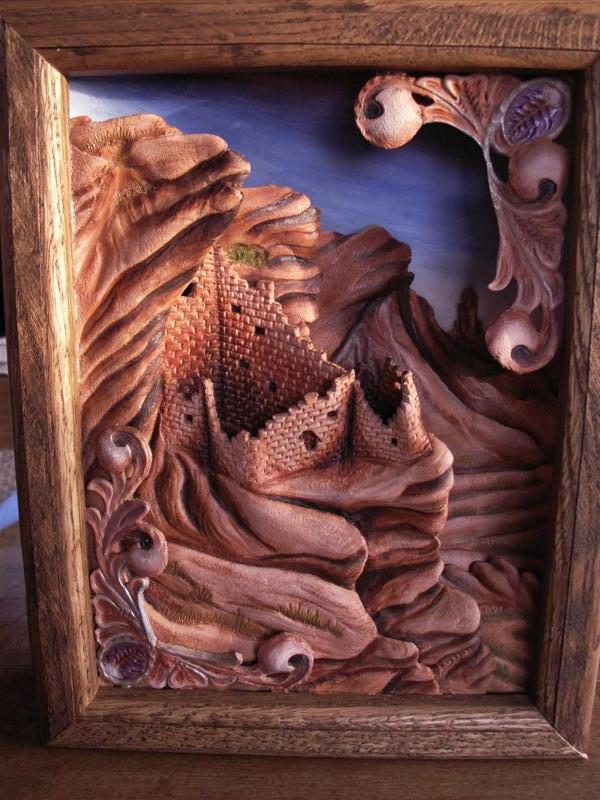
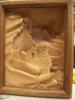
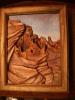
A couple years ago in Sheridan, I saw one of the coolest leather pictures I have ever seen. It was a 3-D diarama of a desert scene with Anasazi cliff dwelling ruins. This picture is made with 9 different layers of leather set in a shadow box frame that is 3 inches deep. It was a picture Bob Beard had done in 1989 at an IFoLG show in Bismarck, ND. This is also the show where Bob introduced his new line of Pro Series tools. I had been begging Bob to teach this class again ever since I saw the picture. He said he would love to come back to ND to do another class, but he really tried to talk me out of the ruins picture. First off, someone got away with the pattern the first time he did it so he would have to try and re-draw it. The first time he did the class, it was 5 days, they didn't color the picture, and most of them didn't finish it. I won out in the end and Bob agreed to try the class. He came up here the last weekend in July and we spent 3 days with him learning this really neat technique. We left off the scrolls that he had put in the corners of his picture for decoration, and we didn't color it, but we all finished our pictures up in the 3 days with time to spare. I have done a couple more of these pictures since the class. The second one I colored and entered in the competition at this years IFoLG show where it took a blue ribbon in the advanced class. I just finished up my 3rd one last night. This one has the scrolls in the corners. I really enjoy this project and am so happy that I got Bob to teach it. He is thinking about making a video lesson of this project. I have new ideas rattling around in my head about how to do a ND badlands scene using this technique. Hopefully I can turn the ideas into a leather project.


-
[quote name='Johanna' I was too busy talking to pay attention, and I didn't even see where Billy's piece went. Probably Clay. quote] It wasn't me!! I spent my raffle ticket budget on postage to get my entries to the show. And I figured I would give some of the rest of the people a chance at the prizes. Sounds like there was LOTS of really cool things given away. If I would have been at the show, I am sure that I would have had to spend quite a bit on tickets. I will be placing an order with Bob Beard soon thanks to the tool raffle. Clay