ClayB
-
Posts
2,063 -
Joined
-
Last visited
Content Type
Profiles
Forums
Events
Blogs
Gallery
Store
Everything posted by ClayB
-
untilCLASSIC WESTERN SCROLL CARVING CLASS March 27th, 28th and 29th, 2007 Stand Bears Trading Post Reseda, CA 818-324-9120 inquiry@sbearstradingpost.com Please note: RSVP to Standing Bear Trading Post as early as possible, the March 28th class is already filled. Class size limited to 11 students
-
Ok, now there is another really good reason to try and get to the show in Wickenburg. You might just run into Bruce! Bruce really knows his stuff, be it leather, saddles, history, ranching etc. I had the pleasure of meeting him and his wife in Sheridan a couple years ago, and they are both really nice people. Clay
-
Yesterday on the DIY network they had a craft show on how to make a leather beer holster. The show gave pretty basic instructions on how to do some stamping and construction of a holster to hold a beer bottle that attaches to a belt. You can see the brew holsters at http://brewholstercult.com/ You can see the instructions for the project at http://www.diynetwork.com/diy/cr_wood_leat...5226637,00.html
-
I got my booklet that lists the classes for this show yesterday. For those of you that live anywhere close to Phoenix, Az or can travel that way March 5-10, this looks like it will be quite a show. There are over 30 different classes listed in the booklet. They vary from boot and saddle making topics, to formed leather vases and masks. You can learn to braid a bracelet, a bosal, or a reata. There is a class on chap making. If you are into carving, or want to learn, there are classes on figure carving as well as several on different styles of floral carving. Then when you are done with the carving, more classes on finishing and even covering a picture frame with leather. A couple classes on sharpening tools, pattern drawing, and swivel knife work. Classes range from beginning leather work to expert. There are some really good teachers scheduled to teach. I have taken several of these classes before in Sheridan and I know you will not be disappointed. There really should be something for everyone at this show. For more info, go to the Leathercrafters and Saddlers Journal website at www.leathercraftersjournal.com or call the at 1 888 289 6409.
-
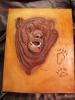
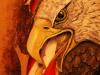
This past weekend, I finished up my second grizzly bear from Robb Barr's video. The carving went really well. The coloring went pretty well too. There were some blemishes on the leather outside of the carving, so I decided to darken the area with antique to camouflage the area. My bottle of antique was almost empty and pretty dried out. I usually thin antique with Tan Kote, but had read that some people use neatsfoot oil so I tried that. Gave it a nice color and covered the blemishes. The final step should have been spraying on the acrylic sealer. I have been using Krylon Preserve It for this for the last couple years and it has worked really well. It claims it has UV protection to help against fading. Someone told me once that you should spray the can somewhere before spraying it on the leather. It can spray white spots if you don't. Well, I didn't and I did get some white spots on the leather. They where just little white specks, and they did scrape off. But then later I noticed some large white patches starting to show on the leather. I thought maybe the neatsfoot oil hadn't been done soaking in and was drying unevenly. Ok, now what? Maybe a coat of straight neatsfoot oil will even it out. Nope, that didn't work. Still white areas when it dried. Ok, found another bottle of antique, thinned it with TanKote this time, applied it, and everything looks good. Whew. When it dried, get the Preserve It again. Shook up the can really well and sprayed it into the garbage can and then onto the leather. Also sprayed the eagle picture that I had just finished. As the sealer was drying, I looked at the bear picture and noticed that it looked like it had been sitting on a shelf for a couple months and was covered with dust! What the heck is going on here? My son picked it up and where his fingers touched it, the dust rubbed off a little. Tried wiping it with a rag and some of it came off, but it still looked dusty. Looked at the eagle and it was the same, all dusty looking. I decided to wipe it with water. Looked great wet, but as it dried, still looked dusty. Then I decided to try putting straight Tan Kote in the corner. Looked good wet, and when it dried, still looked good. Whew, what a relief. Now the background was looking good, but the bear still looked like he was covered with dust. I figured the TanKote could fix him too, but how to you apply it to all that hair? Can't rub in on with a sponge. Maybe try to spray it? Finally decided to try a tooth brush. Dipped it in the bottle of TanKote, then brushed it into the hair on the bear. Worked great! Saved both pictures. I guess the reason I wanted to share this story is to let you know that finishes can be really unpredictable sometimes, even when you have used them before. I am going to throw out the can of Preserve It, but I will get another and try it again as it always worked good before. And even if things don't work out like you planned, don't give up, there might be a way to save your project. Clay
-
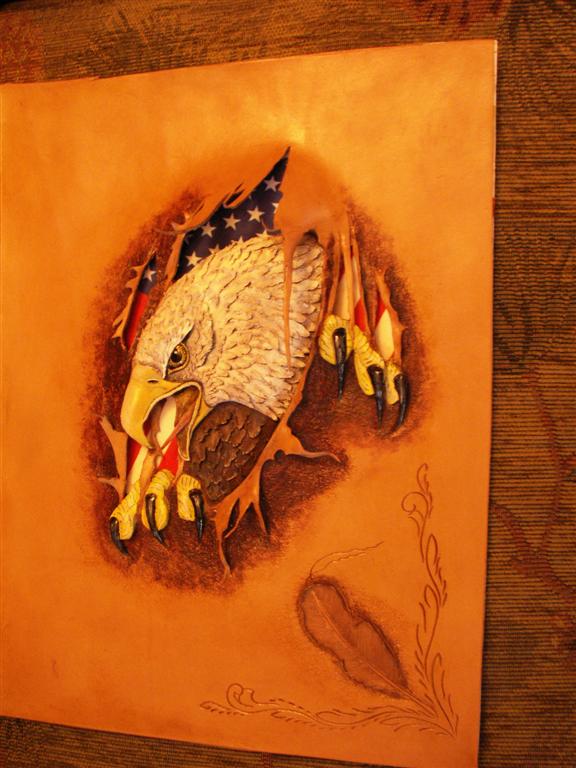
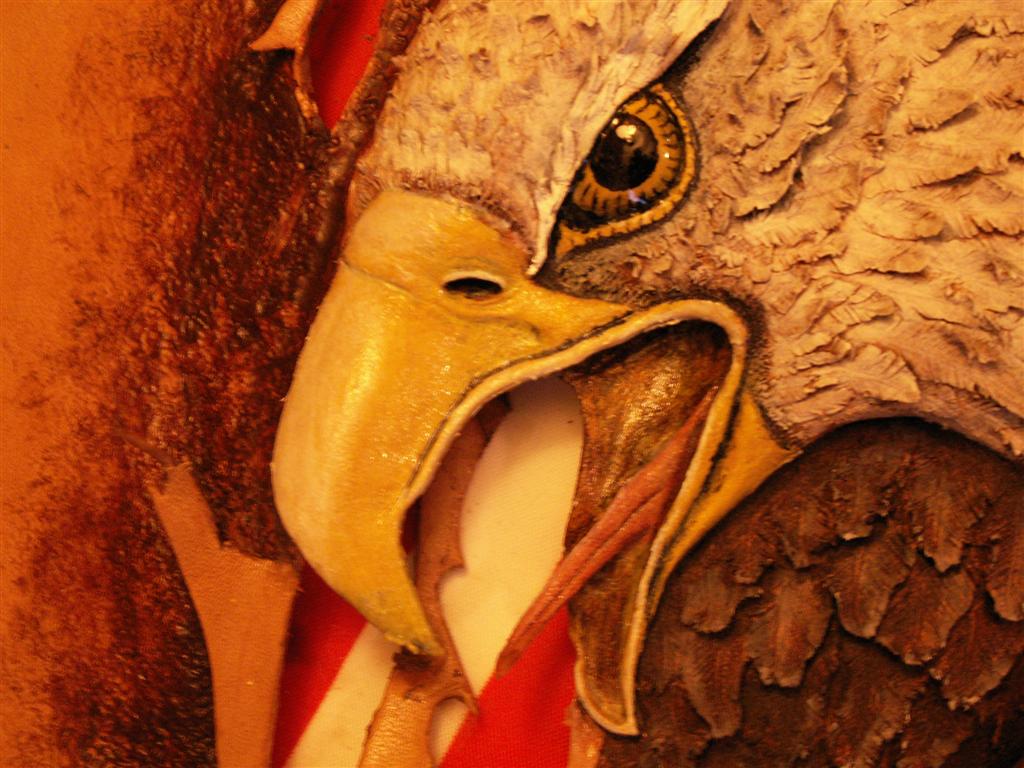
Thanks to all of you for the nice comments of this picture. It may be my favorite one so far. Roxie, Hidecrafter leather carries all of Robb's videos. Breaking out eagle is #0063-01 in their catalog. You can check out the catalog at http://hidecrafter.com/ or call them at 1-888-263-5277 (ask for Anne) There are a couple different eagle videos and this is the harder of the two. It may be one of the most challenging of his videos to do, but it is a really cool project to do. If you are up for a challenge, give it a try! If you have any questions, I would be happy to try and answer them.
-
Hi Marilyn and welcome to the forum. This is only your third piece? I would say you are off to a fine start. I think you did a really nice job on the trees. There are tools made especially for tree branches and feathers that would make it possible to get finer detail in these areas, but what you have used does give texture and that's the idea. There is nothing wrong with using what you have, like the veiner on the small evergreens. I looked at the pattern you used and I think that your computer did the enlarging right. Al's owl is pretty chubby. I think that when you enlarge the pattern as you did, you have the possibility of adding finer detail than when it was as small the original. If you study how Al did the feathers on some of the other birds, you will get an idea of what I mean. Then it just takes practice. I completely understand where you are coming from with finishes and coloring. I still leave finished carvings sit for weeks sometimes before I attempt coloring. But that too will get easier. Thanks for sharing your picture. I hope that we get to see more. Clay
-
I finally got brave enough to color my eagle picture. It turned out better than I expected. Sure wish I could have met Robb. Must have been really something to learn from him in person.

-
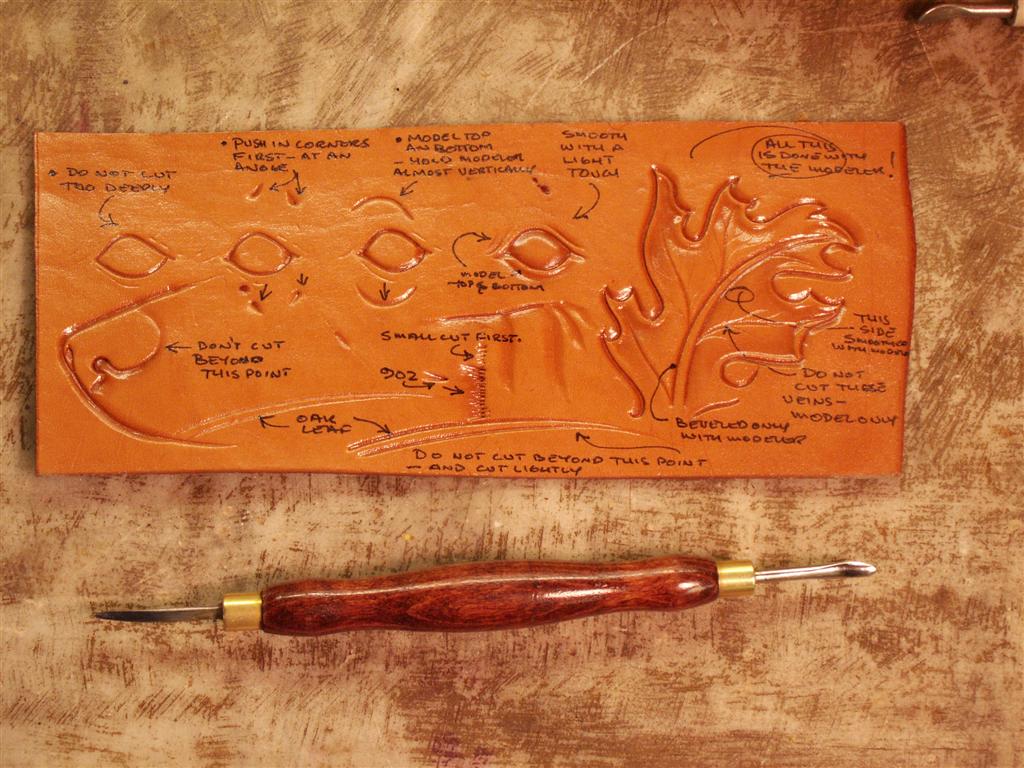
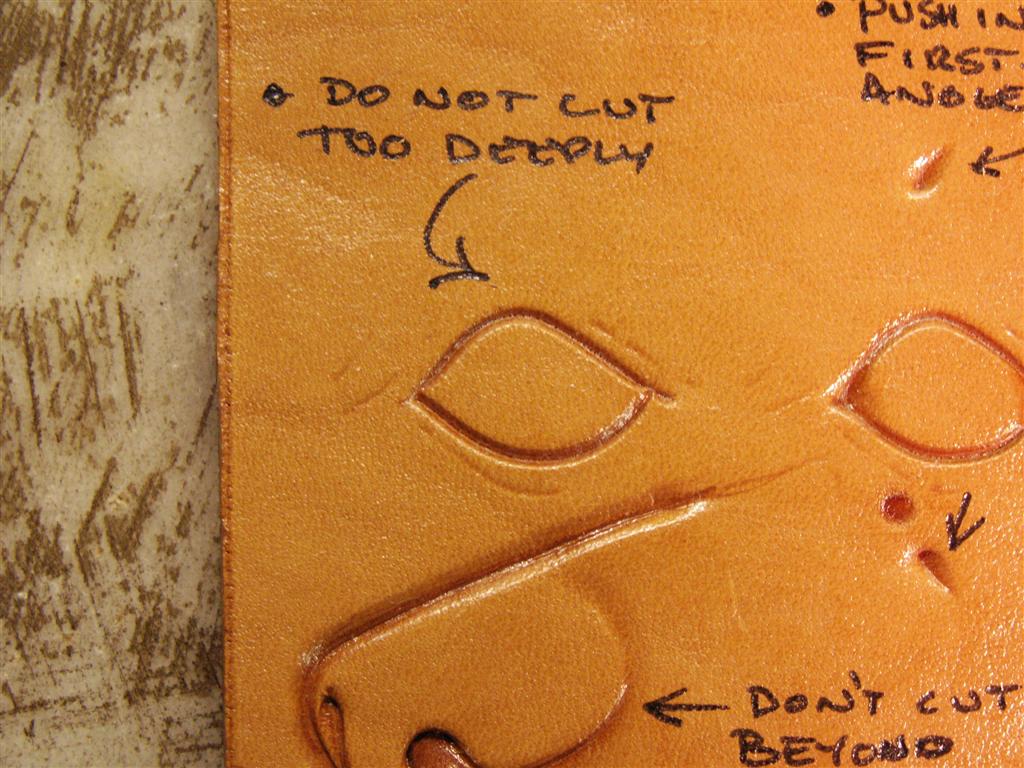
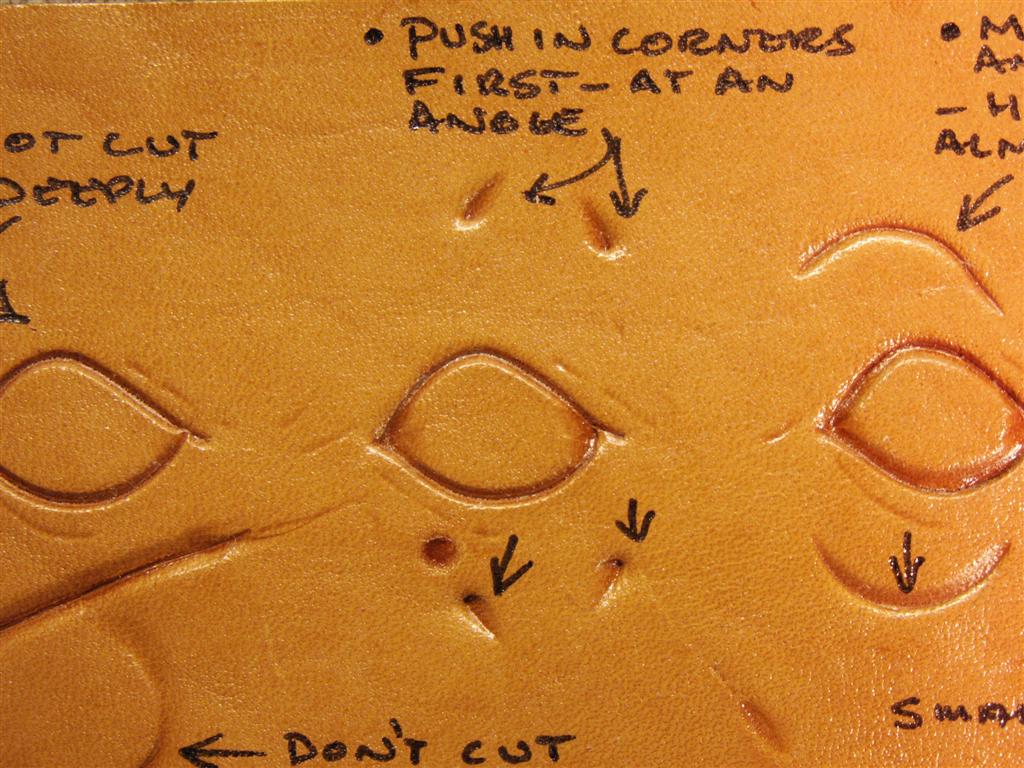
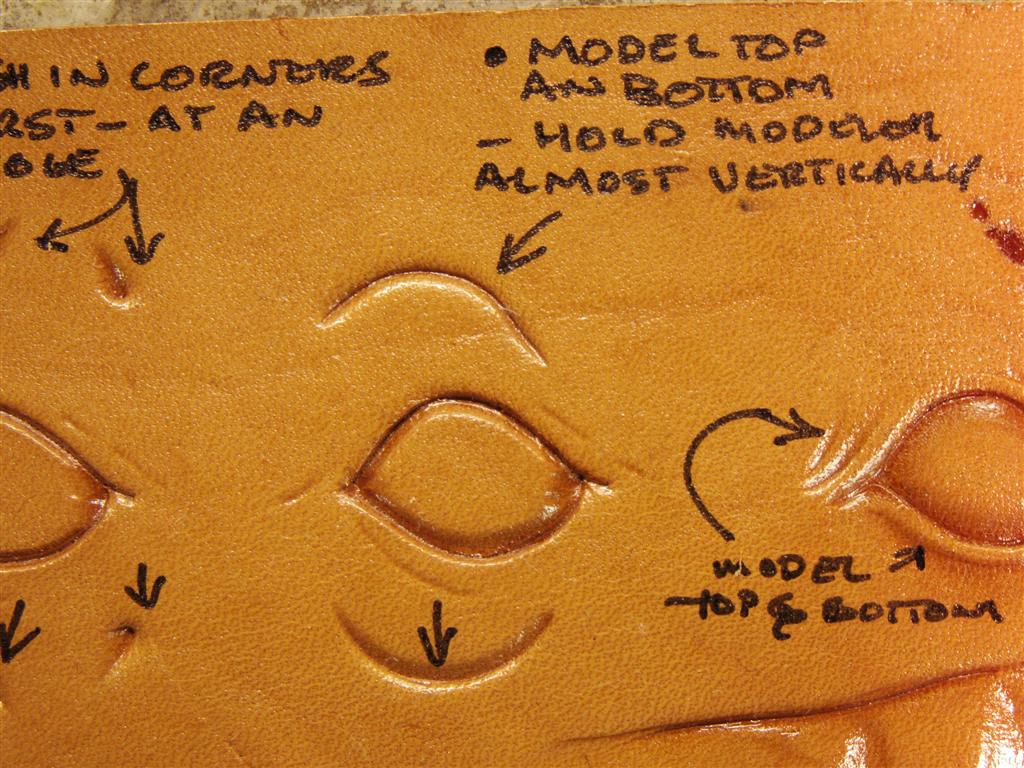
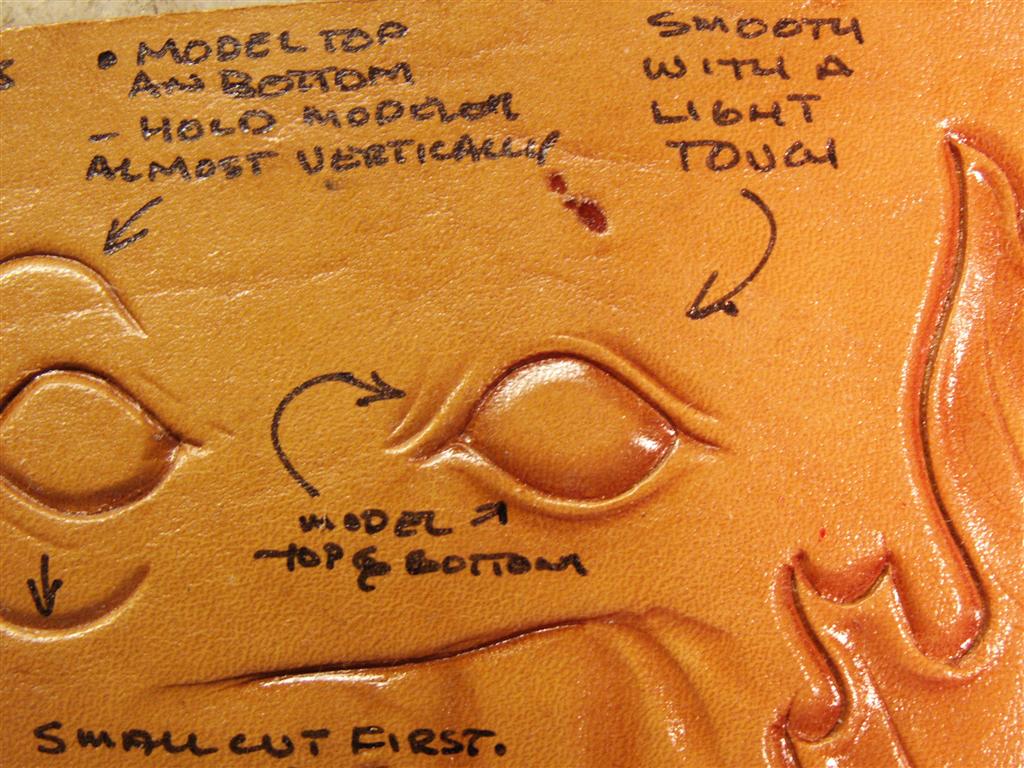
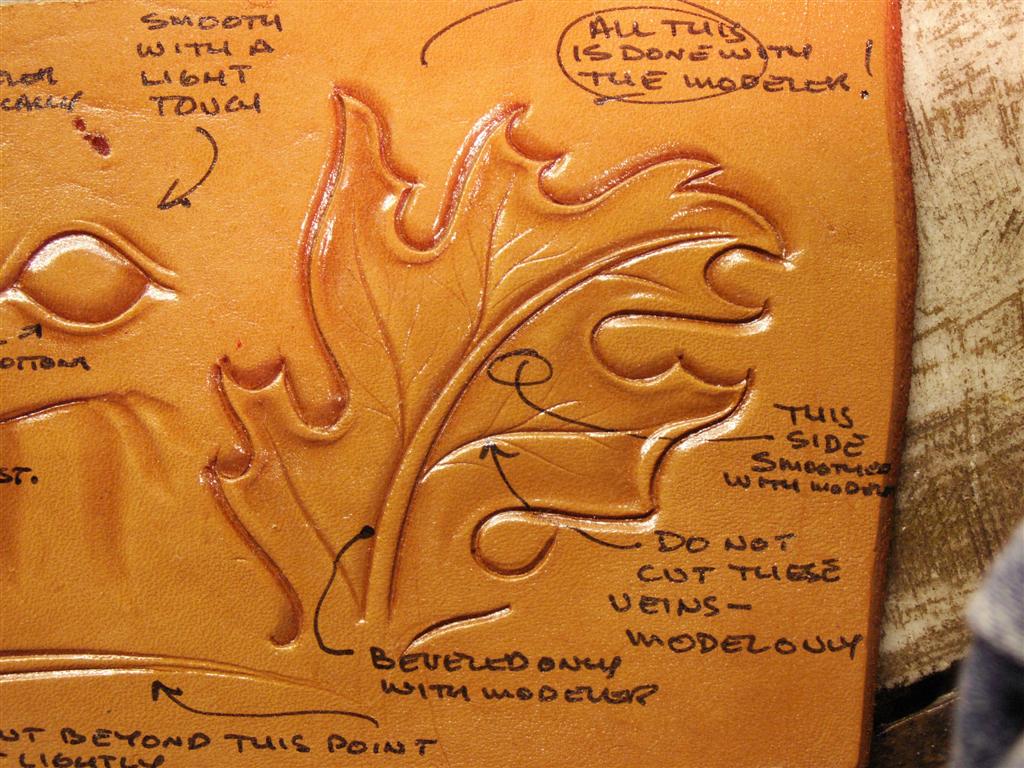
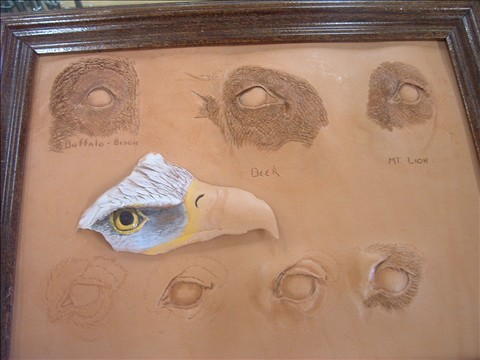
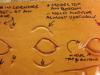
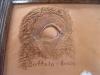
Well, I found the page that Peter did and it was on lips not eyes. It used to be on a different leather site but I couldn't find it there anymore. But when I ordered my modeling tool from Peter, he enclosed a piece of leather that he had demonstrated some techniques on. The eyes on here are for a dog (because that is what I was working on at the time) but the technique will work for most any kind of eye. I really like Peter's modeling tool and owe a lot to him for the help he has given me.

-
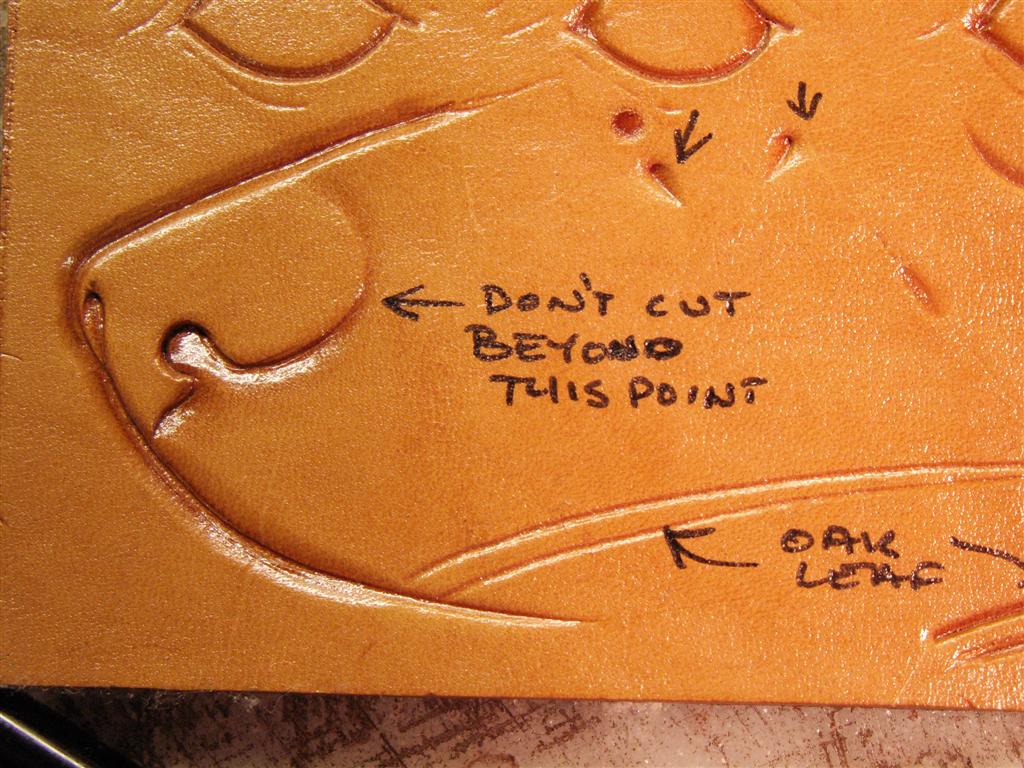
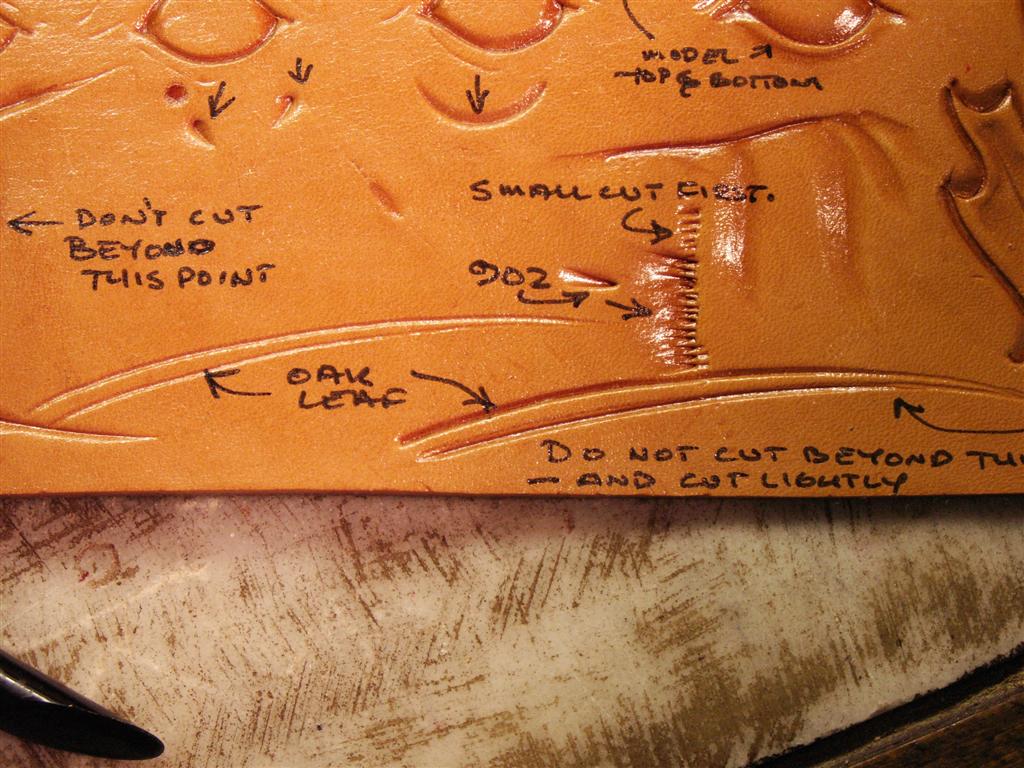
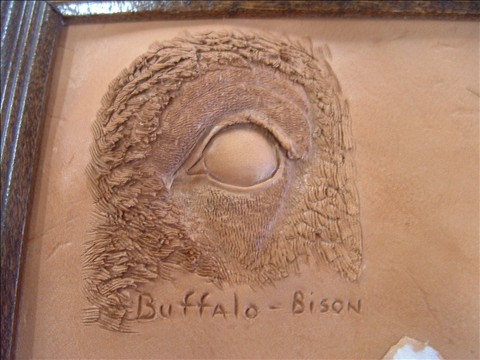
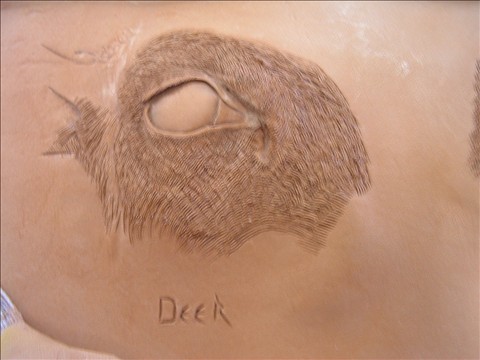
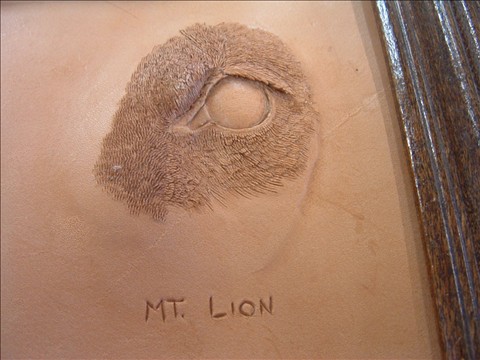
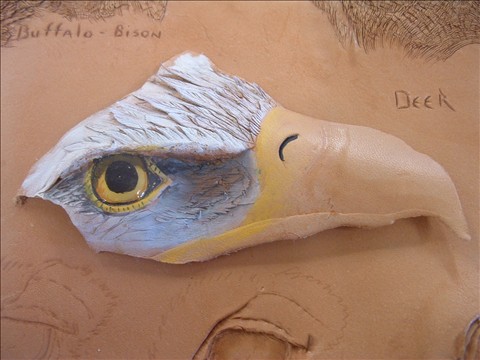
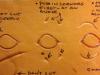
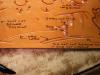
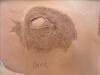
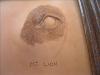
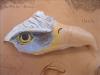
Jan Schoonover does a one day class on just eyes every once in awhile. So far it has not worked out for me to take it, but I have seen the project and have some pictures of it. Peter Main did a demo on human eyes somewhere but I can't seem to find out where it is on the internet. I think I have it printed out somewhere and when I find it, maybe that will help me remember where it came from. Paul Burnett also did a series of articles in the old Make It With Leather magazine many years ago. I will see if I can find out which ones they were in. For now, I will attach pictures of some animal eyes that Jan did.

-

Biker wallet
ClayB replied to CitizenKate's topic in Purses, Wallets, Belts and Miscellaneous Pocket Items
Finally Kate, Been waiting forever for pictures ) Can't wait to see the ones you carve your designs on. Clay -
Hey Jim, The blood spots on projects are there so that 100 years from now, they can take DNA and identify the maker. I do it all the time )
-
untilAnother saddle making class with Bill Gomer is planned for February 2007. Class will be held at Hidecrafter in Fort Worth and will cost $1500. For more info, see this link http://hidecrafter.com/uploads/Saddlemaking_Broshure__Fort_Worth_.pdf or contact Hidecrafter at fortworth@hidecrafter.com or phone 817-878-5797. Bill's health hasn't been the best so if you are interested in taking this class from him, now might be the time to be signing up.
-
One more rifle sling
ClayB replied to ClayB's topic in Gun Holsters, Rifle Slings and Knife Sheathes
Hi Bill, All it took was for me to read some directions in the help file to get it figured out. I will redo the comments with a better font. Might have to wait until the weekend, but I will get it done as soon as possible. -
One more rifle sling
ClayB replied to ClayB's topic in Gun Holsters, Rifle Slings and Knife Sheathes
Hi Bill, I am lots better at carving than I am with computers. Yours isn't the only complaint about the font. When I decided to see if I could do this, my kids said I could just use the Paint program on my computer. I don't know if there is a way in that program to change the font, or the font size. I am open to suggestions from anyone more knowledgable than me as to a better program to use. I would be happy to do more tutorials like this if there is any interest so any help in making them better would be appreciated. I will be happy to redo this one too if someone tells me how to do a better job of it. -
When doing figure carving, the more you know about your subject, the better job you can do. There are a couple authors that write some books that I have found really helpful. One is Doug Lindstrand. You can go to his website at http://www.douglindstrand.com/ In his books, this author has both pictures of wildlife along with his own drawings and field notes. I think the drawings will be especially helpful in drawing your own wildlife patterns. The field notes might also come in handy when it comes to putting your subject in the proper setting, making them the right size, etc. Another author that I find really good is Dr Valerius Geist. I have both Elk Country and Mule Deer Country from him. He gives very good reference material on each species and the pictures in the books by photographer Michael Francis are very good.
-
I just wanted to say Congrats to Dale for his winning piece in the Hidecrafter Digest annual cover contest. Dale's winning picture is on the cover of the current Hidecrafter Digest. You can see it at Hidecrafter.com website or at Dale's site http://moonlightartstudio.com/new.html
-
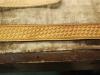
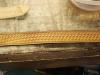
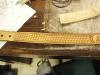
I just got that video before Christmas. The rope roll is a kind of fancy laced edge on a belt. First the belt is laced with a piece of rope. The rope is then covered with a strip of upholstery leather. Then the final lace is laced over the upholstery leather and the rope. The technique is also sometimes done on the back of a saddle seat. I haven't made one, but it looks like the video does a pretty good job of explaining the process. Sorry, I dont have a picture of a belt. You can go to this site and see how looks (and is done) on a saddle. http://www.lewissaddleshop.com/Birth/birth_5.htm It is continued on the next page of the website.
-
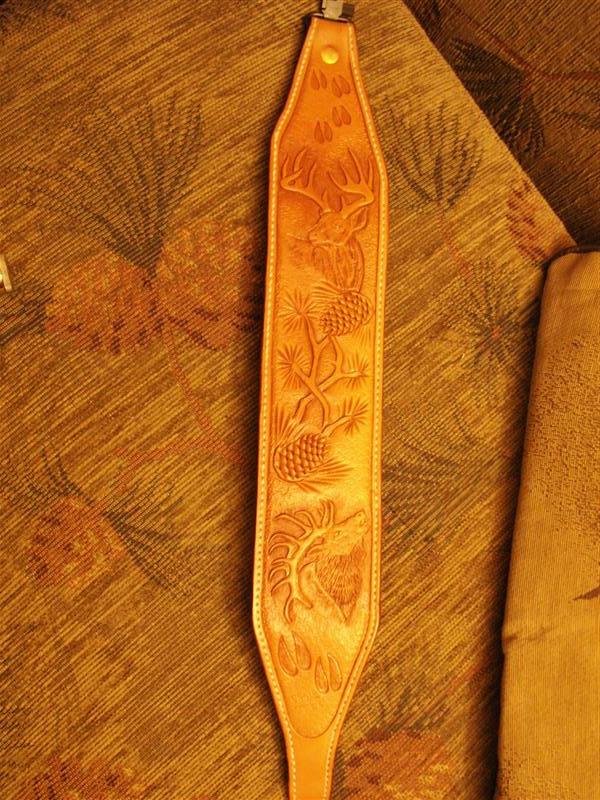
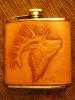
I kind of like this elk pattern, so I did it on a flask too. I took step by step pictures as I was carving this one and put descriptions of what I was doing on each photo. I sent these to Johanna hoping she could figure out how to best put them on the forum for people to see. Not sure when they will be up, but when they are, I hope they will give an idea of what goes into figure carving.
-
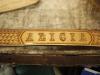
When I started making these, I cut out an extra one in case I screwed up. I decided to go ahead and make one more, this one without a name.
-
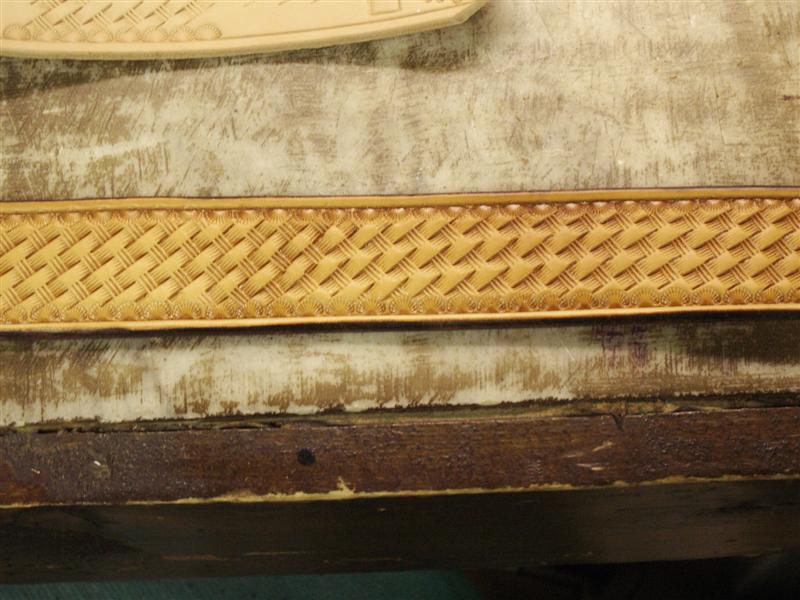
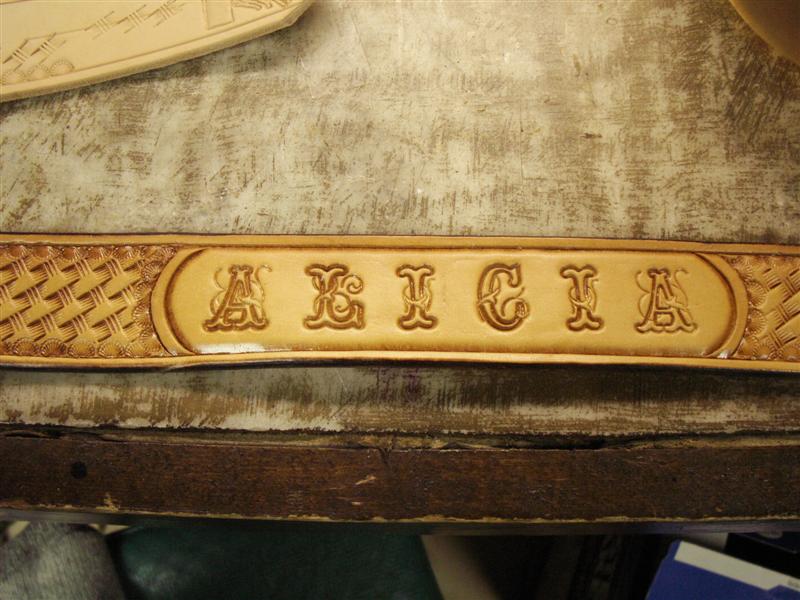
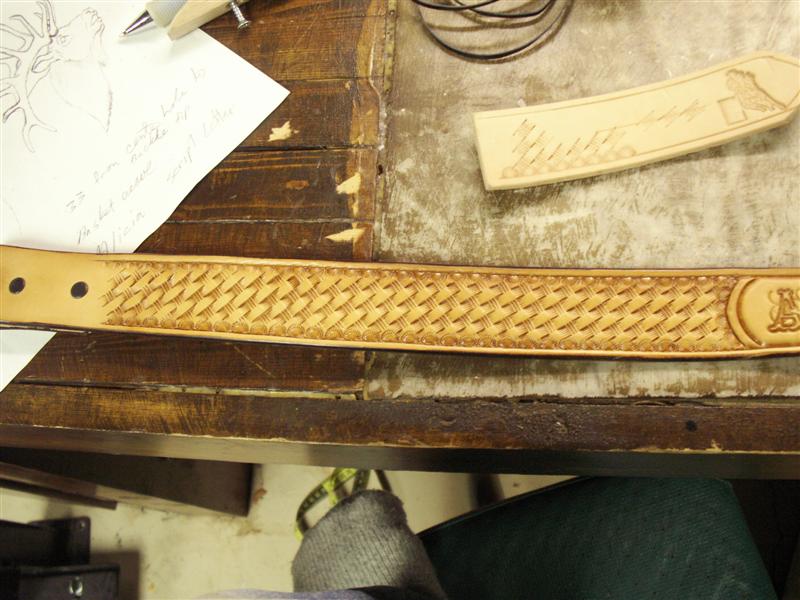
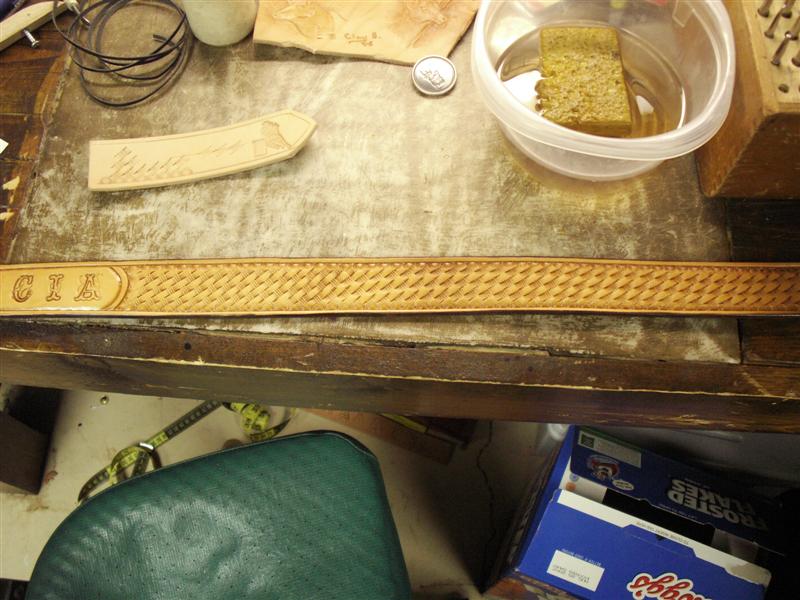
A friend of mine asked if I could make her daughter a belt for Christmas. She brought the girl over to be measured and to pick out a pattern. After looking through several patterns, she decided she just wanted a basketweave design and her name on the back. I don't do a lot of basketweave, but this should be simple enough. Well, I made more mistakes on my first try at this belt than I have on anything I have done in a long time. The attached pictures show how NOT to do basketweave! The basketweave wanders all over the belt. I stamped over the border in several places. The border stamp isn't done the same on both sides of the name. The border around the name looks really bad to me. There may even be more mistakes. If you want to do it right, check out a basketweave tutorial made up by Jeff Mosby a few years ago. If you follow his instructions, it should turn out right the first time. You can find his intructions on the PSLAC site here http://www.pslac.org/public/02_feb05.pdf Jeff's instructions are clear and easy to follow. I redid the belt using Jeff's instructions and the second one turned out a lot better than the first one. I thought I had taken pictures of it too, but I cant find them on my camera. Clay
-
Hi Freak, I do carve some of the small details. In the smaller areas, you make your cuts very light. And then in some area, you don't cut the lines, just put the detail in with a beveler or modeling tool. That helps a lot, huh? On animals, you dont usually cut the muscles lines, nose, lips. Things like eyes are cut very lightly. I have another project that I was going to put an elk on soon. When I do it, I will take some pictures to show the steps I use. I never used to like to do small carvings of animals because of the details. It is easier to get the details in larger projects. But once you have done the bigger projects and learn how to do the detail, it is lot easier to do the same pattern on a smaller scale. There are lots of people making swivel knives, and different types of blades. Depends on what you want and how much you want to pay. The best way to find out what will work best for you is to go to a show such as Sheridan or the annual IFoLG show where several different vendors will have thier products there for you to try out. I know that isn't always practical. What I have just started using for fine details is a blade that is sold by Peter Main. I think he has them made by Henley. This blade is a lot thinner than the regular Tandy type blades so you can cut lines closer together. Robert Beard and Barry King also make different blades for different types of carving. There are others too. You can call these guys and talk to them about what you want to do and they will give you an idea of what might work for you. I have had the same trouble with brushes as you describe. Start with pretty good quality brushes, and clean them well. In a class last spring, Tony Laier told us that after you clean your brushes that you use for spirit dyes ( alcohol based) you should apply some lanolin to the brush. Put a small drop in your hand and roll brush in it. I think it adds oils back to the hairs of the brush that the alcohol removes and it helps the brushes keep thier shape. I think Peter Main covers this in his latest book on color too. Hope some of this helps you. Clay
-
There are a couple things that I have found that help me out with small details. One is magnifying lenses. I had my eyes checked this spring and they told me I don't NEED glasses yet, but that they would probably be a good idea. I didn't get them, but started using a magnifying lense on a headband and I was really surprised how much it helped to see what I was doing. Another thing that I use a lot is Peter Main's modeling tool. It really works nice to get into small spaces and clean things up. When I look at the work of people like Peter Main and Silva Fox the thing that really catches my eye is thier attention to the smallest details. It is something that I now try to pay more attention to in my own carving. Clay
-
For kangaroo leather or lace, you could try Jim Downey. He carries a wide variety of colors and widths of lace and also carries hides and other things such as lace bevelers. Jim Downey Box 30 Skull Valley, AZ 86338 928 442 3638 928 925 3365 cell j.c.downey@worldnet.att.net
-
Hi Bill. Looks like the same kind of feathers that Robb did. Robb used the angled bevelers on the quill, and then his multi-blade knife for the veins. I see no reason why a regular hair blade wouldn't work, just wouldn't make the veins stand out as much as the sharper blades do. I never thought I would get any good at painting either, but if you keep at it, you'll get there. Your painting isn't too bad. I found that I like my results better when I really thin down acrylics. You can always add another coat if you don't think it's dark enough, but it's hard to take it away if you put it on too thick to start with. With the thinned down paint, it is easier to blend the colors together. I'd love to take a class or two from Jim Linnell someday. He does some really nice work, and he is such a nice guy. Clay