-
Posts
1,983 -
Joined
-
Last visited
Content Type
Profiles
Forums
Events
Blogs
Gallery
Store
Everything posted by Beaverslayer
-
Okay everyone following, here's what you should have so far. The outer shell is pretty much complete at this stage, now we have the two side adjustment parts to make and then it's on to the hard stuff. Front should look like this. Back should look like this.
-

more wallets!!!
Beaverslayer replied to corter's topic in Purses, Wallets, Belts and Miscellaneous Pocket Items
Very Very nice Corter, that first one has a real fine look to it, keep it up. Ken -
Amazing what people will think up. That's definately one thing I have NEVER seen before, great job though rdb. Ken
-
Vista sucks....way to many "Yes I Authorized That" for my liking. Good choice on the XP. Ken
-
ferret, Shirley is from England, just lives in Vegas. Ken
-
Shirley Shirley Shirley.......Things are already going through my "Monarchist" mind as to just what this could be. I love the Queen and anything English. Well I've already made something special for Kate, and have even started on Wolvies "sqeeky Wheel" project, so the list is fine with me. I'll be doing a turorial on Wolvies as well, so it may be a day or two yet before I send his.....sorry bro. Ken
-
Those things scare the ..... outta me. It reminds me of way back in the day, I knew a guy that went out on weekends and collected horse droppings, cleaned em all up nicely, coated them in some sort of substance and made birds outta them. He sold them at flee markets, called them "The Alberta Turd Bird", he was a wierd sort of guy now that I remember. Ken
-

my first go at a set of chaps
Beaverslayer replied to Duke's topic in Clothing, Jackets, Vests and Chaps
They look great Duke, I'd like to know how they are going to fasten on the leggings. The basket weave, now there's something that I can see you've got down, I can't do that no way no how, try as I might. Great job. Ken -
Very nice there Duke, I love that color. Ken
-
Regis, I believe whatever you make for ClayM he will cherish forever. Also, seeing as most everyone is "Out of Country" from me, I also have no problems sending overseas or to the good ole USA. It's actually cheaper to send something to the USA than it is to send something across town here in Canada....go figure. Ken
-
Simply AWESOME Shirley, great job on that lacing. This should make someone very happy and proud to own. Ken
-
Thanks Gremlin, much appreciated. Now that you let the cat outta the bag, let's be sure to post pics of your vest when your done. Ken PS. Now you can see why I want you to will me your air hole punch..LOL...
-
Why thank you rdb, I really appreciate the compliments. I'm pleased to be able to share my knowledge as freely as it was shared to me when I learned how to do this. Granted I have changed a whole lot of things since I first learned, but the general jyst of it is still the same. As to showing how to make my trademark item, as long as there's no mass producing replicators from large overseas countries checking it out every day, I think I'll be fine. The next tutorial will be on my trademark hat. Had almost finished that one when my harddrive crashed, and have had to redo all of it. So sometime soon, keep your eyes open for that one, it will be almost as long as this one. Ken
-
The squeeky wheel gets the grease EH Wolvie....? I was actually thinking on doing two things, one for Wolvie, and another for Kate, seeing as she was next in line. Well, ya never know Kate, something may show up anyhow. Ken
-
That's about $22.75 USD Ken
-
Well that's about he coolest thing I've seen in a while now. I always thought about doing one of those and taking it around to all the Bicycle shops but never got around to it. I think you've got a winner there. Ken
-
Thank you David, hopefully it will help someone out and that they can learn something from this. It's people like You Beeza, ClayB and the others that have taken the time to add these tutorials for all the rest to see and learn from, thta makes this a great site. It would be nice if everyone would take just a few extra minutes and a few extra pictures, just to show what they did to accomplish the project that they are posting, that way, there is always going to be tips and tricks on how and why something is done. Ken
-
Now to lace the top of the pocket. This is a bit tricky to start, but I think you will get it by the pictures. Starting on the side closest to the front of the vest, push your needle through about 4 laces back and bring it out just before the top lace. Pull your lace slowly so that the tail is left under as many laces as possible. Then run your lace through the first open hole on the top of the pocket. On the inside of the pocket, push your needle up through one hole back, this hole already has 2 laces through it from the side lacing. When you've crossed over and back through to the inside again, you will have to go back one hole on the bottom of the top, into the hole that has 2 laces, just like the last stitch that you did. Continue to lace from here as normal. Once you've reached the end, again you will have to run your lace through holes that already have 2 laces in them. To finish off, run your needle down the side under about 4 or 5 laces, cut the tail and straighten out any nubs left showing. Here's the completed laced pocket.
-
Now we can lace this pocket to the vest. Start your lace into the hole shown in the picture, then in the top of the corner, sand a small area towards the opposing corner and apply a bit of glue to the lace and the sanded area. Press this down and roll. Run your lace up through to the front through the hole shown, and just before you pull it snug, place a bit of glue on the vest and also the lace. This will help the lace from being pulled out at any time. Now just continue lacing as before, being carefull not to pull your lace to tight on this as it will tend to pucker the leather. A little lacing tip here: Use the edge of your thumb when pulling the lace to align it with the hole, This helps prevent the lace from twisting as you pull it through. Once you reach the corner where the holes have been punched a bit farther apart, make sure that when you push your needle through, it comes out on the proper side of the last lace. When you reach the centre of the pocket, sand an area that is about 1" long so that you can glue the tail down as before. This will be covered by the next lace we do. Be sure to roll all of these glued spots, it realy does help it to bond. Now on the other side of the pocket, you want to do the exact same thing you did on the first side. Sand a small area, glue the tail down, roll the glued tail, then glue the loop of the first lace on the backside. Then continue to lace until you've reached the end. At the end of the run, just push your needle through like shown, you want to run it under about 4 or 5 laces back, then cut the tail and tuck any little nubs back under. Here's the back of the finished seam. And here's the front of the finished seam. Remember to roll the lace from the back of the vest to help lay the lace down nicely.
-
Okay, now that the glue has had some time to dry and bond real good, let's get those holes punched and laced up. Starting 1/4" above the pocket top, punch 2 holes above so that when the lace is in place this will keep the pocket from being pulled away from the vest. Next, following along the holes that are alredy punched in the pocket, punch holes 3/16" away from the edge of the pocket. When you reach the corners, you have to adjust the space a bit to allow for the lace to flow evenly around the corner. Now cut a piece of lace 7 times the length from the top to the centre of the bottom. We will be lacing one side from top to bottom, then the other side from top to bottom. This gives the same look of the lace on both sides, more appealing to look at.
-
Jeff, I found what your looking for, looks like it's a bit more than 11 British Pounds. Heres the link: Lever Buckle Ken
-
Jeff, I've built quite a few weight lifting belts in my day, and have never seen one of those. Where did you get the picture from? Ken
-

Glue for leather
Beaverslayer replied to MarkS's topic in Dyes, Antiques, Stains, Glues, Waxes, Finishes and Conditioners.
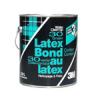
Rawhide, after surfing the net, I was able to find a picture and description of what I use. 3M LATEX BOND CONTACT CEMENT • Excellent bond strength with more than twice the coverage of solvent based contact cements • Bonds plastic laminate, wood, veneer, wallboard, etc. • Non-flammable, cleans up with water Ken -

Glue for leather
Beaverslayer replied to MarkS's topic in Dyes, Antiques, Stains, Glues, Waxes, Finishes and Conditioners.
Didn't you just have your 29th Birthday the other day??????????????????????? Rawhide, it is made by 3M and I don't have a can of it now to see the actual label, but it's just 3M's water soluable contact cement. I learned about it while doing my prison term, as we were not allowed to have the real kind in prison. It works just as good, just can't get high off it. -

cleaning glue brushes: white glue and contact cement
Beaverslayer replied to esantoro's topic in Hardware and Accessories
I'm with Barra on this one, I'll use the brush until the job is done then into the waste can it goes. I'll buy a few bags of them at the dollar store, that way the cost is greatly reduced. There's no need to use an expensive brush to apply glue with. And the smell of some of those solvents, and the thought of what they are doing to your skin...YIKES Ken


