-
Posts
406 -
Joined
-
Last visited
Content Type
Profiles
Forums
Events
Blogs
Gallery
Store
Everything posted by Suicide
-
Thanks for suggestion. I have heard alot about Barry King tools. But I'm in Europe. And moreover besides the oversea shipping I have to pay taxes and it will increase tool price almost twice here
-
Make sense, but I' m for a fair play Until it dies in a battle I can't break it just for get a normal replacement. What I suppose to do is just buy normal B701 and compare them side by side to be sure Z is the reason. All at all 7 bucks only. I can grind one of them down later if need
-
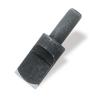
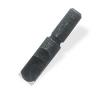
Thanks! Now it is clear. Before I just thought if I anyway going down everything with backgrounder, why should I bevel first? You most likely right and this is the issue. The B701 came to some months ago with Tandy's Kit. It has strange Z letter in front of marking and no "Craftool" trademark (so all the spec read from it is Z-B701 and this is it). It also leaves a lot of toolmarks from one of its side edge. So using it I have to tilt it a bit on one side then chatter less. The another (that "coarse") beveler B702 is a regular Tandy's one, with no Z- prefix and with Craftool tm on it. It has nice lookin elevated edges and leaves no any toolmark at all. I know these Tandy\s stamps far away from the "best tools ever" defenition, but even besides it I suspect that Z-B701 must be thrown away and changed to ... at least regular B701.
-

Dyi: Making Tool Rack For Leather Stamps In 15 Minutes
Suicide replied to Suicide's topic in How Do I Do That?
Thanks! very appreciate. And yes, that was what I forgot to mention. Lid still work as it suppose to work on original container. So you can open it, put all the tools inside the box and close the lid. -
Thanks for your advices, guys! I am happy you like cuts thats what I tried hard to improve last time. Yes, you right. I experience lack of bevelers for now, going to get some others. I used B701 along petals but combined using of B701 and B702 along the stems. Mostly used there 702 whereever I could go with it. It was a first time I used B702 and was kind of surprized too with its coarse texture. I thought that 702 just a larger version of 701 but seems it isn't. No, I guess its just my misunderstanding of backgrounding Please see my question at the bottom. Great point, thanks for it. Now the question: So far I couldn't get clear one thing: before using a backgrounding, should I bevel all the surrounding cuts or I shouldn't? I mean I need to background closed area between leaves, stem and petal. Should I bevel all the items anyway (as there wouldn't go with backgrounder at all)? And if cuts anyway should be beveled, should I look do not go with backgrounder onto beveler's path? Thanks in advance!
-
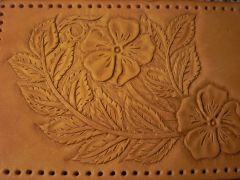
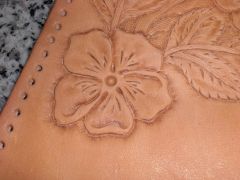
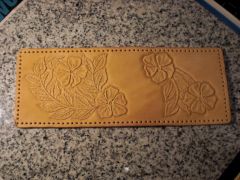
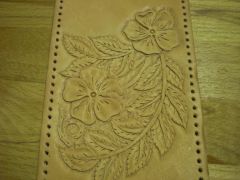
Hey folks. Tooled today, so still drying yet. It is going to be colored and used as a billfold cover. Any advices on improving are also warmly welcome.
-

Bag Panel Carving
Suicide replied to tatehunt's topic in Purses, Wallets, Belts and Miscellaneous Pocket Items
looks great! -
From the album: Weekend carving
-
From the album: Weekend carving
-
From the album: Weekend carving
-
From the album: Weekend carving
-
Hi all, I'd like to share my experience how quickly make a toolrack for leatherstamps you most likely have. All thumbnails are clickable. Project costs: 95 eurocents Time : 15 minutes including helping to wife to open the bottlle with juice and drinking glass of juice. You need: 1. 2 plastic food containers with lid. After you done you will have 1 lid as a spare 2. Drill. 3. 3 drill bits - 8mm, 11 mm and 4 mm. 4. 2 alu rivets + setter. (optional) I got a set of 3 food containers in local IKEA shop for 0.95 euros. The key moment is that these containers must be able to be put inside each other (I guess by default most of food containers have such ability ) Lid should be fixed firmly on the box. I have click-in covers but actually any fixeable would work. So take 1 container's cover and 2 containers. On this photo you see what being inserted one into another the bottom of top container is about 1,5 cm above the bottom of second container. Then drill one of container's bottom. I drilled holes mainly with 8 mm bit as I don't have much stamps with thick handle. I also drill some holes with 11 mm for such a thick handle stamps. Next put the lid on , turn container up side down and mark slightly placement of holes in the cover through the holes in the bottom. Do not drill through. If you did verything right, on the right side of the cover you'll also see these marks. Drill it from the right side now. You can correct a bit a placements of the holes as they might be marked not very even before. Now put perforated container into untouched , drill a holes with 4 mm bit on the opposite sides and fix boxes together with a rivets. Put lid on. Your rack is ready for load!
-
Bruce Grant "Encyclopedia of Rawhide and Leather Braiding" plates 126-129 demonstrates several ways to wrap a buckle with lace. Have a look.
-

Harness Vs English Bridle Vs Motor Latigo Vs Carving Vs Skirting?
Suicide replied to cleveland's topic in All About Leather
Thanks alot! Just thinking to try it, but their oversea shipping rates are quite hight, so I want to understand beforehand if it worth to try. -

Harness Vs English Bridle Vs Motor Latigo Vs Carving Vs Skirting?
Suicide replied to cleveland's topic in All About Leather
Can you please briefly specify the exact differences you see/feel (smell? )? Thanks in advance! -
No, I haven't tried splitting. I just dont have a splitter/beveller yet (Thats why I was asking you in another thread about your guidlines how to make beveler like you did ) I just wandering if there is other way to slick flesh down (hopefully forever ).
-
Thanks for reply, Kevin. Yep, I actually thought about this. I'm using 50-70 cm splits and having them shorter might not be very handy. Mostly I am doing mexican round braid and flesh side became fluffy after about 3-4 holes forward (as the lace is going through the each hole 2 times + over/under passes in between).
-
Hi guys, I'm using upholstery cow leather offcuts to make a laces. That leather has a bit fluffy flesh side. What I have been doing so far is waxing a lace with saddle soap , give it to dry and then lace. Flesh side is glossy and slick at that moment. IHowever after awhile more and more I pull the lace through the holes, the flesh side becomes more and more fluffy again ... Is there a way to prepare such sort of laces to keep flesh side slick while braiding? I did try Gum Trag but it makes lace sticky. Thanks!
-
Hmmm... According to pictures I see, hollow grinding affects the edge, please have a look at attached pictures. At least edge's width is affected.
-
Thanks! As you see on the picture I marked "base" holes do not miss them, but finally found what it actually not much necessary. Closer to the end, I discovered that I made 1 extra hole on the longer edge and fixed it just by skipping this hole and hide it into plait as there wouldn't be hole at all. This place even culdn't be noticed now And thanks to Dave(braider) once again for such a great advice!
-

Segma Snaps Got Loosing - How To Fix?
Suicide replied to Suicide's topic in Hardware and Accessories
8 oz skived down to about half of thickness... so roughly lets say 4 oz. btw that leathe is quite stiff. The whole belt is like a belt because of length but these snaps are placed first about inch off the buckle and second about 1-1/2" of the first one. There are alu keeper in between of them. So in best case I sometimes have just this keeper goes freely to buckle (the closest to buckle on eis unlocked), in worst case after lets say fasten my shoes I need to lock em both back And, once again, it happens after about 2 days of using the belt. I have never used such snaps before so I'm buffled a bit who is wrong -me or snaps. btw2 Just fixed pair of them with method suggested by TigerPal - now tightly as hell, I even can't unlock them with fingers. Lets see tomorrow after lunch -
Thanks, Bob! Interesting idea about holding knife that way, definitely have to try.
-
-
Thanks, Ferg. I just thought hollow ground may give sort of benefits while carving sharp/small radius curves and scrolls. Just my wild guess
-

Segma Snaps Got Loosing - How To Fix?
Suicide replied to Suicide's topic in Hardware and Accessories
Seems no. I see the same behavior with both snaps preinstalled on tandy's belt blank and with the snaps I installed myself... Unless all the I have seen so far snaps eventually installed wrong.... And moreover, as said they hold pretty well for first couple of days and seems it doesn't matter how often I lock-unlock them .... Thanks for this suggestion, I'll give it a try.


