Studio-N
-
Posts
1,035 -
Joined
-
Last visited
Content Type
Profiles
Forums
Events
Blogs
Gallery
Store
Everything posted by Studio-N
-
Laser Cutting Of Leather.... Looking For Advice And Tips
Studio-N replied to biglew's topic in Leatherwork Conversation
Hello biglew, Cleaning is easy. just wash it. Removing the sooth produced usually only takes running it under water and maybe use a toothbrush if it is stubborn but you can always use saddle soap or a light dishwashing detergent. The edges will remain black / dark. simply airing out the leather will work best for the smell, but fabreeze does wonders. 2nd: it's not always possible but if you are able to apply a finish to the leather piece ahead of time then you can just use Pledge or a damp sponge to remove the sooth. Cheers! -
thank you. It's one of those things you look at in hindsite and say "I should have gotten this years ago". But in reality I think the timing is right. I did a lot of good work with the laser (13 years to be exact), but this tool is opening me up to some new ideas. and combining the two is just too much fun for one person. cheers!
-
yes, this was my prototype but I will beging offering them as soon as i can take pictures and get them posted on ebay. If you're interested in them sooner drop me a PM. -nick
-
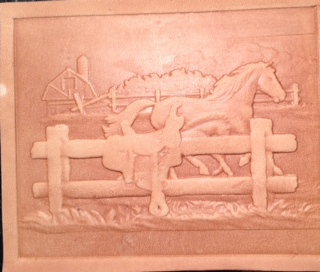
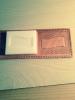
I made the plate out of delrin and embossed with a 1 ton arbor press.
-
It is roughly 3.25 x 2.5".
-
I have to say this came out rather nice. 3d plate for wallets or other projects. cheers!
-
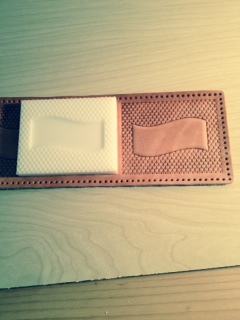
I'm on a roll until the work starts piling up. This is a new wallet back roughly 3.2 x 2.6" with a running horse. Much more wholesome than some of my other subjects. Cheers!

-
well for just cutting (2d work) it's pretty straight forward transition. There is a bit of a learning curve for 3d modeling. Mostly making sure the model isn't too high/low for the material being used.
-
Thanks Biglew, got the 60th anniversary CNC shark from rocker. Equivelant to a HD Shark plus. I'm very happy with it. I've taken to it very well. Of course I already had Aspire software for the 3d stuff so it's just been a matter of learning to generate the gCode for the machine instead of TIFF files for the laser. Cheers!
-
correct Lew, still using delrin and cutting it on a new CNC. Working my way up to aluminum. Already broke a bit trying to cut it.
-
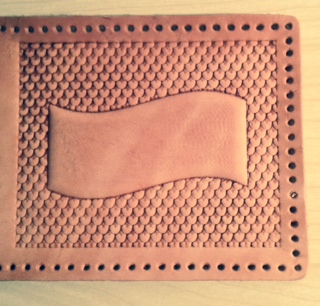
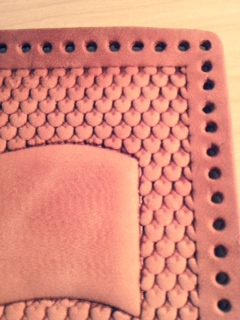
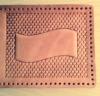
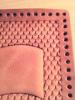
This is a new wallet back embossing plate fresh off the CNC. I took a fishscale (or dragonscale if you prefer) checkering pattern and transfered it over. I've added a closeup of the scales. I'm thinking of redoing this and adding just a hint of a border to better protect thos outside scales, but otherwise pretty pleased with it. Cheers!
-
totally cool.
-
very nice find!
-
i thought this was differnt and interesting, I hope others get a kick out of it: http://www.instructables.com/id/Functional-Leather-Respirator/
-
sorry I don't know anything about the tagging part. Compared to the Evil Empire, I'll probably be far more reasonable. just have to get past the learning curve first. -nick
-
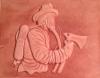
My CNC machine finally came in and after a few bad starts I finally got a 3D embossing plate that I'm happy with. It's of an adult nature so I won't post it here but it is in the adult section. It was really smooth after being machined and was usable with only a washing of the plate. I'll post some as I get them done. Cheers!
-
well done! it really pops.
-
you can check most dollar exchange rates at xe.com
-
thanks Billybopp, I'm waiting for some materials to come in that are of a better starting size. What I had on hand was 1 3/4" diameter which fits very tight on the Speedy embosser even with the table all the way down. A 1 5/8 should work perfect and I won't have to stand there and hand turn these down to size. Unfortunately, I was told today there is about a 10 day wait before they will ship. After that I will start producing some. But if you have some ideas, just let me know and I'll see what we can do for you. After my CNC comes in, I may move to brass rollers but that's another learning curve for me. Itch, that is a beautiful belt.
-
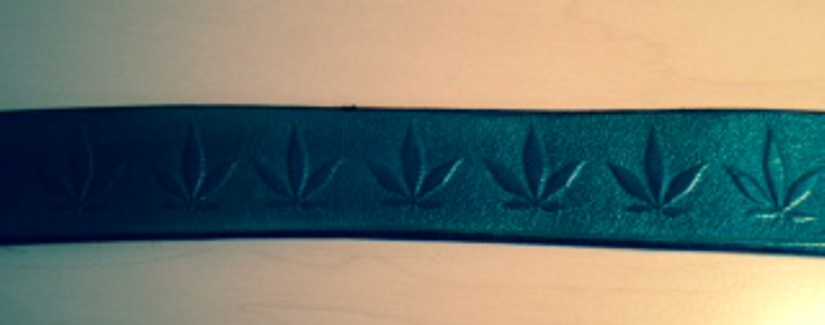
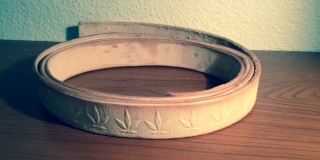
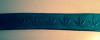
I got the bugs worked out of making the embossing roll and rolled out this belt strip. It made sense to dye it green and I've added a vintage Peace sign buckle. I'll be making up some new embssing rolls as soon as I get some free time.


-
I've done 1/2" but it was a solid figure with no real details. I've done just letters like MADE IN USA down to 1/4" with good results. For stuff that has figure/lines/detail, I try to keep everyone at 1" or more, but somethings work out fine at 3/4" except that the lettering gets small.
-
what part broke? I know you can add some 'bridges' for support between the open spots for strength. As long as they are below the surface enough to not be pressed in it might help. You might also make the base with a bit of a bevel so that if bottoms out you don't get much of the base impressed. Great looking experiment. Keep going. -Nick
-
Here you go: https://www.standardrivet.com/spots/13-coin-holders.php Standard rivet makes coin holders that act like spots. Should not hurt the coins. Cheers!
-
Its a small Shark Pirahna from Nextwaveautomation. I've already got ASPIRE for my laser as the software which does 2D and 3D design.
-
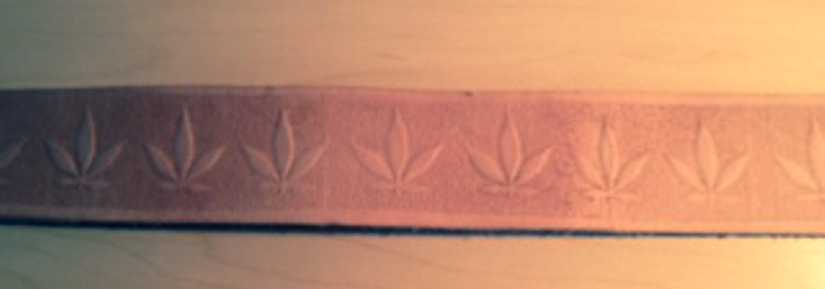
I've often been asked if I could do an embossing roll and I finally got a little time to work on one. This is done in the same delrin plastic I use for my stamp and plates. The first version of this just had the figures cut in. Because the surface is slick, it did not grab. I added a texture to it which gives the stamp enough friction to pull the leather in. This is a 1 1/2" belt blank embossed on the Speedy embosser (same as the current offering from the evil empire). This is the least flexible of the embossers, so it should work on the Tippmann and the last offering from the Evil Empire embosser or anything that uses a 1" center bore. Besides the surface preperation, I had to figure out how to safely and accurately center bore it and cut the key slot in. The real trick is getting the start to equal the end so it stops engraving after 1 revolution. There is no information out there from those that offer such things, so I've had to reinvent the wheel. But now that I've done it I can add whatever figures and patterns on rolls for use. I think if I stain this belt green it will look nice. Cheers!