-
Posts
186 -
Joined
-
Last visited
Content Type
Profiles
Forums
Events
Blogs
Gallery
Store
Everything posted by Matt Alsaker
-

Rubber Bushing For A Holster
Matt Alsaker replied to steelhawk's topic in Gun Holsters, Rifle Slings and Knife Sheathes
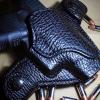
I don't know what the material is for the spacer in your picture, but I use vacuum hose. It took some shopping around to find some that was the consistency I was looking for, most was very hard and gave no compression to adjust fit. I checked numerous hardware and auto supply stores. I finally found what works for me at a local auto parts store. It works with the screws, t-posts, and Chicago screws I use. I buy it by the foot and cut it into the lengths I want. My picture is not great, but you can see the vacuum hose next to the magazine. The piece in your picture looks to have a greater diameter than vacuum hose. -
I just learning to lace. The round braid is my favorite. What book are these instructions from? I picked up two books that didn't have really clear directions. I just learning to lace. The round braid is my favorite. What book are these instructions from? I picked up two books that didn't have really clear directions.
-

Holster Inlay - 1St Attempt
Matt Alsaker replied to Matt Alsaker's topic in Gun Holsters, Rifle Slings and Knife Sheathes
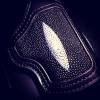
I don't do anything special to sew it, other than run it very slowly through by Cobra 4. If doing an overlay, the stitch line many not appear perfectly straight. The needle will move slightly side to side as it glances off the hard calcium deposits on the hide. The lines generally are straight, but you get that occasional deposit that pushes the needle minimally off line. Most leather craftsmen notice it right away, most who don't have the eye for that level of meticulous detail don't even notice it. With inlays, I don't have the same issue. The stitch line is visible on the outer piece of leather which have enough give to accommodate the movement of the needle, but the leather seems to straighten the stitch out (at least that's how it appears on the leather). The bigger issue for me is....finishing the edges. Cutting the fine edges (along an edge where leather and the stingray meet) is a pain. I used shears and heavy scissors. When I went to sand the edge (wear a mask if you don't already, you don't want to breath in all the calcium dust), those calcium deposits were tough on my sanding drums. In certain situations I start with a small grinder on my Dremel, then switch to the sanding drum. -

Holster Inlay - 1St Attempt
Matt Alsaker replied to Matt Alsaker's topic in Gun Holsters, Rifle Slings and Knife Sheathes
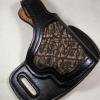
Oh, I did. I'm surprised to see this old post show up again. I'm addicted to working with exotic hides....but still a novice. I've done a fair amount with alligator, shark, and elephant. I recently got into stingray, which is an entirely different monster. My personal preference is with inlays, but don't mind working with overlays. -

Reinforcing Mouth Of Iwb Holster
Matt Alsaker replied to asbandr's topic in Gun Holsters, Rifle Slings and Knife Sheathes
http://leatherworker.net/forum/index.php?showtopic=22992 It's not a video, but has pretty good pictures. This is one way to do it. I do mine a little different, but the end result if the same. Install the stainless steel between the leather reinforcement piece and the holster leather. Once everything is glued and stitched, I bend the mouth of the holster by hand around the slide of the firearm. Final adjustments are done as I finish the holster. -

Reinforcing Mouth Of Iwb Holster
Matt Alsaker replied to asbandr's topic in Gun Holsters, Rifle Slings and Knife Sheathes
Don....first, I love your work and thank you for your years of service. I'll hit my 20 years of LEO service in March. All I know is one handed holstering. From the first time out of the holster in the recruit academy until this day, that is all we've ever trained. The State's firearms training curriculum for all new officers and the annual certification only have one handed holstering. It's not just that special tactics guys that train for one handed holstering, it's all of us. As for the purpose of one handed holstering, I guess I was so excited as a young cop I never asked the instructors. However, my experience has been that threats change. I'm not talking about a situation where deadly force has been used and we are holding on a threat waiting for more help, that is still a threat. I'm referring to those situations where we are out of the holster believing there is a threat, but as the situation evolves / develops and as we gather more information we determine the use of deadly force is not justified. Some other level of force may be justified, hence wanting to keep our off-side hand free while holstering. I like being able to holster with one hand while keeping my off-side hand free and being able to keep my eyes down range. There is more than one way to skin a cat (or holster a firearm). There are a lot of ideas about tactics and equipment out there, ask a cop and they will tell you, but my comfort level is with one handed holstering. That doesn't make it the right way, it just makes it the way that works for me. Take care of yourself brother, the world seems to have gone crazy. Here's our State's student manual for the firearms stuff. I think they discuss the draw and holstering starting on page 35 (I got this with a quick internet search, so I'm not giving away anything Top Secret here). http://ecampus.matc.edu/policetraining/Library/Required%20Reading/Firearms_Student_Text.pdf -

Reinforcing Mouth Of Iwb Holster
Matt Alsaker replied to asbandr's topic in Gun Holsters, Rifle Slings and Knife Sheathes
Most (I think all but one) of Milt Sparks IWB holsters use a steel reinforcement piece under the leather reinforcement. I use a piece of 20 gauge stainless steel that is custom laser cut to the shape and size I want at a local shop for me. When I first started building holsters it was for local cops and they demanded the steel reinforced mouth (probably because a lot of them were wearing a Milt Sparks holster). For the most part cops want to be able to holster easily with one hand. Cops train to constantly be evaluating dynamic situations. They want to be able to transition quickly in and out of the holster, potentially several times during a single incident. The civilian concealed carry crowd tends to be a little different. If presented with a threat, civilians tend to stay out of the holster until law enforcement arrives. There tends to be very minimal dynamic transitions into the holster. **This is general statement based on my observations / experience and wont' be true everywhere or for everyone.** Each customer needs to determine their needs and potential applications may be when buying a holster. The customer should know any pro's and con's of the particular style / model holster they chose to carry in, then train to compensate for the con's. Will an IWB stay open without steel reinforcement? Yes, but to a lesser degree than one that is reinforced with steel. Some of it depends on the size of the handgun (small frame versus larger frame), some of it depends on how tight your belt is cranked down (I know some that carry with it so loose you'd think if they ran the entire holster would bounce around and others that wear their belt so tight I'm surprised they can breath), and some of it depends on the quality of the materials / construction. Does the steel reinforcement effect comfort? I've never had any complaints, many makers use steel reinforcement, and Milt Sparks doesn't seem to have a shortage of customers. Should the reinforcement piece (leather and / or steel) wrap around the mouth of the holster? I think that method works the best, but have seen "clam shell" style reinforcement (individual reinforcement pieces for the front and back). The "clam shell" style IWB's I've seen I have not been impressed with. IWB carry is not for everyone for a variety of reasons, but those that carry that way tend to love it. Building an IWB with a wrap around stainless steel reinforcement piece does take extra time and until you get used to doing them you'll mess up the occasional holster, but being able to do so opens up more of the IWB market for you. That being said, I have another style IWB holster out in the field being tested. It does NOT have any type of reinforcement and the feedback has been great (although the testers are all skinny LEO and military athletic types who carry IWB pretty much exclusively). Good luck. -
I don't know if the foam caused your issue (it might be holding water), but either way I wouldn't use foam. When you cut the "window" for the inlay out of the reinforcement piece, save the leather that you cut out. Depending on the thickness of your inlay, trim the piece you saved (for me I usually take 1/16 - 1/8 of an inch off the entire edge). Glue that piece to the back of your inlay. When you assemble the inlay in the "window", make sure the piece of leather you glued to the back of the inlay is centered in the window. That will push the inlay forward into the "window" once you attach it to the main body of the holster. I don't soak any of my holsters with an exotic inlay to assist with molding. I use a sponge to control where the water goes and how much I put on. I have never put water on the exotic hide. I do use a sponge or damp rag to wet the inside of the holster behind the exotic inlay, but I never soak it. I do the same thing with a full overlay. I carefully wet the inside of the holster, but not the exotic hide. Hope that helps.
-

Accordion Straps, Help And Tips, Please.
Matt Alsaker replied to Erystawi's topic in How Do I Do That?
Very nice and the post is timely. A friends husband plays the accordion and just broke a strap. They are bringing it to me next week to look at. Your work looks very nice. -
For those contemplating using personal "umbrella" insurance policies to cover their business venture, you better read the fine print and don't take the word of the agent selling it to you. Most (not all) umbrella policies that are attached to your auto / homeowners polices will not cover business ventures. Every company is different, so read your policy carefully. If it's not clear, get an answer in writing directly from the company underwriting the policy. More likely than not, you'll need to seek out product liability insurance. That's a whole different ball game when you get into anything related to firearms (i.e. holster making).
-
Check out this thread... http://leatherworker.net/forum/index.php?showtopic=44142&hl=transfer#entry276223
-

4/5 Oz Leather Holster?
Matt Alsaker replied to B shift's topic in Gun Holsters, Rifle Slings and Knife Sheathes
+1 on the other comments. 4/5 alone will be to thin. Make yourself a nice lined holster with the 4/5. -

Glock Blue Gun
Matt Alsaker replied to Josiah's topic in Gun Holsters, Rifle Slings and Knife Sheathes
Gen 3 and Gen 4 are the same external dimensions for holster making purposes. Most of the changes were internal. The name exterior change was to the grip, which does not effect holster makers. The G30, G30s, and G36 are similar. The G36 is a slimline (single stack) version of the G30 (double stack). The G30 and G30s use the same lower assembly, but the G30s has a narrower slide. The slide is the same slide as the G36. So the G36 has a narrow slide and narrow lower assembly. So the G30s and the G36 have the same slide, but different lower assemblies. Using them interchangeably will depend on how tightly molded your holsters are for the specific firearm. I use the same template to make holsters for the G30 and G30s, mostly because the lower frame is the same. I have a slightly different template for the G36. Even with the G30 and G30s, I use the specific firearm to mold the holster. Depending on how true your molding is to the firearm, the wider slide on the G30 will not fit into a holster molded to a G30s. So if you were only going to by one and wing it, get the wider G30. **Disclaimer - I recommend you use the proper model blue gun model to mold. If the holster is for a G30s, I use a G30s to mold.** The G17, G19, and G26 (and their related .40 and .357 models) all have the same trigger guard, slide width, and lower frame size. The only thing different is barrel length. If you built a holster with an open toe for the G19, the G17 would fit properly (the barrel would stick out the bottom some) and the G26 would fit properly (the barrel would just sit higher up into the holster). Your target audience will dictate where to start when purchasing blue guns. My experience has been the G19, G26, and G30s are a good place to start. They are very popular for me. I've been around Glocks for years, but am not an expert. If someone sees somewhere that I'm wrong, feel free to jump in. The above information has always worked well for me when building holsters. -

Inlay Examples
Matt Alsaker replied to kid terico's topic in Gun Holsters, Rifle Slings and Knife Sheathes
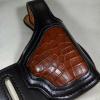
I'm a big fan of inlays and am always trying to come up with something new an unique. I really like the third picture with the alligator back on the holster. Very nice. -

Belt Slots In A Holster
Matt Alsaker replied to Tommy217xxx's topic in Gun Holsters, Rifle Slings and Knife Sheathes
Your standard off the shelf oblong punch will not be wide enough. If you are starting out and trying to keep costs reasonable a round punch and chisel is the way to go. I use a #8 (7/32") round punch on each end. By the time I'm done burnishing, I have a nice 1/4" wide slot. All my belts are 1/4" thick, to I build the belt slots on the holsters to accommodate. For 1-1/2" belt slots I have a 1-1/4" chisel and for 1-3/4" belt slots I have a 1-1/2" chisel. I tried drilling and did not care for it. I've also tried using a knife to cut between the holes, didn't care for that either. Custom punches from Weaver, about a year ago, were around $90. Well worth the price for me. -

Modeling Spoon To Remove Marks?
Matt Alsaker replied to harley45's topic in Gun Holsters, Rifle Slings and Knife Sheathes
I use a cobblers hammer to flatten the stitch. It removes the press foot marks at the same time. Depending on how wet the leather is the hammer will leave additional marks unless you hit the leather perfectly square with the appropriate amount of force. My holsters are dry or almost dry when I use the hammer. -

Some Leather Holsters
Matt Alsaker replied to Scott Ebersole's topic in Gun Holsters, Rifle Slings and Knife Sheathes
Ditto on Shooter's question. Also, who at these companies are you guys directing your inquires too when getting permission to use trademarked images? I've called and written Customer Service and Legal, but have never gotten a written response back from any of them. -

Couple Of Recent Holsters
Matt Alsaker replied to jackd942's topic in Gun Holsters, Rifle Slings and Knife Sheathes
Very nice work Jack. I've been called cheap, frugal, a tight^, and several other things (I like financially responsible) over the years...making my decision to purchase a stitching machine almost painful at the time. The only regret I have was waiting so long to make the purchase. Your work is really nice. Keep at it and you'll have that new stitching machine paid for in no time. I struggling with the thought of spending money on a clicker and dies right now. -

Modular Cowboy
Matt Alsaker replied to Eaglestroker's topic in Gun Holsters, Rifle Slings and Knife Sheathes
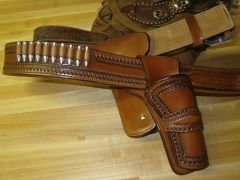
Very nice work. The veiner on each of those cartridge loops is a nice touch - and a lot of planning. -

Civil War Holster Instructions
Matt Alsaker replied to Brazos Jack's topic in Gun Holsters, Rifle Slings and Knife Sheathes
The pattern and instructions are very well done. I've only seen that much detail in the Stohlman books. Thank you for sharing. -

1St Duty Style Holster
Matt Alsaker replied to George B's topic in Gun Holsters, Rifle Slings and Knife Sheathes
That is a very clean and polished looking holster George. -

Bonding Double Layer Belts ?
Matt Alsaker replied to Shooter McGavin's topic in Gun Holsters, Rifle Slings and Knife Sheathes
I use a lace roller that I picked up from Springfield. I use it to bond a lot of things that I glue. http://springfieldleather.com/24810/Lace-Roller/ -

A Few Recent Projects
Matt Alsaker replied to Josh Ashman's topic in Gun Holsters, Rifle Slings and Knife Sheathes
Damn! Very sharp rig Josh. -
-

Elephant Hide Holsters, Belts & Pouches
Matt Alsaker replied to Lobo's topic in Gun Holsters, Rifle Slings and Knife Sheathes
I've done several inlays, but never an overlay. I really like elephant and ostrich hides I've seen many of you overlay. I'm considering an overlay with an alligator hide I just picked up. Is alligator an okay hide to try as an overlay? With an overlay, do you guys run the exotic to the edge - then bevel and burnish like you normally would?


