


bruce johnson
-
Posts
4,401 -
Joined
-
Last visited
Content Type
Profiles
Forums
Events
Blogs
Gallery
Store
Everything posted by bruce johnson
-
If it is going to be heated I like the Dixon or other European made adjustable creasers. The shanks are usually longer and the jaws tend to open up wider while not splaying as much. It is not going to be heated I like the checkering type creasers better. The tips stay parallel as the jaws are opened and they track a more true line. The added bonus is the tips are pretty narrow and can make a nice fine line. They aren't cheap, but they are good.
-
 KingsX - Yes it is! The past coming back in a post from Oct 2006. Life has changed a lot since then for me, but I am still an oil user....
 -
I've got a few tutorials done with a bunch more to go. There is one on edge beveler sharpening - www.brucejohnsonleather.com/tutorials/
-
Barb Sorenson at Y-Knot Lace, always a pleasure to talk to - www.y-knotlace.com
-
Head Knife Vs. Skiving Knife
bruce johnson replied to MonicaJacobson's topic in Leatherwork Conversation
DavidL, Thank you for the link to that French edger video! I keep forgetting about those clips. There were several little video clips we did for a display of saddle making tools for the local cowboy museum. The videos were done on the fly. The videographer came to my shop one night. We made some hasty scripts, shot the short clips, and did most of them in one shot in a few hours. The actual tools mentioned were all ready for display so I grabbed the closest stand-ins and used them in the videos. -
Missed the post earlier. I'd price it around $350-400. Crank skivers always sell pretty well. The upside of that one is that it has a cutter and some people like that. If you are cutting sole leather it is nice. The downside is that it has a cutter and if you don't need it - it takes up more bench space. The more common ones have a deeper throat for the cutter and some need and like that, some don't.
-
The larger ones in your link are French edgers. As far as the old makers, when these were made 100-140 years ago they were used in harness and saddlery work. There are some #1/2 sizes around but pretty rare. The smaller sizes came in when the craft movement got to be the market share and tools were starting to be made for a different user market. Osborne is one of the hardest to figure now. Even between different styles of edgers the size numbers don't correlate even though it is the same company. Some of their tool patterns have drifted for more economical manufacture as well. If you are looking for good quality narrow edgers, I would suggest Toby at Ron's Tools or Barry King. They both have a small edger that would fit your needs well.
-
Head Knife Vs. Skiving Knife
bruce johnson replied to MonicaJacobson's topic in Leatherwork Conversation
I do for some skiving. they are handy for crowning saddle strings by hand, and fine skiving thin leathers. For the heavier leathers, I like a round knife. -
I generally like the HF Osborne knives as well. It all comes down to condition for value. I sell the better ones up to $180. I'd like to see a picture too!
-
I can't speak for some makers but the rule of thumb on the old makers edge bevelers and French edgers was each size number = 1/16 inch of cut. They were all pretty consistant between makers unlike now. It looks like that black handled edger is based on the western or bent toe edger pattern so it might run larger, but doesn't look 3/16 to me. If you are ordering from someone who can read a ruler, I'd ask them the width of the cutting edge. Across the board that tells me more than try to compare sizes with the newer patterns and sizing.
-
Head Knife Vs. Skiving Knife
bruce johnson replied to MonicaJacobson's topic in Leatherwork Conversation
Here's another choice. I'd get a fair amount of the old flat handle paring/skiving blades in and they never stayed a day on my website. I sent Terry Knipshield one to duplicate in a right and left. He got these right and pretty handle scales to boot. I'd sure ask him about these. Terry is a really good guy. He patterned the Texas Rose after a 100 year old Rose knife pattern I sent him, and I told him that some people like a smaller knife too - hence the "Rosebud". He has also duplicated English and French pattern plough gauge blades for me too. They all have been dead on good users.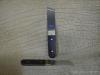
-
Commonly found - if I don't see one in half the antique shops I am not looking hard enough. They set tubular rivets and were used to rivet in brake bands on old cars and tractors too.
-
I had a set of Watt's round bottom edgers several years ago. At that time the only other one making the better quality edgers was Ron Edmonds (Ron's Tools). They were both a huge step up from the new Osbornes and others at the time. Now Barry King is making good edgers also. I have a bit of an iron in the fire hereby dealing in a lot of old Gomph tools. I will say that any of these current makers or the old Gomphs will be an improvement over what you may currently be using.
-
Does A Southeastern Leather Show Exist?
bruce johnson replied to JomanB's topic in Special Events, Contests and Classes
I think the LCSJ tried a show in Georgia several years ago, also one in Pennsylvania maybe. Other than the annual IFOLG shows that rotate around to different guilds who host them, pretty much the major shows are Sheridan, WY in May and the Southwest Show in Prescott AZ in February. -
There are very few collectible stitching horses so I'd go ahead and refurbish it for use. Semi-collectible ones are the metal jaw "Doering patent" stitching horse with the metal jaws or the occasional wooden jaw Randall wooden jaw that the markings have survived. Other than that, most are shop made or unmarked commercial mades that are users only. The interior decorators haven't keyed in on stitching horses for interior décor yet, so they are still mostly selling for user prices.
-
You will like it...
-
Barry King. I bent and broke several Tandy and Hidecrafter ones from doing tipped impressions. I had Barry maker me a couple as customs a few years ago and now he catalogs them. Haven't had a problem with them. I do have a CLT that is beveled and really detailed, but I have the only one I have run across in 5 years. CLT is not in business anymore.
-
Brent, I will take them all. How would you like paid? You can call me also. toll free number on website through the link below my name. Thanks, - Bruce
-
Hide House in Napa, Maverick Leather in Petaluma, Goliger Leather in Santa Barbara.
-
Thinking Of Purchasing A Used Adler 205-64...thoughts?
bruce johnson replied to fitabull's topic in Sewing Leather
I had one, heck of nice machine and in the same circumstances would buy it again. -
Unless they have changed, the one I ordered was made by Barry King.
-
Nail Cups You Say.....why Here Are Some Nail Cups
bruce johnson replied to Rossr's topic in Leather Tools
Ingrid, They are a leather shop item and common in shoe shops. They are a heavy cast iron carousel that holds nails, tacks, and shoe pegs. -
Nail Cups You Say.....why Here Are Some Nail Cups
bruce johnson replied to Rossr's topic in Leather Tools
Nice find. Usually the antique people are the ones painting them all colors and using them for candy and nut dishes,. My favorite is seeing them tagged as "cast iron muffin/cornbread pan with cooling stand - $175". -
can you post a picture of them?
-
Its A Mystery .....at Least To Me...or What The Heck Is This Tool?
bruce johnson replied to Rossr's topic in Leather Tools
Stapler . and I have never seen one WITH staples. The old guys tell me they were used to staple bows and decorations on shoes, and other say that some styles of buttons were stapled on too.
