Rawhide
-
Posts
1,311 -
Joined
-
Last visited
Content Type
Profiles
Forums
Events
Blogs
Gallery
Store
Everything posted by Rawhide
-
 Thanks Kustom Thanks Steve I appreciate all the nice statements...
 -
Boy Arizona is a bit of a stretch, can you e-mail it to me?? Can't wait for teleportation of inanimate objects!!!
-
Thanks Guys... That means a lot to me. I've been working at bettering my stitching for a while...Seems to be paying off.
-
Thanks Bree.
-
Talfuchre, First off welcome to the board and the craft. Slicking is the process of compressing the fibers of the leather to yield a smooth appearance. What it entails is moistening the leather (this is usually done on the flesh side, and/or the edges), and rubbing it with a glass slicker, or a bone folder, or a piece of canvas or nylon. This rubbing generates heat, and sort of 'fuses' the fibers together... it gives a smooth "slick" feel...hence slicking!! If you do a query here, you'll probably find a ton of methods of how to do it.
-
Rayban, I did think about that, but I wanted to make the foreground stick out like a sore thumb to highlight the carving. Just something not seen often.
-
Thanks Marie...my goal is to get better at hand sewing with each piece I do... I took this piece to our local guild meeting and one of the guys gave me the best compliment ever...He asked if I had bought the handles somewhere...Fantastic!!!
-
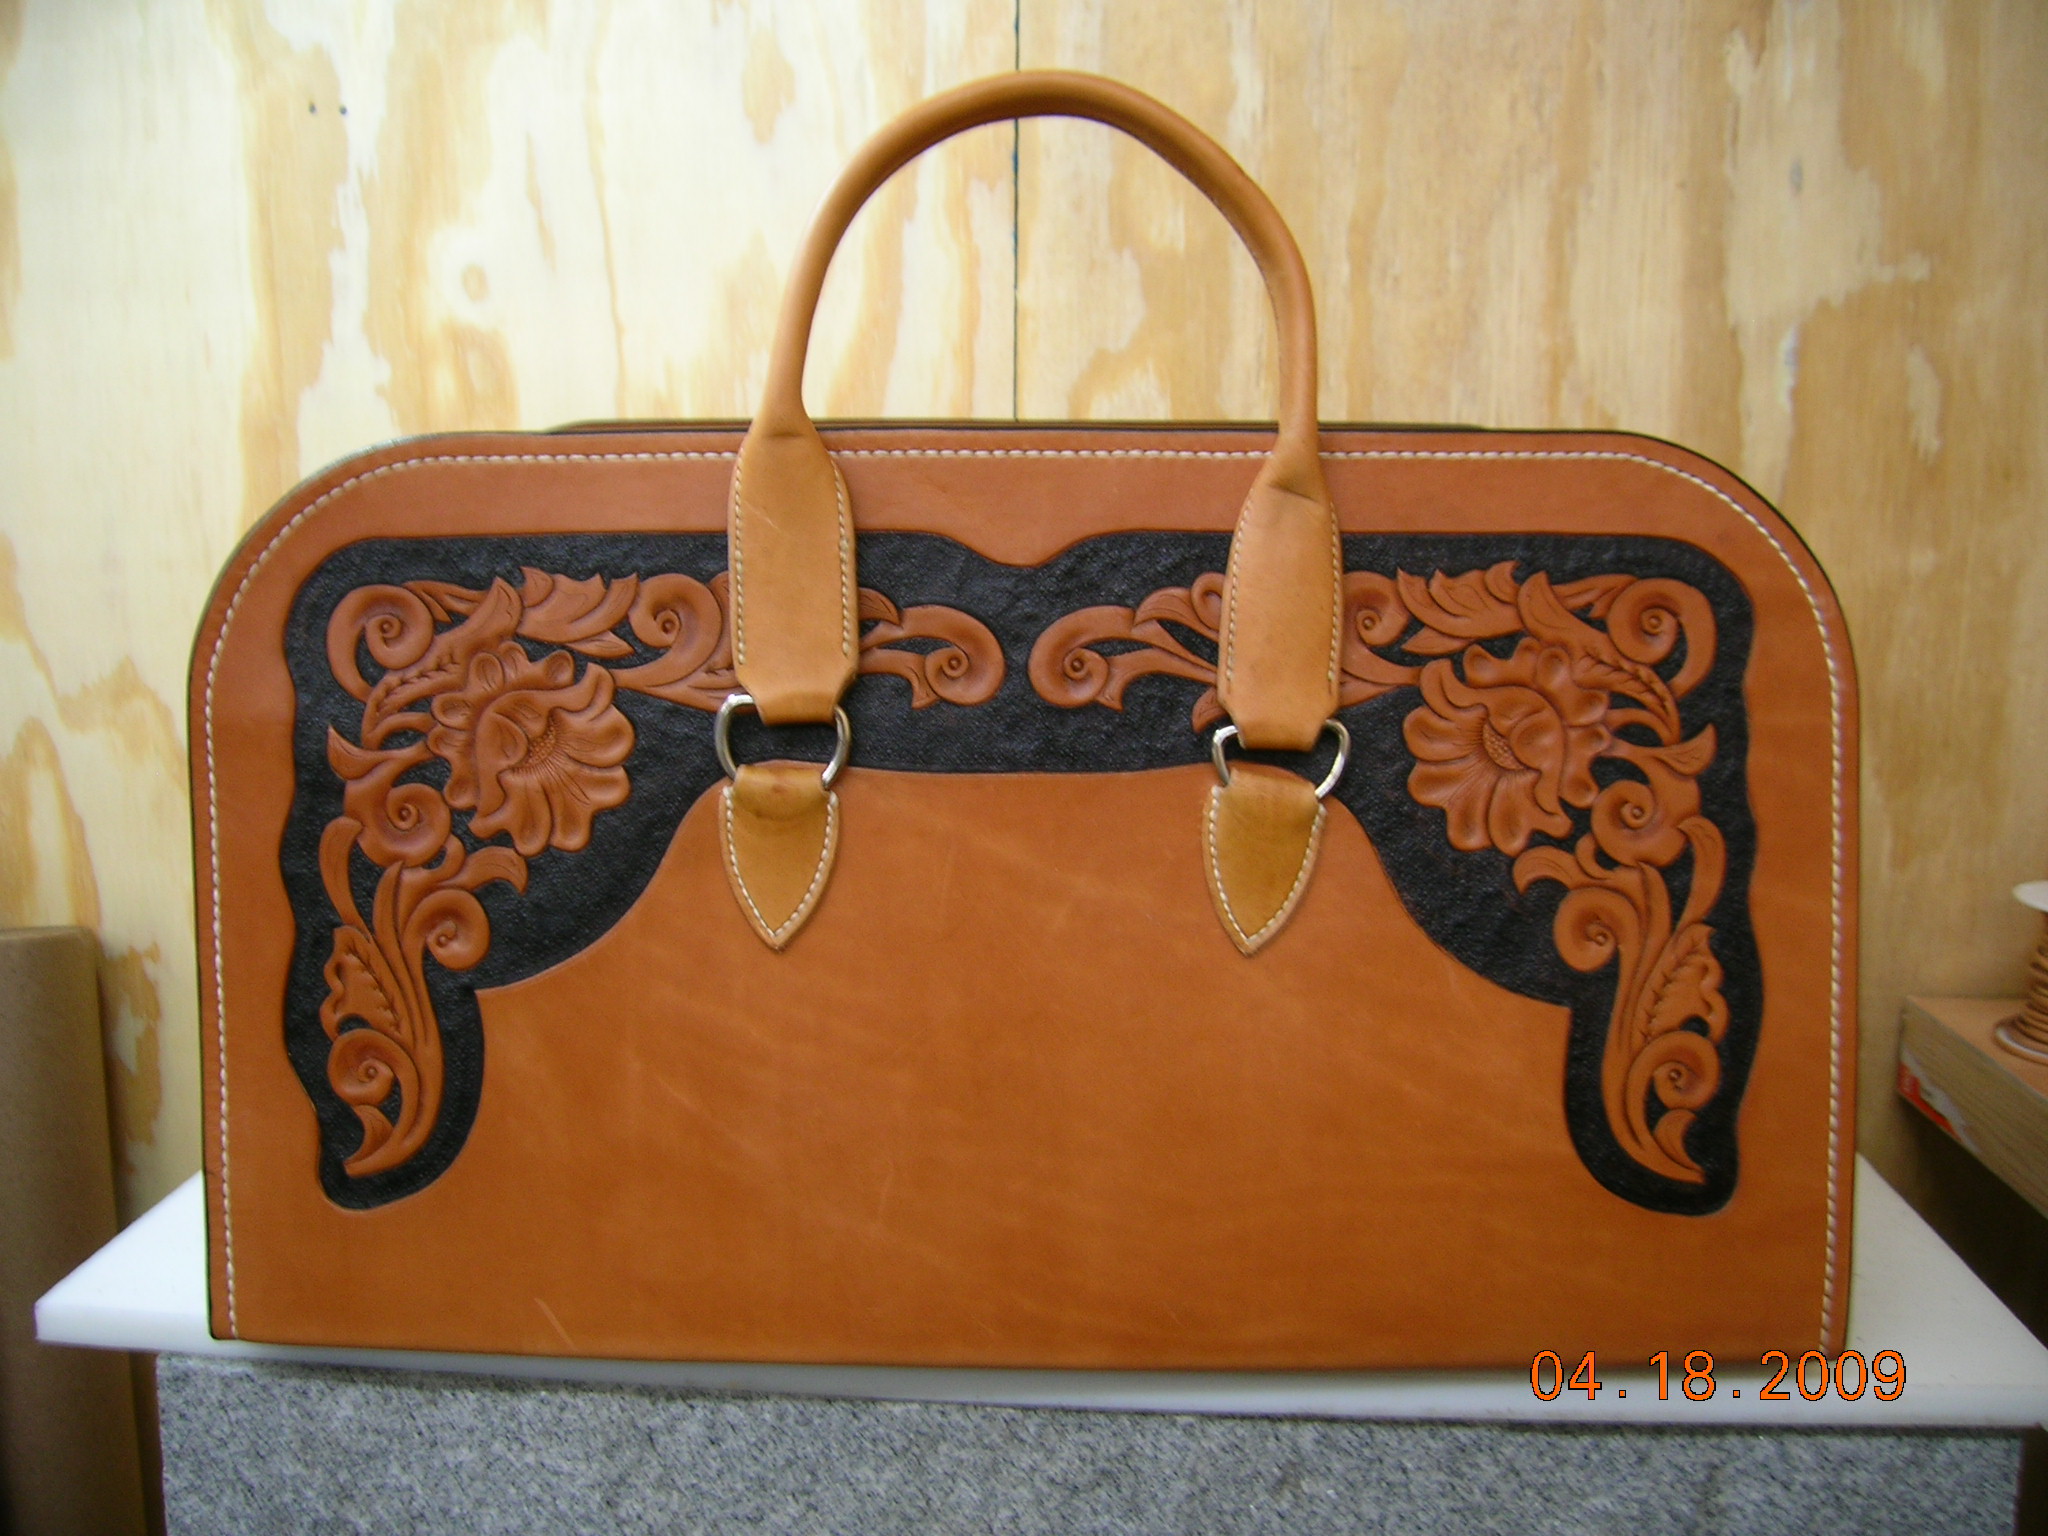
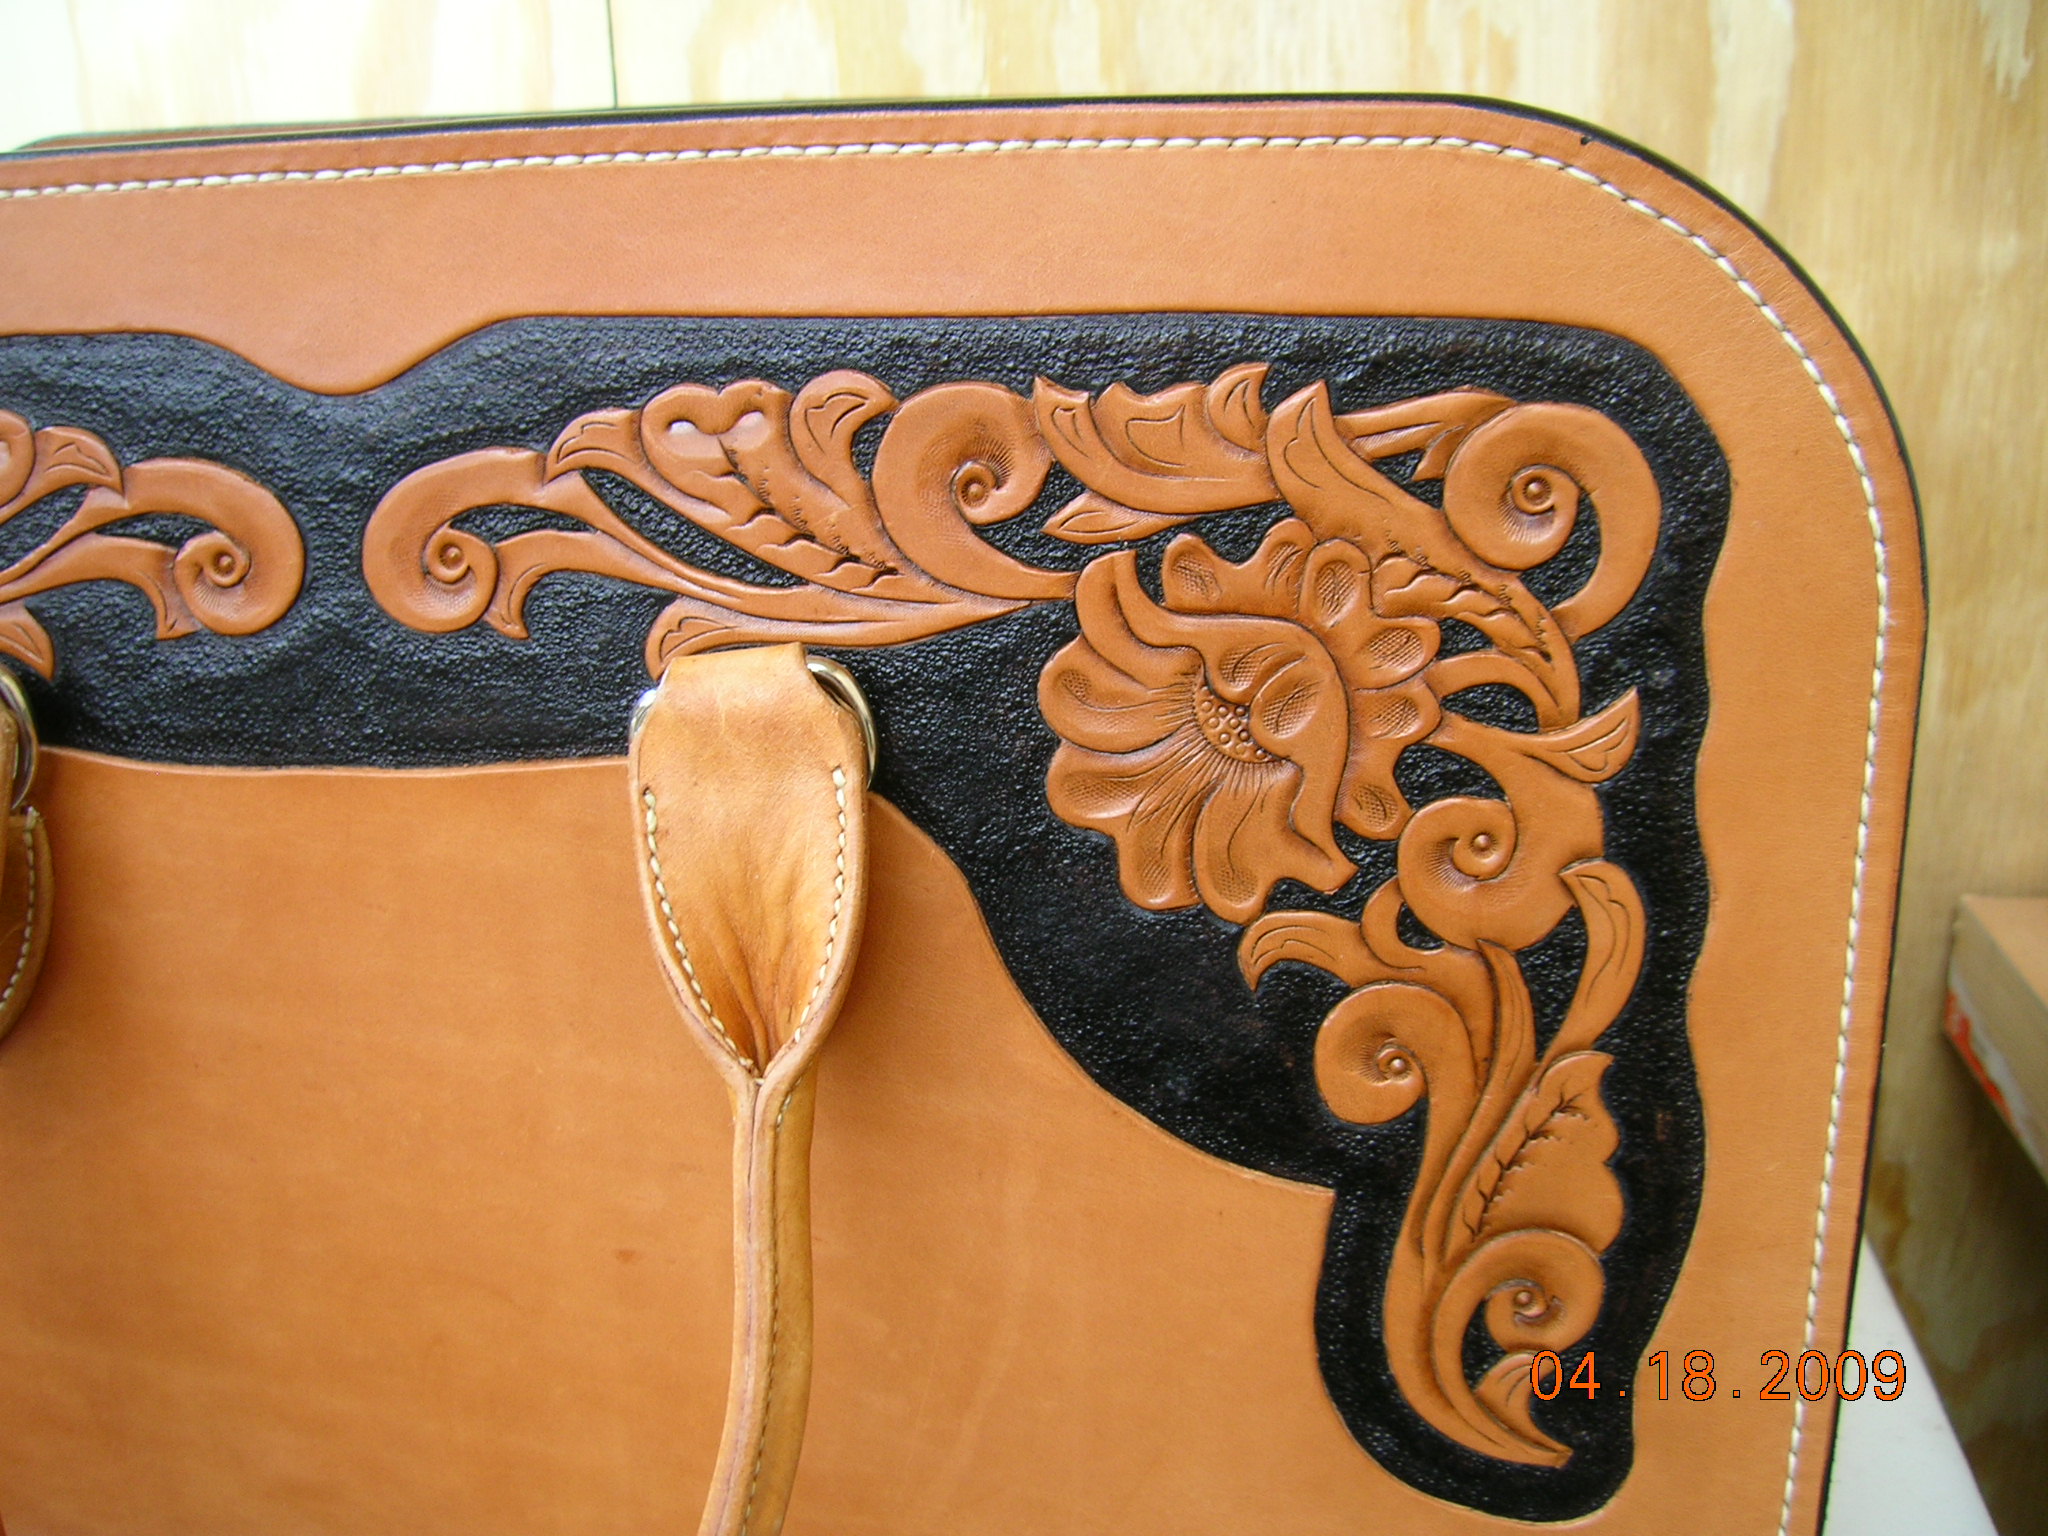
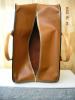
Here's a bag I made from skirting leather. No liner inside, just sanded and slicked. I used 4/5 oz chap leather for the gussett, with a jacket zipper. The zipper is sewn in with 69 thread on my sewing machine, but everything else is hand sewn... the bag to gussets are 6 spi with 5 cord, and the handles are 8 spi with 3 cord. The background in the tooling is dyed black and the bag is just oiled and finished. the handles are stained with oil mixed with med brown dye and finished with bag kote. There are some large dome spots i used as 'feet' to keep it off the floor, but I may order some real feet for it. Let me know your thoughts. Thanks, Marlon

-
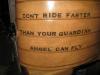
Lee hasn't quite figured out the picture postings so I offered to post some for him. ...A Very good friend of mine survived a horrendous motorcycle wreck. Among many others he had several abdominal surgeries which left his Abs weak and dislocated to the sides. The doctors want to wait a year for swelling to subside and everything to heal. When he tries to stand or lift anything his internal organs press on the skin of his stomach making him look 9 and a half months pregnant. He has difficulty breathing and speaking because his diaphragm has nothing to work against. He was given an elastic band with Velcro but it does little to help. He asked me to make him a leather belt which I was more than happy to do. The belt is 10 inches wide and is made of Wickett and Craig 10 ounce leather. It took three attempts to get the buckle ends in the right place ( Lots of hand sewing and redoing) I have since changed the buckles to brass roller type which are easier for him to work. I have cut semi-circles out of thee bottom side so that it fits better over his hip bones. If I had it to do over I would make the body of the belt from chap leather and use the skirting for the ends and a stiffener on the back side. He says that he is much more comfortable while wearing it. Lee

-
John, As you can see, Peter sneaks in from time to time. Peter posts in the iilg list quite often and it's easier to post it there with the email format and he can send it to multiple lists at once. I asked if I could post some of his work here for the benefit of those that are not part of iilg....That's kind of how this whole thing got started. He doesn't frequent as much as I do, so it's usually quicker for me to ask him a question for everyone, than for him to stumble up on it. ....and You're welcome Peter.
-
Tina...here's your answer, ...I use dyes that I had made in Australia in '92...these are highlyconcentrated and are pure in color. I also use Fiebings Oil Dyes for overall coloring of large projects...I do not use water based dyes or acrylic paint, with the exception of diluted white now and then. Peter
-
Peter's reply ...I have used a very diluted white acrylic to highlight the horns....it is very transparent. There is no such thing as a 'white acrylic dye', as dyes are made from 'dyestuffs'...white is a pigment, as found in a acrylic paint.
-
MADMAXX, I would think that it's a very thinned White Cova Dye or Acrylic. The rest is spirit. Just to be sure I'll ask him for you.
-
Dye Removal
Rawhide replied to cazio's topic in Dyes, Antiques, Stains, Glues, Waxes, Finishes and Conditioners.
You're pretty much stuck with it. You'd do more damage than good trying to remove the dye. -
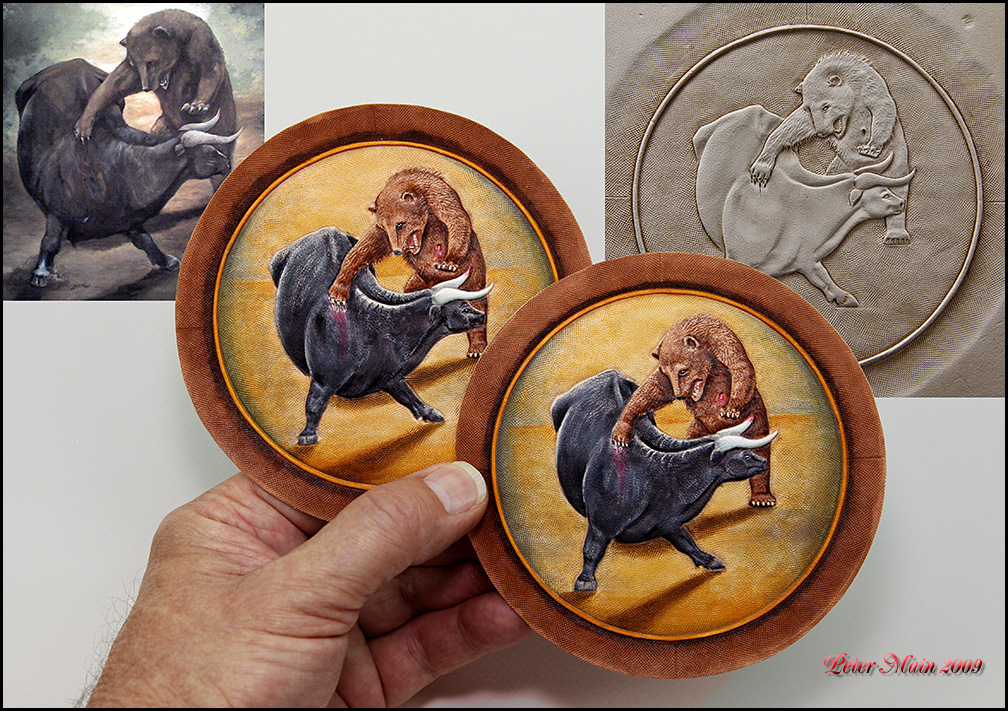
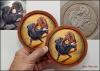
...here are some new inlays for boot tops that will appear in a chocolate calf background. The original photo is shown at left and the uncolored carving at right. The colors were altered by request...the foliage was not required so the subjects were more featured. These were colored with spirit dyes. Peter
-
What is the Best Way to Remove the Chrome Off Tools
Rawhide replied to ArtS's topic in How Do I Do That?
I asked Peter Main this question a while back and he said that he heats them up with a mini torch til cherry red (in a vise of course), and then wire brushes the chrome off, then cool in water. He also said that he doesn't trust the newer craftools to do this with, cause he doesn't know what they are made with. -
That's funny! The newer Craft Japan tools I have from Hidecrafter's are of much better quality than the current line of Craftools. Hopefully the quality will increase, but thank God for the custom makers...Maybe more expensive, but if you gotta replace tools several times the more expensive tools are worth it. It's not just that the tool bends, or breaks but the time lost going back to the store to get another, or even worse having to wait for shipping.
-
It's the tools. They are definitley lower quality than those from the days of old. I've done it on a pear shader with a 16 oz maul.
-
Jim, Glad that helps you out. Since you're a lefty, you should be able to reverse the instructions, except still stitch toward yourself. Bob's awls are the best...also, the versa groover, while expensive, is the perfect tool for the job... it excels where all others fail, HANDS DOWN.
-
Kevin, I saw George last night at the guild meeting and he was happy to know you asked about him... As far as the recent health issues...He mentioned that he had to spend 3 days in the hospital after a fall outside his home where he hit his head...Fortunately, everything looks ok. He's still in a little pain, but otherwise, he's fine. And may I mention a faboulous 76 years old.
-
Hi Jim, Here's how I do it. I am right handed, so I hold the awl in my right hand with the right hand needle in between the index and middle finger (kind of like a cigarette). and the left hand needle the same way. I pierce the hole from right to left, with the front of the project facing the right hand. Insert the left hand needle, reach over the project with the left hand and pull the needle through about 5-6 inches and pull the thread into the upper corner of the diamond shaped hole. Then insert the right hand needle behind the thread in the hole. Switch the left hand needle to the right hand and use your left hand to pull the right hand needle through. Pull the stitch up tight, and repeat with the next hole. I stitch toward me. I hope this helps. If not, let me know and I'll try to take some pictures.
-
Kevin, I sure will tell him. I hope to see him tomorrow at the guild meeting .
-
Hidecrafter's used to carry it, but they don't anymore.
-
Chuck Smith's website isn't functioning...you'll have to call or email them and they can email you a catalog. Chuck Smith Tools PO Box 2647 Valley Center, CA 92082 Phone: 760-749-5755 Fax: 760-749-5355 E-Mail: olsmoothie@sbcglobal.com
-
Thanks for the welcome Damon. I look forward to meeting you. (Not sure what I can teach, but I'll show you everything that I know ) I plan on being at the guild meeting Tuesday night.