gunfighter48
-
Posts
195 -
Joined
-
Last visited
Content Type
Profiles
Forums
Events
Blogs
Gallery
Store
Everything posted by gunfighter48
-
I'm out in beautiful, if somewhat rainy, Seattle Washington. Born and raised in Washington but we've lived in almost every area around the state. When I was 12 we spent 2 years in Orange California. We had to move back to Washington because the smog was so bad ( 1960 - 1962 ) 2 of us couldn't take it, missed 3 months of school because of lung infections. Also spent three years in the Garden State, NJ, thanks to Uncle Sam. Was stationed at Ft. Monmouth, at Eatontown NJ. Met my wife at the USO in New York City, always knew I went back one too many times!! She was a volunteer at the USO. We've been married 39 years, and they said it wouldn't last!!!!!!!!!!!!!!!! Have two grown daughters and 2 grand kids, one boy and one girl. Love to spoil them and sent them home, revenge on my one daughter!!! John
-
Those are great for the first holsters!! Your molding looks very good; are you using a press or doing it by hand? Are you going to dip dye them or use a piece of wool or dauber? I like Fiebing's USMC Black and the medium brown. You can thin them with alcohol and get just the right color. If you don't already know, don't use neatsfoot oil on holsters it will soften the leather and they won't hold their shape. After dyeing I use a couple of light coats of Lexol conditioner and then 2 coats of Super or Satin Sheen. John
-
That's a great holster for a first try, nothing to be ashamed of!!!! My first three went in the garbage, even I couldn't stand them!!!!!!!!! John
-
did me first holster tonight
gunfighter48 replied to Drac's topic in Gun Holsters, Rifle Slings and Knife Sheathes
As stated above, chrome tanned leather will eat the finish on most guns and the suede will gather dirt/grit and scratch the gun. The best liner for holsters is 4-5 weight veg tanned leather. Glue the flesh sides of each piece of leather together, then sew and mold. But take heart, the design is very good, clean and uncomplicated!! If you like making holsters be sure to go to www.pistolsmith.com and look in the holster forum. Some of the top holster makers in the country post to that forum. There is something over 38 pages and there's about 2 lifetimes worth of information in those pages. Great place to learn about holster making. John -
Very nice looking leather work. The stitching is very nice, clean, and precise. John
-
Hi Jordan, Try doing a google search for watchmaking supplies, it turns up pages of suppliers. John
-
You also might try a craft store or a fabric/sewing store. John
-
Brought my mother, who will be 80 in March, up to our house for the New Years weekend. I needed some stuff from Tandy (not really but couldn't pass up their sale) and their sale was good until 12/31, so took my mother with me. The store is in north Seattle. The manager is Dave, just a great guy to be around and very knowledgeable. He knows me very well, he should I have dropped a bundle in his store over the last year!! So he asked me who's the lady with me and I tell him my mother. He says HI MOM and my mother didn't know what to say at first. So she said HI SON, he got a big kick out of that. Anyway I'm looking at stamping tools and above the rack are samples of wallets, folders, etc. My mother spots a wallet she just loved. It's carved in Sheridan style and extremely well done. She pointed it out to me and commented on how nice it was. I'm thinking that if they have that style in stock I'll get it and make it for her. Anyway Dave comes over and asked her if she likes that wallet and she says "yes but I can't afford to buy it". Dave says it's yours and Merry Christmas and a Happy New Year. She wouldn't take it, folks her age have a hard time taking anything they didn't pay or work for. So he asked me if I'd take it and give it to my mother and I said sure (I on the other hand have no trouble taking freebies). So she winds up with an excellently carved wallet. It just made her year!!!!!!! While I'm shopping Dave takes her in hand and shows her what all the different hides are and what animals they came from. She had a blast, couldn't wipe the smile of her face a day later!!!!!!!!!! Great way to start the new year. Great customer service like I used to see 40 years ago and Dave knows I'll be back! John
-
A couple of holsters
gunfighter48 replied to Jordan's topic in Gun Holsters, Rifle Slings and Knife Sheathes
Hi Jordan, That clip on holster is excellent. Great workmanship and the stitching is excellent. Great job!!!!!! John -
Concealed Carry Gun Belts
gunfighter48 replied to paris3200's topic in Gun Holsters, Rifle Slings and Knife Sheathes
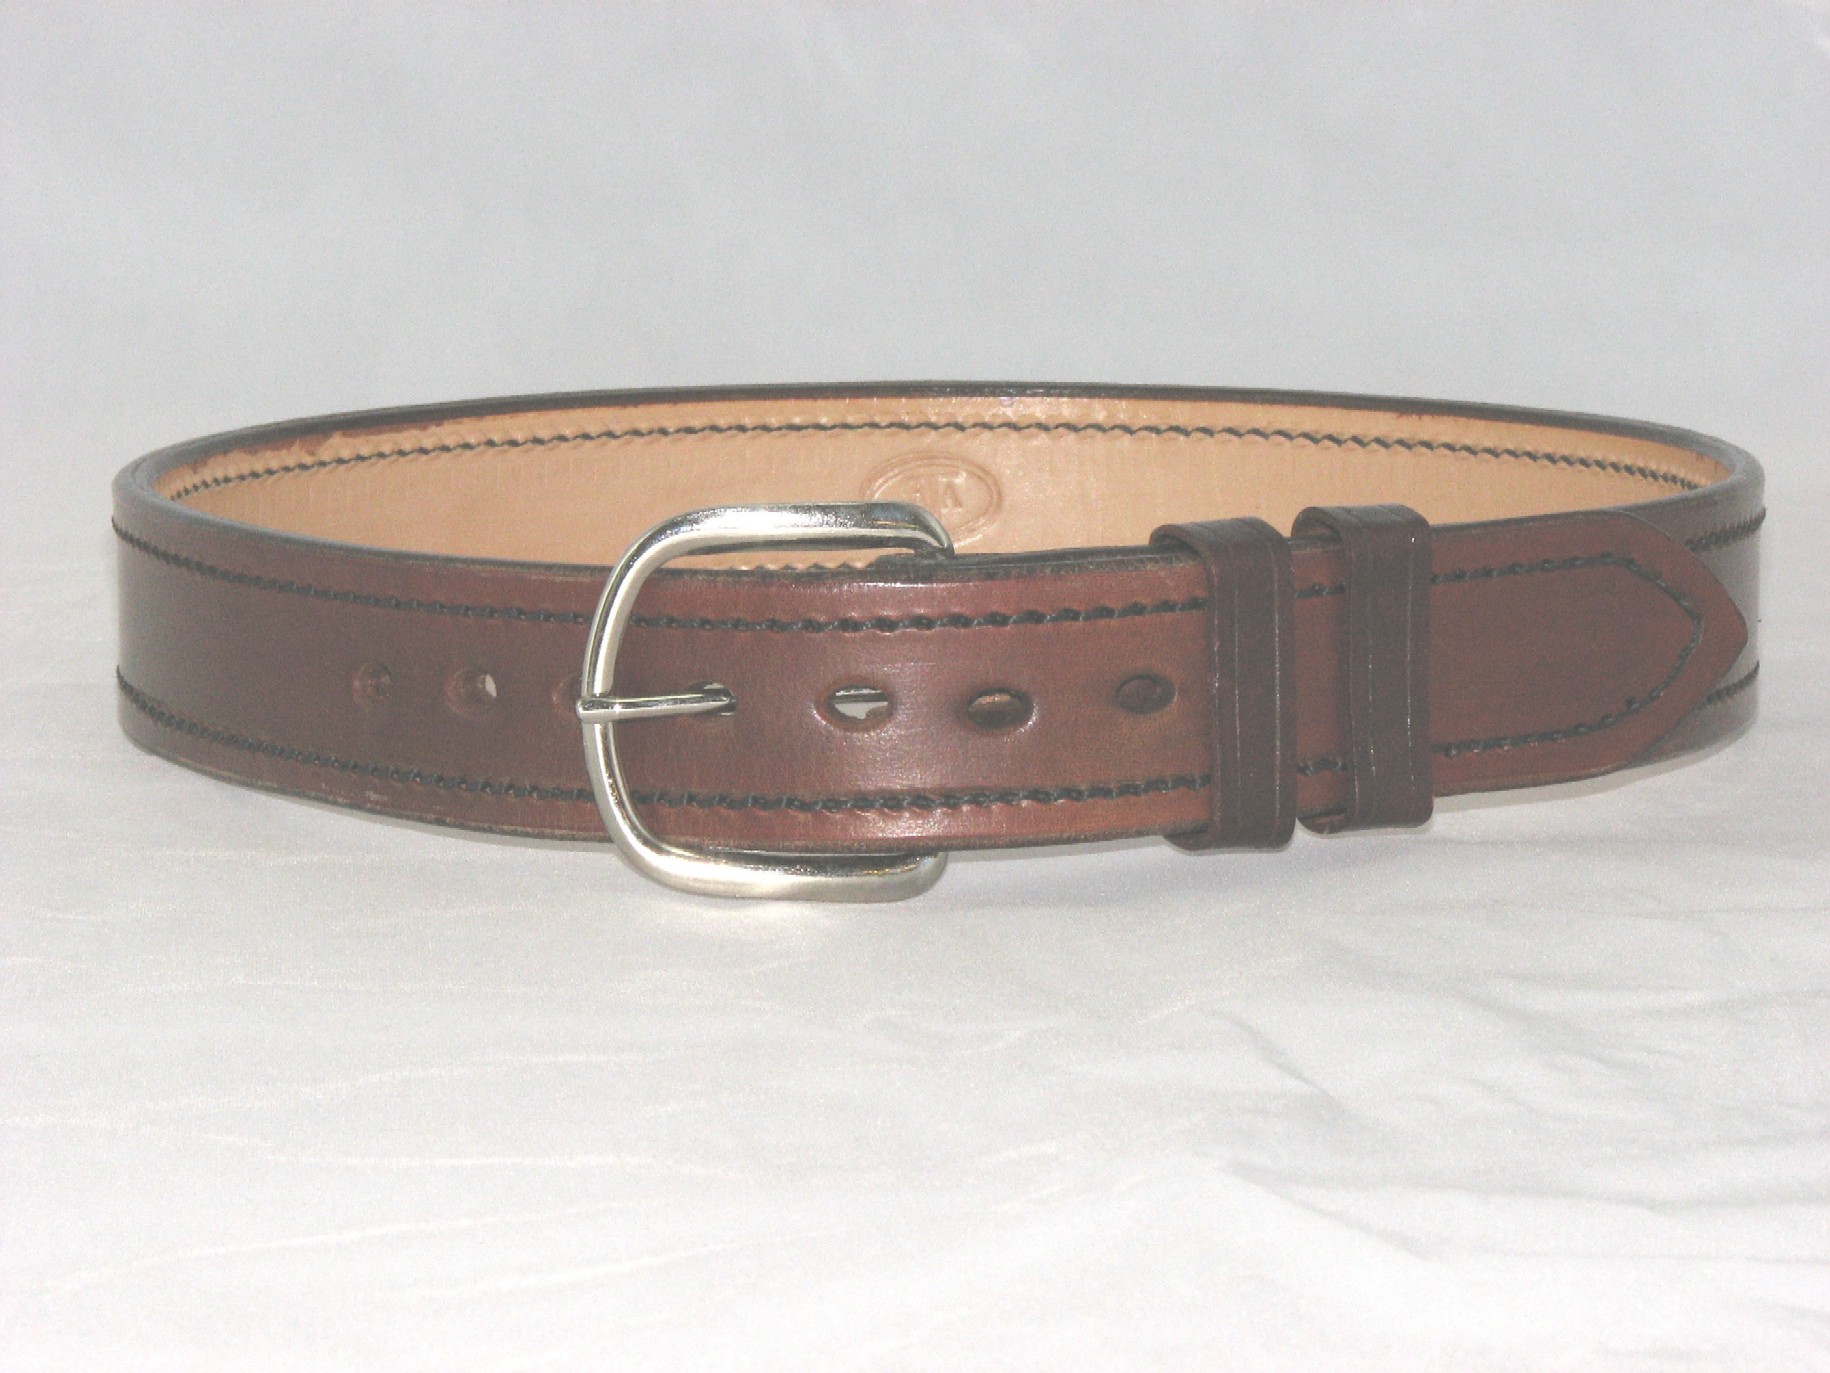
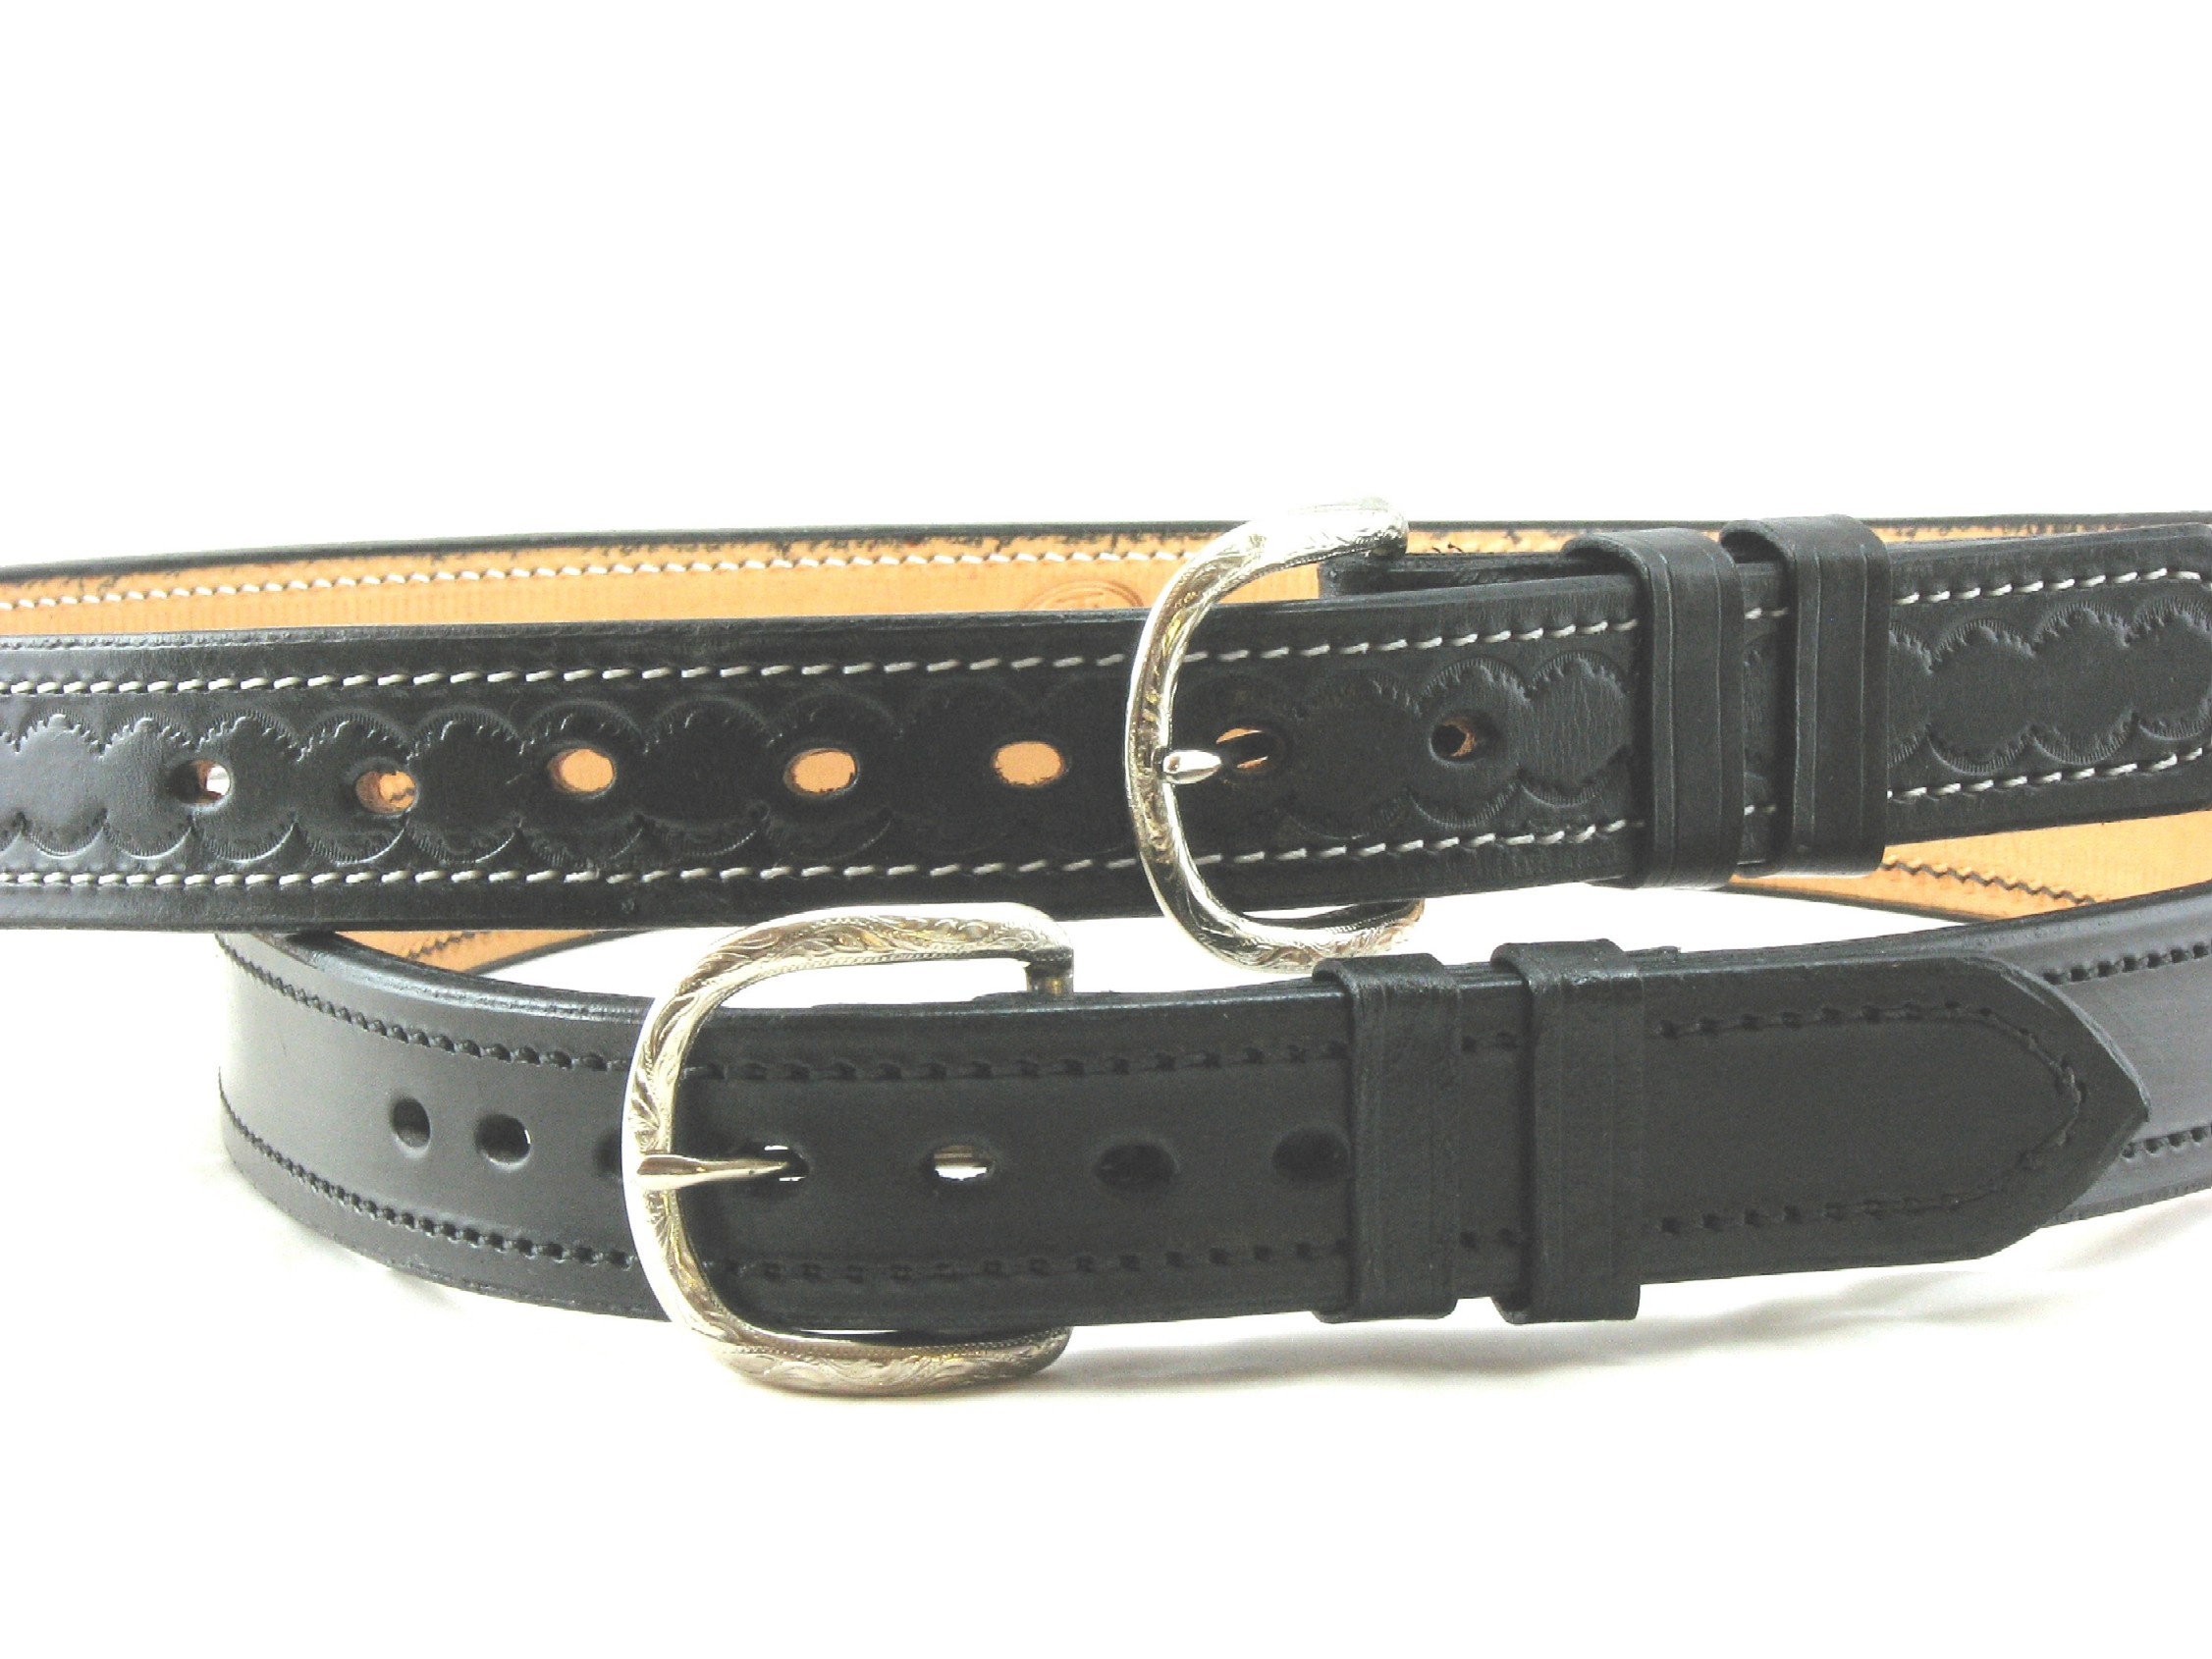
Hi Jason, I've always run both layers full length, then I skive the buckle and tongue ends down to about a 9 -10 oz weight. This makes the belts easier to buckle and reduces the bulk on the buckle end. But I an starting to think about ending the inside layer about 6 - 8 inches from the buckle end and then bending the outside layer around to meet the inside layer. That would further reduce the bulk and make anchoring the buckle end much easier. I don't think it would reduce strength of buckle end. As for belt keeps, I make mine out of 4-5 oz leather using a strap cutter. I cut a block of soft pine a little thicker than the tongue end,as a spacer, and put it on outside layer of the belt. Then I run the keeper around and cut it to length. Then I glue mine to the belt and then glue and rivet the buckle end. I have not been able to pull one of the keepers loose doing it this way. If you are wanting to use screws you'll need to glue the keeps down. I would use Shoe Goo, it's a very think clear cement, kink of like rubber cement. I used it to glue felt soles on my wading boots when I used to fly fish. They never ever came off. I still use it today to patch all types of things where most glues won't hold. Once it's dry you would have to cut the keepers off!!! You can find it in the sporting goods/camping sections of most department or sporting goods stores. One tube will last a long time as it doesn't take much to make a lifetime bond. The only thing I do to the back layer on my belts is use Super or Satin Sheen on them. I usually do two coats and buff well. Hope this helps you. Some of the other folks here have a lot more experience than I do. So they may have a better or different way to doing belts. That's what's great about this site, everyone is very helpful and willing to share their knowledge. John -
Here's a couple of pictures of the belts I am making for concealed carry purposes. They are double layers of 8 oz veg tanned leather glued together, then stitched with 277 thread top and bottom. I skive the tongue and buckle ends to make the belts easier to buckle and reduce the bulk. I sold 8 at a local gun show in Dec. and everyone seemed to like them. Handed out several dozen 2 page brochures and about 50 business cards. This is my first venture into selling my gun leather, would like to do this as a part time business. Only time will tell if it is successful. John

-
Thank God for Johanna, Kate, and all the others that got this site up and running. Now I can cancel the 12 Step program for leather worker withdrawal that I was going to enroll in!!!!!!!!!!!!!!!!!!!! I was on the site the night it went down. The first 4 hours I was annoyed and figured it was a temporary thing. Tried the next morning and the site was still down and I started to get the shakes and a facial twitch. Tried later that day and it was still down, nearly went into convulsions!!!!!!!!!! Started looking for a withdrawal program to wean me off of Leatherworker.net, and the wasn't any such group!!!!!!!!!!! Figured I might give AA a try!! Nearly went out of my mind, my wife says it wouldn't take very long!!!!! Then Johanna posted the update about getting the site up and running again. I feel soooooooooooooooooo much better now; it's great to be back from the brink of insanity!!! :-) John
-
The blue guns that I have bought generally run somewhere between $34 to $38 each. I only buy ones that are popular, 1911s so far, and will be getting some of the glock, S&W. Ruger. I also use my own guns to make holsters. If the customer is local then I get their gun for about 3 days to do the fitting and molding. I am not large enough yet to spend a bundle on blue guns!! I will be taking some holsters to the local gun show in April and have a sheet for them to put down which models they would like holsters for. If there is enough demand then I will try to get a blue gun. John
-
I like it. For a proto, not too shabby. Certainly better than I picture my first holster.Ever since I started using oil dyes, mixed with neatsfoot, all my troubles have ended trying to get the color I want. 3 parts neatsfoot, 1 part dye, always gets me close to what I want, and no streaking. Just add dye to oil to darken You won't want to use neatsfoot on your molded holsters. The holster leather will become too soft and won't hold its shape when you try to mold it. John
-
Never work on leather when you're tired. When hand stitching, your thread will always be too short!!!!!! Glue aways goes where you don't want it to. Machine stitching is NOT as easy as you think it will be!!!!!! Your sewing machine will always screw up half way through you project. Every project cost more for materials than you thought it would. Keep you fingers away from the bobbin on cylinder bed sewing machines!!!!!!!!!!!!!!!!!! Alway wear old clothes when dyeing leather. Leave the credit cards home when going to the leather supply store!!!!!!!!!!!!!!!!!!!!!!!!!!!!!!!!!!!!!!!!!!!!! NEVER tell your better half how much you spent at the leather supply store!!!!!!!!!!!!!!!!!!!!!!!!!!!!!!!!!!!!!!!!!!!!!!!!!!!!!!!!!!!!!!!!!!!!!!!!!!! !!!!!!!!!!!!!!! John
-
shark skin holster
gunfighter48 replied to Randyc's topic in Gun Holsters, Rifle Slings and Knife Sheathes
Very nice pocket holster, I like the concho!! The shark skin should make it almost indestructible. What size is the Colt pistol? John -
Hi Jordan, Man that looks great now that it's finished, nice job! I agree about your stitching, looks like it was planned that way. I also use Fieblings medium brown and get the same brown/mahogany look. I mix my dye with alcohol, about 4 - 8 to 1, if I apply two coats of with this mixture it comes out a nice brown. But if I apply 3 or 4 coats I get the brown/mahogany look. Two coats doesn't always get a nice even dye job. My customers seem to like the brown/mahogany color. John
-
Hi Jordan, Here is a picture of the two presser feet that I made. The castings are off a little in the channel that goes onto the presser bar. I had to use some reinforced cutoff wheels and some grinding stones in my Dremel tool to alter the shape so that the needle went BETWEEN the toes and didn't hit on one side or the other. I emailed Ryan at Neels Saddlery and he said you can loosen the screws that hold the presser bar and rotate it slightly to get the presser feet centered. But I wanted each of them centered so that the dual toe foot that came with the machine fit correctly. Anyway after I got each foot centering correctly I cut off one side of the toe, making one right and one left toe foot. Ferdco sells presser feet for their 440R machine that will fit the model 5 but they want $99.00 ea, too pricey for me at this point. Ryan charges $60.00 each for his feet. I could afford to spend the time to make them fit correctly. They work great and let me get right to the edge of what I'm sewing, just what I needed for holster and ammo pouch making. John

-
Hi Jordan, It's looking pretty good, the molding is coming along fine. You'll want to get the stitching as close to the molded parts of the holster as you can. That will help the molded parts from loosing their shape. I just bought two leather presser feet from Neels Saddlery for my Model 5 machine and made a left and right single toe presser foot. These will help get the stitching as close to the molded parts of the holsters as possible. I'll take a couple of photos and post them here as I know you have a Model 5 machine. The other thing I like is a more open end at the muzzle end of the holster. That lets all manner of stuff fall through the holster and not build up in the end. I like your sweat shield, it comes up far enought to keep the beavertail from sticking you in the side. Us fat guys appreciate that!!!!!!!! I won't build holsters or mag holders without a sweat shield. John
-
I am going to make my daughter a Bible cover and want to use a pigskin lining. I have never used a lining before on any of my projects and just want to find out the best procedure to use to glue it to the leather cover. If I use contact cement will it bleed thru to the front of the lining? Any help would be much appreciated. If anyone has any good cross patterns they are will to share, I could use some. Thanks, John
-
Mexican Loop holster
gunfighter48 replied to Warren's topic in Gun Holsters, Rifle Slings and Knife Sheathes
Great looking holster. very authentic. For anyone that's a western holster fan, get the book titled Packing Iron Gunleather Of The Frontier West by Rickard C, Rattenbury. There are hundreds of pictures of authentic western holsters some going back to pre civil war times. It's an excellent book with very good photography and many vintage pictures. It's surprising how ornate some of the holsters were. Cowboys back then also liked beautiful gunleather. John -
Very nice rig, the shark skin really makes it stand out!!!!! Love the belt also, very good!!
-
prefer to sew with Polyester or Nylon?
gunfighter48 replied to JustWakinUp's topic in Sewing Leather
I have been using polyester. It's supposed to hold up better to chemicals, uv, and abrasion, at least that's what I've read on some of the thread supplier sights. I have used Coats and But I still very new to sewing machines and such, so what do I know!!!!!!!! -
I have ordered from these folks and they provided fast and excellent service. http://www.thethreadexchange.com/miva/merc...;Store_Code=TTE
-
Hi Alex, Thanks for the reply. I'm not using edge coat, just regular Fiebing's leather dye. I dye the edges then use beeswax to slicken up and finish the edges. Thought this might be a better alternative to Edge Coat. But maybe I need to go back to Edge Coat. John