.JPG.4e1168cf7a6fb5a83ffe216cc6d17428.JPG)
Tim Schroeder
-
Posts
844 -
Joined
-
Last visited
Content Type
Profiles
Forums
Events
Blogs
Gallery
Store
Everything posted by Tim Schroeder
-
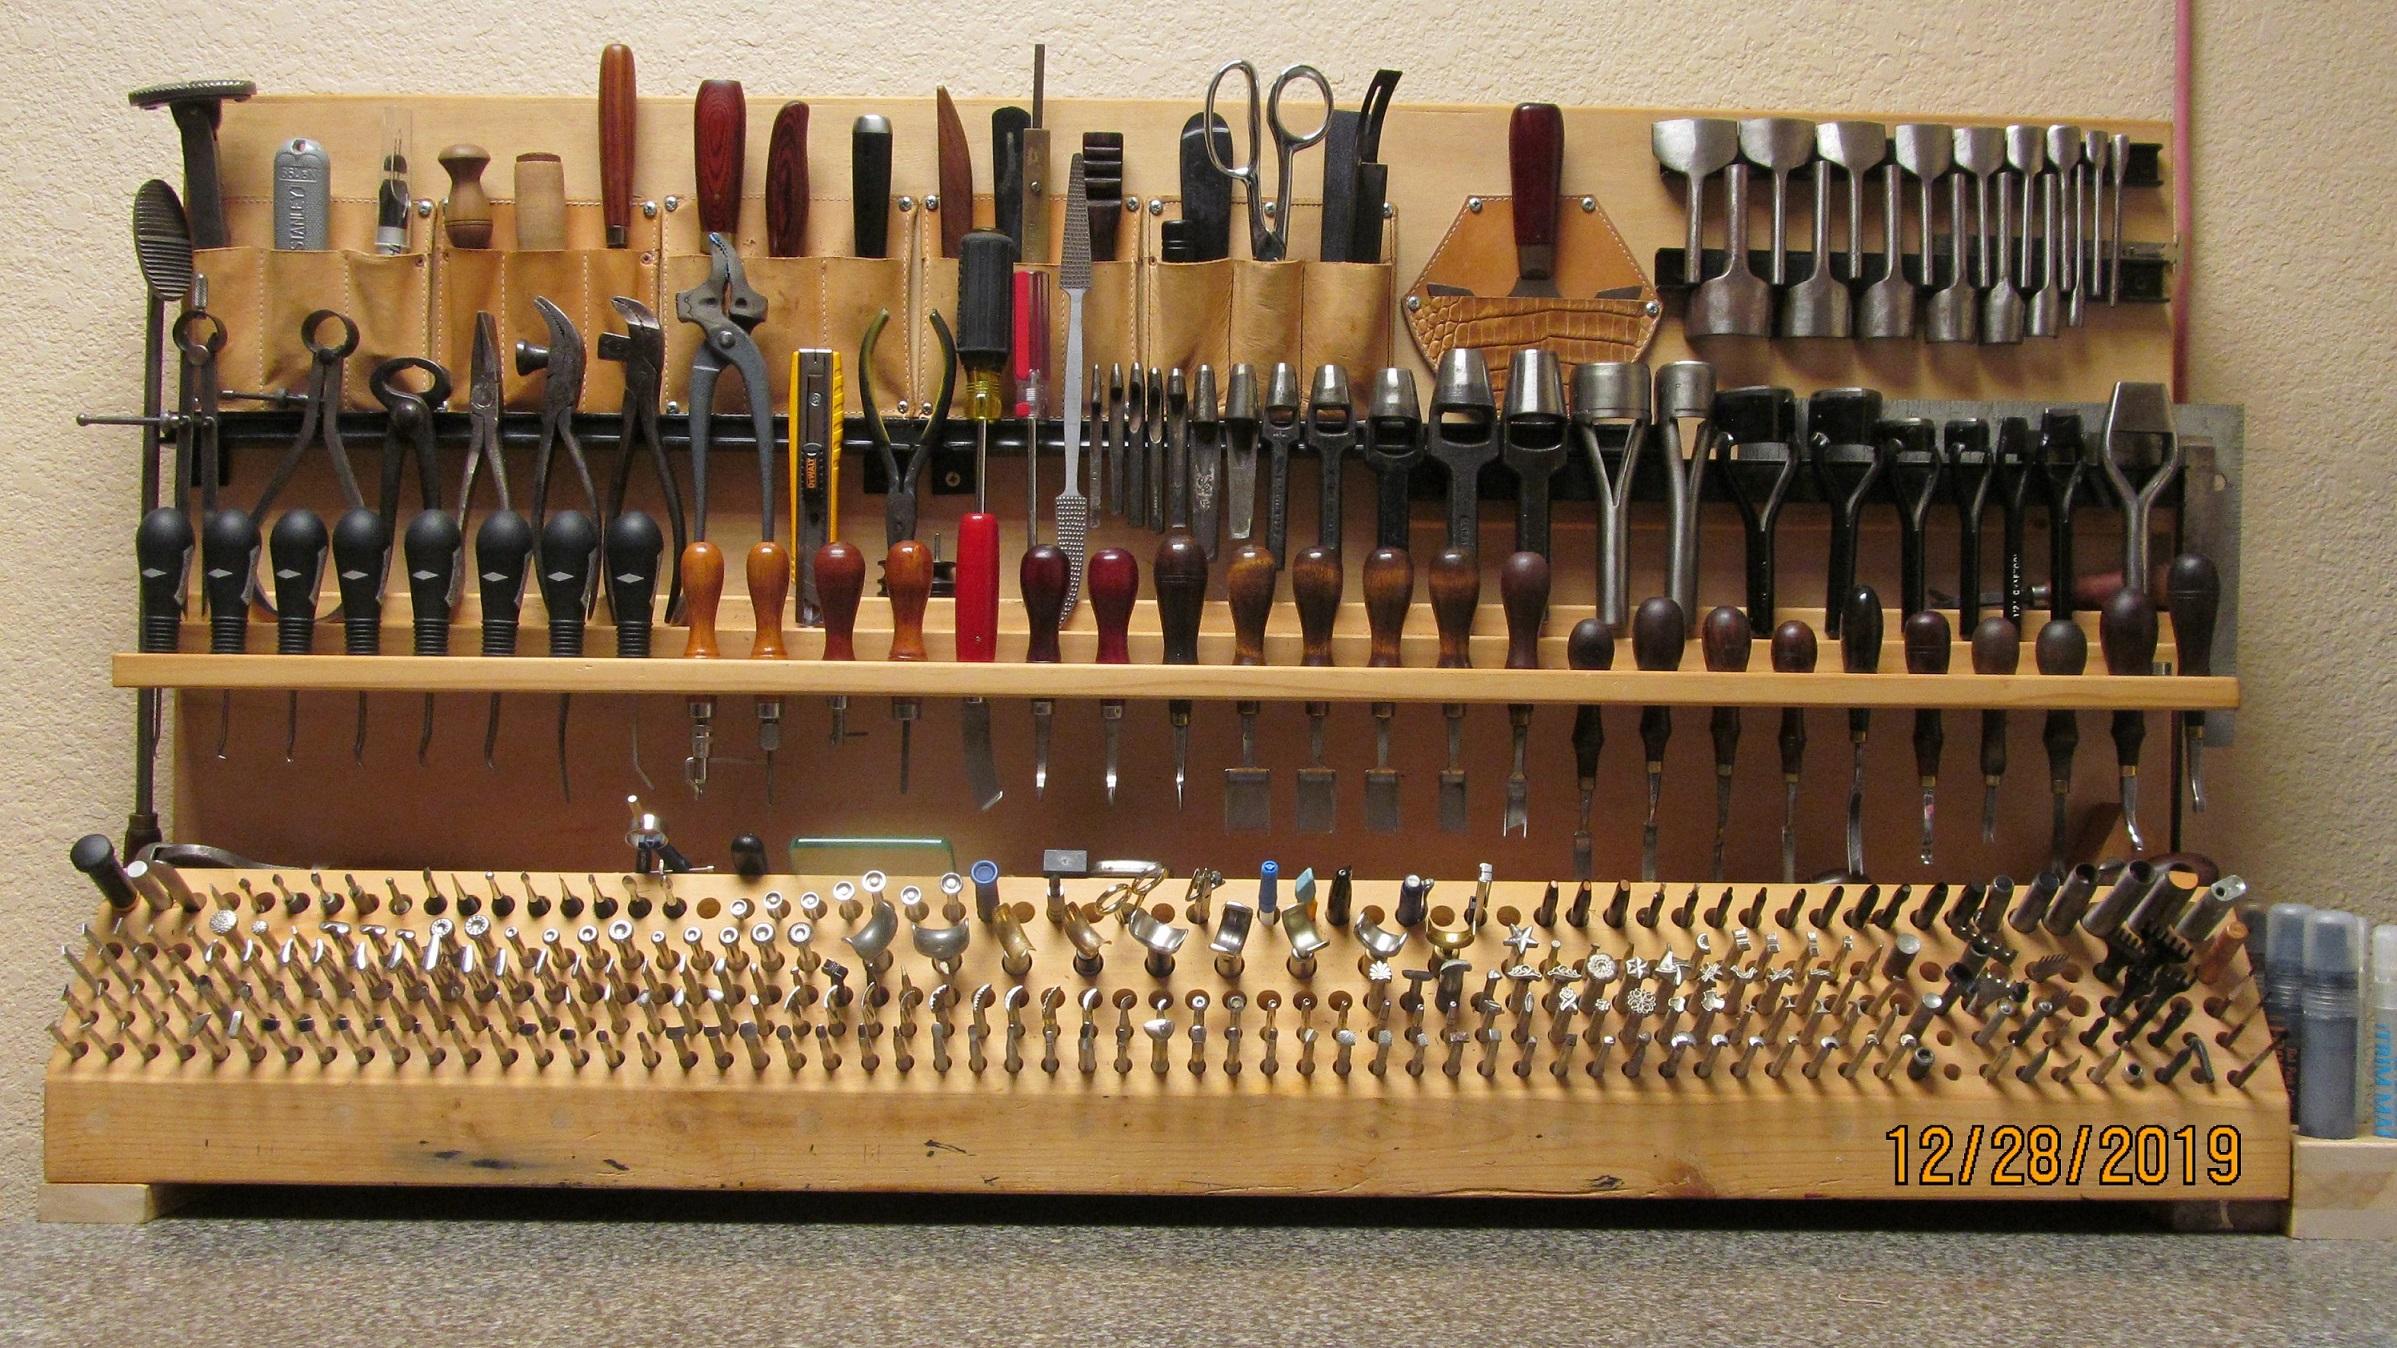
 This tool rack was not my idea. I used Hidepounders as a starting point.
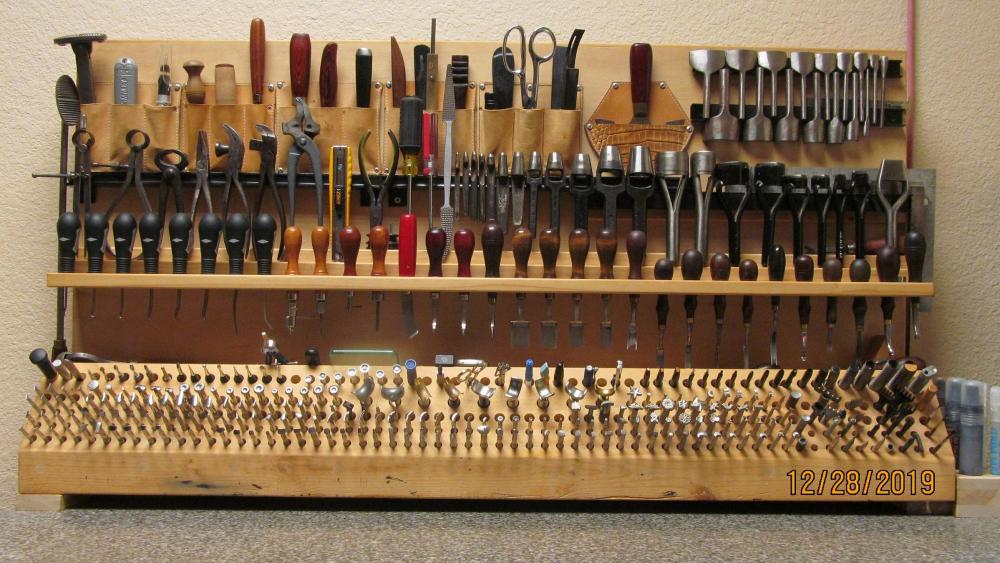
-
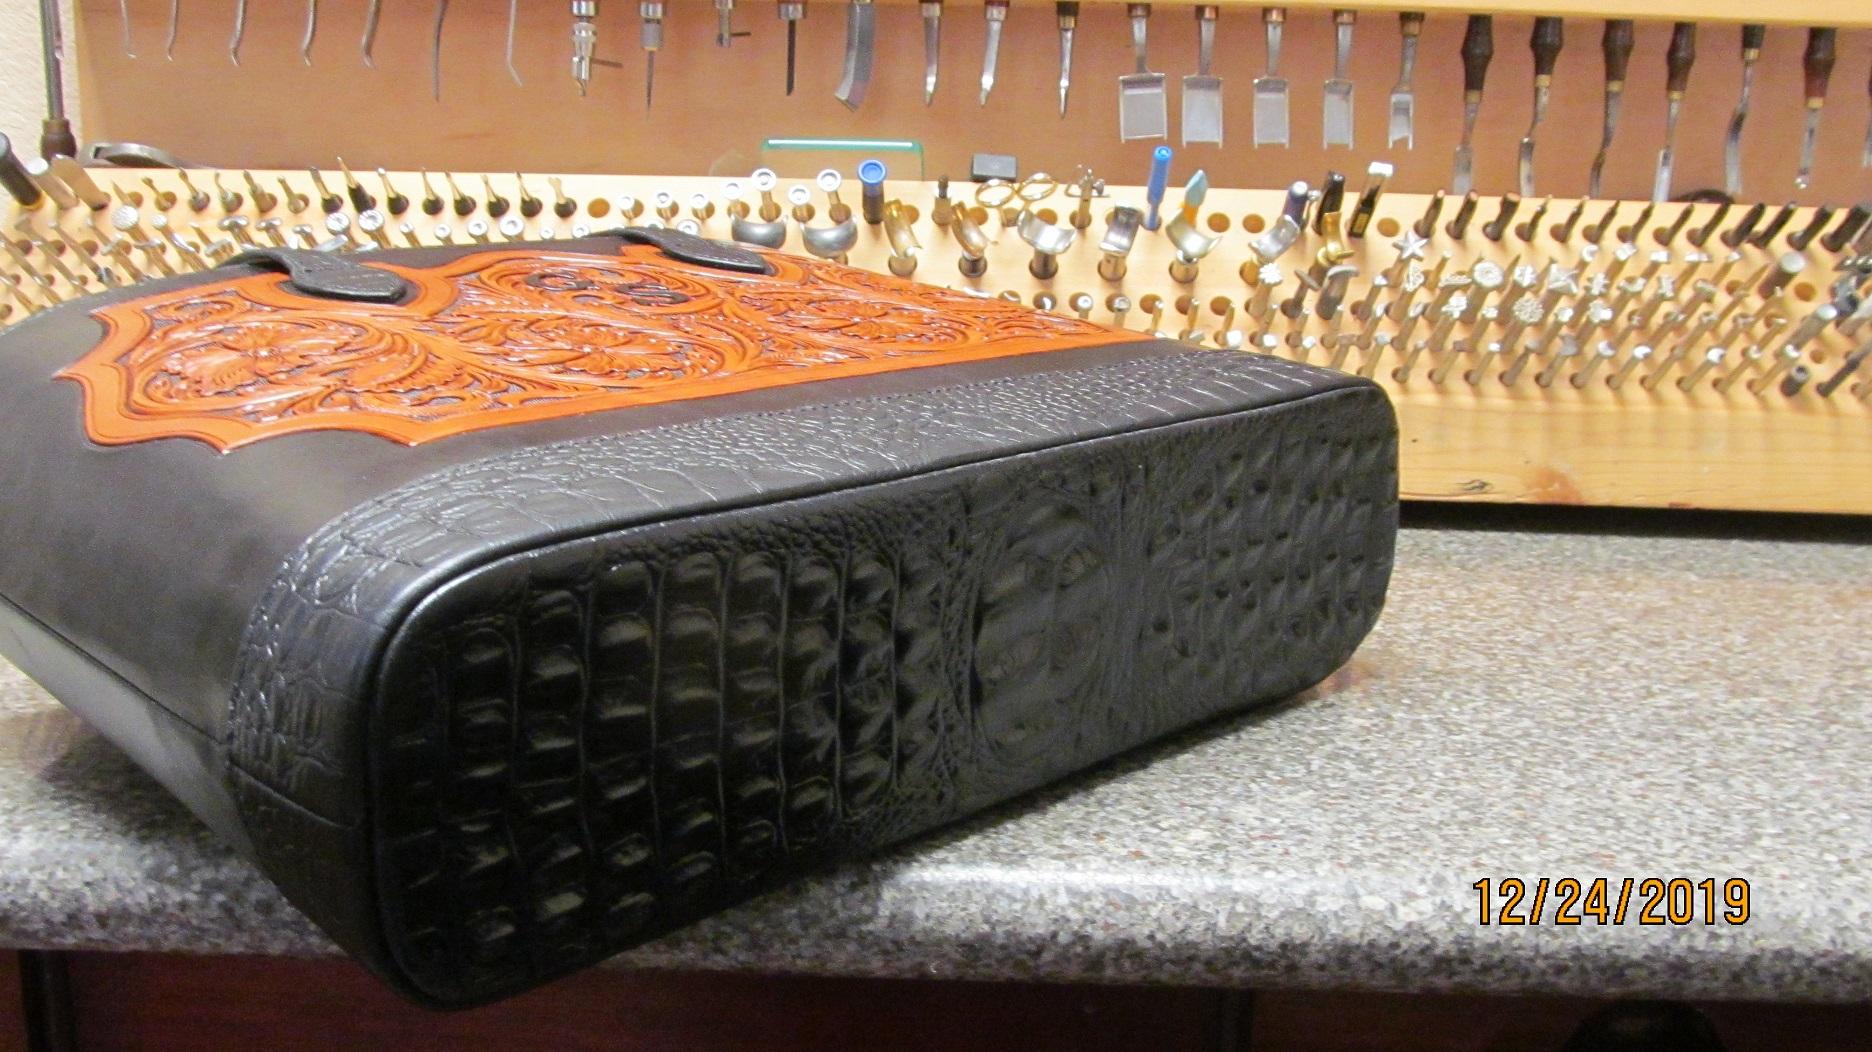
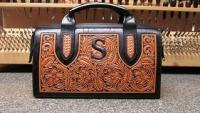
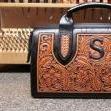
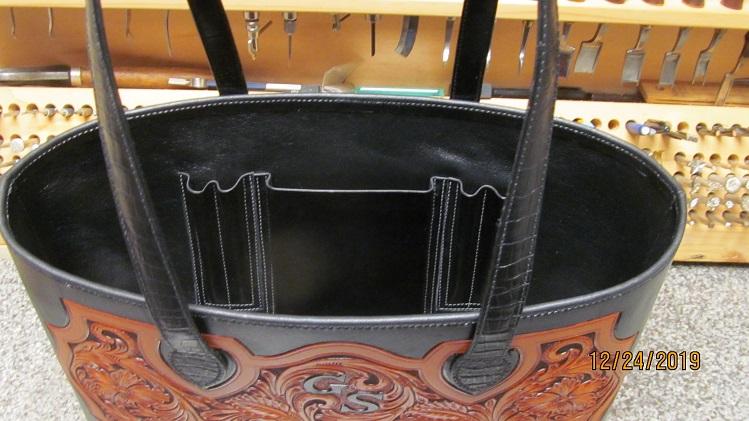
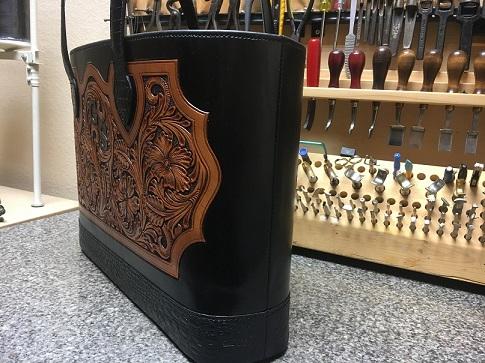
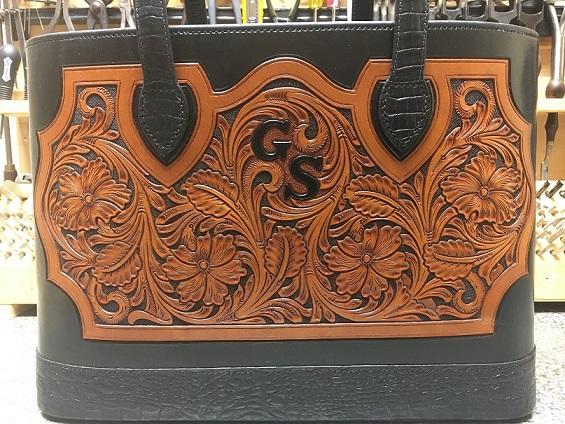
Thanks for the comments. The bottom is a piece of embossed veg tan. It held up really well on the other bag this one is replacing. She said no feet on the bottom. It is sewn together inside out and then turned right side out. The rest of the embossed leather is some cowhide. Thanks and Merry Christmas to everybody.

-
My wife asked for a new Tote Bag for Christmas. She's been carrying the other one for 6 yrs. Lined with Lambskin with veg tan molded pockets. Tooled on 5/6 oz. Herman Oak.

-
No longer available. Thanks
-
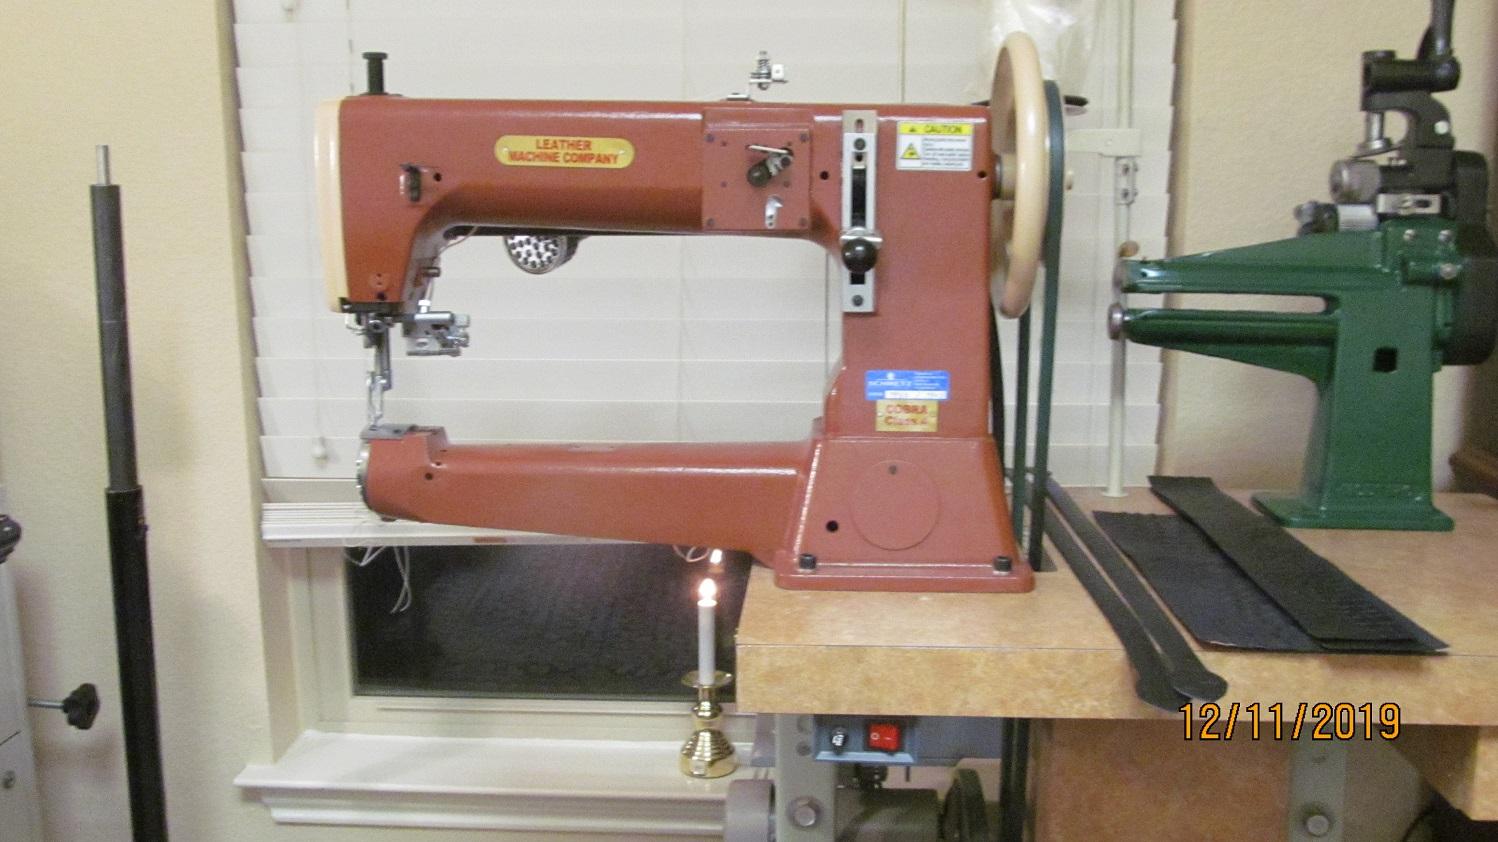
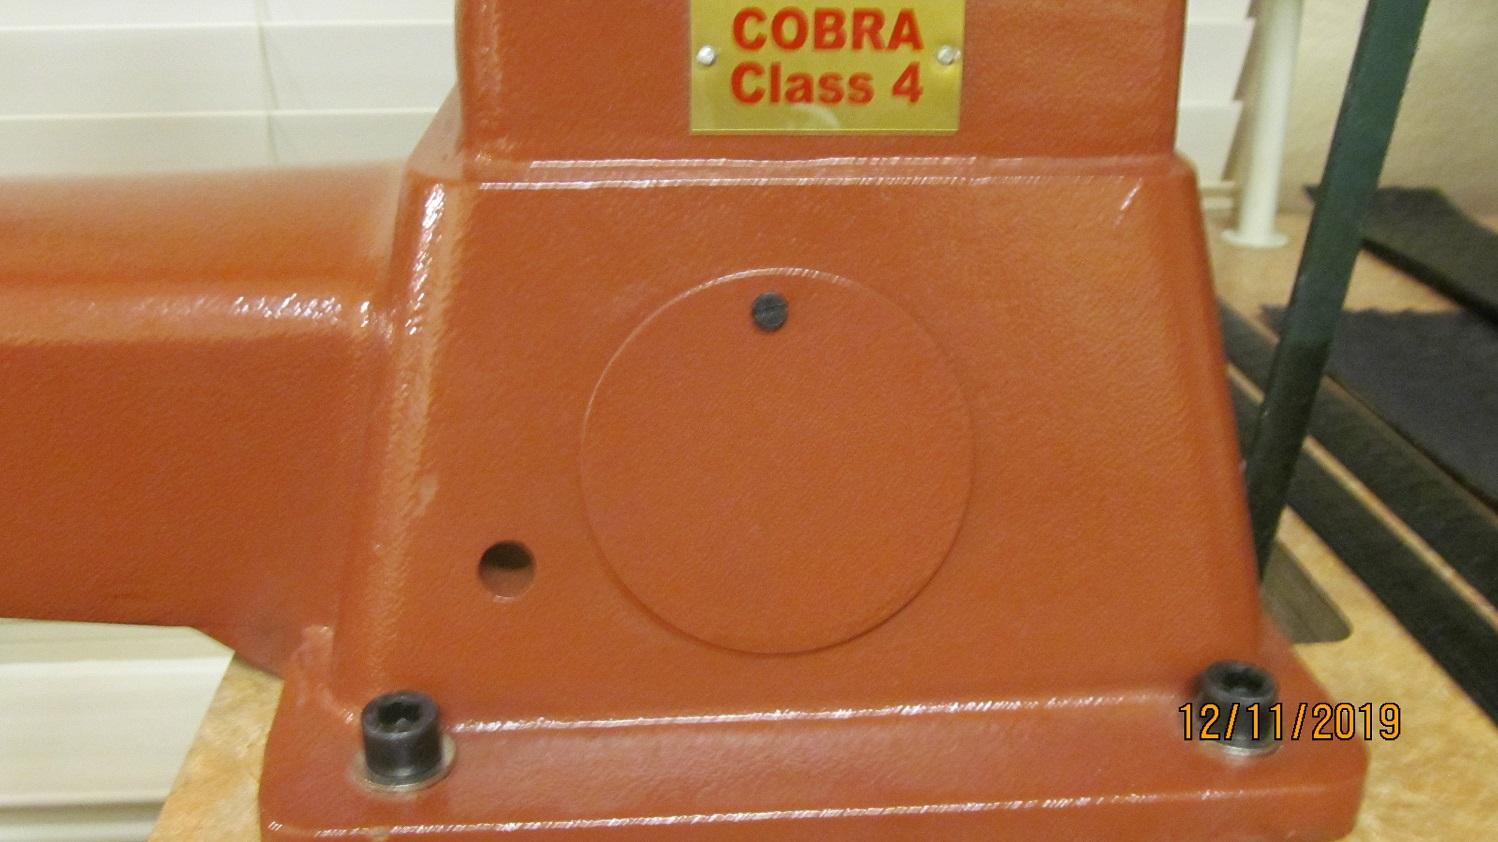
Price was lowered to $2050 plus shipping. The flip down roller guide is NOT included. The premium package has an arm mounted roller guide included.
-
I have a Cobra Class 4 Premium Pkg. machine for sale. HEAD ONLY. $2300 Includes everything in the Premium Package. Machine is just two big for me. A Class 26 would be better suited for what I do. It has two little scratches on it from putting the work platform on it. I made a couple of sets of Bolt Bags with it and other than that it just sits there. Machine is about 1 year old. I have the original box for the machine and will split shipping.


-
Tooled Make Up Bag
Tim Schroeder replied to Tim Schroeder's topic in Purses, Wallets, Belts and Miscellaneous Pocket Items
They are lined. Some with American Flag fabric but most have a slick brown nylon. No dividers. I would send a picture but they are all gone now. I usually make 5 or 6 for my wife's friends and co workers every Christmas. -
Tooled Make Up Bag
Tim Schroeder replied to Tim Schroeder's topic in Purses, Wallets, Belts and Miscellaneous Pocket Items
I use a Douglas stitching groove tool to put a groove on the fold line half way thru the leather. Then use a wide French edge tool to skive both sides of the groove. Then I usually go back and run the grooving tool again lightly to make sure there is a distinct groove and the leather will fold straight down the groove. It should fold really easy if not probably need a deeper groove and a little more skiving. On thicker leather a little moisture on the outside will help keep the leather from cracking when you fold it. -
Tooled Make Up Bag
Tim Schroeder replied to Tim Schroeder's topic in Purses, Wallets, Belts and Miscellaneous Pocket Items
Thanks for the comments. The leather is 3/4 oz. Herman Oak. Learned how to fold the Veg Tan and make it straight and even. -
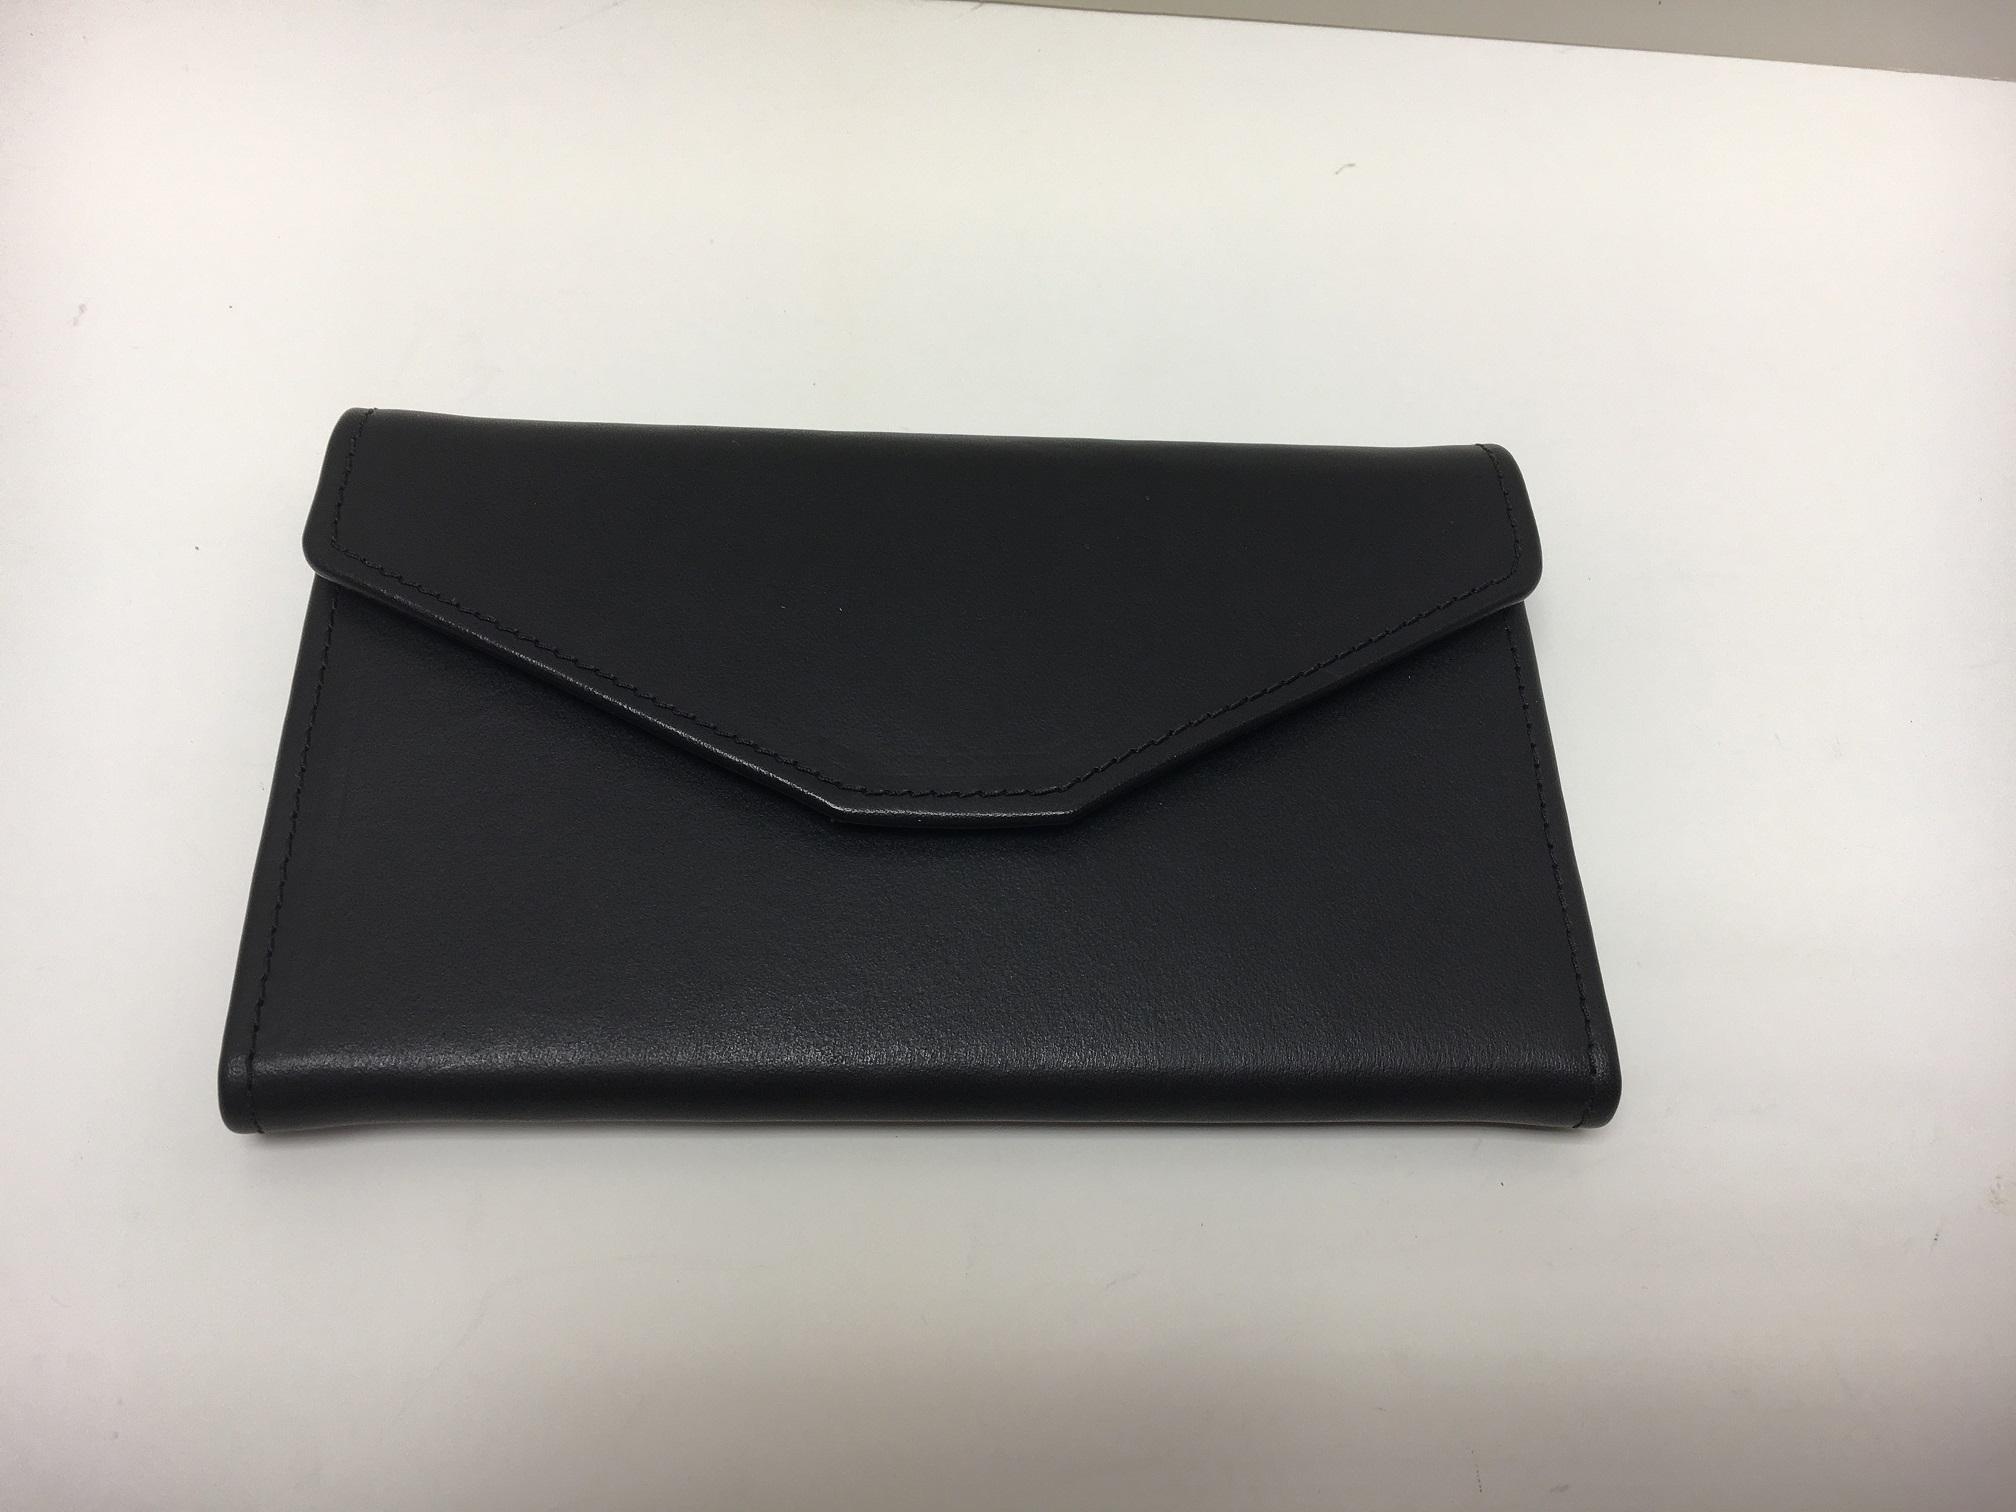
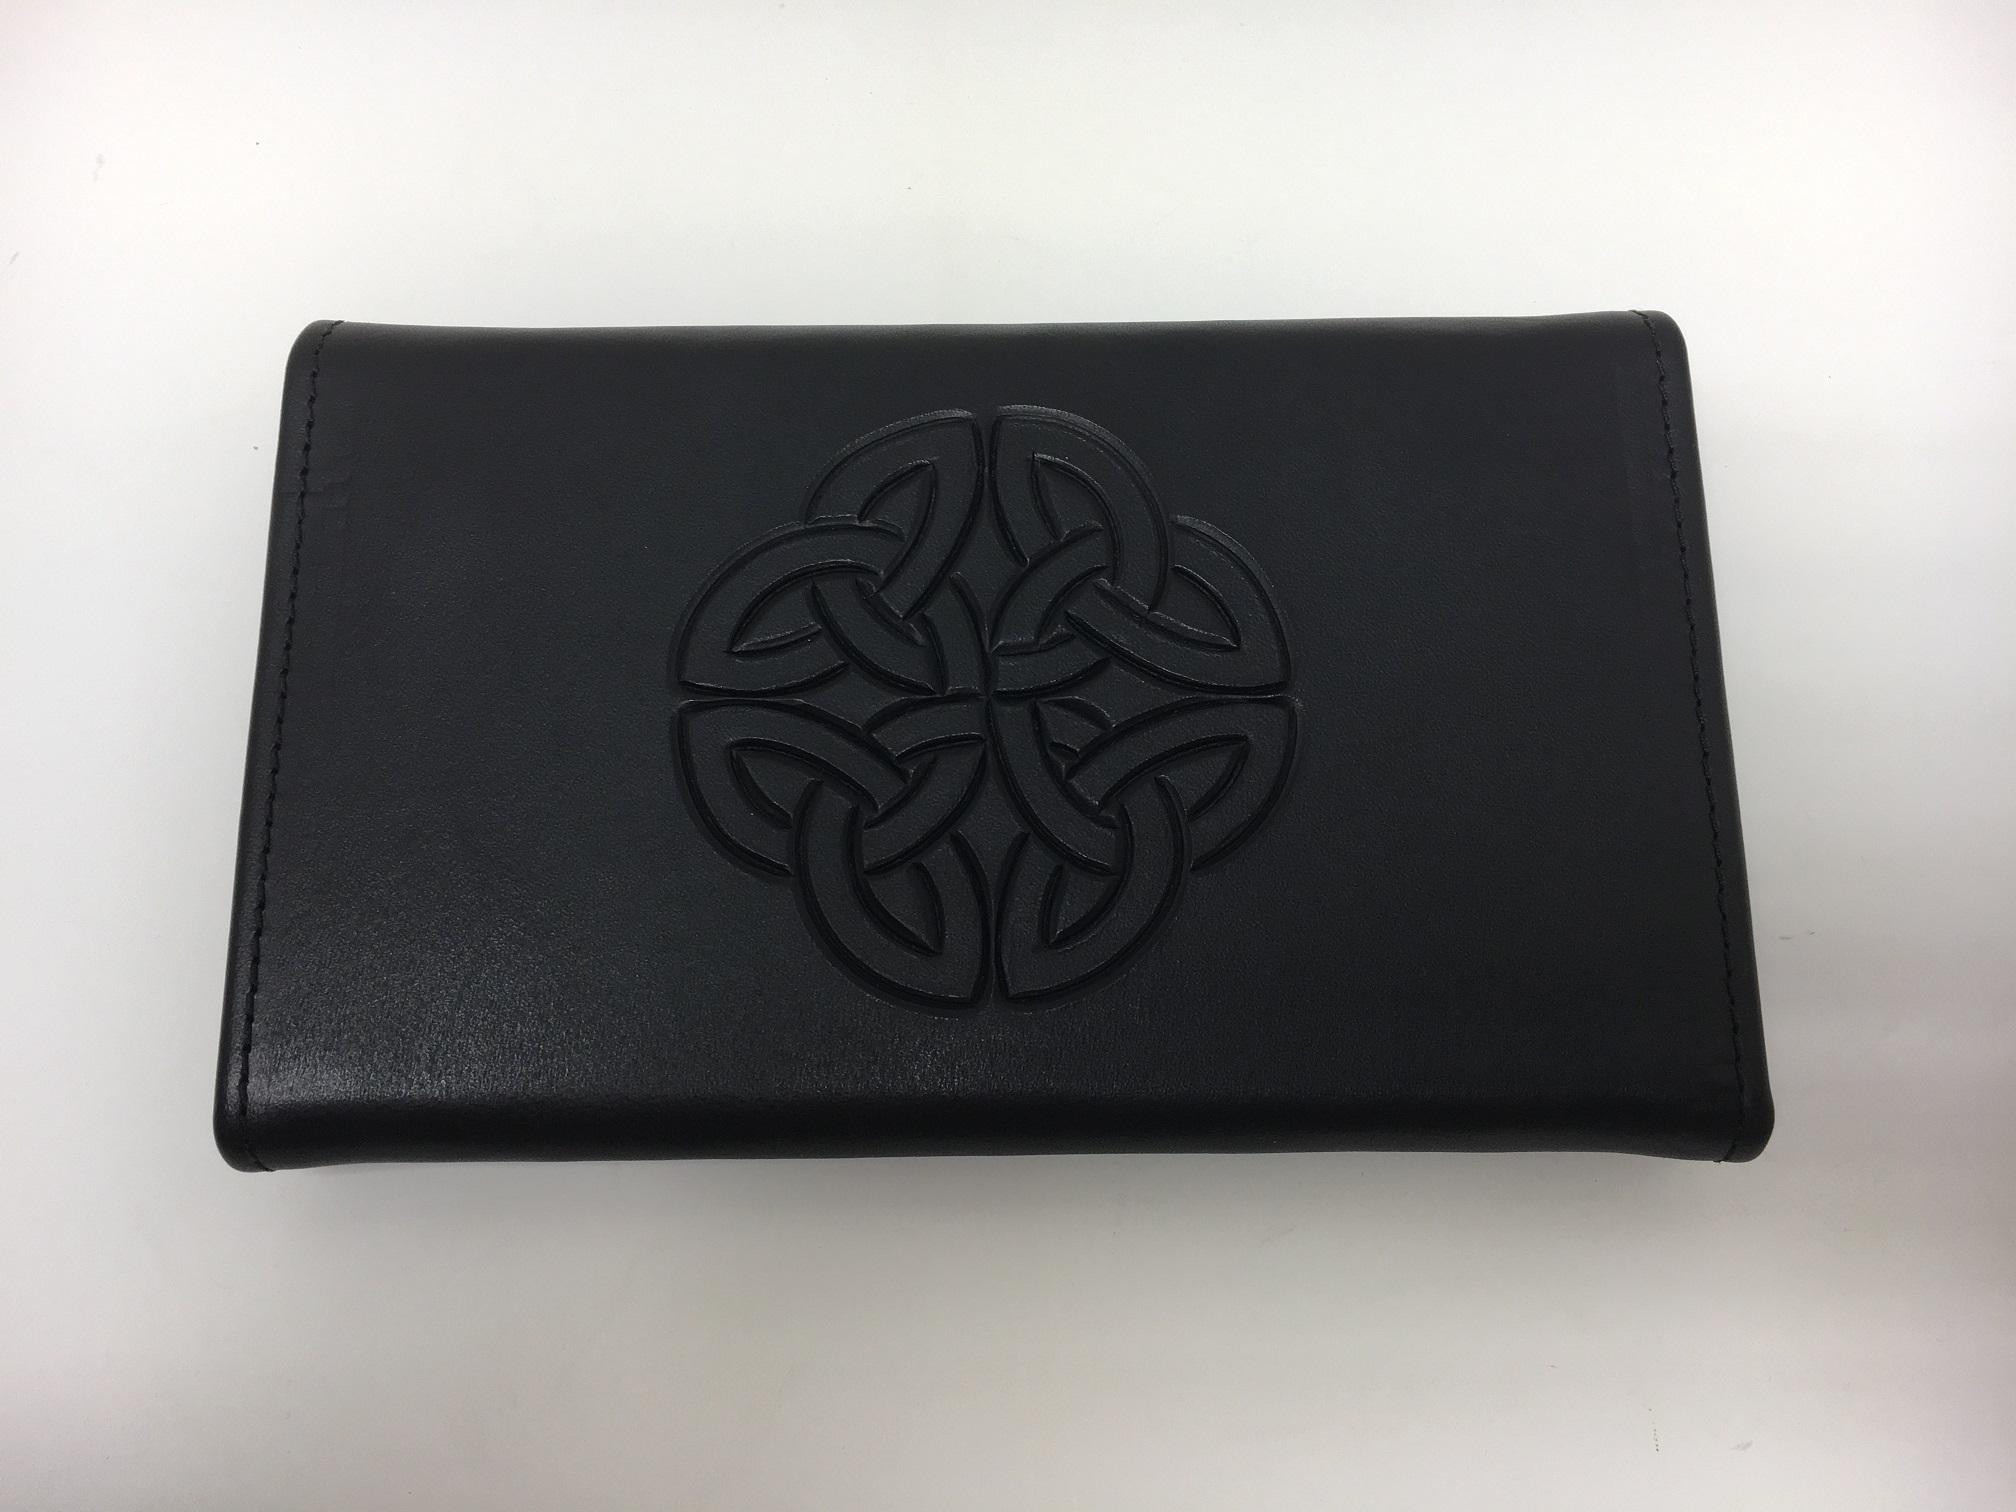
Just finished this travel wallet for my sister in law. They live in Italy so they carry a passport most of the time. She wears a necklace with this knot on it and he has this knot tattooed on his arm. The ouside is 3/4 oz. Herman Oak and the inside is some .5 mm Kangaroo.


-
RFID wallet
Tim Schroeder replied to Tim Schroeder's topic in Purses, Wallets, Belts and Miscellaneous Pocket Items
Thanks Fred I already have some of the copper stuff. Thanks for the tip on the aluminum tape. -
Just curious if anybody is building RFID wallets. Do you need to line every pocket or do you just need a layer in between the outside cover and the lining on the outside so when you fold it there would be a layer on both sides of the cards. I know the RFID material can't be in contact with the cards or it will become an antenna. Thanks for any input.
-
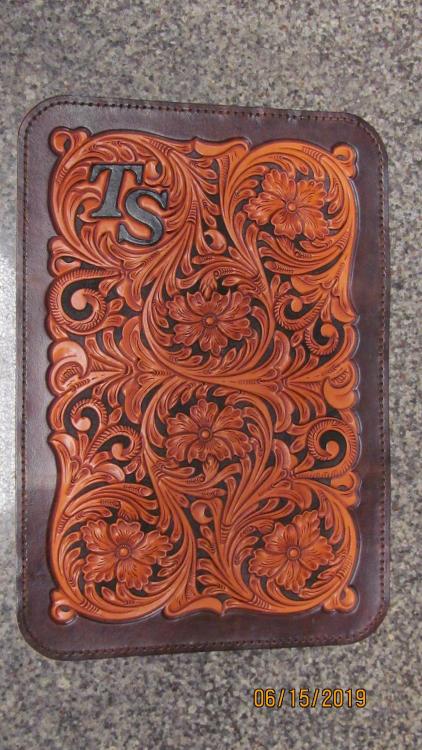
Thanks. This piece took 10 hrs to trace, cut and tool. I usually average about 1 hour per circle plus the fill in areas.
-
Thanks It's a Chuck Smith flower center with a Barry King center shader around it.
-
I tooled this piece to make myself a dopp kit but have gotten to lazy to finish it. Still trying to find some soft chromium tanned leather to make the gusset out of. I made one from some veg tanned leather and dyed it the same color but it was some cheap Tandy leather and it's pretty stiff.
-
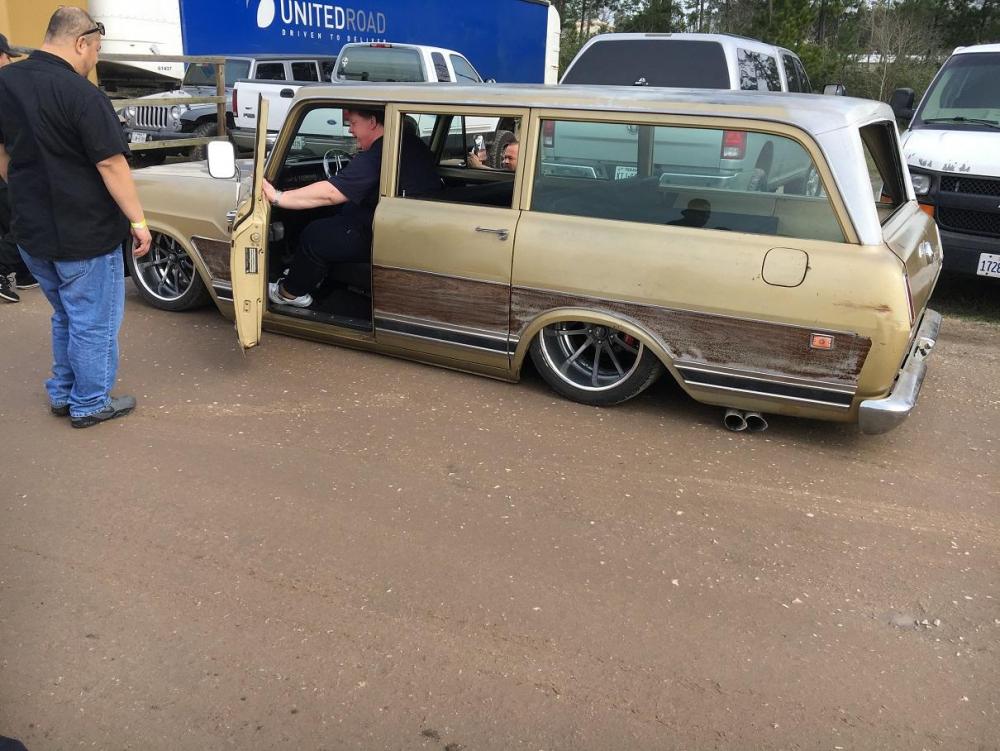
It was for a job. I would love to have this vehicle. LS-1 motor with a Pro charger, overdrive trannny and Ford 9". Not all that big won it sitting on the ground but it's not mine.
-
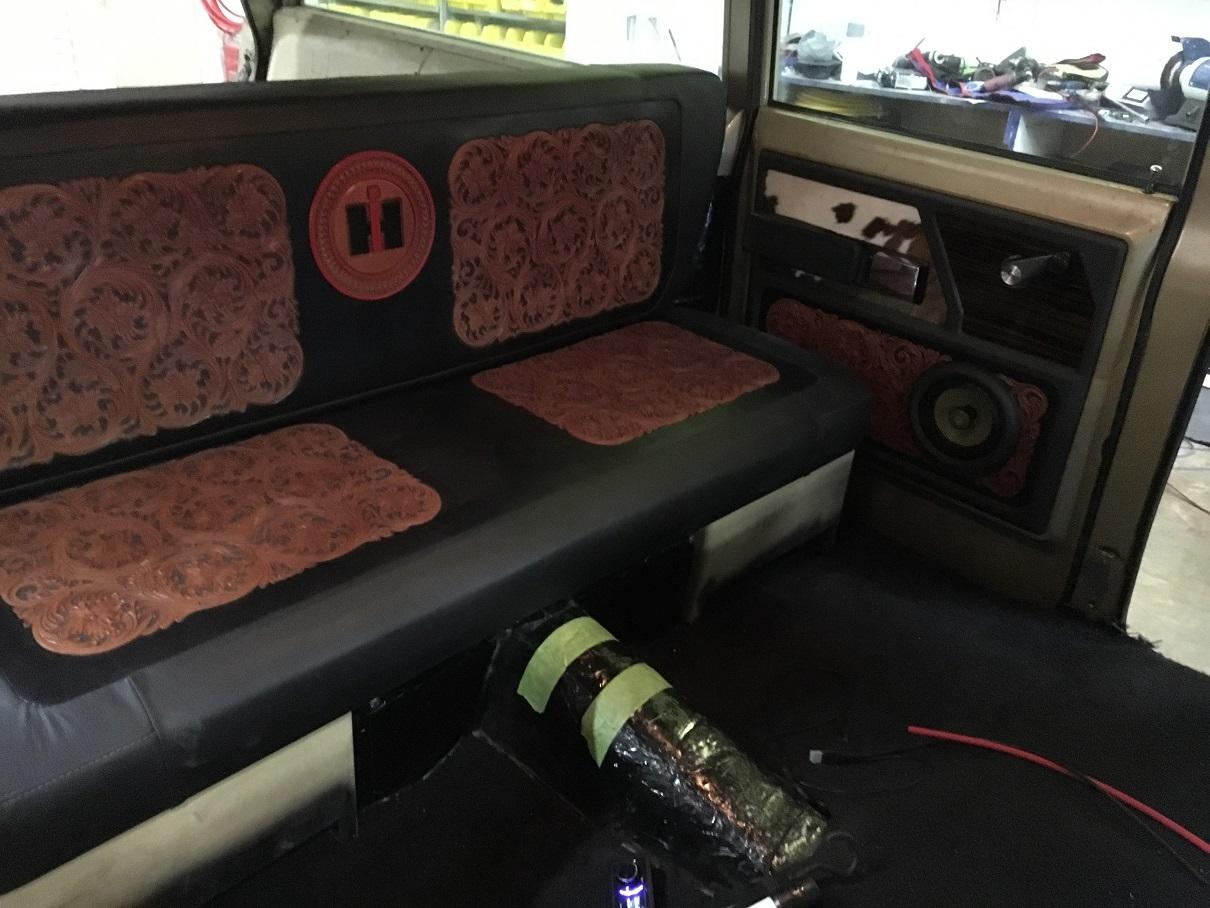
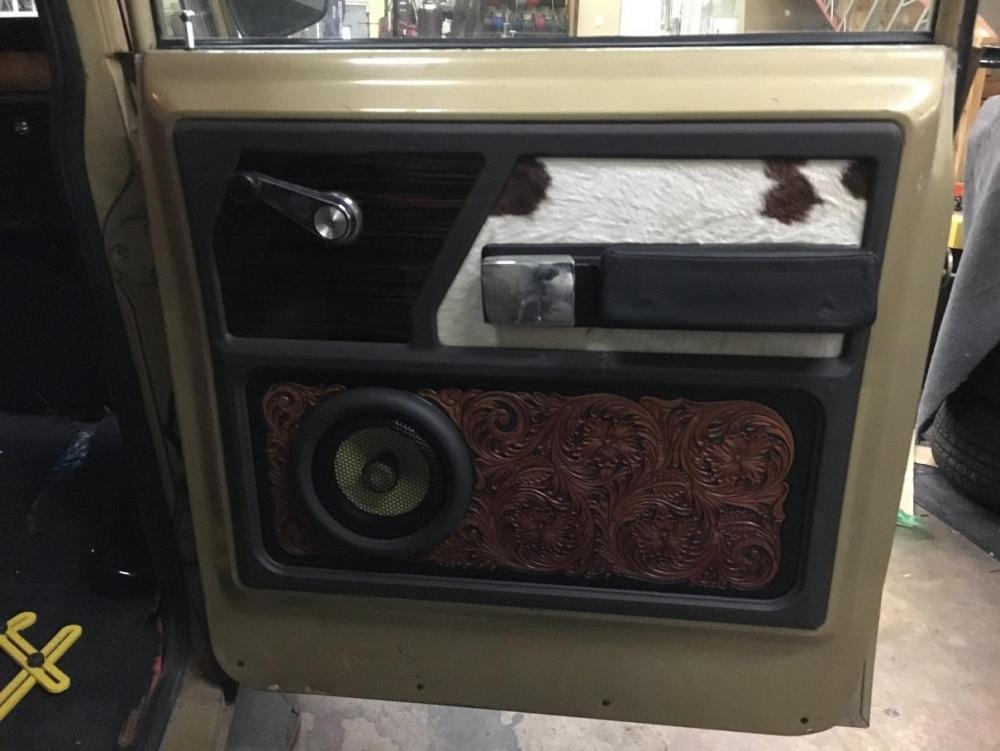
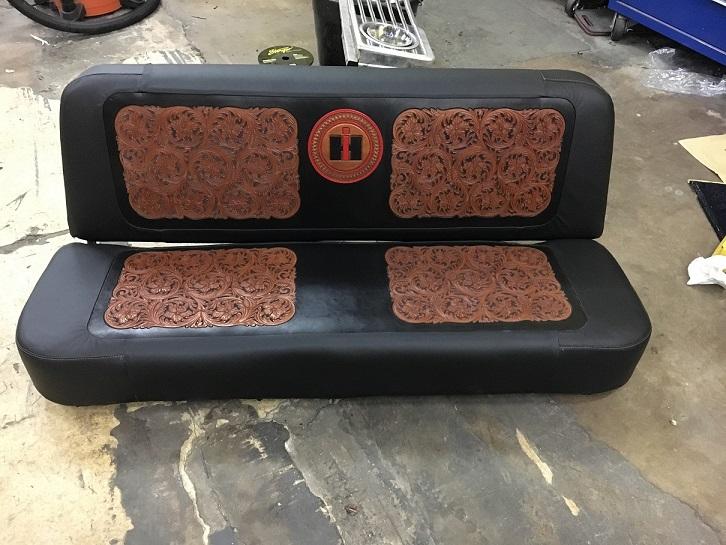
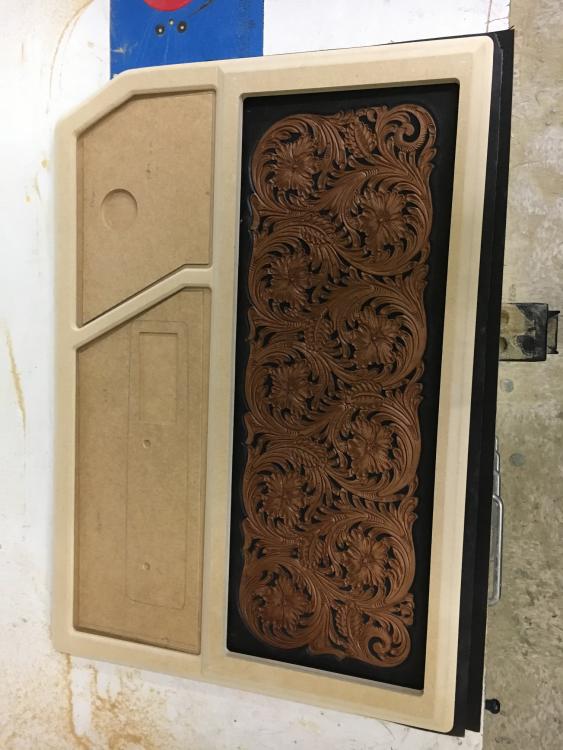
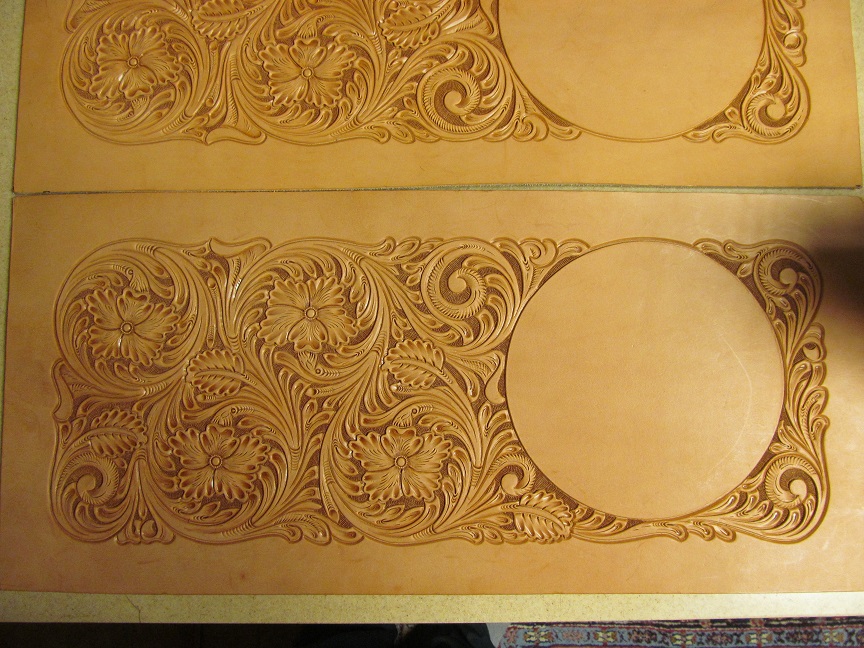
Tooled Seats and Door Panels. The headliner was Hair on hide from front to back.


-
These are the door panels to match the tooled seats in the International Travel All. The car has to be in Houston on Feb. 21 so I should have some finished pictures of the seats and door panels in a couple of weeks. The section with arm rest will be hair on hide and the section with the wi9ndow crank will be walnut wood.
-
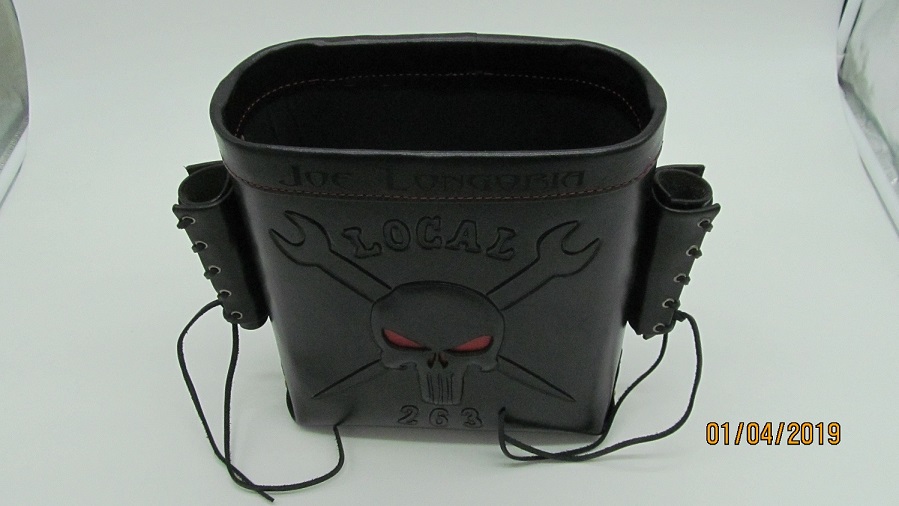
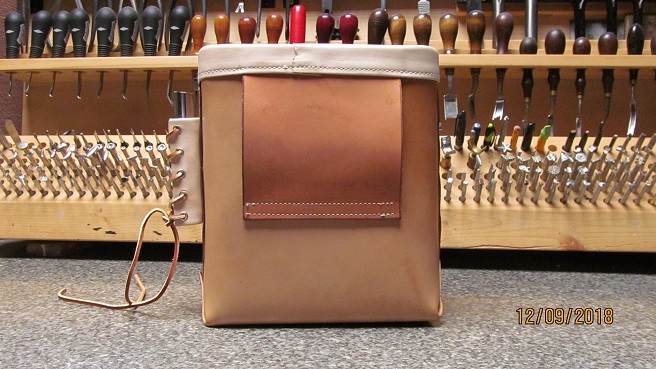
Bolt Bags
Tim Schroeder replied to Tim Schroeder's topic in Purses, Wallets, Belts and Miscellaneous Pocket Items
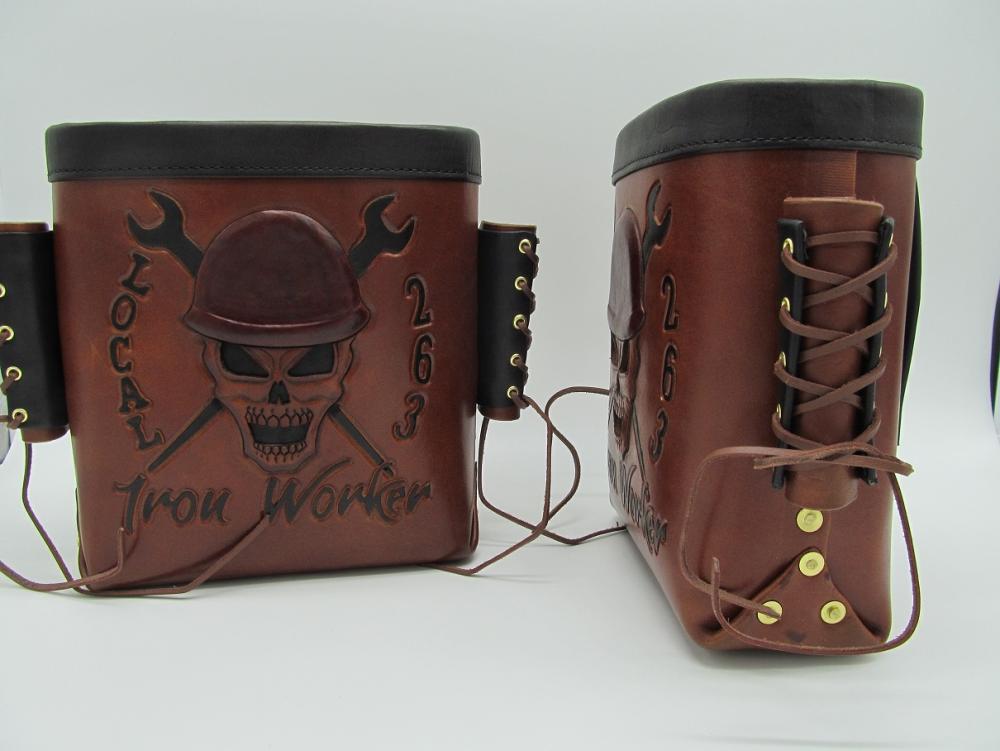
Thanks for the comments. Embossing is when you push the image out from the back. Then you build a plug that fits in the image so it doesn't collapse. The plugs in the brown set are made of 6/7 oz. with another 6/7 oz. on top of that for the hardhat and the another little strip on top of that for the brim of the hardhat. -
Here's a couple of sets of bolt bags. They wanted durable. They are 6/7 oz. Hermann Oak with the top trim out of some cheaper Tandy 3/4 oz. because it seems to stay a little stiffer after I wet it to fold over the top. The skulls in both sets are embossed. They are lined with Flame Retardant Kevlar material.


-
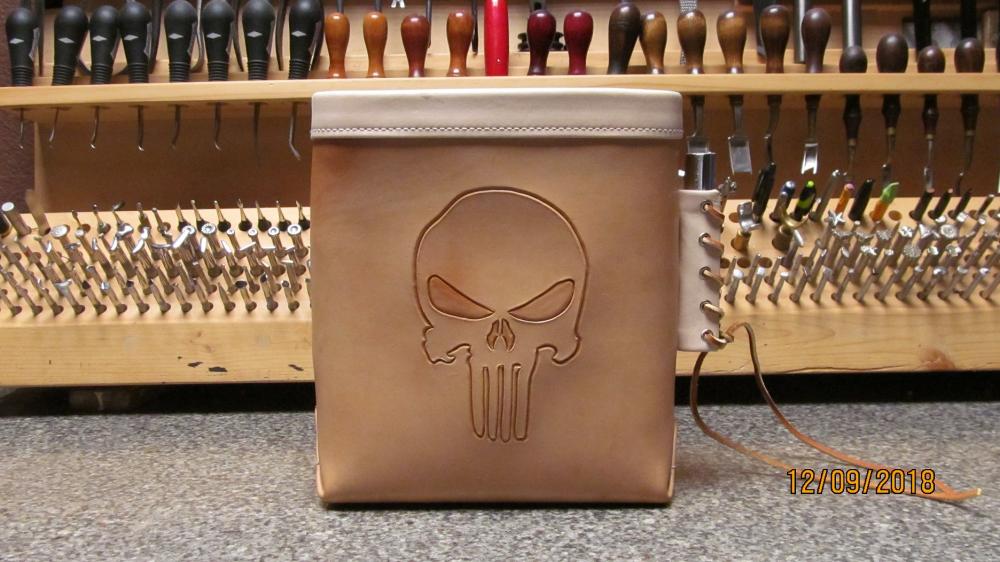
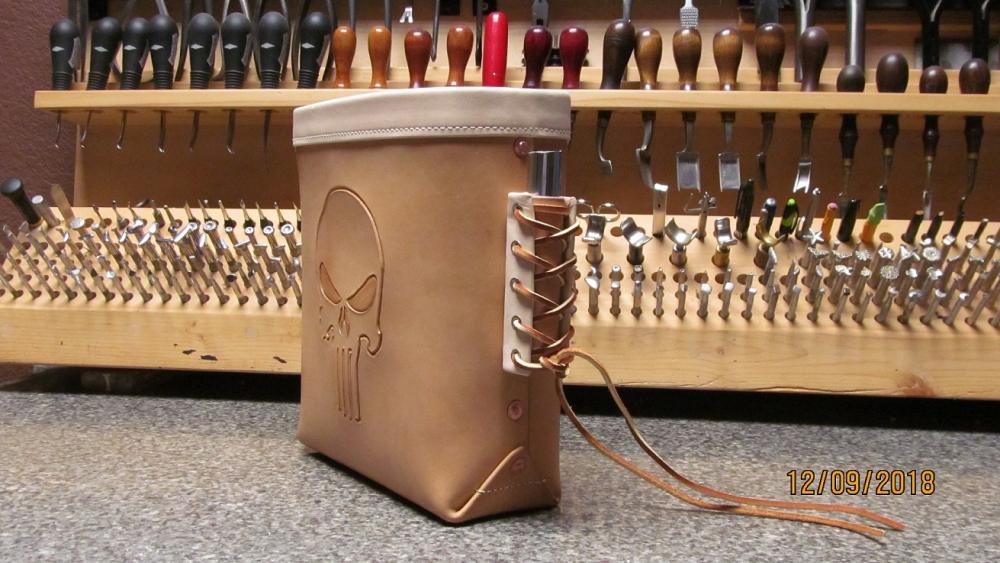
Prototype for some bolt bags I'm getting ready to start making This one is unlined made out of 6/7 oz. Herman Oak and the light colored leather trim is some 3/4 oz. Tandy leather. I'm wanting to make them out of 4/5 oz. lined with some 2/3 oz.. Looking for something thin (canvas maybe) to line them with so the outside can be 6/7 oz.
-
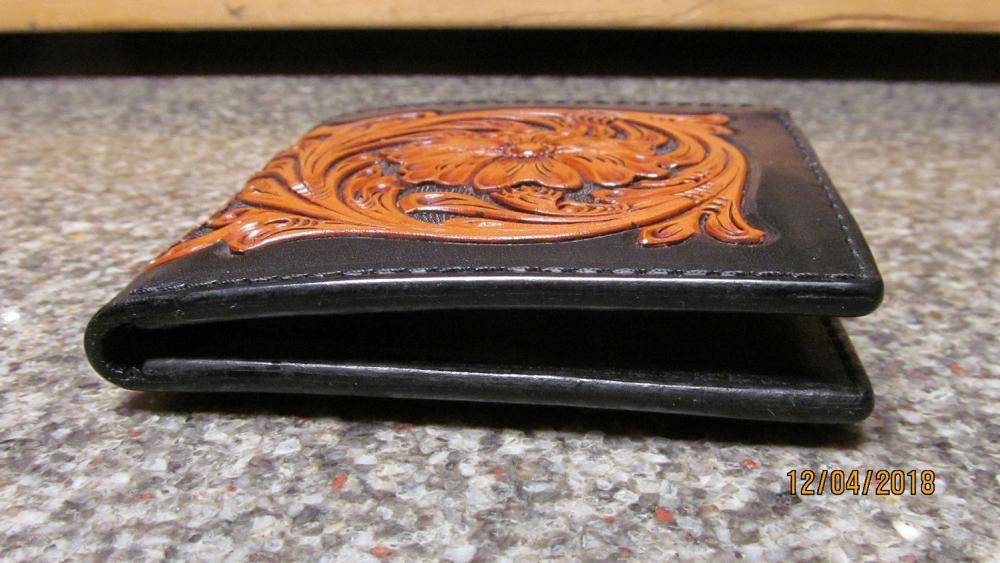
Tooled Wallet
Tim Schroeder replied to Tim Schroeder's topic in Purses, Wallets, Belts and Miscellaneous Pocket Items
I was just looking at the presser foot and it was tilted to the back with just the back touching. Changed that presser foot right before sewing that guitar strap and this wallet. One of those ID10T errors. Been using that machine for years and have never had that problem. The edges are burnished using Glycerin soap, canvas and wax. I can't seem to get the Wyo Sheen to look good on the edges so I usually just put some Atom Wax on the edges when finished.
-
Tooled Wallet
Tim Schroeder replied to Tim Schroeder's topic in Purses, Wallets, Belts and Miscellaneous Pocket Items
Thanks Gary, If your talking about the beveling around the tooling I use Barry King Bevelers then a spoon modeling tool one pass to smooth it up and then a ball point modeling tool to bevel the edge of the tooling so it doesn't look so flat and that also widens the beveling and smoothes it up more. -
This strap is for my wife's brother and Christmas presents are suppose to be a surprise. So I couldn't make it custom fit. He'll just have to deal with it. I'll tell him I will make a new tail piece if it's to long.