


garypl
-
Posts
1,642 -
Joined
-
Last visited
Content Type
Profiles
Forums
Events
Blogs
Gallery
Posts posted by garypl
-
-
2 hours ago, georgiapine85 said:
Thats nice garypl. Dang what a friend to make something that cool for a guys birthday, and thanks for sharing the dimensions with us!
Thanks! I enjoy making small items for friends and family - just started making and selling shooting accessories for some of the guys at my gun club that have seen my work. I’m not interested in turning this into a real job, but nice to sell a few pieces now and then to support my hobby!
Gary
-
4 hours ago, JMcC said:
Good job Gary! I love how the airbrush work came out. Have never tried using an airbrush on leather before. I am interested in trying that out. I guess a cheapo from HF wouldn't be a deal breaker either.
")
I highly recommend the air brush from Harbor Freight for dyeing and spraying finishes where I am not concerned about pinpoint detail work. I use the #93506 air brush - cost $9.99 and there are always 20 or 25% discount coupons online. I:like it because it comes with 5 paint cups that you can switch without having to clean the air brush.
I also use the Harbor Freight #62994 brush, but you have to buy extra paint cups and you have to clean the brush after each use. Keep a straight pin handy to unclog the vent holes in the paint cups - they tend to accumulate dried dye and finish and won’t spray if they become clogged.
Either brush sprays Resolene thinned 50/50 with water and they do a great job.
Gary
-
8 hours ago, Carson said:
Very nice job. Thinking of the cobra class 4 how do you like it? Where did you buy it from?
Thanks,
carson
Hey Carson, I use a Cowboy CB4500 and very much enjoy sewing on it. I am thinking I will get a smaller machine for very thin leather so I can use thread smaller than 138. I bought the machine from Bob at Toledo Sewing - check his banner ad here in the forum.
Gary
-
5 hours ago, onelooneyzeta said:
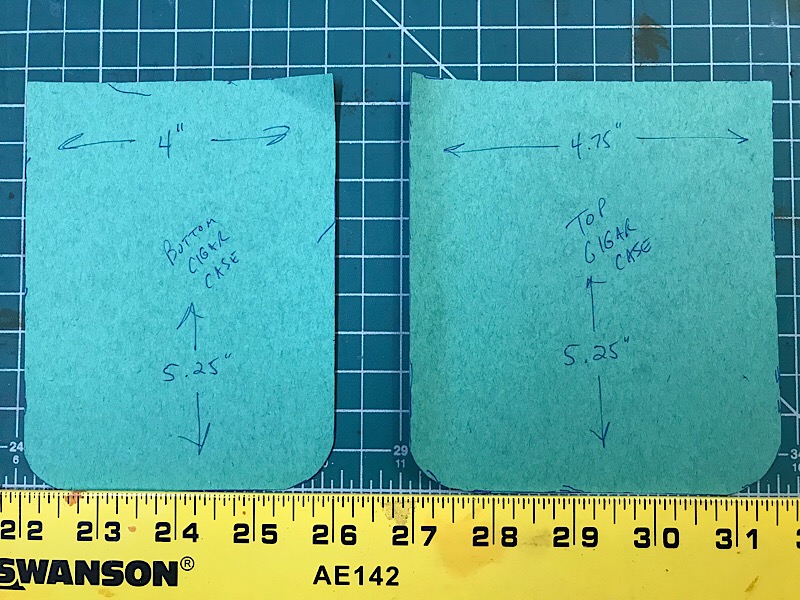
would you be willing to share the dimensions you used for the cigar case? Looking to do a project similar.
Sure - here are templates - cut two of each size.
Gary
-
5 hours ago, DJole said:
I used paintbrushes of various sizes.
It's some nervous work, because you do NOT want to mess it up, since the dye cannot be brushed off or removed.Ben, when applying acrylic paints, in addition to several sizes of paintbrushes, I also use small plastic bottles with very fine steel tips to apply paint along borders. I outline the area using the squeeze bottle because it allows a very fine line of paint to be applied. Then I can paint in the interior area with brushes. The steel tips are not much thicker than a hypodermic needle, so you have to thin the paint so it will flow through the tip.
Gary
-
6 hours ago, Jake907 said:
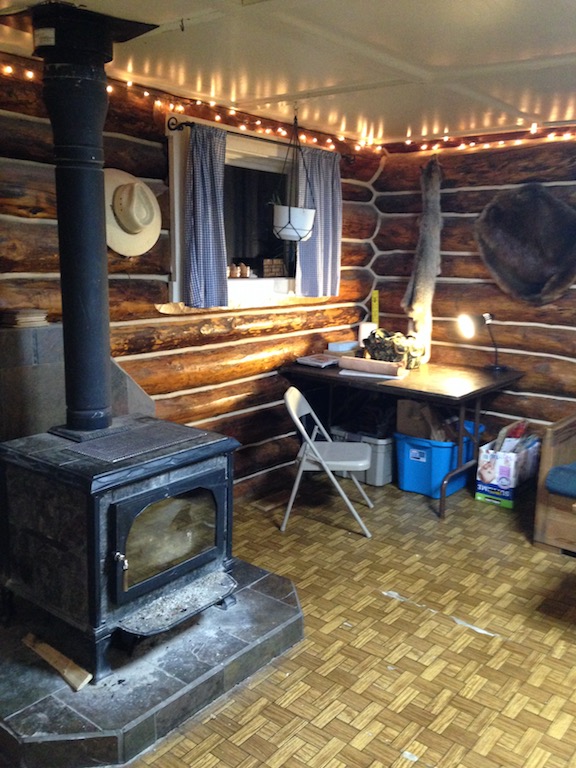
I've been so inspired by all of you and your workspaces, from the little hole in the wall places to the big professional shops. Thank you everyone for sharing. So, now I've decided that I "need" a dedicated leather workspace of my own, so I gave away my old recliner and set up a table in the corner of my living room by the wood stove.
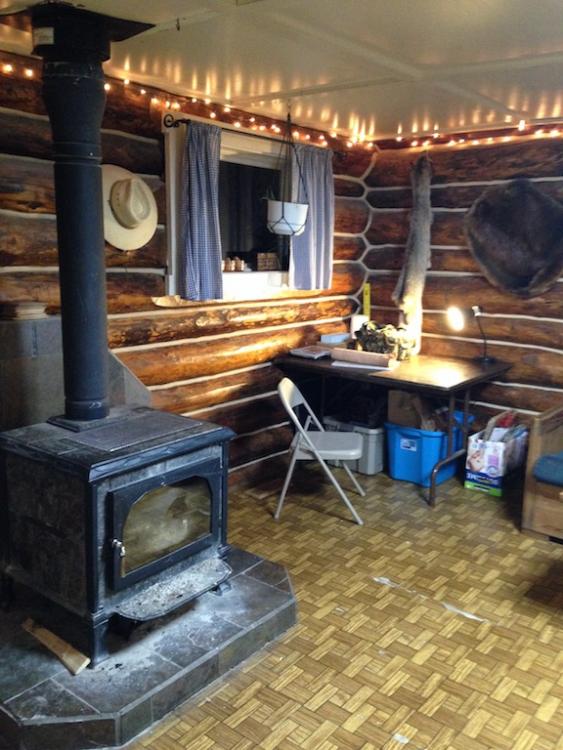
Congratulations Jake on taking your first step to a dedicated workspace! That table doesn’t look stiff enough to pound on though - where do you do stamping, rivet setting and other activities that require a very solid surface? (Also, coming from someone in Georgia, I don’t think I could handle the cold up there!)
Gary
-
Welcome Ben - you are doing well and will keep getting better! So many talented people in this forum that we can learn from and hopefully we can give back to,others!
Gary
-
Mark, I think you did a great job on your first wallet! As far as fabric used for lining, I prefer thin leather like pigskin - then you won’t have to deal with cement bleed through.
Only other comment is that I think the stitching would look better using 90 degree turns at the corners instead of what looks like a 45 degree angle.
Every project is a learning experience and you are off to a good start!
Gary
-
48 minutes ago, JMcC said:
Awesome! I am sure you will love it Gary
 You will definitely notice a difference in how well it cuts!
James
James, I should receive it at the end of the week. I am in the middle of carving a shotshell pouch and have already carved two oak leaves, so I am going to wait and finish the additional two oak leaves with the new knife! I’ll post results when I finish.
Gary
-
1 hour ago, CZoc said:
I haven't figured out how to respond directly, without messaging. I think it has to do something with that Quote button.
Anyways -
Garypl - No tricks. I didn't really tool it. I just carved it then spread the cut open more with a ball scribe. I tried to tool a piece of that milled leather, but it was too soft. It just mushed outward. It left an impression, but it just wasn't right. Plus I think it would ware of quickly because the leather is so pliable.
Leathersmyth - That stool is awesome! I actually looked for one of those as my first idea and found one in UK somewhere, and it was pricy. Very nice! Let me know if you ever want to sell that, or know where to get one. I think they are pretty hard to find.
However you did it, it looks great!
-
1 hour ago, Josh Ashman said:
Thanks BikerMutt!, I'm a big Ruger fan too!
Gary,
I use "velum" printing paper which I buy by the roll on Amazon. It's relatively cheap, 3' wide by as long as I want for larger projects and handiest for me, you can see through it. Being able to see through it is a big deal for how I make my patterns, which mostly involves having them folded on a "centerline". The process I used for making this pattern is almost a step by step of the one Al Stohlman provides in his book on how to make holsters. Granted, Al's book is outdated having come from the 60's (or whenever it was he made it), but the principles are the same.
I'll also add that when I draw a pattern I mostly shade a huge area then erase what doesn't look like the line I want. I envy people who can draw smooth flowing lines in one try. I'm certainly not one of those people.
Good luck with your pattern and holster!
Josh
Thanks Josh - I will try the velum paper!
Gary
-
36 minutes ago, CrackedPennyLeathercraft said:
Thanks. That is correct. I didn't stitch all the way to allow clearance for the width. I didn't make a welt for this as I just gave another 1/8 in to allow for space from blade to the stitching. I will in the future though. Thank you again for your reply!
Thanks for your reply! The other advantage to using a welt (besides protecting the stitching) is to allow a little more clearance between the leather and the blade so it is a bit easier to insert and remove the knife. We learn a little bit with every new project!
Gary
-
48 minutes ago, Josh Ashman said:
Thanks Alpha! and yes sir, that is light brown.Thanks Gary! and yes sir that is my own pattern.
Thanks Josh - when you design a new pattern, do you use heavy paper or is there another type of material that works well for pattern design? I want to try to design a holster for a S&W M64 and seeing your holster is for a similar revolver (Ruger) got me thinking about getting started down the right path with this!
Gary
-
That's a nice sheath - noticed you did not stitch all the way up to the hilt on the cutting edge side - is this to allow clearance for the widest part of the blade?
It looks thin - did you use a welt to keep the threads from contacting the blade?
Gary
-
Really nice work - is that your own pattern?
Gary
-
2 hours ago, JMcC said:
Hmm, just a thought Alpha2...I believe that LW makes blades that will fit in a Tandy swivel knife. So, that would be less money spent for a better performing tool. The cost is $55 for a blade that will fit a Tandy barrel according to their website. That would be a considerable savings if budget is a constraint. And I too am a confessed tool junkie lol...probably shouldn't spend the money on a head knife either after hearing Yin's argument for cost effectiveness.

That's a good idea, so I looked at the LW website and then figured if I am paying $55 for a blade, why not get the complete knife for $110? I ordered the brass body knife and and extra blade - looking forward to testing it out.
Gary
-
2 hours ago, YinTx said:
I test drove one for about an hour. It was a smaller one, and yes, it was nice. I had only been tooling for a month or so before that, so I realized I needed my tooling to actually make money for me before I could justify laying that kind of $$ down for yet another tool, especially when I already had 4 different ones - albeit all Tandy versions, I was able to cut leather and work. I even did the wallet with tiny tiny tooling with my large 3/8" heavy thickness swivel knife. On top of that, I think before I lay down a lot of money for a blade and knife combo, I need to understand which diameter shaft and length of shaft best fits my needs. Seeing that folks have sharpened a screwdriver and gone to work, or use a utility knife instead of a round knife and get to work making things, makes it even harder to spend more $$ on one. Yeah, I want one. Might be a few years before I convince myself to get one. Having a hard enough time convincing myself to buy a 1/4" thin blade for $20 when I have already cut flowers the size of a quarter with the big blade I already have. I think we all to often get bitten by the "I need this better tool" bug, when we could make a perfectly useable petal lifter with a free screwdriver. (Which works better than my $40 petal lifter that I had to fix brand new anyhow).
Also, it's tax time, and I see how much I have already spent in the last year on this craft!
YinTx
You make some good points Yin. I don’t do this to make money, it’s just an expensive hobby! I’m also a tool junkie, so I will probably get one to see what I am missing.
-
That is a beautiful holster!
-
2 hours ago, alpha2 said:
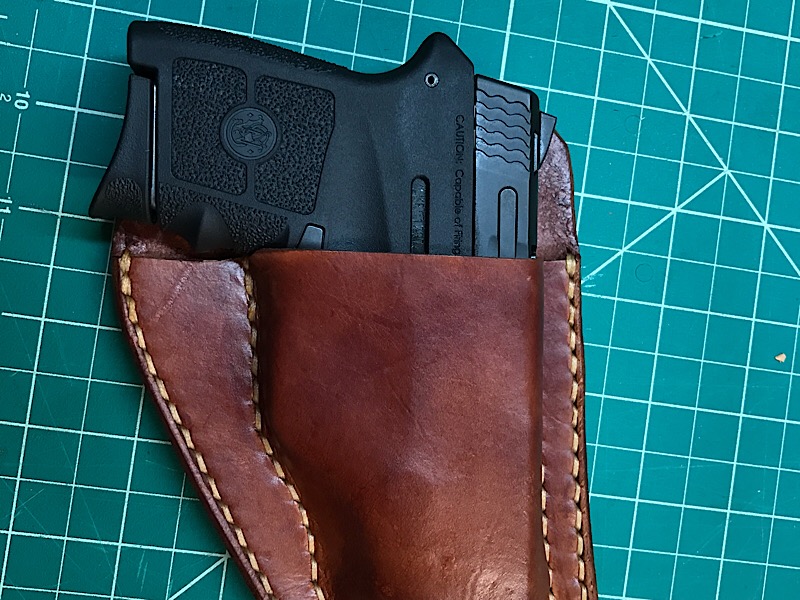
And, the flat bottom keeps it upright in the pocket. That feature REALLY makes it easier to draw!
My laser doesn't work, it just died one day, and it's not the battery, but no matter, you couldn't see it except at night. Smith soon changed to a different vendor.
You are right, in a loose pocket mine tends to drop down on the grip end. I am going to try your design. Thanks for sharing!
Gary
-
Mine has the built in laser (that I never use) so maybe a bit bulkier under the barrel. I made a small pocket holster but it is difficult to raw without pulling the holster out and using two hands. For this reason I normally just keep it in my glovebox. Your design might just be the ticket!
-
10 hours ago, JMcC said:
Thanks again Yin, If you buy one of those swivel knifes from Leather Wranglers, you will never use anything else again. They cut like butter and make carving a delight. I used an adjustable wing divider to draw the border lines and then used the swivel knife to cut the border lines followed by beveling. I will attach a pic of the swivel knife I used for doing the carving. And, I am not affiliated with them in any way, just love my swivel knife!
I looked at the LW website and the swivel knives look good. I am using a couple of Tandy knives and seems I am constantly stropping them. I am struggling with deciding whether or not using a better quality knife will make enough of a difference to justify the cost. Would be nice to test drive one before committing to the purchase!
-
4 minutes ago, alpha2 said:
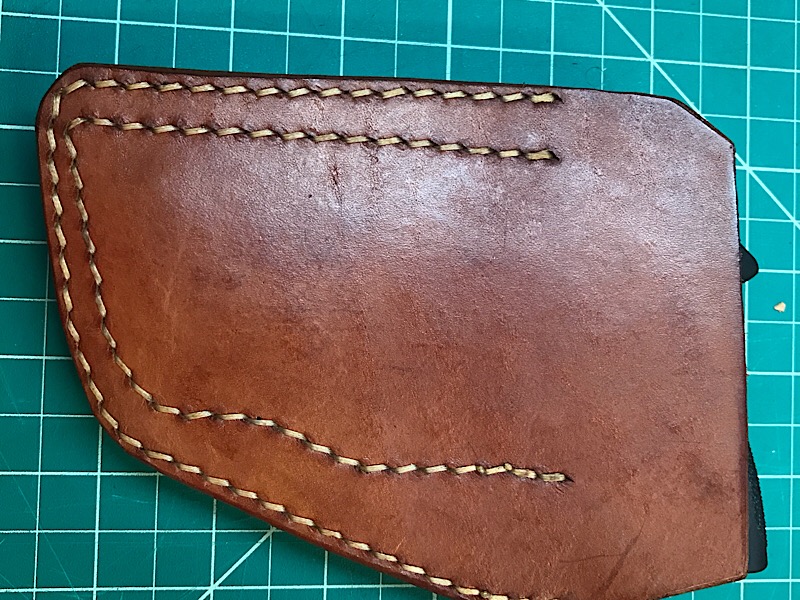
My wife and I have a couple of this type of holster, and they weren't glued before stitching. The sewn corners have started to loosen up allowing the holster portion to move relative to the back panel. So, rivets. Too bad, too, 'cause that would have been the shortest stitch line I've ever had to do!
The flare is for the front sight on the second iteration of the LCP. Not to be confused with the LCP II. The first iteration barely had any sights at all, and would not require any flare for sure.
The draw is actually not bad, as the only attachment of the holster to the back piece is at the lower corner, allowing you to easily get you fingers between the two parts and draw the gun. Like any "draw from concealment", a bit of practice will help. Pretty simple, though.
If you've ever carried a sub-compact in a pocket, when you're standing, they're mostly okay. If you sit, with it in a front or side cargo pocket, or bend over with one in a back pocket, they print pretty good. This even with one of those soft pocket holsters, or one that doesn't cover the outside of the grip. I just retired from a job where I was not "allowed" to carry at work. Did for years, no issues. Printing was not an option.
Thanks for clarification Jeff - I have a S&W Bodyguard that would probably be a good fit for this type holster. I will make one when I complete a few ongoing projects and let you know how it turns out.
Gary
-
9 minutes ago, Constabulary said:
NO - totally different machine but our member UWE had designed one for the CB4500 / 441 type machines that one could fit the CB3200
Looks like this table will be too long to properly fit the CB 3200 - the CB4500 cylinder arm is 6” longer than 3200. Maybe you can cut a few inches off the end and redrill new mounting hole? Better talk to Uwe first!
-
I only use pigskin for lining, I wonder if it would be too flimsy to use as cartridge loops. I guess I would take some scrap first and make a sample 1 or 2 cartridge holder and see how it turns out before proceeding with your project.
Let us know what you end up using.
Gary
work bench
in Leatherwork Conversation
Posted
Susan,
If you have a space on a wall, you can build a very sturdy workbench by screwing a horizontal beam to the wall (2x4" by however long you wish to make the table). Screw the beam to the wall at the height you want, then make a table top frame out of 2x4" lumber and top it with plywood or whatever material you wish to use. Just make certain the top is at least 1.5" thick. Working on the floor, make a couple of support legs from 4x4" lumber and lag bolt them to the underside of the table top in the two corners. Cut the legs so they are the proper height that when the top is set onto the wall beam, the legs will support the underside of the top. Now have someone help you flip the table right side up and set the rear edge on top of the wall beam, bolt the top to the beam, build a shelf underneath the table to strengthen it and provide storage space.
This sounds more complicated than it is to build and I will post a few pictures tonight when I return home. It makes an extremely sturdy bench top and the cost is minimal. Only caveat is you must have some blank wall space to attach the bench/table top.
Gary