


garypl
-
Posts
1,642 -
Joined
-
Last visited
Content Type
Profiles
Forums
Events
Blogs
Gallery
Posts posted by garypl
-
-
Looking good! You did a great job on the toe plugs. Is the entire rig handstitched?
Gary
-
Welcome to the forum! This is a great place to learn and share ideas, tips, and projects. Look forward to seeing your leather projects.
Gary
-
I like the concept Jeff - very clean and simple! To draw, do you pull the entire holster out of your pocket? Seems like it will be difficult to get a good grip on the handle to pull it out of your pocket.
Gary
-
9 minutes ago, geargarcon said:
Can someone tell me why one would make a briefcase/satchel where the back and top closure portions are made out of separate pieces of leather instead of one continuous piece?
Is this just to allow the designer to pick the cleanest pieces of leather and add some interesting stitching detail, or does it serve a structural purpose?
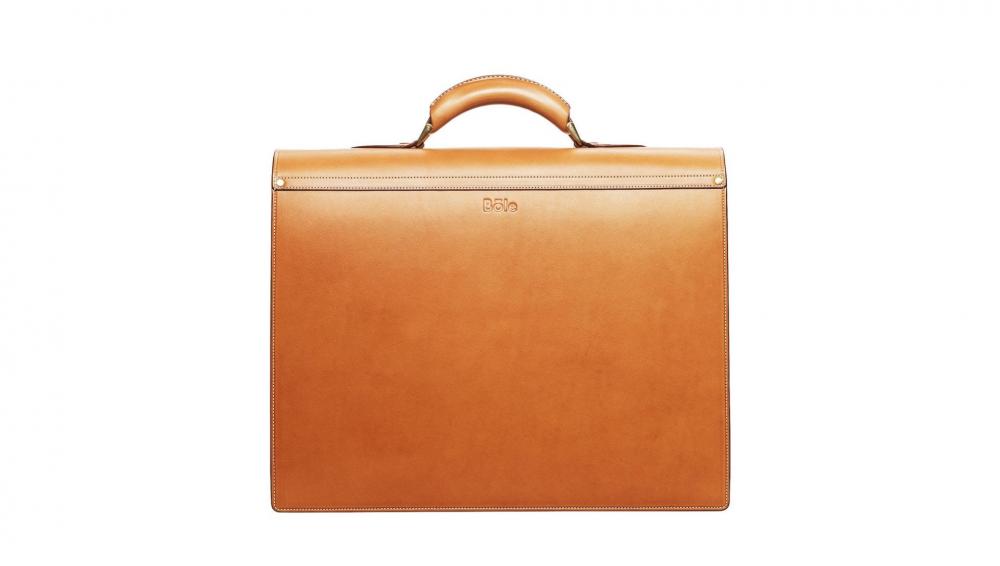
I can’t think of any reason other than what you stated - use of leather and design element. Possibly use thinner leather to make the cover flap more flexible.
Gary
-
2 hours ago, georgiapine85 said:
Here's the latest rifle sling I finished this evening for a buddy of mine. I used Eco flo super sheen for the resist and Eco Flo med. brown antique gel over that. Buffed it good and topped it off with a couple of good coats of Aussie using a hair dryer to get it to penetrate better, then I buffed it again. The buck came from an old hunting book cover that was my grandfathers.
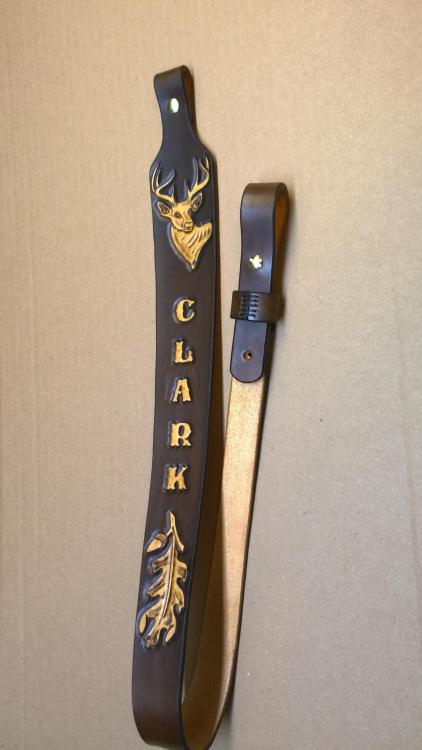
That’s a fine looking sling! Nice job. Did you paint the carvings and letters or is that the natural color?
-
Great job! I have never tried tooling milled leather, but yours turned out nice. Any tricks versus tooling plain veg tan?
Gary
-
You are spot on! I find the layout and order of assembly to be the most difficult part of the process. Once I have this figured out, sewing on the machine usually takes just a few minutes. Every day and project is a learning process for me.
Gary
-
Very nice looking belt and you did a good job on the background. What kind of leather, dye, finish did you use?
Gary
-
That’s a nice looking holster Alpha - clean design and no frills! Looks like it is not lined?
Gary
-
24 minutes ago, Gregsleather said:
Hey Gary. Yes I wet formed them with a dowel glued down to a block. Only using 3-4 oz and they seem a bit light weight but they seem to be holding shape well. I just rasped the end of the dowel to try and give me a good rounded end but didn't do a very good job. If I make any more I will try to make a better form with the dowel so I have a nicer shape at the bottom. Right now trying to make a form for a med size possible pouch/purse and trying to finish up my wife's purse. Just waiting on the clasp.
Thank you.
Thank you.
Thank you.
Greg - I think the bottom end looks great! If it ain't broke, don't fix it!
Gary
-
When you sharpen a V gouge, you must remove the small burr that forms on the inside of the V. If you are only sharpening the outside, the small burr that forms on the inside will prevent a clean cut. You can use an appropriately sized whetstone, very fine sandpaper, shaped leather strop, and probably other ways to remove the burr. I have ruined V gouges trying to sharpen them - it takes some practice!
Gary
-
7 hours ago, Halitech said:
I've used these on some belt bags I've made using a similar set up
https://www.tandyleather.ca/en/product/strap-loops-w-plate-nickel-plate
That looks even easier to attach than a D ring!
-
1 minute ago, Jake907 said:
I'm just drooling over all the leather and tools, don't care if its a little unorganized.
Kind of looks like my shop - organized chaos!
-
I really like these! Did you wet form using a piece of dowel rod?
Gary
-
16 minutes ago, battlemunky said:
Yeah man, another beautiful example. Hint: you are a painter.
I agree - you do nice paint work!
-
I think the paint job is beautiful - you have a steady hand! What’s the inside look like?
Gary
-
Looks like a simple D ring to me. Check out Tandy, Ohio Travel Bag, or the Buckle Guy - they all carry D rings.
Gary
-
8 hours ago, superpacker said:
To report, wetting the Leather made the creaser work so well!
That’s good to hear! I use a Tandy creaser and had to polish the ends to get them nice and smooth so they didn’t scratch the leather. Heating the tip with either an alcohol burner or my heat gun also produces a nice burnishing effect in the crease.
-
1 hour ago, Yetibelle said:
I struggled with this question for a few years and went with the CB4500. Just like you I have a Singer 111w155 that is similar to the Sailrite and it can cover the smaller weight leathers and canvas, but I wanted a machine that could do more. I run 346 thread in it and it doesn't flinch on a single stitch it runs so smooth I wish I had 2 of them. I feel if I had gone with the CB3200 with the shorter arm and less clearance I would have wished I got the CB4500. Plus with @Uwe flat-bed table it converts into an exceptional flat bed machine and I see my Singer 7-31 gathering dust. So I would recommend getting the base CB4500 with Uwe's custom flat-bed. I know it seams like a lot more money, however these machines last 100 plus years so it is worth the money.
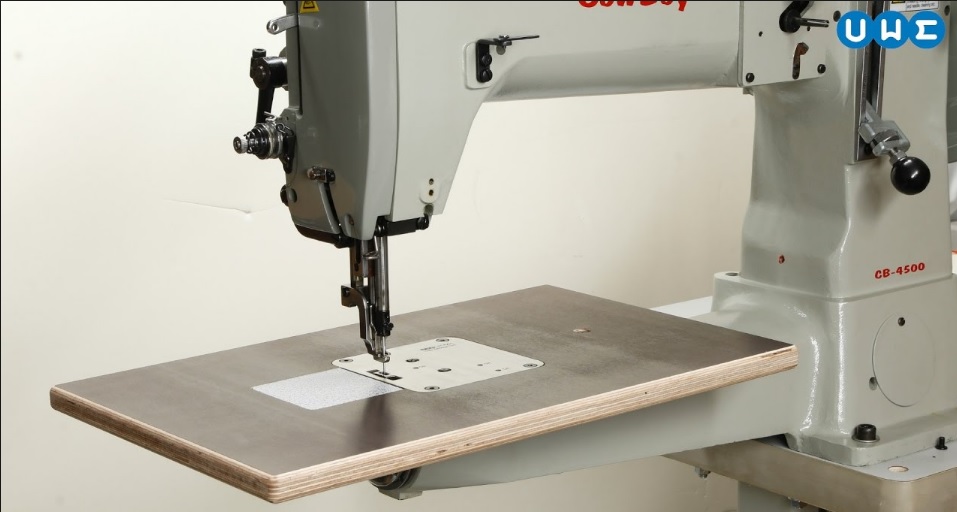
That's a nice looking table - how does it attach to the machine? Do yu remove the standard plate from the cylinder and use what looks to be a built-in plate in the new table?
Gary
-
Beautiful work! I like the rifles as well - LH flintlock and mule hammer sidelock - don't see that many of either styles around much!
Gary
-
If you haven’t already tried it, wetting the leather will help.
-
How long did it take to stitch that big holster with the Tippman?
-
I agree with alpha2 about Uline. I buy cartons in many sizes from Uline as well as from another local Atlanta supplier. It pays to shop around in your local area. Do a Google search for packaging or carton suppliers in your area.
-
Nice job on that holster - what weight leather did you use? Your stitching looks very good!
Gary


Optimum Workshop?
in Leatherwork Conversation
Posted
I have a 4 x 8 foot work table. One corner covered with cutting mats with a 4 ft straightedge attached to the edge to cut long straight pieces of leather. (Leather slips under the straightedge and is clamped to hold it securely while cutting.)
Another corner setup with airbrush and fan/filter for spraying dye and finishes.
Third corner has granite block covered with brown paper - stamping and tooling is done here along with gluing, edge painting, dyeing small pieces and coloring leather. Brown paper makes drips easy to clean up, I just replace the paper when it gets nasty.
4th corner has bench vise and arbor press for stamping and setting rivets, grommets etc. (vise is not normally used for leather, I used to do a lot of woodworking and a vise always comes in handy for holding things.)
4 x 8 ft shelf under the workbench holds plastic storage bins with hardware, threads, tools, dyes, and any other stuff that I don’t use every day.
Sewing machine in another room - keeps it away from dust and dirt. Also have a large table to layout leather to mark for cutting. More often than not, I layout large hides on my pool table - it’s the largest flat area available to work on other than the floor, and my back and knees don’t like working on the floor anymore!
Gary