-
Posts
43 -
Joined
-
Last visited
About FoamerAce
- Birthday 04/01/1964
Profile Information
-
Gender
Male
-
Location
Goat Rope, Missouri
LW Info
-
How did you find leatherworker.net?
google
Recent Profile Visitors
FoamerAce's Achievements

Member (2/4)
-

CB2911C3-7BB9-4D2B-BB54-3EF6F23CA65A.jpeg
FoamerAce commented on Garyak's gallery image in More Leatherwork
-

6E31B8A0-1159-4675-B1E3-7210EC42EC61.jpeg
FoamerAce commented on GamberLeathercrafter's gallery image in Our Leatherwork Galleries
-

Tandy Leather Expedition Briefcase Kit
FoamerAce replied to Hooper26's topic in Leatherwork Conversation
Hello Musa. The pockets are pretty straight forward. I used one piece of leather for each pocket. I cut it wide enough for an 'S' fold gusset on each side and stitched the sides down. Then just riveted the bottom corners and stitched across the bottom. The lining is cotton fabric. If I were to do it again, I'd have glued it down better. I was afraid if I used too much glue it would feel hard to the touch so most of it is floating with only the edges really glued down hard. I built the bag on commission, so I don't know how it's holding up today. But I did do a one year follow up, and the owner reported that he still used it every day and was in good shape.- 51 replies
-
- tandy
- briefcase kit
-
(and 1 more)
Tagged with:
-
-

My first triweave belt bag
FoamerAce replied to stormdevil's topic in Purses, Wallets, Belts and Miscellaneous Pocket Items
A third of the way across you reversed your tool. How'd manage that? -

Not Your Grandpa's Briefcase
FoamerAce replied to DonorLeather's topic in Satchels, Luggage and Briefcases
Consider That Shit Stolen Son- 16 replies
-

Not Your Grandpa's Briefcase
FoamerAce replied to DonorLeather's topic in Satchels, Luggage and Briefcases
I like the ouside pocket for convienence. You can throw a document or folder in there and grab it without having to open the case. I'd say if pigskin would have "rocketed up the price", you work too cheap. I'd be astonished if you had less than a hundred hours in that case. The tooling alone would have taken me a month. "Woody" is exactly how I'd describe that finish. I'm interested in the creases on the straps. Are they just creased? Cut? Grooved? Did you use oil dye on the straps as well? How did you keep it out of the creases. One thing, your edges look raw. I don't know if that's a look you're going for, but it rubs me wrong. All that work and just leave the edges unfinished. I was actually impressed with the thickness of the leather in Tandy's kit. Here's a video I made for the one I put together.- 16 replies
-

Not Your Grandpa's Briefcase
FoamerAce replied to DonorLeather's topic in Satchels, Luggage and Briefcases
Awesome work there. I really dig the color choices and dye technique. Very impressive tooiing. I recognize the pattern as Tandy's Expedition Briefcase. It looks like you cut your own leather on it, but you followed it almost exactly, down to the mismatched hardware on the sides. But I think you left out the center divider. How did you finish the inside? Did you add any pockets or lining? My experience with that bag is that the handle is a weak point. There's only one rivet holding it on there. Don't know if you'd want to throw a couple stitches on there at this point though. Again, really excellent work. That full coverage tooling is really impressive.- 16 replies
-

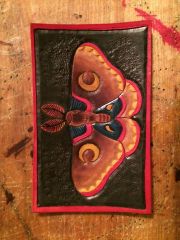
Moth Leather Trading Card
FoamerAce commented on ShellyAnn's gallery image in Gallery- Our Leatherwork
-
That is master level work. I'll die happy if I ever make anything that good.
-

Birds On Coin-Purses
FoamerAce replied to FoamerAce's topic in Purses, Wallets, Belts and Miscellaneous Pocket Items
I use Tandy's Eco-Flo dyes. They mix well and dilute with water. Applied with taklon artist brush you can pick up anywhere (I think I got mine at Walmart). I screwed up on the goldfinch. It was a brighter yellow, but when I applied the Super Shene finish, it picked up some of the black and made the yellow dingy. What I should have done, is done the black first, buffed it, then locked it in with a coat of finish before doing the yellow area. Painting with dye can be a bit tricky. Of course you need to work slow and careful to "stay inside the lines" but there are other things to keep in mind. I apply dye after tooling and before conditioning with any oils. At this point the leather is really "thirsty" and will soak up the dye well. Which is good because it colors the leather like you want it to, but it also has a tendency to bleed out. The dye simply refuses to recognize that line you cut and beveled and crosses right over. So you want your brush nearly dry when you get to the edges of where you want it. A bigger annoyance for me is when I make a brush stroke, as the brush comes off the leather the tips of the fibers will fling little drops of dye where you don't want it. -

Birds On Coin-Purses
FoamerAce replied to FoamerAce's topic in Purses, Wallets, Belts and Miscellaneous Pocket Items
Thanks MJ. I want my work to have distinctive look. The pic I posted looks too dark on this site. I adjusted the levels. See if this looks better -

Belt "grapes"
FoamerAce replied to Tatyana's topic in Purses, Wallets, Belts and Miscellaneous Pocket Items
+1 What stain/technique did you use? -
Eeeeep! You cut the groove with a swivel knife? You've got a steadier hand than I sir. A utility knife is a fine tool for cutting leather. I think a sharp blade and good technique will give you better results than a new knife. It's very impressive work for limited tools. With that kind of talent you could go full hobo using only tools you fabricated yourself from scrap. Not that I there's any reason you'd actually want to do that.


