Warren
-
Posts
228 -
Joined
-
Last visited
Content Type
Profiles
Forums
Events
Blogs
Gallery
Store
Everything posted by Warren
-
Amen to that. Happy Thanksgiving everyone.
-
business card holder
Warren replied to JustWakinUp's topic in Purses, Wallets, Belts and Miscellaneous Pocket Items
Looks good. Nice work! -
Matt, very cool! No pun intended, LOL. I looked at your website also and man your one talented dude! Those paint jobs are art in every sense of the word. As for the mask being cold, I would think you could glue some black polar-fleece to the backside of the mask to make it warmer. Just be careful not to saturate the cloth with glue or it will stiffen it up and it won't be as comfortable( personal experience talking). Just use enough to cover the backside of the cloth and don't put it on the areas where the leather it cut out. Warren
-
checkbooks & wallets
Warren replied to Kevin King's topic in Purses, Wallets, Belts and Miscellaneous Pocket Items
Kevin, as usual all I can say is WOW! Every time you post a new one it's better than the last. Really like the new black and brown flame design. If anything it's even better than the one on your website. Keep it up! Warren -
WOW, that is beautiful! I'm sure she will appreciate it.
-
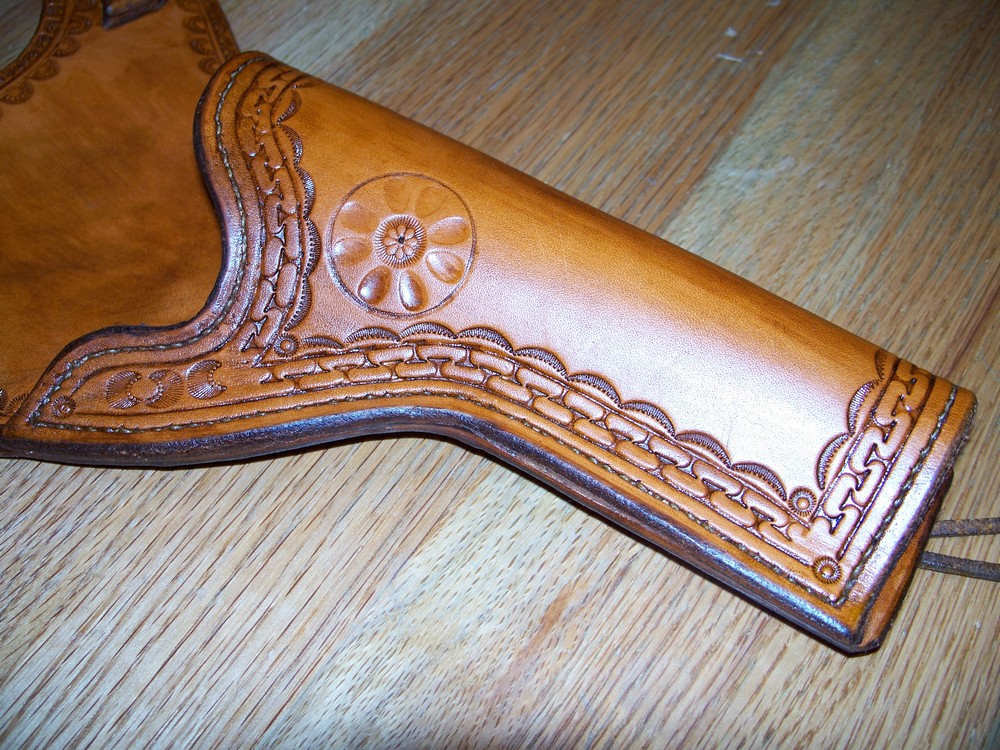
I had to remake the front of the holster because I messed up the meander up on the first one. I have all 3 sizes that Craftool makes. It can be very frustrating to use, but I like the way it loks.
-
1st holster I made
Warren replied to Warren's topic in Gun Holsters, Rifle Slings and Knife Sheathes
Thanks for the compliments. Everyone has commented about the stitching. I must be doing something right. -
No Billy it's not. It's 2 pieces. The front of the holster is sewn down the back edge to the yoke, then folded over and sewn along the front edge to form the pouch.
-
re-sheath a Coldsteel Magnum tanto
Warren replied to patricweill's topic in Gun Holsters, Rifle Slings and Knife Sheathes
All I can say is WOW! I am SO impressed by what I see on this forum. -
wallet
Warren replied to Kevin King's topic in Purses, Wallets, Belts and Miscellaneous Pocket Items
Kevin, I don't have enough space here to tell you what all that kid likes, LOL. I'm thinking of something along the lines of the flame wallet on your website. What do you normally charge for something along that line? -
Nice work! Wish I could carve like that.
-
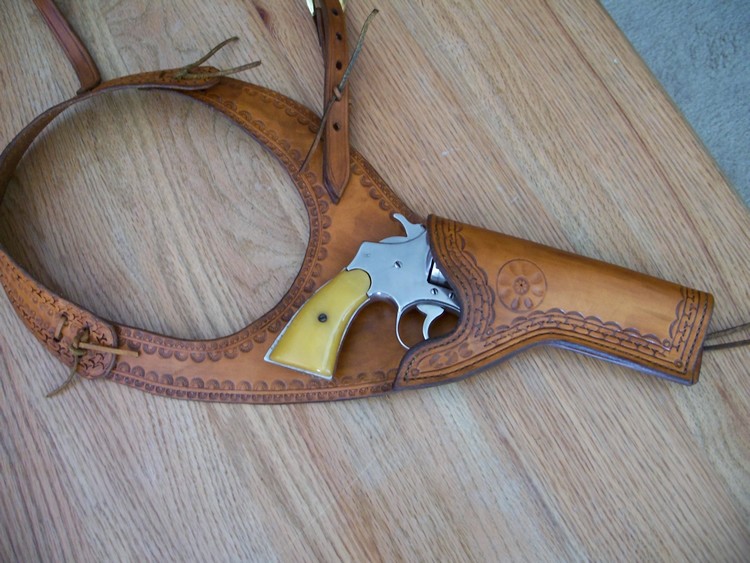
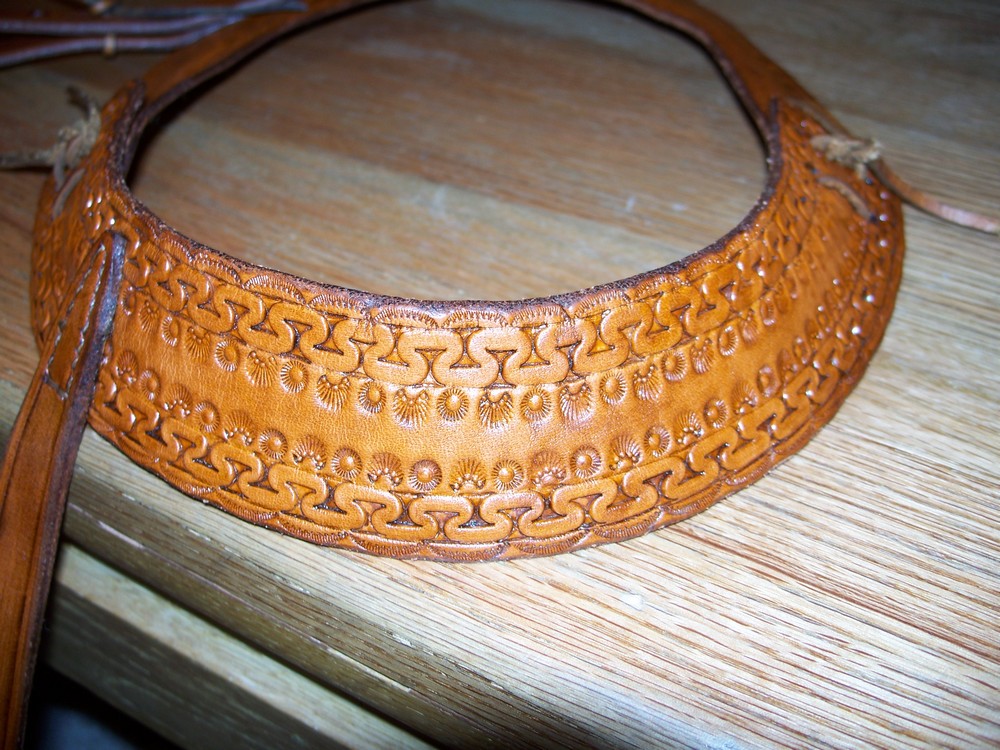
This is my latest holster. I made it for a friend of mine. He got this pistol from his grandfather. It's a chrome plated .32 caliber Smith & Wesson with real bone grips. It was made in 1925. He wanted a period correct western shoulder rig. It's got more tooling done on it than any of the pictures I could find of shoulder holsters from that era, but the shape and contruction are correct according to my research. He wanted the extra tooling and the customer is always right! Hope y'all like it.


-
Thanks for the encouragement! I probably will try a belt at some point I just haven't yet.
-
Don, love the scabbards! Very nice work. The look like they came straight out of "Packing Iron". I love that book. Mbrien, Yours is very good too. Would love to see some pictures of your gun belts.
-
Thanks for the warm welcome and I've posted 3 holsters in the showoff section. Mike, always glad to meet a brother f.f. and Don I would love to see some more of your work. To all the rest, thanks again and I am very glad to meet you!
-
This is the latest holster that I've made. It is for my son. I talked about this one in the leather casing thread, where I soaked it and put in in a bag overnight. I had just been spraying or sponging my leather before this. I didn't like the way the tooling looked after I finished. It isn't sharp. The holster I'm working on now is going much better and I will post pictures of it as soon as it's finished. By the way the belt is store bought. I haven't gotten brave enough to try to make a gun or cartridge belt yet. Warren

-
wallet
Warren replied to Kevin King's topic in Purses, Wallets, Belts and Miscellaneous Pocket Items
Do you do custom work or do you have a standard line? My son would love something like that for Christmas. -
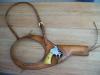
custom leashes and collars for dogs
Warren replied to ck9a's topic in Collars, Cuffs, Leashes and Leads
Man, I'm always impressed by someone who can braid. I've tried but I just can't seem to get it to look like it does in the books. I'm way to impatient. -
2nd holster I made
Warren replied to Warren's topic in Gun Holsters, Rifle Slings and Knife Sheathes
Hey it worked! so here is the last one. Thanks agian for the input, Warren.
-
2nd holster I made
Warren replied to Warren's topic in Gun Holsters, Rifle Slings and Knife Sheathes
Thanks for the input guys. I really appreciate the The compliments and suggestions. I found a free image reducer so here is another picture I hope. Warren
-
2nd holster I made
Warren replied to Warren's topic in Gun Holsters, Rifle Slings and Knife Sheathes
I have some more pictures of this holster but I can't get them to upload because they're to big. Does anyone know how to reduce them? -
this is the 2nd holster I made. It is for a Ruger Blackhawk.

-
This is the 1st holster I made. Not too pretty but it works.

-
Hello all! Glad to have found this forum. I have already found answers to several questions i had. It's great to know I'm not the only one who sometimes has problems. I'm a professional firefighter in Lubbock TX. I've been doning leatherwork for a little over a year now. Last year at this time I was at home recovering from back surgery and going nuts from not be able to do anything. I went in a leather store by my house to look around and I knew this was something I could do while recovering. I've spent the last year learning everything I could about leatherworking and trying to improve my skills. I have a great interest in historically accurate gunleather as well as knife sheaths. I make knives as well so the sheaths kind of fits right in. I have several holsters in various stages of production and will post pictures of them as soon as they are finished. Thanks for the help and I'm looking forward to getting to know y'all better. Warren
-
Hello, just wanted to add my two cents worth in. I'm new to the forum and have only been doing leatherwork for about a year now so I'm by no means an expert. I had been just spraying or sponging my leather before I tooled it with no problems. Then I was on the net the other day and I came across a blog about saddlemaking. The guy does some beautiful work and has great credentials, so I read through his tips and suggestions. He was very adament about the way he cased his leather. he uses the dunk method and says to leave the leather in a bag or between two blankets for at least one day and two would be better. I can't remember if he says what kind of bag and the only thing he specified about the blankets was wool.He says it will really set the stamps and allow the tool to burnish the leather. Now this guy makes alot of money making saddles and I'm just an amateur so I take his advice. I'm not saying he's wrong but I will never do that again. The next day when I took the it out of the plastic bag I had placed it in, it was molded or mildewed I not sure. What I do know is it was messed up. I let it sit for about four hours until it looked dry and tried to tool it. No go, it was still squishy and the stampings didn't look sharp at all. I waited until the next day when it was completely dry, buffed it with some 600 grit sandpaper on the front and 400 on the back. Then I sponged it and tooled it and I wasn't happy with the results. The stampswere not sharp and clear like they usually are. I finished the holster because I hate to start something and not see it through and because it was for my son. He's happy with it and I guess thats what counts. Oh yeah the leather was herman oak 9/10.