Oldtoolsniper
-
Posts
276 -
Joined
-
Last visited
Content Type
Profiles
Forums
Events
Blogs
Gallery
Store
Everything posted by Oldtoolsniper
-

Help With Sharpening This Tool Please
Oldtoolsniper replied to Woodcarver G's topic in Leather Tools
http://billhooks.co.uk/other-edge-tools/ These are also called hawkbill knives. Do a search on google and you will find the correct way to sharpen your tool. One use for them is cutting hides. I use a similar knife to cut deer hides that have hair on them from the back side. I skin, flesh, wash and dry the hides. They are then cut from the flesh side into small pieces for fly tyers. The hide is stretched on a two by four frame and cut so the hair does not press against anything. With the blade hooked like that I can line the handle up on the sharpie line and the tip is still cutting the hide. All hair on hides are cut from the backside to preserve the fur or hair on the hide. -
Springfield Leather Company - That Time They Told Me To Get Lost.
Oldtoolsniper replied to KandB's topic in Suppliers
DavidL So getting two hides plus free shipping on one of them to Canada for the price of one is what you consider a good business model? Still need to give us a guide on how to get the best hides we can and where we are getting them from. If you look at my posts they are for the most part contributing to the forum. I take clear pictures and explain why and what I am doing. I even remember where and how I buy my leather. If there is a minimum I'm pretty sure I can keep that clear too. So you know those are mosquito bites, explain it so I can benefit from it. Do the Mosquitos feed on the hides after the cow is skinned or is this feeding taking place before? I mean are they somehow sucking blood from a skinned hide or do they chew on them to eat the flesh? I have read a lot of posts on this forum and you Sir, seem to dispense a lot of information as though it were a fact and you have the knowledge others are seeking. I see that when you are directly questioned you give no answers and no support for your facts. You supply pictures that are at best murky and unusable for anything other than to say your camera is bad and you have poor photography skills. Are you really a US Citizen running for office? Answer one question at a time. How do you know those are mosquito bites? -
Springfield Leather Company - That Time They Told Me To Get Lost.
Oldtoolsniper replied to KandB's topic in Suppliers
[The people on this forum I wouldn't say are non discerning craftsman, probably the opposite considering they actively searched out this forum. People that do events for kids, or for the campsite, things like that quality isn't a huge concern, marks scratches, brands they wont bother returning it in. In cases like warranties the majority don't get the item fixed (if we are talking about cheap electronics or something thats not worth the hassle). The same goes for mail in rebates the company knows that less than 50 percent will go through the mailing process to get a 5 dollar rebate (they forget, or are busy). ] In reading this I have to again ask if you read what you write? You imply that the only people who buy from SLC cater to kids and campfire types and have no idea about what quality is. I've seen pictures of holsters made on this website. Are those for the campfire kids? Yes, please post a picture of a mosquito bite on a hide. Explain how you determined it was a mosquito bite and not from a Dermestid beetle? Where did cheap electronics and warrantees come from in this conversation? Why did you not return the mosquito bite riddled hide? You can't say you did now because you just told me you would provide a picture if I asked, I'm asking. I've been to thirty five countries compliments of my previous employment. This has nothing to do with that. -
Springfield Leather Company - That Time They Told Me To Get Lost.
Oldtoolsniper replied to KandB's topic in Suppliers
In reading what the OP typed It sounds like neither side is happy with the other. It happens, it a free market place and perhaps both should just move on. They did offer alternatives and did not appear to be rude. They admitted that they cannot meet the OP demands, I'm not sure what else they could do. Customer service is tough. I'm old enough to remember ordering by mail order from a black and white catalog. We wrote letters back then and waited. If it wasn't right you sent it back with a letter and waited. We used checks too. I work part time selling firearms and until you have been "behind the counter" what some customers want and what can be provided is worlds apart. Your not going to drop a "perp" at 200 yards with your .380. Perhaps this individual needs to go shop in Hollywood. Free markets allow us to shop and buy anything we want from whomever we want. It also allows the seller the ability to say I can't satisfy your needs at this time, I would recommend you go to X,Y or even Z and try them. In this case it seems as though they did that. The original poster had a bad experience and posted about it. I completely get that. As a new guy to leather working when I read all these posts it implies that Springfield Leather is a place to avoid because they have a track record of ripping off customers with bad hides. Is this true? Their catalogs says they have been in business for over 40 years. How can they be in business that long by providing bad customer service? -
Springfield Leather Company - That Time They Told Me To Get Lost.
Oldtoolsniper replied to KandB's topic in Suppliers
Off topic from the OP but: Do you read what you write? Spring field is trying to increase their profit margins. They buy in huge lots (4000sq feet for one veg tan minimum order from brazil last time I emailed) from low end tanneries in developing nations for really low prices. Then they turn around and sell them at a huge markup. no surprise there. Wow they personally tell you their business model. That's impressive. [The only thing is the products he gets are so poor quality that a lot of the pieces have things like mosquito bites, holes, brands and really bad characteristics, majority low end and fewer that are okay. No high end leathers, mostly at cheap leather for beginners or the non discerning craftsman. The one I received had at least 200 mosquito bites and it was "A" quality. Anyone who checked it would have noticed immediately it was scrap.] Can you share a picture of one of these mosquito bites? I'm surprised that would survive the tanning process or that someone could in fact determine that a blemish was in fact caused by a mosquito bite. [No high end leathers, mostly at cheap leather for beginners or the non discerning craftsman.] What are you saying here? If we buy from them we are__________? [They try to pawn off some of the bad stuff into peoples shipments knowing that there is a 25-40 percent change that the person will call to get it replaced depending on how bad the hide is and they take those odds. Bottom line they don't care about the customers and make up for the bad quality by acting like it was a mistake and they send you a new hide thats one of the good ones. In your mind you think its great customer service] You are who they personally decided to divulge their business plan to? You even know the percentage of non returns they have on a weekly, monthly or yearly basis? Which is it because those statistics matter to us Non discerning beginners. I hate getting duped into thinking I got great customer service. Sounds like a great way to do business ship a junk hide then re-ship a good one at no cost to correct it. Yes sir paying for employees to man those phones, box up products, and ship them is all free. So are the boxes, tape, and printing labels. I bet UPS is in on it too, perhaps they only charge for every other box shipped. [Not blaming them though, thats just how bad some of these hides from undeveloped countries tanneries are and there is no other way to get rid of them and they won't admit its garbage quality otherwise it will scare away customers. So if you call in they give you a good one and pay for shipping too. ] I'm glad you don't blame them! I'm also glad you let us in on where those nasty mosquito bitten, Non discerning beginner hides came from. I'm betting you have been to those tanneries and seen the poor practices first hand. I'm sure you can show us pictures of all of this and offer some sound guidance to help out us Non discerning beginning craftsman so we don't get sucked into buying any of these bad hides. Put something useful together and help us please! -
I tried a plug cutter for wood plugs but it just tore it all up.
-
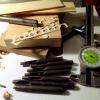
This would work for any kind of inlay. It does not need to be an Ivory piano key, I just happen to have a few hundred on hand.
-
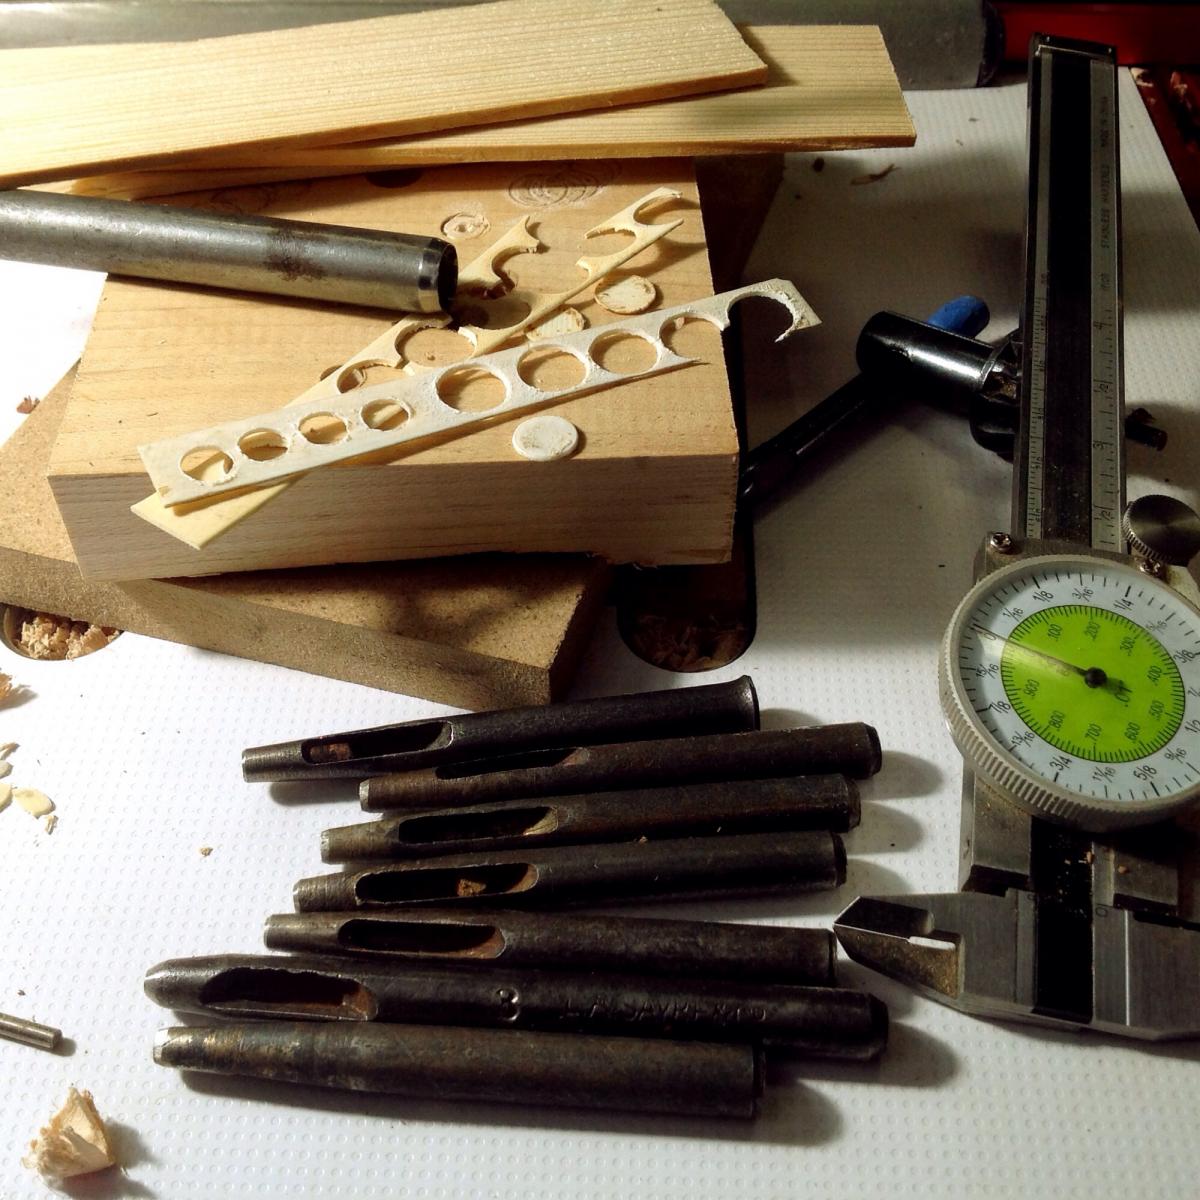
The punches are just straight shaft hollow punches that I can put in my drill press. An arch punch won't work since the handle is square and won't work as a drill bit. The punch up high on the shim stack is home made. Just a 3/8 inside diameter piece of pipe put in the drill press and sharpened with a file and sandpaper. I used a file to form the angle and sharpened it or honed it with wet/dry sand paper glued onto medium density fiberboard (mdf) as the hone. I did this under power in the drill press. I use the drill press because hammer punching the disks does not work, the Ivory shatters. I'm betting some of those hollow punches made in China from Horrible Freight would work just fine for this operation. The only requirement is to have a straight shaft so you can use the punch as a drill bit in the drill press. You need to match the inlay with a drill bit but that's pretty easy to do. Finding pipe without a seam inside is the biggest challenge.
-
http://leatherworker.net/forum/index.php?showtopic=58695 Here is some information on a rose knife I cleaned up. It will explain it in more detail.
-
Drill out the Ivory with a hollow round straight punch. I used my drill press. Drill a inset into the handle to insert the disk. The low parts of the handle will leave the Ivory sticking out the most, just sand it flush after you epoxy it in.
-
GerryR, Try that finish on some scrap wood. I learned it from an instructor at Palomar College while attending classes in furniture technology, it's woodworking with a fancy name. It's a simple easy finish on smooth wood. The story is that the recipe came from Sam Maloof and is what he did on his rocking chairs. I don't know if that's true or not but the finish works and is easy to do. I use it on duck calls so it's even pretty durable.
-
Warning! Please do not assume this will work on all of these knives. Each manufacturer did things in their own way and pin sizes as well as ways to attach the handle May or may not be the same. Go slow and be prepared to do some repair work on the handle you remove. I'm not trying to insult folks with these instructions I'm explaining things in detail so the things you have on hand can be used to do this. Look at how the brass is inserted onto your handle. Try and determine if it was slid onto the handle after the blade was installed into the handle. If that is possible you may have a rod under the ferrule that holds the handle on. If there is no way that this is possible make sure there is not a pin through the handle somewhere else that is covered with grime or hidden by an earlier repair. On this knife the steel pin was apparent but really hard to remove. I used a magnet to determine it was steel so from there I could assume it was rusted into the blade. It was. I shimmed up the handle so it was level and drove the pin out with a short punch and an arbor press. The pin was 5/32". If you look at the pictures the rust tore out some of the handle so be prepared for that. I was prepared to make an new handle if needed and I'm fortunate to have the tools to do it. Driving it out with a hammer would work too but I find better control with the press. Using a vice as a press with a block of wood behind the handle and a hole drilled for the pin to slide out into would work too. The brass ferrule in this case is very thin stuff. I chose not to remove if from the wood because it was not loose and removing it would have most likely destroyed it. It's press fit onto the handle. Here are some things to remember about wood. Humidity or moisture will swell it, while being super dry will shrink it. Drawers stick all summer and then pull right out dumping everything on your feet in the winter here in Iowa. I have two old food dehydrators that I use to shrink wood or dry it. Sometimes a day in the dehydrator will shrink the wood and the ferrule will fall off. I believe that if I can not pull it off by hand I will cause more damage to it by forcing it so I operate with it in place. The Dixon I'm working on had two brass nails through the ferrule and no pin through the handle. That's why there is the warning at the top of this post. With the ferrule in place I sanded the handle by hand through 400 grit. I went this fine because I was sanding the brass too. The brass should be level with the wood, sanding both at the same time makes this simple. Save the sanding dust because you will want it for the epoxy repair on the handle. You will be making epoxy wood putty. Tape the wood part of the handle with good blue or green painters tape. Don't use cheap stuff or regular masking tape because it will leave sticky residue all over the wood and then you have to clean up that mess too. Avoid the urge to go "Harbor Freight" on tape, it is not worth the aggravation. Now you can polish the brass without turning the handle black. I use a buffing wheel and jewelers rouge. You can sand it also up to about 1000 grit then polish it with brasso or some other metal polish for non-ferrous metal. If the wood is taped up good the wood will stay wood and not turn black. A dremel with a buff would work too. In the Marine Corps we did it with sandpaper and Brasso so there are many ways to get that little piece of brass shiny. If the ferrule is off the handle then polish away with no worries about the wood! Chemical stripping of the wood should not be required and be warned that chemical strippers may or may not eat the brass. Ammonia eats brass. The handle in this case is walnut. Walnut is not an oily wood so glue adheres very well to it. If your handle is rosewood then it is oily wood and glue does not bond well to it without prep work. If your handle is rosewood you have to treat any place you are applying glue with acetone or lacquer thinner to remove the surface oil from the wood so glue will stick. Most all of your modern wood glues are water based and oil prohibits the moisture in the glue from penetrating or bonding to the wood. Remove the surface oil and it will bond. You have to do this even for epoxy. Gorilla glue won't work, it's a moisture (water is required for it to work) reactive adhesive. Oily wood has no moisture for it to react too. It also foams all over the place and creates another mess to clean up. Once the handle work is done I complete the blade work minus sharpening it. I installed the handle back on the blade. I cut the 5/32" brass rod about a 1/2" to long and roughed it up for the epoxy to stick to the pin. I use 100 grit paper to rough it up. The pin has oil on it from manufacturing and epoxy won't stick to oil. I drove the new brass through the handle and blade. It sticks out on both sides. You belt sand it off flush later. Because I have tear out on both sides of the handle I did not use epoxy inside the pin hole. The pin will be epoxied on each side of the handle so I opted not to place it into the handle as well. Either way will work if you have tear out. If I you made a new handle I would epoxy the inside of the hole around the pin. I'm not a knife maker so this may be wrong but it's what I do. I mixed the epoxy and added sanding dust to it so it pretty much matches the wood from the handle. It's epoxy wood putty or filler at this point. I use the thirty minute stuff because I'm slow. Clean the area to be adhered to with a q-tip and acetone ( finger nail polish remover is acetone, wife or daughter may have some). Apply the epoxy to the tear out area on one side, level the handle to and wait for it to set up. Now do the same thing on the other side. You can do both sides at once but gravity will be a problem on the bottom hole. I use my fishing rod dryer so I do both sides at once and clamp it into the rotating dryer for a few hours so the epoxy levels. After both sides are done leave it alone for at least 24 hours. Longer is better because epoxy shrinks. You don't want to sand it and then have it shrink into the hole creating recessed areas around your pin. I belt sand the pins down to almost flush. Caution here, heat will make the epoxy let go so don't overdo the pin grinding. You don't really want to be sticking the wood handle in water to cool the pin either. A file and sandpaper will work too. Tape the blade and clamp it in a vice between two pieces of leather and file the pins down or dremel them too. Whatever works for you. Tape the ferrule off again with good tape. Or you can leave it and polish it again after sanding in the finish if you feel the need. I finish sand the pin pin to 400 grit. I go to 400 grit because I wet sand the finish in at 400 grit. I wet sand the finish in because it's a handle on a tool. It's a tool I don't really want to slip with so a glossy, shiny, and slippery handle is not what I want. Using a mixture of 1/3 boiled linseed oil, 1/3 oil based varnish and 1/3 mineral spirits I sand in the finish. I use 400 grit wet/dry (black) sandpaper and wet sand the finish into the handle. Do not go "Harbor Freight" on your sandpaper or your handle will be black or the same color as the sandpaper. Mineral spirits is a solvent and solvent will loosen the glue on cheap wet/dry sand paper and then you have a black handle. 3M paper is not effected by mineral spirits. Dip the sandpaper in the finish and hand sand the finish into the handle. You can also dip the handle into the finish and then sand the handle. The point is to sand the finish into the handle, how you apply the finish doesn't matter. Wet sanding the finish will create a slurry that will fill the grain and minor imperfections on the handle. Sand until it gets sticky and hard to sand. Hold the blade end and wipe the handle off with a disposable rag preferably one not full of lint. Let the handle dry for an hour or so, if you are not happy with your sanding job simply repeat wet sanding the finish into the handle until you are. You want to add finish each time you sand it or it will become a sticky mess. Let it dry for a day or so when you are happy with it and then you can remove the tape from it and sharpen away. I use paste wax on my handles after they are completely dry but this is not necessary, I just prefer it. I also use it on the steel to prevent rusting. What the finish parts do. Boiled linseed oil adds depth to the wood grain and penetrates the handle or wood (must be boiled not raw or it will never dry) Oil based varnish adds protection and durability (water based will not work for this type of finish) Mineral spirits thins the other two so they penetrate the wood and makes sanding it into the wood easier. With the finish being thin and sanding it in you protect the wood but it still looks and feels like wood. It won't be slippery and it will feel good in your hand. Do not wad the rags up and toss them in the trash. Spontaneous combustion is a hazard with finishes so dispose of your materials with proper precautions. I know this was long and drawn out, I'm sorry about that but I don't know how else to explain it. It has taken me longer to type this then it does to finish a handle. (Not counting drying time) The Ivory inlay is another matter. It's cut from a piano key with a drill press. You can't punch Ivory it's a bone and it shatters. Match the size of circle you wish to inlay with a forstner bit of the same size and epoxy it in. If you are doing this to resell knives you will be working for less than minimum wages or asking a premium price for the tool when it's done. It takes me about four hours to do a knife. Figure the price of the used knife, your hours of labor and you are into the $200.00 price range pretty quick. Shop labor here is an average of $65.00 an hour and you should consider your labor as shop time. I figure shop rate because I have all the tools. Time and material would work out the same or close to it. My goal is to have an awesome estate auction! You know the one where people are saying what the heck was this guy thinking and why does he have three of everything? It's nice to have goals!
-
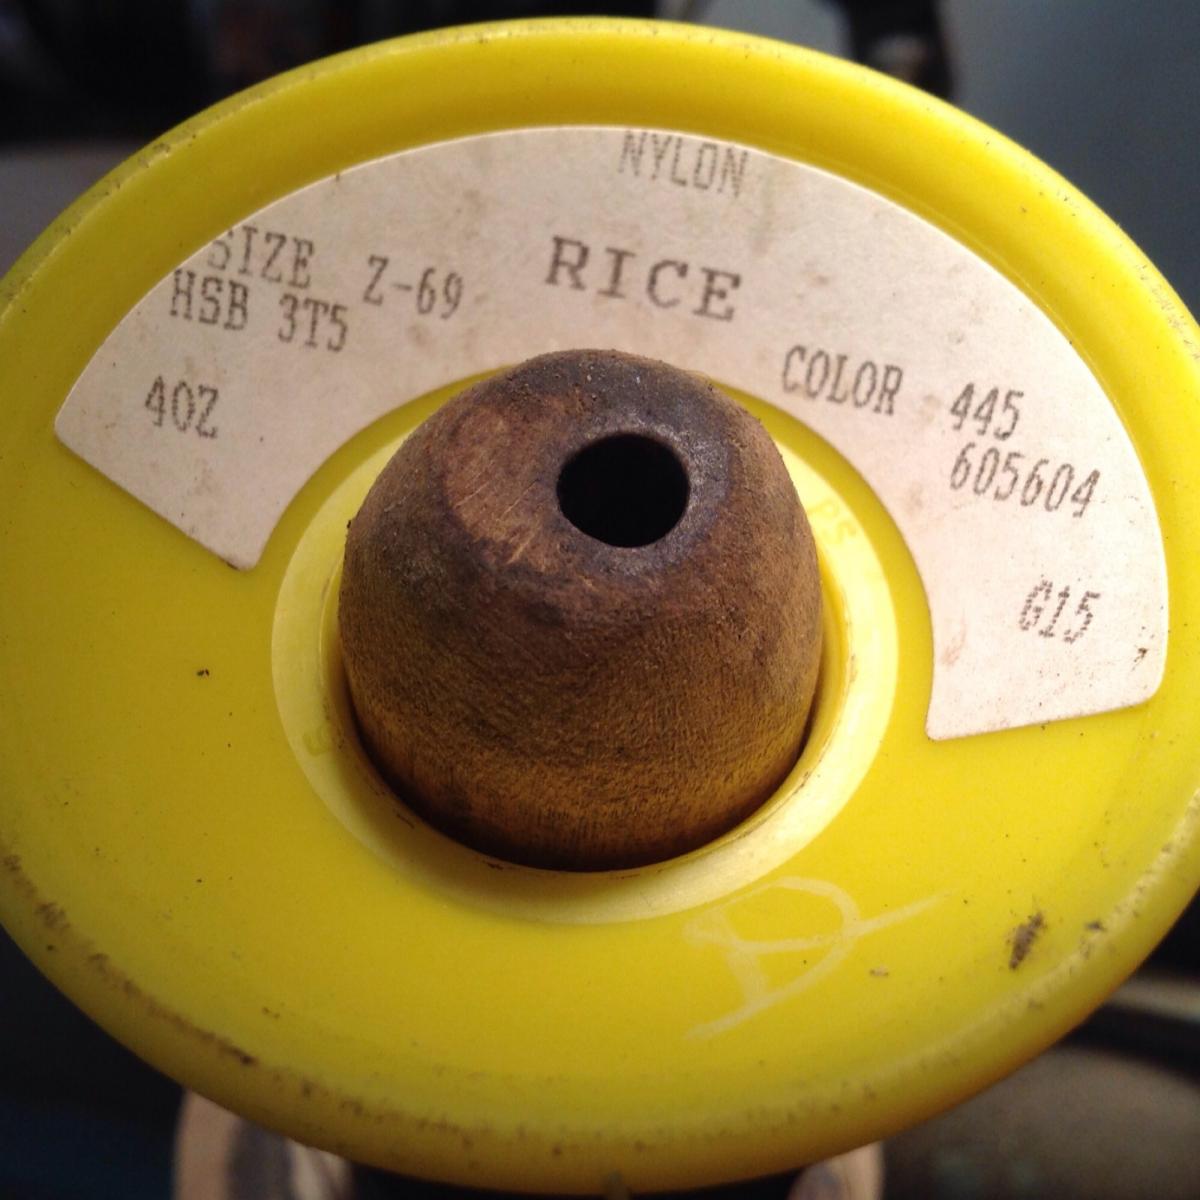
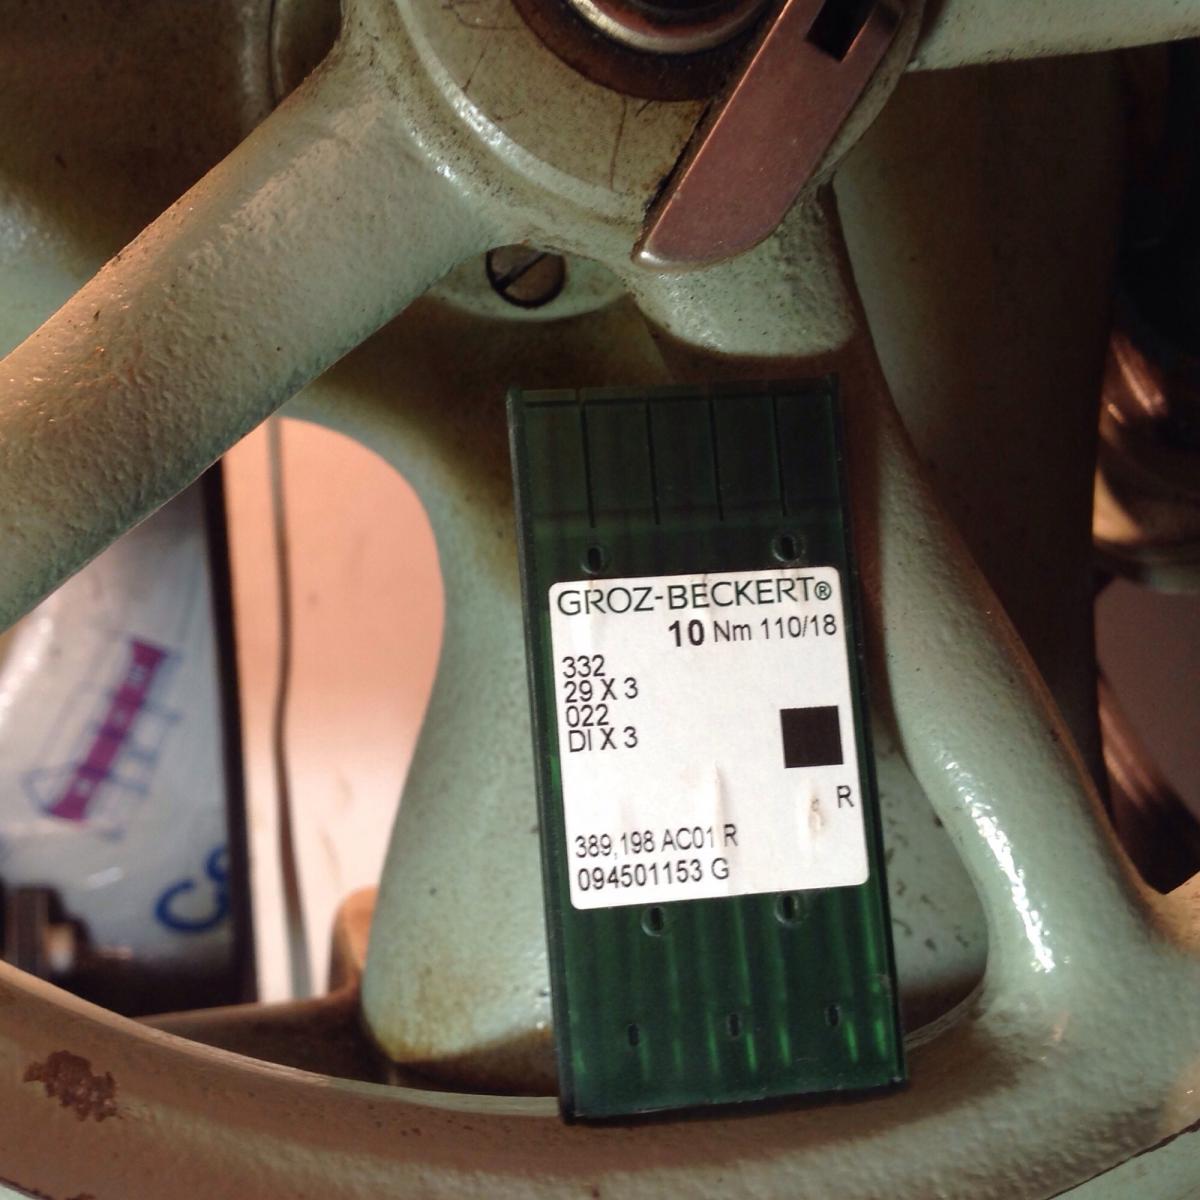
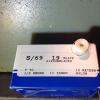
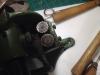
Glenn, Thanks for that, I'm getting somewhere now. I have some experience with home machines, mainly singer 301's. I own a few of them. That being said I pretty much used standard thread from any store to sew on the patches for uniforms saving the Marines that worked for me lots of cash. The thread that came with the machine for the bobbins are a size 19 (see the picture) and I'm just learning about this type of machine. I wish to learn with what I have on hand before I invest in more thread. The bobbins are all pre wound as you can most likely tell. Taking a wild guess I'm looking for a 135x16 size 20 needle for the thread I have on hand. I am looking on EBay and I don't see any size 19 needles. That is based on the 19 on the bobins and the 18 sized needles I have with the machine. It stitches fine with what is in it right now. My main concern here is using the correct thread needle combination and not screwing up the machine by using the wrong things or combination in it. Picture of needles that came with it. The other picture is the spool of thread I have with it. Not sure what the numbers mean.
-
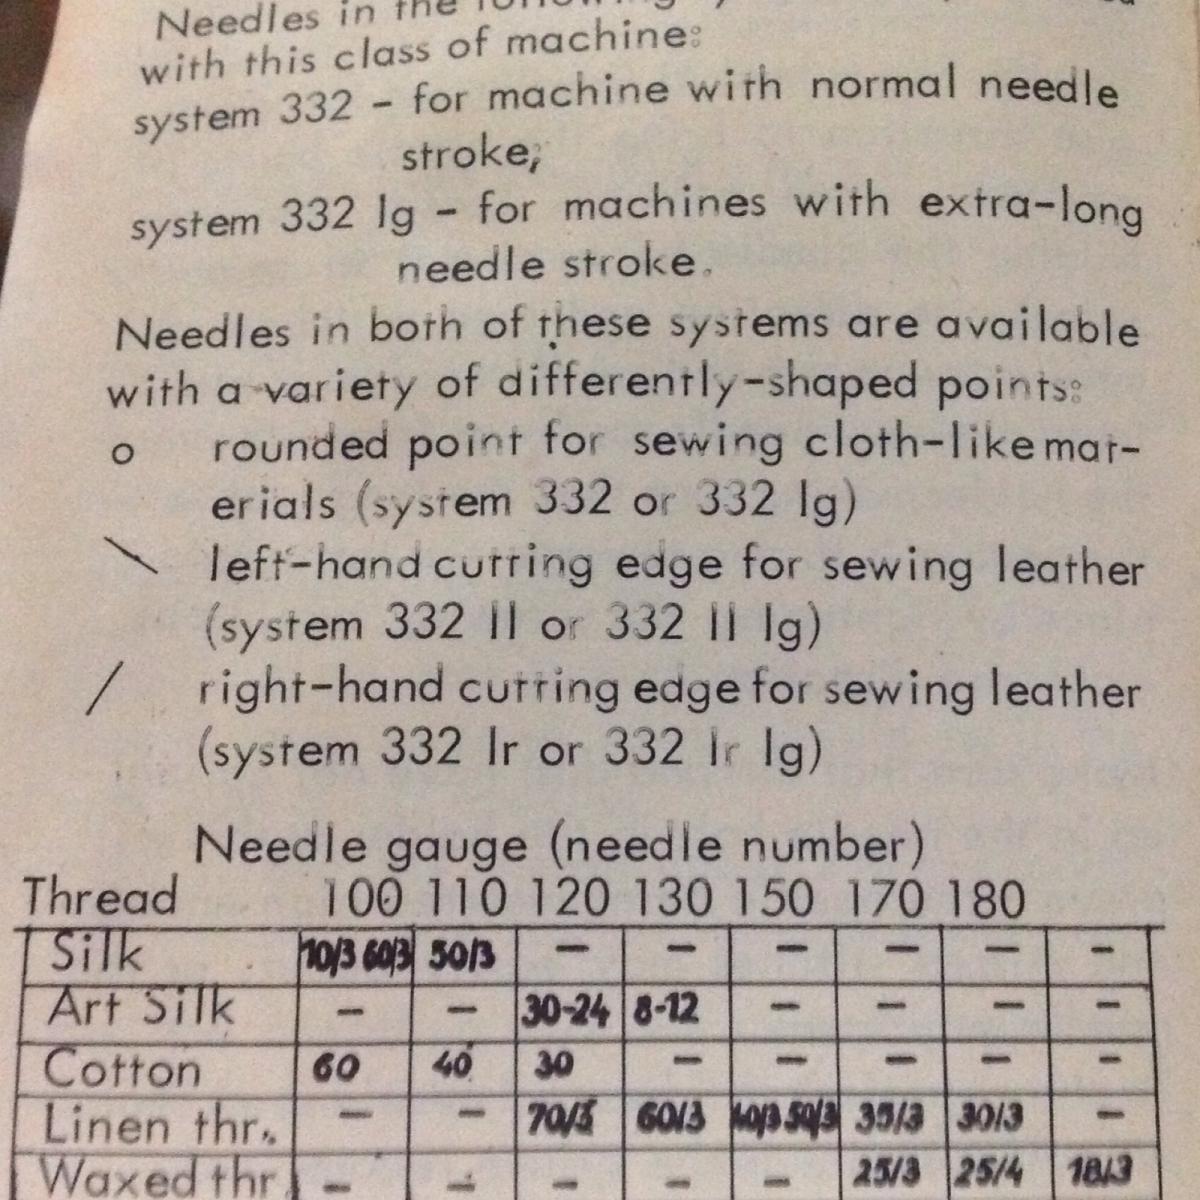
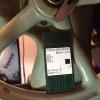
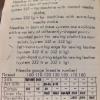
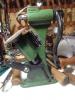
I have a used Adler 30-1 patcher. It came from a shoe repair shop auction. I have the original instruction manual with the machine. It leaves a little to be desired for the un-experienced patcher operator. The machine tag says 30-1 The book says the machine was bought in 1966 it is light grey in color. ( the date is not real clear and written in by hand) it might be 88 but I'm guessing 66 since the other equipment was some of the earliest made. A line shaft leather belt driven shoe finisher as an example. I'm looking for an explanation on a couple of things. Instructions state there are two systems of machines. This is directly from the book. " Needles in the following systems may be used with this class of machine. System 332 for machine with normal stroke; System 332LG - for machines with extra long needle stroke." How do I determine which one I have? I also don't really understand the needle number system. Again directly from the book. "Needles in both of these systems are available with a variety of different shaped points: * rounded point for showing cloth like materials (system 332 or 332LG ) \ left- hand cutting edge for sewing leather (system 332 II or 332LG II) / right- hand cutting edge for sewing leather (system 332 lr or 332 lr lg)" I get that the L means leather and l or r designates right or left cutting. Is 332 the class of needle? I've enclosed a picture of the needle chart because I don't know how to do the boxes for the table. I want to sew leather within the limits of this machine. I'm looking for an explanation of the needle sizes. I need help in determining what machine I have. Regular or long? About how thick can I expect to sew on this machine? I would like to get good needles for the machine, recommendations as to that would be appreciated. I realize this is not a Cobra class 4 and my expectations are not that it is. I'm not real clear on thread sizes either. Is there some place I can read about that. I have one sewing place here local and Coats and Clark upholstery thread is the heaviest thing they carry and experience is limited to home machines. The next place would be 150 miles so looking at it in person isn't really an option.
-
I use electrolysis on tools that the pitting is not very deep. Seems like these old knives were put down years ago and just left to rust, they are either clean and taken care of or in rough shape. Some of the pitting on these is the same depth as the makers stamp. They can be brought back to good shape with a lot of handwork and some time. I'm truly amazed at how well these old tools take an edge and hold it. Considering all the computerized methods used today to temper blades and how they did it a hundred years ago. I'll take one of these old girls over any six modern osbornes in a heart beat, rust and all. They are wonderful tools when you get them back to useable condition. In my opinion the worst thing to do to one of these old tools is going after them with a wire wheel. I see countless examples of wire wheeled old tools and to me they look awful. I'd rather have all of the rust on them then a wire wheeled version. Doing that rounds all the letters off on the makers mark and eats up brass and wood something fierce.
-
Tanning leather is not the same as dyeing leather. To completely different processes. Dying changes the leather color and tanning preserves the hide or leather.
-
The very first thing I do is grind the edge off with the belt sander. I forgot that part. It's a 4 inch belt sander. This gets the nicks out of the blade and shapes the edge so you are not trying to sand out pits on a sharp edge. It keeps the end of your fingers on your fingers too. J Hayes is correct, these blades by Rose are HARD! I start at 90 grit and work until the pits are as far gone as I'm going to get them. I did not want to sand the name out of the blade so check your progress often. I use oil for all grits, my handle is removed. If you leave the handle on oil will soak into it as will the black slurry you create while sanding. I would use good blue or green painters tape to keep the handle clean. Any oil will work I just happen to have lots of mineral oil on hand for trapping. Try not to skip grits, it makes it harder to get the scratches from heavier grits out if you skip. If you decide to take the hadle off driving the pin out is tough. It's not tapered but it's most likely rusted in place and chances are high that you will damage the handle around the pin hole. I used an arbor press to remove mine. Forgot that tool in my list too! The Dixon knife I'm working on is not near as hard as the Rose. The osbornes have the softest blades according to my sanding.
-
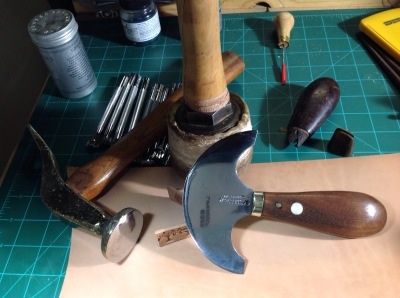
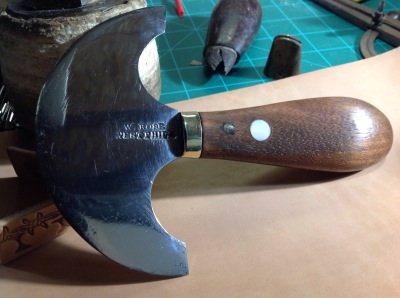
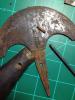
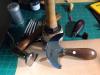
An old Rose head knife I picked up for next to nothing. You can see why from the first picture, she was a little rough. That being said I'm a firm believer that if it's beyond repair you may as well try and repair it because it can't get any broker! I know that's not proper but broken won't work and broked ain't a word for that sentence either. The first picture shows the knife as it was when I got it. The second shows the handle removed. It's a 5/32" steel pin for those interested in knowing the pin size. Picture three shows it back together. Picture four is just closer so you can see I did not remove every pit down flush from the blade. It is also not sharpend yet. The inlays are Ivory from a late 1800's piano keyboard they are 3/8" and cover a repair to the handle. The pin holding the blade has been replaced by a 5/32" brass rod. The missing wood around the pin was replaced with epxoy mixed with sanding dust from the handle. The handle is walnut and I chose to repair it rather than replace it. I tried to keed everything as original as I could on this. Total time invested was about four hours. That's actually working on it, not drying time or breaks from sanding out rust pits. I have a lot experience with restoring old woodworking tools and I am a woodworker with all the tools to build whatever I need. I'm saying that because doing this sort of thing can overwhelm folks who are not prepared. It's also not a cheap way to get a tool if you charge an hourly rate for your time. Having to buy all the tools would really make the price jump. I used Ivory key from piano Two 1 x 30 belt sanders 120 through 2000 grit 1 drill press 4 sizes of drill bits Shims and scrap boards to level handle for drilling I 3/8" drill hole punch made from pipe to cut inlays Wet/dry sandpaper from 80 grit to 2000 grit Mineral oil for sandpaper lube Bolt cutter Dremel tool Dremel grinding stones 5/32" brass rod Buffer 4 different buffing wheels with different compound on each wheel Epoxy Bodied linseed oil/varnish/mineral spirits 1/3, 1/3, 1/3 mix Rubber gloves Lots of blue tape on edges ( even dull they cut flesh) Band-aids Safety glasses A bunch of other stuff I forgot Lots of patience The last one is the most important. Stop and leave it alone. Think through the problem and go back to it. I'm working on a few more. Each manufacture did things in their own way. I'm sure over the years the methods vary within the same manufacturer. The Dixon I'm working on has a rosewood handle that is simply driven on the tang. Two brass tacks hold the ferrule on and have caused the wood to split out over the years. You can see that handle in picture three in the background. I'm pointing that out so anyone who wishes to do this will take the time to figure out how to take the one they have apart.


-
I agree. If you haven't trashed it give it a try. I honestly don't know what the trees in my back yard are but they work. I'm betting that the ones you have will work, if your gloves and or hands turn brown when you are handling the husks you should be good to go.
-
http://www.durofelt.com/ These guys have all kinds of wool felt wheels already cut. I bought a 1/2" mandrel at the hardware store and the wheels from this place. If you already have the motor find a mandrel and get the ready made wheels from theses guys. Saves having to buy a 2 inch or bigger punch too.
-
Anodized brass and gold plated both retain the "Shined Brass" look for years of use as a belt buckle, I wore it every day so I don't think losing the shine will be a problem. My belt buckles lasted about 3 years. Just to clarify I retired from the Marine Corps and shining brass was something that was a requirement every day as well as shining boots. Anodized and Gold plated brass solved the daily brass polishing issue. Boots still got shined every day. Have the client snap a pic of the hardware on the item. No questions need to be asked and the party receiving it will be none the wiser.
-
For years I have used whole walnuts to boil and dye traps. It turns them black after they are rusted. The concentrated stuff is called logwood trap dye. It's used as a form of rust presevative and has been used for more than a hundred years as far as my reading has revealed to me. I have also used the leaves from maple trees for brown on traps, I discovered this by accident, leaves in a bucket of water turned the water a golden brown. If you hold the dye over it molds. I've had some for years in a stainless steel crab pot. I just let the water evaporate and add water when I use it again in the fall. It stains everything it touches to include the grass. It will not completely come back out of jeans either. I just use whole walnuts. I never tried breaking them up. They do have worms in them here in Iowa if you pick them up on the ground. Be prepared to for the squirrels, they will find the walnuts unles they are in a container they cannot get into or you submerge them as soon as you gather them. They will shell them for you but they tend to strew the husks all over the yard so it's not really beneficial.
-
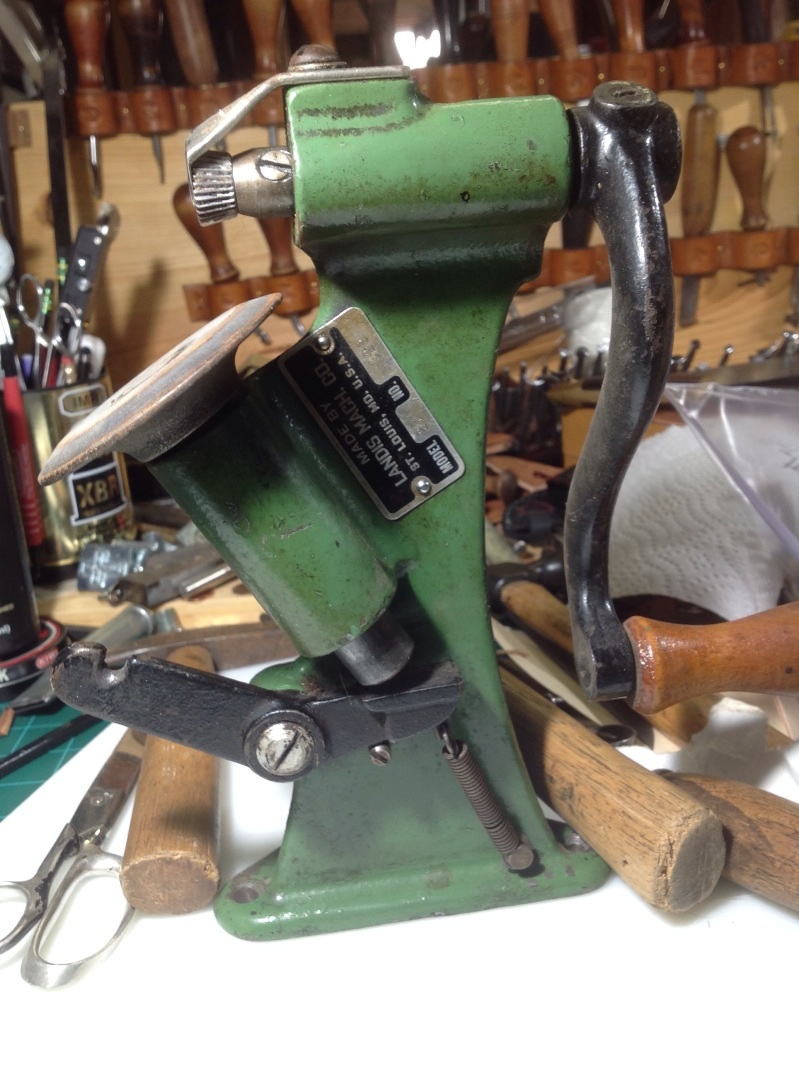
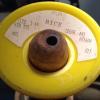
I'm at a loss as to what this is. It came from a cobblers shop. Has three different small notched wheels that attach to the top crank part, # 16, 24 and 32 stamped on the end.
-
My First Wallet
Oldtoolsniper replied to alackofcolor's topic in Purses, Wallets, Belts and Miscellaneous Pocket Items
Thank you! -
My First Wallet
Oldtoolsniper replied to alackofcolor's topic in Purses, Wallets, Belts and Miscellaneous Pocket Items
What mm tools did you use from that site?