Oldtoolsniper
-
Posts
276 -
Joined
-
Last visited
Content Type
Profiles
Forums
Events
Blogs
Gallery
Store
Everything posted by Oldtoolsniper
-
Try looking for a gouge in the correct size you need. Wood carving type. They come in about any size you could hope to want. A lot of the woodworking stuff will work on leather. I'm not a carver but I think the radius of the cut is called the sweep.
-
 Monica, Your work is awesome. You, like the rest of us tend to focus on any error we make. I've made quite a few of these for friends and they love them. I see the flaws and they see them as incredible. Truth be told I'm making them to practice my sticthing so I can improve, they take up hardly any leather and I've been able to give them all away with no problems. The finger knife added to the back was a seemingly simple idea until you have a go at it with a pricking iron. It's all one big curve and the pricking irons are straight. I bought a blanchard combination pricking wheel tool and there is again another learning curve to deal with. The nice thing about the knife sheath is that the stitches on the back are not visible. Stitching on a curve has really challenged me. I have a hard time with straight stitching and those pesky curves tend to amplify those problems greatly.
 -
I switched to pricking irons. Blanchards was the first set I bought. I make my own awl handles with an ivory dot inlay to keep track of the awl orientation. I was shocked at how much I allowed the awl blade to drift from the slots //////// if I did not pay attention. Even a little variation makes the stitch look slightly wrong on the front and way wrong on the back. Having those ////////// marks really reminds you to correct your awl orientation each time you penetrate the leather. If your awl is sharper than you think it needs to be then it might be sharp enough. I have a long way to go but the leap in improvement for me came with the use of a pricking iron. It caused me to really see the errors in my awl orientation. I also use tiger thread and that too added to my neatness after using some "Tandy Waxed Boat Anchor Rope". Look at these two phone cases and you can clearly see "awl orientation" issues, especially as I get close to the corners.
-
I made a case for my iPhone. It was way to tight and therefore pretty worthless. It is 5 oz veg tan and beaver tail laminated to one side. Hand stitched with .8 tiger thread. Since it would not fit I decided to experiment. I found a white plastic cutting board the same thickness as the phone, ripped it to width on the table saw leaving it plenty long. I placed it in my vise and clamped vise grips to the warm water soaked case, I drove the case over the form by striking the vise grip nose ends with a lead hammer and flat bar. The stitches held as did the leather and the tiger thread did not break. It's plain old saddle stitched and weldbond glued, no knots, expect back stitching three holes at the start and finish. I use it everyday, I doubt the thread is going to fail from the phone sliding in and out or my pocket after all that abuse. I really thought it was going to fail, come unstitched, or tear as I was beating the snot out of it. All that being said I would recommend sizing the case properly in the first place.
-
New Life For Friend's Knives
Oldtoolsniper replied to Fonzarellis's topic in Gun Holsters, Rifle Slings and Knife Sheathes
You did a really good job on those. As for the rivets, I had that issue as well so I ground off the stud part to about an 1/8 inch proud of the total leather stack, I copied the crimp bend with some side cutters (the indent on the stud shaft) and applied as normal. They seem to work just fine. I can't pull them apart without destroying the leather. This was with rapid rivets. Test on scrap first. I also don't know if that crimp or dent is nessasary but I'm not a rivet maker and I assume it has a purpose so I put it back after grinding to length. -
Singer 176-11 Fur Sewing Machine Needle Source
Oldtoolsniper replied to Oldtoolsniper's topic in Leather Sewing Machines
Toledo sewing "Cowboy Bob" has helped me immensely in my endeavor to get this machine running. He has found me the needles, and also help me select the servo motor for it. I should be in running order as soon as the shipper delivers. Many thanks to Bob for locating what I needed and the phone calls back and forth to make sure we had things right. 1st class service. -
Singer 176-11 Fur Sewing Machine Needle Source
Oldtoolsniper replied to Oldtoolsniper's topic in Leather Sewing Machines
Wiz crafts, Already placed a call and he is trying to come up with a solution for me. He has been a top notch guy to deal with on getting parts for my Adler 30-1. I figured I'd post here too, I can't be the only guy on the planet with one of those machines. -
I have a Singer 176-11 fur sewing machine. The manual calls for a 176x1 needle in sizes 4,5,6,8,9,11 or 12. I've been searching the net and can find nothing. Thanks in advance for any help.
-
Videos like that, are where the stupid safety warnings we have to suffer through come from. Do not operate hair dryer underwater.
-
Let me in too.
-
What Is This And Who Wants It? Seriously
Oldtoolsniper replied to plinkercases's topic in Leather Tools
Pm sent -
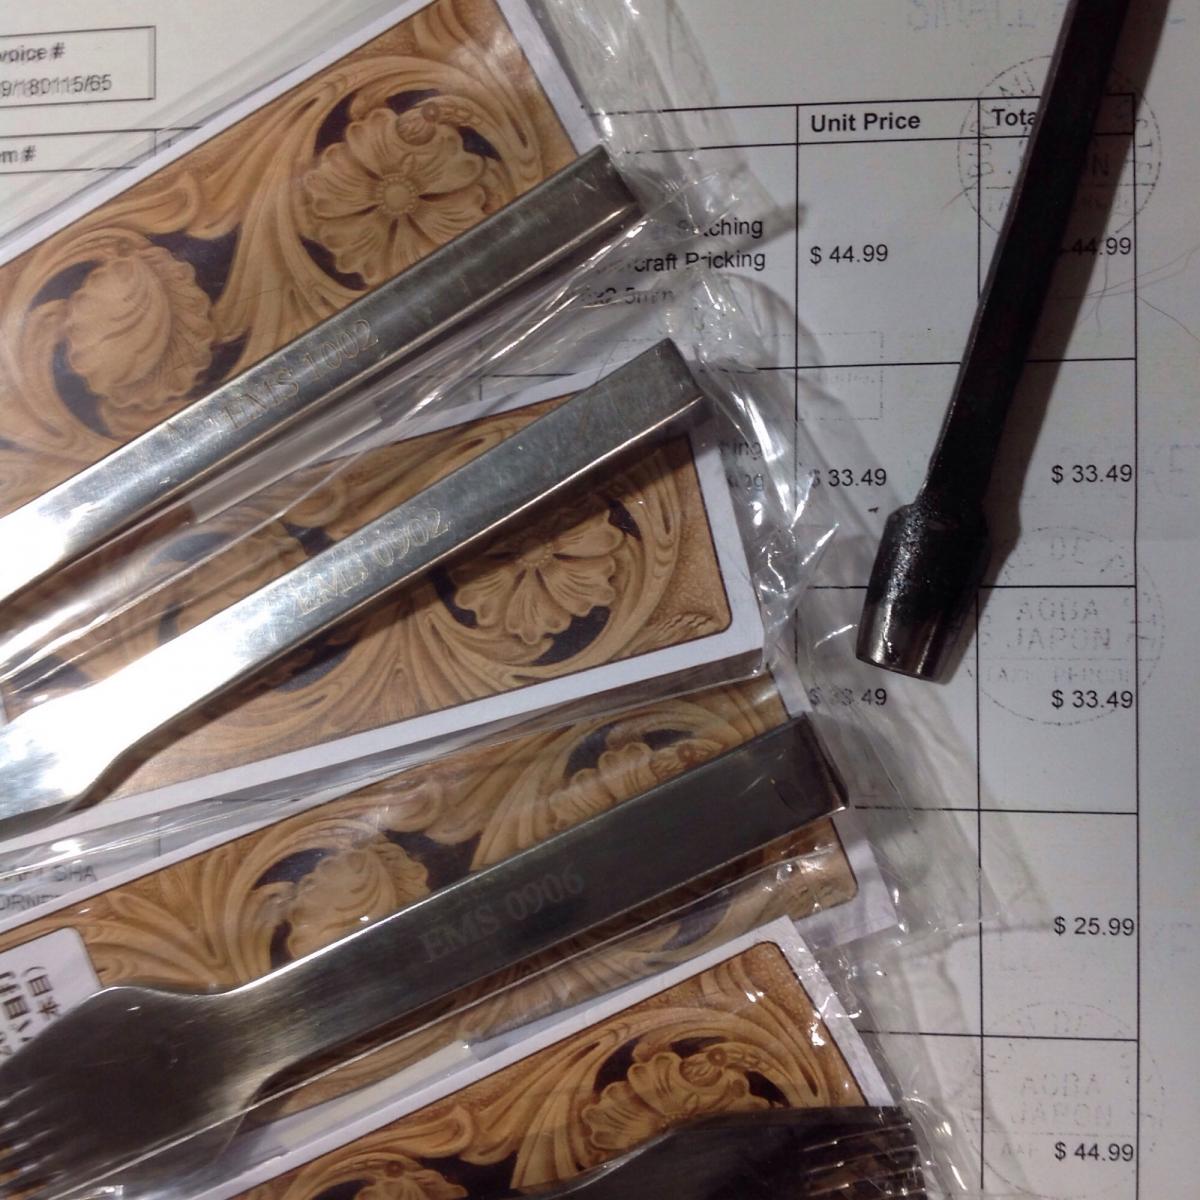
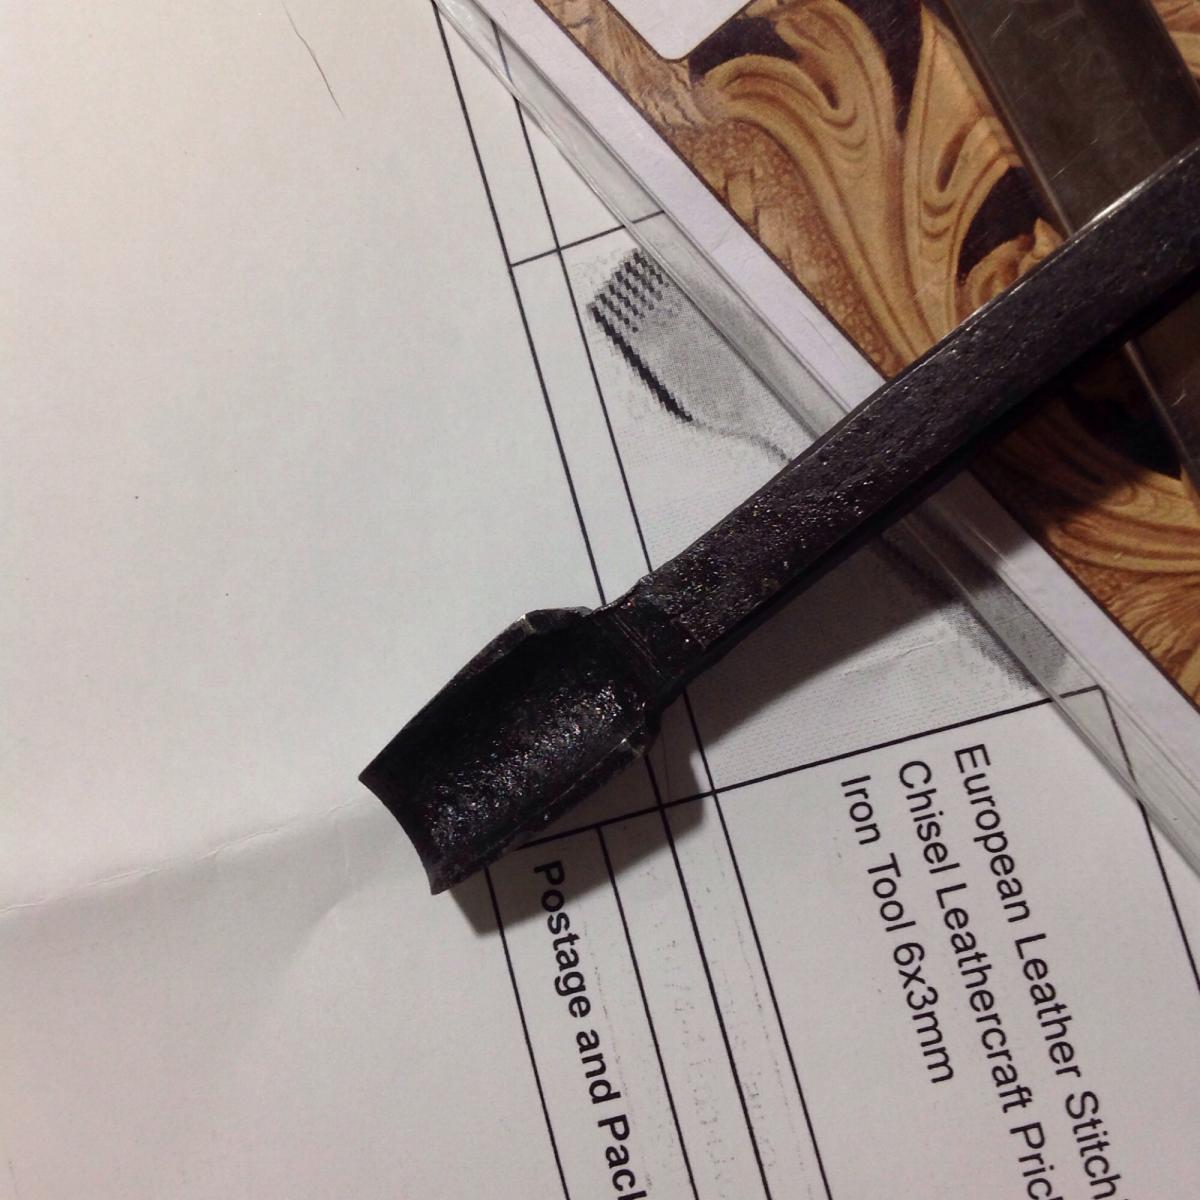
Ordered 2.5 mm set and the 3mm set as well as a wallet corner tool. Placed order via net on 18 Jan and they arrived today the 23rd of January. I paid the extra for EMS mail and figured it as part of the of the tools. That being said two sets of irons, the small $25.00 corner punch and expedited shipping was still cheaper than one set of Blanchard irons. They are stainless, magnet won't stick so no rust issues around damp veg tan. Blanchard's rust like any other carbon steel. For those of you not familiar with Japanese tools the corner punches may be a little bit shocking to you. The pricking irons are beautifully polished. The corner punches are hand forged and NOT at all polished. Same way you get the woodworking tools. They still do apprenticeships in Japan and sharpening is a skill you're expected to have. It cuts just fine but I'm the guy who sharpens his new utility blades before use so as far as in concerned I've never bought a truly sharp tool. Now to go stick some leather.


-
Those are sharp, wonder how well something like that works for brush busting and keeping snow out while hunting.
-
Sometimes the holster costs more than the gun!
-
Winter in Iowa, it does strange things to one mental state.
-
Felt For Ankle Rig?
Oldtoolsniper replied to harley45's topic in Gun Holsters, Rifle Slings and Knife Sheathes
http://www.durofelt.com -
I tend to rough up any smooth surface that I'm bonding, some leathers the cement will roll off the surface or not stick very well if I don't do this. I also try it out on scraps of the same leather before I commit. I use weld bond (flammable red can) contact adhesive. I let it dry to tacky so no reside sticks to your knuckle but the surface is still tacky. Like a post it note. Glued together a magnetic money clip this morning with the magnets poles wrong, they broke apart when I tried to pry them out of the leather, I had to use pliers to pull the two pieces of leather apart. If done properly this particular cement works very well. Experiment on your scrap, I know it takes a little time but redoing an entire project usually takes more time and is more expensive. Not all adhesives work on all types of leather. Same as wood working there are choices that work and that don't. Test on scrap and make notes.
-
Thanks for the information. I'm going to stitch mine if it works out. Im going to go with an iPhone/card holder. I'm interested to see if the edges can be finished like I do with veg tan. I'm assuming since it will have a veg tan backing the edges will finish fine. Good thing those critters aren't really that color in the wild, they would have been extinct long ago.
-
Rohn, Got my "gator leather" today. Same color as yours. I've never made a wallet but I have done some iPhone cases with card pockets, no lining. I've also worked with beaver tail which I laminated to veg tan leather before stitching. By laminating I mean glued the entire thing together with contact cement to make one piece. Is that how you applied the pig lining? If not could you give a quick idea on how it's done. I bought more than enough to experiment but I am willing to cheat off you since the one you made is what inspired me. That is of course if you are willing to share. Thanks
-
Off The Bench
Oldtoolsniper replied to Frank's topic in Gun Holsters, Rifle Slings and Knife Sheathes
I would never be able to wear one of those, they are works of art! -
Perhaps a fellow pen turner? That's nice, what finish does it have on it?
-
I've used the electric method it tends to turn the surface a black color and takes additional steps with scotch brite pads to remove. I use it on handsaws because of the size of them evaporust is cost prohibitive. This time of year I buy the stand up wrapping paper storage tubs because they are narrow and tall enough for most saws. It's very easy to scrub a large flat surface like a saw with a scotch brite pad, not so sure on a punch or something with a cutting edge. Oxalic acid. Never tried that on anything but leather. Off to google!
-
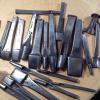
Most of those are the same tools, either way these were all rusty when I got them. These are only through step three. 1. I degrease them. Don't skip doing this, evaporust is water based and won't penetrate oil or grease. 2. Soak in evaporust in a covered container, it evaporates! 3. Polish them out on a cloth buffing wheel with the black compund from Caswell plating or wherever. That's just what I use. 4. As time permits they get final clean up with a foredom tool and hard felt buffing bits. 5. Sharpen them. 6. Use a good wax on them to prevent rust. I use car wax, try to avoid any silicone it will repel dyes and such. I clean up a lot of old tools and in my opinion and this is only my opinion, to many people go the wire wheel route and it looks worse to me than the rust. Sandpaper and steel wool have there place too, but going the least aggressive route is usually your best option. Remember what you're trying to accomplish as well. In some cases you just have to live with the pits that the rust has caused. If it does not effect how the tool operates I don't try to polish them out. Most of these tools are old and they deserve to have a rust wrinkle or two. This takes time but it works. Doing it this way you won't be removing the metal very fast and to buff out a stamped name or number on a steel tool would take a lot and I mean a lot of buffing. Practice on an old pair of pliers or something rusty before you go after that priceless heirloom. I posted the pictures so you can see that it works, at least for me. The easiest way is to prevent the rust in the first place, after you polish it off of a few tools you too will develop good rust prevention habits.
-
This is good advise. Do not use a wire wheel, they are fine for removing welding slag and ruining tools.
-
70S-Inspired Phone Case
Oldtoolsniper replied to hobbihorse's topic in Purses, Wallets, Belts and Miscellaneous Pocket Items
That's Groovy!