Windrider30
-
Posts
806 -
Joined
-
Last visited
Content Type
Profiles
Forums
Events
Blogs
Gallery
Store
Everything posted by Windrider30
-
Now those are cool, i would'nt mind getting into making leather amour but oy that is a LOT of leather! And a limited clientell having hard enough time selling some of the bags I have done lol.
-
drnorwood thanks and hmm steampunk vibe might be a good route to go next time. The color variation is actually something that I was going for just away to make certain things stand out but once in a while that can actually be a real pain in the ass to get the look i want with the gel antiques that i use (tandy's eco flo) as well as with the streakiness i do not like a simple flat looking bag. I was thinking about going for a distressed look like with what i did with my wallet (must get pictures of it) basicly dyed it, let the dye dry then hit the wallet with sand paper, redyed, let it dry, hit again with the sand paper until i found a look i liked, took 8 coats on the wallet to get the look i was going for. But I do agree if you do not want a streaked look it can be a pain in the ass with the gells.
-
I like it especially the pillow after all if you get a splinter from sitting on that you will really find out who cares about you!!!
-
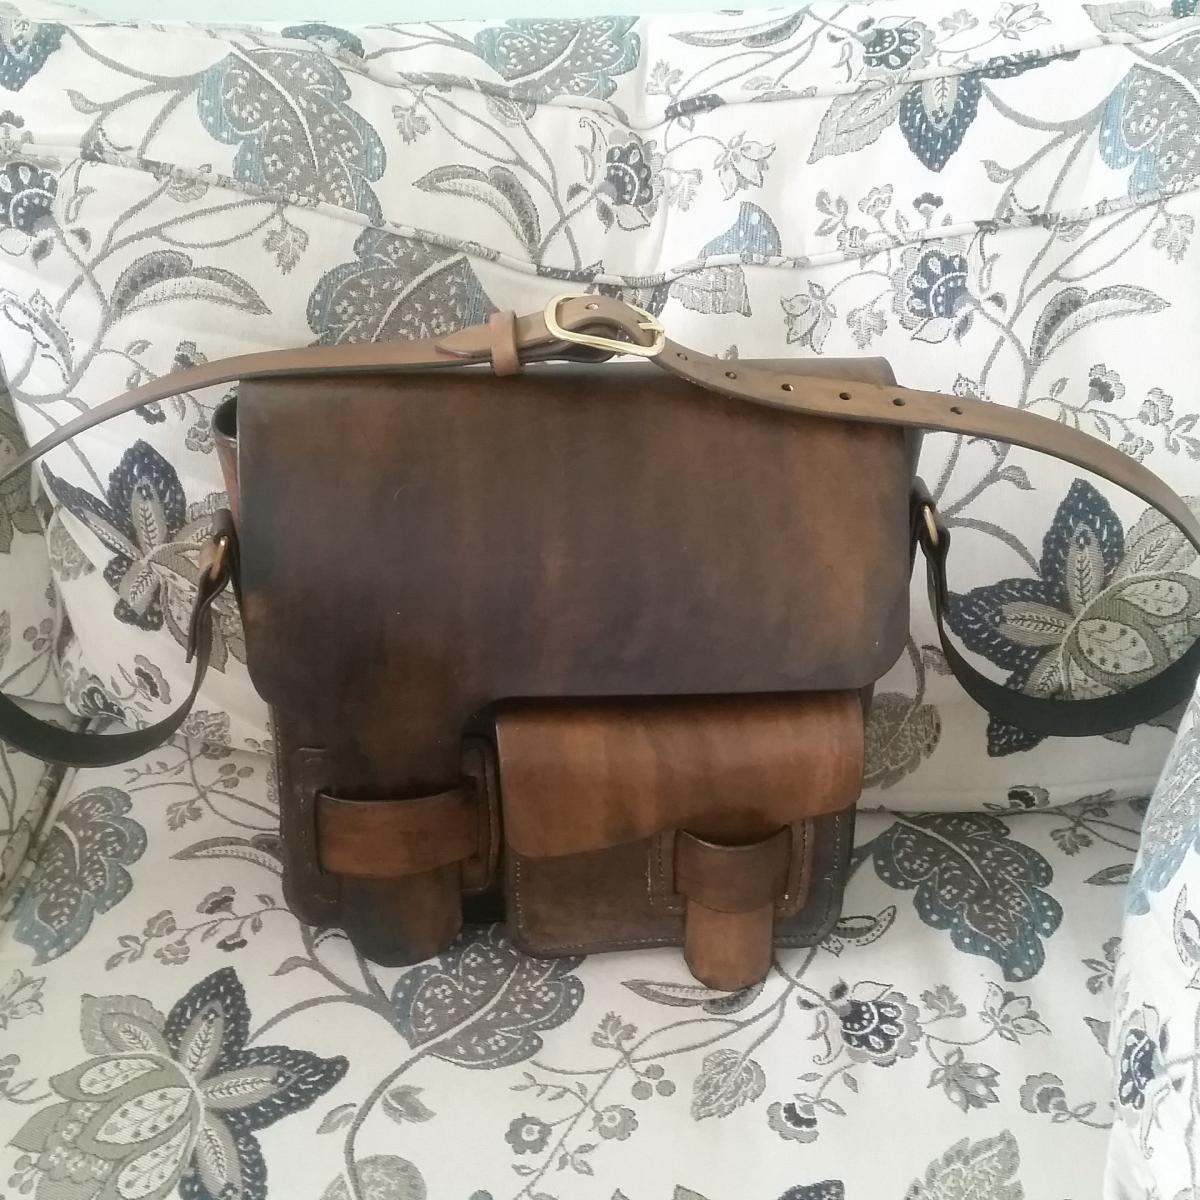
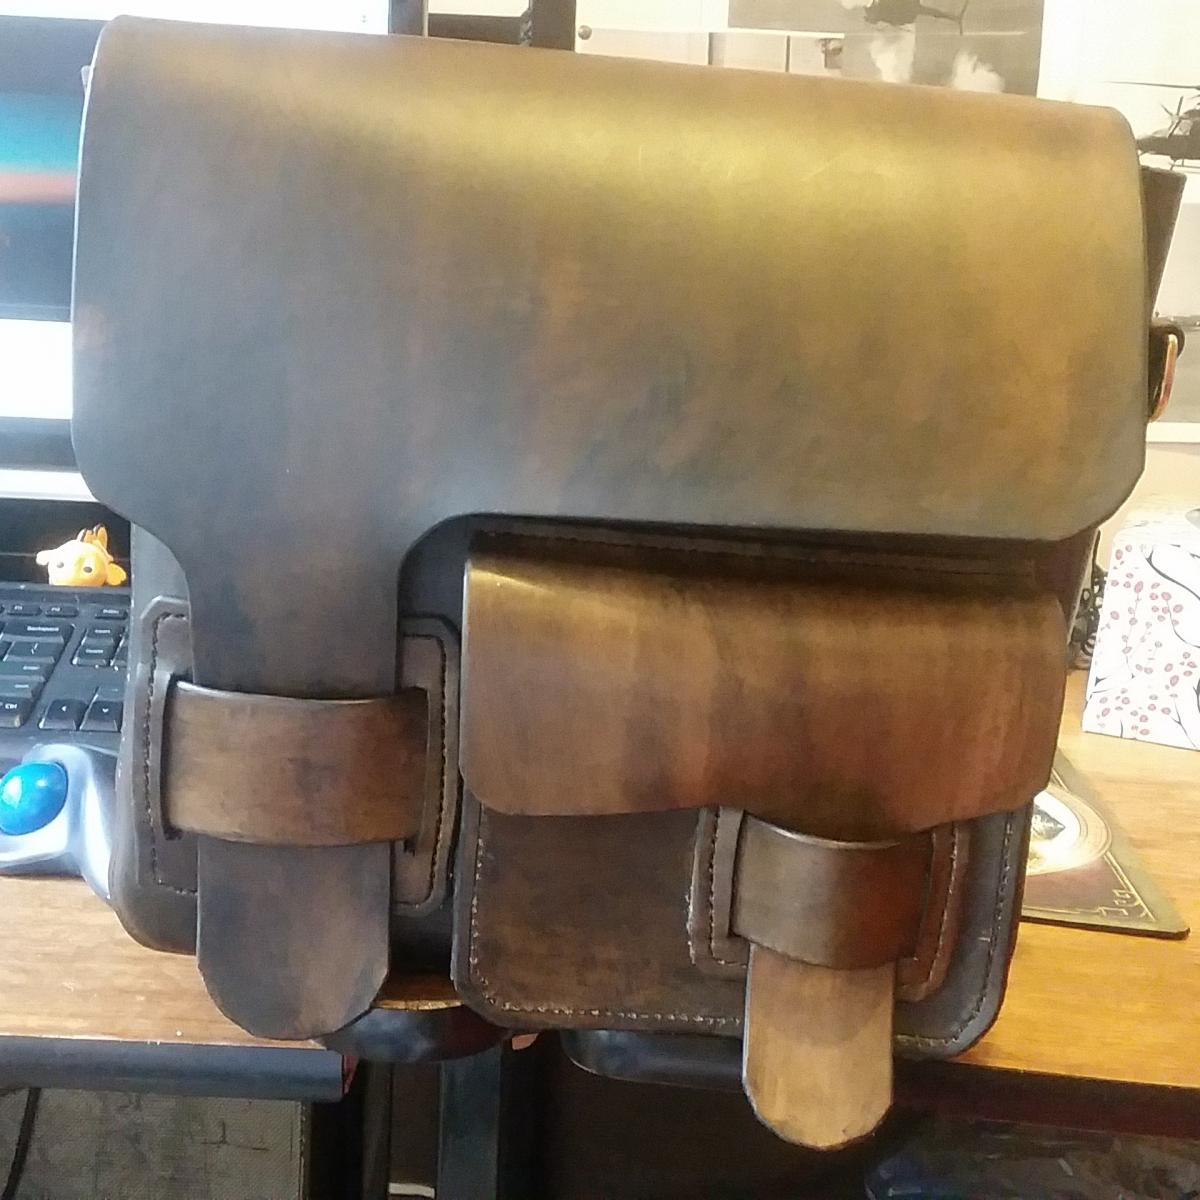
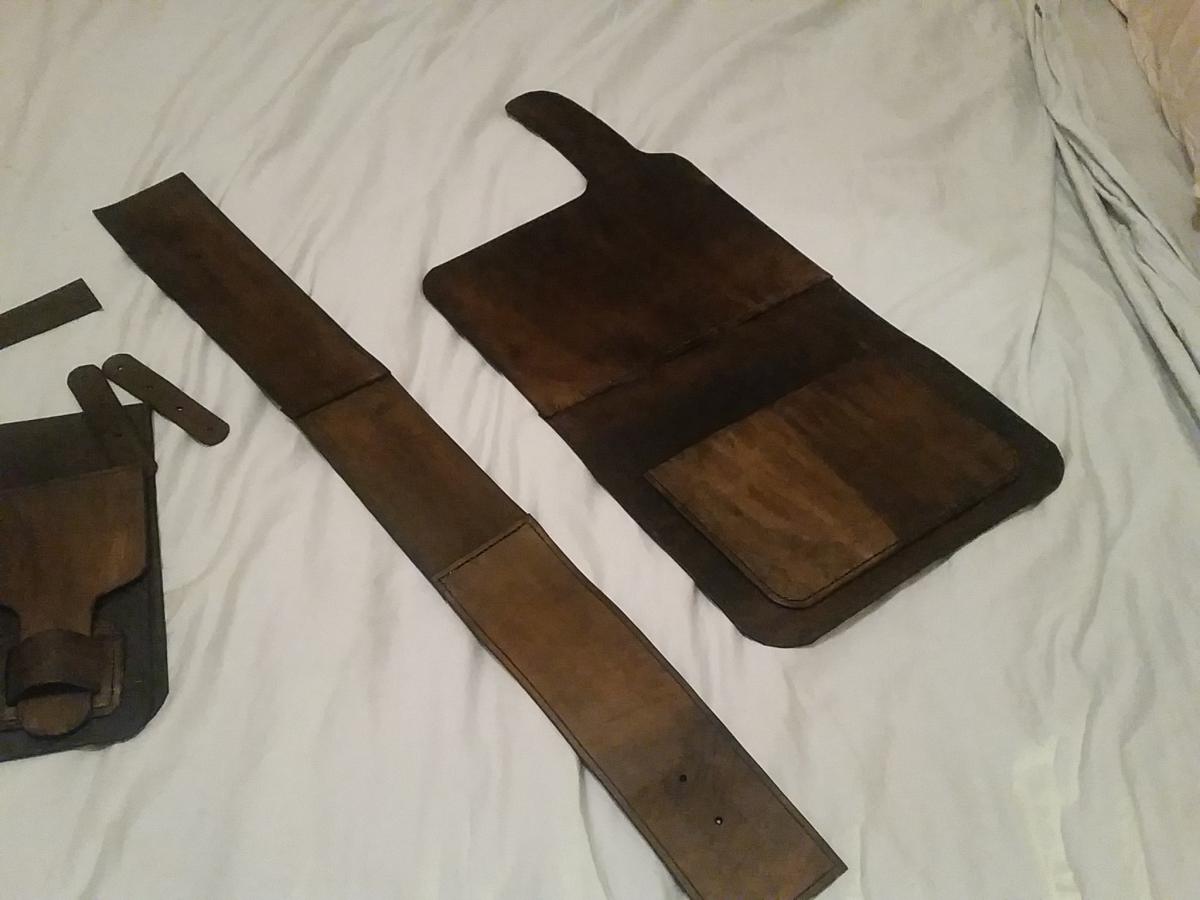
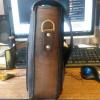
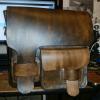
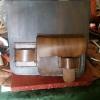
Finally after 26 hours of hand stitching, 2 days of cutting, dyeing, slicking and a lot of swearing this messenger bag is FINISHED! added an adjustable shoulder strap. Measurements H 10 3/4 inchs W: 12 1/4 inches Depth 4 inches 7 SPI back pocket is 9 1/4 inches wide 6 1/4 inches high (its a flat pocket so that is pretty much the depth as well front pocket: H: 5 1/2 inches W 5 17/16 inches Depth max 1 1/2 inches good place to store a cell phone in the back, or the front as well as a few other odds and ends such as sunglasses in the front pocket or car keys.
-
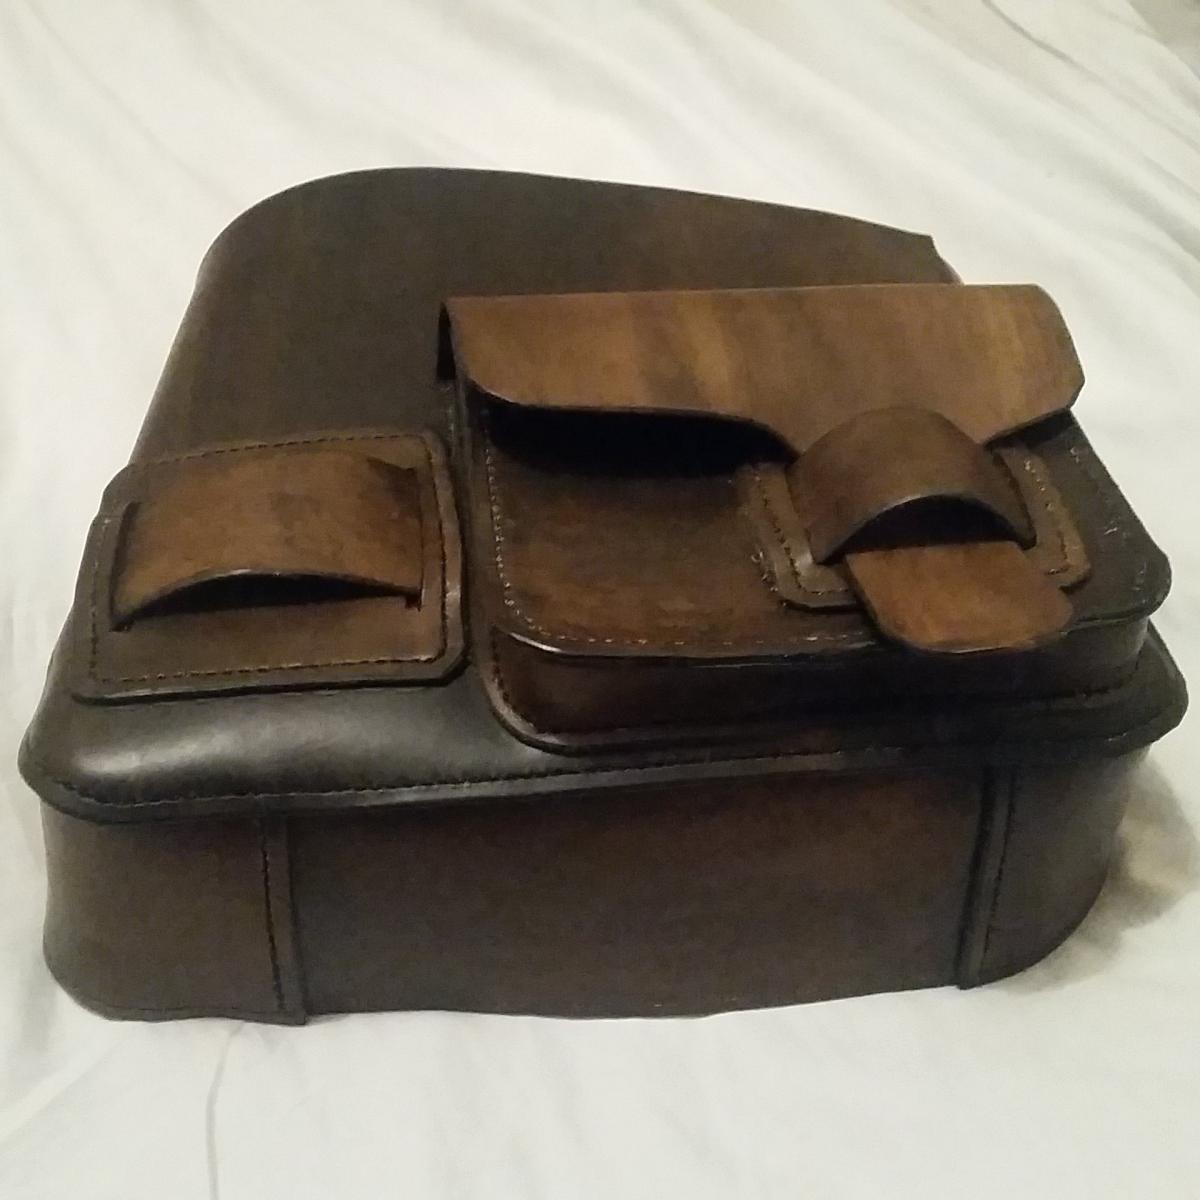
26 hours total of hand stitching is DONE!!! just have to do the straps and that is the easiest part! Pics are of front, side and bottom

-
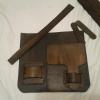
Oh also forgot to mention on the gusset there is no fold, no 90 degree square or even something that resembles a bent edge, so no glue is really able to be used so stiching one hole at a time and forcing the leather to bend all the way around. It is an interesting way to sew to say the least! But I kind of like this look a little more then I do with the straight look. Also there are 7 stitches per inch if anyone is interested in that. and that goes for every stitch on the bag from attactching the back flap to every last stitch
-
holes are already pre punched with a pricking iron, doing a saddle stitch just takes time is all, especially with all the stitching that has been done on the bag. Added up the time (not including what is left to do) and it will be 28 hours flat, next bag i may be able to cut the time down a little bit as this is the first bag of this design i have done. Wasn't to sure about how i had the holes set up but they are dead on so I am happy about that!
-
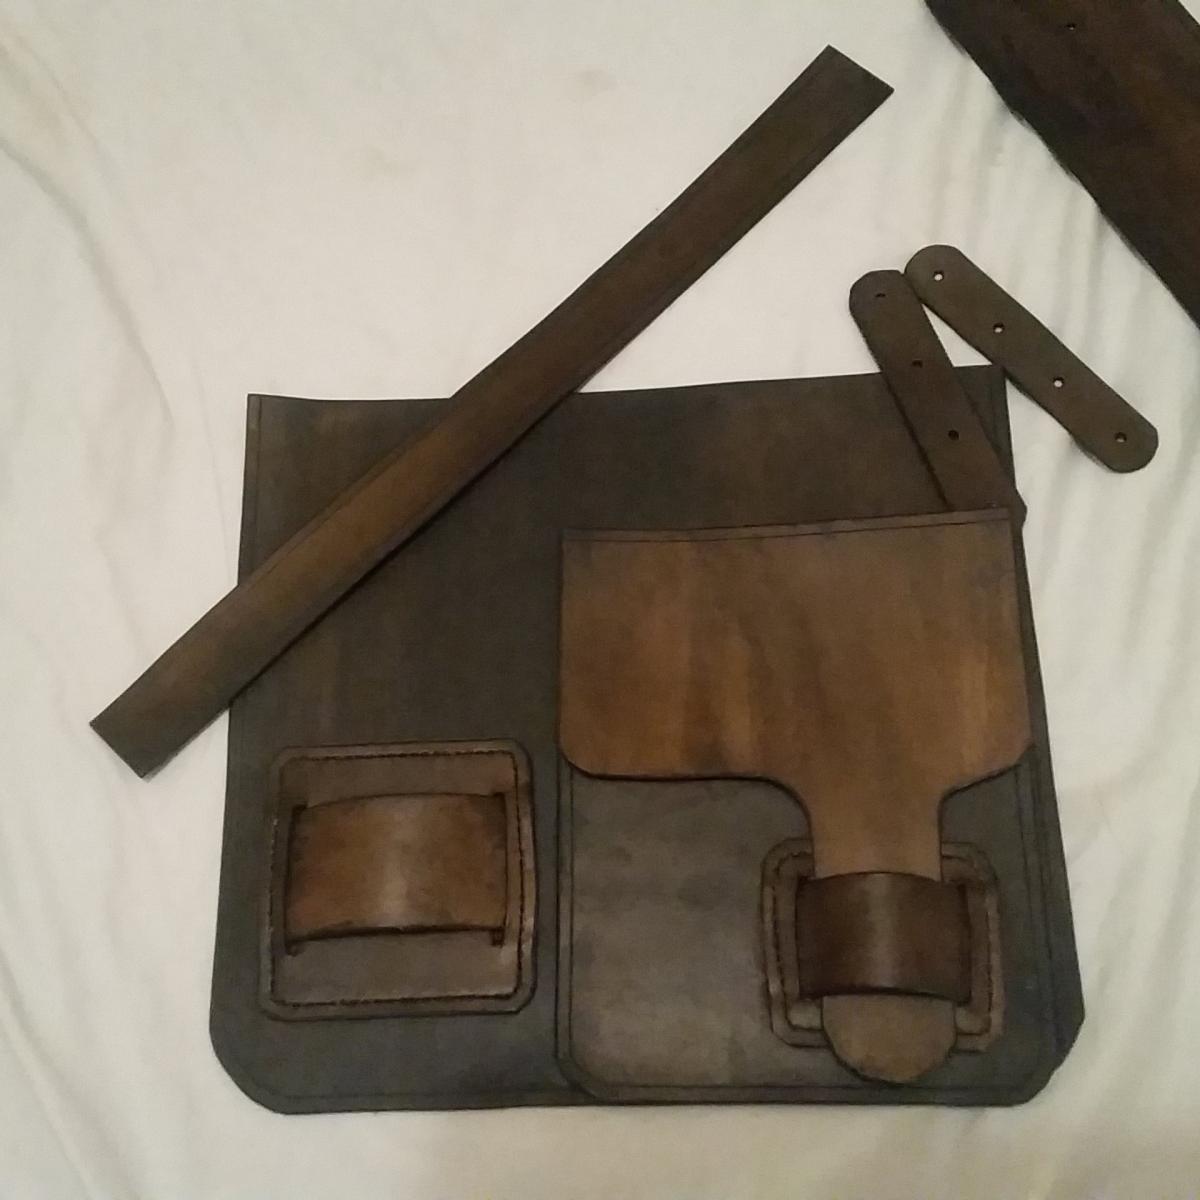
Ok almost done, here is how the bag will look (or close to it) when its totaly finsihed have half the bottom and one side left to stitch. I will have roughly 28 hours of hand stitching total for this one bag! I think I am going to set the price at 300 debating about 400..not totaly sure yet
-
Will have to give that a try venator sure would save the hands
-
Thanks Pat i still have another 8 hours or so to go of hand stitching to put it all togethere, but i am taking the day off lol my fingers are litterally burnt from pulling on the thread they need a break!
-
Computer is being a pain ugg, anyways after 16 hours of hand stitching front is done and attached to the side and back gusset really like this rounded look.

-
Those are stunning!!
-
now that is a cool idea to vacuum wet form something!!
-
Only took me 4 hours to do this one little front pocket..but at least the front is fully done now..NO clue why it took me that long for some reason this was a real bastard of a gusset to put on!!! Now all i have to do is get the whole bag put togethere!!! But that is a job for tommorow!!
-
I like that what leather did you use, thickness as well?
-
How Do I Attach This Concho Without Deforming It?
Windrider30 replied to BeUnico's topic in How Do I Do That?
try and use a rubber mat the kidn that are used for jeweled rivets that might still allow you to hammer it on without deforming it maybe? -
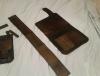
Has taken me 8 hours of hand stitching (saddle stitch) to get as far as I am currently. Still have to put a gusset on the front pocket then put it all together..I do all my stitching by hand so it does take a while to get a bag like this together. Found the plans for it online and really liked the look so figured what the hell will give it a go. Only thing I still have yet to do is cut the shoulder straps...I so hate cutting straps!!! Will post more as I get the bag put together.
-
THat is pretty cool!
-
I love it!!
-
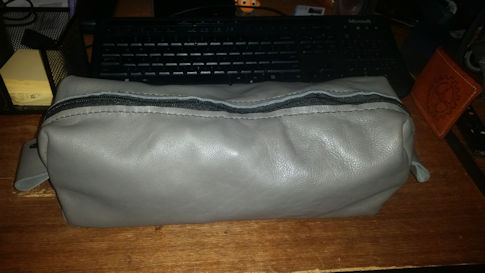
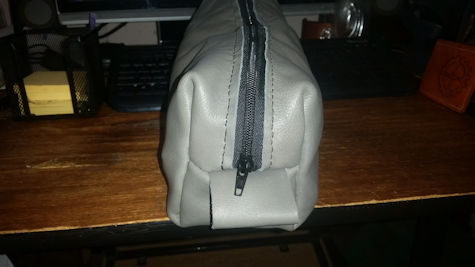
First Ever Dopp Bag
Windrider30 replied to Windrider30's topic in Purses, Wallets, Belts and Miscellaneous Pocket Items
Thanks for the idea! -
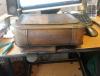
Everything is done by hand only had one issue and that was trying to figure out how to make the zipper pull tabs, only took me three times of breaking the stitching and re stitching to finally figure out how to put that part on. ALso first time i have ever done a square bottom turned out really good. The leather is a mineli side from tandy granite color very soft leather, in the pictures i just stuffed the bag full of news papers as when its empty it just collapeses on it self. There is no inner lining just the leather itself, mind you this is for me and I HATE putting wet things away in a bag with out first putting them in a plastic bag (normally zip lock ) because I do not want my bags to get wet or smelly! One question is when I make more, and I do plan on making more should I line it with plastic or line it with something else or don't line it at all?
-
Steam Punk Style Hat
Windrider30 replied to Windrider30's topic in Purses, Wallets, Belts and Miscellaneous Pocket Items
THanks Wild Bill and I am the same way no idea why i like Top Hats but I enjoyed the challenge of making it, and according to my wife it proves I have a big head as when she puts it on it drops to her shoulders, I told her I loved her like that, hard to hear her...she smacked me can you believe that?!!! I am thinking of seeing if I can sell the hat for around 150 to maybe 200 not to sure just yet. -
Those are really cool!!
-
Steam Punk Style Hat
Windrider30 replied to Windrider30's topic in Purses, Wallets, Belts and Miscellaneous Pocket Items
Thanks all -
For a bracelet you really do not want to use a glass burnisher. I use one on belts and a few other projects but i find that using a glass burnisher makes the leather get way to stiff for the proper flex that a bracelet needs Grain side if the brain is working right after a 2 k walk with the dog lol (back side non smooth side and people ssay walking is good for my brain doestn work!!!)is the bleed problem Oh and water based a:cleans up a lot easier off clothing hardwood floors and other accidents the oil based (found this out the hard way more than once)and the oil based dyes just have a lot harder chems in it then the eco flow that i prefer to use (only oil based dye i use is fiebings ox blood LOVE that color!!)