Uwe
-
Posts
2,221 -
Joined
-
Last visited
Content Type
Profiles
Forums
Events
Blogs
Gallery
Store
Everything posted by Uwe
-
I worked on a SunStar KM-235A machine over the past week and put it up for sale on my local CraigsList (http://detroit.craigslist.org/wyn/bfs/4994972902.html). It's not really a leather sewing machine, which is why I'm not keeping it. I bought it for the table, really, but then I decided to fix her up. I made a little demo and how-to video for the machine on YouTube and I thought I'd share it here for your entertainment: https://youtu.be/roF2t16TiqQ
-

Forward And Reverse Stitch Don't Match
Uwe replied to NewYorkerInSydney's topic in Leather Sewing Machines
I posted this in the other thread, just reposting here to have it all in the same place. The service manual (http://semsi.com.mx/...00N SEM02_.pdf) talks about how to adjust forward/reverse stitch length on pages 26/27. -
Forward And Reverse Stitch Don't Match
Uwe replied to NewYorkerInSydney's topic in Leather Sewing Machines
The service manual (http://semsi.com.mx/Manuales/JUKI/LU-1500N%20%20SEM02_.pdf) talks about how to adjust forward/reverse stitch length on pages 26/27. -
Make sure you watch the guy do his work. If it'll fix your machine and make you resolve that you will never pay another tech to adjust your timing, it'll be money well spent.
-
I bought my Consew at a local goodwill store partially as a training machine, so that I can try things out before I work on my expensive Pfaff and Adler. Many of the machines are slight variations on each other. Edmonton may not be a hot bed of used industrial sewing machines, but Toronto should be okay. Consider getting a cheap machine just to poke at without breaking out in a sweat.
-
Google is your friend http://www.manualslib.com/manual/464955/Duerkopp-Adler-467.html

-
It's not in the tech's interest to make you feel comfy about doing it yourself. The nice thing about these machines is that they're VERY mechanical. If you're okay with a wrench on a car, you have a VERY good chance at becoming good at working on these old sewing machines. Don't make a change and floor the gas pedal, make an adjustment and very gently turn the wheel by hand. It'll be very obvious if something is way out of whack that might damage the machine. Get hold of a service manual and read it. Chances are it'll seem less problematic than you think. I just got done reading a service manual written for military training(!) for my Consew 225 to adjust my bobbin release lever and it's quite straight forward (turns out it was loose and didn't do anything at all!) It's not rocket science, but rather sewing machine science invented about 150 years ago. But it's your call, obviously. $500-$1000 sound very expensive to me for a slight timing adjustment.
-
I've seen a few needle/thread charts and they don't always agree. There's a number of factors that determine if a needle/thread combo will work or not. The chart at Toledo Ind. Sewing Machine's website indicates you might be okay with a 207/23 combination: http://www.tolindsewmach.com/thread-chart.html But if using a 24 needle solves the problem, you're golden! Alas, I also once had an issue with the hole in the inner sewing presser foot getting too small for a particular needle/thread combo, causing the thread to fray. Changing out the presser foot for one with a slightly bigger hole fixed that problem. Another time I had a brand new presser foot and it had some rough edges at the bottom, again causing the thread to fray and break at times. Smoothing the bottom of the presser foot with very fine sand paper solved that problem. I'd also recommend pulling the thread loose at the top tension and alternating this with pulling out the material, at the end of a seam. If you inadvertently bend the needle just a little by pulling hard, it may cause trouble. Proper spacing between needle and hook is often about the thickness of one sheet of paper, and any excessive bending of the needle will surely mess that spacing up. (Almost) Last point is to hold both loose threads firmly for the first few stitches. It makes it less likely that loose thread underneath the material will cause trouble a few stitches into the seam. Now I'll go and look up what a latch opener is and what adjustment my machine may need, haha.
-
Since I have an iPhone 4 and clearly too much time on my hands (or procrastinating things I should be doing instead). I made a little video snippet using my iPhone 4 and recorded a making-of for your entertainment and education, haha. You don't want to hold the phone while you sew. My high-tech setup includes scotch tape dispenser and a AAA battery to adjust the angle of the phone. Touch and hold the part of the screen you want to be in focus until the focus lock and AE lock message appears. Then start recording, then start sewing. Actually, it would be interesting to see your machine turn without a thread and without the drive belt connected. It should turn by handwheel quite easily and not snag or bind at any time during a full cycle. It's easy to miss a bind if the motor just powers past it. If you turn by hand it will be very obvious if there is resistance at some point due to parts touching or rubbing. Making-of how-to video is here: https://youtu.be/twl_V_vlq2Q iPhone 4 close-up is here: http://youtu.be/S0YaHrA0aqQ
-
You can download manuals and parts lists for your machine from Durkopp Adler here: http://www.duerkopp-adler.com/en/main/Support/downloads/index.html?action=search&prop0=%2Fcommons%2Fdownload%2Fpublic%2F467-180%2F&prop1=
-
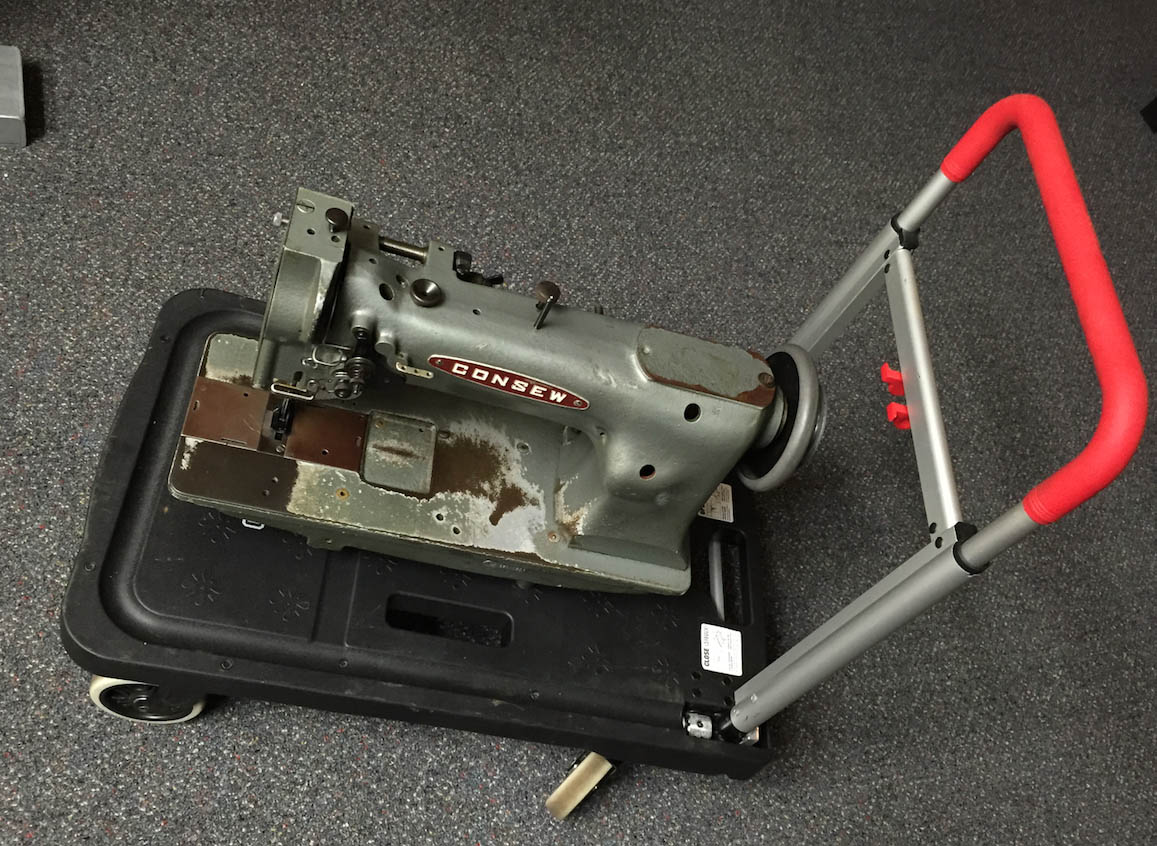
For local repair options, check with your Central Sewing Machines Store in Edmonton. Any reputable sewing machine store will have access to repair people to fix machines. No need to move the entire table around, they just need (or rather, want) the machine head. The repair person will drop the machine head into their own table for testing and repair. Your machine may have arrived on a pallet, all assembled. Most industrial machine heads can be lifted out of the table after tilting it back and disconnecting the drive belt. The head itself will be quite heavy but manageable - no need for a truck, just a trunk. I have a handy little folding cart to move my machine heads around when needed. Your machine head will be bigger, but not dramatically. (http://www.amazon.com/Magna-Cart-Flatform-300-Capacity/dp/B002TITK8O).

-
For remote, internet based debugging, try find a friend with an iPhone 6 and try to take a close-up video like mine at https://youtu.be/Dg12IXhcqkU (2:40 mark) to show what's going on inside when you're stitching and the thread is breaking. A real close-up video snippet with that kind of angle, resolution, good lighting, focus (even better in super slow motion) of the thread breaking would go a long way toward figuring out what's going wrong, without schlepping the machine around. Just an idea.
-
Your problem may have to do with the needle as well. Your thread appears to "break" right after you reverse. I noticed that when I use leather tri-point needles, the needle will sometimes actually cut the thread in a previously stitched hole if I reverse the stitch. The leather point needle tips are like little knives and they cut leather (and thread) quite easily. Your thread may be cut instead of break when reversing, or the thread may be cut partially and then break when it's pulled tight in the upward stroke. Personally, I no longer use reverse when I stitch thick leather with a tri-point or similar knife-edged needle. I just finish the seam by hand, which is a little more manual work, but to me it looks cleaner and is less frustrating than messing up an otherwise fine seam on the second to last stitch. I'd try sewing with a different needle (regular point, not a knife-edge needle) and see if the thread still breaks upon reversing. If your thread also breaks when stitching forward into new holes, the problem is not the needle. Try to eliminate a few possible causes.
-
Thanks for your replies and the referral to College Sewing in the UK. I ordered a drop down guide from them. The price was reasonable and the shipping wasn't bad at around $10. Of course not even a day later I got a reply from Kwok Hing, too. I asked for a quote on a bunch of items I'm interested in and it seems I might be able to order stuff. I'll report back.
-
So this company named "Kwok Hing" in Hong Kong makes a bunch of really interesting sewing machine parts for two machines I own. They have a website at http://ww.kwokhing.com I've contacted them four times over the past two months through email to get pricing and ordering information, but I've yet to receive any response from them. I know that some folks on here have successfully ordered things from them. I also see parts made by them on eBay every so often. The drop down edge guide on one of my machines is made by Kwok Hing and it's really well made. I'd like to order a few more parts from them. Is there a magic word I'm supposed to use when I contact them directly? Is there a reseller I should use instead? If you've successfully ordered directly from them or know of a reseller, I'd love to hear from you. Perhaps theres a contact person who handles U.S. orders. Thanks in advance for any help you can provide.
-
Nicely done Tor! Interesting variation on the more common U-shaped table tops. The photo reminds me of scenes from "Dexter" (a TV series where the walls often get covered in plastic to contain blood spatter instead of paint). This solutions certainly looks like it won't fold flat when it gets bumped. Now you got me contemplating using an old cast iron base for my Pfaff 335 table. Thanks for posting this project!
-
It looks great but I'm concerned about the load bearing ability of that design. I'm thinking you'll need a cross brace at the very least, better yet two - and even then you may be pushing it. As it is, any sideways motion of the heavy top is going to get amplified into a VERY large twisting motion at the bottom center T-joints. Don't underestimate the power of levers and you have a formidable lever that has a 30" vertical lever twisting a pipe (joint) that is perhaps an inch thick, giving you a roughly 30x torque multiplier - it may very well twist the pipe itself if you bump into it hard enough with that much weight on top. Adding a few T connector vertically will improve the situation a great deal.
-
New Dürkopp Adler 969 And 967 H Type Machines For X Heavy Work
Uwe replied to Trox's topic in Leather Sewing Machines
Now I'm curious what a European "tablespoon" table looks like. I've always felt a little jealous of the nicely engineered tables with fold-away options that are available to european buyers. Even the DA promo video for the flatbed 967 shows a super nice, thick plywood table the 0:22 mark in the video. I took apart and re-finished my Adler 205 stand that was made by Weaver some twenty years ago. While the welded metal parts are super strong and confidence inducing, the tabletop itself was an unworthy laminated particle board affair that I replaced with a butcher block piece of wood. Thanks for posting the little trip report and the photo - it does give a good sense of scale! I do hope that the Weaver people will be up to the task of supporting this piece of modern machinery, although I don't mentally put the Amish together with modern, computer controlled high-tech equipment. I'm surprised they allow electricity. But having somewhat local (i.e. "on this continent") support is important for this type machine. Overseas phone support can only do so much and it's not like you can just quickly mail this behemoth to a service center to have it looked at. -
I'd buy the original part. It's not that expensive and time is money, too. You probably already spent hours researching the screw online and trying different things. You'll spend more hours trying to make the other part work drilling and tapping an otherwise perfectly good piece of machinery. Unless you put no value on your own time, you won't save any money, really. But that's just my opinion.
-
New Dürkopp Adler 969 And 967 H Type Machines For X Heavy Work
Uwe replied to Trox's topic in Leather Sewing Machines
Please post a trip report (and a selfie with the machine of course) if you go to Weaver and actually see and touch one of these mystical machines. I've contemplated making the 3.5 hour trip myself just to see it in person, but current weather conditions make that impractical. I'm ready for a spring road trip to Mt. Hope. -
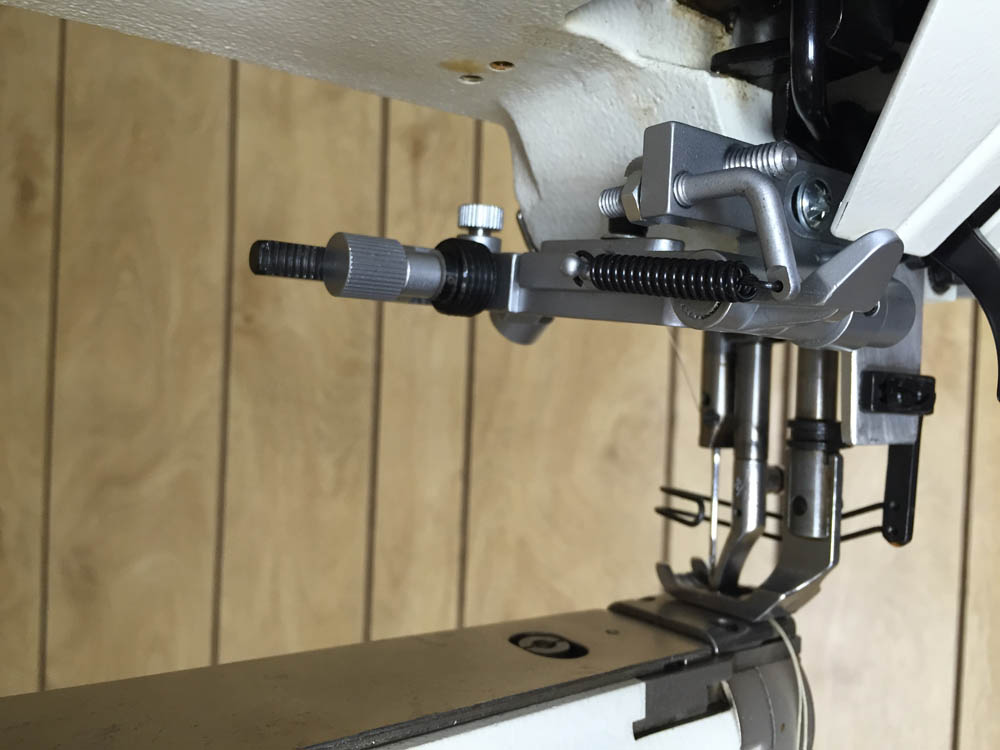
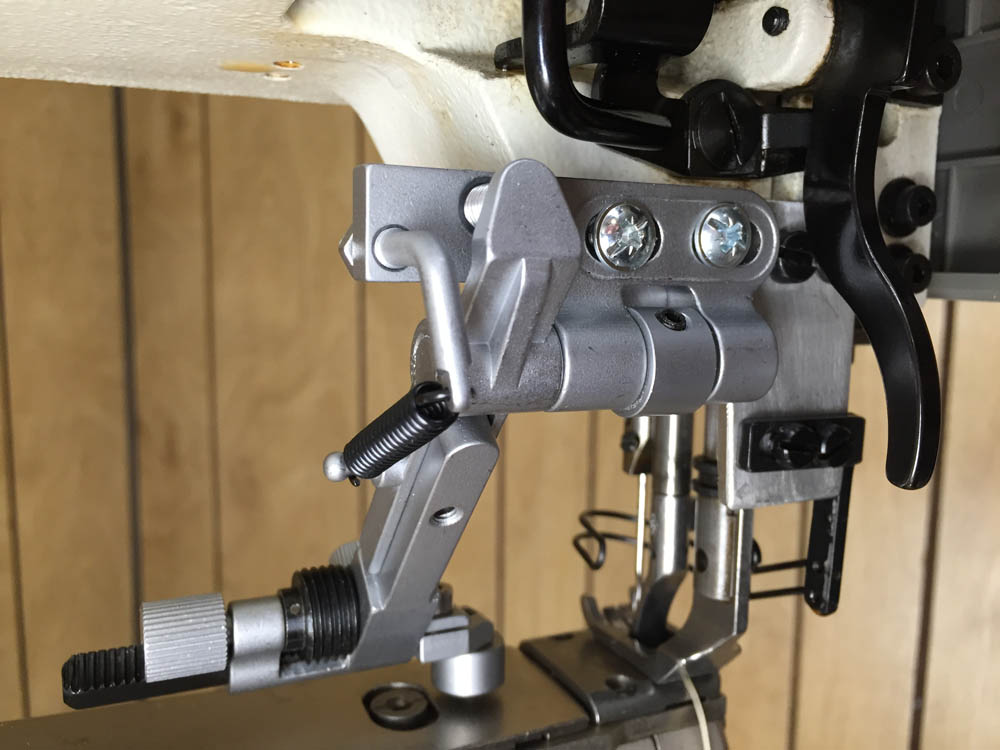
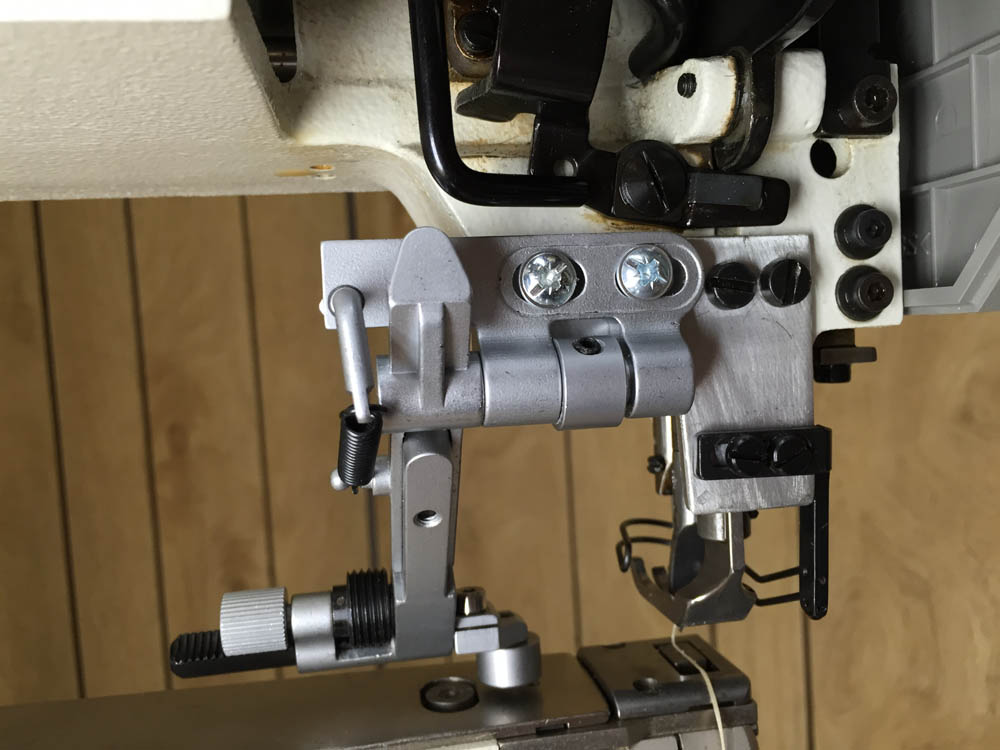
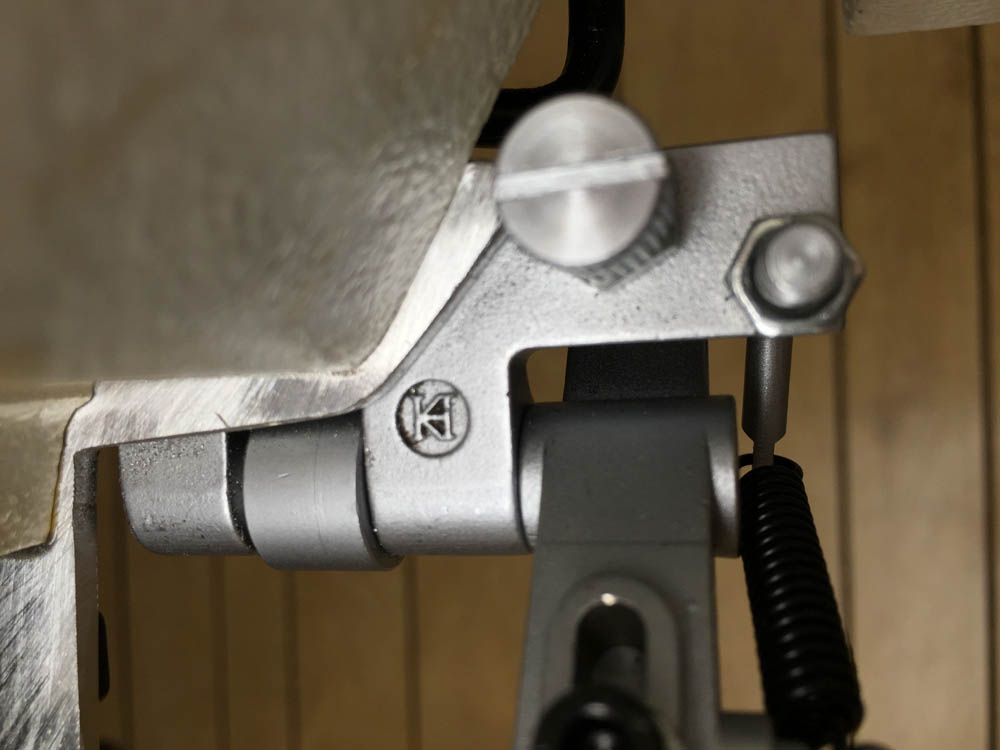
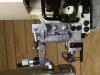
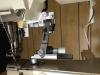
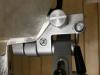
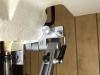
I recently installed an edge guide on my Pfaff 335. I bought the guide through eBay from Nick-O Sew for around $90. The edge guide looks to be a Kwokhing and is actually a very nicely done guide. It also needed a bracket to attach to the Pfaff 335. Alas, I cannot bring myself to drill holes in these machines. I figured out a solution using existing holes and making a little custom bracket from a scrap piece of aluminum. It worked out quite nicely, fits under the cover panels and does not interfere with with anything. I'm attaching some pictures that hopefully show how I did this.


-
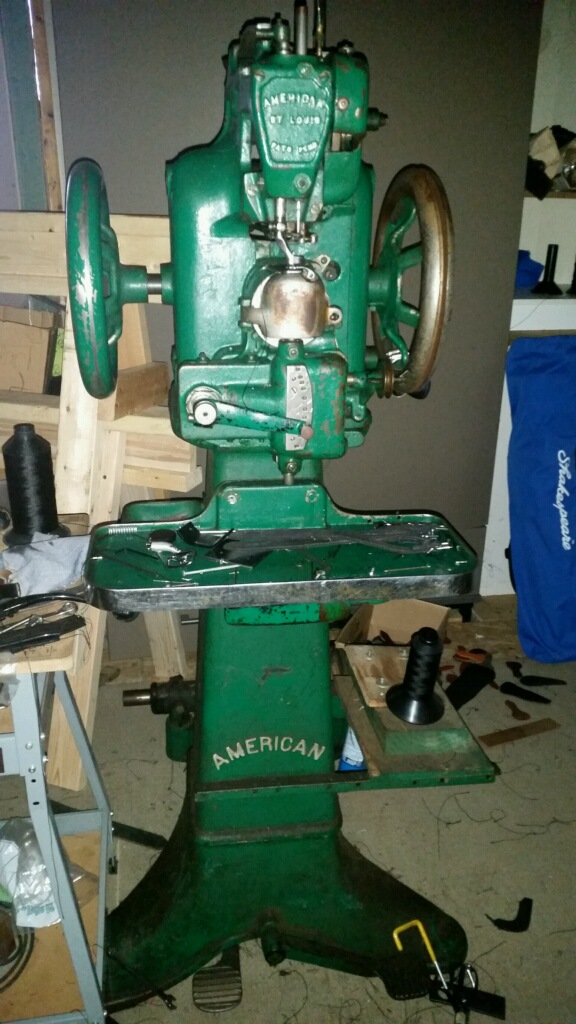
I knew I'd figure it out myself as soon as I asked. It's apparently an "American Straight Needle Stitcher" and may or may not be made by Landis. It's worth somewhere between $500 and $1,500 based on for sale postings I came across. It weighs around 500 lbs and will *not* find it's way into my basement. There a nice tutorial by boot maker Lisa Sorrell on youtube on how to operate the machine: If anybody is interested, here's the CL posting that is asking $950 for the machine near Toledo, Ohio: http://toledo.craigslist.org/for/4871315670.html
-
New Dürkopp Adler 969 And 967 H Type Machines For X Heavy Work
Uwe replied to Trox's topic in Leather Sewing Machines
Welcome and thanks for sharing the price quote! -
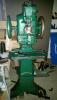
This machine came up for sale locally. I shouldn't even be looking, but I'm intrigued. Does anyone recognize it and have some info or resources on it? The person selling it knows *nothing* and I'm certainly no expert on these machines. What's a reasonable value for a machine like this assuming it's in good working order?
-
Remote Pedal Modification For Enduro Pro Motor On An Adler 205
Uwe replied to Uwe's topic in Leather Sewing Machines
Thanks for the kind words, Gregg! I'm not really familiar with Efka models, but I had come across some other servo motors that are designed with separate motor, controller box, and pedal actuator that connect via wires. The Goldstar GBSM 550s is one example. This is where I got the idea to separate the pieces, but I have no experience with that brand of motors.