Uwe
-
Posts
2,221 -
Joined
-
Last visited
Content Type
Profiles
Forums
Events
Blogs
Gallery
Store
Everything posted by Uwe
-

Looking For Advise On The Aftermarket Foot Sets For Pfaff 335
Uwe replied to DrmCa's topic in Leather Sewing Machines
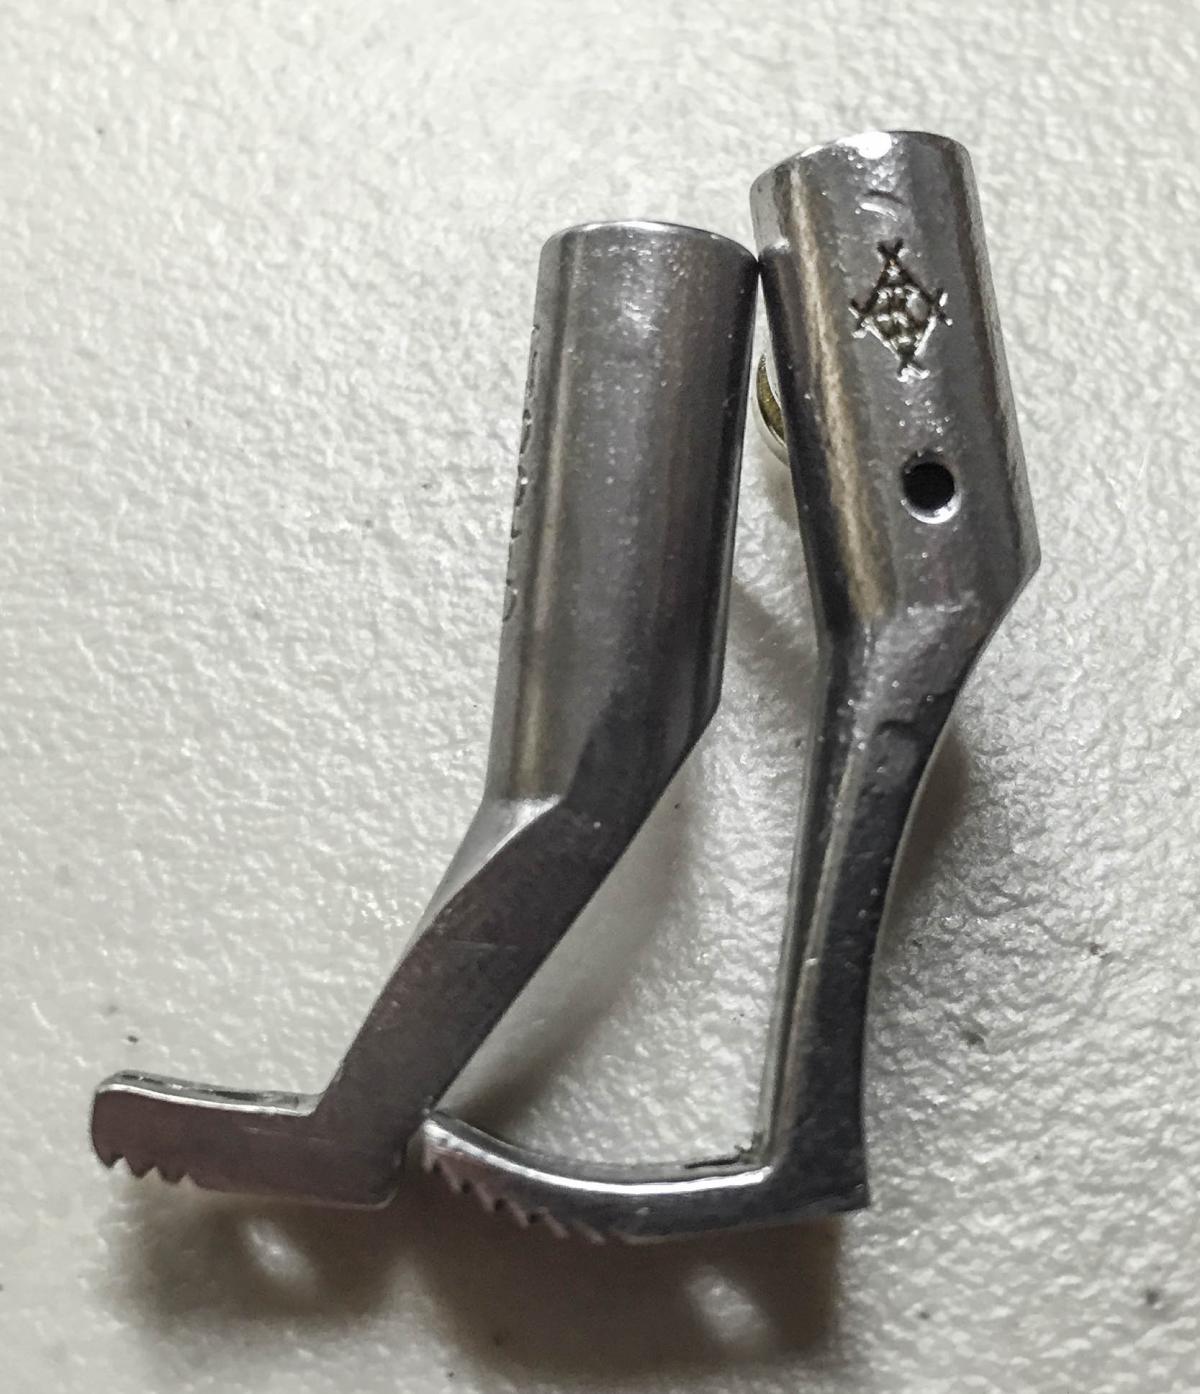
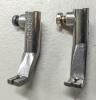
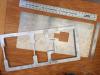
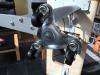
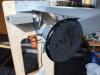
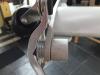
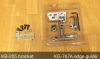
They're not plated but rather solid metal as far as I know. I made some adjustments to the images to make the markings more visible, which also gave the images a more chrome-like look. -
Looking For Advise On The Aftermarket Foot Sets For Pfaff 335
Uwe replied to DrmCa's topic in Leather Sewing Machines
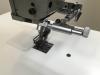
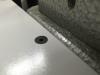
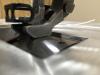
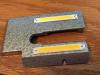
I've ordered presser feet for my Pfaff 335 from Sharp Sewing on Ebay and directly from a manufacturer Kwok Hing in China. Both sets of presser feet fit very nicely on the round presser foot bar and are of what I consider nice quality. There are only a few manufacturers of aftermarket presser feet, which are then resold by many resellers/suppliers. Some parts have markings that identify the manufacturer, which is generally a good sign, I think. If you make something and you don't want people to know that you made it, you're not super proud of your work. If the supplier is large enough (e.g. Weaver Leather), they may contract directly with a manufacturer (usually in China) to make custom parts for them which only they will sell. I've ordered a few original Pfaff parts that were missing on my 335 machine from AAAsew.com, which is based in Canada. Their online ordering does not work well, but I managed to order hard-to-find OEM parts from them for a reasonable price twice in the past. The suppliers advertising on this site might be a good resource as well, since you can actually talk to them on the phone and ask about fit and finish, and origin of the parts. I'm attaching a few pictures of my presser feet so you can see the markings. The left foot is from Kwok Hing - they either put their part number on parts or a logo that looks like a K and H overlaid on top of each other. I don't know who makes the right foot in the pictures - all I know is that Sharp Sewing sells it.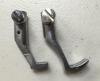

-
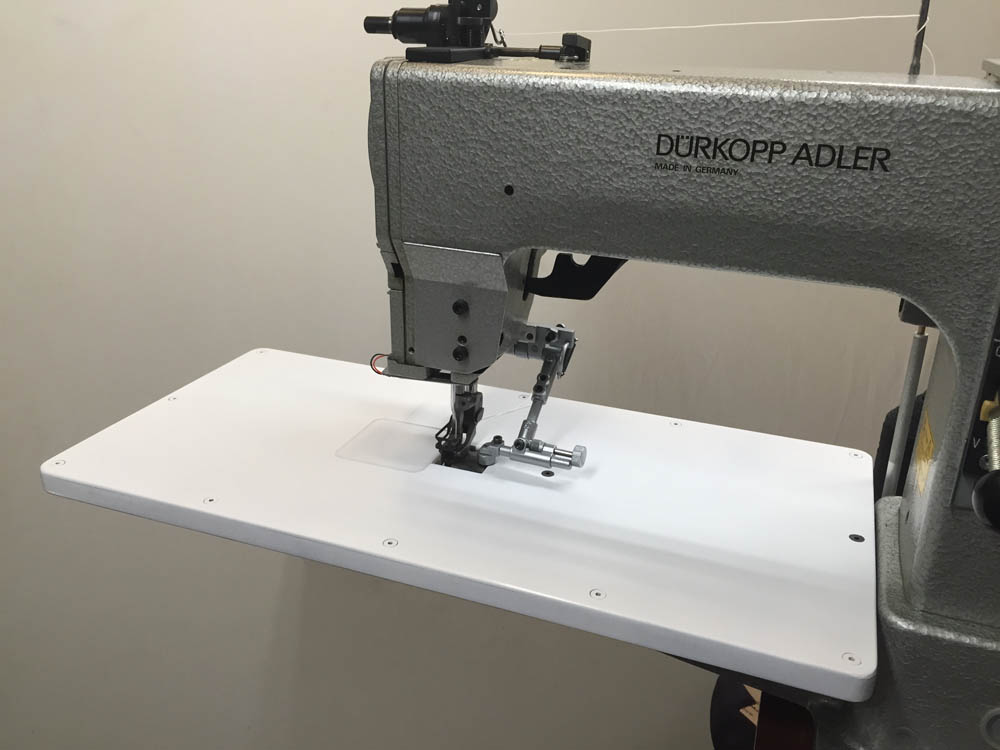
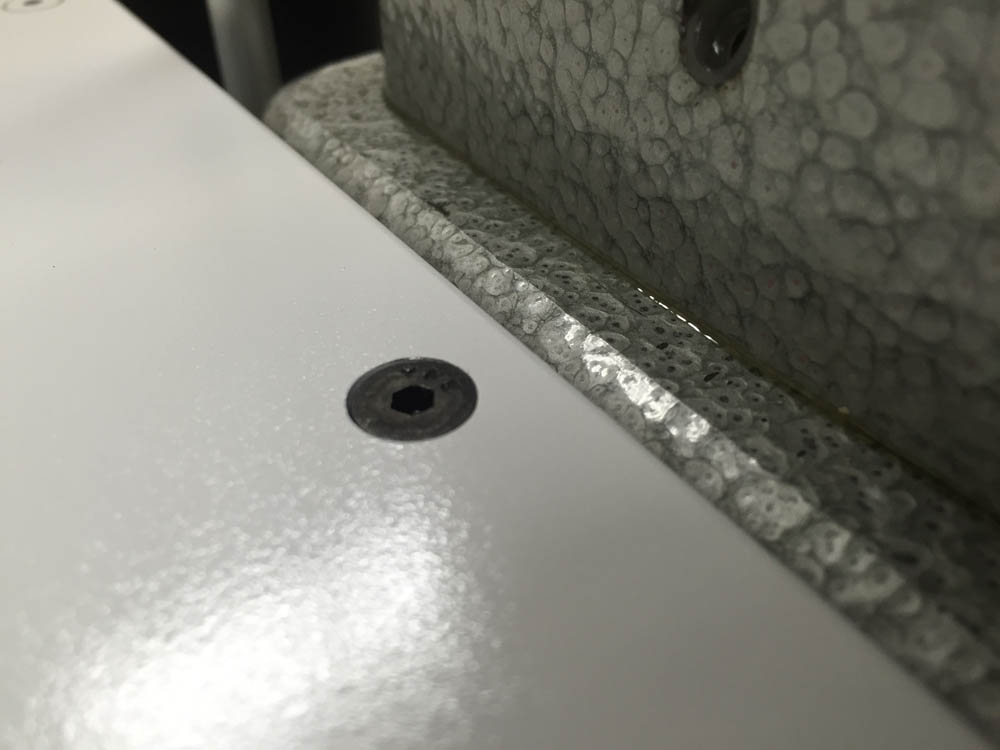
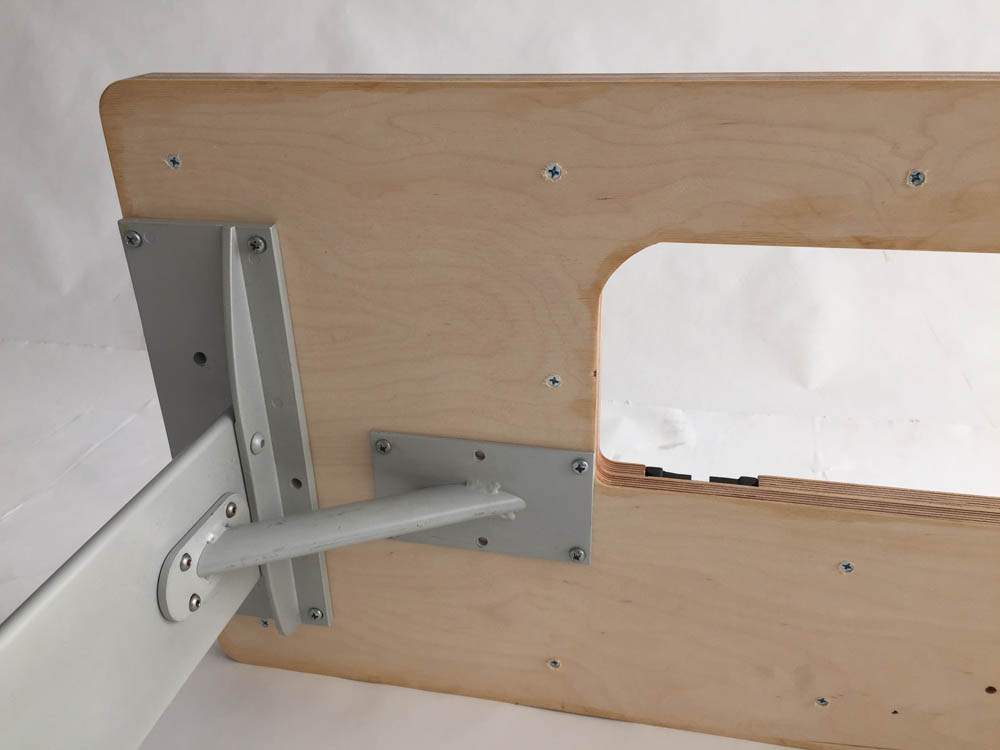
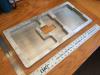
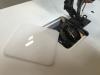
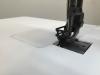
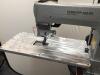
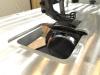
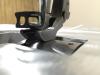
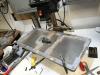
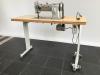
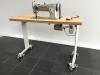
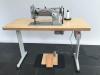
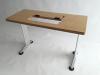
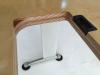
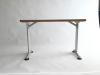
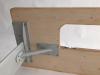
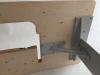
Just an update on my flatbed table attachment for my Adler 205. I sanded the whole thing down to make smooth, rounded edges and painted it white. It installs in under a minute and is remarkably solid when attached to the cylinder arm by two countersunk screws, earning it a perfect score on my UCI scale (Uwe's confidence indicator)
-
Thanks Constabulary! I do plan to paint it, either white or a hammered gray to match the machine. The brushed aluminum surface is actually too shiny and scratches quite easily. The next version will have a plywood support plate and a painted or anodized metal top surface.
-
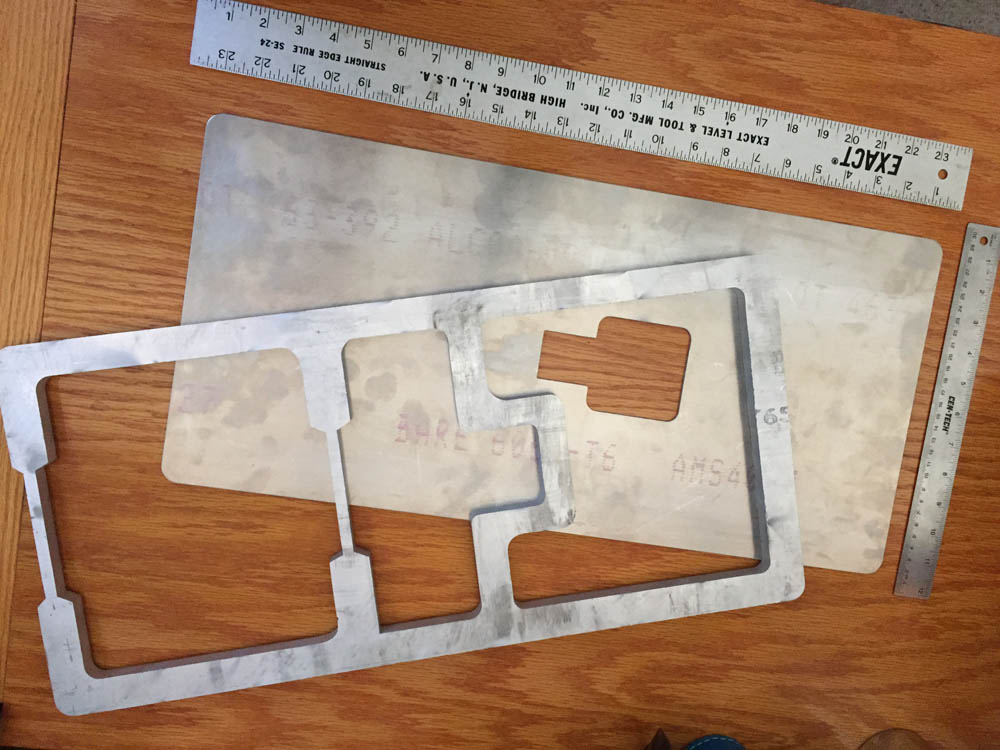
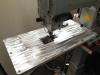
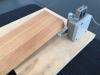
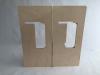
I was working on the flatbed sewing table attachment for my Adler 205-370 today and thought I'd share a few pictures from that project. None of the commercially available table attachments appealed to me so I decided to make my own, spending more effort and money than I probably should. It's all aluminum, made from two sandwiched aluminum plates that mount to the cylinder arm using existing threaded holes intended for attachments. The support plate is 5/8" thick. I made a CNC pattern and cut the plates using a WaterJet machine at my local TechShop. The project is not quite finished yet but I like where it's heading.

-
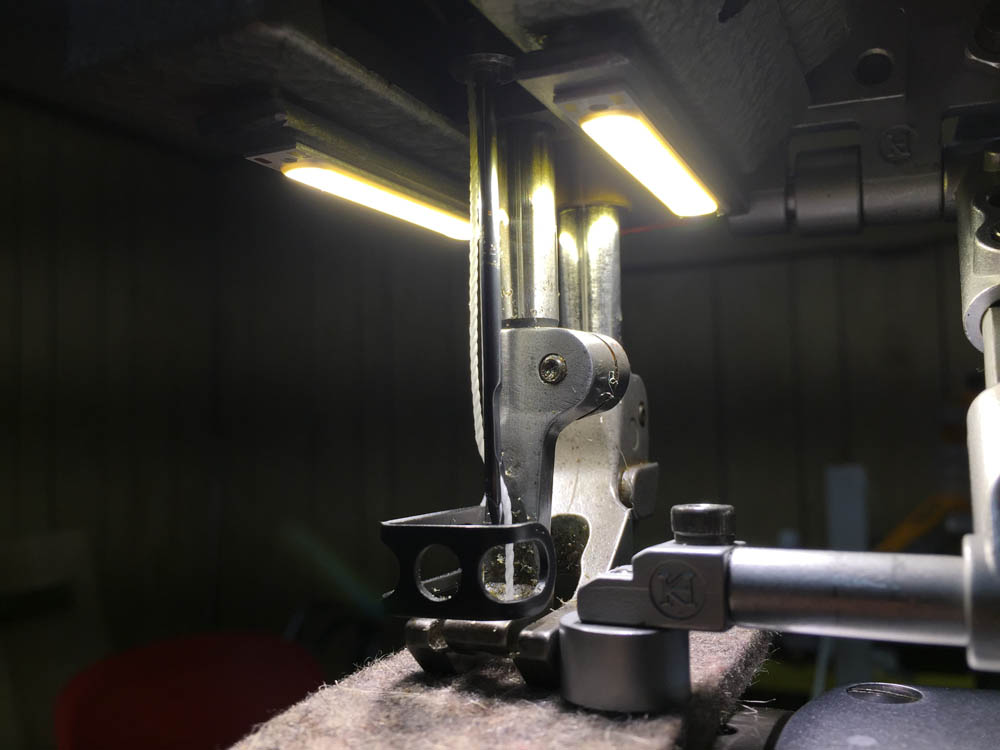
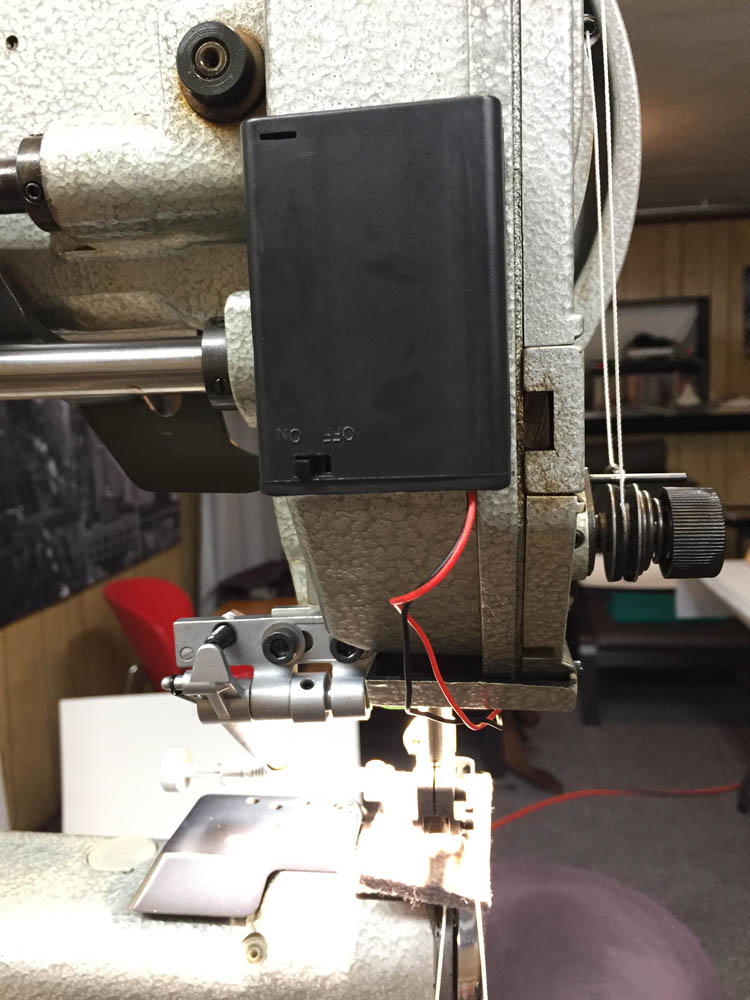
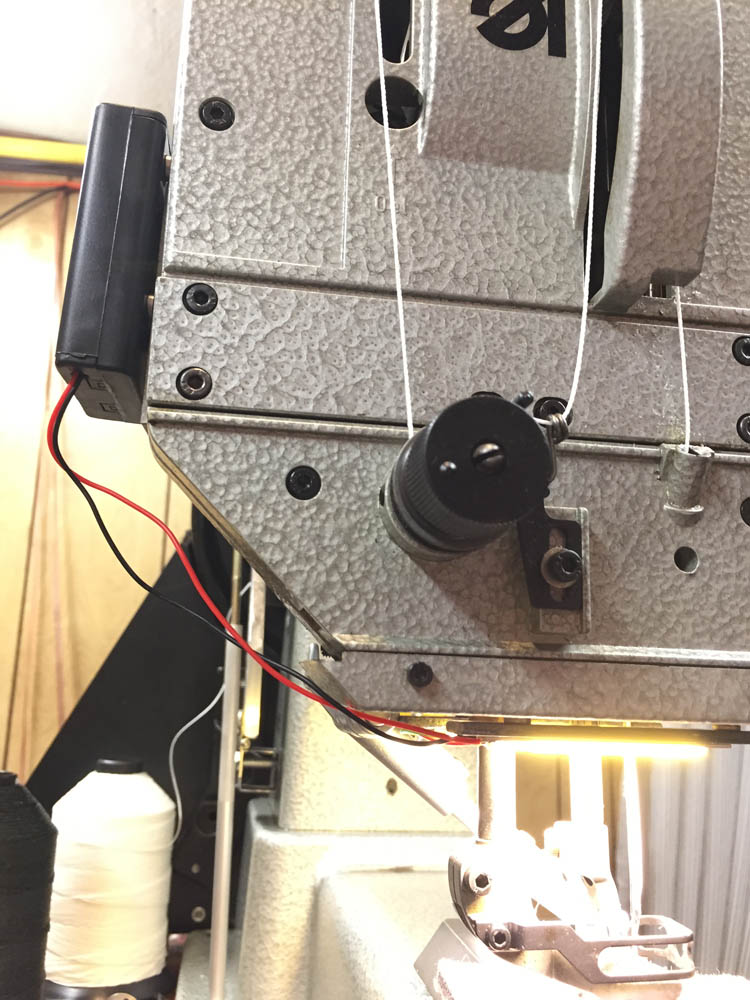
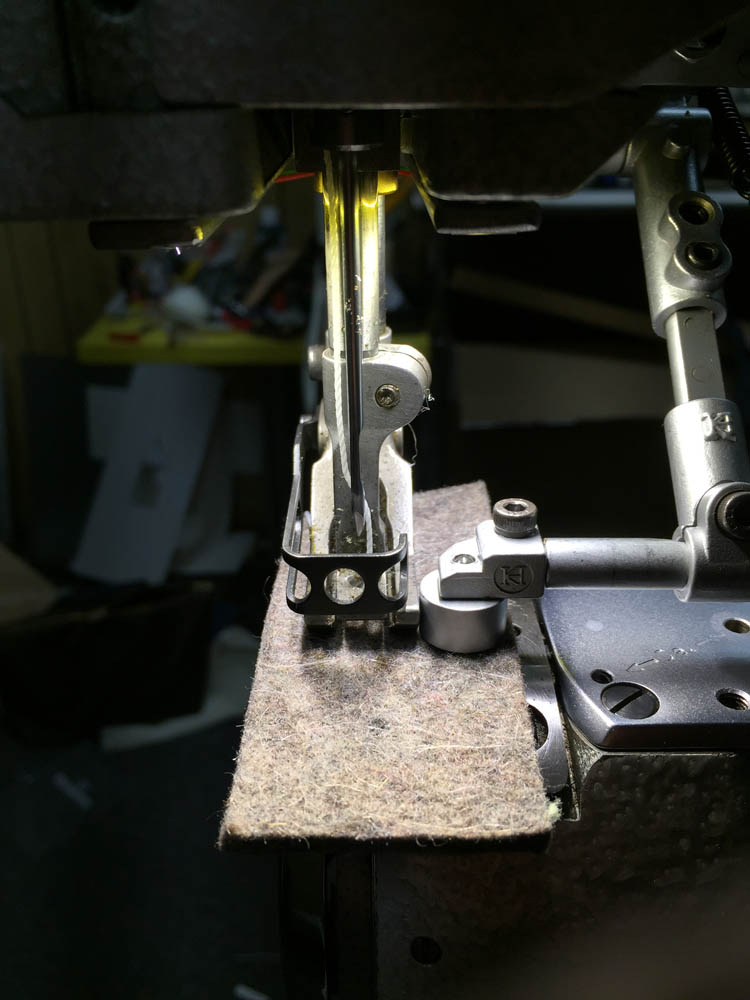
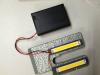
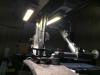
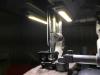
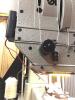
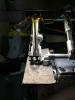
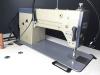
Having seen the nice LED sewing lights that are available for many newer machines, I decided to try and retrofit my Adler 205 with a homemade LED sewing light. I used two LED light bars and a small battery case that holds three AA batteries. The installation is mainly via tiny magnets that I glued to the plastic drip tray. It makes for a nice, shadow-free light that is super bright. It only adds about 1/4" under the drip tray, so it doesn't get in the way. The pictures are of the working prototype. I'll work with it for while to check if there any usability issues that require modifications. As usual, I hope the pictures tell much of the story.

-
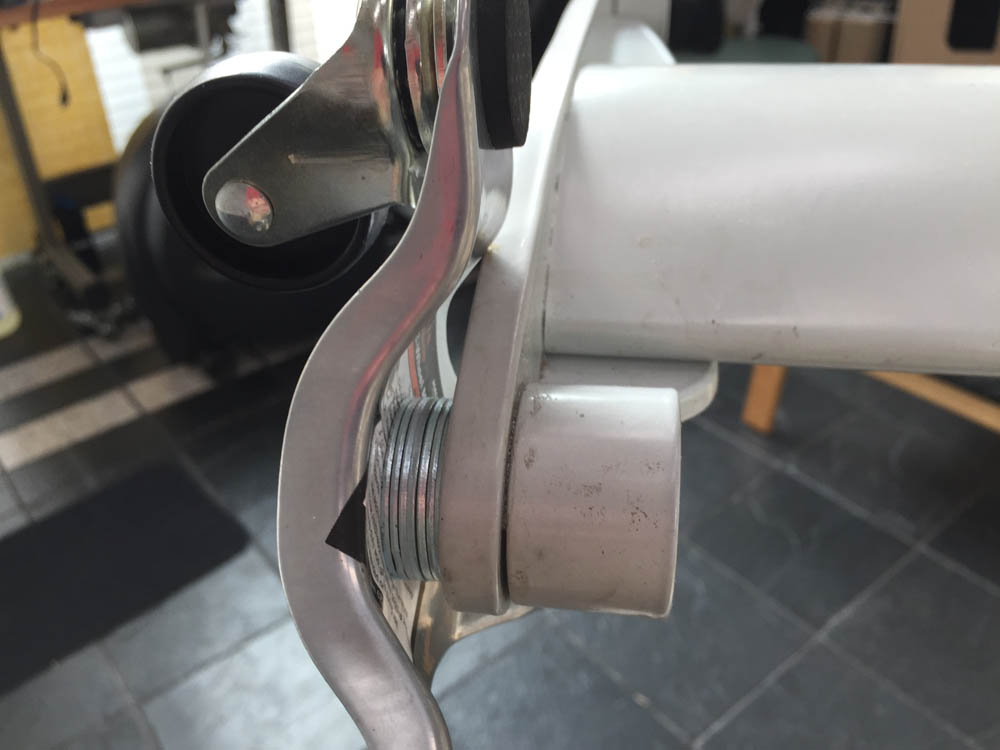
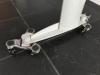
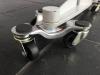
Good point carlosbruno, the wheels don't lock as they are. On a smooth tiled or linoleum floor the table would move quite easily. A carpet keeps it in place better, but not as solid as fixed legs or locking wheels. I may go with a hybrid solution, having wheels on just the heavier side, and regular feet on the other. I can still move the table around by myself easily by lifting just one side a little bit. This hybrid approach has the added benefit of allowing quick leveling of the desk on uneven surface like my slate tile floor.
-
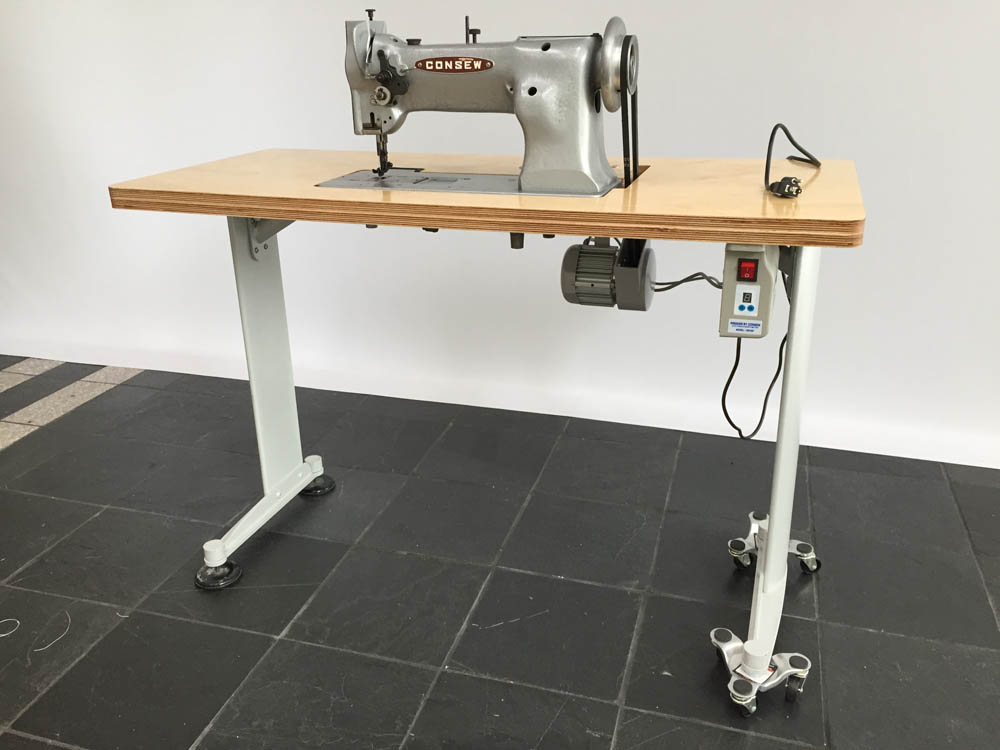
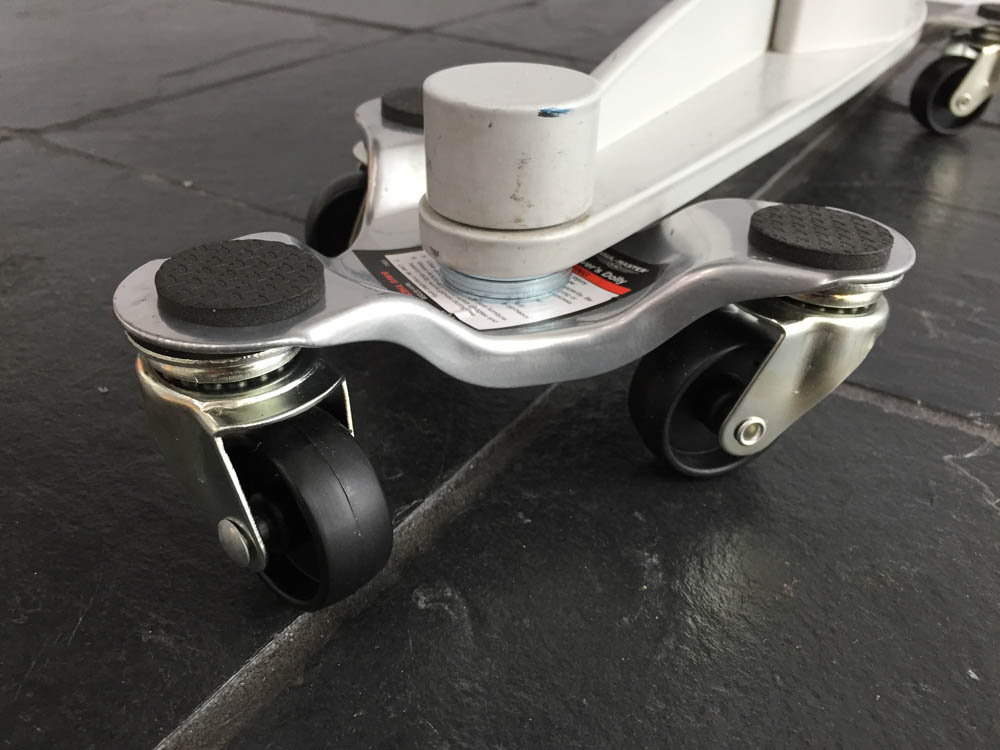
Looking the last post had a few synapses firing and I realised I had these moving dolly wheels I got a Harbor Freight Tool for $3.99 which would work nicely on my latest table. Twenty minutes later my table was mobile The height change is minimal, if any, from the previous round metal feet pads. I'm not sure the wheels earn me any style points, but it'll surely be easier on my back when I need to move the machine.

-
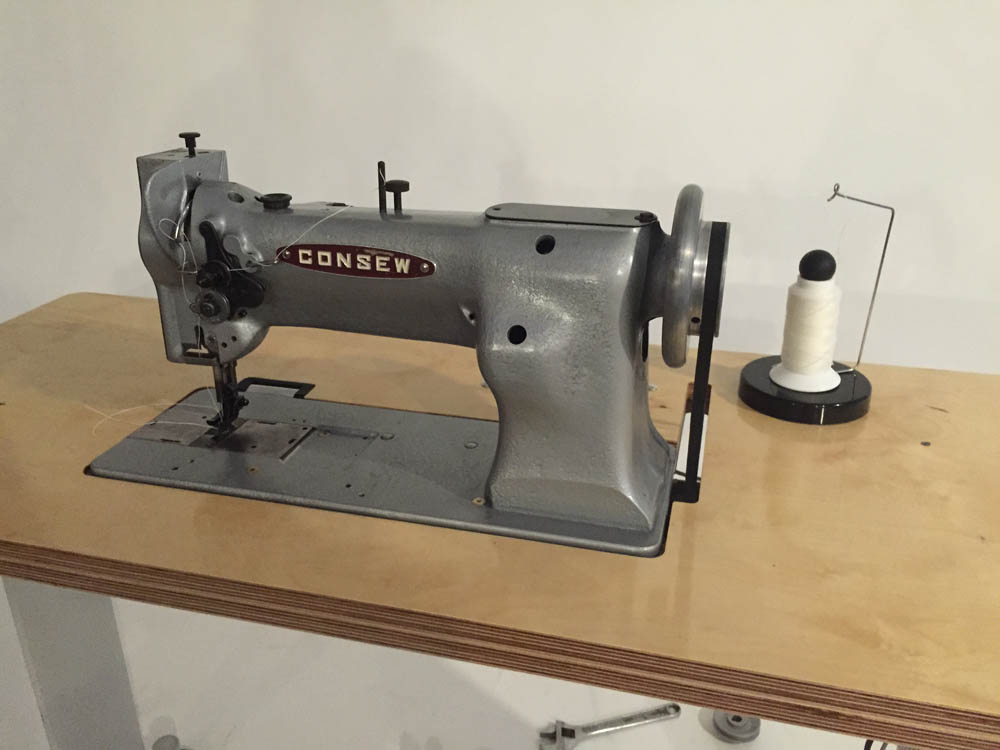
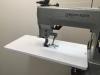
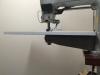
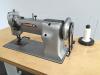
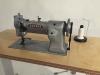
Just a little update on my sewing table project. I've installed my Consew 225 in it with a new Consew CSM1000 servo motor I got on eBay. I've been meaning to try a motor that has three separate parts - the motor, the controller, and the speed input. This allows putting the speed input on a movable pedal assembly with a wire connection instead of having it attached to the table directly with a fixed rod connection. It worked out quite nicely. All that's missing now is drip tray , a knee lift mechanism, and a bobbin winder.
-
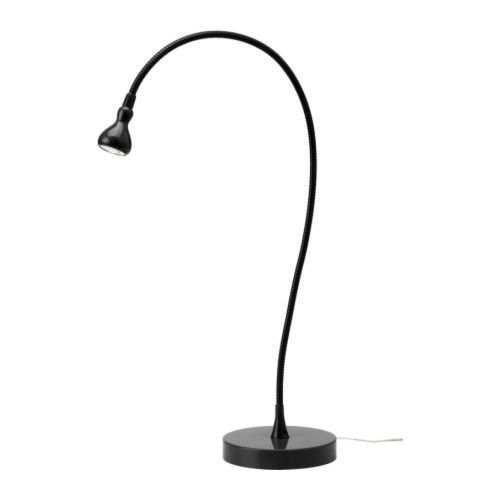
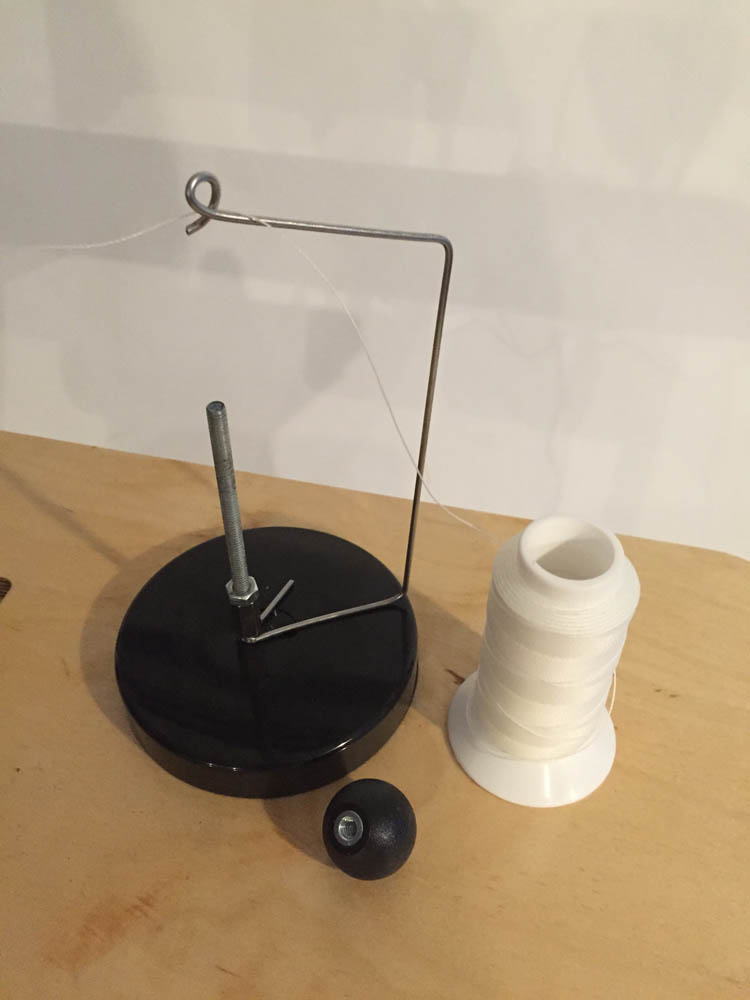
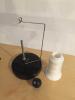
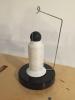
Here's my sewing machine related Ikea hack for the day. I've been using the $10 Ikea Jansjo LED lights on my sewing machines and had the weighted bases left over. I had also ordered some threaded 1" plastic balls on Amazon, which turn out to be super useful for a whole bunch of things. The weighted base makes it stay put, the ball holds the 4 oz. spool in place so it doesn't go bouncing about when it gets light toward the end and also makes sure the thread doesn't snag as it unwinds. The wire is stainless steel welding wire. A coat hanger would probably work, too, but that's not my style, haha. Hopefully the pictures tell some of the story.

-
Bolt Size For Consew 225 Balance Wheel Arm Shaft?
Uwe replied to Uwe's topic in Leather Sewing Machines
Thank you Bob! -
I'm trying to attach a needle positioner hub on my Consew 225 arm shaft, but I cannot figure out what size bolt the arm shaft takes. Does anybody know what size I should be looking for? I've tried countless bolts in my possession, made trip to the store to get M7 bolts, but I'm striking out. 1/4"-20 is close but pitch is off just a little, M7 is too big, M6 is too small. - oy! I'm striking out on Google, too. Is this one of those special "9/64-40", "3/16-32" style screws no regular store carries?
-
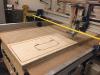
I've been meaning to post pictures of my latest sewing table project to contribute to this nice collection of table ideas. I finally got around to making a CNC template for carving out a tabletop for my Consew 225. The legs came from a local University surplus store for $20 (same legs as a previous poster, haha). The wood is marine plywood and ran $45 for this project. The ShopBot CNC router machine is at my local TechShop playground for adults. The two plywood plates are glued, then screwed together, for a total thickness of 1.4 inches - just the right amount of overkill.

-
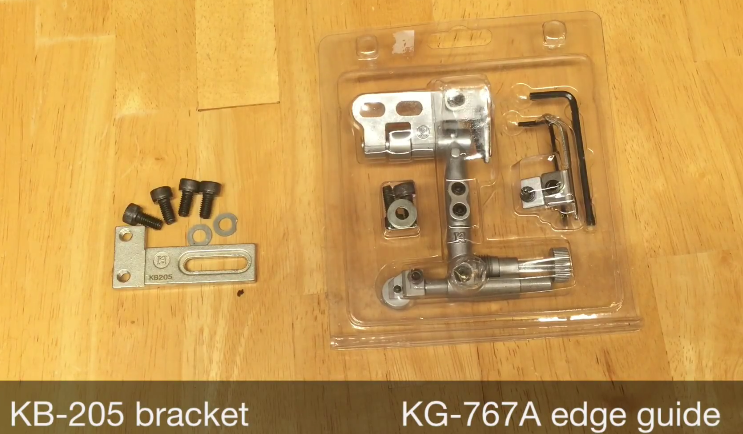
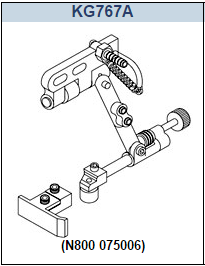
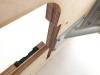
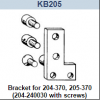
I managed to order some parts from Kwok Hing recently and got a few extras. This kit consists of the Kwok Hing KG767A swing down edge guide with the matching KB205 adapter bracket for installing it on an Adler 205 or 204 (and clones thereof). These edge guides are very nicely done and work well. Because I clearly have too much time on my hands, I made a little video on how to install this kit on the Adler 205-370. Check it out here: https://youtu.be/dShePFyKdcc Price for the kit is $75 for fellow LeatherWorkers and includes free shipping within the U.S. I'm set up to take credit card payments, too.

-
Nice going Captain Kirk, now you got me shopping for a borescope on Amazon. It sounds like a great tool to boldly look where no man has looked before inside my sewing machines.
-
Congratulations! Looks like you got a great deal on some really cool sewing machinery!
-
Very nice. I shouldn't even be looking, but I'm tempted to sell my Pfaff 335 and go all Adler in my shop.
-
I look forward to seeing what alternate system you come up with for lubricating this machine. I wonder if the original system was really suitable for sewing really slow, at about 1/10th the rated speed. Perhaps the lubrication system works okay for sewing leather at medium high speed like in those youtube videos where they sew sofa covers or similar things and only slow down at the seams. My leather sewing speed is 1-3 stitches per second at most, and I somewhat doubt that the spiral screw channel oil delivery system would work well at that speed even if it were working perfectly, without any corrosion.
-
I'm not really an expert on these machines, but the various subclasses on that model normally are just various combinations of base plate, presser feet, feed dog, etc. On some machines you can change a machine over from one subclass to another simply by swapping out certain parts. This particular one does not appear to be one of those. This document gives some details on the "normal" subclasses of the Pfaff 335 H3: https://www.universalsewing.com/images2/parts_lists/all/echbr8a0.pdf To me this machine does not look like what a stock Pfaff H3 17/1B "should" look like, so it may be a custom build for the Polish market or modified later in life for some custom application.
-
Sometimes machines simply get left out in the rain at some point during their storied life. Nothing like a quick downpour during a yard sale or a leaky roof in a storage unit to get water into places where it shouldn't be. I was at an estate sale recently looking at a seemingly nice Pfaff flatbed machine. When I lifted the presser foot there was a crusty, rusted outline of the foot on the denim fabric. The fabric along with the rest of the machine had gotten quite wet at some point. I took that as a bad sign and moved on.
-
I think my $25/gal. ZipperStop oil is the same as the AlbaChem Lily White, but I'm not positive yet. They sell the little zoom-spout bottle with definitely is identical, because it says AlbaChem right on the bottle. The Gallon size bottle get new reseller labels. There's apparently a bit of leeway in oil viscosity that will work in a machine. AlbaChem Lily White has a ISO viscosity of 22 Pfaff 335 manual specifies viscosity of 22 Durkopp Adler manuals specify viscosity of 10 Juki Defrix No. 1 has viscosity of 7.4 So the AlbaChem Lily White oil is a perfect match for my Pfaff, and apparently close enough for other manufacturers. Perhaps the lack of long term residue or nasty corrosive effects are equally if not more important than precise viscosity. I still have almost a gallon left, which seems like a lifetime supply in manual drip oiling - yay!
-
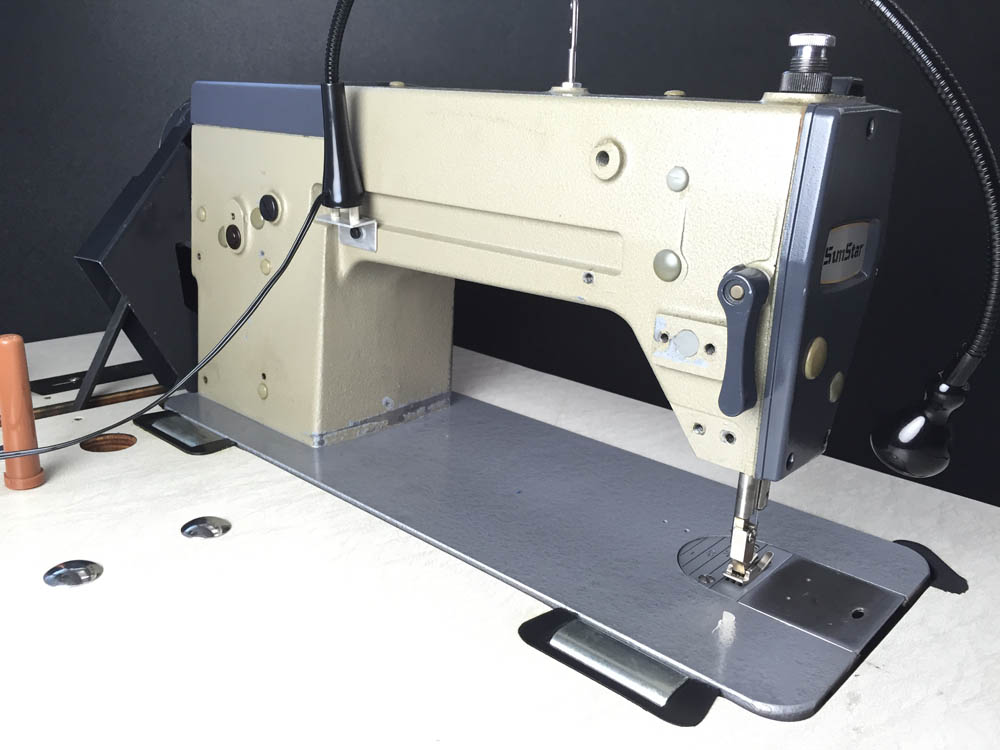
A disconnected oil line will create some havoc regardless of the oil used, I imagine. It would be super useful to get a list of a few "good" oils, that are still commercially available (ideally on Amazon or my local AutoZone) identified by brand and item name/number. Also, a list of (corrosive?) oils to positively avoid may be equally useful. Or will this set off a near-religious war of the oils? I've come across many references to "Lily White" oil and even ordered some from ZipperStop for my SunStar sump machine. But I've realized the term simply refers to the clear color and says very little about the chemical formulation. Is there an original "Lily White" oil by some manufacturer? Automatic transmission fluid (ATF) may be a great choice but I can't get over having everything in sight stained red. I've read blogs recommend fully synthetic 0W20 oil, but the one I bought to try looked like maple syrup in coloring. I use rather expensive Tri-Flow to manually oil my machines - it was recommended by my local sewing store. Another youtube sewing tech highly recommended Marvel Mystery oil, saying it was developed for sewing machines originally but later marketed for automotive use to actually make money. It's very confusing, what with additives, detergents, anti-foaming agents, synthetic or not. It seems we should have a sticky post with a list of definitive sewing machine oil recommendations.
-
Thanks for the details on the lubrication issue. I'm on vacation, so I spent way too much time reading up on the lubrication system of the 467. The service manual for the Adler 467 (available in English or German) explains how the oil lubrication is supposed to work/flow on pages 12/13. It sounds as if that pump inside the machine is there to suck the excess oil from the head back to the main sump and to the hook case. Apparently the oil is delivered to the head by way of spiral grooves on a "pump" shaft and a brass tube. The oil should be dripping from the brass tube (3) in the head when the machine is operating. The little viewing window (K) should show oil "bubbles" during operation. Its seems if the head is bone dry, there is either no oil dripping from the brass tube, or the oil is not hitting the wick when it's dripping from the brass tube. The manual talks about bending the brass tube "just so" to make it drip onto the wick and into the hole below in the return tube. I've not seen the 467 in person and was wondering if you mind confirming if that brass tube is indeed visible and dripping oil as indicated in the attached diagram from the manual. The diagram has two version of the head dripping chamber. Could you let us know which one is on Venator's machine?

-
Most mortals would have looked at your adjusted stitch sample and said "my work is done here." Thanks for going the extra mile. I just went to inspect the cast-off point on my Consew 225 basket now that I know what it's supposed to do, lol. It's a little sad that apparently nobody has written a comprehensive "this is how it works and this is why this detail or adjustment is important" treatise on this decades-old technology. If there is such a thing, I'd love to know about it. Most service manuals just say stuff like "loosen these screws and align these marks", but they generally don't say exactly why or how things are connected beyond the obvious. I'm glad you're chipping away at the tradition of revenue-protecting secrecy amongst many sewing machine techs and share your expertise with us.
-
Thank you Eric for posting these detailed problem solving steps and photos. I'm a little excited that my suspected presser foot roughness was part of the problem, but the whole set of problems was clearly much more complex than could have been debugged remotely. I'm glad you got your hands on the machine to inspect and fix it. Your posts are very educational indeed and I very much appreciate your efforts in documenting the process.