Chief31794
-
Posts
1,801 -
Joined
-
Last visited
Content Type
Profiles
Forums
Events
Blogs
Gallery
Store
Everything posted by Chief31794
-
Thanks tons, Thank you sir. Dwight, thanks. However, the name is not from a Native American Source in my case. It was my rank in the US Army, Chief Warrant Officer, in the Army we're affectionately (or not so affectionately) referred to as "Chief". Thanks, Chief
-
Thank you sir Thanks Papaw, I appreciate the comments. Chief
-
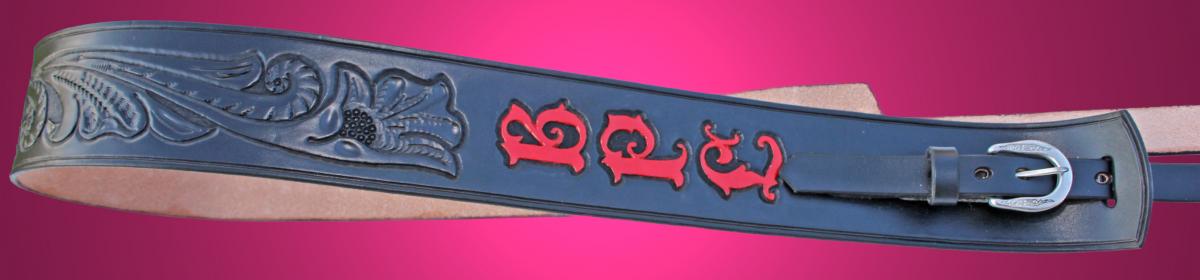
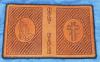
Been a while since I posted a Bible Cover, the customer on this one wanted the cross on the front and the hands on the back, I normally do them the other way. Chief
-
Welcome to the forum from South West Georgia, Chief
-
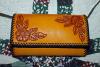
 Oscar, I'm a little confused, if you mean basically how I accomplished the look, it is: Cased the leather (See Bob Parks Post in "How Do I Do That" forum on properly casing leather) Transfered the designs to the purse, in this case I used a craftaid, but it's nearly as easy to do with a tracing on tracing film. Cut the lines of the design with a swivel knife Used Barry King Thumbprints to put the depressions in the flower petals. Used Leaf Liners on the leaves Used Flower Centers on the center of the flowers. Used stops on the bottom of the petal lines Used a veiner to decorate the leaves Uses a lifter on the center of the outside of the petals. Beveled all lines Cut decorative cuts with a swivel knife Cut the edge of the leaves with a swivel knife to give them the "jagged" appearance. Let project dry thouroughly Applied Tandy Saddle Tan Gel Antique (the only tandy staining product that I use) very liberally, rubbed it in well with a sheepskin pad) Allowed to dry somewhat, then wiped with paper shop towels lightly to remove excess antique paste leaving the residue in the depressions. Allowed the project to dry thouroughly (24 hours) Applied two light coats of Pure Neatsfoot Oil, allowing about 4 hours between the coats and then waited till the next day for it to settle and smooth out. Applied two coats of Clear Lac to seal the project. Allowed to dry for another 24 hours. Laced it using a double loop stitch with high quality lace. Hope that helps, Chief
 -
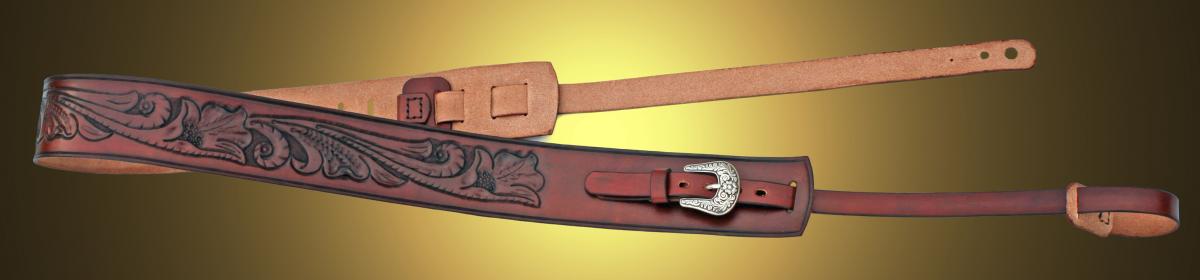
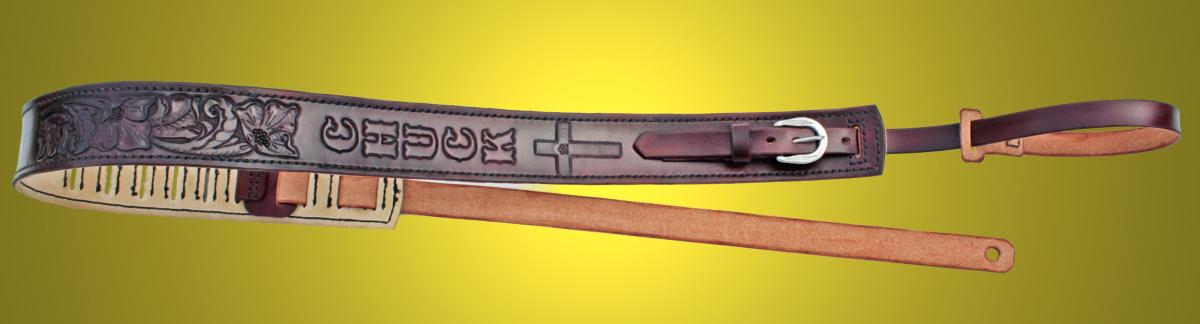
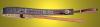
The one from BlackRiverLaser is a good one. I designed it and have used it for years then Joyce converted my pattern to an acrylic template and I love it. It is 44" long which will fit most any rifle. I highly recommend it. It is designed to use Chicago Screws to close with, is adjustable, but it couuld easily be modified to use a conway buckle, it is 2-1/4" wide at the widest point and tapers to 1" the 1" in maintained all through the adjustment area on the bottom of the strap. The top piece is 1" as well. Chief
-
Thanks, both of you. I appreciate the nice remarks. Chief
-
Thanks Rohn. Thanks, I appreciate the nice comments. Thanks Wild Bill. Chief
-
How Do You Hold Your Project Down When Stamping And Carving
Chief31794 replied to Pappys Leather's topic in How Do I Do That?
To keep my leather from stretching I use self adhesive shelf liner, there are two kinds, temporary and permanent, I use the premanent, it blocks dye, stops stretching, and peels off easily and leaves absolutely no residue, a roll lasts a long time and is pretty inexpensive. Chief -
Making and selling some, but it isn't what it used to be. It seems to me that it has become "cool" (shows my age) to wear the tactical type stuff that you see in gun stores. There is also a renewed fascination with the "Military Look", so they can but those types of, and I use the term loosely, holsters. That being said, I am still selling a few, just depends. Chief
-
Tom, It's your business or hobby so charge what you want. I would offer an observation, in your calculation you haven't added a cost for overhead (lights, cleaning supplies, heating, etc) and you haven't recovered any depreciation on tools (punches and strap cutter, etc.), and hardware (Chicago screws, snaps, rivets or what ever you use), the leather for the keeper (or more leather if you cut your own). You want to recover all of your costs and overhead then apply your labor and profit. One other thing, when you cut a belt strap from a bend, back or double shoulder, it is cut to ~50" or if you buy belt blanks they are ~50", while that could be considered in the 15% waste I wouldn't, the waste is what's left from the leather piece after all the straps are cut out of it and the amount you had to cut off to get the initial straight edge. I would have used (1.25 X 50)/144 = .43 SqFt) a 36" belt takes about 41" due to the 36 being at the center hole, the belt end past the last hole and the billet fold over. So I suspect your costs are higher than you think. I didn't see a cost for buckle you need that as well unless the customer is providing the buckle. It is hard for most people to account for all costs, such as the $500.00 you paid for the sign has to be recovered, since it's a durable item it could be recovered over time, but you need to determine a ROI (Return on Investment) point. Say you decide that a ROI of 12 months is acceptable, then say you produce and sell 10 items a month, then you'd need to charge $4.17 per order. The amount of time you want to extend for the ROI is up to you however, remember that you made that investment and you are allowed and should recover that before profit. Just ramblings I know, but manufacturing costing is a complicated matter and most businesses utilize software and CPA's to insure they are capturing ALL costs. These are just a few examples, also I could be wrong that happens a lot!!! Chief
-
This is a good thread, just to add my $.02 worth I never see anyone talk about the marketing reality side of pricing. There is a philosophy in business that basically states that, "The price point for an item is determined by the market", it doesn't do me any good to make a holster for say $20.00 in Materials, $80.00 in labor, then add a profit margin (wholesale is normally <=~30%, Retail is normally ~100%) so then it looks like this: Materials: $24.00 (added 20% for waste, etc) Labor: $80.00 Profit: $100.00 (retail would be $30 for wholesale then the reseller would add another 60-80%) MSRP: $204.00 (marketing would put this at $199.95) However, it does me no good to price my work at $199.95 if people aren't willing to pay that much, they won't sell, it also doesn't do me any good to price the work at $199.95 if people are willing and happy to pay say $250.00 because it won't sell. The reason for that is that most people have an idea what something is worth and if you charge to little their instinct is to believe that it's a "substandard" product or it would cost more. They will buy from your competitor if his is priced at the price point and your's is less. You may think this is crazy, but keep in mind, while you can look at an item and determine it's worth based on craftsmanship and materials, most of your customers can't and they'll think his is better than yours because it costs more. Keep in mind this is mostly in people's heads, but that is where the sale is made. Bottom line from all of this rambling is that you need to determine the price point for an item and set your sales price close to that. If you can't make a profit or get what you want at that price then work to decrease the cost while maintaining the value or move on to another item and don't attempt to make and sell that particular item. Just my opinion after too many years of studying business (MBA) Chief
-
Just one way to do it, the gussets in your drawing appear to be folded (accordian style), sew the divider into the center fold of the gusset, if the pockets must be "discreet" with no cross over of items at the bottom then leave the bottom long and sew it to one side of the bottom, most I see this way use a "pocket" with a zipper and sew that into the center of the gusset, then you have basically three sections, the front and back of the pocket and the center zippered pocket in the middle. Chief
-
Drum Dyed Or Do It Yourself
Chief31794 replied to barehandcustoms's topic in Leatherwork Conversation
I use both, I'm not overly thrilled with the color selections on drum dyed and I do a lot of Antiquing so the drum dyed there is a drawback. I use drum dyed mostly for utility items with no tooling or carving, although the drum dyed will tool, it just never seems quite right to me. Just my personal choice, I've got a side of drum dyed (Havanna Colored) on hand and the rest is sides and shoulders of natural. I mix dyes a lot to get the color I want and that isn't available with drum dyed. Chief -
Welcome to the forum, lots of good information and people here. Chief
-
Ditto on the way Camano Ridge does it, that has been the tried and true method for as long as I can remember. Most people don't know their waist size and will lie about it anyway if they've gained a few pounds/inches. Some times customers don't have an old belt with them (particularly ladies) while I'm at a show. I made a belt with holes punched from 60" down to about 16", and keep it hanging in the shop or under the canopy when at a craft show. They can put this belt on get it comfortable, and then the hole that the tang is in is the measurement I need to make them a belt. I've had to use it more often than you would think and it works good, but my preferred method is an old belt. Chief
-
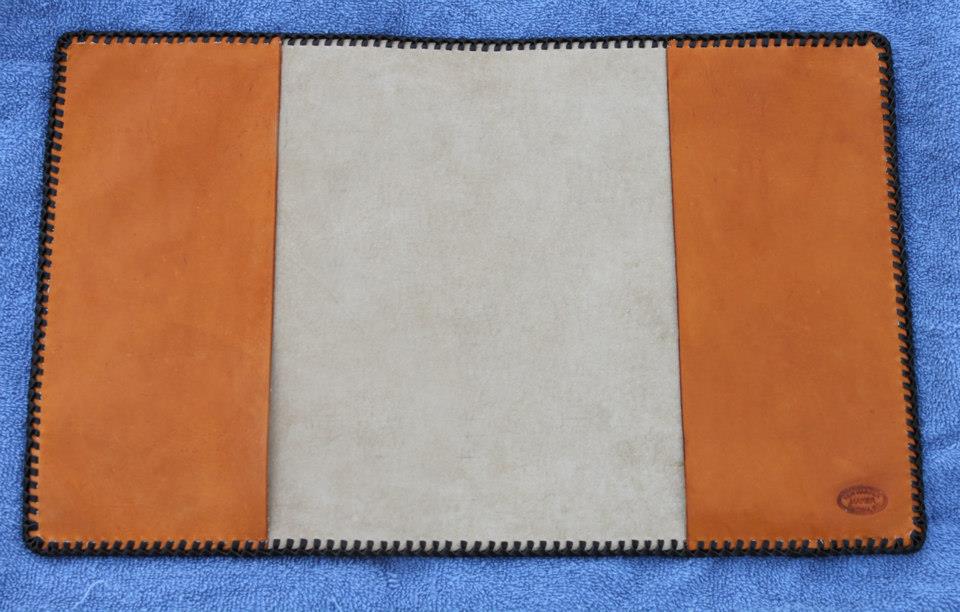
Don't get many requests for a clutch purse, but occasionally someone will order one. I put this one out recently. Chief
-
Thanks Joe, Chief
-
Thanks, I appreciate the kind comments. Chief
-
Latest Rig Off The Table
Chief31794 replied to Dwight's topic in Gun Holsters, Rifle Slings and Knife Sheathes
Great looking rig. Nice work, very clean. Chief -
Most of these products are used for Vegetable Tanned Leather and most of the leather workers out here use Veg Tan or Chrome Tan, I'm not sure what you could use for Oil Tanned Leather. You could try some of them and see. Tan-Kote and Super Sheen are water based products and I don't think they would be very effective. I would try Clear Lac, it's available from Springfield Leather, it is a Lacquer Based sealant and may be a better solution for you. Chief
-
Last one for the week. Chief

-
I have one more going out tomorrow, but these two went out Wednesday and this morning. Chief

-
Cowboy 3200 Belt
Chief31794 replied to Jess Jones's topic in Purses, Wallets, Belts and Miscellaneous Pocket Items
Pretty sharp, loving my Cowboy 3200, looks like you've mastered yours. Chief -
Thanks everyone, can't take credit for the Basket Weave "Trick", I don't remember where, but sometime in my past I saw this pattern in a book or magazine, and started doing it on belts. Thanks for all the nice comments. Chief