Chief31794
-
Posts
1,801 -
Joined
-
Last visited
Content Type
Profiles
Forums
Events
Blogs
Gallery
Store
Everything posted by Chief31794
-
 Found it, thanks. Pretty interesting. Chief
 -
Good looking purse, I'm a little confused though, the picture says it's made of Chrome-Veg Retan, I'm not sure what that is can you explain. Purse looks great, sure she'll love it. Chief
-
Thanks, one of the things I didn't mention, is that although the back is taped and you trim the edges, you may get a few small spots on the back particularly near the edges, I work hard to keep them off, when they get there and don't fall into the edge bevel area, I use a hand held skiver to gently remove them from the surface, then if necessary you can sand the back if you have to get a little deep but usually not. Thanks, Chief
-
I've had Bearman's Holster Maker Burnisher for a couple of years now, it does a good job, however, I still mostly hand burnish, I can't get as good of an edge with the cocobolo that I can from my hand burnishers, I have several wooden hand burnishers (never liked the plastic ones from Tandy) and I seem to have better control and get a better edge from them. Everyone else seems to really like these burnishers, maybe I'm doing something wrong with it. Don't get me wrong it will put a slicked edge on the piece, just not as good of an edge as I can get with a hand burnisher and/or canvas. I use it to start the edge, then I normally finish the edge by hand. Chief
-
Lurking For Almost 2 Years, Finally Did A Project.
Chief31794 replied to xxsjuxx's topic in Member Gallery
Looks great for a first attempt. Carving will improve with experience, this is way better than the first piece I carved decades ago. One suggestion on these kits, Tandy punches the holes, these don't work well for hand sewing in that the holes are too large, you can lace the edges, these holes work well for lacing. Just a suggestion, there's nothing wrong with sewing them, in fact you can't do any thing "Wrong" in leather work, the lacing just looks better with these holes. Most of the sewn wallets you see were hand cut from 4/5 oz leather and the linings were either bought without holes or made as well. Keep at it, you're well on your way. Chief -
I have a letter like this for each of my items, and I adjust them for each order, this is a sample wallet letter. I X'd out my phone and contact info, but this gives you the idea. Hope this helps, Chief Wallet Thanks Letter.pdf
-
Thank you sir, Chief
-
Thanks Rohn. Thanks Cheryl. Thanks Colt, I tape the back with blue painters tape and then dye the front, I use Rabbit Fur to apply the dye, normally dampen the leather with either destilled water or denatured alcohol, depending on what type of dye it is. With these antique dyes from Fiebings, I put it on pretty thick, then wipe it off with a clean cloth just before it drys and that sort of spreads the dye and basically makes it more consistent, then I wait about 1 minute and then rewipe the item with a dampened cloth with the same product I used to pre-dampen the leather, that removes some of the surface pigment and again spreads the dye a little to make it more consistent, it smooths out even more after it has thorughly dryed (about 12 hours), I put neatsfoot oil on with a cloth and that seems to help as well. After that dries (another 8-12 hours), then I normally use Clear Lac to seal it. Then I take the tape off the back, a little will get on the edges so I don't bevel the back until after it's dyed (I bevel the front before), beveling now removes the slight amount on the back edges and makes them appear trimmed. Hope that helps, Chief
-
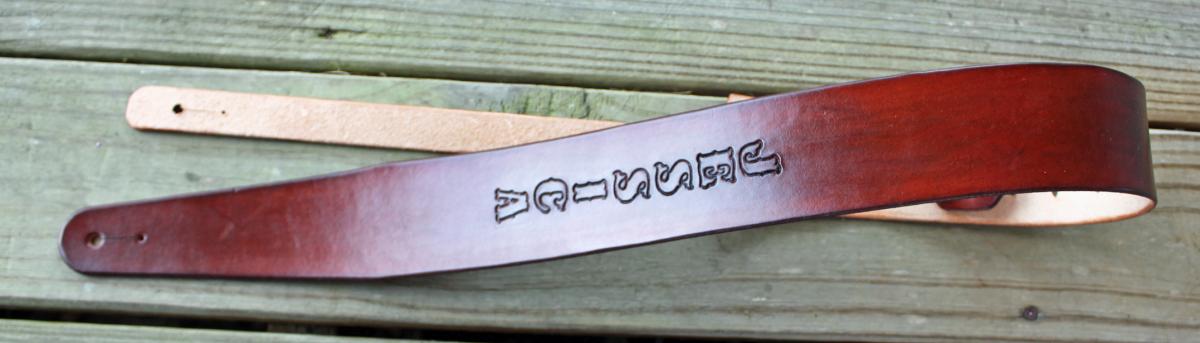
The customer wanted a simple brown guitar strap with their name on it, here tis'. Chief

-
First Gunfighter Stitch Belt
Chief31794 replied to Red Cent's topic in Gun Holsters, Rifle Slings and Knife Sheathes
Looks really good, nice work. Chief -
There are many ways to do things, this is my way, others may have better or different methods. I never make lines pencil or otherwise for layout. I use a Tsquare and a wing divider. I set the divider to the width of the stamp (looks like a veiner in your case), I then use the divider to put a dot at the beginning and end of each stamp location by moving the divider to the first dot and then aligning the divider to the Tsquare at what ever distance you want from the edge (normally 1/4"), these will be eradicated when the veiner is stamped. Once I have my alingment on one side, I don't use the divider on the other side. I line up each dot with the Tsqare on the dot across the belt and the 1/4" mark on this side and make a small dot with a scratch awl this keeps the stamps in perfect alignment and doesn't leave any marks, try it on some scrap till you get the hang of it and make small adjustments on the wing divider to make sure the marks are accurate. I place the "Toe" of the veiner in the first dot, then align the other toe up to the next dot, set the divider so that only the first dot is irradicated and the next in line is kept in tact, takes a little adjustment to get the dots right, then move the veiner and insert the toe in the next dot and continue on until you reach the end, turn the piece around and do the other side, the veiners will be perfectly aligned with each other on opposite sides of the belt. The 1/4" is arbitrary it can be any distance you decide from the edge just make sure both sides are the same. Hope that helps, some others may have better ways, this one works for me. Chief
-
Need Advice On Special Purse
Chief31794 replied to Dwight's topic in Purses, Wallets, Belts and Miscellaneous Pocket Items
I like Aussie as well, but I normally only use it on "outside" items (Rifle Slings, etc for use in snow, wet weather, etc). It does add suppleness to the leather, has a nice sheen and does a good job protecting the leather. You might want to think about buying a 8oz Belly as well, usually there are a few stretch marks but you can normally cut around those. The leather is "softer" and more flexible but still very sturdy and dyes and tools nicely. Chief -
Holster For S & W With Carved Cross
Chief31794 replied to Rohn's topic in Gun Holsters, Rifle Slings and Knife Sheathes
Good looking rig! Chief -
Thanks, I appreciate the comments. Chief
-
Thank you sir, Thanks Wild Bill, most Marines like anything with an Eagle, Globe and Anchor on it. Chief
-
I don't throw any away, I've never made any mistakes, although the leather fairy comes sometimes (actually pretty often) and removes some of my items so I won't have to deal with them. I hope you know I'm just kidding, I keep the local land fill in business. Learn from everyone of them. Sometimes it's mistakes, sometimes poor planning, and sometimes it just happens. I do seem to do a lot better if I'm not rushing, I ought to think about that, there may be a lesson in there. Chief
-
Welcome to the forum. Lots of good folks here with lots of knowledge. Chief
-
Holster For A Glock 22 - .40 Cal
Chief31794 replied to Chief31794's topic in Gun Holsters, Rifle Slings and Knife Sheathes
Thanks for the comments, it has no strain on the magazine release. The magazine release is designed so that the release must be depressed beyond the plane of the pistol grip, like a thumb curling around the grip and pressing. I checked it because of your concern and can get the holster to put any pressure on the release and I can't force it even with direct pressure to press the release beyond the plane of the pistol grip. Thanks, Chief -
Barbed Wire 1911 Holster
Chief31794 replied to Rohn's topic in Gun Holsters, Rifle Slings and Knife Sheathes
Great looking holster, Nice strap from Mr. Knight as well, I've never done a barbed wire piece but you guys are making me itchy to give it a try. Chief -
Holster For A Glock 22 - .40 Cal
Chief31794 replied to Chief31794's topic in Gun Holsters, Rifle Slings and Knife Sheathes
Thanks Tex, Thank you, Thanks, Chief -
Great job, Chief
-
Advice Needed On Purchasing Better Leather
Chief31794 replied to All4Christ's topic in Leatherwork Conversation
Have to punch in for Springfield Leather as well, they sell Hermann Oak, in any increment you want from 2 sq ft to full sides, will take it from whatever area of the hide you want, and will split it to any thickness you need. Their prices are competitive and the Leather is pretty good, Grade A Hermann Oak would be better but I don't know of anywhere you can get that with anything other than full sides or shoulders, etc, and the cost is pretty high, the difference I've found in the Grade B that Springfield sells is that you get a little more waste (a few spots that have imperfections), but you can be creative when laying out projects and get what you want. When you buy their Grade B in sq ft quantities (2,3,4...10, 12) etc, they normally try to take that from a good looking area of the hide. I've tried RJF, wasn't happy with it, for lots of reasons, but I'll stay with Hermann Oak, it's been a major player in leather tanning for over 100 years. Chief -
Narvi, Thanks for the nice complement. It takes about 2 hours to completely lace a wallet. It takes a while to punch the holes, etc. But the lacing itself is about 2 hours maybe three depending what's on TV in the shop. Chief
-
Holster For A Glock 22 - .40 Cal
Chief31794 replied to Chief31794's topic in Gun Holsters, Rifle Slings and Knife Sheathes
Thank you sir, Chief -
Thanks everyone, Chief