Chief31794
-
Posts
1,801 -
Joined
-
Last visited
Content Type
Profiles
Forums
Events
Blogs
Gallery
Store
Everything posted by Chief31794
-
I have posted an additional video on youtube, that goes through just the technique for going around the corner. I hope it will clarify and make it a little easier to understand. The video is at: http://youtu.be/KCKFd-yUSpA Chief
-
Blackriverlaser.com is making tools now, I just finished reviewing their new hole punching die set for the Tandy Snap Setting Press. It is a great product and a lot less than the same tool at Tandy. Here is a link to their tool. http://www.ebay.com/itm/PRESS-DIE-LEATHER-PUNCH-HOLDER-SET-FITS-ANDYS-PRESS-SUPERIOR-COSTS-LESS-/141212867759?pt=LH_DefaultDomain_0&hash=item20e0f15caf and here is a video on youtube demonstrating the product. http://youtu.be/GakWFa9WqJo Great product and BlackRiverLaser is a great supplier. Chief
-
Mine stay rolled loosely grain side in. I dampen leather before I cut it, makes the cuts smoother and makes the leather lay flat, never had a problem with it and I live in South West Georgia where humidity is always very high. Chief
-
SilverBear, I removed the video because there were a lot of complaints about the videography, some people like it some didn't. There is a book that Tandy sells called Lacing and Stitching for Leather Craft Tandy Item# 61906-00. It is available for order or you can download it from the Leather Craft Library on their site. It is dated, I bought and read it decades ago, I learned the technique from there, but as with many of their lacing instructions, I have adapted it somewhat over the years, it does provide the basics. Chief
-
Great tips, I didn't see it anywhere but one of my things is I buy large rolls of 24" wide butcher paper (brown craft) from the home improvement stores, I roll out enough to cover the width of my dye bench, then I dye on it on both sides front and back by turning it over and spinning it around. 1 piece normally lasts over a week and I'm pretty busy in the shop, then dyes, glues, etc get on the paper and not on the bench itself and when I get too much dye or glue on both sides, I simply fold it up, put it in the trash and roll out a new piece. Keeps the dye table much less messy. Chief
-
Maybe my answer was too short, Copper Rivets 9's or 12' are solid post, tubular rivets are very thin walled in comparison and the mushrooming under the cap can't come close to comparing with peening over the burr. I have worked on some 75-100 year old mule tack for the Georgia Museum of Agriculture and while some of the leather was deteriorating, the copper rivets were still holding tight and were a pain in my, you know, to get out to replace parts of the tack. I have to make sure I stay historically correct and do, but I use copper as opposed to tubular cap rivets anytime I'm looking for a super strong hold. Tubular rivets hold well if set well, however, the question was are copper rivets stronger than the solid brass tubular rivets as I understand it, the answer is absolutely. Tubular rivets are so thin you can mushroom the tops with out much effort, if you decide to use copper #9 or #12 you better bring a real hammer. Chief
-
Short Answer, Yes. Chief
-
Welcome to the site, lots of friendly people here. Chief
-

Feibing's Aussie
Chief31794 replied to wlg190861's topic in Dyes, Antiques, Stains, Glues, Waxes, Finishes and Conditioners.
I've thought about this, my opinion is that leather balm, aussie, etc are leather conditioners and hands are covered with untanned (unless you live in the south) leather. I'm not sure though, I'm pretty sure I have a problem from dyes and denatured alcohol and lacquer finishes drying and irritating my hands. Chief -
Resolene And Water
Chief31794 replied to chevvy64's topic in Dyes, Antiques, Stains, Glues, Waxes, Finishes and Conditioners.
For a good water repellent finsih, I use Feibing's Aussie. It is beeswax based and does a good job. I use it on Rifle Slings and anything that will be used primarily outdoors. I put it on liberally, heat it with a hair dryer until it starts to liquify and then wipe off the excess. Chief -
Harbor Freight has a selection. I would look at them. Chief
-
New Member With Zero Experience: Leather Questions
Chief31794 replied to Locry's topic in How Do I Do That?
Hard to tell what type of leather you have from a picture, it may be latigo. In order to wet mold you want Vegetable Tanned Leather. Tooling leather is always veg tan. If you want small quantities of leather (less than a side) then the only place I know of is Springfield Leather Company, they will sell you high quality leather tanned by Hermann Oak. They sell in quantities as small as 2 sq ft. Thinner leather (4oz or so) will mold, however the thicker leather 8/9oz or so does a better job. Hope this helps, others may know of other places that sell small quantities, Springfield Leather is good, their turn around time to get the order picked and shipped is a little slow. They are good to deal with. Chief -
Something that big should be pressed with an arbor press or the like, the pressure needs to be spread over the entire stamp and then it will require quite a bit of pressure to get it to tool the leather properly. Very hard to do with a hammer. Chief
-
Air Brush Help
Chief31794 replied to Chief31794's topic in Dyes, Antiques, Stains, Glues, Waxes, Finishes and Conditioners.
I got the Paasche VL in this afternoon, hooked it up, tested it on some leather and it is exactly what I needed, thanks for all the great advice. Chief -
Drum Dyed Leather
Chief31794 replied to tanglang69's topic in Gun Holsters, Rifle Slings and Knife Sheathes
Drum dyed Veg Tan Leather can be molded and tooled. I have used some HO drum dyed brown, it tools nice. Most suppliers will send you some sample pieces of their drum dyed leathers. The only reason I don't use it is that I want more control over the color. I know Springfield Leather Company will send you samples if you ask, most others as well, I don't think Tandy will but I wouldn't use their's anyway and I don't remember them selling any drum dyed tooling leather. Chief -
I've always used the two prong needles, I've tried the screw ons and the ones with the hole and one prong. The screw on ones didn't work for me at all, the one prong with hole were okay but I like the two prong better. The do wear out so I try not to open them any farther than necessary as said, use small needle nose pliers as was said, and I have over 200 of them in a needle box, so I use them till they don't close right or get bent and throw them away. I normally can use a needle for several projects before it goes bad, but it will go bad eventually. Chief
-
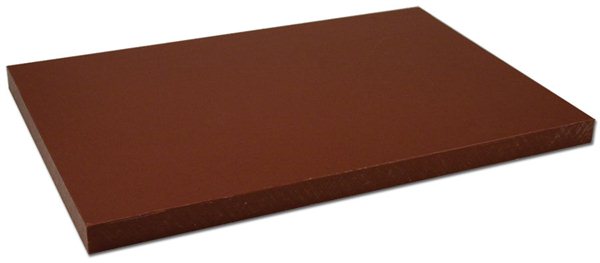
I've got one of these Professional Cutting Boards that I've had in the shop for about 3 years, it's the same material a lot of clicker boards are made of, a little pricey but they last a long time, I am at the point that I need to sand mine down a layer and you can do that several times as well. Tandy sells them for $99.99 retail or $70.00 if you have an elite membership. One of the few tools Tandy has that still works well. Chief
-
Air Brush Help
Chief31794 replied to Chief31794's topic in Dyes, Antiques, Stains, Glues, Waxes, Finishes and Conditioners.
Thanks, I bid on a VL on Ebay earlier this afternoon. We'll see. Chief -
Air Brush Help
Chief31794 replied to Chief31794's topic in Dyes, Antiques, Stains, Glues, Waxes, Finishes and Conditioners.
Thanks to both of you, I'll take a look at it. JLSleather, very nice looking work, I'm looking for just overall dying but it looks like this brush would do it really nicely. Chief -
I guess I'm too old school. I've been admiring the dye jobs achieved by air brushing so I bought an air compressor and air brush and read the directions well. Here's my problem, the air brush works well but the coverage is very small like it's for writing or fine detailing, I'm looking for something that can dye an entire guitar strap or gun belt with maybe a 1" spray pattern that I can overlap like spraying paint on a car. Should I be looking more at a "Spray Gun" as opposed to an "Air Brush" and keep the airbrush for fading on edges etc and use the spray gun to dye the leather? I have found one, very reasonable, that is called a "Detail Spray Gun", it has a 4 oz capacity and is more designed for doing detail work on larger projects. Cost isn't an issue, I'm just not sure what I need to buy for spray dying. Chief
-
Since it's for Charity and I assume you're donating the cost of the fobs and rings? If not, then make sure you cover that then set an amount on each to give to the charity. If you're donating the materials and labor then set a price for what you want to get for the charity. Here's my advice, start selling them at the price you set, if sales are low, reduce the price some, if they are selling like hotcakes, then raise the price at an appropriate time (different day, etc). The philosophy I use is that an item is worth what the market will pay, that sets a price point, then if you can still sell it and make a profit that you're okay with, you're good. You can go a little high since it's for charity, people expect to pay a little more as a donation, let them know it's for charity and that all of the proceeds go there or that a set amount of each sale will go to charity, which ever is applicable. I think you're price is probably pretty close, but that's just me, others have other opinions on how much should be charged. Bottom line is that since they're for charity, you need to sell as many as you can at the highest price that will allow you to do so. Hope that helps, Chief
-
X2, great advice from Tree Reaper, I also clean my leather usually with Oxalic Acid (I use Barkeepers Friend which is available in most Lowes, Home Depot, etc, then mix 3 teaspoons of it to 1 pint of distilled water, dissolves easily, just shake), I use a sponge and wet it in the mixture, then "scrub" lightly, then I wipe the surface again with clean water to remove any remaining chemical. It will remove most impurities, some of yours looked to be abrasions, hard to tell from a photo, but if that's the case, then it's just bad leather. I look for abrasions, marks, etc when I start wetting the leather for the casing process, but it doesn't always show all of them up. Tree Reapers advice will identify most inconsistencies in the leather. I just noticed that the marks on yours is spaced and looks sort of like finger prints, you or someone else may have handled the leather with something on their hands, finish, gum tragacanth, just about anything. Hope that helps, Chief
-
Order Process Of Belt Making. Question About Dying.
Chief31794 replied to zaynexpetty's topic in How Do I Do That?
I try to keep all dye leaks off the back of the belt. I do this with Frog Brand Tape and seal it really well on the edges. Should some get by, then I consider splitting about 1/2 - 1 oz off the back of the belt to remove the dye. if it's very light then I use a safety skiver to remove the spot. Chief -
Order Process Of Belt Making. Question About Dying.
Chief31794 replied to zaynexpetty's topic in How Do I Do That?
I'll take a stab, keep in mind this is my way of doing things there will be others who do it differently. 1. I don't dye the inside of belts, I think they look better left natural and dying them seems to "stiffen" the belt, I like them to be supple. 2. I use water to "burnish the edges before I dye then I use Gum Tragacanth to final burnish as a last step, however this is after I have put a finish on the belt. With GT the edges will darken just a little but will dry back out and leave no discoloration. 3. I have edge coats but have never liked them. The recommended method is to put it on as a last step. As for the difference, the edge coat is designed to dry smooth and simulate burnishing to some extent. Some like them, some don't. I recommend you try them on some scrap to see if the look appeals to you, I prefer the look of a well burnished edge. Hope that helps, Chief -
You might want to look at Angelus dyes and stains, although I don't think they have a "Antique or Highlighter" per se, they have an abundance of colors. They are spirit based dyes though (alcohol). Chief