particle
-
Posts
1,352 -
Joined
Content Type
Profiles
Forums
Events
Blogs
Gallery
Store
Everything posted by particle
-

Recent Holster Builds
particle replied to particle's topic in Gun Holsters, Rifle Slings and Knife Sheathes
Thanks! It's Herman Oak, 7-8oz. -
IWB Holster for Sig P229
particle replied to particle's topic in Gun Holsters, Rifle Slings and Knife Sheathes
Thanks Josh! Been too long. I think I burned myself out and started browsing forums related to my 8-5 job and never really hopped back on here. -
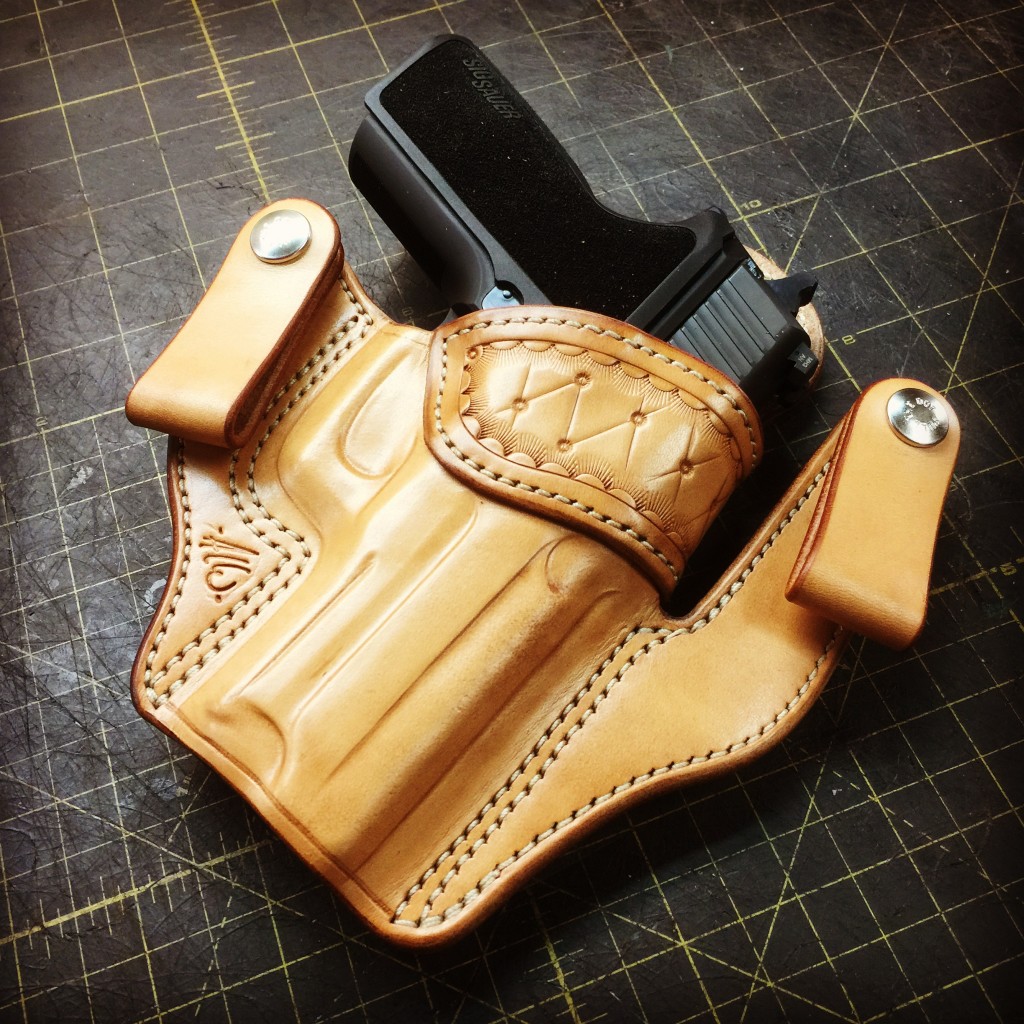
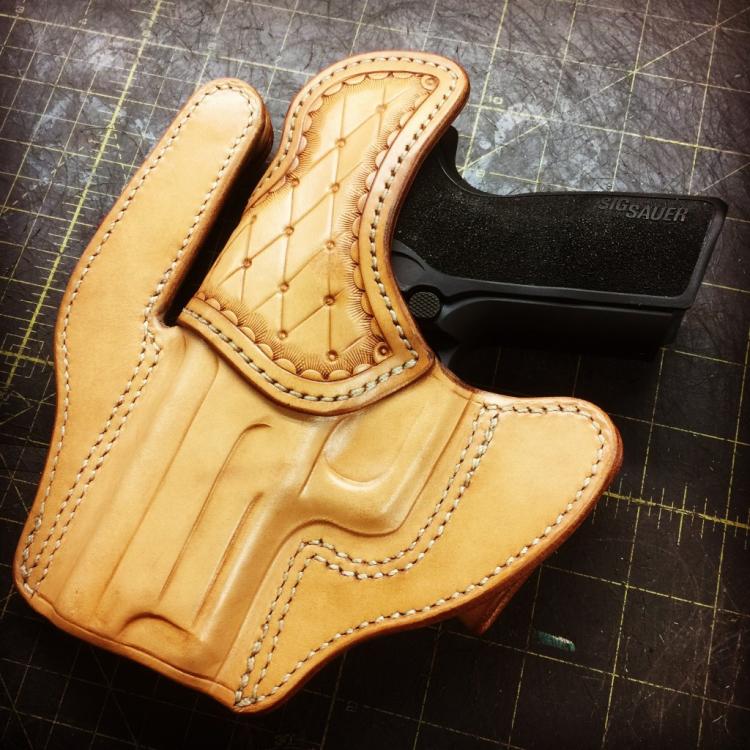
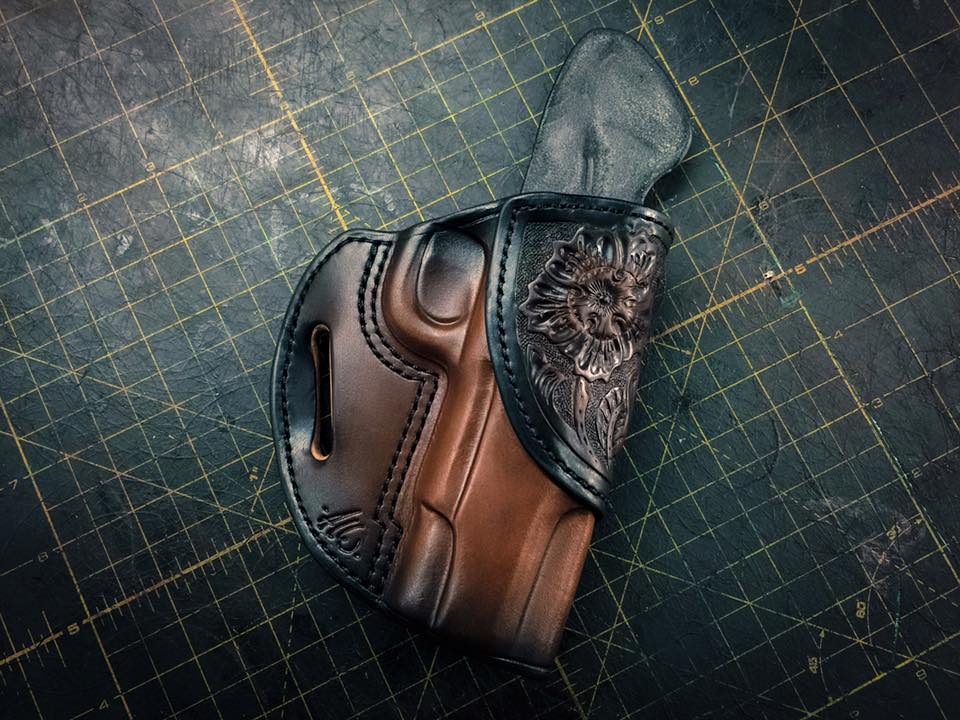
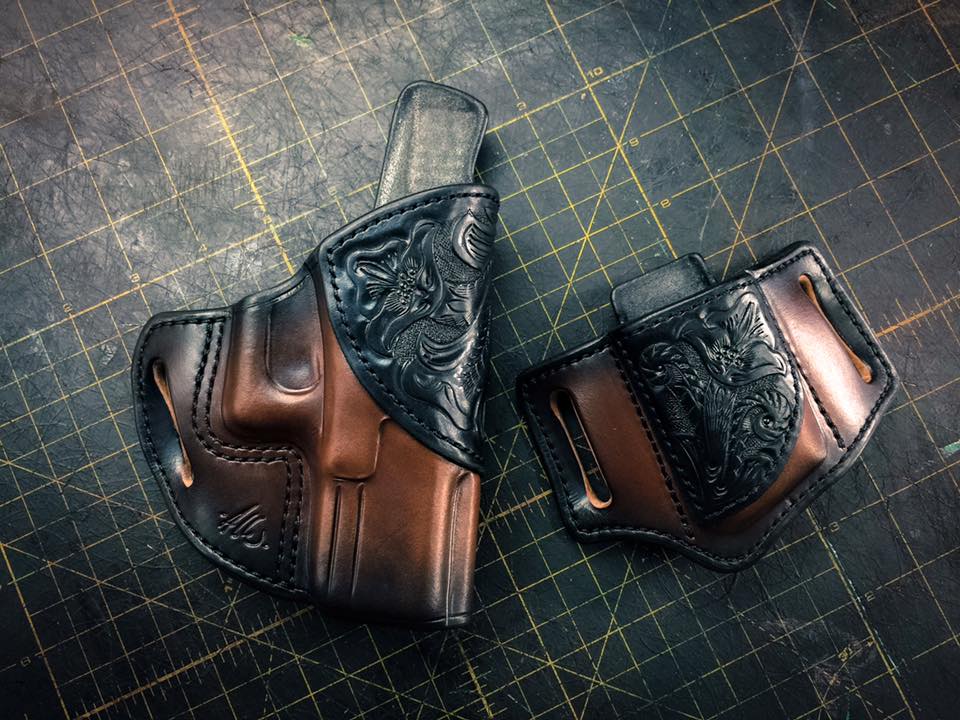
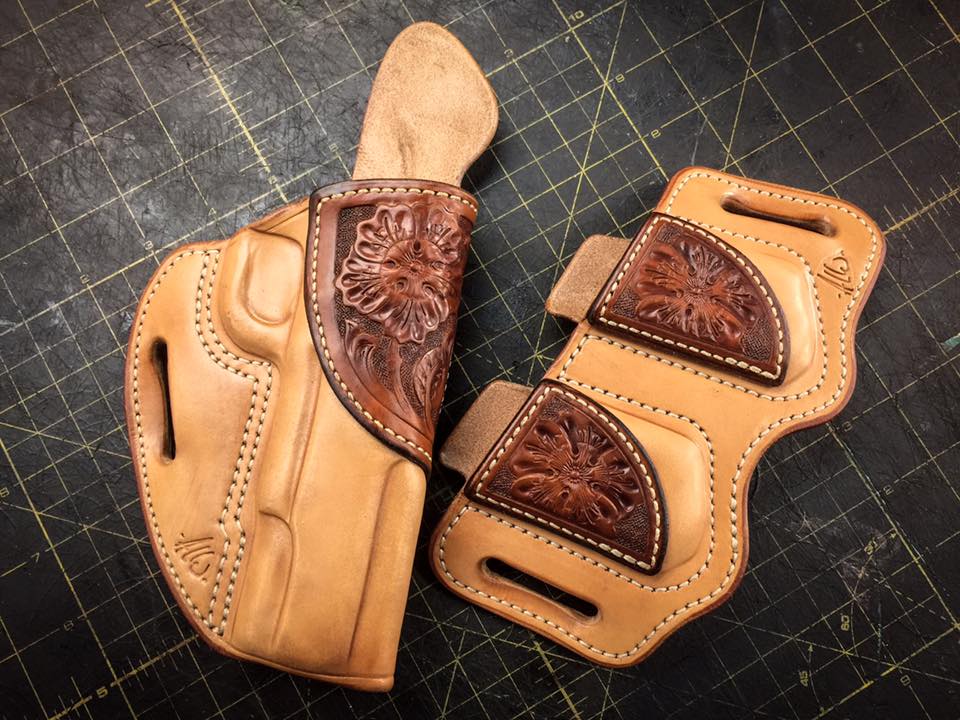
I built this holster for my new pride & joy - a Sig P229. Natural Herman Oak. Very comfy!

-
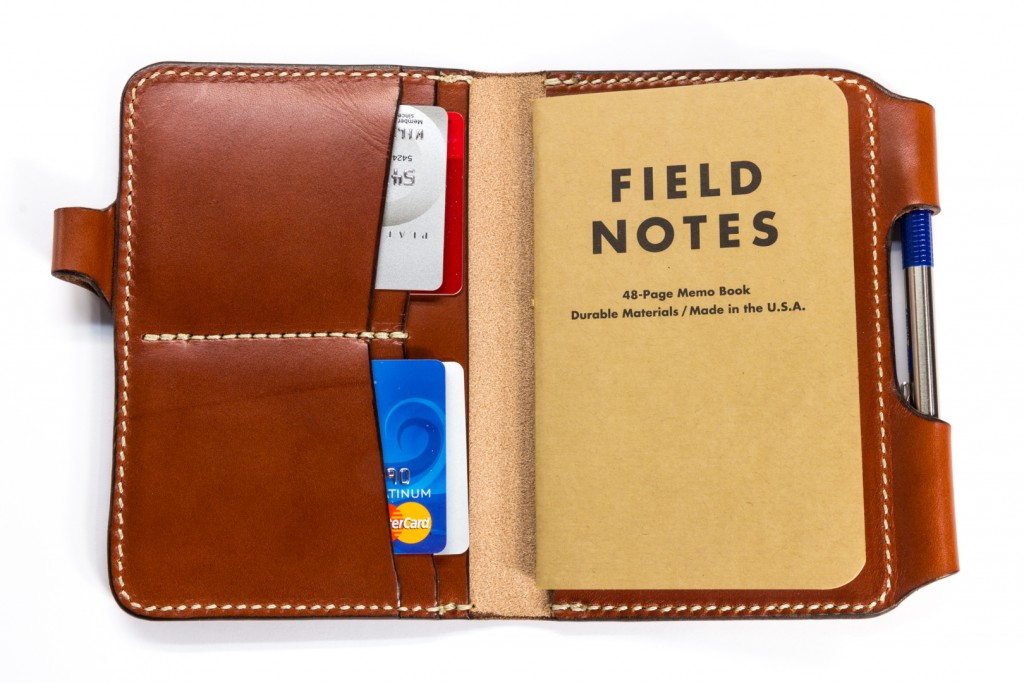
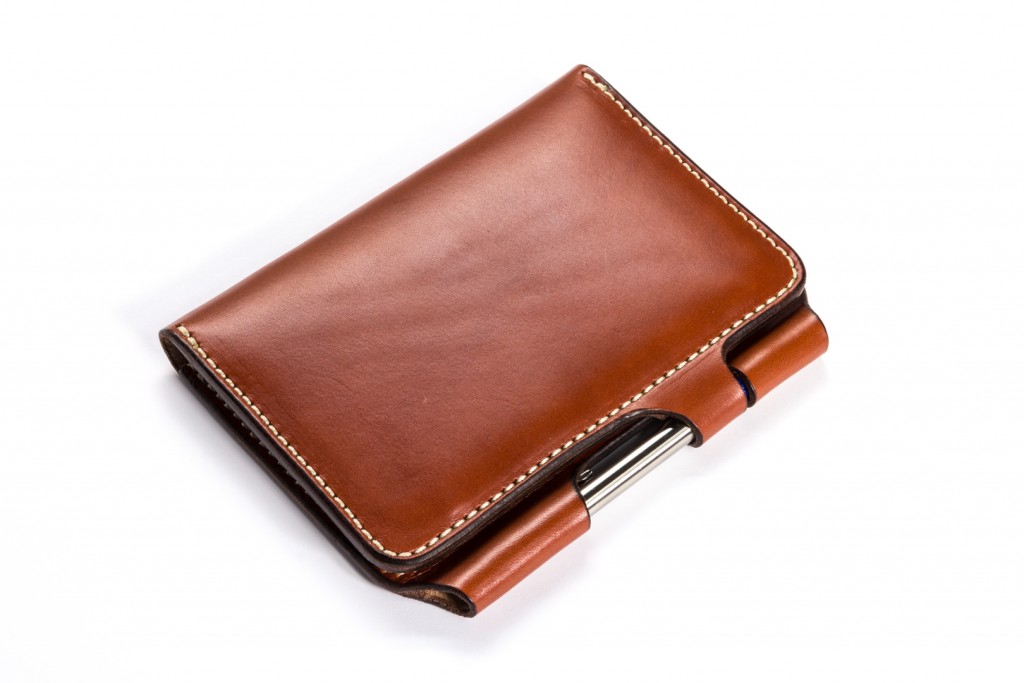
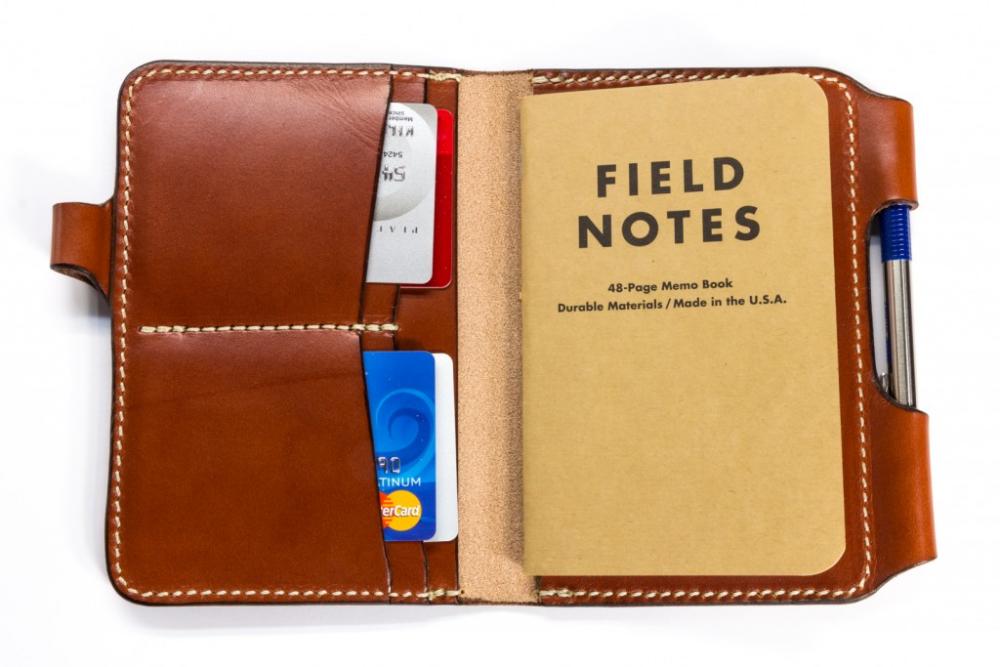
I made this cover a while back to fit a field journal insert, a few credit cards, receipts, and a pen, etc. I used English Bridle leather leftover from a previous project. Wish I had more of that stuff!

-
Here's a few holsters I shipped out recently. A couple 1911's and a Glock.
-
Nice looking rig! Love the colors.
-
I've not had good luck applying dye with a dauber, so my suggestion for your next holster would be to apply the dye using an airbrush, or at least the Preval Sprayer (which I've never personally used). You could also try switching to Angelus dyes, as I've heard they're much easier to apply. You might also consider diluting your dye with the appropriate thinner. Another thing you can try is the Tandy Professional Waterstains - they're very easy to apply and come out very evenly when applied full-strength with a sponge and won't go excessively dark on you - they'll come out very close to the sample colors you'll find online. Ian Atkinson has some videos that show him applying dye with a dauber - his products come out great looking, though I'm not sure exactly what he uses off-hand. He has a video or two that specifically relates to applying dye (how-to). http://www.youtube.com/user/satansbarber For finish, I like to apply it with a 1" sponge paint brush, but this method really one works for small items (holsters and such are fine). I would not do it this way with a large journal cover, etc. For that, I'd use an airbrush to eliminate streaks completely and to eliminate dye transfer. Others like to dip their holsters in their finish. This works too, but make sure you have an air compressor handy to blow off the excess finish so you don't get puddles and streaks. I always use 50/50 acrylic sealer & water. I've had good luck with Fiebing's Resolene and Angelus 600. When I first started, I was using Tandy's Satin Sheen, which also works fine.
-
Great looking holsters!
-
"aged" Saa Holster & Cartridge Belt
particle replied to Josh Ashman's topic in Gun Holsters, Rifle Slings and Knife Sheathes
That looks fantastic! -
I'm no sewing machine expert, but am I reading correctly that you backed off the top and bobbin tensions completely, and only re-tightened the top tension just to the point where it touches the screw? Did you ever go back and add more tension?
-
I think I asked about it, someone said it could be done, and I probably mentioned I'd try it. I'm pretty lazy though, so I never really got around to it. LOL
-
Nice looking holster! Actually, that wasn't me that airbrushed the Tandy Pro Waterstains (not sure who has), but I was thinking about trying it. I agree - it doesn't seem to penetrate very deeply and it makes the surface of the leather somewhat water resistant. Strange stuff, but it's certainly easy to apply with a sponge. Angelus has been calling my name, but I haven't gotten around to trying their dyes yet.
-
About Vacuum Forming
particle replied to Dwight's topic in Gun Holsters, Rifle Slings and Knife Sheathes
Yep, it just helps to keep a seal from forming right at the nipple. Uh, I think that's what it's called... Allows more air to be sucked out of the bag, more quickly. -
About Vacuum Forming
particle replied to Dwight's topic in Gun Holsters, Rifle Slings and Knife Sheathes
Thanks Denster - I'll give that a try. I was never sure what that little brass thing was for, so good to know it's not needed! I actually never actuate the red lever. I never noticed it doing any good, so I just leave it alone. I always just figured I got a faulty pump, but once I figured out it wasn't holding suction, I'd already thrown all the packaging away and couldn't send it back. -
About Vacuum Forming
particle replied to Dwight's topic in Gun Holsters, Rifle Slings and Knife Sheathes
Thanks shtoink - as I was studying the picture, I was beginning to think the same thing. I'm wondering if I should move the lever to be inline with the moisture filter, and close off the port pointing downward. I've used my bag so many times, I'm probably due for a new nipple valve so I can make use of the other half. The part I'm using right now does have a few holes in it (but it never held suction even before the holes....). My main goal for holding suction is so I can turn the pump off while I'm forming - the motor makes it hard to hear my Hulu tv shows while I'm working... -
Owb Pancake Width
particle replied to chiefjason's topic in Gun Holsters, Rifle Slings and Knife Sheathes
Dwight - the reinforcement is 8oz thick, and so are the body pieces. When I said detail molding was difficult to do on 1/4" thick leather, I was just referring to the reinforcement area. I pretty much make everything out of 7-8oz leather. Thanks for the compliment about the tooling! I still have a lot of room to improve - I'd love to hang out with some local saddle makers and watch them tool some saddle pieces. -
About Vacuum Forming
particle replied to Dwight's topic in Gun Holsters, Rifle Slings and Knife Sheathes
Supercub - I think I just ended up ordering some online, but may have bought some from Oreilly's - can't remember.... Here is my pump setup. I built a little table that has a wood skirt to raise it up off the table. That gives me room to clamp the bag to the top. Here is how I clamp mine. Here is my pump with all the fittings. Maybe I don't have the fittings connected properly - I thought the red lever was supposed to close the system and keep it under vacuum when I shot off the pump, but it has no effect on the system at all. I'd love it if someone could point out my problem, if there is one. Here is the platen I made. Ignore the string - I don't use it anymore. I just butt my dummy gun up to the platen - that allows enough air gaps to keep sucking air out of the bag. Here's another view of the work surface I built (view from the back side): -
About Vacuum Forming
particle replied to Dwight's topic in Gun Holsters, Rifle Slings and Knife Sheathes
Dwight - I have the same pump as you. Does yours hold suction after you turn off the pump? Mine doesn't, and I'm not sure if it's supposed to, or if I have a fault in the system. -
Owb Pancake Width
particle replied to chiefjason's topic in Gun Holsters, Rifle Slings and Knife Sheathes
Thanks! I tool the piece, then assemble as normal. You have to make the tooling pretty deep since it does soften a bit after wet forming, but you can go back after it's formed (while it's still wet) and trace over the edges a bit with a beveler or modeling spoon to deepen the tooling again, but I don't normally need to do that. You also can't do any detail molding, but that's pretty difficult to do anyway on 1/4" thick leather. I just press inward a bit at the trigger guard and ejection port with my thumbs for added retention. -
Owb Pancake Width
particle replied to chiefjason's topic in Gun Holsters, Rifle Slings and Knife Sheathes
I like to pre-curve my holsters when I form them - that way when the customer is wearing the holster and tightens his or her belt, it doesn't have to pull the wings too far toward the body, which causes the holster to flex and bend too much, as well as putting excess pressure on the back of the holster causing it to want to collapse. I try to leave about 1/2" from the edge of the holster to the edge of the belt slot. The amount of space you leave between the belt slot and the stitch line will vary with the thickness of the holster, but I'd say you want at least 3/4" clearance between the slot and the trigger guard and top of slide stitch lines. The thicker the gun, the more space you'll need. How do you know how much is enough? Your mock-up holster... Make your pattern, then make a mock-up out of scrap leather. When I form my holster, I like to bend my wings downward enough so I can see straight through both of my belt slots without the back of the holster getting in the way very much, if at all. If it's too hard to bend the leather that far, add a little more width to the holster. Here's an example of where I probably should have added a little more width to the pattern because the wings had to curve pretty far (very thick pistol), but I was able to make it work. Here's an older photo that shows how much curve I shoot for: -
Something to keep in mind is the resale value will be much better with the longer arm machines like the 4500 / Class 4. You can invest your money knowing if you ever have to sell the machine, you'll get most of your money back. I actually sold my Boss for more than I paid for it after using it for around 3 years for holsters and belts, and a few journal covers and a couple bags.
-
That machine should have very similar specs (if not identical) to the Cobra Class 3. If you are happy with the price, and the owner can sew on it and prove it sews fine, then it will probably work perfectly fine for your holster business. http://www.leathermachineco.com/catalog.php?item=2
-
I use 277 bonded nylon regularly on 2 layers of 8oz without a problem in my Class 4. Are you certain the machine is threaded correctly? Have you made any adjustments to the bobbin tension? You might try calling Steve and asking him how to reset the tension. I haven't had to do so with my Class 4, but on the Boss I previously owned, you basically backed off the two top tension nuts completely, then screwed them back on just until they contacted the spring. Once they made contact, you turned them both basically two complete revolutions (one may have been 1.5 revolutions), then adjust the bobbin tension until the thread gets pulled into the center of the leather. Steve should be able to quickly walk you through the proper way to adjust the tension from scratch on the Class 4 in just a couple minutes.
-
Slicking The Inside Of A Holster
particle replied to Jeff L's topic in Gun Holsters, Rifle Slings and Knife Sheathes
Very rarely. I dilute my finish 50/50, so it's not usually very tacky feeling once it dries. But, if I'm bored, I might take a few extra minutes to wax the exterior. I don't personally like the smell of the Kiwi neutral shoe polish, so I don't use it unless I really think it needs it (or I'm REALLY bored...). -
Slicking The Inside Of A Holster
particle replied to Jeff L's topic in Gun Holsters, Rifle Slings and Knife Sheathes
To clarify, are you referring to -A- smoothing the interior of the holster to make it slick, without the fuzzy or sandpaper'ish feeling on the inside? Or are you referring to -B- minimizing and/or eliminating the grippy/tacky feeling that comes after applying an acrylic finish coat on the holster? -A- Prior to applying your finish coat, brush gum tragacanth on the interior of the holster and work it into the fibers with your fingers, then a burnishing stick of some sort to smooth it out and polish the interior. -B- After your finish has fully dried, rub your finger in a little neutral shoe polish and rub down the interior of the holster as best as you can. This will go a long way towards eliminating the tacky feeling of the acrylic finish. I've also quickly applied a little silicone spray on the interior which helps too, but wax is probably better. After wearing the holster for a few days, skin cells, dust, lint, etc. will quickly coat the interior of the holster, eliminating the tacky feeling on its own.