Dwight
-
Posts
5,252 -
Joined
-
Last visited
Content Type
Profiles
Forums
Events
Blogs
Gallery
Store
Everything posted by Dwight
-
It would surely help if there were pictures, drawings, or dimensions: but absent from those, . . . your best bet as you have outlined it so far would probably be a copper rivet. Copper rivets can come with a large flat head, . . . goes through the hole in each piece of leather, . . . has a washer affixed on the bottom side, . . . cut very closely with a pair of side cutters, . . . and expertly flattened by a small ball peen hammer on a wide steel surface. You attain the rotating effect, . . . place a thin sheet metal spacer between the two pieces of leather, . . . after the rivet is set, . . . pull out the spacer and it should rotate freely. May God bless, Dwight
-
The dye will not overly effect the molding, . . . just keep your fingers and thumbs away from the areas molded and/or stamped and/or carved. Messing with it while it is damp or wet is what will effect it. If you want white stitching, . . . on a two tone holster, . . . I would first create the holster in it's final form except for dying and sewing. That means also that ALL gluing, edging, etc. is also done. I would then dip dye the main color, . . . and air brush the second. I'd give it 24 hours between the colors, . . . and I'd have it where it is being "assisted" in the drying process. I'd then give it a coat of 50/50 resolene & water. Let it dry for 36 hours. I'd then stitch it up. Then I'd give it another coat of resolene & water, . . . especially over the thread to protect it and keep it pretty white longer. There are many other ways to do this holster thing we do, . . . but that is the process I would use. May God bless, Dwight
-
In a nutshell, . . . you can't. Smokecigars laid it out for you. I have never ceased to be amazed at how many guys wear 36 jeans with a 42 belt. You can also look at my belt page on my website, . . . tells a similar story on how to measure properly for a belt. May God bless, Dwight
-

Good Weekend.
Dwight replied to Eaglestroker's topic in Gun Holsters, Rifle Slings and Knife Sheathes
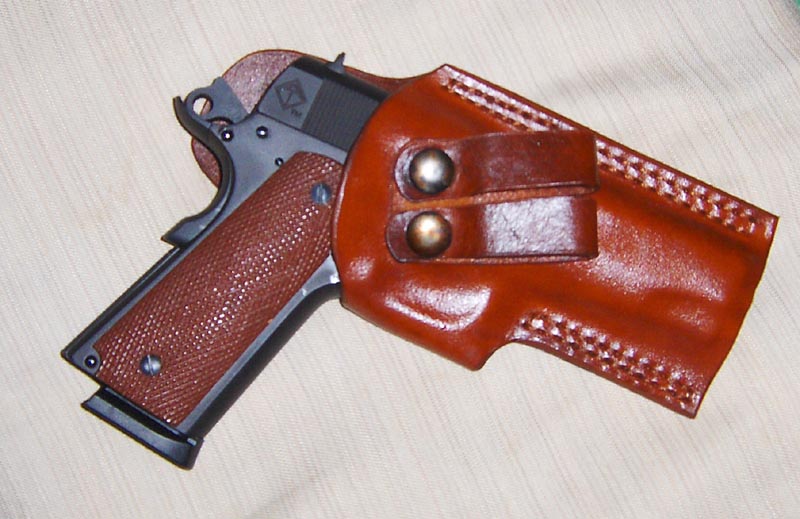
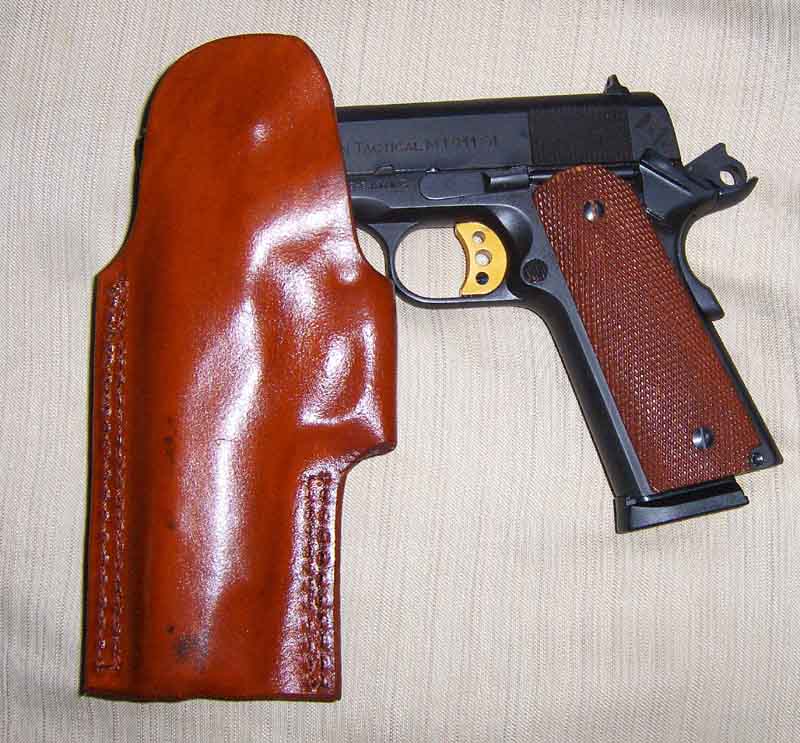
Eaglestroker, I started getting leery of using a press on my holsters, . . . afraid that one day I would pull that handle one time too many, . . . and be buying a broken gun or something to that effect. I investigated the vacuum bag idea, . . . and I am sold. My whole setup cost just under $150 and these pics show the first one I did with it. It is a modified Rhodesian style IWB, . . . and the detail is exactly what the vacuum bag did, . . . nothing added. And, yes, . . . the retention is really great. It actually was too great when I first did it, . . . had to loosen it up a bit. This one has some flaws in it, . . . so overlook them, . . . it was a "practice" piece to begin with, . . . testing the vacuum and the Rhodesian design. May God bless, Dwight
-
A Couple Of Recent Builds
Dwight replied to Ran's topic in Gun Holsters, Rifle Slings and Knife Sheathes
Good looking work, . . . but can the next pictures be on the kitchen table? We've got plenty enough snow to go around here, . . . woke up this morning to another 2 inches or so, . . . May God bless, Dwight -
Getting My Feet Wet
Dwight replied to Jay Gibson's topic in Gun Holsters, Rifle Slings and Knife Sheathes
Jay, . . . do you have your firearm? If so, . . . which one, . . . I might be able to find a pattern if you are interested. May God bless, Dwight -
Sorry, Zooker, . . . the only videos I've seen were the Bianchi ones, . . . which were three VHS tapes, . . . probably not 2 hours each, . . . but VERY thorough. You have to kind of overlook the obvious plugs for Tandy, . . . they certainly had some $$$ invested somewhere in the videos, . . . but all in all, . . . really good. He sewed his cartridge loops on, . . , I punch and lace mine, . . . he used a set of calipers for his stitch lines, . . . I use a gouge, . . . and when he was all done with the rig, . . . he dunked it in a bath of neatsfoot oil, . . . which I just don't do. All of the cowboy rigs on my website were created using his techniques. But he shows you how to make the proper curve in the belt that will keep you from coughing and your gunbelt winding up around your ankles, . . . he goes through the pattern process for both the belt and the holster, . . . honestly, I cannot imagine anyone being any more thorough. May God bless, Dwight
-
Several folks on here do holsters with a two tone effect, . . . or even three tone. If I were doing that, . . . the base color, . . . the main color, . . . I would dip dye it, . . . then use the other for accents. As a matter of fact, . . . I have a project to do later this year, . . . and that is the process I plan on using on it. It will be a light saddle brown with black highlights. May God bless, Dwight
-
John Bianchi, . . . of Bianchi Holster fame, . . . made a three tape VHS demo on how to make the rig you want to do. It is probably out there on DVD, . . . It is an awesome teaching exercise, . . . may be available on Ebay, . . . well worth a 40, 50, or 60 dollar price tag, . . . just in the leather you might save by using his process. I only disagree in a couple of areas, . . . nothing that makes any major difference, . . . I just do a few things a bit different, myself. From what I could see, . . . your patterns look OK. May God bless, Dwight
-
Just another way to do it, . . . do all the tooling, . . . then dye it with Feibings black oil stain, . . . not USMC black. The USMC is a great dye, . . . but it leaves so much extra pigment on the product, . . . it takes forever for me to buff it off, . . . and I can never get it all buffed out (like it want it) from any carvings or stampings. I would then burnish the edges, . . . coat it with a 50/50 Resolene finish, . . . and buff that out. IMPORTANT: let the Resolene dry 36 hours or so. Then I would get a full pot of coffee, . . . a couple of doughnuts, . . . some small brushes, . . . and Eco Flo paint the right colors, . . . and commit myself to painting the other colors on, . . . very painstaking, . . . very slowly, . . . but it comes out nice, . . . This is a painting I did that way on a holster for a friend. May God bless, Dwight

-
Ruger Blackhawk Pancake
Dwight replied to George B's topic in Gun Holsters, Rifle Slings and Knife Sheathes
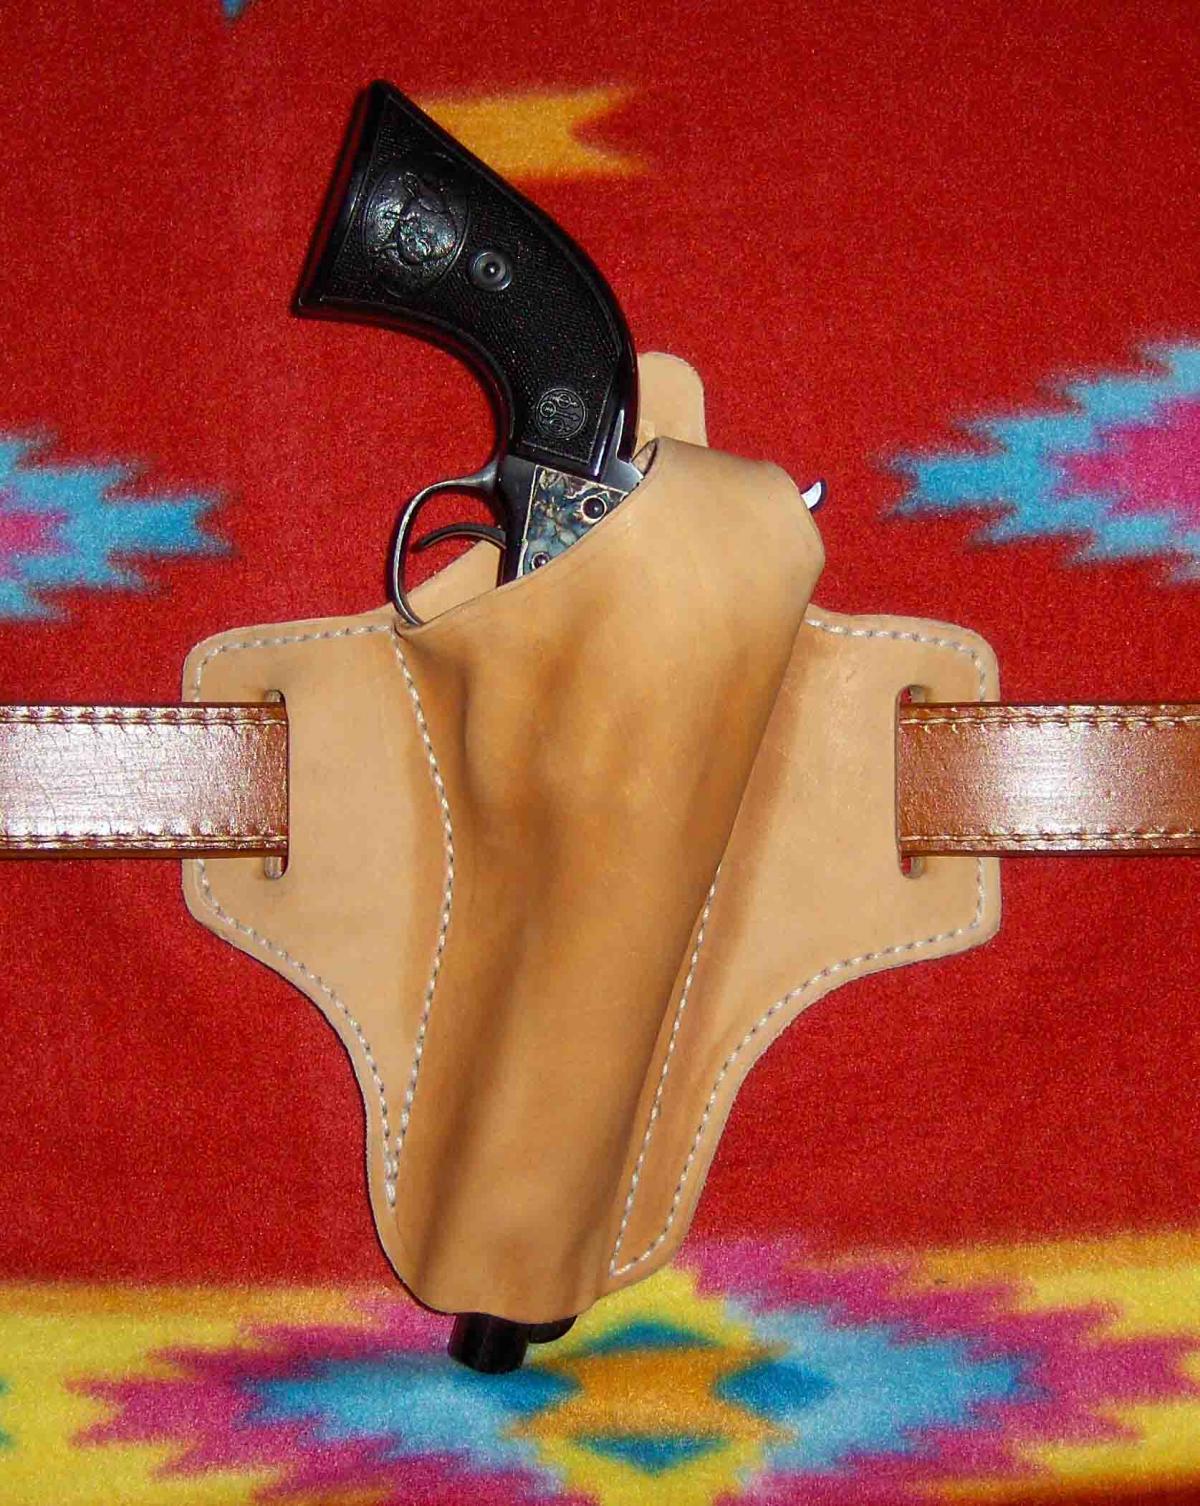
Good job, George, . . . It's been a couple years, . . . but I made one "back when" for a fellow I think in Colorado. It actually was one of the easier ones I've done for a revolver, . . . I used my single six to mold it, . . . he seemed very satisfied, . . . and kept the thumb break. One thing for sure, . . . if someone ever pulled out a single six as his CCW, . . . I'd be right good and careful of him. All the folks I know who have em, . . . they can use em, . . . forget that spray and pray stuff. May God bless, Dwight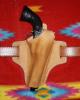
-
Part of the reason I dip dye is to make sure I don't get blotchy spots. BUT, . . . having said that, . . . I have found in some cases, . . . not all by any means, . . . but in some cases, . . . applying the Resolene finish that I use will take care of the problem. I cannot answer why, . . . just know that it happens sometimes. May God bless, Dwight
-
I use three factors to determine my price: what I HAVE TO HAVE in order to survive, . . . what the customer is comfortable with, . . . and the prevailing price of a similar product produced by someone else. The first two make up 90% of the decision, . . . the last one is simply a flag, denoting which way the wind is blowing. I never allow a third party to enter that judgment, simply because they DO NOT know my situation, . . . or my customer's situation, albeit they may know prevailing similar prices. Taking advice is good, . . . especially getting started, . . . but don't be overly influenced, especially by well meaning friends or acquaintances who really do not know what they are saying. The final judge of your prices will be your return business. If your customers never come back, . . . something went astray. Generally price will be the culprit. May God bless, Dwight
-
The absolute first and most important foundation point for beginning ANY business: you already have, . . . the head orientation that your customer must be first. Companies or individuals who do not get their heads oriented that way, . . . fold up, die out, go bankrupt, . . . or worse, produce an inferior product that gets someone hurt or sick, . . . and legal action nails their business' coffin shut. Being up front with your customer, . . . AND being willing to adjust as required, . . . will go a super long way toward making you successful. And like others have said, . . . the pictures look good, . . . but you need to develop your product as you go along, . . . the Edsel is proof you can go too far, . . . the Yugo is proof that some junk is sold, . . . but personally I like what I saw. One final point, . . . accept limitations. For instance, . . . I will not build a "small of the back" holster, . . . nor to I sell horizontal shoulder holsters. To me they pose a serious liability that I am all to happy to allow someone else to assume. Again, . . . you have a good start, . . . good attitude, . . . that is most important. As an aside, . . . I also teach basic Microsoft Office applications, . . . one of the things I teach is how to use Excel to produce a one piece document that is your production order, . . . packing slip, . . . and shipping label, . . . by typing the order once, on one piece of paper, and the rest is done automatically. Anyone can learn that little computer skill, . . . but having a desire to be partners with your customer and friends with your customer base, . . . is FAR, FAR more important. May God bless, Dwight
-
I'm going to disagree with Particle on this one, . . . for 100% of my belts, . . . and about 75% of the stitching on my holsters, . . . I groove on both sides. I figure if I use the same groover, . . . groove from the same edge, . . . it will be the same. Guess what ! It works. There are two serious helpers here though: one) the edges are done all but the final burnishing, . . . so they are good as a guide, . . . and 2) I manufactured a little 12 inch table out of some scrap 3/4 inch plywood and a 1/2 inch thick plastic cutting board. It lays perfectly flat with the sewing level of the Boss, . . . making the needle go 90 degrees straight down, . . . and hits the groove on the other side. May God bless, Dwight
-
Tiger Stripe Holster
Dwight replied to usmc0341's topic in Gun Holsters, Rifle Slings and Knife Sheathes
I do not know the proper terminology, . . . as I don't get into a lot of fancy, multicolored leather items, . . . but the folks at Tandy do that sort of stuff in their classes and teach others to do so of course. Might just want to mosey over and ask them for a "how to" idea. My local Tandy shop is super helpful on things like that. May God bless, Dwight -
First Matching Holster/gun Belt Combo
Dwight replied to Ran's topic in Gun Holsters, Rifle Slings and Knife Sheathes
Excellent work, and you choice of stamp is also one of my favorites. I also like the color choices, . . . as well as the contrasting stitching on the holster. May God bless, Dwight -
Triage, check your PM, . . . I get mine from Tandy's and am about 95% happy with them. The 5% unhappy, is they don't come short enough for just a few things I do, . . . wind up having to put a spacer somewhere, . . . one size shorter than their shortest would be a great help. May God bless, Dwight
-
Well, Mike, . . . it would assist us if we knew more about what you were going to do: pictures, drawings, detailed descriptions. But, . . . in the interim, . . . yes, vegetable tan is the type you want, . . . the thickness will be strictly up to "what are you wanting to do with it? IF, . . . for example, . . . you were covering a round cylinder, . . . 15 inches tall and 6 inches in diameter, . . . no serious designs (perhaps a few stamped letters or something of that nature), . . . you could get away with 3 or 4 oz. If you wanted to do some serious 3D detail carving and stamping, . . . you might want to move up to 7 or 8 oz, . . . Remember: in leather terminology, . . . 1 oz = 1/64th of an inch in thickness, . . . 8 oz = 1/8th of an inch, . . . 16 oz = 1/4 of an inch, . . . etc. If you are going to form, . . . then contact cement or glue, . . . and there are some irregularities to the shape, . . . you might want to use leather from a side, . . . shoulder leather is a bit tougher than the side, . . . belly leather is loose and floppy. A kind of rule of thumb is that the thinner it is, . . . the easier it is to work with in forming, . . . but the less rigid it will ultimately be when done, . . . OTOH, . . . the thicker it is, . . . the harder it is to work with, . . . but it can become really firm when it is done. May God bless, Dwight
-
Flat Back Pancake
Dwight replied to chiefjason's topic in Gun Holsters, Rifle Slings and Knife Sheathes
Yessir, . . . that is correct. The leading edge of my pancake is for all tense and purposes done, . . . the back half still needs everything, . . . but it will not happen until the "middle" step is done, . . . which is the molding. Hope this helps. May God bless, Dwight -
Tandy sells a "package", . . . big white envelope, . . . I disremember the author, . . . but you will be hard put to find anything better for starting out. It'll give you a good foundation, . . . getting your edge designs, . . . spacing, . . . notching, . . . all that needs to be laid out right or you might just as well hang em on with a pair of pliers and some bailing wire. Make a couple pairs of basic straps, . . . wear em for a day or a week, . . . figure out what you do and don't like about em, . . . then adapt the pattern to what you want. May God bless, Dwight
-
Streaky Bag Kote
Dwight replied to stef73433's topic in Dyes, Antiques, Stains, Glues, Waxes, Finishes and Conditioners.
Did you thin it down any with water? I don't remember, . . . I think it is 60/40, bag kote/water, . . . but it works for me that way. I put it on with a 1 inch wide brush. May God bless, Dwight -
Dipping Holsters?
Dwight replied to lowlife's topic in Gun Holsters, Rifle Slings and Knife Sheathes
My wife had an old beat up cake pan, about 10 by 14, 2 inches deep, . . . I used it once to do some brown leather, . . . got hooked, . . . almost never do it any other way now. I have a black pan, a brown pan, and a "spare" pan in case I want to do something other than them. I have a belt for a princess I have to do today, it will be pink. May God bless, Dwight -
Google a company called Law Enforcement Targets, . . . in Minnesota (I think). When you get on their site, it is down in the bottom of the first page, in one of the columns on the right side, . . . under tools I think, . . . They have always come through for me, . . . price, service, delivery, . . . and if they don't have it, . . . they'll find it and drop ship it to you if you ask. I always go to them first, . . . and have never been disappointed. May God bless, Dwight
-
There are now two of us who make belts with 7 holes, . . . (that I know of, . . . lol). Just about every one else only does 5. Good job, . . . welcome to "belt land", . . . May God bless, Dwight