Dwight
-
Posts
5,264 -
Joined
-
Last visited
Content Type
Profiles
Forums
Events
Blogs
Gallery
Store
Everything posted by Dwight
-
Cyberthrasher beat me to my rule, . . . overnight. May God bless, Dwight
-
Awesome is the word that comes to my mind. You have talent and patience, my friend, . . . consider yourself blessed. May God bless, Dwight
-
Hey, Cogs, . . . I've never been accused of being a guitar player, . . . but I can beat one into submission in a quick G, C, D7th order. Have him simply undo his strap, . . . turn it 180 degrees clockwise, . . . re-attach and the strap should be flat. May God bless, Dwight
-
I would hazard a guess that it is done with a clicker and dies. It is literally a bent piece of steel, sharpened on the down edge, arranged to be a closed loop that IS the shape of your object. If you can think of cutting biscuits with a milk glass, . . . it is the same concept, . . . except it uses very sharp steel made into a design, . . . and either an air powered or hydraulic powered press. They're not exactly inexpensive either. The words: Norfolk, Captain, Firefighter, Fire/Rescue, . . . those also could have been done with a pantograph engraver, . . . another expensive little toy. If I were going to attempt to do that type of work, . . . my first choice would be to go to someone like Weaver Leather, . . . or maybe Tippmann Company (makes the Tippmann Boss sewing machine), . . . and ask them about clickers and dies. At the same time take a look at this youtube, . . . while he is doing this in wood, . . . the same concept can be adapted to leather: In the leather work, . . . the letters would be actually left standing, . . . the background would be eliminated by the router cutting blade. I've done a little work with a router on leather, . . . it does and awesome job if your tool is really sharp. May God bless, Dwight
-
If you want to, mail me one that is complete, . . . except for the rivets, . . . and a couple of extra barrettes, . . . at least one of em will get whacked the wrong way. I'll PM you the address. May God bless, Dwight
-
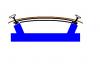
My apologies, Montana, . . . I missed the etsy connection. From the looks of the clip, . . . I'd bet that a little jig could be made like this drawing, . . . bottom is 1/4 inch steel plate, . . . maybe 4 inches square, . . . the two supports would have to be 3/8 or 1/2 inch steel, . . . and they would be as long as the plate is wide. You could then lay several side by side, . . . rivets pointing up, . . . cap em and clinch em. The bottom would not be rounded, but that does not make any difference if you are using capped rivets. In the drawing, the brown is your leather, . . . two curved black lines are the barrete, . . . the blue is all the jig to hold it. We used to make things like this all the time in the factory where I worked. Do you have someone who could make that for you? May God bless, Dwight
-
 Keplerts, . . . send an email to Will, . . . he usually answers fairly quickly. He and I have kicked around a couple of topics, and I've found him to be most helpful. Rory, . . . explain how you are sewing that the thread gets frayed, . . . I used to have that problem, . . . but one little change solved it when I was doing more than my share of hand stitching. May God bless, Dwight
 -
Can you show us a picture of the other side? It may take a special shaped tool, . . . need to see what we are up against. I've never really found a pair of pliers I would trust to set a rivet, . . . just cannot get enough force onto the jaws. May God bless, Dwight
-
Good looking saddle, . . . looks like a lot of effort went into that one. Oldtimer beat me to my question, though. May God bless, Dwight
-
Some people swear by a coat of neatsfoot oil before the final finish. Some people swear AT a coat of neatsfoot oil before the final finish. I've done it both ways, . . . and I haven't lived long enough to see what the outcome will be in 5, 10, 15 or 20 years. My decision is based on which stain I use. If it is an oil based stain, . . . I don't use the oil. If it is not oil based, . . . I "most generally" do give it a quick coat, on the hair side, one smooth pass with the paint brush, lightly dipped, . . . and leave it out to come back to the original color before doing anything else to it. In answer to your unasked question: yes, . . . too much oil can make the holster a throw away, . . . good for absolutely nothing. May God bless, Dwight
-
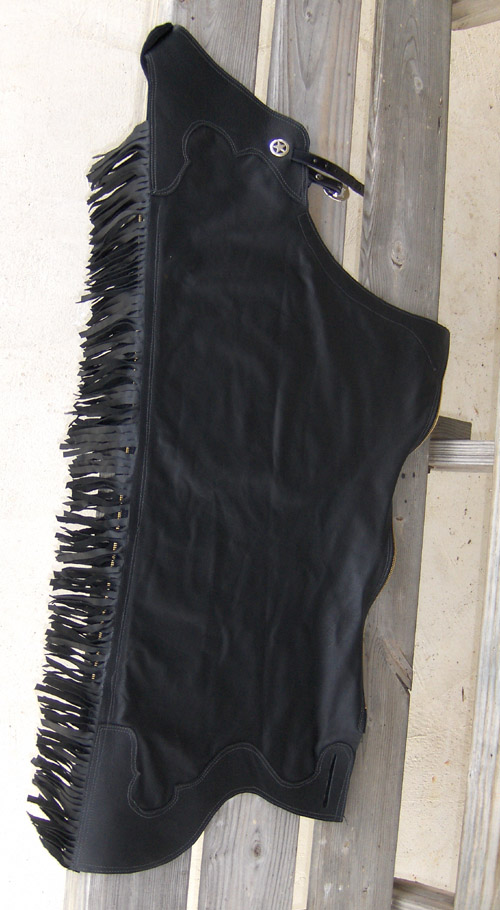
Looking for batwing chaps patterns
Dwight replied to JAM's topic in Clothing, Jackets, Vests and Chaps
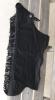
I just finished my first pair of chaps, . . . shotgun, . . . for a little 11 year old cowgirl. Her bigger sister had a pair someone had give her, . . . just used them for my pattern, . . . Learned a LOT !!! For the smile I got on her face when she put them on the first time, . . . I could have almost walked away without a check, . . . but I need to pay my bills. Can't see a lot of the details, . . . her mom wanted black on black (and I had a really beautiful piece of white buckskin), . . . but there they are. I have a whole folder, . . . maybe 50 pictures of chaps, . . . chinks, . . . etc. They are made just like the people who wear them, . . . all sorts of sizes, shapes, colors, and textures. May God bless, Dwight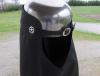
-
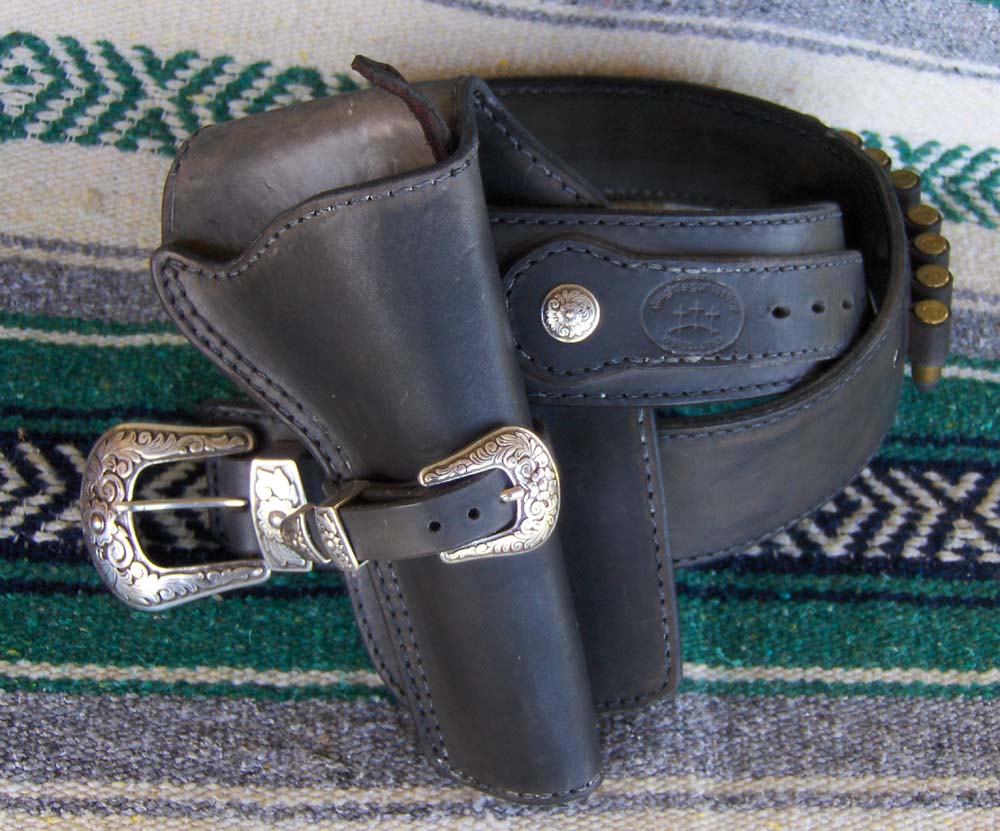
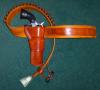
That's a good looking rig you made there. I made one similar a while back, . . . it's traipsing somewhere out west now. I didn't like the way Will did the opening and closing of the belt, . . . so I changed it. The tongue that holds the buckle, . . . I used it to close the belt and keep it closed. I used two snaps on the back, . . . unsnap and pull it back through the slot, . . . dig out the cash, . . . re-snap and you're back "in the saddle" again. Either way it works out good, . . . mine was 5/6 oz rough out leather, . . . was made to imitate the rig the Duke wore in his last few movies. May God bless, Dwight

-
I make similar pouches to hold ammunition magazines, . . . riveted in the exact same way. First, . . . make a wooden insert that is 1/4 inch shy of the width of the pouch. Get a piece of flat stock steel 1/4 inch thick, . . . as wide as the pouch, . . . and the length is the same as the depth of the pouch. Put the wood in, . . . lay the steel on the wood, . . . set the pouch up on edge, . . . and hammer away. I always position the rivet so it is pointing out of the pouch, . . . and I usually give it one extra whack after setting it, . . . that flattens the inside, keeping items from catching on the rivets. Also, don't use a maul, . . . use a small ball peen, . . . it sets them better. You'll mushroom up the top of the setter, . . . but they come free in the big bags of rivets anyway from Tandy, . . . May God bless, Dwight
-
My First Pancake Holster.
Dwight replied to buzzkiller's topic in Gun Holsters, Rifle Slings and Knife Sheathes
Looks good from this end, . . . Particle should be proud. May God bless, Dwight -
A New Experiment - 1911
Dwight replied to immiketoo's topic in Gun Holsters, Rifle Slings and Knife Sheathes
Some day, . . . I am going to perfect my basket weave stamping. Probably right after I surf over Niagra Falls, . . . Good job, . . . my friend, . . . you have patience I only think about, . . . May God bless, Dwight -
Leather is measured in ounces, . . . and those ounces translate each to 1/64th of inch. One full inch of 64 oz equals 25.4 mm. Breaking it down further, . . . 8 oz would be 1/8th of an inch or just a tad over 3 mm thick. Most of the leather sellers offer their leather in like a 7/8 oz or 6/7 oz, . . . which means it is not absolutely perfectly uniform from edge to edge, . . . some will be very close to 6 oz while the rest will be closer to 7 oz in the last example. If I made a suggestion, . . . it would be to go with a piece of 7/8 oz, . . . and order the piece called a "single shoulder" if your supplier offers it. Shoulder leather is good tough leather, makes good holsters, belts, cuffs, wrist bands, spur straps, . . . it usually tools nicely also. Back leather isn't usually as tough, . . . is softer, . . . belly leather is even worse. Good luck, . . . and welcome to the wonderful world of leathercraft. May God bless, Dwight
-
Paddle Holster For A Ruger .45 Auto
Dwight replied to Solofalcon's topic in Gun Holsters, Rifle Slings and Knife Sheathes
The main thing I saw missing was the sweat shield. There are too many rough edges, sharp corners, etc. on most semi-autos to not have a sweat sheild to protect the old body from rubbing and chafing. I'm not fat by anyone's standards, . . . but I have just enough of a "roll" that your holster would chafe my side, . . . Otherwise it looks good. May God bless, Dwight -
Double Layer Holster Ques
Dwight replied to Boriqua's topic in Gun Holsters, Rifle Slings and Knife Sheathes
Because it is two pieces of leather, . . . I stitch the outside edge of my holsters all the way around. The parts that don't become the folded together edge get stitched last. BUT, . . . I contact cement the pieces together, . . . I sand smooth the edge before stitching, . . . bevel both sides, . . . and stitch gouge both sides. It takes a bit of practice, . . . but it can be done, . . . and it protects the stitches a bit more. I then do whatever folding has to be done, . . . cement the edges after folding (also usually put in a welt for western holsters), . . . sand them smooth, . . . edge bevel, . . . stitch gouge both sides, . . . and sew. If I wander a bit on the backside out of the gouge (virtually never do) it is no big deal, . . . the rest of the stitches being protected is more important than whether I wandered 1/3 or 1/4 of the way out of the stitch groove. PLUS it is on the back side, . . . dyed, . . . finished, . . .and practically un-noticeable. Quite honestly, . . . if a customer did notice something like that and complained, . . . I'd hand him back his money, . . . . with a smile, . . . retrieve the leather goods, . . . and wish them a great day. Hand made leather goods will always have some sort of irregularity, flaw, mis-step, . . . that is what makes it personal and unique. May God bless, Dwight -
He said it well, . . . May God bless, Dwight
-
Charcoal Grey Color
Dwight replied to steelhawk's topic in Gun Holsters, Rifle Slings and Knife Sheathes
I wanted a Western rig like that for myself, . . . my formula was 90% Feibings thinner, . . . 10% black oil dye. It makes a very dark charcoal grey, . . . but it also does not fully cover in 1 dipping. I was looking more for a "worn" look, . . . weathered, etc. Got what I wanted. The picture here was just after I got it done, . . . the oil in the finish I use darkened it some, . . . that has since gone away, . . . it's a real nice dark charcoal now. May God bless, Dwight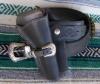
-
Good looking work, . . . simple, graceful, elegant. May God bless, Dwight
-
Arrowhead Basketweaved Rig
Dwight replied to Eaglestroker's topic in Gun Holsters, Rifle Slings and Knife Sheathes
I don't carve much, but I also don't have the patience to pound, stamp, hammer, and decorate like that. Great job, . . . it would take me a week, . . . pound of coffee, . . . 4 dozen dougnuts, . . . and a trip to the Dr for blood pressure meds. That's why I do plain Jane's, . . . but your's is indeed fantastic. May God bless, Dwight -
Double Layer Holster Ques
Dwight replied to Boriqua's topic in Gun Holsters, Rifle Slings and Knife Sheathes
John Bianchi left a little tip on making this type of holster out of two pieces. Cut both pieces to size, his example used 7/8 oz leather if I remember correctly, . . . take the INSIDE PIECE and determine the 1 inch wide area that would be the front of the holster, . . . where the sight track would be. Skive that area down about 1/3 to 1/2 its normal thickness, . . . skiving out of the flesh side. Then, . . . glue or contact cement the two together, . . . flat, . . . and allow it to dry for 8 to 16 hours. You can then wet it and form it any old way you would like to do with it, . . . no puckers / no wrinkles / just a very good looking holster. I really can't remember how many I have made this way, . . . every one worked like a champ. The vas majority of them were Western type cowboy rigs. May God bless, Dwight -
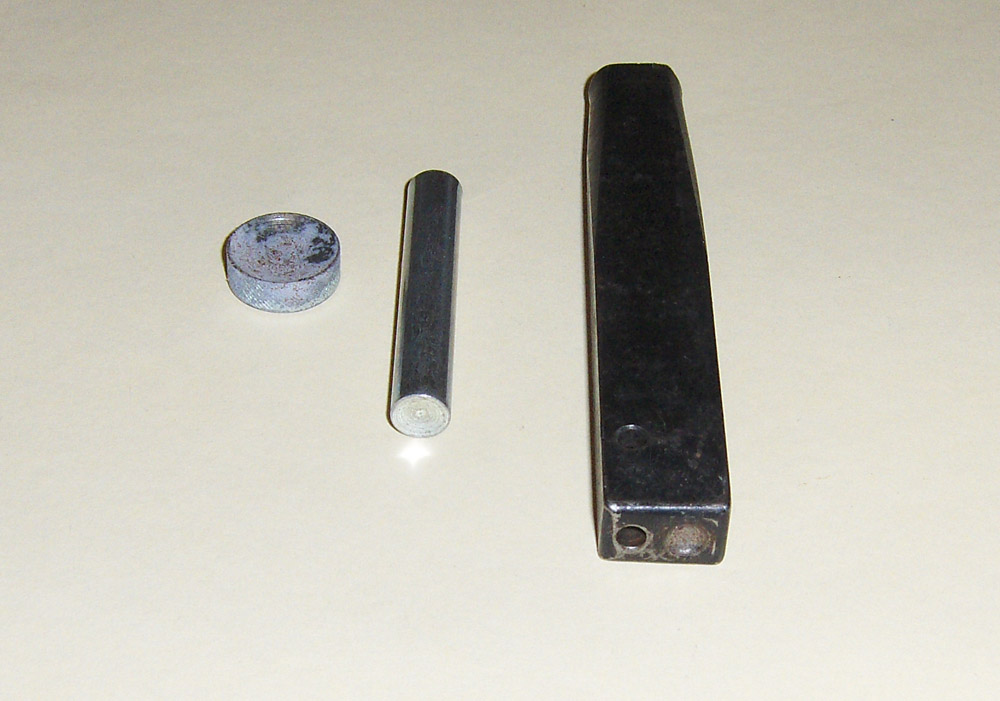
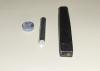
Leslie, . . . I suspect you are using a tool not really designed for copper rivets. The rivet setter and anvil on the left in the picture is made for little metal capped rivets and is often given away inside big bags of Tandy rivets. It is really hard to use for copper rivets. The tool on the right is the copper rivet setter I use and it works fantastically. Look in the end of it you will see a hole on the left and a domed impression on the right. The hole sets the copper washer down on the rivet, . . . snip off the extra copper with a pair of side cutters, . . . peen it a little bit with a small ball peen hammer to get it started, . . . then lay you work on a solid metal plate. DO NOT USE your marble slab, . . . the force needed to dome the rivet correctly will crack your marble slab. The domed impression is where you make the pretty little ball on top of the rivet. On that steel plate, . . . you don't whale it, . . . just tap it real good, . . . 10 to 15 times, . . . you are literally forming the little ball on top of the rivet above the washer, . . . and it takes a bit of practice, . . . and you will eventually harm your maul. Get a ball peen hammer, . . . works better for this. I have a piece of 1/4 inch steel that is about 12 inches square that I usually use under my copper stuff. Works great. Hope this helps. May God bless, Dwight
-
Holster Maker Needed In Kalispell, Montana
Dwight replied to Lobo's topic in Gun Holsters, Rifle Slings and Knife Sheathes
Lobo, . . . looks like no one else out there, . . . give him my email, . . . ciminod@midohio.net. I've made a couple using wooden models that I made from drawings, . . . worked well enough to satisfy the customer. Worst thing that would happen, . . . I've got another "model". Be more than happy to try it. May God bless, Dwight