Handstitched
Members-
Posts
2,817 -
Joined
-
Last visited
Content Type
Profiles
Forums
Events
Blogs
Gallery
Store
Everything posted by Handstitched
-
G'Day, If they don't have a makers mark, how do you know they are genuine ' Craftool' stamps? The genuine Craftool stamps go for around $10 - $12 ea new ( Australian) see Tandy's . S/H around $7 -$8 ea Aust. I paid $4 - ea S/H for my CT stamps when I first started 14 years ago . I was lucky enough for many people to just give me their old stamps, some were the original Midas tools, and not the newies. God knows what their value is now. They've just started making them again: http://www.kellymidasclassics.co.nz/about_noel_kelly.php Hope this helps a bit, HS
-
iPad case
Handstitched replied to fuzzbucket's topic in Purses, Wallets, Belts and Miscellaneous Pocket Items
WOW !!! The basket weave is...well.....its......awesome And I love the filigree , something I haven't tried...yet. It didn't you long to pick it up again I see. Like falling off a horse I guess , you never forget. HS -
I do find photo copiers , ( and the ' ye olde' XP publisher ) very handy for changing the size of patterns. I've become very adept at modifying patterns to suit a project like changing, adding or 'omitting' bits of a pattern to make things fit without it looking obvious. That pattern looks a bit like " Celtic Knot" type pattern that I love doing. Nice bag btw HS
-
G'Day, Depending on the type of leather, with that width, you could make some really nice guitar straps, for yourself or for sale. If its not veg tan, and its already black, brown or whatever, then perhaps use studs, spots, concho's etc to jazz it up , finished off with with some nice hand stitching along the edge. If its black for example, perhaps a red or yellow or white thread? Re-enactment belts ? One piece utility cases, for phones, tools ...or....whatever Just a few ideas there. HS
-
G'Day Thom, and welcome to the forum . I had a quick search for the 151, and found this post, it may or may not be of interest : They look very similar to a Consew 226, or my Seiko STW-28B . The 7-33 is a thing of beauty . I wish I had one, not that I need one, I just want one I look forward to seeing your work in the future. HS
-
G'Day, From my own experience on occasion, I have experienced dye not soaking in, or not taking for some odd reason in one particular spot, leaving a noticeable, almost shiny " blotch" (?) Sometime the size of a match head or a 5 cent piece . Its either, something in the leather itself, or a stray bit of oil or sealer( from my messy bench no doubt) has somehow got onto somewhere where you don't want it. This is a very crude way I've dealt with it. I gently 'rough up' the spot with the very tip of my sharp knife, not too deep, but just enough to remove the ' shine' , and then using a cue tip ( ear bud) or a small brush, dab a little dye on the spot, and finish of with a bit of persuasive burnishing or polishing etc. . HS
-
G'Day, That looks ' noice ' A good quality belt that will last for ever. You mention an Aussie conditioner , does that mean you're an Aussie ? Don't worry about messing up a few stitches, I've messed up my fair share, and no doubt I'll mess up many more . I was told by a friend that made custom made quilts as I was showing her my sewing machine skills on a belt and I said to her that " a few stitches are a bit wonky " . She said, "Don't worry, they're called ' humanity stitches ' " Our individuality is in everything we make. HS
-
G'Day , I was considering buying a Tippman ( and a few others) before settling on my 441 clone, but after, reading that, I'm so glad I didn't. And you're right, these machines are so simple to use, easy to maintain, and I have never had to fiddle with the adjustments, I have got it adjusted just right . Needles are easy to get, however, accessories are harder to obtain in Australia . But so far theres nothing I need for it at this point. I got all the feet & feed dogs etc when I bought it. They are a great investment. HS
-
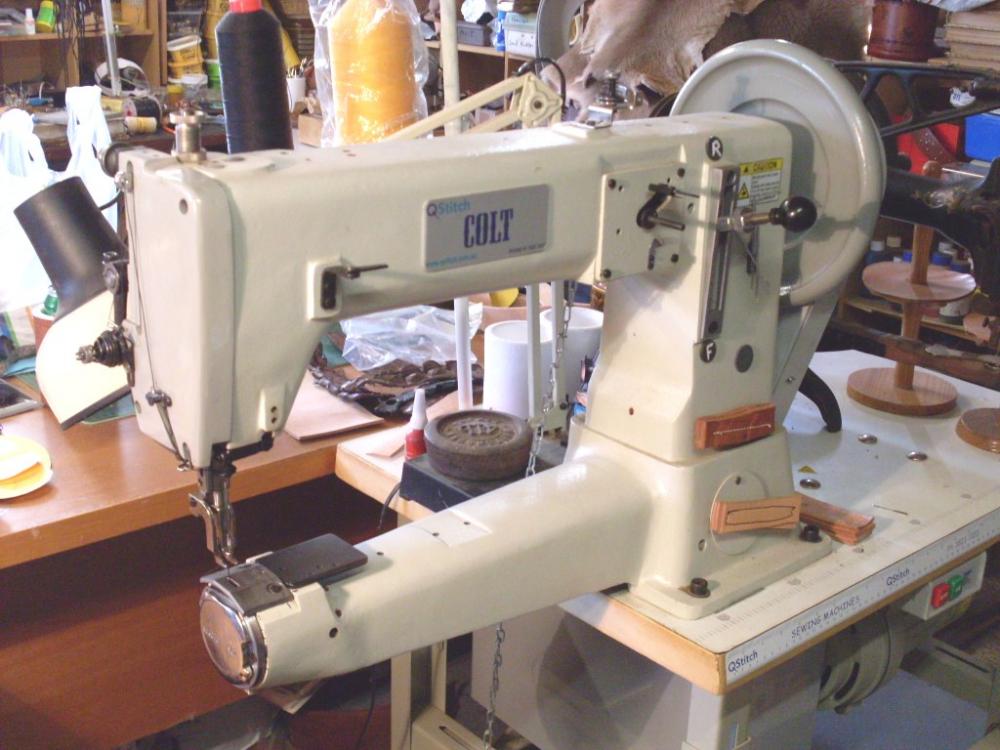
G'Day irish47 , This is my machine. Look familiar ? Its a ' Colt' by Qstitch Queensland Australia . I don't think they do them anymore. I've had this machine for 8-9 years, and with regular servicing, its been so reliable( touchwood) , and its paid for itself now. I've never had a job that required that thickness( perhaps half that) , but I was just curious if it could do what the ad said it could ..........sure as eggs, it can With all the advice from other leather workers, I do hope we're able to help. I fully understand about your hands. The 'age ' of my hands shows up after prolonged hand stitching. God bless sewing machines eh? But they certainly are a worthwhile investment , especially if you intend to do a lot of sewing for commercial purposes. HS
-
G'Day, @Riem , yes, my customer is ex Kimberley now living in Western Australia , her and her family have lovely SA accents . Occasionally she comes out with a word or sentence , that I don't understand, that I'm guessing is Afrikaans , as she's trying to describe a particular fabric or hardware etc I do eventually work out what she's saying and give her an English translation Lovely people and they've kept me busy for years. HS PS : I think the biltong posts are a bit off topic, however leather is a by-product of the meat industry after all. PPSS: I love biltong, so moreish << he's eating biltong , not popcorn
-
G'Day I feel like the odd one out being from Western Australia , however, since many of you are from South Africa, my ex was from Sydenham but she also spent time in Durban in the Natal Province as a kid. One of my customers is from Kimberley, small world eh ? , her family keeps me very busy with an assortment of work, horse rug repairs , tie down strap alterations for their truck and various horse gear repairs etc. . They do a lot of cross country comps. But anyway,back on topic, welcome 'emo chair ' . So 'yah man', look forward to seeing your work HS
-
I also like the raw edges and the lovely hand stitching.
-
G'Day, thank you so much for your reply. Unfortunately , I don't know anyone with a spool rewinder, so I'll just keep doing it by hand. I done enough research now to convince me to stick with polyester for its UV properties . I also use a M40 poly UV bonded thread on my Seiko, that I use on horse rug repairs, its super strong and just perfect for my needs.( I can even use it on my old Pfaff 60 machine) I thought about using a nylon thread because it can be a bit cheaper than poly, I have noticed. And while its strength is pretty much the same as poly, its UV property is not as good. HS
-
G'Day, I'm doing a bit of research on nylon thread and found this post. I have an issue with a brand of thread, not nylon, but polyester . While the quality of the thread is OK, its so tightly wound on the spool it causes tension issues on my saddle machine, almost as if its caught on something. So what I do before using it, is I manually unwind a few metres etc. of thread from the spool by hand , re-wind it back on , and then sew, and it sews fine after that. I'm wondering if theres a bit too much bonding agent on the thread. I only tried it because its a bit cheaper than my regular brand ,and every dollar counts when you're a small operator. HS
-
Latest Project
Handstitched replied to Handstitched's topic in Purses, Wallets, Belts and Miscellaneous Pocket Items
G'Day Raksha, Its just something I've picked up over the years from experience , probably somewhere on this site no doubt. I apply 'leatherphane oil' , let it soak in, before applying antiques , and black dyes ( it can darken the leather a bit) . For other colours like browns, tans and lighter colours etc. I use ' Laceol before dyeing. http://www.birdsall-leather.com.au/DLAw/Laceol/pd.php its a very light thin liquid and doesn't darken the leather like some oils do. It pretty much dries clear. Its a Birdsall Leathercraft brand here in Australia . It smells totally gross, like a mouldy fridge, but works great. (I ignore the directions on the bottles ) My method will no doubt be totally different to what other leather crafters do , but it works for me , and you can see the result. I have always believed that there are no " rules" when it comes to leatherwork, we all have our own techniques & methods, but its the end result that counts. HS -
Latest Project
Handstitched replied to Handstitched's topic in Purses, Wallets, Belts and Miscellaneous Pocket Items
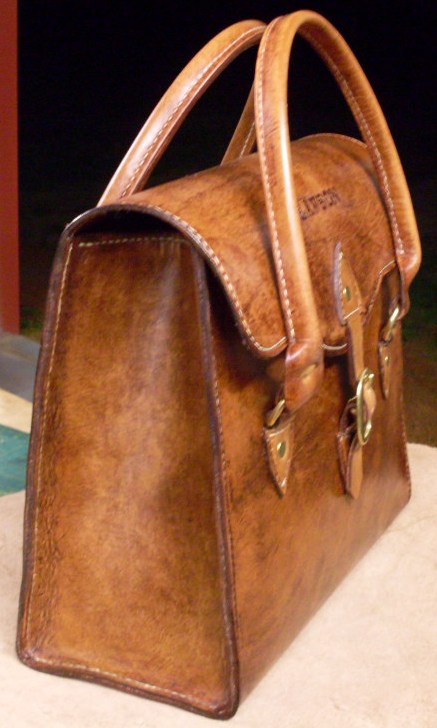
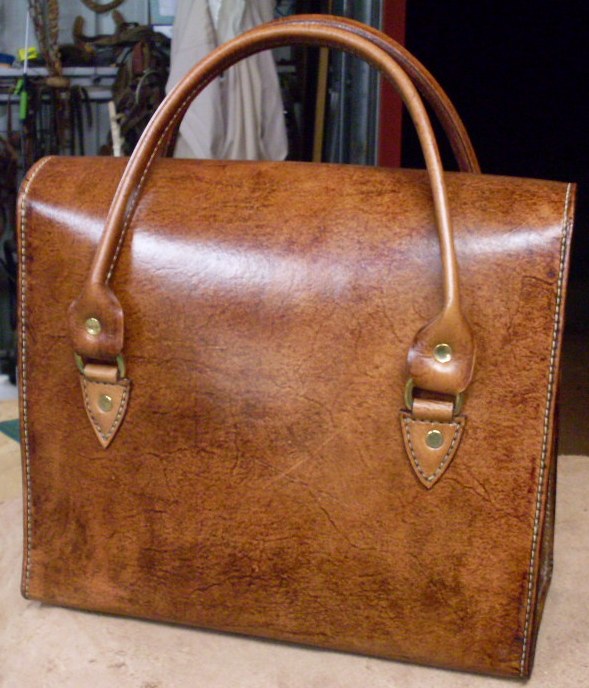
G'Day and thank you all very kindly @battlemunky, the client requested no lining or pockets, which is a pity, but if she did, I could have really gone to town I made the pattern from scratch using the dimensions she requested, making minor adjustments to the pattern as I went along. She also requested the leather not to be too thick & rigid, so I used a 2-2.5 mm leather , with a liberal dose of oil before dyeing . She picked it up this arvo, and was obviously very happy It was a shame to sell it Some projects I have difficulty parting with , this was one of them. ( PS: thanks go to the late Anne & Al Stohlman for a bit of help with the handles. I've lost count the amount of hours I've spent going through their books over the years for ideas & inspiration most people read novels ....I read leather books ha ha !! ) HS -
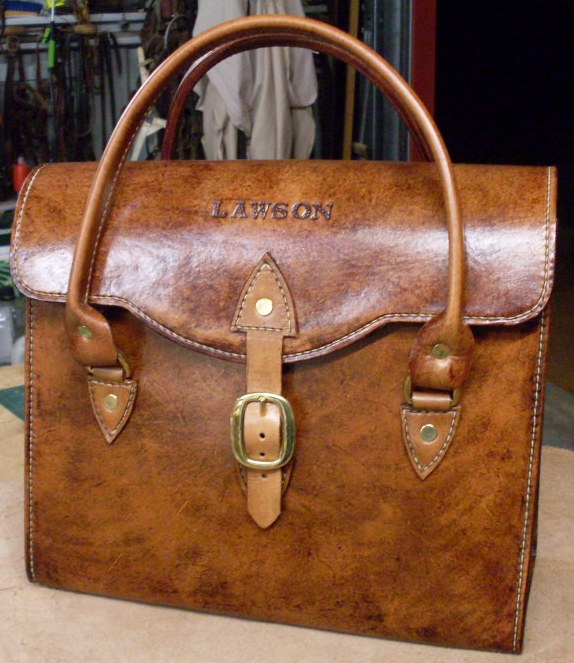
G'Day, This is a variation of nurses bag / hand bag . I made this for a client that asked for an ' antique look ' . Its all hand stitched with solid brass fittings and theres two different antique colours. It had a good dose of oil to begin with , and the first coat is my regular ' Birdsall' brand of brandy antique, and the second coat is a Fiebings medium brown that gave me the colour I was trying to achieve, and finished with a few coats of antique sealer . The dye took a bit of work , but I'm really happy how it turned out. Pics don't always do justice HS
-
G'Day Karlova, Love your work...and your dog, what a star I just love to be able to just make & create all day like you do .....but , being a ' one man band' ( working for myself) , I'm forever filling customer orders ,from a simple 10 minute repair to a 3-4 day job ,( I also do horse rug repairs which are coming in now , as its Winter here in Western Australia ) , which leaves very little time for me to doodle and create...and have fun Its a case of ' start project...order comes in ( customers come first ) ... project gets put back....and back further...repeat HS
-
Choker/Collar/Necklace
Handstitched replied to JMixx's topic in Purses, Wallets, Belts and Miscellaneous Pocket Items
G'Day, Thats actually quite good, well made . I've been in two minds whether to make these or not but with spikes etc . Not even sure if theres a market for them here, though, I could be wrong if I started making them and people see them displayed. But I also wondered about the comfort side of things . I've also taken into consideration that necks do sweat against leather and thought about a fabric backing. The chain is a great idea . Well done HS -
G'Day Noob, I am about 140 k's east , in the Central Wheatbelt , where a lot of farmers are doing rain dances about now , Ha !! The tri-weave just takes practice...and more practice. I don't always get the basket weave right either , I always have to practice on a piece of scrap before stamping on a project, even then I still don't get it quite right. But I guess if I was to use the weave stamps on a regular basis, I'm sure to master it.....eventually HS
-
You seem to be like a kid with a new toy, and couldn't wait to use it, stamping your name on everything But it is nice. I used to have such nice hand writing, but these days its just nondescript ' scribbledeegook' . HA !! HS
-
G'Day, My Mother used to spin and prepare her own wool, knit , make garments etc. While she kept her colours natural, as in how they came off the sheeps back, her friends used natural dyes like boiled spinach water, (amongst other vegies and plants) , mulberries, assorted berries etc. I guess thats where the influence came from . HS
-
I think hand stitching will look nicer than rivets, but thats just me . Not so much for myself, but I made a cartridge belt for a client (also a friend) , a re-creation of a ' western style' cartridge belt , for use with shot gun( 12 gauge) cartridges with the intention of it actually being used , only to find out that he's put it on display in his house because he thought it was too nice use. Doh !! HS
-
G'Day and welcome from ' upside down land', aka Australia Love your work and the use of the herringbone stitch on the carry bag with alcohol warning, I've only rarely used that stitch...and the lovely dog is very photogenic . My dog is 'photo-impatient' . In Australia, you won't need alcohol warnings...Ha !! HS
-
G'Day, The markings on the skin are just perfect. Even the markings on the blade of the knife look cool too. Speaking of natural colours Rockoboy, , I have thought about using stuff like paprika, turmeric...and tea... as a natural dye, amongst others. I'll experiment with water based & oil based versions. They can stain clothing & kitchen benches if you're not careful when cooking. I think the oil based version will work better.... the paprika on my steak tonight and my love of curries gave me the idea. HS


