Lobo
-
Posts
1,065 -
Joined
-
Last visited
Content Type
Profiles
Forums
Events
Blogs
Gallery
Everything posted by Lobo
-
Horizontal Shoulder Holster
Lobo replied to Lobo's topic in Gun Holsters, Rifle Slings and Knife Sheathes
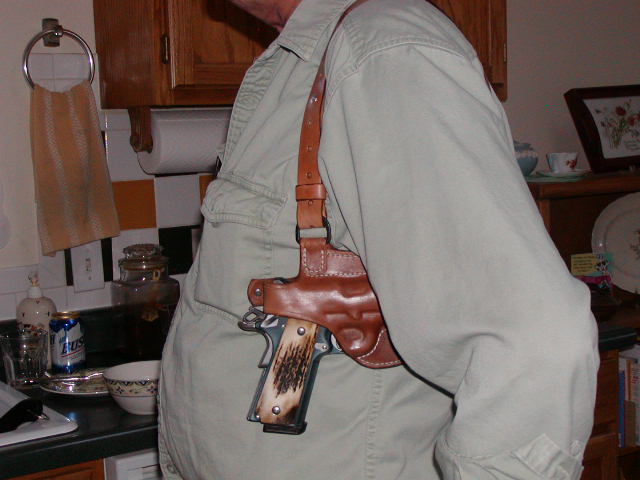
That portion of the harness is where all of the weight is supported. Having the weight distributed between the shoulders helps to keep the harness in position without excessive shifting. The upper harness straps, passing over the shoulders, carries the weight. The lower harness straps hold the holster and magazine pouch in position against the body. If the pivot point were placed lower the effects of gravity would cause constant shifting of the harness, which is a general problem with many shoulder holster designs. I hope this answers your questions. -
Horizontal Shoulder Holster
Lobo replied to Lobo's topic in Gun Holsters, Rifle Slings and Knife Sheathes
Mike: Thanks for the compliment. I agree with you completely about wearing shoulder holsters. About the only time I find one truly useful is on a long driving trip. But in business we don't have the luxury of making only what we like or prefer, we have to make what customers want and are willing to pay for. This is a fairly popular style so I expect to receive enough orders to make it worthwhile doing, and at the same time try to provide a product that overcomes some of the inherent problems of this type. Best regards. -
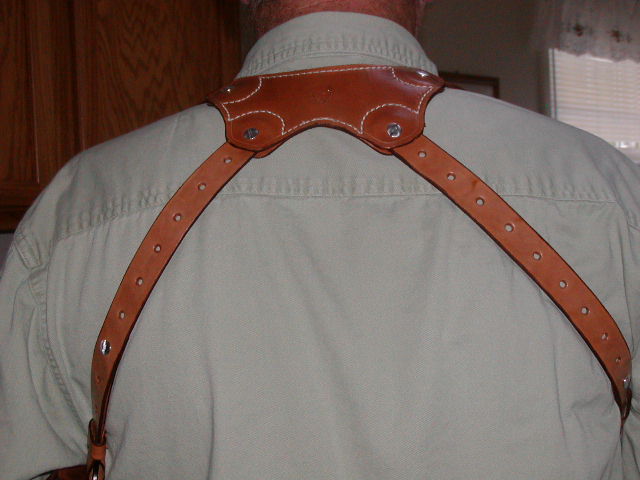
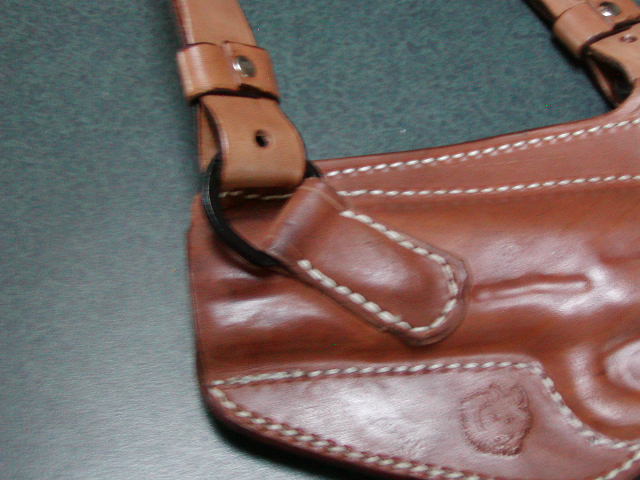
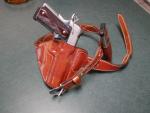
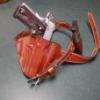
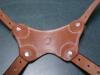
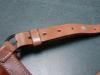
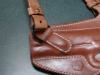
I recently had a request for a horizontal shoulder holster with X-style harness for the full-size 1911 pistols. Prior experience with this style has indicated several items that require attention: 1. The harness must be fully articulated, allowing great flexibility so that each strap can move with the body during normal activities, rather than binding up in some positions. 2. The center harness connection needs to be relatively large, providing a central support for the weight, be contoured to fit the body, and have no protrusions that can cause discomfort. 3. Harness straps need to be as light as possible, providing support for the weight while also allowing them to conform to the body. 4. An off-side double magazine pouch can provide a counterbalance to the weight of the pistol. Without the counterbalancing weight the off-side strap can be constantly pulled into the armpit and causing irritation unless a belt tie-down strap is provided. Having a good supply of horsehide on hand in varying weights, I decided to utilize that material. Straps were cut from hide gauging about 4-oz. weight. Center harness connection is of two layers of about 3-oz. weight, cemented and stitched with rounded recesses provided for harness strap ends. Holster is of about 6-oz. weight. Mag pouch is of about 5 oz. weight. Holster and mag pouch connect to the straps using D-rings to permit free movement of the straps as the body moves. Harness straps are adjustable via Chicago screw attachments, with keepers to keep the strap attachments secured at the D-ring attachment points. Strap ends connect to the center harness connection with Chicago screws, permitting the strap to rotate freely as the body moves. Holster construction is basic 2-panel pancake with reinforced thumb-break. The mag pouch is a modification of my compact belt model with provisions for the D-ring attachments. Here are a few photos. The customer reports good comfort and concealability in use. The customer wears a size 44 jacket, so I have sized the straps on this piece to accomodate from about size 40 to size 50, with adjustment holes at 1" intervals. Adjustments also permit changing the holster and pouch positions to ride further forward or further back. Shoulder holsters have a relatively small range of usefulness, but quite a few customers are interested in them. This is probably one of the more popular styles. This style harness permits the use of multiple holsters and accessories with one harness. Also, individual parts are interchangeable making repairs or sizing changes quite easy to do.


-
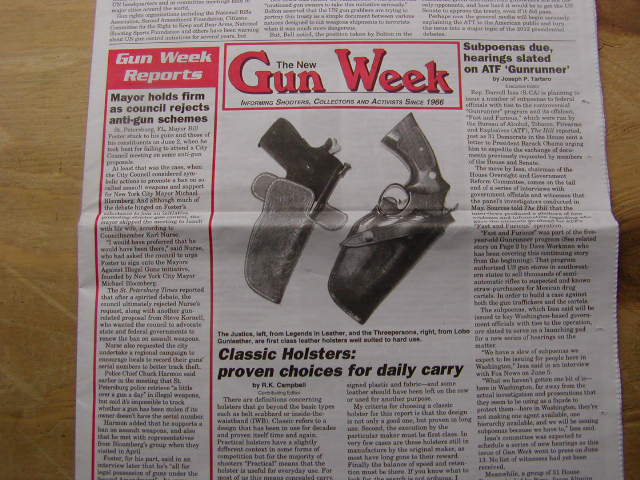
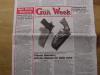
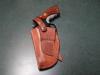
Several months ago I received an e-mail from a writer working on an article about classic revolvers and holsters, requesting information about my recreation of the Classic Tom Threepersons' style holsters. I sent one to him for the N-frame S&W 4" revolver. July 1, 2011 issue of "Gun Week" (published by the Second Amendment Foundation) contains an article featuring my holster. Apparently this old design remains at least as popular as I believed it to be. The author is also releasing a book soon which features my Threeperson's style holster in two chapters, and was kind enough to send copies of the publisher's galley proofs. I think I've got a little ego massage going on right now. Feels pretty good.

-
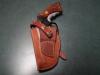
Another Classic Threepersons' Style Rig
Lobo replied to Lobo's topic in Gun Holsters, Rifle Slings and Knife Sheathes
Thread is T270 (277 weight) bonded nylon, Linhanyl brand. The silver-colored accessory on the revolver is a Tyler T-Grip, designed for use with the standard grips to fill the space forward of the grip-frame for improved gripping qualities. Tyler Manufacturing has been in business for many years and recently went through a major reorganization. Similar products were offered by Pachmayr (shown on Katsass's Model 64 in his photo) and others. Oversized grips (target grips, combat grips, etc) became increasingly popular on revolvers through the 1970's and 1980's, probably cutting demand for grip adaptors, but such accessories were very common for many years. -
Another Classic Threepersons' Style Rig
Lobo replied to Lobo's topic in Gun Holsters, Rifle Slings and Knife Sheathes
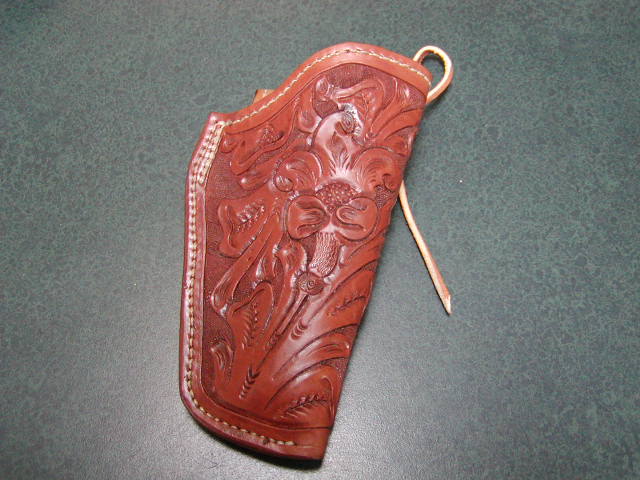
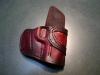
The Threepersons' holster design uses a welt at the seam, but not fitted to the weapon. The originals, like most holsters of that time, was simply folded over and stitched together, providing a pocket of the general size and shape required for the handgun. I wet-form these for a very close fit to the handgun. I have made these in the traditional open-top, with hammer thong, with snap-strap, and with thumb-break according to the wishes of the customer. The design also lends itself to neutral cant, forward cant, and rear cant, and for strong-side or cross-draw applications. The Threepersons' design was not only quite successful, it provided the basis for many of the developments in holster design that followed over many years. One might say that the Threepersons' style holster was a pivotal development, which explains the continued interest after more than 90 years.

-
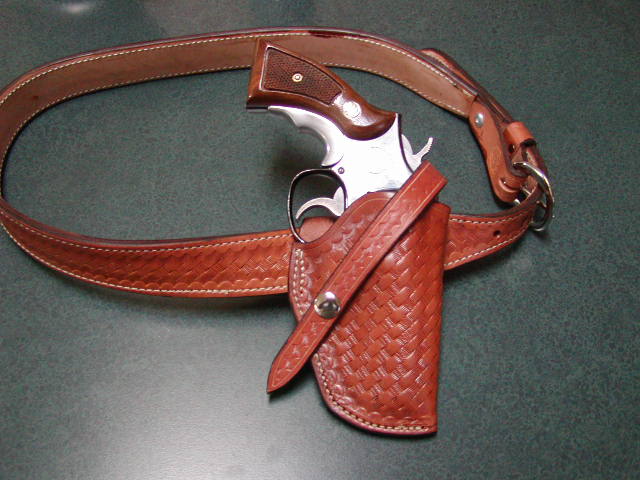
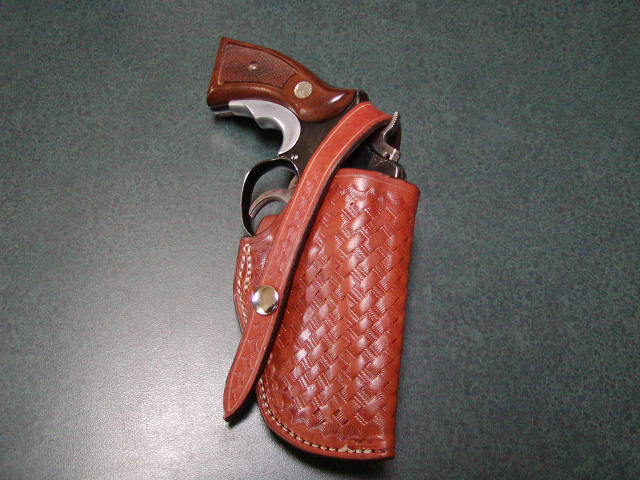
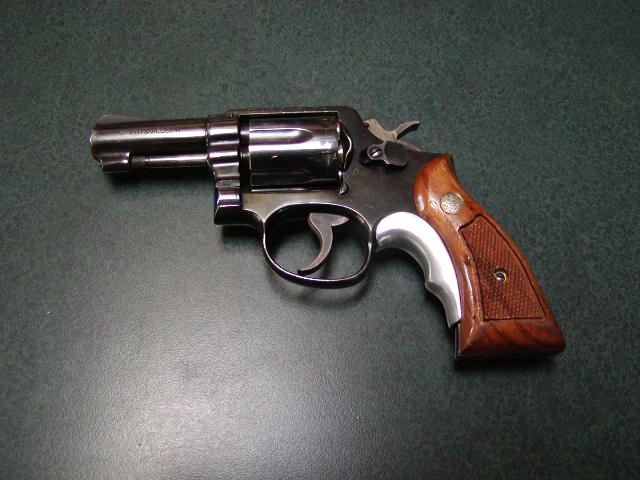
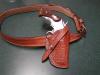
From the 1920's to the 1980's any American lawman would have believed himself to be well-equipped with a Smith & Wesson .38 revolver and a Threepersons' style holster. Here is one just completed with basketweave tooling, classic oiled tan finish, 2-position retention strap, with matching 2-layer belt. Shown with my old 3" Heavy Barrel Model 10 Smith & Wesson, arguably the most purpose-built defensive revolver ever made. Tom Threepersons' holster design, originally made by "Tio Sam" Myres (S.D. Myres Saddlery) about 1920, remains very popular with revolver enthusiasts. Just as practical and functional today as it was when Tom was a detective in El Paso, Texas and US Customs Inspector on the Mexican border. This set goes out to a customer today. The S&W revolver stays here.


-
There is quite a bit of difference between various brands of snaps. Different metals (stainless steel, plated steel, brass, plated brass), rivet shaft lengths, etc, all make snap setting a chore at times. Much of what I've seen in suppliers' catalogs is imported products I prefer the Durable Dot fasteners for most uses. A bit pricier than some others, but more consistent quality IMO. Purchasing in bulk quantities reduces per-unit costs considerably. I have been trying to find snap buttons (female portion) that mount with machine screws, rather than rivet-style mounting, especially for use on thicker and reinforced areas like thumb-breaks. Also working on an arbor press modification to use for snap setting (along the lines of a recent post in this forum), hoping for more consistency and ease in use.
-
New Tom Threepersons Holster
Lobo replied to JeffGC's topic in Gun Holsters, Rifle Slings and Knife Sheathes
Very nice work. -
V2.0 Of My First Holster Pattern
Lobo replied to mlapaglia's topic in Gun Holsters, Rifle Slings and Knife Sheathes
I recommend against sharp corners on a holster meant for close concealed carry. Rounded edges are much more comfortable in use and have less tendency to become frayed and worn quickly. Your belt slots are at an angle to the belt, which is fine but you must remember that the belt passes through in a straight line. Slots cut to belt size, but laid out at an angle, will not fit the belt. I always draw in two parallel lines on my patterns to indicate the belt location and width, then mark and cut the slots to fit properly. Best regards. -
Gun Rig For A Friend
Lobo replied to cgleather's topic in Gun Holsters, Rifle Slings and Knife Sheathes
That is a beautiful piece of work. -
Need Some Input!
Lobo replied to Spidey2011's topic in Gun Holsters, Rifle Slings and Knife Sheathes
OK, since you have asked for comments I will make a couple. 1. The space forward of the front strap of the grip-frame needs to be as open as possible in order to permit a solid "shooting grip" on the weapon during the draw. Anything less leaves the user fumbling around and adjusting the weapon in his hand prior to engaging a target. Your design does not appear to provide sufficent space for the fingers of the gun hand to wrap securely around the pistol grip without interference from the aft belt attachment point. 2. You have made an IWB-style holster of pancake-style construction. Pancake-style holsters can be expected to flex along the fore and aft stitch lines, especially when subjected to belt tensioning as expected with IWB-style holsters. The reinforcement piece you have added to the front panel serves no real purpose for reinforcement of the holster mouth, and actually serves only to add bulk to the "package" of the holstered handgun inside the trouser waistband. 3. Your slide shield does not appear to provide full coverage between the rear of the slide and the user's body. 4. Your belt loops appear to be rather large, suitable for a belt about 2" or more in width. Belt loops should be formed for the width of belt to be used so that the holster is secured against movement during use as the body moves and applies pressures to the "package" in the waistband. 5. You have already mounted your hardware (snaps, etc), so dyeing at this point will result in unnecessary work cleaning up the hardware after dyes and finishes are applied. Overall, nice looking work. But a bit more thought to the design and functions might result in some improvement. Best regards. -
Thanks for that clarification. Here would be my plan for completion: 1. Lay out your pattern and cut all the pieces. 2. Bevel all edges. 3. Lay out your stitch lines and cut stitching grooves. 4. If lining the holster, now is the time to cement in the lining leather and stitch at the openings, then trim flush at all edges. 5. Dyeing can be done now, allowing plenty of time for the dye to completely dry and set. 6. Assemble the piece, cementing all joining surfaces together firmly, then stitching down the belt loop, then stitching up the welted seam. If doing this by hand I would use my stitching wheel to mark stitches into the stitching groove. By machine is much easier and quicker. 7. After stitching I would dampen the edges and dress those down on a drum sander, followed by beveling those edges again. 8. Wet forming is next, followed by a thorough drying. 9. Edges can then be dyed and allowed to dry thoroughly. 10. Dye can be touched up where necessary, and perhaps another coat applied if needed, followed by thorough drying. 11. I apply a single moderate application of neatsfoot oil at this point, allowing 12 hours or more for the oil to fully penetrate and settle into the leather fibers (others will argue against any use of neatsfoot oil, and they are entitled to their opinions; this subject has been thoroughly hashed out in prior posts so you can make up your own mind on this). 12. Edges are now ready for burnishing. 13. Next I would apply my acrylic sealant to all interior and exterior surfaces, followed by a thorough drying time. 14. Final exterior finishes are applied, followed by a thorough drying time. Try not to rush between steps, especially when dealing with dyes, oils, acrylics, and final finishes. Thorough drying is required to permit all of these chemicals to completely cure before proceeding to the next step. Neglecting this will usually result in muddy, smeared, and generally poor final results. In my shop the dyeing and finishing processes usually take 3 days to complete with the required drying times, which may vary depending on temperatures and humidity where you are working. I cut stitching grooves only on the exterior surfaces to be sewn. Attempting to groove the underside is likely to result in a great deal of frustration and a stitching groove somewhere other than where your stitching ends up being. If stitching by hand there will be plenty of opportunity to snug up the stitching without excessive exposure. If stitching by machine the tensioning should be more than sufficient to sink the stitching into the surface without a stitching groove. Personally, I do most of my dyeing after forming, but as you have noted this needs to be adjusted when dealing with certain designs, belt loops, welted seams, etc. If I failed to mention it, be sure to allow for adequate drying times at every step. OK, I'll say that one more time. Best regards.
-
What style of holster are you making? The process can be a bit different with different designs.
-
Botac Bluegun Drop Shipped
Lobo replied to George B's topic in Gun Holsters, Rifle Slings and Knife Sheathes
So, this is your first experience with drop-shipping of Rings Blue Guns. Rings Manufacturing produces these pieces as orders are received. They do not regularly maintain an open-stock inventory. Numerous retail outlets advertise Rings Blue Guns, take orders, transmit those orders to Rings, then everyone waits for the next production cycle, after which Rings will drop-ship everything. If you are producing orders for the public I would suggest that you advise customers when you are ordering a dummy gun, letting them know that it could be 6 to 8 weeks before you will receive the dummy and can start working on their project. The alternative is to allow your stomach acid to eat up your entire GI tract and push you right into the nearest mental health facility to have your nuts and bolts re-torqued. Three or four companies make dummies. There is little competition. These companies make dummies primarily for the most popular handguns in current production. They don't fill a mold without having an order in hand, paid in advance. Finding anything "in stock and ready for delivery" is entirely a hit or miss proposition. Best regards, along with the general warm welcome to the world of holster makers waiting for dummy guns! -
Very nice work, Rayban.
-
Thoughts On Sweat Shields
Lobo replied to katsass's topic in Gun Holsters, Rifle Slings and Knife Sheathes
Well said, Mike. Trends come and go. Marketplace demands vary over time. Peoples' expectations are tittilated by reading every gun magazine or internet blog they can subscribe to. The bottom line is this: 40 states have adopted "shall issue" type concealed carry laws, requiring the issuance of a carry permit to anyone not otherwise prohibited that meets minimum standards (I think this is a good thing). Roughly 20,000,000 to 30,000,000 people have chosen to carry a weapon as a simple exercise in enlightened self-interest. Many of those nice folks have little or no experience, and rely upon (first) what they see and read, and hopefully (second) on an experienced hand that can guide them toward a carry rig that fits their needs, wardrobe, usual activities, etc. Those of us having a few decades of experience carrying defensive handguns can share what we have learned with others, as you have done in your original post. Those of us who have both the experience and the ability to craft the necessaries for discreet, comfortable, and functional concealed carry rigs can help folks even more. That is what I have based my little business on, that is what has led me to several unique holster designs, and that is what keeps me busy filling orders. I am sure that your business is much the same. People come to you for your experience and expertise as much as for your craftsmanship and artistic abilities. What works? Tell them. What doesn't work? Tell them. Most will listen to the voice of experience. Best regards. -
Handcuff & Double Mag Holster
Lobo replied to Sixer's topic in Gun Holsters, Rifle Slings and Knife Sheathes
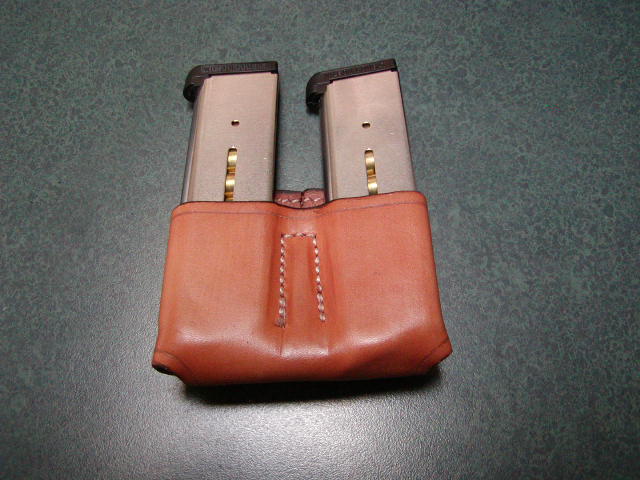
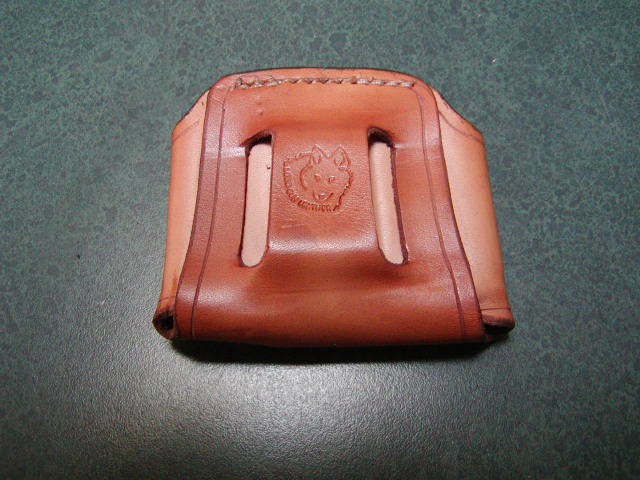
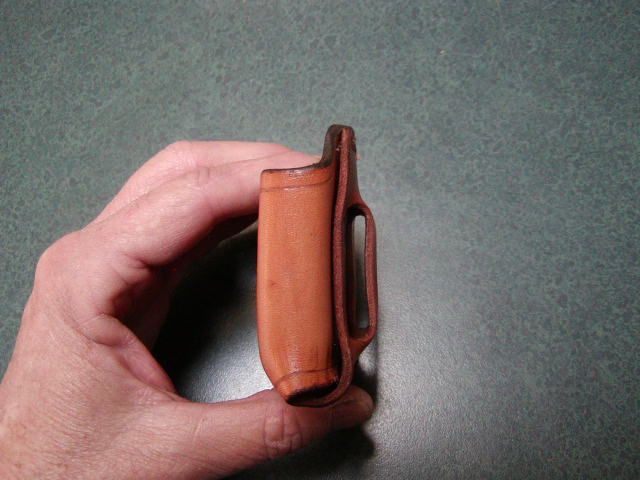
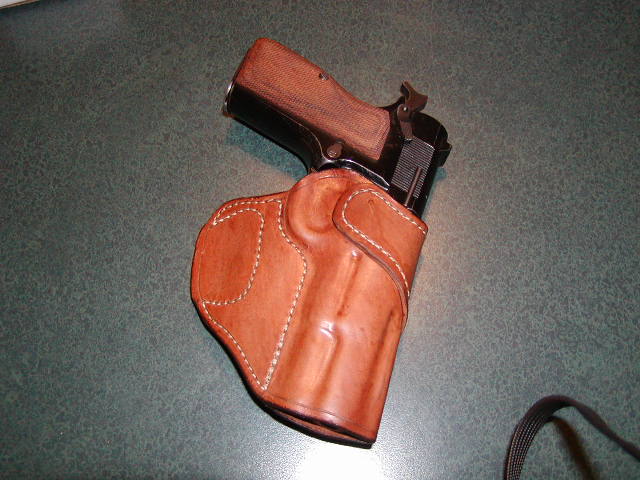
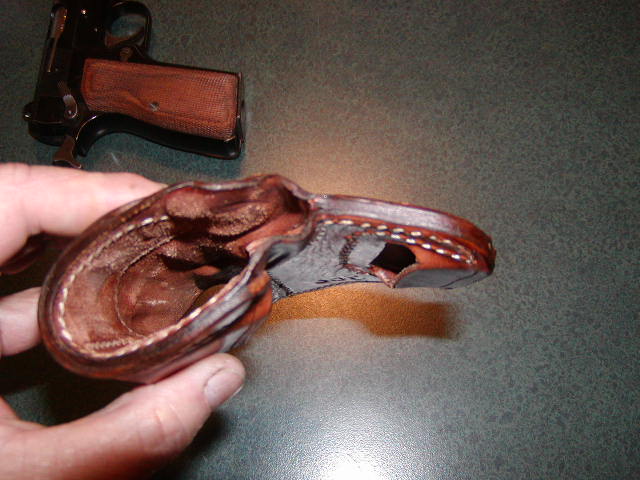
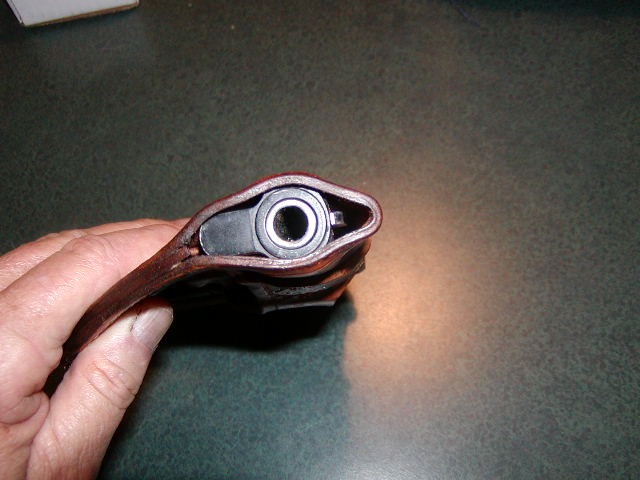
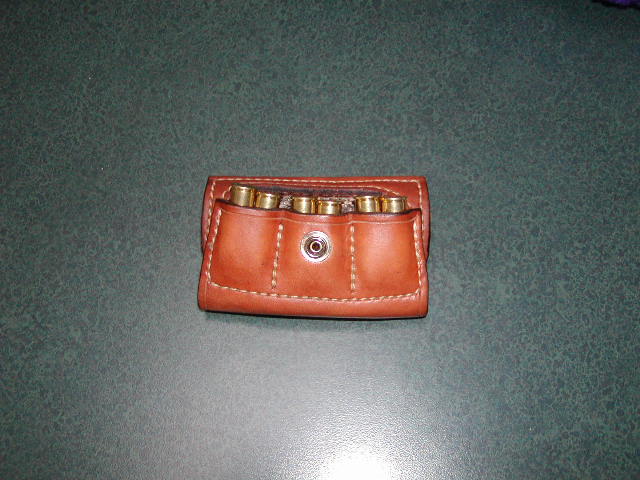
Because customers continue to request double magazine pouches I spent some time on designing one for minimum bulk, better concealability, and better comfort. I ended up with a very simple pattern, single piece cut in a "T" shape, assembled with a welt between the magazines that can be adjusted in thickness and width to accomodate different magazine sizes with the same pattern (one pattern for single-stack magazine, one pattern for double-stack magazines). The welt also serves to maintain sufficient space between the magazines to permit each one to be easily gripped and withdrawn. Two slots form a tunnel-style loop on the back side that requires only about 2" of belt space, so interference with belt loops is pretty much eliminated. As the photos show, only about 1/2 the magazine length is contained within the pouch with this high ride design. When forming these there is considerable stretching of the leather, and that means quite a bit of contraction during the drying period. Retention is quite good for the intended purpose (off-duty, plainclothes, etc); for other applications I would suggest pouches with retention flaps or straps. It would not be difficult to expand the pattern to produce deeper pouches, accomodate wider belts, etc, and the rear panel could also be extended to include retention flaps over the top of the magazines. As stated in my earlier post on this subject, my personal preference is for single magazine pouches which can be situated anywhere convenient on the belt, are much easier to conceal, and generally more comfortable during extended use. But customers keep asking for double pouches, so I have tried to come up with something that will do the job without feeling like a brick strapped to the belt. There may be other compact double pouches that can be worn comfortably for hours on end, but I just haven't seen them. This appears to be about as compact and low-profile as a double pouch can get. Also, once I got the patterns worked out, along with sizes and shapes for the welts to accomodate several different magazines with each pattern, I can knock one of these out in about 15 minutes or so, plus finishing time, so profitability remains good at a modest price.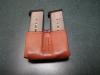

-
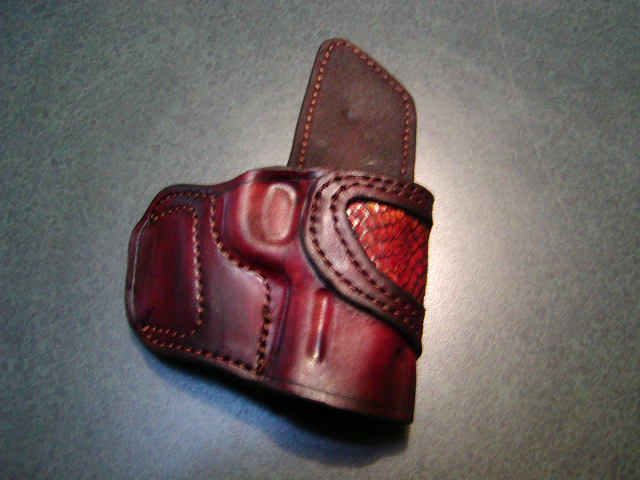
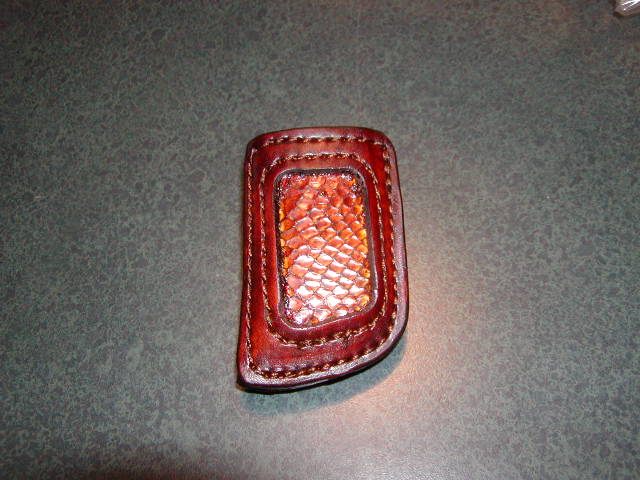
One of my long-term customers and I recently discussed something a little fancier than usual for his new Kimber Ultra Raptor. Having a nice cobra skin on hand, I offered to make up one of my Enhanced Avenger models with slide shield and mouth reinforcement band modifed for an inlay. Along with the holster I included a single magazine pouch with inlay, and a B8 Belt with fancy stitching pattern. The results are shown in the photos. I have also been playing around with some of Kevin's (Springfield Leather Company) horse butts that are now on sale. I've never worked with horsehide before, so my first effort was an Enhanced Avenger with mouth reinforcement made for the Browning Hi Power. While the horsehide on hand gauges in the 5-6 oz. range, the resulting holster has at least as much structural strength as one made of 8-oz. cowhide. I am impressed with the strength, very dense grain, incredibly smooth flesh sides, and nice clean cutting of the horsehide. This leather readily accepts modeling and boning during the forming process and is very easy to work with. The holster shown was finished with a light application of neatsfoot oil followed by acrylic sealant and final exterior finish. The horsehide is noticably darker than cowhide and displays a certain mottled effect, so I expect this leather type to benefit from dyeing for a more evenly finished look. A little learning curve going on here for me. Maybe others will benefit from a few observations from a first-time horsehide user.


-
As always, my hat is off to anyone that takes on hand-stitching a belt. I've done it, but I don't want to do it again! Best regards.
-
PM sent with photo of Tom Threepersons' original holster. This is the photo that my carver used to replicate the original carving pattern.
-
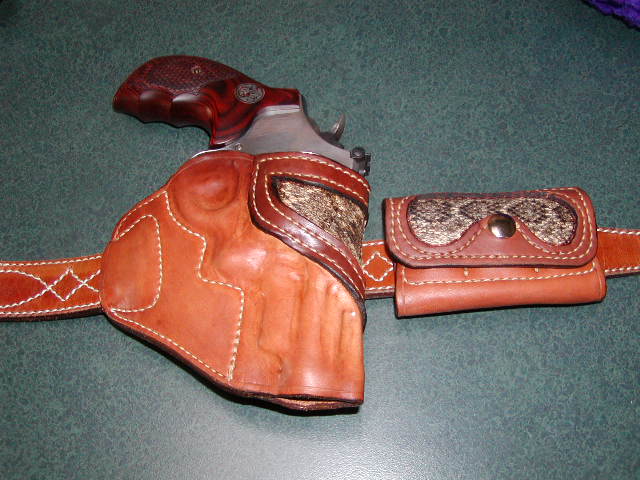
Playing Around With Some Snake Skin
Lobo replied to Lobo's topic in Gun Holsters, Rifle Slings and Knife Sheathes
Thanks, Mike. Here in Colorado we have mostly prairie rattlers, but they are quite thick in some areas. Even though they are a real problem at times (a friend of mine got nailed by one on his patio a couple of years ago, nearly lost his foot), our state legislature has seen fit to "protect" them, and there is now a hunting season with bag limits and a small game license is required. I don't know of any restrictions on use of the skins, but I'm sure that they will find another way to "Californicate" Colorado any day now. The nut cases in Boulder and Breckenridge are known for throwing paint on fur coats, vandalizing large SUV's, driving spikes in trees where logging is going on, occasional arson of building sites in the mountains, etc. We had to pass a law several years ago prohibiting animal rights protestors from interfering with legal hunters. At the same time, we have laws prohibiting hunters from overtly displaying their deer, elk, bighorn sheep, mountain lions, etc, while transporting them home after the hunt, so as not to traumatize those who never learned that meat doesn't always come wrapped in cellophane at the grocery store. The skins that I have came from Arizona, tanned and ready for use. I suppose someone has a snake ranch, probably selling venom, maybe canning the meat, and selling the skins/heads/rattles, etc. Something else for the environmental nazis to lose sleep over, I suppose. How long do you think it might be before the California legislature prohibits the use of leather for commercial purposes? I'm sure there are those pushing for just that. Maybe we need to start working on "kydexworkers.net"? But Kydex is a thermoplastic, probably containing petroleum products, so that can't last very long either. -
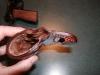
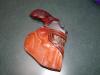
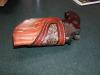
OK, I make two or three dozen holsters every week and send them all over the country to fill orders. I also like quality handguns, and have a nice S&W 3" Model 629 Deluxe .44 magnum, and decided to outfit it with a bit of leather. I've been playing around with a couple of snake skins over the past several months and decided to see what could be done with my Enhanced Avenger design coupled with some western diamondback set in an inlay-style around the holster mouth and circumfrence. As long as I was piddling around with this concept I decided to add in a matching 2X2X2 cartridge carrier for the big .44 shells. Lots of lessons learned on this one. In the future I will try to avoid squared-off corners in the inlay, as those are very difficult to finish properly. Back to the grind, filling customer orders, waiting for the opportunity to go fishing. This might come in handy if I have to deal with any two-legged or four-legged critters in the high country.
-
Thanks, Mike. Actually, my comments about the old clam-shells was intended as a humorous aside for those who get the vapors any time they see a holster without trigger guard coverage! So many of the younger ones seem to get all queasy in their stomachs, probably have to sit down and do deep breathing exercises before they can type out a condemnation of any holster with open trigger guard! The clam-shells proved to be problematic, not because of the exposed trigger guard but because of both unintenional opening and the occasional refusal to open. Both LAPD and CHP ended up banning them after several nasty incidents. Molded inner and outer shells, each with steel inserts, piano-style hinge, spring-loaded release button activating a lever to pop the shell open; pretty complicated to make, and complicated usually means unwanted malfunctions. Not all of the old ideas were bad. The Hank Sloan style saved many an expensive suit coat lining, and similar designs might find a use on more up-to-date holster designs. It never hurts to exercise the gray matter a little bit.
-
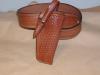
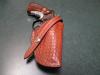
I recently shipped out another Tom Threepersons' style holster with matching 2.25" belt, all fancied up with basketweave tooling. Made for the Colt Python 6" with smooth leather lining. Belt is two-layer construction. I always enjoy doing these.