Lobo
-
Posts
1,065 -
Joined
-
Last visited
Content Type
Profiles
Forums
Events
Blogs
Gallery
Store
Everything posted by Lobo
-
Kahr Cw9 Demo Gun?
Lobo replied to Kcinnick's topic in Gun Holsters, Rifle Slings and Knife Sheathes
The Kahr CW9 is a plain vanilla no frills version of the P9, differing primarily in not having the slide cut of the P9 version, and plastic sights rather than steel. Rings Manufacturing offers their Blue Gun version of the Kahr that should work nicely. The Kahr pistols in 9mm, .40 S&W, and .45ACP are all very similar in overall size and profile, the major differences being (1) slide width, varying about .01" to .03" or so between the three calibers, and (2) barrel/slide length with 3", 3.5", and 4" models in each caliber. -
Machine Sewing A Holster
Lobo replied to rccolt45's topic in Gun Holsters, Rifle Slings and Knife Sheathes
+1 on this. Practice, practice, practice. The more you work with the machine the better your results will be. For stitching uniformly along edges some folks might find the roller material guide (included with your Cobra Class 4) to be handy. Set up only takes a minute. But you'll have to remove it before doing anything other than edges, so repeated set up may become an issue. -
My experiences with Springfield Leather Company have all been positive. Kevin, J'Nae, and Emma are all very responsive to every need and request and have gone out of their way to assure satisfaction every time. I'm using 30-40 sq. ft. of HO sides every week, but have only enough room to stock about 8 sides at a time, so I am ordering every few weeks. There is no one I would trust more than the folks at Springfield Leather.
-
Made A Blue Holster For A Friend.
Lobo replied to cjcinin317's topic in Gun Holsters, Rifle Slings and Knife Sheathes
Horsehide and cowhide can be expected to react differently to dyes, with shades of variations inevitable. I've dealt with some issues when customers order horsehide holsters and cowhide belts, etc. Only blue items I've ever done were a belt to match a pair of cowboy boots in navy blue, and a matching holster/pouch/belt set for a female police officer who felt a need to "accessorize" for her wardrobe (she also had a red set made). Very nice work on the holster. -
Horse Hide Thickness
Lobo replied to J Hayes's topic in Gun Holsters, Rifle Slings and Knife Sheathes
Working with horsehide has been an interesting experience. The horse butts offered by Springfield Leather Company are from Horween's Tannery, a very reputable source. Those I have received (over 100 so far) have varied in size, weight (thickness) and surface appearance. These are vegetable tanned and suitable for a variety of uses. Sizes have run from around 12" width up to around 20" width, lengths overall from around 40" to about 52", probably averaging around 5 sq. ft. total each of which nearly all is useful for various projects. Weights have varied from about 5/6 to around 7/8 oz overall with the edges (flank areas) noticably thinner, down to around 3 oz. or so. Exterior surface condition has varied from plain to spectacular, with some abrasions and spotting noted on some pieces. The flesh sides have all been very nice, uniform, and exceptionally smooth. It has all been good stuff and very usable for a variety of projects from holsters to pouches and belts. Horsehide is much more dense than cowhide, providing equal strength with less thickness. The denseness provides for extremely smooth cutting of edges. Sharp tools are required to avoid the need for excessive effort. Polishing and burnishing edges is very easy to do. Horsehide resists moisture infiltration much more so than cowhide from any source. Wet-forming requires much longer immersion in water to achieve the flexibility required to mold and model the leather to desired shape. There is a definite learning curve involved in boning horsehide, as the range of temperature and moisture content permitting good results is quite narrow as compared to cowhide. After wet-forming the horsehide products are very rigid in form and resist deformation very well, and this has been noted on pieces that were air-dried as well as those dried using heat. One of the first products I made was a two-layer belt that I have now worn for about 9 months, and it remains incredibly sturdy and rigid. Horsehide does not tool well at all. The density of the leather prevents any significant depth to tooling impressions. Basketweave tooling resulted in a very flat-looking result. Simple embossing (such as trademark stamps) is clear, but very shallow in appearance. I had my carver try out a couple of pieces, and he reported that horsehide is not suitable for carving. Horsehide takes leather dyes quite readily, but the resulting colors and shadings are noticably different than similar applications to cowhide. When wet horsehide has a strong odor, which my assistant compares to that of a wet dog. When finished there is no objectionable odor, but the smell remains different than cowhide. One customer has reported that his horses do not like the smell of his horsehide holster (pretty smart critters, horses). For those willing to spend the time learning to work with horsehide the results can be very interesting and rewarding, and the horse butts offer a lot of good leather at very reasonable prices. For those without the patience to learn a few different approaches to the work horsehide will not be a good choice. Best regards. -
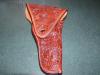
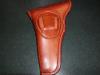
Some Recent Exotic Work
Lobo replied to JRCHolsters's topic in Gun Holsters, Rifle Slings and Knife Sheathes
Beautiful work. -
Every gun shop and pawn shop I've ever been to has a box, perhaps a drawer or two, filled with magazines for pistols that may or not be identifiable. I've bought dozens for less than the price of a cheap lunch each. There is certainly some variation, but there is some commonality with magazines in general. Single-stack metal magazines are very similar in overall dimensions (other than length) from one brand to the next. A single-stack .380 will serve many needs, a single-stack 9mm will serve many needs, a single-stack .45 will serve many needs. Double-stack metal magazines are also quite similar (again, other than length). The double-stack 9mm mags are all quite similar in overall dimensions. The .40 S&W round was developed specifically to function in pistols originally developed for the 9mm Luger cartridge, so magazines are similar in overall dimensions. The .357 Sig is essentially a .40 S&W necked down to 9mm, so dimensions are very similar. Double-stack .45 magazines vary somewhat, so an actual representative piece is usually required for forming. Glock magazines are in a class all by themselves, however there are some very close similarities between the different models (length being different, of course). 1911 pistol magazines will all share the same basic dimensions, differing only in the metal folding to accomodate specific calibers and overall length to fit the various grip-frame configurations. Recently went out of my way to purchase a Springfield Armory double-stack .45 magazine to complete an order, and found that the dimensions were nearly identical to the Glock plastic double-stack magazines in 9mm, .40, and .357 Sig (length varying, of course, and taper to the feed lips being a bit different). Bottom line, about a dozen magazines can be bought for a few dollars each and used to fill the majority of orders for magazine pouches. YMMV.
-
Another Iwb Holster Question
Lobo replied to glockanator's topic in Gun Holsters, Rifle Slings and Knife Sheathes
Every holster ever designed involved compromises among four basic factors; i.e.: comfort, accessibility, security, and concealability. Whenever one factor is emphasized there will be compromises among the other factors. IWB-style holsters generally emphasize concealability by keeping the bulk of the handgun inside the trouser waistband. The compromises are typically found in reduced accessibility, as well as comfort issues for many users. IWB-style holsters can be made to allow greater accessibility (especially in ease of re-holstering) by significant reinforcement of the holster mouth area. The trade-off comes with increased bulk and reduced comfort in many designs. IWB-style holsters based on the pancake-style of construction allow for reduced bulk and greater concealability, but there are few methods available for reinforcing the holster mouth to permit ease of access (re-holstering) because of the natural flex-lines created by the fore-and-aft stitch lines. Adding material to the holster mouth can be superfluous unless provisions are made to prevent collapse of the holster along the stitch-lines when the handgun is removed and the holster remains compressed between the body and trousers/belt. Many folks carry IWB-style all the time without problems. Many others (including myself) cannot tolerate IWB-style carry for any length of time. I regularly make dozens of IWB-style holsters every month, many intended for very large and bulky handguns, that I would not consider for my own use. I'm an old guy and my personal philosophy of life revolves around personal comfort; others may view things differently, and that is their prerogative. If there were such a thing as the "perfect holster" design there would be only one holster design being produced. In point of fact, there are millions of handgun owners, each having his/her own preferences and requirements, and none of those are perfectly suited by ANY holster design. This may help to explain why there are so many holster makers, and so many different designs offered. I make 11 holster designs, with or without 4 common options, in 4 finish colors, for 137 different handguns, resulting in over 24,000 possible variations (not including left-hand versions). I still receive requests for others daily. Things were much simpler 40 years ago, half-a-dozen handgun manufacturers each offering half-a-dozen models. Now there are dozens of manufacturers, each offering dozens of variations, and new handgun models being introduced just about every week. Add in the after-market products (tactical lights, laser sights, custom safeties and other parts) and it becomes an endless cycle of trying to keep up with everything anyone can dream of to strap on his belt. For those who have never been through the process of developing a new holster design, allow me to share the experience. I have developed 3 unique holster designs, each of which took between 5 months and 14 months to bring a finished design to marketable status. Hundreds of drawings, followed by dozens of patterns produced, then a dozen or more prototype holsters made for testing by multiple experienced individuals, then revisions based upon feedback, resulting in more prototype production, then light at the end of the tunnel (meaning the time has arrived to start producing several hundred patterns for the final design adapted to every handgun type accomodated), all before an order comes in with payment for the first production product. I encourage everyone to continue thinking about possibilities. Roy Baker developed the pancake-style holster ("Roy's Original Pancakes") while working out of his garage in Indiana before moving to Arkansas and building a factory to produce them. Bruce Nelson developed his "Professional Model", then licensed production to some very talented people, followed by multiple knock-offs by any number of sources. Legendary lawman Tom Threepersons came up with a design for his personal holster and had "Tio Sam" Myres, S.D. Myres Saddlery Company, make the original, followed by millions of copies and subsequent innovations on the original idea. I have a few new ideas floating around in my head, usually for a year or two before I have the time to try them out on paper or with leather. Maybe I'll come up with something worthwhile, maybe not. Keep after it, keep working your mind. Maybe you will come up with something that meets someone's needs or preferences. That's what the business is all about. -
Sewing Holsters With A Machine
Lobo replied to Sixer's topic in Gun Holsters, Rifle Slings and Knife Sheathes
When I started my assistant on the stitcher I had her watch me do several pieces, discussing each step such as curves and changes in direction, stopping the machine at the proper time to avoid skips, etc. Then I assembled dozens of practice pieces from scrap and let her spend a couple of hours per day for several days just practicing on the stitcher. Her work improved steadily and very quickly. The key is practice, practice, practice, making mistake after mistake, and learning to avoid mistakes, then learning to correct (some) mistakes. At the same time you will get familiar with bobbin changes, the occasional bent or broken needle, and everything else involved. You have already gotten past the really big hurdle by selecting Leather Machine Company. Lots of other sources, but none of them are run by Cobra Steve and none of them can compare for service after the sale. -
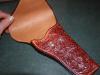
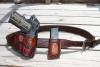
Shipping Out Some Fancy Pieces, Part 1
Lobo replied to Lobo's topic in Gun Holsters, Rifle Slings and Knife Sheathes
Thanks for your comments. I mix dyes for this color using Fiebings spirit dyes in medium brown and dark brown. Neatsfoot oil is one step in my finishing process and the oil will significantly darken any of the brown or tan dyes. The thumb-break is made as a separate piece using two layers of light (4/5 oz. or so) leather sandwiching a strip of Kydex between. A snap stud base is set into the inner side, then the piece is sewn up, trimmed, and edged before insertion through a slot at the top of the belt loop and stitched down to the holster back. Snap cup is installed on the stud base after finishing. Lowered profile on the finished thumb-break release, no issues trying to set a long-shank snap cap through two layers of leather and reinforcement piece, but you only get one chance to set the snap cup and if you don't get it right you are back to square one on the project. -
Mr. Customer wanted a full flap field holster for his 4" S&W Kit Gun .22 revolver, complete with full coverage Sheridan style floral carving. My very talented carver applied his best skills, and my assistant did a tremendous job on the edges and finishing work. Old Lobo did the basic assembly, lining, and fitting. Finish requested was a medium oiled tan. Carved pieces tend to absorb neatsfoot oil more readily than might be expected, so multiple light coats are better than any quicky approach. Edges are dyed dark brown, then burnished on a hard felt wheel with my wax mixture (50-50 paraffin and beeswax). It is difficult to do justice to the carver's artwork with photography. You have to hold a piece like this in your hand to fully appreciate the work. I am very pleased with this one.
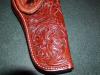
-
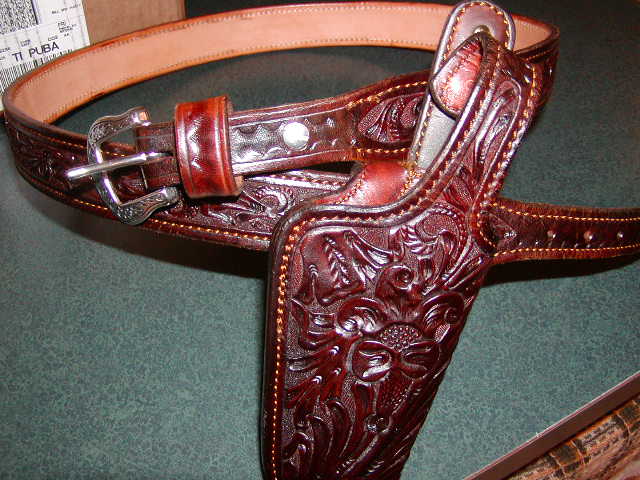
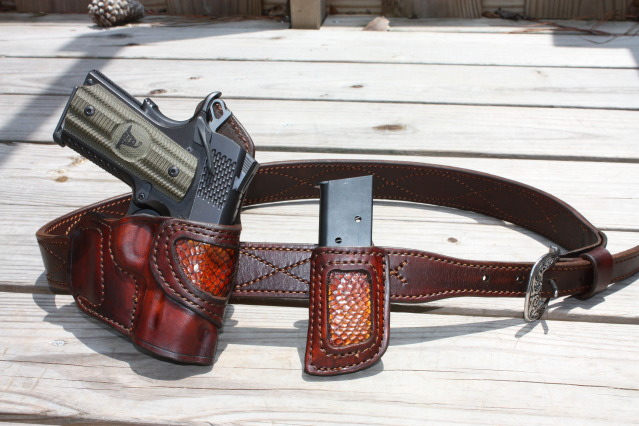
Completed a few of the hand-carved pieces recently, with all credit due to my very talented carver as well as my talented assistant. First is a Threepersons' style holster modified for thumb-break retention, hand-carved to the original style, lined with some lovely calfskin, and completed with a matching carved belt, all done in cordovan brown. Trying to show the incredible detail of the carving work is a chore. One can only imagine the talent of the carver. Displayed with Old Lobo Hisself's constant companion, the Kimber Custom CDP with a pretty nice pair of stags for the occasion. Per customer request, thumb-break was made for hammer-down carry.

-
Do You Heat-Dry Your Items?
Lobo replied to JoelR's topic in Gun Holsters, Rifle Slings and Knife Sheathes
I am in final finishing on 38 items now, and have completed well over 200 pieces since the first of the year. What I gain from heat drying is keeping production moving. For those making one item at a time there is little to be gained. For those with 10 to 12 (or more) pieces in progress at all times there is much to be gained. I am presently working on a new drying cabinet to accomodate up to a dozen pieces at once. The time savings will be considerable. -
A good and expedient method for 1.5" belt slots requires these tools: 1. 1.25" wood chisel ($10.00 +/-) 2. 3/8" round punch ($4.00 +/-) 3. cutting board (plastic kitchen type, about $1 at the thrift shops or dollar stores) 4. mallet (2 to 3 lb., about $10.00 at Harbor Freight for a dead blow type hammer) Process: 1. mark slot locations on holster front (after assembly and stitching) 2. place holster on cutting board on solid bench top 3. tap 3/8" round punch at top and bottom to mark ends of each slot 4. drive wood chisel straight down on each side of the slot 5. drive 3/8" round punch through at each end of the slot This will make a very neat and clean slot 1.5" X 3/8". Cut edges can be beveled. Slot can be burnished quickly with a wooden dowel in a drill press or hand-held drill. The cutting board supports the leather, allowing a clean exit cut, and protects the edges of your chisel and punch. The heavy mallet or hammer allows each cut to be made with a single strike, nice and neat. Different sizes of slots can be made with different sizes of chisels and punches. While wet-forming the holster you can use a wooden mandrel to work the slots into the desired position, and stretch a bit if needed. I cut these from wood in the sizes that I regularly use (1.25" X 0.25", 1.5" X 0.25", 1.75" X 0.25", 2.25" X 0.375"). Pre-forming each belt slot or loop makes holster break-in much easier for the customer. When laying out slots always keep in mind that the length may vary when the slot is anything other than perpendicular to the belt lines. I mark the belt lines on my patterns so that the slots automatically allow for the angle to the belt. Good slot punches are rather expensive and they can be difficult to sharpen when needed. Round punches are cheap enough to be thrown away and replaced when needed. Wood chisels are relatively inexpensive and easily sharpened. Mallets and hammers last forever and have many other uses.
-
New Sewing Machine To Arrive On Friday!
Lobo replied to Sixer's topic in Gun Holsters, Rifle Slings and Knife Sheathes
We have a winner! Best response to a post I've seen in a long time! Read it again, then read it again. Then practice, practice, and practice. -
Taking Requests For New Gun Models
Lobo replied to particle's topic in Gun Holsters, Rifle Slings and Knife Sheathes
Life was pretty simple when I sold my first holster 40 years ago. Half-a-dozen handgun manufacturers, each offering half-a-dozen models. Now there are dozens of manufacturers, each offering dozens of models, and the latest "new and improved" handgun comes out just about every week or so. At last count I had 5 dummy 1911's. I also have 28 pistols of that style in my collection, starting with a pre-WW1 commercial Colt and ending with currently produced pieces. There are still holster requests for 1911's that I can't make. Dummies are usually available only for current production pieces that have a significant market share. Out of production handguns are quickly dropped. New handgun models may take several months before dummies become available, if ever. I've had customers offer to pay for a dummy. I've had more customers lecture me about how much business I would have if I'd just be reasonable and get what they want. I've had customers place orders requiring dummies, ordered the dummies, then had those orders cancelled. I've bought dummies that were used once, then set aside for a year or two before receiving another order. I've bought actual handguns that have paid for themselves in holster orders over a few weeks' time. I've had customers ship their custom one-of-a-kind handguns to me, with overnight freight charges and FFL transfer fees at both ends, to have holsters made. A couple of years ago I was receiving countless inquiries for the Ruger LCP and S&W Bodyguard .380. Looking at the handguns, and looking at my holster designs, I didn't see how those tiny semi-autos would be well-served by most holster designs, so I didn't go there. Now I hear very little about those two pieces, but am receiving quite a few inquiries for the Ruger LC9, Walther PPQ, and a couple of others. Bought a Sig P238, made a dozen or so holsters with it, now it sits in the gun safe and I'm getting requests for the Sig P290 (which I haven't even seen yet). Next week it will be something else. One thing I know that can be counted on in this business is that there will be at least one e-mail every day from someone wanting something I can't make. That won't change, no matter how many guns I have on hand. Every time something new hits the market there will be a spike of interest; sometimes demand will be sure and steady, sometimes there will be a spurt of orders followed by nothing. If you hear of somebody that makes these calls right all the time be sure and get your lotto numbers and Super Bowl predictions. As far as asking customers to pay for forming pieces, or charging a surcharge on new models, etc, I think that would result in more negative reaction than positive. Best regards. -
A Really Big Belt
Lobo replied to steelhawk's topic in Gun Holsters, Rifle Slings and Knife Sheathes
The longest belt order I have received was 2 belts for 60" waist, about 70" overall strap length. My helper swears that it took her a month to burnish the edges! When I start doing belts I usually put a fresh bobbin in the Cobra Class 4, and that will complete two belts of moderate lengths (single stitch-line all around), thus avoiding bobbin changes in the middle of a job as much as possible. Each belt will take about 7 - 10 minutes for stitching. At 6 stitches per inch a 40" belt requires about 400 stitches (I amuse myself by counting as I go, which also helps me to stay focused on the work). I've done quite a few with the fancy "lazy stitch" pattern, which takes about a half-hour to lay out and stitch. It also doubles the amount of stitching involved. I like the look. One of the nice features of the Cobra Class 4 is the automatic bobbin winder, which will wind a bobbin completely at a rate considerably faster than the bobbin in use is emptied. My machine came with 4 bobbins, so I always have a couple ready to go. When I have a partially used bobbin it can be saved for use on smaller projects.
-
New Laser Design Holsters New For 2012
Lobo replied to goodfella's topic in Gun Holsters, Rifle Slings and Knife Sheathes
Big time warning here! If you are doing these for your personal use, edification, or enjoyment then you have nothing to worry about. If you are offering to make holsters for sale to the general public bearing recognizable images of copyrighted trademarks you should probably be visiting with the attorney who will soon own your home and retirement account. Lasers can do remarkable work in reproducing anything you might like. If used to reproduce an image that someone else owns you might have a problem in your future. Best regards. -
First Holster With Cobra 4
Lobo replied to steelhawk's topic in Gun Holsters, Rifle Slings and Knife Sheathes
Rayban: My post was in response to Shooter McGavin's questions about the new machine. -
First Holster With Cobra 4
Lobo replied to steelhawk's topic in Gun Holsters, Rifle Slings and Knife Sheathes
Shooter: Steelhawk can add his comments. I've been using the Cobra Class 4 for about 16 months now and I've been very pleased with it. Palletized shipment weighed about 310 lbs, delivered to my door 4 business days after ordering. Took me about 40 minutes to finalize assembly and set-up, and within 2 hours of delivery I completed my first project. As received, machine was set up for 6 stitches per inch (easily adjustable), thread tension was perfectly adjusted, and servo motor control was set up for about 60 stitches per minute (treadle control allows slower speeds for intricate work or curves, and the learning curve is remarkably short before you become completely comfortable operating it). 16.5" throat depth allows plenty of room for the larger pieces without straining yourself or the machine. LED work light included with the machine is great. Pedestal-style machine stand can be adjusted for height, so you can set up for use while standing or seated, as you prefer. I ordered the "special" deal with all attachments and accessories, so I have the flat bed available, all the presser feet, roller material guide (handy for belts especially), and so forth. Nothing else to buy, so I've never felt the need to order anything other than thread and needles. In 16 months of use I have had to adjust thread tensioning a couple of times for some applications, replaced several broken needles (hey, that happens with any stitcher), and run through about 8 lbs. of thread (over 10,000 yards) with no significant problems. The couple of times I have felt the need to call Cobra Steve he has always answered his phone personally and always provides just the advice or assistance needed. I clean out the bobbin shuttle recess and apply a drop of lubricant at each point (clearly marked on the machine) once per week. Other than that all I've ever needed to do is turn the machine on and go to work each day. My assistant had never operated a stitcher or sewing machine before, so I set up a couple of dozen pieces to teach her with and she had mastered the machine within a few hours of practice and was doing production work by the second day. Great product. Great service. I can't offer a higher recommendation. Call Cobra Steve when you are ready for a new stitcher and you'll be happy. -
What Sewing Machine Do You Use?
Lobo replied to Sixer's topic in Gun Holsters, Rifle Slings and Knife Sheathes
I've said it before and I'll say it again. When you are contemplating a stitching machine you should invest your money in one that will more than meet your anticipated needs. Working any machine at rated capacity will wear it out more quickly than working another machine at less than capacity. Greater throat depth will never be a problem, but minimal throat depth will frequently be a problem. My comments are posted on Leather Machine Company's website, following my purchase of the excellent Cobra Class 4 machine. Cobra Steve has always answered his phone when I called, or returned my messages promptly, and has proven that he deserves my business with follow-up service after the sale. Enough said. Call Steve at Leather Machine Company, establish the business relationship, and enjoy the benefits of having Steve on your team. -
Belt Slot Questions
Lobo replied to mrfixit's topic in Gun Holsters, Rifle Slings and Knife Sheathes
Sizes of belt slots must accomodate the belt width, belt thickness, and the angle of the slot to the belt. Belt slots that are 1.5" in length will accept a 1.5" belt only when the slots are perpendicular to the belt-line. Any angle to the belt slot will require greater length. (Try it; draw two parallel lines 1.5" apart, then draw a slot-line at 45-degree angle, and measure that line; it is much more than 1.5"). Many knowledgeable folks will use heavy-duty belts to support the holstered handgun. These are frequently around 0.25" in thickness, so the width of the belt slot must be sufficient to allow the belt to pass through. When doing patterns I always start out by drawing two parallel lines representing the upper and lower belt-lines. Carry height and holster cant are easily established relative to the belt-lines. Then the belt attachment points (slots or loops) can be established and marked on the pattern. If the slot or loop is to be angled this is easily done on the pattern, then transfered to the leather for cutting. The holster styles that I make most frequently have belt slots angled to approximately the same angles as the handgun, which I find best for pulling the holstered handgun firmly into the body when belt tensioning is applied. Since the slots are angled, and the angles are always a bit different depending on the handgun profile and holster cant, I have found that standard slot punches are not the best method for me. Nothing wrong with good slot punches, but for my purposes I would need half-a-dozen or more and they are both expensive and can be a chore to sharpen. My procedure is to make marks at the upper and lower ends of the belt slot. Then, using a 3/8" drive punch, I tap two marks to establish the ends of the slot. Then I use wood chisels of appropriate length to make the long cuts for each side of the slot, connecting the two round punch impressions. After the long cuts have been made I return to the 3/8" drive punch and complete the upper and lower ends. Nice clean result every time, takes only a couple of minutes to do, and the slot is a perfect fit to the belt. During the wet-forming process I form each belt attachment point on a wooden mandrel simulating the belt dimensions (1.5" X 0.25", 1.75" X 0.25", etc), which both forms the slots and aligns them for the belt, making the holster ready for break-in and use. The work must be fully supported on a surface that will not damage the chisel blades and punches. The softer plastic kitchen cutting boards work nicely for this and last through thousands of uses. A 3-lb. mallet works well for driving the chisels and punches. Round drive punches are pretty economical (+/- $5.00 or so), and good wood chisels are readily available (@ $10.00 to $20.00 each, or in sets including several widths) and easily sharpened and maintained. So, a couple of drive punches and 4 or 5 wood chisels, totalling around $75.00 or so, take care of all my slot-cutting needs. A half-dozen slot punches would cost $250.00 to $350.00 or so, and give me fits at each sharpening time. -
Sanding Holster Edges
Lobo replied to Abram's topic in Gun Holsters, Rifle Slings and Knife Sheathes
Going back to the original topic, what some might view as a problem others may find to be an advantage. When dressing edges I work the leather while it is damp using a drum sander to dress down each edge. This always results in a thin "flap" forming along the smooth sides of the leather, which can be cut off very neatly with the edge beveler (and residual dampness in the leather makes this work very easy to do). For pancake-style holsters I find that the beveling can be done all at one time, right after dressing the edges on the sander. For envelope-style holsters I do the beveling prior to assembly, then again after the edges have been dressed on the sander. Another advantage of working the leather while it is damp is that there is no dust in the air during sanding. The damp residue drops immediately to the bench top where it can be brushed into a trash can at the end of the day and the air in the shop can be breathed without irritation. I cut the leather when it is dry, assemble and stitch while dry. From that point onward the piece is damp until after it has been wet-formed and completely dried. Dyes can also be applied while the leather is damp, and dye penetration is enhanced a bit (in my experience). Please note that when I say "damp" I don't mean "soaked", just slightly moistened with water. -
Issues Selling/shipping To Canada?
Lobo replied to evandailey's topic in Gun Holsters, Rifle Slings and Knife Sheathes
The basic issues I have encountered in international sales (including Canada) have been: 1. Customs declarations. These must be accurate and truthful. Some customers will ask that the contents be indicated as a "gift", or a lesser value shown on the declaration (see duties, below). 2. Duties. Most countries assess import duties on products entering the country from another. Import duties vary depending upon the nation's laws, type of goods involved, and the value of a shipment. 3. Currency conversions and methods of payment. Every country uses different currencies, and the relative values change continually. Exchanging foreign currency for US currency can be a chore, and fees are to be expected. Banks regularly charge fees for collecting foreign checks, money orders, bank drafts, etc. 4. Value Added Taxes (VAT). Many countries assess VAT on every transaction. This is particularly true in the European Union nations. Generally, the VAT will be a flat percentage of the sale price of any item. 5. Delivery confirmations. Some means of delivery will provide delivery confirmations on parcels (FedEx, UPS, etc), but some will not. Items sent via mail to another country are delivered by that nation's postal service, which may or may not provide delivery confirmation. So, I recommend a few things when dealing with international customers: A. I insist on completing every customs declaration accurately, with the contents indicated as "merchandise", properly described, and the actual sale price listed. B. International customers must understand and agree that import duties are the responsibility of the purchaser. C. I use PayPal exclusively for international payments, providing (1) automatic currency conversion to US dollars, (2) secure website for credit card transactions with no sharing of account data, (3) instant funds availability in most cases. NOTE: PayPal has a standard requirement for delivery confirmation to provide coverage under their "seller protection" program, so choose delivery methods accordingly. D. Customer must understand and agree that VAT is the responsibility of the purchaser. E. Customer selects the method of delivery, decides on parcel insurance, and accepts responsibility for parcels lost or damaged in delivery. Having said all of this, I have had remarkably few concerns or problems involved in international deliveries to 19 foreign countries to date. The majority of customers are fully aware of customs requirements, import duties, VAT issues, and delivery methods and times. All of my customers have been pleasant to deal with, and that is especially true of the Canadians I have had the pleasure of dealing with. -
Is A Groove Line Necessary?
Lobo replied to Kcinnick's topic in Gun Holsters, Rifle Slings and Knife Sheathes
Nearly all of the belts that I make are ordered as part of a matching set including holster, magazine pouch/cartridge case, etc. As Electrothon has pointed out, the stitching groove is intended to set the stitching below the surface of the leather to avoid excessive wear to the thread, and this can be important for holsters and pouches. Since I am making matching sets, I make the belts in the same manner as the other items, same stitching groove, same distance from edges, etc. My Cobra Class 4 machine pulls a very tight stitch. Stitching with, or without, the cut stitching groove is nearly identical in appearance. Some machines will not set the stitching with as much tension, so different results may be expected. I've known other craftsmen who did not use stitching groovers, prefering to use a creasing tool at the edges. This is done while the leather is damp, so the overall effect is rather similar in appearance to the cut stitching groove. Stitching machines can be equipped with a material guide to maintain an even spacing from the edges to the stitch-line. As Katsass has pointed out, hand-stitching requires a positive guide, so the stitching groove is advisable.