Lobo
-
Posts
1,065 -
Joined
-
Last visited
Content Type
Profiles
Forums
Events
Blogs
Gallery
Everything posted by Lobo
-
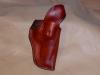
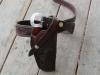
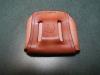
I recently received another request for the Hank Sloan style holster, which was very popular for double-action revolvers back in the late 60's to early 80's or so. The basic concept involves an upward extention of the front holster panel to shield the hammer and/or rear sight, keeping those from snagging on the cover garment. This reduces "printing" and also keeps jacket linings from being ripped to shreds. We saw a lot of these "back in the day", and they were quite popular with FBI agents during the years when double-action revolvers were the standard sidearm choice. This one was made to fit a 3" S&W K-frame revolver for a retired federal officer whose original was lost in a fire. Now, before we start getting all worked up and swooning about exposed trigger guards, I promise that I won't post photos of the old clam-shell duty holsters! As the name implies, those were made with a steel hinge along the rear seam, and opened up at the press of a button. Where was the button? Right underneath the trigger guard, all you had to do was stick your trigger finger through the exposed trigger guard and push the button and, presto, your revolver was in your hand and ready for action, with your finger on the trigger!
-
I agree with Sixer's rounded corners comment above. In addition to being more exposed to wear and tear, sharp corners and edges can cause comfort issues. You have made all the necessary observations on your stitching. This will improve with practice and experience. If you are not already using a stitching wheel and stitching awl, those would be good to have and help you keep everything nice and neat. I don't know how you are cutting your belt slots, but here is a simple method that requires only a few tools: 1. Mark the upper and lower ends of the slot location on the outer holster panel. 2. Using a 5/16" or 3/8" round drive punch, tap a mark at the top and bottom of each slot. 3. Using a 1-1/4" wood chisel, cut the vertical belt slot lines. Keep the chisel absolutely perpendicular to the work and use a plastic kitchen cutting board underneath to support the work and avoid damage to the chisel edge. 4. Go back to the drive punch and drive it through at the top and bottom of each slot (plastic cutting board under). When cutting with the chisel or drive punch try to make each cut cleanly with one blow. A 3-lb. dead blow mallet or similar tool will make this easier. Multiple impacts can have a tendency to make your cutting tool bounce around and leave stray marks. Round drive punches are only a few dollars each, and can easily be replaced when dulled. A good wood chisel is about $10 or $15, and they are easy to sharpen. A plastic kitchen cutting board can be found at WalMart for a few dollars. So, for the hobbyist or beginner this is a good alternative to buying a set of oval slot punches, which are rather expensive and can be difficult to sharpen properly. After cutting you can bevel the raw edges. Then dampen the leather and burnish with a wooden dowel rod turning in a drill or drill press. After you have done a few you will start getting a nice clean slot every time. Your work is progressing nicely.
-
For a second project I think your work is looking pretty good. Doing the welted seams can be a bit tricky and requires careful use of your pattern as a template to locate the stitch-lines accurately. When I make this style I try to allow a bit more width to the loop under the belt, typically locating the slot about 1" from the stitch-lines around the weapon and allowing a full 1" width for the loop. Also, I find it helpful to contour the holster to approximate the body curve during the forming process, which makes breaking the holster in considerably easier. I use wooden mandrels in the shape of the belt (1.5" X 0.25", 1.75" X 0.25", etc) inserted through the tunnel loop, then forming the "wings" inward in a curve and stretching the belt loops into final form. Best regards.
-
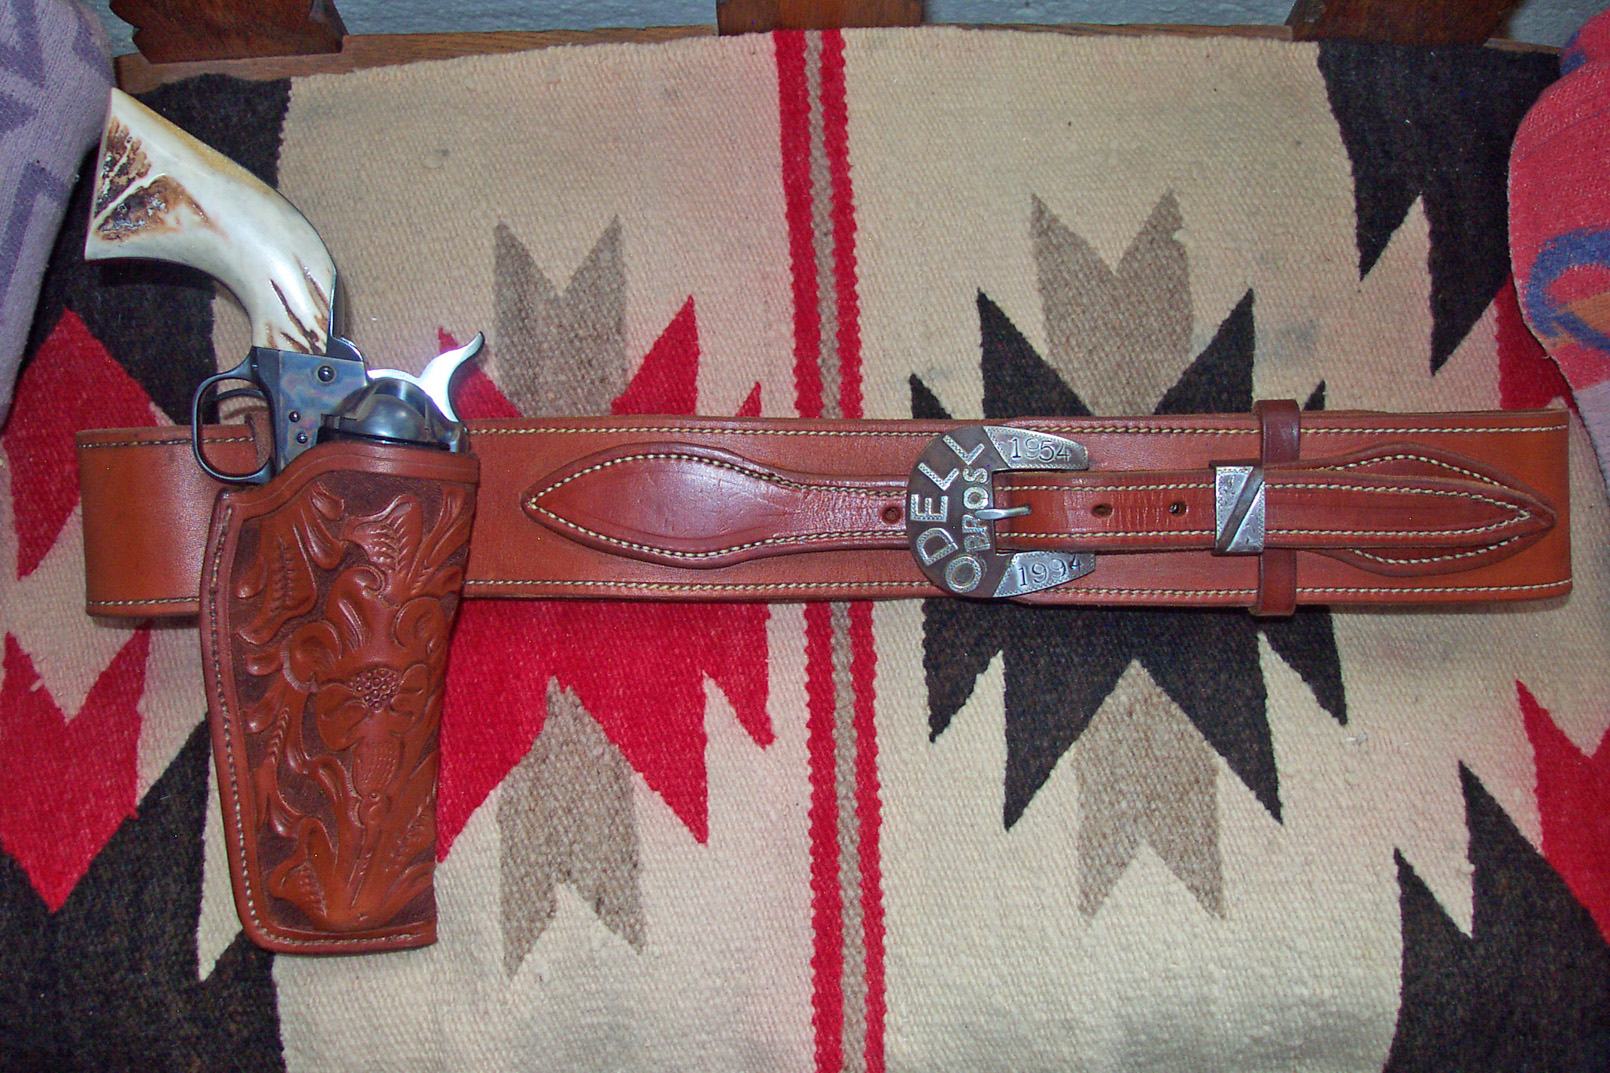
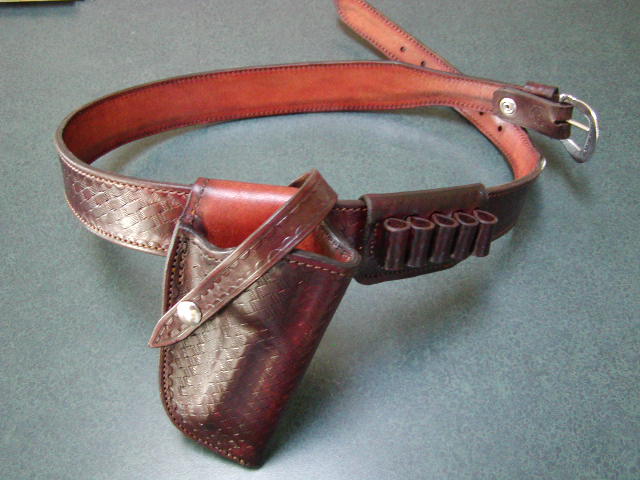
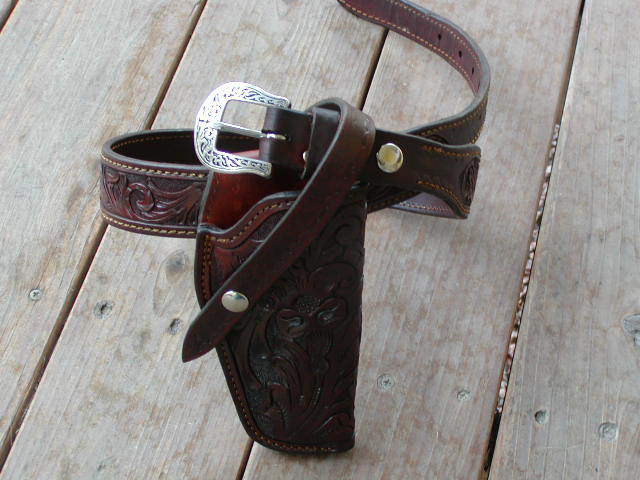
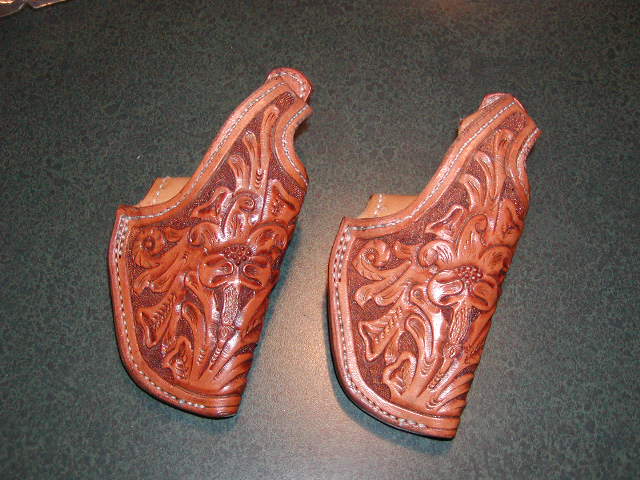
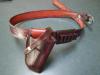
Nothing says "barbeque" better than a classic Tom Threepersons' style, especially when made for a vintage or custom handgun. Here are a few I have done: 1. customer-provided photo, carved Threepersons' for 6" S&W Highway Patrolman with stag grips. 2. customer-provided photo, carved Threepersons' for a Colt Single Action Army, set up for use with the customer's dad's custom belt. 3. Threepersons' with matching belt and cartridge slide, basketweave tooling, for a custom Ruger .476 Linebaugh. 4. Threepersons' with matching belt, hand-carved, for a 5" S&W Model 27. 5. Matching holsters made for a mother and daughter, hand-carved, for S&W Model 60 .357's. These are always fun to do.

-
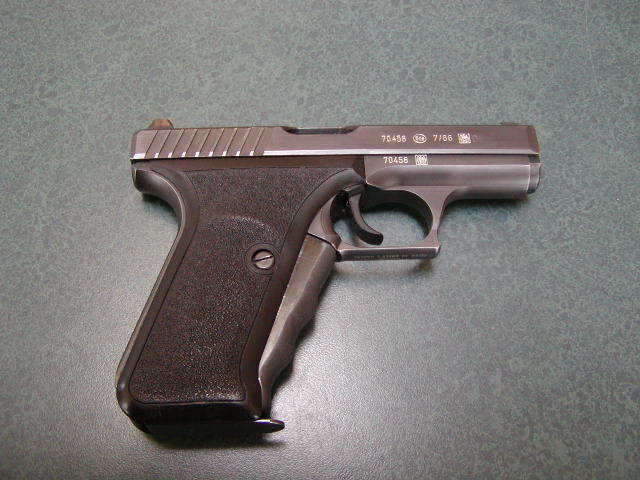
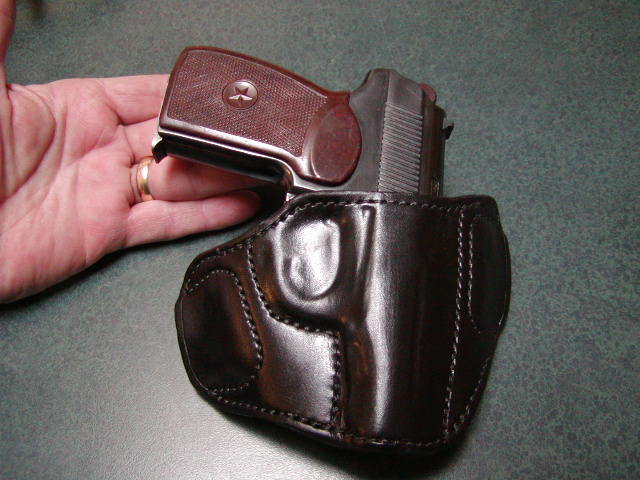
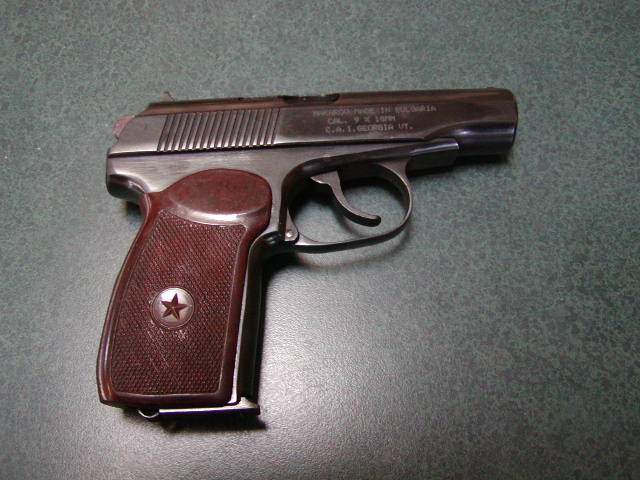
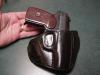
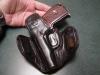
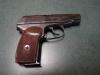
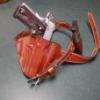
Just about all of the big-name holster makers tend to concentrate their offerings on popular handguns that are currently in production. As some handgun models go out of production, those models are dropped from the product line. Some handgun models are, or have been, so scarcely distributed in the US that holster makers found it impractical to make holsters for those models. This can change. I have continued to offer holsters for a number of vintage and modern handguns that have gone out of production, but many thousands continue in use. This has provided a steady stream of orders for years. I recently noted two particular pieces that offered some opportunities. First was the H&K P7 PSP model, a German design in 9X19 mm caliber featuring two unique features, (1) a squeeze-cocking mechanism on the front grip strap, requiring the user to grip the pistol and depress the lever-like device to cock the striker and permit the trigger to release the sear, and (2) gas-operated chamber locking, with a gas vent in the barrel allowing the expanding powder gases to drive a piston that locks the breech until the bullet has left the barrel. The H&K P7 pistols (PSP and M8 variants) were very popular with German police forces, and some were imported into the US, but they were always a pretty high dollar item here so distribution was somewhat limited. This changed last year when H&K took in thousands of police trade-ins, ran them through the factory, imported them to the US, and offered them at reasonable prices in three grades, depending on condition and wear. A year ago the P7's were bringing $1200-plus; the limited numbers recently made available were in the $600 to $700 range, so there was a lot of interest. Second was the Makarov pistol, originally a Russian (Soviet) military piece and later made in Bulgaria, East Germany, and China. Again, these were quite rare in the US prior to the fall of the Soviet Union in the early 1990's, but that changed as former communist bloc nations started selling off military hardware to raise hard currency. Many thousands were imported from the mid-1990's until fairly recently, and prices were very low. Ammunition was a problem, but that has changed and US makers are now offering some serious defensive loads for the 9X18 Makarov. I bought the Bulgarian "Circle 10" military production piece and I have been quite impressed with it. Overall, a very robust and dependable pistol that is quite usable for discreet concealed carry. Based upon customer requests I decided to add both of these models to my line-up. As is the case with most smaller semi-auto pistols, holster design requires some thought to maintain adequate room around the grip-frame to permit a solid grip during the draw. Pancake designs need particular attention in this regard, and the squeeze-cocking mechanism of the H&K P7 requires extra attention to allow drawing the weapon without inadvertently cocking the piece prematurely. The first holster model that I adapted to these pistols was my Enhanced Pancake model, the most popular design in my product line. Below are a few photos showing the results. The H&K P7 holster is a plain, unlined open-top model. The Makarov holster features a slide shield and holster lining. The word seems to be spreading. As always, dummy guns are not always available, and even when they are it sometimes just makes sense to invest in something that will always have value. I doubt that I will ever regret adding these two to my collection.
-
Edge Waxing Question
Lobo replied to rccolt45's topic in Gun Holsters, Rifle Slings and Knife Sheathes
Billy: My edge finishing process starts with dressing down the edges smoothly using drum sanders (I dampen the leather first to reduce airborne dust), then beveling the edges, then dyeing, then rub on the wax mixture and burnish on the hard felt polishing wheel. After that the final finishes are applied. That's it. I've used wooden burnishing tools, thread spools with grooves cut for various profiles, and other methods. The hard felt polishing wheels are the best option I have found. Very easy to use, fast and consistent results, minimum effort required. Combined with the wax mixture described, this is almost idiot-proof. I would not recommend using good cooking utensils for making up the wax mixture. Just about any Goodwill store or second hand shop should have a few old pots and pans, maybe a muffin tin or two, at much less cost than listening to complaints about what you've done to the household items. Duro Felt's website ordering process was a bit convoluted, as I recall, but they have been responsive and got my orders out quickly. Once there was a question, and their rep called me to make sure they got the order right. I have been pleased with their products and service. -
To Oil Or Not To Oil.....
Lobo replied to Cattle Hide's topic in Gun Holsters, Rifle Slings and Knife Sheathes
Cattle Hide: You have touched on a subject that has been the source of several heated exchanges. Here is my opinion: The vegetable tanning process removes most of the natural moisture in a hide. The wet-forming process (with or without forced drying or heat applied) removes even more moisture. The completed holster will be required to flex during use as it conforms to the belt and body, and the weapon is inserted and withdrawn. I use a modest application of neatsfoot oil as the first step in my 4-part finishing process. In my opinion, this replenishes some of the natural moisture in the leather and allows the leather to flex without cracking. As our friend Katsass has noted, neatsfoot oil does not dry, but remains infused within the fibers of the leather. The oil will also migrate within the leather fibers until it is evenly distributed. Of course, too much neatsfoot oil will make the leather limp and useless for the purpose. I apply only one time, and only to the exterior surfaces (the flesh side will absorb so rapidly that there is little control over how much is applied). This has worked well for me over the past 39 years, and I know of quite a few holsters that I made back in the 1970's that are still in use today. In fact, an old friend and customer recently passed away and his son called me to report that his father's pistols and holsters were now his and he will be using them. I made one of those for my friend's birthday present in 1976, several years before the son was born. Now we can wait for those of differing opinions to add their absolute condemnation of any uses for neatsfoot oil! Occasionally there will be a well developed bit of knowledge, rather than simply another strong opinion. Best regards. -
Edge Waxing Question
Lobo replied to rccolt45's topic in Gun Holsters, Rifle Slings and Knife Sheathes
Well, it looks like there is a fair amount of interest in this subject, so I will share what I have found to work in my shop. Both parrafin and beeswax are readily available at craft stores or any place offering candle-making supplies. There are on-line sources, and quite a few eBay sellers offering beeswax. Beeswax is very soft. Parrafin is quite hard and brittle. Blended together, they make a nice pliable and easily used material. The parrafin can be melted easily in a pan at moderate temperature, then the beeswax is added and allowed to melt. Keep temperatures at the minimum to get the waxes to combine and stir together. Higher temperatures result in vapors, and the waxes are flammable. A muffin pan with cavities lined with aluminum foil or waxed paper can be used to pour out the molten wax mixture in little cakes of about 2 ounces each. Candle-making suppliers can provide shallow plastic trays that are disposable after one use. After it sets up it is fairly hard, but responds to the warmth of your hand and can be molded and worked as needed. Mine always seem to end up molded into a ball shape during use. When the remaining portion becomes too small to easily use it can simply be mashed into the next piece, so there is really no waste. Prices on beeswax vary, but a pound is usually $10.00 or so. Parrafin is quite inexpensive. One pound of each, combined, will make 16 cakes of 2 ounces each. One will be enough for 100 or more holsters, belts, etc, so the overall cost is neglibible. Less than an hour's effort will make enough to last a long time. To apply the wax mixture just rub it onto the edges to be burnished. The leather fibers will pick up the wax easily. Only a light to moderate application is needed. Avoid using too much. If the burnished edge requires more wax, just rub on a bit more and then put it onto the polishing wheel again. Felt polishing wheels come in several hardnesses; soft, medium, hard, and rock hard. I recommend the "hard" which do a very good job and last much longer than the softer felt. I buy these from Duro-Felt Products (www.durofelt.com) as cylindrical polishing bobs 1" in diameter and 1" length with a 1/8" shank built in, at about $1.50 each (in dozen quantities). Many other sizes and shapes are available. I like the 1" diameter because it allows me to get into the tighter inside curves. My last order was for 3 dozen over a year ago, and I still have about 20 or so on hand. Those of you using Dremel tools will find that the 1/8" shank will fit your chucks. Each will last for about 150 to 200 uses before becoming overly worn. The hard felt acts much like fine sandpaper on the leather edges, and turning in the drill press makes the polishing action build up heat to melt the wax and force it into the leather fibers. You may even see a little smoky vapor rising from the work. If your edges are well sanded down and dyed before burnishing you should have a very slick finished edge. A smaller holster or pouch might take a minute; larger holsters might take two minutes. A long belt might take four or five minutes. My apprentice easily burnishes two dozen items in well under an hour (then gripes all day about the residue on her hands). As the polishing bob is used there will be small grooves formed that conform to the edges being burnished. If you are doing different colors I recommend using one felt polishing bob for each color to avoid unwanted color transfer. I once discussed this with an older lady (widow, fixed income) at my club who makes candles as a hobby. She expressed some interest, so I have had her making up my wax mixture for me. I pay her $2.00 per 2-ounce cake (which delights her every time) and I don't have to mess around with it. All I have to do is call the nice lady when I see my supply running low, and within a week I have another batch. Maybe I should branch out a bit and start offering burnishing kits with wax and felt polishing wheels? Best regards. -
Edge Waxing Question
Lobo replied to rccolt45's topic in Gun Holsters, Rifle Slings and Knife Sheathes
I like a 50/50 mixture of parrafin and beeswax. I just rub it onto the edges, then burnish on a hard felt polishing wheel turning in a drill press. Takes about one minute per holster, belt, pouch, etc. -
I use panhead machine screws of #6-32 size in lengths of 1/4", 5/16", and 3/8" depending on the thickness of the pieces I am securing. A T-nut is set into the leather from behind, then the male stud of the snap is secured to the T-nut with the machine screw passing through the center hole (where the rivet base would normally go). T-nuts with 1/4" shaft length work well. 1/4" is very close to the thickness of two layers of 7-8 oz. leather. Machine screws can be selected for the length necessary, keeping in mind that one thickness of 7-8 oz. leather is approximately 1/8". I keep screws on hand in the lengths listed above, which seem to meet all of my needs. Buying in small quantities at a hardware store will help you figure out what sizes and lengths you need for your designs. Then you can purchase by the hundreds or thousands and get much better prices. Bolt Depot (www.boltdepot.com) has been a good source with a broad selection and reasonable prices. You'll find T-nuts under the "nuts" tab, and machine screws under that tab.
-
Usmc Wwii 1911 Holster Template
Lobo replied to Semperfidelis354's topic in Gun Holsters, Rifle Slings and Knife Sheathes
The most common holster in use during WW2 by Marines, as well as Army and other forces, was the US M1916 Model Dismounted pistol holster. That model remained virtually unchanged from 1916 to the 1980's, although changing from russet tan to black in the mid-1950's when the US Army changed to black gear. I don't know of a source for a pattern or template, but there are many thousands of GI surplus holsters available and frequently seen on eBay and other sites. If you really wish to make one you should be able to acquire an original to strip down and replicate the pattern. Most of the original WW1 and WW2 production holsters have a good demand from collectors, and prices may range up to $200-plus for those in excellent condition and/or from certain producers. Later production pieces, such as Vietnam era and later, can be purchased for relatively small investment, frequently less than $20.00. There are also a number of companies producing replicas of the originals at varying prices. Some are well made and others are basically junk. Reproducing the original pattern will require a source for the wire belt hanger and Sam Browne-style stud fastener for the flap (which will also require the installation tools). Duplicating those parts may be the most challenging part of your project. The other commonly used holsters during WW2 were the US M3 shoulder holster, and a very few US M7 shoulder holsters (reportedly a special order for the US Marine Corps). Again, originals are in good supply (and also in high demand, especially when found in original and excellent condition), and several companies are offering replicas based (more or less) on the original patterns. The US M3 and M7 shoulder holsters also utilized some specialized hardware including the "pull the dot" style fastener on the retaining strap, and the adjustment buckle on the shoulder strap(s). Again, finding appropropriate hardware may be a challenge. Personally, I would scour eBay and other auction sites in search of original items, which will have and retain a genuine collector value, whereas a replica will never have significant value. All of my WW1 and WW2 era M1911 and M1911A1 pistols have been outfitted with original period-correct holsters, belts, pouches, etc, that I have located on-line. I would look in that direction before I started thinking about making replicas. Best regards. -
+1.
-
Legal Liability Selling Holsters?
Lobo replied to rmhovis's topic in Gun Holsters, Rifle Slings and Knife Sheathes
An excellent example of thoroughly distilled wisdom. Much more could be said without adding materially to the topic at hand. -
A Problem ..and A Solution
Lobo replied to katsass's topic in Gun Holsters, Rifle Slings and Knife Sheathes
There are welts, and then there are welts! Nicely done solution to a problem that ambushed you rather abruptly. I don't think my burnishing wheels would handle that edge. I'm not sure if my Cobra Class 4 machine would stitch that seam! Is that the pistol that Chuck Norris carried on his "Walker Texas Ranger" TV show? My mother-in-law loves that show. She frequently asks me about some scene or another with old Walker kicking butt right and left, shooting bad guys by the dozen, etc. I've tried to explain that in the real world old Walker would be on permanent leave of absence, pending all the grand jury inquiries and lawsuits, but she continues to love that show. Pretty fancy stuff, indeed. Nicely done. -
1911 Dual Mag Carrier Help Please
Lobo replied to Shooter McGavin's topic in Gun Holsters, Rifle Slings and Knife Sheathes
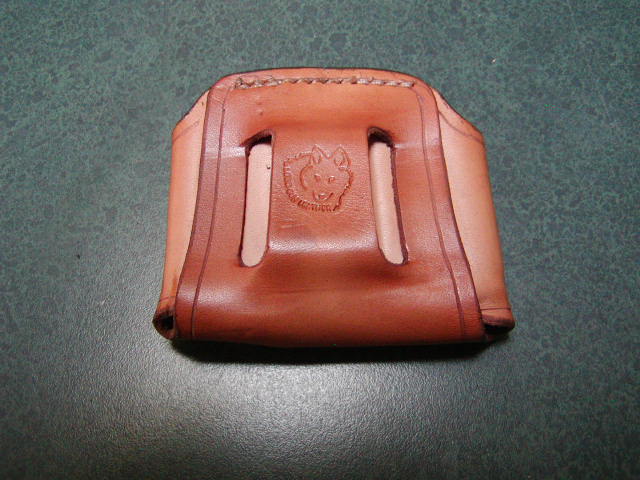
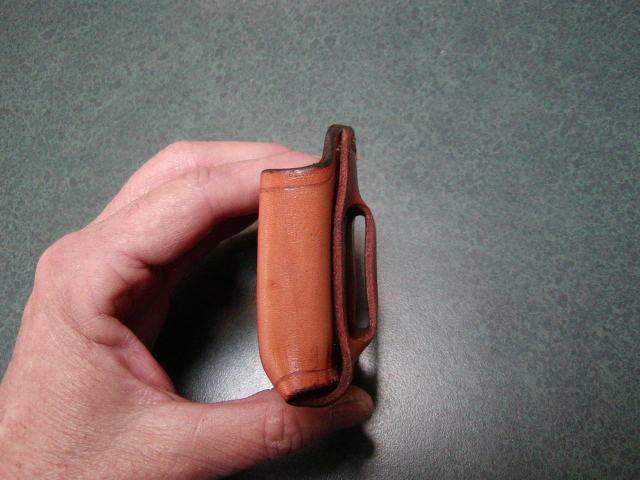
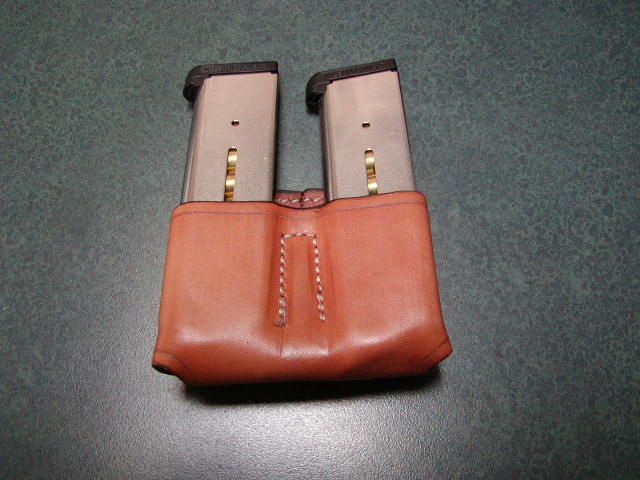
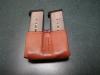
I also receive many requests for double mag pouches. Personally, I never liked double pouches, especially for concealed carry. They can be very bulky, difficult to conceal, and are frequently uncomfortable. When I felt the need to carry two spare magazines I usually use two single pouches, which are much easier to conceal and can be worn in any comfortable and accessible location on the belt. Still, the demand exists and making what the customers want is how we generate a profit. So, after pondering this little problem for some time I started experimenting with a design that is more compact, takes less space on the belt, rides high for comfort and concealability. The basic pattern is T-shaped and a single piece of leather (I used 6/7 oz. on the pouch shown). The outer ends of the"T" are folded in to the center. A small welt is cemented in place, then the "T" ends are cemented over the welt, then stitched together. The tail of the "T" is then wrapped under the bottom and up the back and stitched along the top line. Belt slots can be cut into the back (prior to assembly and stitching, of course) for whatever belt width is required. The welt between the magazines provides the necessary space between the magazines so that they can each be easily accessed. Width and thickness of the welt permit adjustment of the basic pattern for different size magazines. I have found that two patterns are all I need for most applications, one for single-stack magazines and one for double-stack magazines, with welts of different width and thickness allowing considerable flexibility in final sizing. The pouch shown is for 1911-type magazines. The prototype for this design was made for Glock .45 magazines, just about the largest pistol magazines in common use, and the customer reported that it is very comfortable and reasonably concealable. For those requiring a double mag pouch I think this is about the minimum in bulk that is possible. I suppose that it would be possible to use tensioning screws rather than the welt, but that would require a different method of connecting the outer ends of the "T" forming the back of the pouches. Best regards.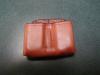

-
Customer seeking IWB-style holster for Glock 30 with Viridian C5L laser light. Unless you have this combination in your shop this will require a maker who will pattern and form to the customer's piece. If interested please send me a message with your e-mail address to forward to the customer.
-
Horsehide tends to have a very dense structure that resists moisture infiltration more so than cowhide, which gives some advantage in IWB-style holsters that are subjected to moisture and body heat in use. A well sealed horsehide holster provides increased protection for the weapon, along with reduced tendencies for mold and mildew formation. The greater moisture resistance is evident during the wet-forming process, and also when dyeing a piece. Getting good, even color saturation can be a challenge. Horsehide also tends to have greater strength, allowing it to retain the molded shape, so lighter weights can be used. This offers another advantage in IWB-style holsters by reducing the bulk of the holstered handgun. I've had difficulty locating reliable supplies of good horsehide over the years, so I have been reluctant to offer horsehide holsters. No sense in advertising something unless you know you can fill the orders.
-
Very nice work. Vintage design reminiscent of the Threepersons' style, but with a little higher coverage. I like the way you have boned the leather into the forward portion of the trigger guard on the outer, and well into the trigger guard on the inner. Does not appear to have a welt in the main seam, which you might want to consider for future production. The welt will add some strength and rigidity, and also allows for closer fitting to the handgun. There are lots of "new and improved" designs out there, but the classics will never go out of style.
-
Summer Special First Attempt
Lobo replied to redhat4201's topic in Gun Holsters, Rifle Slings and Knife Sheathes
Redhat: Very nice looking work. If you are making these for yourself I can see no issue with calling them "Summer Specials". If you are making these for sale I would recommend against using another maker's tradename. Best regards. -
Best suggestions I can make regarding the Tippmann Boss are these: The operating handle (aluminum casting) attaches to the upper helical-shaped drive gear (zinc alloy casting) with a 1/4" X 20 cap screw. That cap screw absorbs all of the force during operation, including the "bumps" at top and bottom of the stroke. The screw can work itself loose frequently, so be sure to tighten it before every use, but don't torque it down too hard or you can damage the zinc alloy gear threads. When relying on the Boss (I've had two of them) I always kept a supply of Schedule 8 grade cap screws on hand, and changed that screw once per month to avoid metal fatigue resulting in breakage of the screw. When that cap screw breaks off you will have to disassemble the upper side of the machine, remove the gear from the shaft, use a drill press and broken screw extractor to remove the broken screw, reassemble the machine and re-time it. Time consuming and frustrating. Changing out a 25-cent cap screw once per month can save you many hours of work. Screws come in many grades, with Schedule 8 being the industrial type; what you find at the hardware store may be less than ideal. That helical-shaped drive gear can also break, so a spare or two on hand can be a good idea. The two-piece rack-and-pinion drive piece can also wear, and can break, so a spare or two can by handy to have. A quick referal to your schematics should locate the part numbers of these pieces. A call to the nice folks at Tippmann will get a supply of spare parts to have on hand for WHEN one breaks (not IF one breaks). Best regards.
-
Rubbing Alcohol Wet Molding Holster
Lobo replied to Clay B's topic in Gun Holsters, Rifle Slings and Knife Sheathes
Clay: Isopropyl (rubbing) alcohol can be used in lieu of water. Either the 70% concentration or 90% version will work. Alcohol evaporates very rapidly, so working times can be short. Forming and boning work need to be done pretty quickly. A piece can be dunked again if necessary and the work continued. The results are comparable to water-forming followed by heat-drying, with a very rigid result being typical. I think that the alcohol has a greater tendency to reduce the natural moisture content of the leather, so some thought might be given to replenishing some of the moisture as part of the finishing process. I use modest applications of neatsfoot oil for this reason. I have used this method when working on larger orders that have to be completed in minimal time. A word of caution: do not try to use a heat source for drying holsters saturated with alcohol; it is flammable. Best regards. -
My Latest Threepersons
Lobo replied to mattsh's topic in Gun Holsters, Rifle Slings and Knife Sheathes
Rayban: You are right; I am always that way. Logic and common sense seem to drive my thinking far more than any other forces. I've carried a sidearm just about every day since 1968, much of that time using double-action revolvers in holsters with open trigger guard areas. I continue to produce the classic Threepersons' style holsters for those who value the traditional design, and I have commissioned (read: "spent the money to have the work done") carving artists to recreate the original carving pattern of Tom Threepersons' personal holster, now in a private collection. The results remain very much in demand, regardless of the prejudice against open trigger guards now prevalent due to the common use of certain handgun designs that seem to have developed a history of accidents. I see in your bio that you are interested in "beer research". You might be interested to learn that I was awarded first prize at the State Fair home-brewing competition for my home-made beer, some 19 years ago. I extend an open invitation for you to stop by and have a taste of real beer, maybe a cigar or two, any time you are in the area. I will also provide spine-tingling tales of personal history from my colorful life as we pop a few caps, tip a few bottles, and sample a brew or two. Then we can go to the range! The Fed's aren't the only people who understand the connection between Alcohol, Tobacco, and Firearms! Best regards. -
Interesting situation. The gentleman involved was straightforward in admitting that he continued to use a holster displaying obvious signs of wear and tear in a critical area around the trigger guard. He also indicated that he will be speaking with his insurance company to see about getting the damage to his car repaired. It is possible that his insurance company will attempt to subrogate the claim elsewhere, perhaps on the holster maker or the handgun manufacturer, or both. The gentleman involved does not have to pursue liability claims against the holster maker or the handgun manufacturer; just making a claim on his automobile or homeowners policy could result in a ripple effect. Having one's business activities under a corporate structure provides some protection of personal assets from claims. Having a good insurance policy provides added protection. Worth considering, even for the smaller producers. Good post.
-
Blackhawk Orange Dummy Guns
Lobo replied to PHIPPS CRAFTED LEATHER's topic in Gun Holsters, Rifle Slings and Knife Sheathes
I picked up a couple at a sporting goods store's clearance sale, the 1911 with rail (cocked & locked) and the J-frame 1-7/8" (shrouded hammer model). Both have been completely satisfactory over a year's use. -
What Thread Size For Holsters
Lobo replied to NC Holster Maker's topic in Gun Holsters, Rifle Slings and Knife Sheathes
I use T270 (277) bonded nylon thread for everything, top and bottom. Plenty of strength for the task, in my opinion, and a nice neat appearance to the finished stitch, even at the overstitched areas where a stitch-line is completed. The only advantage I can see to using a lighter thread weight for the bottom thread would be to increase bobbin capacity, reducing the need to wind bobbins. My Cobra Class 4 machine has an automatic bobbin winder, winds a bobbin while you stitch, so I always have a full bobbin ready to go, and changing bobbins takes only a minute or two. Best regards.