


Rockoboy
-
Posts
1,422 -
Joined
-
Last visited
Content Type
Profiles
Forums
Events
Blogs
Gallery
Posts posted by Rockoboy
-
-
I use John James size 2 (NOT the larger 2/0) for most of my sewing. The main exception is when I am using very light weight embroidery thread or 0.6mm Tiger thread on 0.8mm kangaroo at 3.0mm spacing. It is a personal choice, depending on the look you prefer.
-
WOW!! Just WOW! All of your work is amazing, but I especially like the sunflowers. The placement of your makers mark, and the bug on the flower petal is a tiny bit of whimsy. So interesting and well made.
-
Nice looking job. The 1st thing that came to mind, is the edge distance of your stitching. I think slightly closer to the edge of your project might be a better look.
Second thing is your stitching. It looks pretty good, but my OCD forced me to comment on 2 lines head south and 3 lines heading north! ARRRGGHHH!

Also with your stitching, I start my stitching in the 3rd or 4th hole, stitch 2 or 3 stitches back to the beginning, then do the whole length and finish by back-stitching the same 2 or 3 stitches to lock off the thread. Where possible, I would finish near the top of your case, so I could hide the end of the thread inside the case.
-
WOW! What a tutorial. Between what @RockyAussie and @Handstitched have posted, I am sure that I can find a use for my croc back-straps now!
-
On 8/2/2019 at 10:07 PM, Matt S said:
I only need to use a few ml at a time so a tube's going to last some time!
When I have a part tube of silicone or something similar, to stop it curing in the tube, I screw a wood screw into the nozzle while the contents are still tacky to form a seal. Sometimes, if I can be bothered walking into the house to get some, I will also wrap plastic film (locally called Glad wrap, but same as Saran wrap for those who use that terminology). I have some tubes of gap filler, construction adhesive and silicone that are more than 2 years old and still good-to-go.
-
1 hour ago, Kolton45 said:
'a bit to regular' what do you mean by that?
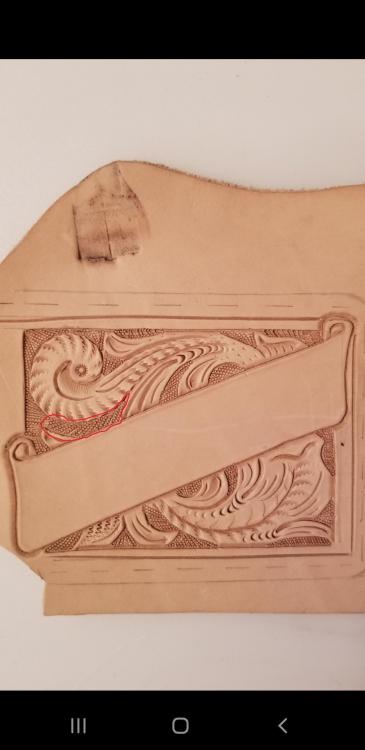
In your original picture, the piece I have outlined appeared to be straight lines of backgrounding, whereas the other areas appeared more random.
When I zoomed your picture out to see the detail better, I see you have used a bar grounder, for the background.
So, of course the background is a series of straight lines, but the area I have outlined, does stand out a little more. Not a huge discrepancy, just the first thing that caught my eye.
I have never tried a bar grounder. I (attempt to) use a random backgrounder or a matted backgrounder.
-
I have never seen this type of clamp before. They look, almost, made for a specific tool or machine. I would be trying some of your major tool suppliers, Harbor Freight etc (Not sure of other tool suppliers available to you).
-
That all looks pretty good to me. Maybe the background is a little patchy in some areas and a bit 'to regular' in some areas, specifically above the scroll on the left, but overall I would be very happy with this result if it was mine..
-
My first thought was a tool to stretch something, like shoes, but then I noticed that the cross hatching is on the inside of the 'jaws'. That would tend to indicate its for gripping something. The holes are not placed where I would think they need to be to be a spring closure, especially the bottom side where the hole is on the protruding piece.
Maybe with a correctly shaped handle, the lever at the top near the handle would ride on the handle as the handle is twisted to tighten the tool. The holes in the 'jaw face'? No idea on them thar holes, by gum!
-
It appears that you have a strip of leather about 2inches wide that has been folded in half and stitched. More pics may give a better idea.
Finding a folder to assist you with this process would depend on the machine you are attaching it to, but I am guessing they should be readily available for most machines.
-
12 hours ago, Handstitched said:
Rockoboy This might be helpful to you.
Thank you HS. Besides Tiger Thread from Abbey England, I get some thread from a mob in Bibra Lake, they're called Paskal Australia, but not much good recommending them to the OP.
-
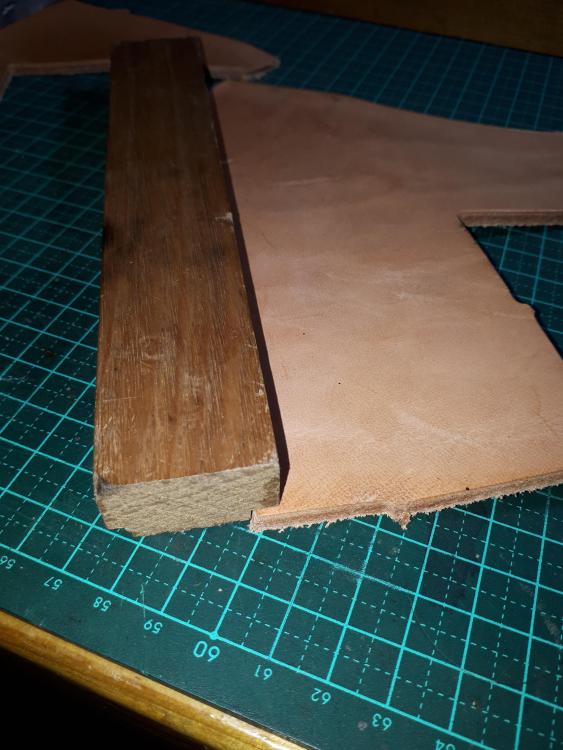
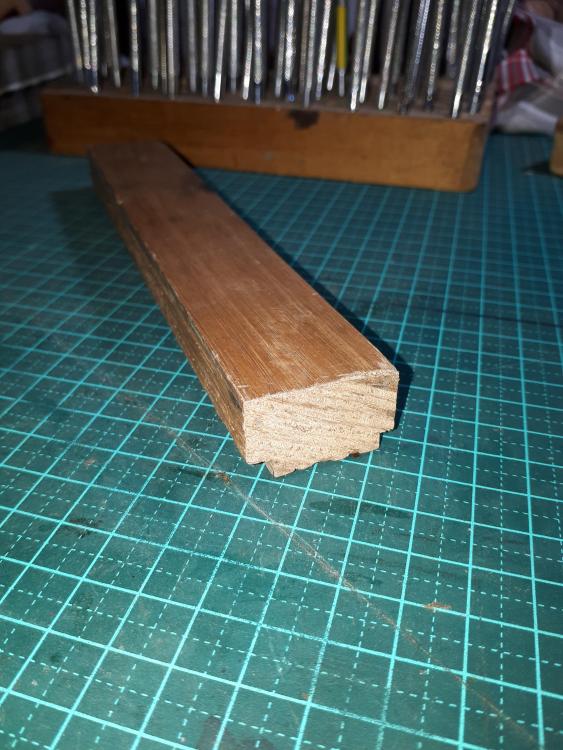
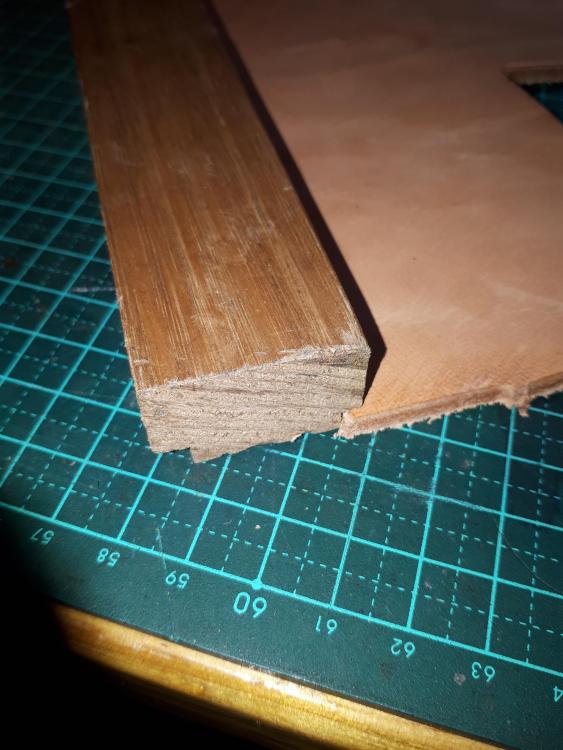
Here you go @JamesR.
Pics hereabouts, of my basic edge stamping guide.
You can see the two rebates on this little piece of timber. One side is a little deeper so that makes the edge stamping a little further from the edge.
-
Unfortunately our postal (dis)service let me down. I have to call my swap from @KAY9, lost!

-
I am not sure exactly of how deep your red is, but I use Ritza Tiger Thread. They have quite a good range of colours. I know they have a 'fire engine red', but they might have something that suits what you want.
-
1 hour ago, dfrensdorff said:
do you know if they can simply press in initials, without using gold foil?
I have never used the Kingsley Letter Sets, but I have used other letter stamps, so I don't see why it wouldn't be possible to use without foil ... anybody got any other thoughts?
-
Very neat and tidy. I like the look of all of them.
Is that an outer pocket on the bigger tote? Are the totes lined?
-
I cannot see any defect. This whole piece is better than TOTALLY AMAZING! I am another person in awe of your amazing talent.
-
Nice looking belt. I always wet form my keepers. I believe it looks more finished.
-
I don't recognise those numbers. What is the design?
-
When using contact cement, I have found if I get any squeeze-out, I can rub with a piece of canvas to remove the glue. I have also successfully cleaned contact cement off a face surface with canvas. Just make sure you get to it before it fully cures.
-
As a customer at this type of venue and a very occasional vendor, I really like the idea of doing some small task connected to the pieces you are selling, ie skiving in preparation for next weeks batch of cases or cutting out some projects, but I believe if your attention was taken away from your saleable goods, you would need to have a salesperson watching over the retail side of the booth. Even with a fully attentive person watching a booth, sometimes things go for a walk!
As for the video idea, I would only use this idea IF there was a dangerous/smelly/otherwise offensive process or needed heavy equipment to illustrate, but I would not have it on loop.
-
If you have a Tandy store close enough to you, I believe you could utilise their classes to try out some tools, techniques, finishes etc. Once you have some practice with some tools, it may become more apparent which tools are worth buying cheaper and which tools are better bought at the higher end of the market.
Basically, I believe box cutter (Stanley knife type) are great for general purpose cutting, as are roller knives (Olfa brand etc) better for cutting straight lines on softer leather. Strap cutters, plough gauges etc are great once you get into the craft a little, but a knife and straight edge will do great for a while. I also use a cutting matt with the lines marked on the cutting surface.
Dividers and a scratch awl for marking cut lines and stitch lines.
Stitching chisels are my preference, rather than pricking chisels or a stitching wheel, which I hammer right thru to make my stitch holes.
Needles made by John James in size 2 (NOT 2/0) are my preference in my cases.
I have several different thread options. My favourite is Ritza Tiger Thread, but some people prefer linen or some other variation. Tiger Thread comes ready waxed in different thicknesses and many different colours. You could possibly get by for a while with a generic 'no-name' thread, but I would suggest waxing it.
If you are looking to get into carving and stamping, there is a whole raft of books and videos that might help.
In the beginning I would suggest getting the following stamps in a similar size - beveller (couple of different sizes to do straight sections or get into corners), veiner, camo, pear shader, seeder, a stop and backgrounder maybe a basketweave for fun. Some people will say a mulesfoot, but I find them difficult to line up correctly, so I don't use it
muchat all. As for a swivel knife, they are fairly cheap, and you will probably end up with several, each with their own blade. So a Tandy cheaper in the beginning, is a good option IMHO. -
3 minutes ago, FarfarsYxa said:
The axe used to belong to my grandpa's
Very nice. I could see it held a deep meaning to you.
-
You could also use this jig to stamp a border along an edge. A friend showed me his design, which was a simple version of this. Pics to follow when I get a chance to take some.


disk, cutter,
in Leather History
Posted
Is this the same as a drive punch?