.jpg.d60258221c476480a6e073a8805645bb.jpg)


TomWisc
-
Posts
107 -
Joined
-
Last visited
Content Type
Profiles
Forums
Events
Blogs
Gallery
Store
Everything posted by TomWisc
-
Hi Regan, I looked at the web site for Tail Spin Bracelets and they have some nice items for hair. First time I have seem their products. With regards to using ashes in glass, following is a Face Book forum that addresses putting pet ashes in glass. Basically the way this works is the ashes are placed usually between 2 layers of glass and it all is melted together in a kiln at about 1475 degrees creating one solid piece of glass containing the ashes. The glass can be formed into different shapes & different colors of glass can be used. Assuming you use Face Book: type "fused glass fanatics" in the 'search' bar at the top of your screen. When their page comes up, on the left side of your screen is a bar "search this group" type "pet ashes" in this bar and it will bring you to dozens of members discussing how to do this and also several who will use pet ashes in glass for a customer. If you can't find this info let me know. Tom
-
Hi Regan, I will check out their site. Also I will try to find the references I mentioned in a few other FB groups that do glass fusing. It will be tomorrow before I can do this, getting late tonight. Tom
-
Hi Regan, Sorry for your loss. My dog is my best friend also and dread the day we have to say goodbye. I am not sure how to incorporate hair into a leather item but I do glass fusing and know people have incorporated pet ashes into a glass item. Most do like a pendent that can be worn on a chain. You might do something like that and incorporate into a leather bracelet or something. Let me know if you want any info on glass working forums, etc. Tom
-
YinTx I received the craftaids I ordered from you today also. Excellent shape! Thanks for the prompt shipping!
-
Hi drzeller, I realized there was a wood support missing on the chair and I had the support made. Without the support the seat was only about 12 inches off the floor. Now the seat is at the proper height but the geometry of the back makes it a bit unstable. If you lean back the least bit the chair will tip over. I had to put it aside with the holidays approaching due to other leather items I was making for Christmas. I am going to bring to chair to a local wood worker to get his 2 cents before continuing. I think I can modify the chair frame to make it work then I will proceed with the leather. I have an idea to tool a wildlife scene on the back but I am pretty new to tooling so it will be a challenge. I have a friend who is an excellent leather tooler so I have him to give me some pointers along the way. I have to finish a few other projects so it may be a few weeks before I get back to the chair. I am also pretty good at procrastinating! Thanks for the interest, Tom
-

A different sort of wallet
TomWisc replied to lovetocreate's topic in Purses, Wallets, Belts and Miscellaneous Pocket Items
The eye is recessed in the pigskin to make it look totally real! That is such a cool idea! And the pigskin looks like part of a face covering the eye. Very creative! -
I would like to have 6578 and 6579. Contact me to let me know the total and how you want payment. Thanks, Tom
-
If the knife is still available I will take it. PM sent
-
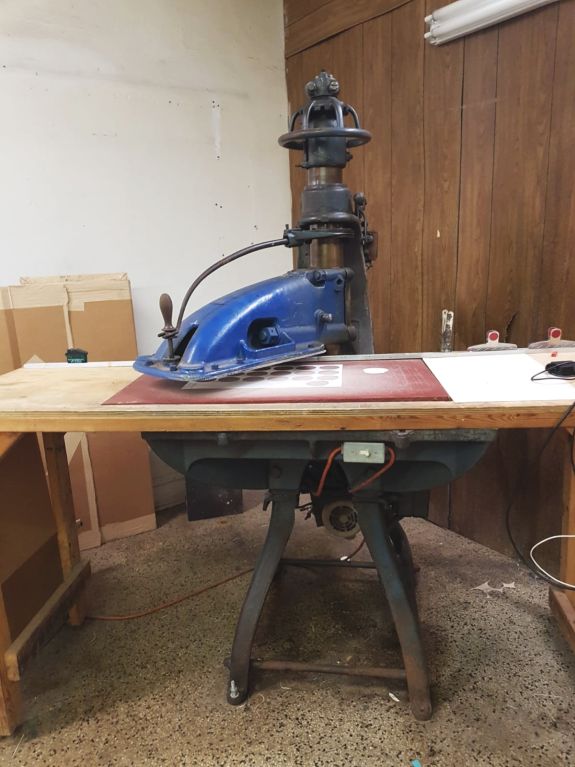
Can this clicker press be used for leather working
TomWisc replied to TomWisc's topic in Leather Machinery
Thanks for the responses. It was for sale at an online auction and I couldn't get in to see it first. Also I am just doing simple things and it probably would not get used. I saw it 2 days before the auction closing and didn't know enough about it before the auction closing. Sold for $60.00, yes SIXTY DOLLARS! -
Lots of good advice here. I have been doing leather working for less than a year and although I wanted to start on a complicated project right out of the gate, I did a couple rounders and a coin purse first. It was a little frustrating doing easy projects but I learned a lot from them. Next I did a belt. No tooling, just a basic simple belt. I was so excited to have actually made something useful that I still wear that belt every day! I have made nicer belts since then but I proudly wear my first belt everyday! It reminds me of how I felt when it was done! Since then I have made a couple of archery arm guards, a few portfolios, and some tote bags. Now I am making my first wallet. It's like woodworking, probably better to make a cutting board before trying to make a china cabinet! Good luck to you and welcome to the wonderful world of leather!
-
I am wondering if this clicker press can be used for leather working? I know nothing about them but see this item for sale and if possible would use for wallets and small pieces for bags, etc.

-
Thanks, alpha2. It was a good exercise in sharpening!
-
I got this at a consignment/resale/junk store for $1.00. It was full of tar, apparently used to clean other tools like a scraper. This was the second store I went to and decided I needed to leave with something. The blade tapers from a potentially sharp edge to 1/4" in the handle. I thought for a buck I would see if it could be cleaned up and used for skiving/cutting leather. I wish I took a 'before' picture. So after cleaning all the tar and gook off it I sharpened it. It actually works pretty well for careful skiving and cuts leather like a dream! Old tools are pretty cool! You may not know what it was intended for, or used for, but I think it is great to repurpose them and give them a new life!


-
Well, I am relatively new to leather work, and I'm sure others here will give good advice but I think if you punch the holes for sewing before you apply the dye you might be getting dye residue in the holes which is sticking to the thread. I imagine if you punch the holes after dyeing there may be original leather color visible so I'm not sure if this would work. Maybe try a scrap and punch holes after dyeing and see what happens to the thread color. Good luck!
-
Another belt
TomWisc replied to Rockoboy's topic in Purses, Wallets, Belts and Miscellaneous Pocket Items
I am having problems resizing a picture but here is what I did. My terminology may not be accurate so bear with me. I wanted a zipper foot to allow me to stitch closer to the edge of the belt. I went to my local guy who I bought my Seiko, STH-8BLD-3 from and he took 2 standard 'lifting pressor foot' pieces and cut right side off one and left side off the other giving me basically a set of zipper pressor foot pieces. Using the left 'pressor foot' piece I can sew very close to the edge of the belt. I also got a basic edge guide from him that can be screwed to the base of the machine and adjusted. With this combination I can get as close to the belt edge as 1/8" which looks good on an 1 1/2" or 1 1/4" belt. -
Another belt
TomWisc replied to Rockoboy's topic in Purses, Wallets, Belts and Miscellaneous Pocket Items
Very nice belt! I thought of using deer hide for a liner but I thought it would be too light/soft, but yours looks great. Did you glue the deer hide to the face leather before sewing? Also, did you burnish the finished belt with the deer hide attached or use edge paint? Either way, very nice job! -
Whatever he does, he will need a piece of granite or marble. They can be expensive. I stated leather working a little less than a year ago. I went to a local cabinet/countertop store and got a 1 foot square piece of marble for $10. It was a discontinued pattern sample. They also had smaller granite samples of discontinued product.
-
I am interested, how do I contact you?
-
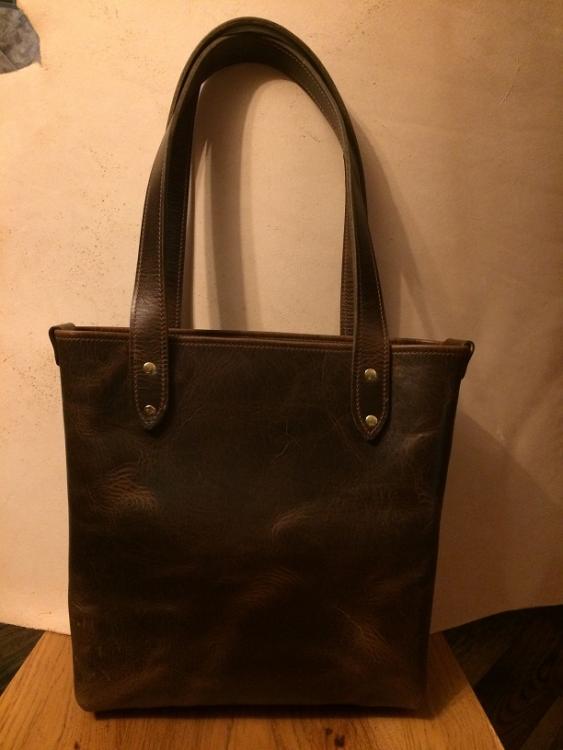
My first tote bag
TomWisc replied to TomWisc's topic in Purses, Wallets, Belts and Miscellaneous Pocket Items
Thanks Gary & benlilly1. Chrisash, it is mostly sewn on a machine. The bottom is hand stitched. -
Not sure about web sites but Tandy has an In-Store Black Friday sale going Friday through Sunday.
-
I have been following this group for several months and have learned so much from all of you. This is my first tote bag. I used Ian Atkinson's Build Along for Messenger and Tote Bags and also followed Ryan from Little King Goods tote bag video. They were both very helpful. Leather is Wheat Harvest (I think) from Acadia Leather. Most of the sewing was done on a machine. A few things I learned to do differently next time. Sorry I don't have more pictures, maybe tomorrow when I can use natural light. Size is about 13" wide & 12" high. What do you all think?
-
Hi Ray, I live in Milton, south of Madison. Kinda far from you. But, hopefully you can find either a community college that has leather working or maybe a local group, like the senior center, that offers something. And if they don't, no harm suggesting they look for a local guy to organize a leather working class. They are always looking for new activities. Maybe someone on this forum lives in your area and would like to get together with other leather workers to share ideas.
-
First Tote bag
TomWisc replied to AndyNext's topic in Purses, Wallets, Belts and Miscellaneous Pocket Items
I am making a tote bag also using Ian Atkinson's Build Along plan. I have made a few changes but pretty similar to yours. I really like how your bag turned out, nice contrasting colors. It looks like you stitched the handle on one side and not on the other side. Just wondering why you did that? Do the rivets alone supply enough strength? I have been trying to figure out a good closing mechanism and of course over thinking it. Your method of using a simple closure is perfect! Thanks for posting! I will post my bag when it is finished. -
Welcome Ray, I have learned so much on this forum. Great people willing to help! I am from Wisconsin also. The local Senior Center has lots of things going on and there is an experienced leather worker who comes once a week to help anyone interested in learning leather work. He is a great guy. if you are retired, you might check to see if your community has a leather working group to join.
-
You can look at Tandy online and order items to be shipped to you. An easy but useful item to make is a simple belt. You can order a belt blank & buckle from Tandy. There are several good youtube videos out there on simple belt making. I like Ian Atkinson's videos. You don't even need to dye your first belt. I used Neetsfoot oil from Tandy for my firstbelt. You will need to sew the buckle end or use rivets. To start with you can use a utility knife with new blades, a punch for the holes in the belt, a slicker stick to burnish the edges. rivets & rivet tool, skiving tool & blades, an edging tool, a nylon cutting board, piece of granite or marble. I got a 12" square of marble from a cabinet shop. It was a discontinued color and $10. I am probably forgetting something and others will give more advice but don't get carried away with tool many tools and finishes for your first project. Good luck and enjoy!