Cowboy316
-
Posts
361 -
Joined
-
Last visited
Content Type
Profiles
Forums
Events
Blogs
Gallery
Store
Everything posted by Cowboy316
-
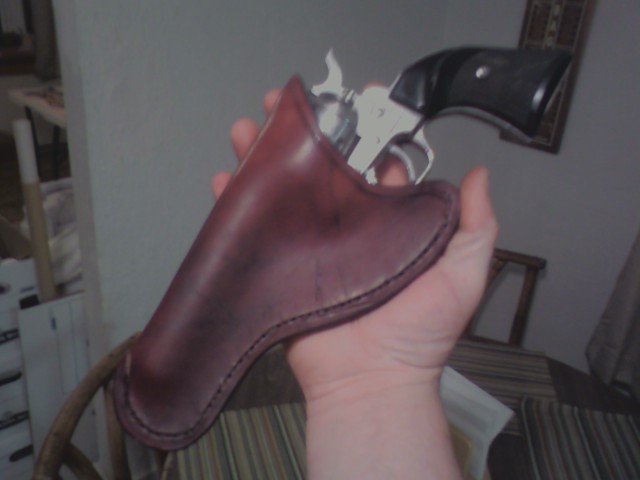
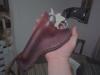
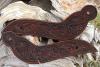
howdy guys and gals thought id post this pics for laugh to show my improvment im my holster makeing i cam across the pic of my very first holster mad bout a year ago this month if i remember right enjoy and feel free to laugh till you fall out your chair LOL Cowboy316
-
Bearman those mauls are just awesome would love to have a good maul for my tooling but right now things are slow here so money is tight but i will keep ya in mind when im ready to buy one Cowboy316
-
hey Josh best of luck my friend if i was closer id come help ya move just to get to know ya LOL my the good Lord light up the path for you and good luck Cowboy316
-
Some cool stuff
Cowboy316 replied to jbird's topic in Purses, Wallets, Belts and Miscellaneous Pocket Items
Josh id be proud to wear a hat like that Tim -
Some cool stuff
Cowboy316 replied to jbird's topic in Purses, Wallets, Belts and Miscellaneous Pocket Items
Howdy Josh flat out awesome work there buddy love the inlay work and love the knife also great work bud keep it up Tim -
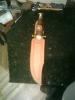
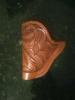
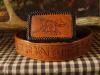
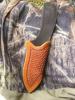
howdy guys and gal just thought id post some of my newest work then knife sheath is for the bowie i traded some antler for(this is a pic of the sheath before going into the walnut dye) the little holster is for a .38 Smith & Wesson 2 1/2 inch snub nose and the bigger holster is for a .45 semi auto enjoy and thanks for the support Cowboy316
-
ok ok you guys asked for it heres my pic and btw im the one hanging on the wall LOL Cowboy316

-
Vinegeroon Questions
Cowboy316 replied to Vikefan's topic in Dyes, Antiques, Stains, Glues, Waxes, Finishes and Conditioners.
howdy guys and gals heres a little right up on the stuff from Mr Chuck Burrows hope this helps Cowboy316 1) Black: VINEGAR BLACK (aka Vinegaroon - these are original old formulas) For giving color to the grain of leather there is no blacking that will at all compare with the well known vinegar black. This may be made in various ways. The simplest, and, without doubt, the best, is to procure shavings from an iron turner and cover them with pure cider vinegar; heat up and set aside for a week or two, then heat again and set in a cool place for two weeks; pour off the vinegar, allow it to stand for a few days, and draw off and cork up in bottles. This will keep for a long time, and, while producing a deep black on leather, will not stain the hands. Another method is to cover iron scraps with sour beer, and allow them to stand for a month or more; then strain off the beer and bottle as before. A third method is to boil sulphate of iron in vinegar; mix some brewer's yeast with beer and allow it to stand for twenty four hours, then skim off the yeast and add the vinegar. Instead of iron shavings you can use steel wool. To use the steel wool burn off the oil first - I dip it in acetone and use a propane/blow torch and light it off in an old pan with a lid, just in case you need to put the flame out. Take all precautions and it will work fine. The only problem with steel wool is it often has copper and other metals in the "mix" which can sometimes add a greenish tint. After the "dye" (actually it's a reagent) dries I then neutralize with a slurry of baking soda and room temp water, about a 1/2 cup baking soda to a quart of water. Then I let the leather dry until just damp and apply a light coat or two of oil (I generally use olive oil, Lexol, Conditioner, or Lexol non-greasy Neats Foot). When the "dye" first dries it may look bluish or grayish at first and sometimes a second coat is needed, but normally the neutralizing and oil will turn it black. -
hey Jo great info and i love the video clips on their site makes me wanna get one right now Cowboy316
-
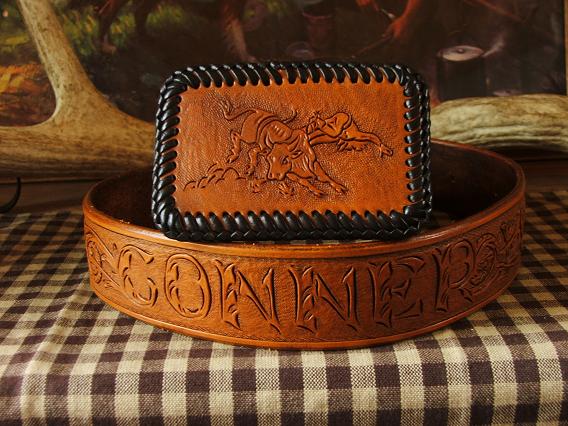
howdy Guys and gals here are some reciepies that ive gotten over the last few months hope these help all that are wondering bout natural dyes Here's some instructions for some of the old time dyes I'm working with these days: 1) Black: VINEGAR BLACK (aka Vinegaroon - these are original old formulas) For giving color to the grain of leather there is no blacking that will at all compare with the well known vinegar black. This may be made in various ways. The simplest, and, without doubt, the best, is to procure shavings from an iron turner and cover them with pure cider vinegar; heat up and set aside for a week or two, then heat again and set in a cool place for two weeks; pour off the vinegar, allow it to stand for a few days, and draw off and cork up in bottles. This will keep for a long time, and, while producing a deep black on leather, will not stain the hands. Another method is to cover iron scraps with sour beer, and allow them to stand for a month or more; then strain off the beer and bottle as before. A third method is to boil sulphate of iron in vinegar; mix some brewer's yeast with beer and allow it to stand for twenty four hours, then skim off the yeast and add the vinegar. Instead of iron shavings you can use steel wool. To use the steel wool burn off the oil first - I dip it in acetone and use a propane/blow torch and light it off in an old pan with a lid, just in case you need to put the flame out. Take all precautions and it will work fine. The only problem with steel wool is it often has copper and other metals in the "mix" which can sometimes add a greenish tint. After the "dye" (actually it's a reagent) dries I then neutralize with a slurry of baking soda and room temp water, about a 1/2 cup baking soda to a quart of water. Then I let the leather dry until just damp and apply a light coat or two of oil (I generally use olive oil, Lexol, Conditioner, or Lexol non-greasy Neats Foot). When the "dye" first dries it may look bluish or grayish at first and sometimes a second coat is needed, but normally the neutralizing and oil will turn it black. 2) Brown: I use black walnut hulls (If they are not available locally - the fresh green hulls are best - you can buy them dried on line from various vendors - to find a vendor search for walnut dye, etc.) Put a pound or so of the crushed hulls in an old stocking and place in a pan of distilled water so that the water covers the walnut hulls about an inch. Cover it and simmer at a low boil for several hours and then let cool overnight - keep an eye on the water level. The next day boil again and let cool overnight. Again watch that the water level does not get too low, but you do want it to get fairly thick. Once it's cool drain off the liquid be sure to squeeze all of the liquid out of the bundled walnut hulls. Save the walnut hulls - hang them up to dry and you can use them a couple of times more. The liquid will go bad so either keep it frozen or add 3/4 of a cup of rubbing alcohol to a quart of the dye. This is the dye I used on the Slim Jim in the DVD. It will come out anywhere from a light brown/gray to a dark grayish brown before oiling (I use light olive oil a lot for oiling and then set it in the sun to darken) - the color will depend on the leather - every piece is different, how long you let it soak, and how strong the dye is. I always do a test on a scrap of every new hide, I use only American tanned hides - mostly from Wickett & Craig. You can also mix the two dyes, which gave me a rusty/black on the pieces shown below. I used a 60/40 mix of walnut to vinegaroon on the belt and a 75/25 on the holster: MAKING COFFEE & NUT DYES = HOW TOO's Just so this doesn't get more complicated than it is. #1 , DARK ROAST COFFEE 1# CAN OR MORE, it's up to you, I make about 10 to 12 QT. with this, and I use a 20 qt. pot with lid, if you have a 20 qt. iron pot with lid , use it if you can lift it... #2, use some IRON, SHAVINGS, IRON NAILS NOT PLATED OR GALVANIZED, JUST SIMPLE IRON NAILS, a lot of your finish nails are iron, if it will rust, or will stick to a magnet it has IRON IN IT, but you want to clean off any oil or grease it may have on it before you put it in your pot, steel wool is OK but you have to burn the oil out of it, which is a pain, LOTS OF SMOKE. WITHOUT IRON AS A MORDANT, YOU CAN'T ACHIEVE MUCH COLOR, IF AT ALL......( IMHO ) especially if you want a deeper darker color. #3 with 10 to 12 QT. of water in your pot, bring it to a boil, then turn the flame down to a slow simmer, and let cook with the LID ON, for about three hours or so, let cool over night, and then do the same thing again the next day, if you want to cook it three or four days go ahead and do so, just make sure you keep your water up and don't let it boil dry, and leave the lid on through the whole process. #4 AFTER THE COFFEE DYE HAS COOLED, you can pour the whole works, COFFEE/COFFEE GRINDS/IRON/DYE, in a thick plastic container, for what ever size you need for what you're going to dye, ( small and deep for holsters ) ( large and flat for belts ) #5 PUT YOUR LEATHER in the container, and leave it SUBMERGED for 24 hours or more if you want. #6 REMOVE YOUR LEATHER from the container, if it is a holster , you want to do your wet molding now, and let dry for 24 HOURS. if it is a belt, lay it out straight, so it will dry the way you want it. #7 APPLY LEXOIL CONDITIONER, both sides of leather and let dry for a couple hours. #8 APPLY NEATSFOOT OIL, a couple coats should do, but you can vary the color with the amount of oil you put on, LET DRY OVER NIGHT. #9 THE FINISH is up to you, you can leave it the way it is now, or you can do like I did by using Gum Thraecanth at 40/60% water, and Bag Kote at 40/60% water, I use a spray bottle to apply this, just apply as you want and rub in, and when it looks the way you want , STOP... YOU can also finish your burnishing at this time. #10 IF YOU WANT AN ANTIQUE LOOKING holster or belt, you will want to bend and twist your leather, to put some wrinkles in the leather, and give the leather that used look. #11 AS A FINAL STEP, I apply a coat of Skidmores Leather Cream, #12 NOW YOU WANT TO STORE YOUR DYE, I put the works in a empty cleaned CAT LITTER container, and I add a 1/2 cup of Rubbing alcohol to every QT. of dye, put the lid on tight and store. #13 WHEN YOU WANT TO USE IT AGAIN, it will help to pour it all back in the pot and cook it again, the alcohol will burn off real quick, and you will have to add more at the end of your dying work, but this helps activate everything, you could even add more coffee at this time, #14 JUST A NOTE, your dye should look like OLD MOTOR OIL, a dirty black, the Mexican one loop holster I did was dyed for 24 hours, and you can see the color of the coffee that came out when the leather was oiled, so have fun with this, you can create just about any shade or color you want by testing on scrap leather. #15 When doing the NUT DYES, Get the nut as they have fallen off the tree, when the hulls are Green, you will get better color out of the Green hulls, you can use the other , but the green works best. you want to remove nuts after cooking and before submerging your leather in the dye, you can hang the nuts up in a stocking and let air dry, or you can freeze them and use them again, also when cooking the nuts, I like to cook them for three days with the cooling in between, and when dyeing I leave my leather work submerged for five days, this longer time allows the color pigment to really get into the leather. Follow up the same as the Coffee dye. I hope this will make it easier to follow how to make these dyes
-
Jim and Jo keep up the great work you guys do Cowboy316
-
More pics from IFoLG 2009
Cowboy316 replied to Johanna's topic in Special Events, Contests and Classes
Hey Jo great pics you take there more i see those pics of what others produce i sit here and think im way out of my league if i think i can compete with these guys LOL but it never hurts to try thanks for the great pics and all your hard work Cowboy316 -
Cowboy Holster Tutorial
Cowboy316 replied to Jim's topic in Gun Holsters, Rifle Slings and Knife Sheathes
Outstanding Jim i love how you go into detail on laying out the mark to get the curve of the pistol now that ive seen this ive been doing it the hard way LOL just an awesome tutorital thanks a ton for it ill use it daily Thanks Cowboy316 -
new work from Cowboy316
Cowboy316 replied to Cowboy316's topic in Gun Holsters, Rifle Slings and Knife Sheathes
hey Josh ty for the kind words im greatful and as for sewin the sheath i just took the pic to post it Cowboy316 -
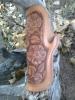
howdy guys and gals been awhile since ive posted any work cuz i cant get my computer to work with this digital camera i got so im haveing to load them to a disk at walmart and the go to my dads and email the pics to myself that way it its a pain in the back side but it works right now LOL and the knife sheath is for the knife that Rayban made for me what a guy to give a knife in trade for a paper holster tamplate and a drawing to carve LOL sorry didnt get the knife in the pic i didnt have it with me at the cabin buts some of my new work enjoy Cowboy316

-
not a problem Vike ill get one done tomorrow when i get acess to a better camera ill get a couple of it taken apart also so you can see just how it goes together Cowboy316
-
hey guys and gals just thought id post my sie so you can check it out still got a little bit to do on it but its coming along check it out and give me some feed back http://wildwestcustom-leatherworks.webs.com/ Thanks Cowboy316
-
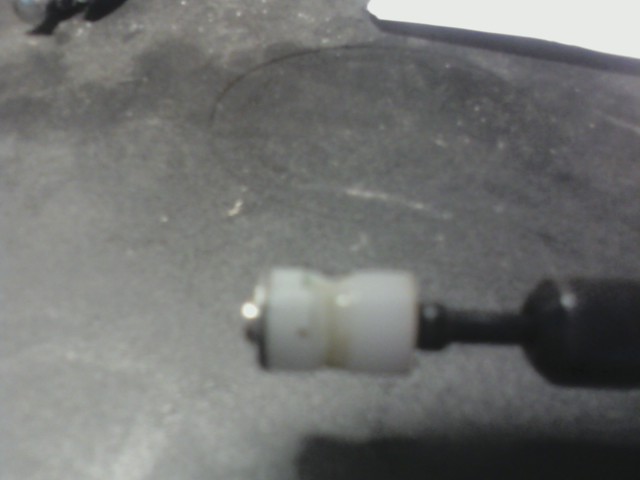
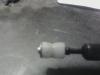
Howdy guy and gal ever get frustrated when your burnishing you edges and get into a tight spot and just cant get it done good enought to make ya happy well i got there and sat and thought for some time then it hit me when i was using my little sanding drum for my dremal tool that maybe if i could get a little piece of nylon and replace the rubber sleeve that the sand paper drum fits on with the hard nylon then take a round file and groove it to the size i wanted it would work to burnish the edges of anything so i went to ace hardware and found in the bins with the nuts and bolts little nylon spacers of different sizes and different size holes in them i found one that would just barely slip onto the dremal bit and but it back together and grooved it and all be if it doesnt work slicker than black ice LOL Cowboy316
-
buddy ole pal ole friend those are beautiful those girls are gonna be pleased with those as awards keep it up your gonna go further than me but it i dont mind Tim
-
well as most of ya know ive set up a web site and have been tellin my friends bout it on here and on my other forum im on and i was playing around thing morning one my editer and found where i could see where the hits were coming from and holy crap i just got a hit on my site from Cario Egypt bout fell out my chair in shock thanks MarkB for the link to the site builder my hats off to ya bud but anyway just thought id share that little tid bit Cowboy316
-
well guys a thought just crossed my mind for a use but not sure if anyone does sculpted leather heads but theres and idea for leather shrunken heads LOL Cowboy316
-
hey guys and gals trying to set up my web site and not having much luck but do have a few pics on there so HELP me please lol http://wildwestcustom-leatherworks.webs.com/ thanks Cowboy316
-
not sure if this is where to put this but it should work but im looking for swivel knife art work designs if some one has some i could get and play with id be greatfull Cowboy316